
Overnight Steel Cut Oats
Overnight Steel Cut Oats have been my quiet weekday lifesaver for years, a simple bowl that feels thoughtful even on rushed mornings. I stumbled onto this technique one bleary November when I wanted the hearty chew of steel cut oats without standing at the stove at dawn. The result was a jarred breakfast that felt like a small act of self care, something I could grab and savor while answering emails or taking a slow walk before the day sped up.
There is a comforting ritual to making Overnight Steel Cut Oats, from the gentle clink of measuring cups to the mild steam that rises when you rewarm a jar. I remember experimenting with different milks and water ratios until the texture struck a balance between creamy and toothsome. Each variation taught me something about patience and texture, and now I keep a mason jar in the fridge like a tiny, reliable friend.
Once you get the hang of it, you can personalize each jar without fuss. I like to mix toppings in the morning so the oats stay silky, while my partner prefers stirring in fruit the night before for an infused flavor. Either way, the base recipe is forgiving and honest, and it rewards a little planning with mornings that feel curated rather than chaotic.
Recipe Snapshot
30 mins
10 mins
20 mins
Easy
200 kcal
American
Gluten-Free, Low FODMAP
Breakfast
2 quart saucepan, Measuring cups, Wooden spoon, Storage jars with lids
The Magic of This Overnight Steel Cut Oats
Comfort with a Chewy Bite
I love how Overnight Steel Cut Oats keep the satisfying chew of steel cut oats while delivering a creamy mouthfeel. The slow absorption of the liquid overnight softens the grains without turning them mushy. For me, that contrast between creamy and slightly chewy is the real draw, it feels like a breakfast that actually holds up until lunch.
Prep Once, Eat Many Times
This method lets me batch cook and portion out breakfasts, saving precious minutes on busy mornings. I appreciate a strategy that frees up headspace and still tastes intentional. I’ll often make enough for several mornings so I only handle breakfast prep once, which makes weekday routines smoother.
Flexible and Friendly to Diets
Because the base uses water and any milk choice, Overnight Steel Cut Oats adapts to different diets easily. I often use almond or oat milk for a lighter mouthfeel, while a richer milk makes the bowl more indulgent. That flexibility means it fits into many eating plans without compromise.
Low Maintenance, High Reward
I enjoy recipes that feel effortless but still impressive, and this one delivers. There is minimal stirring, no babysitting, and no complex timing beyond a short boil and cooling. Yet, the flavor depth and texture make it feel like you put in more effort than you actually did, which is always a win in my book.
Perfect Base for Creativity
Finally, I adore how this recipe invites creativity. Once you have a reliably creamy, nutty oat base, you can layer in seasonal fruits, seeds, nut butters, or a swirl of sweetener. That versatility keeps breakfasts interesting, and I find myself eager to try small tweaks each week.
What Goes Into Overnight Steel Cut Oats

These ingredients are honest and straightforward, chosen to coax the best texture from steel cut oats. The trio of oats, water, and milk form the structural base, while salt plays a quiet role amplifying flavor. Together they create a creamy, chewy canvas that welcomes toppings and variations.
- 1 cup uncooked steel-cut oats: Provide a hearty, chewy base that holds up overnight soaking and creates the characteristic nutty texture of steel-cut oats; requires longer cooking or soaking than rolled oats to soften fully. Contribute complex carbohydrates and fiber for sustained energy and a satisfying mouthfeel in the finished porridge.
- 2 cups water: Serve as the primary liquid to hydrate and soften the oats during overnight soaking, helping to activate texture changes without additional cooking. Aid in controlling consistency and prevent the oats from drying out while balancing flavors when combined with milk.
- 2 cups milk (of choice): Add creaminess and richness to the soaked oats, enhancing mouthfeel and flavor; choice of dairy or plant-based milk allows customization for dietary preferences and lactose tolerance. Provide additional fat, protein, and subtle sweetness depending on the type selected, producing a smoother, more indulgent final dish.
- 1 teaspoon fine sea salt: Enhance and balance the overall flavor by amplifying natural oat flavors and suppressing any blandness; a small amount improves the savory-sweet profile of the porridge. Help to round out taste and can slightly influence the perceived sweetness of any added toppings.
Step by Step Instructions for Overnight Steel Cut Oats

This recipe is deceptively simple, but I like to walk through it with you so every jar turns out creamy and satisfyingly chewy. The directions that follow expand on each move, offering sensory cues, the reason behind techniques, and what to watch for so you don’t end up with undercooked or gluey oats.
- In a 2-quart saucepan combine the steel cut oats, water, milk, and salt. Bring the liquid to a boil over high heat on the stove top.: You will notice a dry, nutty scent from the steel cut oats as they meet the cool water and milk , and the mixture will look thin and slightly cloudy. Combining everything cold lets the grains hydrate evenly as heat rises. The reason we combine all liquids at once is to avoid sudden hot spots that can scorch the oats, ensuring even softening. A common mistake here is crowding the pan with too many ingredients in a small pot, which leads to uneven cooking and splattering later; choose a roomy 2 quart saucepan so the liquid has space to bubble without overflowing.
- Once the liquid is boiling, set a timer for 2 minutes. The boiling liquid may start to rise up towards the top of your saucepan, if this happens lower the heat until the liquid lowers. Stir often so the oats won't stick to the bottom of the pan.: As the mixture warms, you should hear a gentle swell of bubbles that escalates into a rolling boil, and small clouds of steam will lift from the surface. This vigorous heat jump starts the gelatinization of starch in the steel cut oats , which is essential for achieving that tender interior. Boiling also helps the mixture reduce slightly, concentrating flavor. Avoid leaving the pan unattended because the mixture can rise quickly, and scorching on the bottom is a common problem; lower the heat at the first sign of rapid foaming.
- When the timer goes off, remove the pan from the heat and set it aside to cool for 20 minutes. (This way, you won't add boiling-hot oats to glass jars and risk them breaking.) The oats will continue absorbing the liquid as they cool.: During these two minutes the boil will intensify and the surface may push upward, a lively bubbling sound that signals the oats are actively releasing starch. Stirring often during this short, vigorous boil prevents the bottom from caramelizing and keeps the texture uniform. The quick high heat jump shortens the overall time the oats spend over heat, which preserves a toothsome texture. A typical slip up is failing to stir frequently enough, which results in stuck and scorched bits at the pan base; keep a wooden spoon handy to glide the bottom cleanly.
- Once the oats have cooled, transfer them to individual storage jars with lids. One cup of dry oats makes 3 hearty servings cooked. Store the oats overnight in the fridge to continue softening.: You will feel a warm radiance from the pan as residual heat continues to finish the grains, and the aroma becomes fuller, slightly nutty and creamy. Letting the pot rest is a safety move, preventing you from ladling boiling-hot oats into glass jars, and it allows the oats to continue absorbing liquid in a controlled way. Cooling also reduces the chance of thermal shock to storage containers. A mistake I see often is rushing this step and transferring scalding oats directly into cold glass, which risks cracking the jars and losing your batch.
- When you're ready to eat, grab a jar of oats from the fridge and add your favorite toppings. These can be enjoyed warm or cold. Heat them up on the stovetop with an extra splash of milk, or microwave in a heat-safe bowl for 60 to 90 seconds. Oats will keep well in the fridge for up to 5 days.: As you scoop, note the texture, it should be thick but still loose enough to stir; the grains will be plump and slightly glossy. Portioning into jars makes breakfasts grab and go, and sealed jars help the flavors meld overnight while preventing fridge odors from intruding. Each cup of dry oats should yield about three hearty servings, a useful guide when planning quantities. Avoid packing jars too tightly while the mixture is still warm, because trapped heat can create condensation and affect texture; cool fully before sealing.
- Store the oats overnight in the fridge to continue softening: In the cold environment, the oats finish absorbing liquid slowly, becoming creamier without losing integrity. After several hours you can open a lid to check consistency, which should be thick, slightly gelatinous, and with individual grain definition. This cold resting also helps flavors meld, and salt will seem more evenly distributed. A common oversight is leaving jars at room temperature for too long; refrigeration stabilizes texture and extends shelf life to about five days.
- When you're ready to eat grab a jar of oats from the fridge and add your favorite toppings: Cold, the oats are pleasantly firm and ready for contrasts like a spoonful of nut butter or fresh fruit, which add texture and brightness. Reheating brings out a creamier mouthfeel and releases more steam and aroma, making the bowl feel freshly made. If reheating on the stovetop, add a splash of extra milk to loosen the oats, stirring until they shimmer and steam gently. A typical misstep is overheating in the microwave without adding liquid, which can produce dry, gluey patches.
- These can be enjoyed warm or cold heat them up on the stovetop with an extra splash of milk: Warmed slowly, the oats breathe again, and you will see small plumes of steam and hear a soft simmer as the bowl loosens. The added milk restores creaminess lost to cooling, and gentle heating preserves the grains' integrity. Stir frequently to prevent sticking and to create an even, silky texture. Overheating to a vigorous boil can break down the grains too much, so aim for a low simmer and patient stirring.
- Or microwave in a heat safe bowl for 60 to 90 seconds: In the microwave the oats will puff slightly and steam will fog the bowl, so use a dab of extra milk to prevent drying. Microwaving is a fast, practical option, but watch the jar or bowl to stop before foaming over. Stop halfway to stir for uniform warmth and texture. A common error is microwaving in a sealed jar, which can trap steam and build pressure; always transfer to a microwave safe bowl if reheating in the microwave.
- Oats will keep well in the fridge for up to 5 days: Stored properly, the jars will retain texture and flavor, and you can plan breakfasts in advance without quality loss for several days. As time passes the oats mellow and the flavors meld, so earlier jars may taste subtly different from those made the same day. If you notice off aromas or visible mold, discard immediately, as refrigeration delays but does not prevent spoilage. A usual mistake is leaving the jars open or loosely sealed, which can dry the surface and invite fridge odors.
Ways to Adapt This Recipe
I like to experiment with texture and flavor keys for Overnight Steel Cut Oats, while keeping the core technique unchanged. Below are practical adaptations that preserve the method but expand possibilities for taste, creaminess, and convenience.
- Try different milks to change creaminess and flavor profile; plant milks like almond or oat lend a lighter touch, while richer milks make a silkier bowl, but keep the 2 cups to 2 cups ratio for predictable results.
- Adjust water ratio if you prefer a firmer or looser texture, reducing water slightly yields a denser bite, while adding a touch more creates a creamier mouthfeel without changing the technique.
- Make a double batch for the week by scaling the ingredients proportionally, then portion into jars so you can grab and go with consistent servings for several mornings.
- Cool fully before sealing to avoid jar breakage and condensation; let the pot rest off heat for the suggested 20 minutes before transferring to storage containers.
- Reheat gently on the stovetop with an extra splash of milk for the best texture, stirring until the oats are steaming but not boiling to preserve toothsome grains.
Best Served With
This base is versatile enough to pair with many accompaniments, from simple fruit to more elaborate spreads. Below I outline serving suggestions, seasonal ideas, and storage notes so you can present bowls that feel intentional, whether for a quick breakfast or a relaxed brunch.
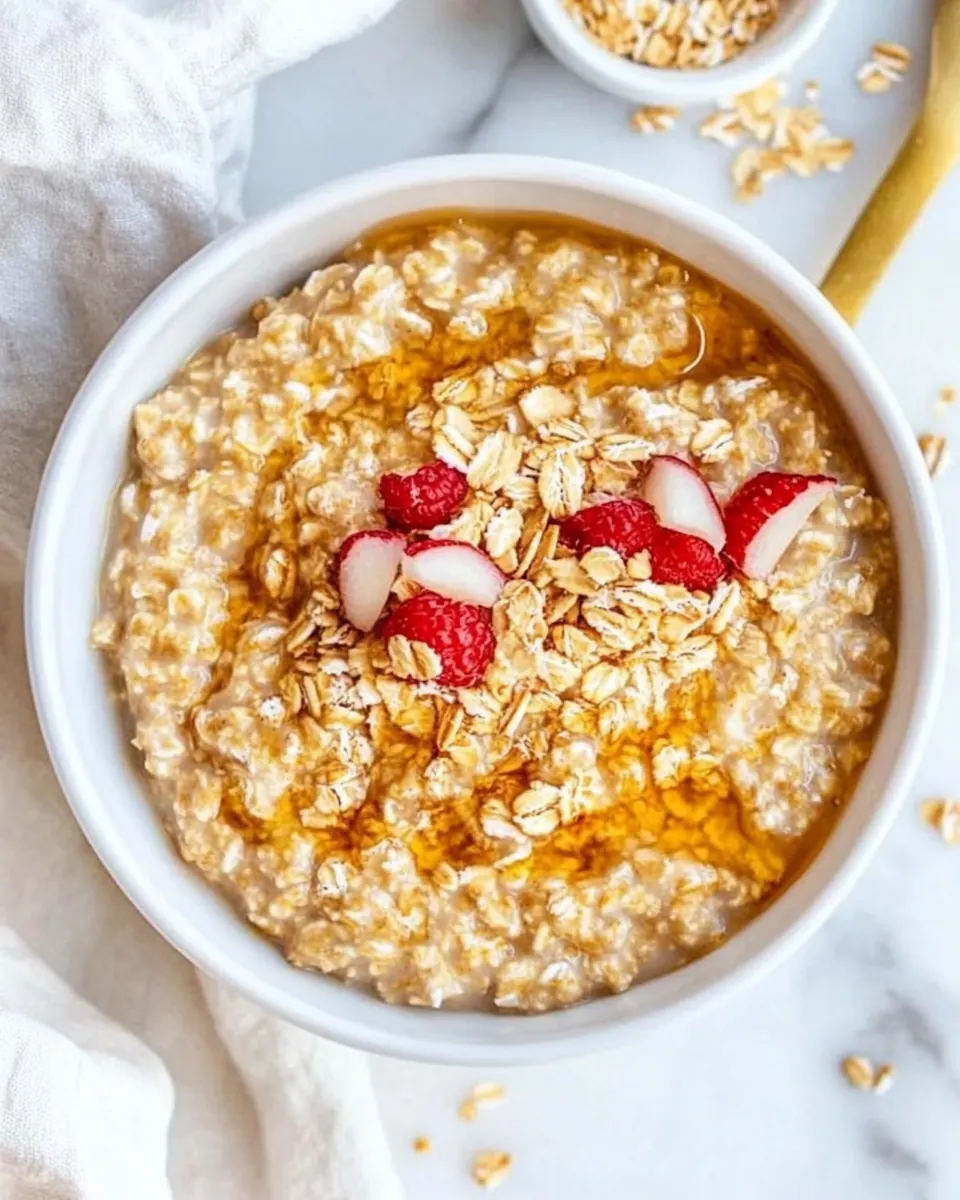
- Fresh fruit, seasonal berries or sliced banana add brightness and acidity that contrast the oats‘ creamy, nutty base.
- Nut butters, a spoonful of almond or peanut butter brings richness and a savory balance to sweeter toppings.
- Crunchy toppings, toasted seeds or chopped nuts provide texture contrast that complements the chewy oats.
- For brunch, serve jars alongside simple scrambled eggs and fruit for a balanced spread that suits leisurely mornings.
- Storage tips, keep jars sealed and refrigerated for up to five days, and label with dates to track freshness.
- Seasonal pairings, in colder months add warming spices and roasted fruit, while in warmer months keep bowls bright with citrus and fresh berries.
FAQ
Conclusion
Overnight Steel Cut Oats shine because they combine a hearty, nutty chew with easy make ahead convenience. They let you prep once and enjoy several effortless mornings, while leaving plenty of room for personalization. Give this method a try the next time you want a breakfast that feels both nourishing and made with care. You may find, as I did, that a small overnight ritual transforms your mornings into something calmer and more enjoyable.

Overnight Steel Cut Oats
Equipment
- 2 quart saucepan
- Measuring Cups
- Wooden Spoon
- Storage jars with lids
Ingredients
- 1 cup uncooked steel-cut oats Provide a hearty, chewy base that holds up overnight soaking and creates the characteristic nutty texture of steel-cut oats; requires longer cooking or soaking than rolled oats to soften fully. Contribute complex carbohydrates and fiber for sustained energy and a satisfying mouthfeel in the finished porridge.
- 2 cups water Serve as the primary liquid to hydrate and soften the oats during overnight soaking, helping to activate texture changes without additional cooking. Aid in controlling consistency and prevent the oats from drying out while balancing flavors when combined with milk.
- 2 cups milk (of choice) Add creaminess and richness to the soaked oats, enhancing mouthfeel and flavor; choice of dairy or plant-based milk allows customization for dietary preferences and lactose tolerance. Provide additional fat, protein, and subtle sweetness depending on the type selected, producing a smoother, more indulgent final dish.
- 1 teaspoon fine sea salt Enhance and balance the overall flavor by amplifying natural oat flavors and suppressing any blandness; a small amount improves the savory-sweet profile of the porridge. Help to round out taste and can slightly influence the perceived sweetness of any added toppings.
Instructions
- In a 2-quart saucepan combine the steel cut oats, water, milk, and salt. Bring the liquid to a boil over high heat on the stove top.: You will notice a dry, nutty scent from the steel cut oats as they meet the cool water and milk , and the mixture will look thin and slightly cloudy. Combining everything cold lets the grains hydrate evenly as heat rises. The reason we combine all liquids at once is to avoid sudden hot spots that can scorch the oats, ensuring even softening. A common mistake here is crowding the pan with too many ingredients in a small pot, which leads to uneven cooking and splattering later; choose a roomy 2 quart saucepan so the liquid has space to bubble without overflowing.
- Once the liquid is boiling, set a timer for 2 minutes. The boiling liquid may start to rise up towards the top of your saucepan, if this happens lower the heat until the liquid lowers. Stir often so the oats won't stick to the bottom of the pan.: As the mixture warms, you should hear a gentle swell of bubbles that escalates into a rolling boil, and small clouds of steam will lift from the surface. This vigorous heat jump starts the gelatinization of starch in the steel cut oats , which is essential for achieving that tender interior. Boiling also helps the mixture reduce slightly, concentrating flavor. Avoid leaving the pan unattended because the mixture can rise quickly, and scorching on the bottom is a common problem; lower the heat at the first sign of rapid foaming.
- When the timer goes off, remove the pan from the heat and set it aside to cool for 20 minutes. (This way, you won't add boiling-hot oats to glass jars and risk them breaking.) The oats will continue absorbing the liquid as they cool.: During these two minutes the boil will intensify and the surface may push upward, a lively bubbling sound that signals the oats are actively releasing starch. Stirring often during this short, vigorous boil prevents the bottom from caramelizing and keeps the texture uniform. The quick high heat jump shortens the overall time the oats spend over heat, which preserves a toothsome texture. A typical slip up is failing to stir frequently enough, which results in stuck and scorched bits at the pan base; keep a wooden spoon handy to glide the bottom cleanly.
- Once the oats have cooled, transfer them to individual storage jars with lids. One cup of dry oats makes 3 hearty servings cooked. Store the oats overnight in the fridge to continue softening.: You will feel a warm radiance from the pan as residual heat continues to finish the grains, and the aroma becomes fuller, slightly nutty and creamy. Letting the pot rest is a safety move, preventing you from ladling boiling-hot oats into glass jars, and it allows the oats to continue absorbing liquid in a controlled way. Cooling also reduces the chance of thermal shock to storage containers. A mistake I see often is rushing this step and transferring scalding oats directly into cold glass, which risks cracking the jars and losing your batch.
- When you're ready to eat, grab a jar of oats from the fridge and add your favorite toppings. These can be enjoyed warm or cold. Heat them up on the stovetop with an extra splash of milk, or microwave in a heat-safe bowl for 60 to 90 seconds. Oats will keep well in the fridge for up to 5 days.: As you scoop, note the texture, it should be thick but still loose enough to stir; the grains will be plump and slightly glossy. Portioning into jars makes breakfasts grab and go, and sealed jars help the flavors meld overnight while preventing fridge odors from intruding. Each cup of dry oats should yield about three hearty servings, a useful guide when planning quantities. Avoid packing jars too tightly while the mixture is still warm, because trapped heat can create condensation and affect texture; cool fully before sealing.
- Store the oats overnight in the fridge to continue softening: In the cold environment, the oats finish absorbing liquid slowly, becoming creamier without losing integrity. After several hours you can open a lid to check consistency, which should be thick, slightly gelatinous, and with individual grain definition. This cold resting also helps flavors meld, and salt will seem more evenly distributed. A common oversight is leaving jars at room temperature for too long; refrigeration stabilizes texture and extends shelf life to about five days.
- When you're ready to eat grab a jar of oats from the fridge and add your favorite toppings: Cold, the oats are pleasantly firm and ready for contrasts like a spoonful of nut butter or fresh fruit, which add texture and brightness. Reheating brings out a creamier mouthfeel and releases more steam and aroma, making the bowl feel freshly made. If reheating on the stovetop, add a splash of extra milk to loosen the oats, stirring until they shimmer and steam gently. A typical misstep is overheating in the microwave without adding liquid, which can produce dry, gluey patches.
- These can be enjoyed warm or cold heat them up on the stovetop with an extra splash of milk: Warmed slowly, the oats breathe again, and you will see small plumes of steam and hear a soft simmer as the bowl loosens. The added milk restores creaminess lost to cooling, and gentle heating preserves the grains' integrity. Stir frequently to prevent sticking and to create an even, silky texture. Overheating to a vigorous boil can break down the grains too much, so aim for a low simmer and patient stirring.
- Or microwave in a heat safe bowl for 60 to 90 seconds: In the microwave the oats will puff slightly and steam will fog the bowl, so use a dab of extra milk to prevent drying. Microwaving is a fast, practical option, but watch the jar or bowl to stop before foaming over. Stop halfway to stir for uniform warmth and texture. A common error is microwaving in a sealed jar, which can trap steam and build pressure; always transfer to a microwave safe bowl if reheating in the microwave.
- Oats will keep well in the fridge for up to 5 days: Stored properly, the jars will retain texture and flavor, and you can plan breakfasts in advance without quality loss for several days. As time passes the oats mellow and the flavors meld, so earlier jars may taste subtly different from those made the same day. If you notice off aromas or visible mold, discard immediately, as refrigeration delays but does not prevent spoilage. A usual mistake is leaving the jars open or loosely sealed, which can dry the surface and invite fridge odors.
Notes
- Try different milks to change creaminess and flavor profile; plant milks like almond or oat lend a lighter touch, while richer milks make a silkier bowl, but keep the 2 cups to 2 cups ratio for predictable results.
- Adjust water ratio if you prefer a firmer or looser texture, reducing water slightly yields a denser bite, while adding a touch more creates a creamier mouthfeel without changing the technique.
- Make a double batch for the week by scaling the ingredients proportionally, then portion into jars so you can grab and go with consistent servings for several mornings.
- Cool fully before sealing to avoid jar breakage and condensation; let the pot rest off heat for the suggested 20 minutes before transferring to storage containers.
- Reheat gently on the stovetop with an extra splash of milk for the best texture, stirring until the oats are steaming but not boiling to preserve toothsome grains.