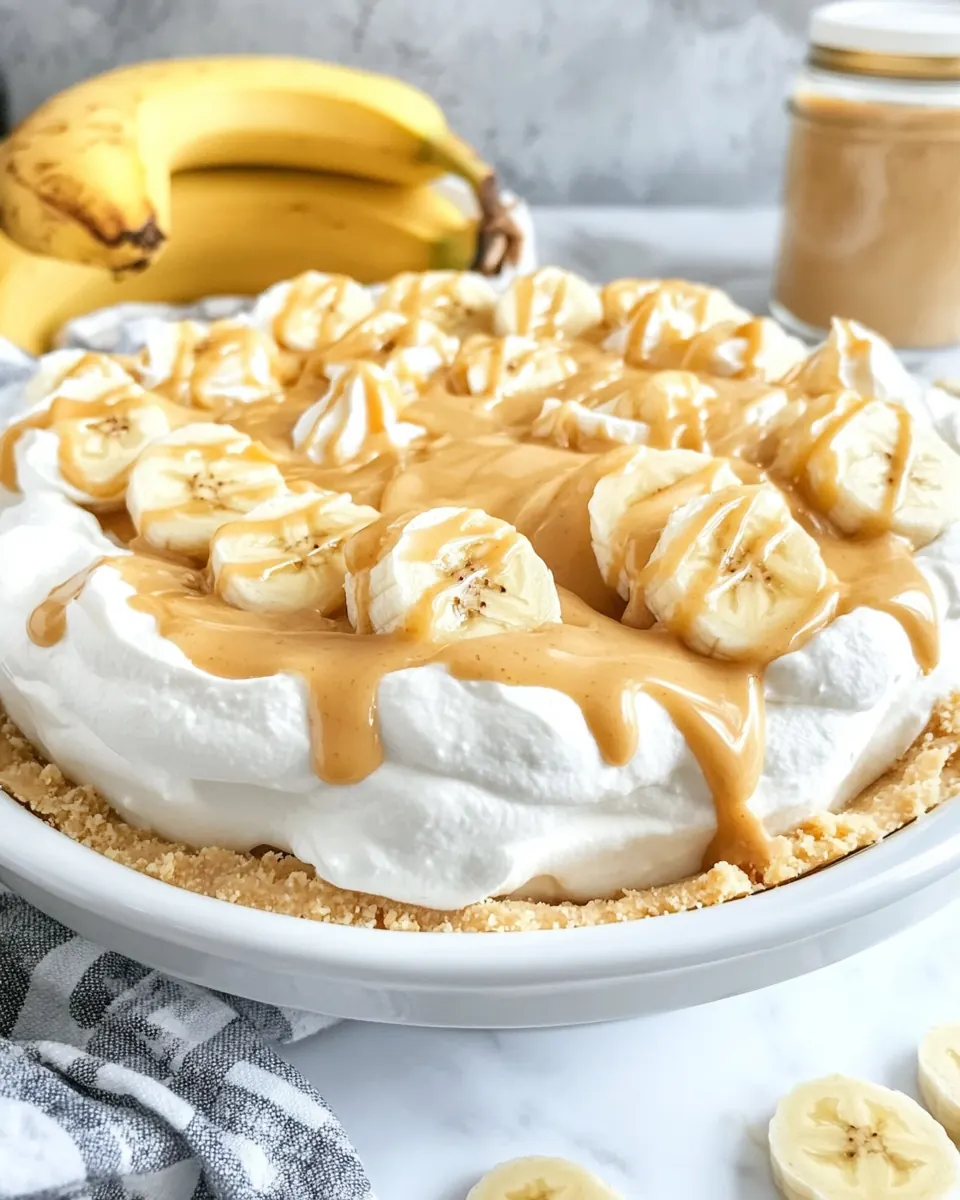
No Bake Peanut Butter Banana Cream Pie
No Bake Peanut Butter Banana Cream Pie became my go to when I wanted to impress with almost no fuss. The first time I made it was for a last minute summer gathering, and I remember juggling kids, music, and a tiny oven that I did not want to heat up. I reached for simple pantry staples and found that a few thoughtful layers create something that tastes much more elaborate than the effort suggests.
I still grin remembering the moment I sliced into that chilled pie, the spoon meeting a cool, creamy center and the soft banana layer melting into the peanut butter pudding. Guests kept asking if it was a bakery find, and I enjoyed the quiet pride of pulling off a polished dessert without turning on the oven. Over time I adjusted textures, learned how ripe bananas change the flavor, and discovered that the right swirl of extra peanut butter on top makes people pause just long enough to snap a photo.
Recipe Snapshot
31 mins
30 mins
1 mins
Medium
300 kcal
American
Gluten-Free, Low FODMAP
Desserts
Mixing bowl, Whisk, Spatula, 9 inch pie pan, Microwave
Why This No Bake Peanut Butter Banana Cream Pie Is a Winner
Simple, reliable assembly
I love how No Bake Peanut Butter Banana Cream Pie requires only a few steps to reach a crowd pleasing finish. The layering is forgiving, so you can build confidence if you are new to no bake desserts. I often tell friends that this recipe is backyard party friendly because it travels well and stays cool in the fridge.
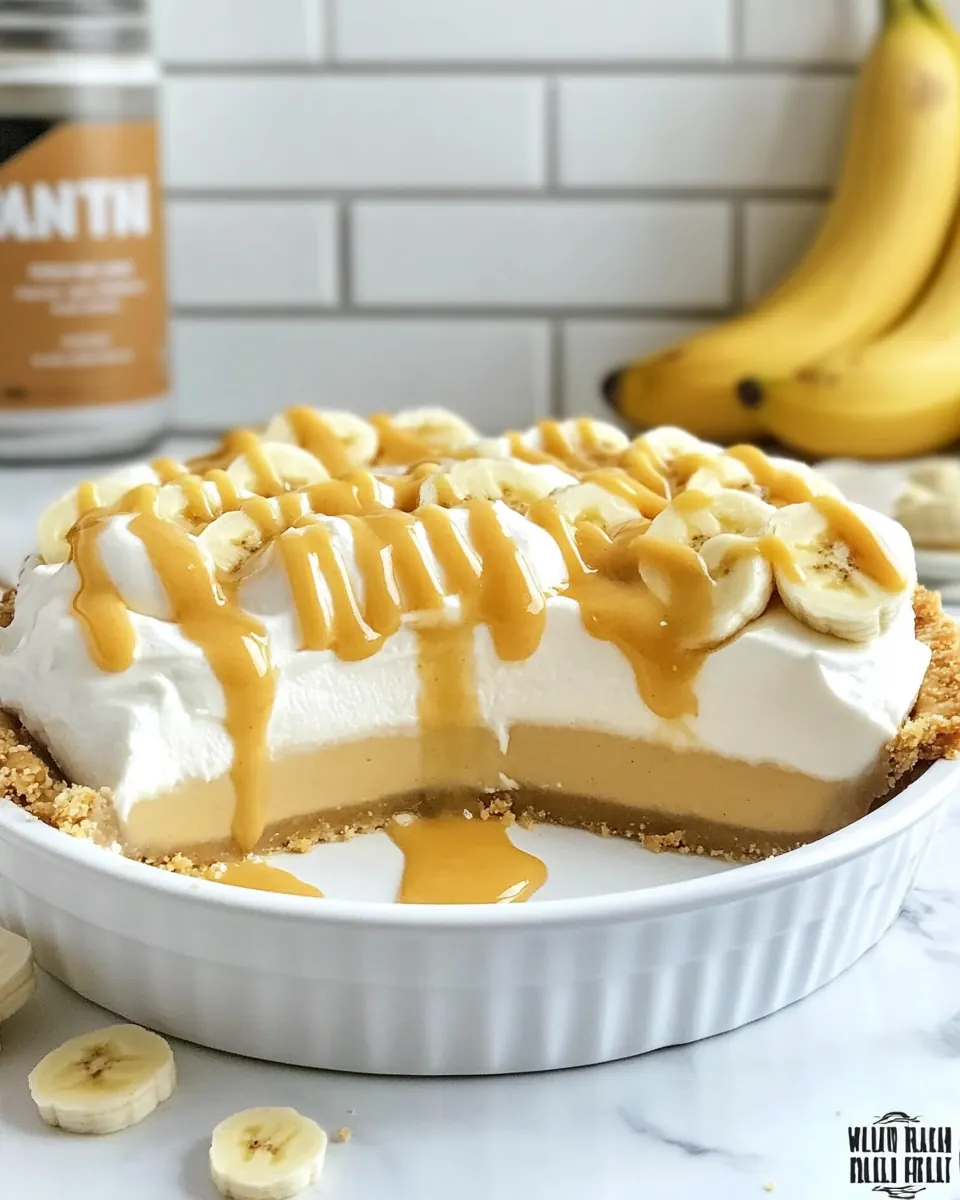
Play of textures
The contrast between the crunchy crust, the lush peanut butter pudding, the soft bananas, and the light Cool Whip topping keeps every bite interesting. I like that each forkful gives you cream, sweetness, and a little snap, which is why I return to this combination again and again.
Speed without skimping on flavor
Because it is a No Bake recipe, you get to skip oven time and focus on flavor. I can mix the pudding and peanut butter in minutes and still end up with a dessert that tastes like it took hours to perfect. This makes it perfect for weeknight celebrations when you want something special but not complicated.
Flexible and forgiving
I often tweak proportions based on what I have on hand. If I have extra bananas I add more layers, and if guests prefer a richer finish I warm a little peanut butter to drizzle across the top. The recipe welcomes small improvisations, and that freedom makes it a keeper in my repertoire.
Kid friendly and nostalgic
There is something nostalgic about the flavors here, and kids seem to love the combo of peanut butter and banana. I remember my own childhood cravings for similar pairings, and this pie captures that happy simplicity while feeling grown up enough for parties.
Key Ingredients for No Bake Peanut Butter Banana Cream Pie
These few ingredients collaborate like an experienced team. The crust gives structure, the pudding mix and milk form the creamy backbone, peanut butter supplies deep nutty flavor and body, Cool Whip lifts the texture, and ripe bananas add fresh sweetness and a tender bite. Together they balance creamy, sweet, and slightly salty elements so each slice feels rounded and enjoyable.
- 1 recipe graham cracker crust: Provide a pre-baked, crisp base for the pie that holds the filling and adds a sweet, slightly salty crunch; press firmly into a pie plate to ensure even support and prevent sogginess from the filling.
- 13.4 ounce 96 g box instant vanilla pudding mix: Bring a quick-set, creamy vanilla flavor and thickening power to the filling; whisk into milk until smooth and allow to hydrate to form a stable pudding layer that sets without baking.
- 1 1/4 cups nonfat milk: Add liquid to activate the instant pudding mix and control the final creaminess of the filling; pour in cold milk and whisk until fully incorporated for a smooth, scoopable texture.
- 3/4 cup 200 g creamy peanut butter, plus more for garnish: Contribute rich, nutty flavor and creamy body to the filling while providing a subtle stabilizing fat; mix with the hydrated pudding and whipped topping to create a dense, peanut–butter-forward cream.
- 8 ounce s 226 g Cool Whip, divided: Offer light, airy volume and a silky mouthfeel to the filling while keeping the pie no-bake and easy; fold most into the peanut–pudding mixture for loft and reserve a portion for garnish or decoration.
- 2 3 medium ripe bananas, divided: Provide fresh, fruity sweetness and a soft, creamy texture that complements the peanut butter and vanilla; slice and layer into the pie for flavor contrast and to prevent browning use ripe but firm bananas.
How to Prepare No Bake Peanut Butter Banana Cream Pie
This pie assembles quickly, but take time to notice textures and temperatures as you go. Chilled elements come together to form a stable dessert, and gentle folding preserves airiness. Read each step before you begin so you have bowls and utensils ready, and allow the pie to chill fully for the best set.
- If making homemade graham cracker crust, make it and chill it until ready to fill.: When you press the crumb mixture into the pan you should hear a faint crunch and feel the crust compact under your fingers, which signals it will hold the filling. Chilling solidifies the butter so the crust stays intact, and failing to press firmly enough is the most common mistake, which leads to a crumbly base when slicing. If your crust seems loose, press again and chill longer, the extra rest time improves structure and mouthfeel.
- Whisk pudding mix and milk and let set 5 minutes.: As you whisk the pudding mix into the milk you will notice the liquid transform from glossy to a thicker, opaque cream, with a faint vanilla aroma rising. Letting it sit allows the starches to hydrate and the mixture to take on the right body; rushing this step can leave a runny filling, so give it the full five minutes for consistent texture. If lumps appear, a quick whisk or brief strain through a mesh will smooth it out.
- Add peanut butter and stir until smooth and thick.: When you add the room temperature peanut butter the mixture will deepen in color and begin to smell nutty and warm, even though it is cool to the touch. Stir until the blend is glossy and thick, which indicates the fats and dairy are fully combined. A common slip is using cold peanut butter, which can create streaks and make blending difficult, so warm the jar slightly if needed for an even, creamy result.
- Add half the cool whip to the peanut butter mixture and carefully fold in until it’s combined.: Folding in the reserved Cool Whip introduces air and lightens the pudding, creating a soft, cloudlike texture you can see as gentle ribbons vanish into the mixture. Use a wide spatula and scoop from the bottom, turning the bowl to avoid deflating the foam; overmixing will collapse the air and yield a denser filling, which is the main mistake to avoid. Stop when the color and texture look uniform and airy.
- Slice 1 banana and place in the bottom of prepared pie crust, slicing more as needed to cover (about 1 1/2 bananas depending on size).: As you slice the banana you will notice a sweet aroma and a soft, yielding flesh that layers beautifully over the crust. Arrange the slices in a single even layer so the filling sits flush and every bite includes fruit. Slicing too thin can lead to quick browning and a mushy feel, so aim for medium thickness for the best balance of texture and appearance.
- Cover the bananas with the pudding mixture. Cover and chill until set, at least 2 hours before serving.: When you spoon the filling over the bananas it should flow like a dense ribbon and settle around the fruit, creating an even top. Chilling allows the pudding to firm up and meld with the banana layer, delivering clean slices when served, and the typical error is not chilling long enough which results in a soupy center. Aim for at least two hours, though longer chilling improves slicing and flavor melding.
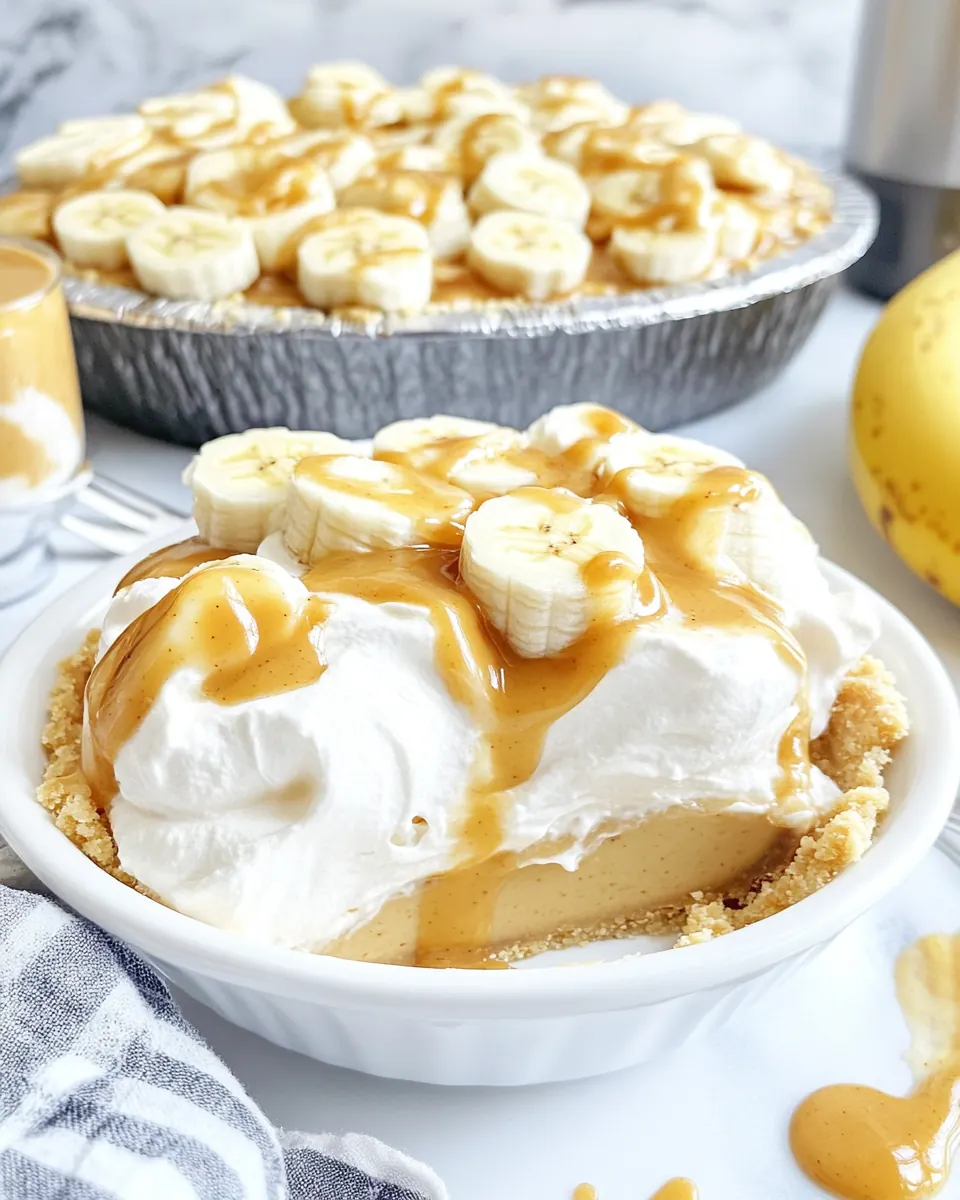
- Before serving: top with remaining whipped topping. Place about 1/4 cup peanut butter in a small bowl and heat in the microwave for about 10-20 seconds until it’s thin enough to spread. Add to a plastic baggie and cut off one tip; pipe over whipped topping. Garnish with additional sliced bananas.: The aroma of warmed peanut butter is instantly enticing, and when drizzled over the pale whipped topping it creates a striking visual and taste contrast. Use a gentle hand while piping to form delicate ribbons and add fresh banana slices for brightness. Avoid overheating the peanut butter ; if it becomes too thin it will run off the pie, and if too cool it will not drizzle smoothly, so heat in short bursts and test the viscosity.
- Store in the refrigerator, covered, for up to 2 days.: In the fridge the pie will be cool to the touch and maintain its layers, but moisture can form on the surface if left uncovered, which dulls texture and presentation. Covering protects the top and preserves freshness, and over time the bananas will slowly brown, which is the primary change to expect. Consume within two days for the best flavor and appearance, and avoid freezing which can ruin the creaminess and make the bananas mushy.
Ways to Customize
You can easily tweak this pie to suit flavor preferences or what you have on hand. Below are options that keep the structure intact while offering playful variations and presentation ideas. Each tip starts with a short strong highlight followed by details to help you execute it confidently.
- Try different pudding flavors Use cheesecake or chocolate pudding as suggested for bold variations, which change the overall profile significantly while keeping the assembly identical. Chocolate will deepen the flavor and pair wonderfully with peanut butter and banana.
- Double the bananas Layer extra slices between pudding layers for more fruit in every bite, creating a pleasing ratio of fruit to cream that feels fresher and less sweet.
- Use freshly whipped cream Substitute 3 cups freshly whipped cream for the Cool Whip to achieve a lighter, more natural topping with pronounced dairy flavor and a delicate melt.
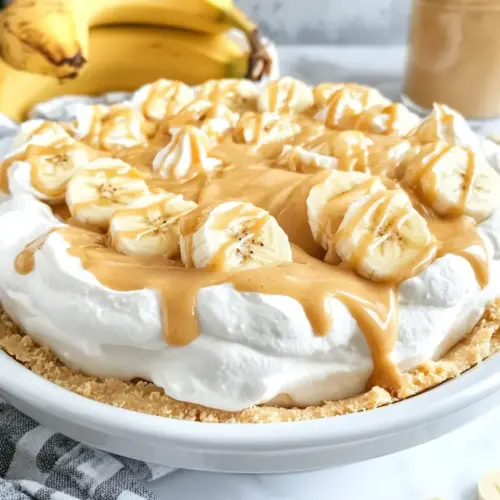
- Garnish for presentation Swirl warmed peanut butter artfully and add extra banana slices at the edge to make the pie look bakery ready; a little garnish elevates simple desserts.
- Make-ahead strategy Assemble the pie the day before and chill overnight for cleaner slices and deeper flavor melding, which is ideal for entertaining when you want to be relaxed on the day of your event.
Perfect Pairings for No Bake Peanut Butter Banana Cream Pie
This pie pairs well with light beverages and simple sides that do not fight its creamy richness. Think bright, slightly acidic accompaniments to balance the nutty sweetness, and select serving styles depending on the occasion. For casual gatherings slice thinly for variety, and for celebrations present with a pretty garnish for a polished finish.
- Light coffee or tea A gently brewed cup provides a little bitterness to cut through the pie’s sweetness, making each bite feel balanced and satisfying during dessert service.
- Fresh fruit platter Offer a plate of sliced berries or citrus segments to add acidity and color, which complements the soft bananas and creamy filling while brightening the table.
- Occasion ideas This is ideal for potlucks, summer gatherings, and Ramadan if you need a chilled, ready to serve dessert after a long day of fasting, the pie provides comfort and easy portioning.
- Storage tips Keep the pie covered in the refrigerator and aim to serve within two days; this preserves the texture of the bananas and prevents moisture from softening the crust.
- Serving sizes Slice into 12 portions as intended for yield, or cut slightly smaller for a lighter finish when serving after a large meal; a small slice goes a long way with this rich profile.
- Seasonal pairing In warmer months serve chilled with bright citrus notes nearby, while in cooler months pair with warm beverages to balance the refreshing texture of the pie.
FAQ
Conclusion
This pie shines because it combines pantry staples into a dessert that feels both comforting and indulgent. If you want a straightforward, no fuss treat that still earns compliments, this recipe is a dependable option. Give it a try the next time you need a quick yet elegant dessert, and enjoy how a few smart layers can transform simple ingredients into something memorable.
No Bake Peanut Butter Banana Cream Pie
Equipment
- Mixing Bowl
- Whisk
- Spatula
- 9-inch pie pan
- Microwave
Ingredients
- 1 recipe graham cracker crust Provide a pre-baked, crisp base for the pie that holds the filling and adds a sweet, slightly salty crunch; press firmly into a pie plate to ensure even support and prevent sogginess from the filling.
- 13.4 ounce 96 g box instant vanilla pudding mix Bring a quick-set, creamy vanilla flavor and thickening power to the filling; whisk into milk until smooth and allow to hydrate to form a stable pudding layer that sets without baking.
- 1 1/4 cups nonfat milk Add liquid to activate the instant pudding mix and control the final creaminess of the filling; pour in cold milk and whisk until fully incorporated for a smooth, scoopable texture.
- 3/4 cup 200 g creamy peanut butter, plus more for garnish Contribute rich, nutty flavor and creamy body to the filling while providing a subtle stabilizing fat; mix with the hydrated pudding and whipped topping to create a dense, peanut-butter-forward cream.
- 8 ounce s 226 g Cool Whip, divided Offer light, airy volume and a silky mouthfeel to the filling while keeping the pie no-bake and easy; fold most into the peanut-pudding mixture for loft and reserve a portion for garnish or decoration.
- 2 -3 medium ripe bananas, divided Provide fresh, fruity sweetness and a soft, creamy texture that complements the peanut butter and vanilla; slice and layer into the pie for flavor contrast and to prevent browning use ripe but firm bananas.
Instructions
- If making homemade graham cracker crust, make it and chill it until ready to fill.: When you press the crumb mixture into the pan you should hear a faint crunch and feel the crust compact under your fingers, which signals it will hold the filling. Chilling solidifies the butter so the crust stays intact, and failing to press firmly enough is the most common mistake, which leads to a crumbly base when slicing. If your crust seems loose, press again and chill longer, the extra rest time improves structure and mouthfeel.
- Whisk pudding mix and milk and let set 5 minutes.: As you whisk the pudding mix into the milk you will notice the liquid transform from glossy to a thicker, opaque cream, with a faint vanilla aroma rising. Letting it sit allows the starches to hydrate and the mixture to take on the right body; rushing this step can leave a runny filling, so give it the full five minutes for consistent texture. If lumps appear, a quick whisk or brief strain through a mesh will smooth it out.
- Add peanut butter and stir until smooth and thick.: When you add the room temperature peanut butter the mixture will deepen in color and begin to smell nutty and warm, even though it is cool to the touch. Stir until the blend is glossy and thick, which indicates the fats and dairy are fully combined. A common slip is using cold peanut butter, which can create streaks and make blending difficult, so warm the jar slightly if needed for an even, creamy result.
- Add half the cool whip to the peanut butter mixture and carefully fold in until it’s combined.: Folding in the reserved Cool Whip introduces air and lightens the pudding, creating a soft, cloudlike texture you can see as gentle ribbons vanish into the mixture. Use a wide spatula and scoop from the bottom, turning the bowl to avoid deflating the foam; overmixing will collapse the air and yield a denser filling, which is the main mistake to avoid. Stop when the color and texture look uniform and airy.
- Slice 1 banana and place in the bottom of prepared pie crust, slicing more as needed to cover (about 1 1/2 bananas depending on size).: As you slice the banana you will notice a sweet aroma and a soft, yielding flesh that layers beautifully over the crust. Arrange the slices in a single even layer so the filling sits flush and every bite includes fruit. Slicing too thin can lead to quick browning and a mushy feel, so aim for medium thickness for the best balance of texture and appearance.
- Cover the bananas with the pudding mixture. Cover and chill until set, at least 2 hours before serving.: When you spoon the filling over the bananas it should flow like a dense ribbon and settle around the fruit, creating an even top. Chilling allows the pudding to firm up and meld with the banana layer, delivering clean slices when served, and the typical error is not chilling long enough which results in a soupy center. Aim for at least two hours, though longer chilling improves slicing and flavor melding.
- Before serving: top with remaining whipped topping. Place about 1/4 cup peanut butter in a small bowl and heat in the microwave for about 10-20 seconds until it’s thin enough to spread. Add to a plastic baggie and cut off one tip; pipe over whipped topping. Garnish with additional sliced bananas.: The aroma of warmed peanut butter is instantly enticing, and when drizzled over the pale whipped topping it creates a striking visual and taste contrast. Use a gentle hand while piping to form delicate ribbons and add fresh banana slices for brightness. Avoid overheating the peanut butter ; if it becomes too thin it will run off the pie, and if too cool it will not drizzle smoothly, so heat in short bursts and test the viscosity.
- Store in the refrigerator, covered, for up to 2 days.: In the fridge the pie will be cool to the touch and maintain its layers, but moisture can form on the surface if left uncovered, which dulls texture and presentation. Covering protects the top and preserves freshness, and over time the bananas will slowly brown, which is the primary change to expect. Consume within two days for the best flavor and appearance, and avoid freezing which can ruin the creaminess and make the bananas mushy.
Notes
- Try different pudding flavors Use cheesecake or chocolate pudding as suggested for bold variations, which change the overall profile significantly while keeping the assembly identical. Chocolate will deepen the flavor and pair wonderfully with peanut butter and banana.
- Double the bananas Layer extra slices between pudding layers for more fruit in every bite, creating a pleasing ratio of fruit to cream that feels fresher and less sweet.
- Use freshly whipped cream Substitute 3 cups freshly whipped cream for the Cool Whip to achieve a lighter, more natural topping with pronounced dairy flavor and a delicate melt.
- Garnish for presentation Swirl warmed peanut butter artfully and add extra banana slices at the edge to make the pie look bakery ready; a little garnish elevates simple desserts.
- Make-ahead strategy Assemble the pie the day before and chill overnight for cleaner slices and deeper flavor melding, which is ideal for entertaining when you want to be relaxed on the day of your event.