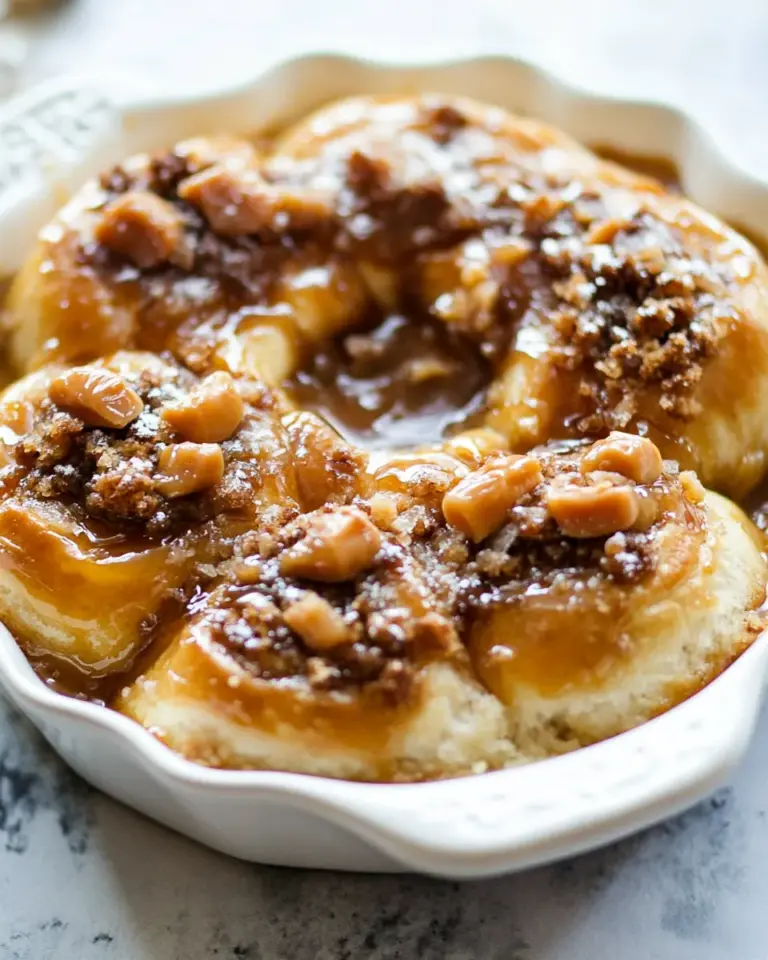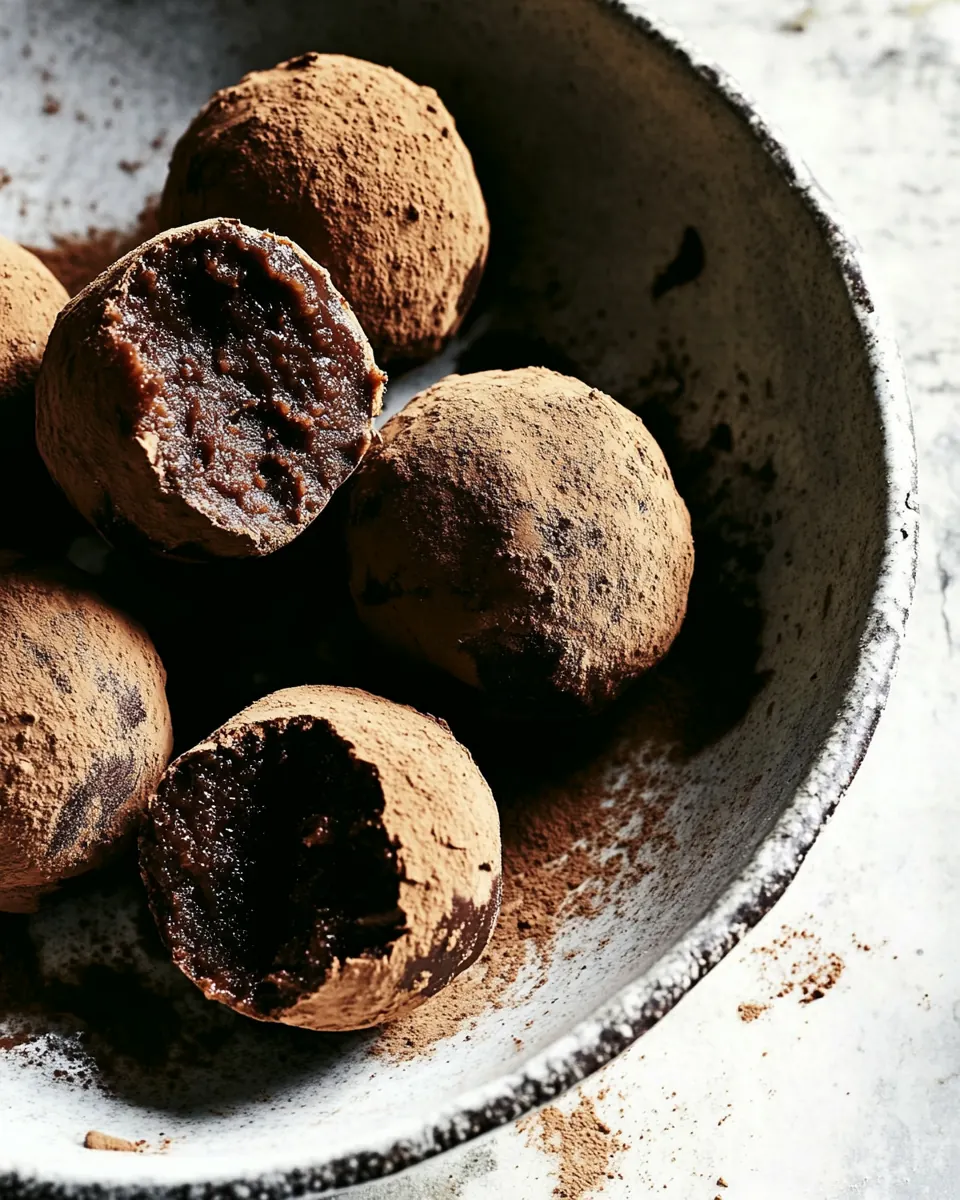
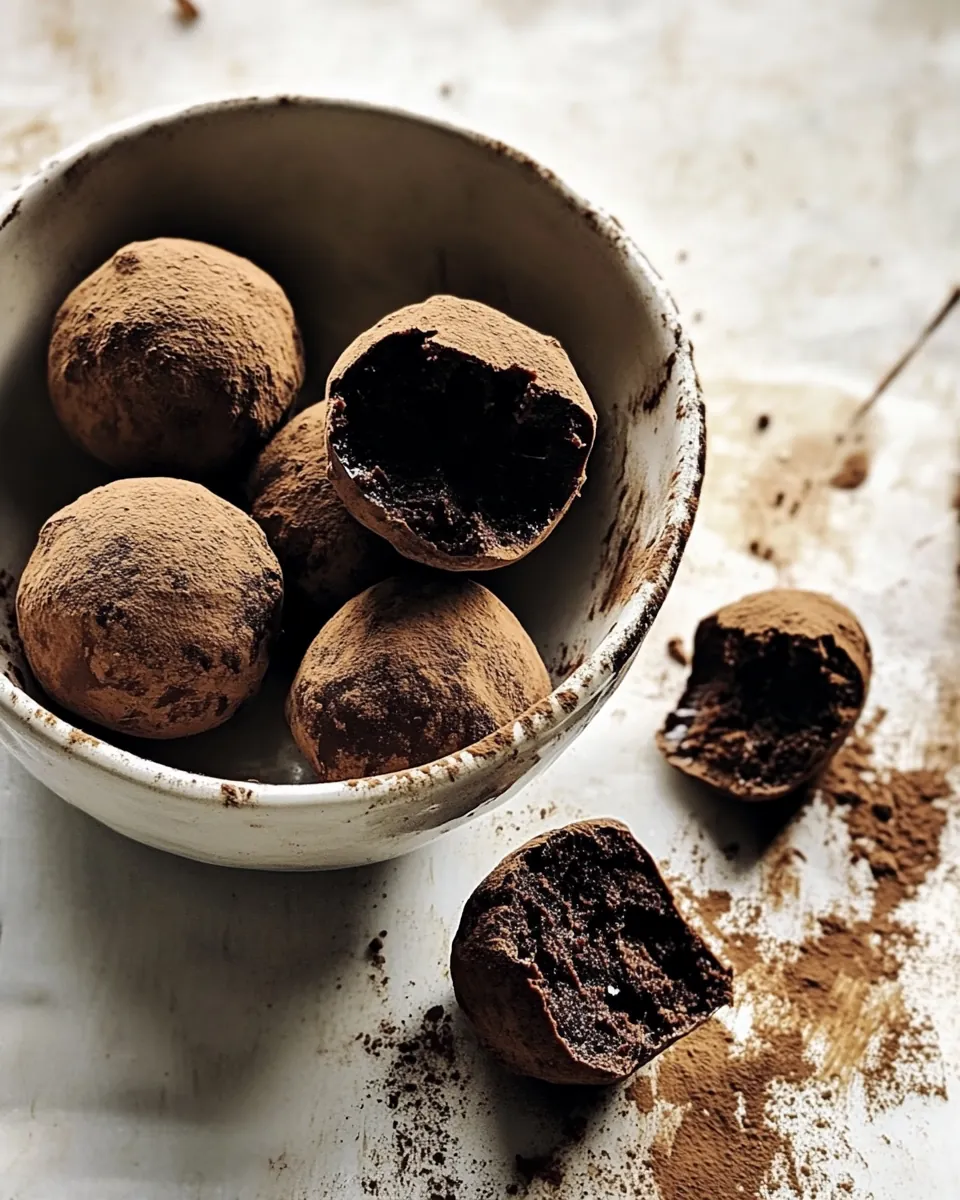
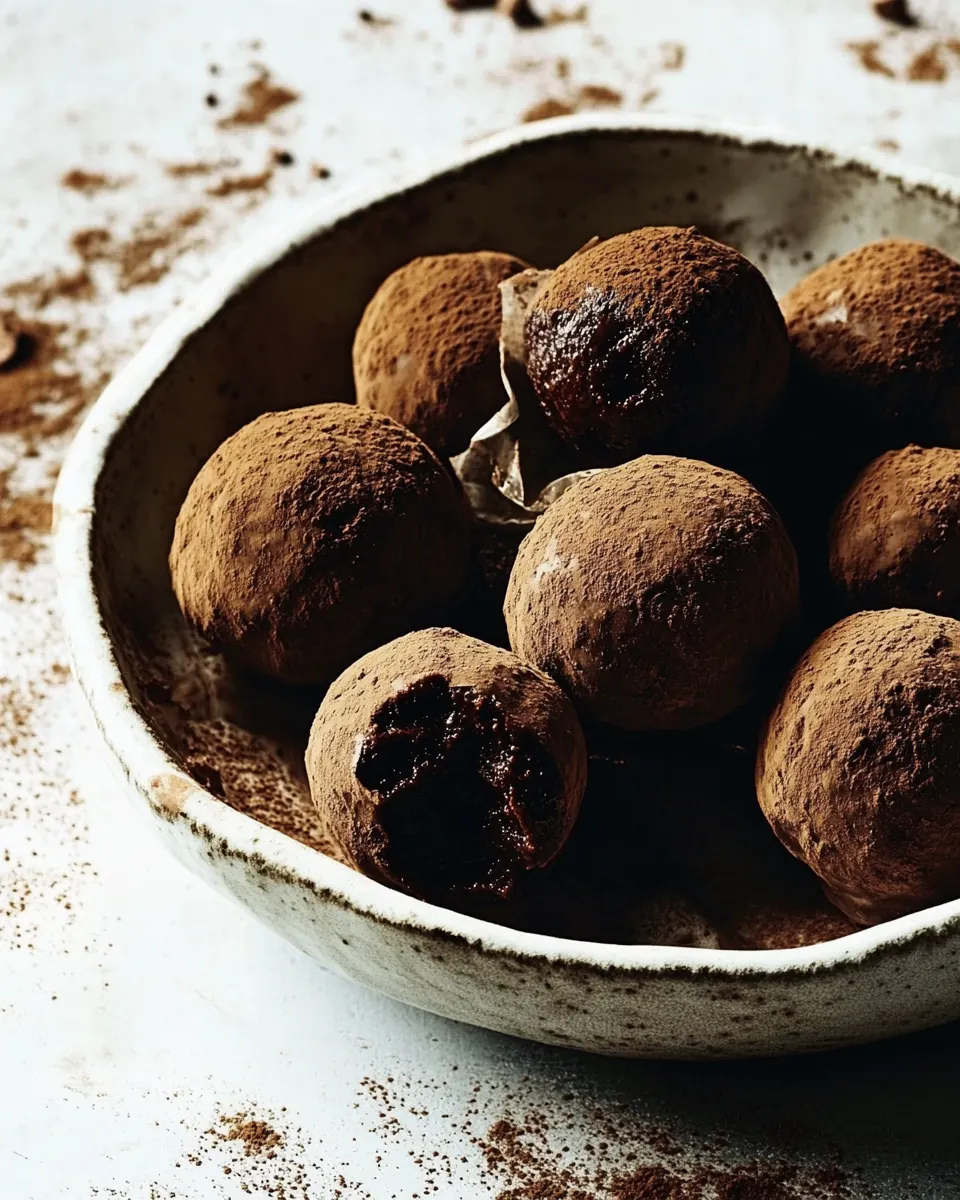
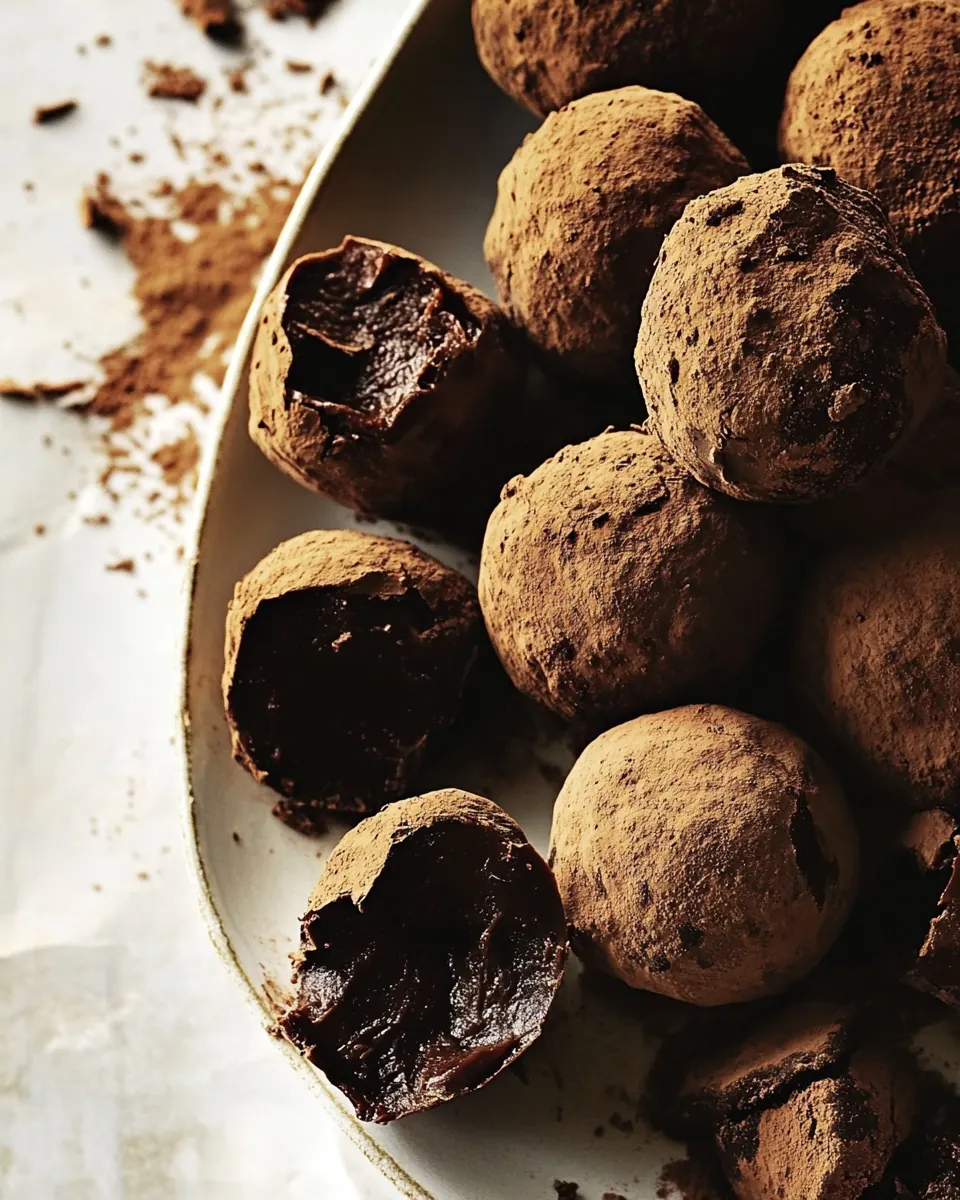
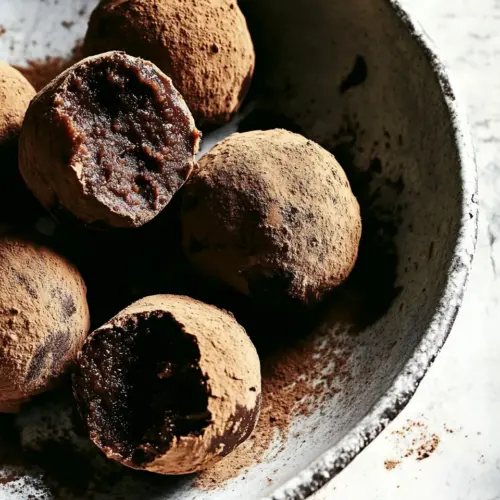
Muscovado Chocolate Truffle
Muscovado Chocolate Truffle began as a tiny experiment on a damp Sunday afternoon when I needed something comforting but not fussy. I had a jar of muscovado sugar that smelled like caramel and molasses, and a few good chunks of chocolate waiting for their moment. I remember the kitchen filling with a warm, toasty scent as the cream and sugar simmered together, and how the glossy ganache made me feel like I had discovered a secret shortcut to happiness.
That first batch taught me a lot about patience and texture. I left some truffles rustic, their surfaces a little rough with cocoa, and made others small and polished, like tiny jewels. When friends came by, they couldn’t help but reach for more than one, and I loved watching the way a simple truffle could shift an ordinary evening into something memorable. Over time I learned small tricks to control firmness and flavor intensity, and those tweaks are the reason I still make Muscovado Chocolate Truffle whenever I want a quick, luxe treat.
Recipe Snapshot
1 hr 25 mins
60 mins
25 mins
Medium
200 kcal
British
Gluten-Free, Low FODMAP
Desserts
Saucepan, Mixing bowl, Whisk, Tray, Sieve
Why This Muscovado Chocolate Truffle Works
Deep, complex flavor
I adore how muscovado sugar brings an earthy, molasses note that plays beautifully with the bitter edge of chocolate. This contrast makes every bite layered and interesting, not flat or overly sweet. I often find myself closing my eyes for a second when the truffle melts and those flavors unfold.
Versatile textures
Whether you chill the ganache until firm or keep it slightly soft, Muscovado Chocolate Truffle adapts to what you want. I like firm truffles for neat presentation, and a slightly softer center when serving with hot milk to create a quick molten hot chocolate moment.
Minimal equipment, maximum impact
One of the reasons I love these truffles is they require almost no gear, yet deliver like something made in a professional kitchen. A saucepan and a bowl are enough, and that low barrier to entry keeps me making them on weeknights and for last minute guests.
Great for gifting and entertaining
These truffles are perfect for wrapping in small boxes or skewering for an elegant platter. I’ve taken them to potlucks and holiday gatherings and they always disappear first. Their rich appearance and handmade vibe make them feel special without much effort.
Flexible for pairings
You can serve them with warm milk, coffee, or simply on their own. I sometimes warm a cup of milk and drop a truffle in, letting the center become molten, which makes an instant treat that feels indulgent and comforting at the same time.
Main Ingredients for Muscovado Chocolate Truffle
These ingredients are intentionally simple and carefully chosen so each plays a clear role. The muscovado sugar gives depth and a caramel like backbone, the cream creates the silky ganache texture, and the chocolate delivers the bitter cocoa intensity. The cocoa powder and extra muscovado sugar for rolling add contrast and a tactile finish that makes each bite satisfying.
- 100 grams muscovado sugar: Provide deep, molasses-rich sweetness and a touch of moisture to balance the intense chocolate, helping create a complex, caramel-like undertone in the truffle ganache. Add gradually to taste to avoid overpowering the chocolate and to maintain a smooth texture in the final product.
- pinch sea salt: Enhance and lift the overall flavors by balancing sweetness and intensifying the chocolate notes; a tiny amount sharpens and rounds the ganache. Sprinkle sparingly and dissolve thoroughly to avoid salty pockets and to accentuate the sweetness.
- 250 grams double cream: Contribute a luxurious, silky mouthfeel and act as the liquid base that blends with chocolate to form a stable ganache; heat gently to avoid separation. Whisk smoothly with sugar and salt so the final truffle center is creamy and cohesive.
- 250 grams chocolate 70% dark finest chocolate, broken into pieces: Melt into the warm cream to provide the dominant cocoa flavor, structure, and richness for the ganache; broken pieces ensure even melting and easy incorporation. Use high-quality 70% dark chocolate to deliver depth, bittersweet balance, and a clean set when chilled.
- 50 grams cocoa powder: Intensify cocoa flavor and deepen the chocolate profile while helping absorb excess moisture for a firmer truffle texture; sift to avoid lumps. Blend thoroughly into the melted chocolate mixture for an even, pronounced chocolate finish.
- 50 grams muscovado sugar: Boost molasses notes and add chewiness and nuanced sweetness distinct from white sugar, complementing the chocolate’s bitterness. Stir in after heating to dissolve completely and contribute to a richer, more complex truffle flavor and color.
Making Muscovado Chocolate Truffle
Working through these steps is relaxing, and I try to stay present at each moment. The directions below follow the original flow, expanded so you know what to expect at each stage, how it should look and smell, and what to watch out for. Keep a warm cup of tea nearby and give yourself time, because patience makes all the difference.
- Bring the sugar, salt and cream to a simmer. Pour on to the chocolate in a bowl and whisk well until emulsified and glossy. Allow the ganache to cool, then refrigerate.: The kitchen will fill with a warm, caramel like scent as the cream heats and the muscovado sugar begins to dissolve, creating tiny wisps of steam. You want small bubbles forming around the edge, not a rolling boil, because gentle heat helps the cream carry the sugar without scorching. Stir slowly and watch for the sugar to fully dissolve, as any remaining grains can cause a slightly gritty ganache. A common mistake is overheating, which can separate the fats, so pull the pan off the heat at the first sign of simmering and let the residual heat finish the dissolve.
- When you are ready to roll your truffles, mix the cocoa powder and sugar together well until fully combined.: As the hot mixture hits the chopped chocolate , you will see the pieces soften and melt into glossy ribbons. The aroma deepens, becoming intensely chocolate forward with a hint of molasses. Use a whisk in steady circles to coax the fat and liquid into a smooth emulsion; the ganache should look shiny and fluid. If it seems grainy, give it a minute and whisk more slowly to bring everything together. A typical error here is whisking too vigorously when the chocolate is still cold, which can cause the mixture to seize, so let the heat do most of the work before fast whisking.
- Now, take a generous amount of the ganache and, having dipped your hands into the dry mixture, form your desired sphere – or feel free to leave the truffles rustic.: As the ganache cools, its texture will change from glossy and fluid to thick and spreadable, releasing a comforting scent that is less volatile than when hot. Place plastic wrap directly on the surface to prevent a skin from forming, and refrigerate until it's firm enough to shape. Cooling slowly helps the texture become velvety, while rapid chilling can make it too hard and dry. One mistake is leaving it out too long at room temperature, which will keep it too soft to roll; conversely, chilling until rock hard will require tempering at room temperature before shaping.
- Once shaped, re-roll the truffles through the dry powder to coat them. Store in an airtight container in the fridge – or even the freezer if you want a constant supply of emergency truffles.: The dry mix should be even and free of lumps, giving a balanced bitter and sweet coating. The aroma will be dry and cocoa forward, which contrasts with the ganache's richness. Dipping your hands into the dry mixture before handling helps prevent the ganache from sticking, and ensures the surface takes on an even amount of dusting. A common slip up is using a dusty, clumpy mix which results in uneven coating, so sieve the cocoa powder into the muscovado sugar and stir thoroughly.
- But be sure to enjoy them at room temperature.: When you press the ganache it should yield softly, and the center should feel creamy, not crumbly. The tactile feedback is important, as it tells you if the ganache is at the right firmness. If it sticks excessively, chill it a little longer; if it breaks apart, let it warm briefly in your palms. Avoid overworking the ganache, which can melt it too much and make the truffles glossy and misshapen.
- Bring a mugful of milk to a simmer, place one muscovado truffle in the bottom of your cup, then pour on the hot milk and allow to stand for 2 minutes.: Rolling gives a matte, rustic finish that highlights the contrast between the interior and exterior. You should hear a faint, dry rustle as the powder settles, and the surface will look velvety rather than shiny. If the coating seems patchy, press gently and roll again, but avoid compressing the truffle which can squeeze out the center. A common mistake is rolling in a humid environment, which can make the powder clump and adhere unevenly.
- You can either drink the warm milk and enjoy the molten chocolate at the bottom, or give everything a good stir for a soothing hot chocolate milk.: Chilled, the truffles hold their shape and gain a firmer bite, while freezing is convenient for long term storage. When refrigerated, the texture is smooth and slightly firm, releasing flavors slowly; frozen and allowed to temper yields a delightful snap and creamy center. Be mindful of condensation when moving from freezer to room temperature, as moisture can ruin the coating. A frequent error is stacking them without layers, which causes sticking and damage to the coating.
- Skewer the truffles on to cocktail sticks and refrigerate. Melt a small bowl of your favorite chocolate over a pan of hot water until smooth.: Bringing truffles to room temperature unlocks the full aromatic profile and creates that melt in the mouth sensation. I usually leave a batch on the counter for 20 to 30 minutes before serving so the center softens without becoming too warm. If served too cold, the flavors can be muted and the texture feels firmer than intended. Don’t hurry this step, as patience significantly improves the tasting experience.
- Place your truffles around the dish of melted chocolate, then dip and indulge.: The hot milk will melt the truffle into a luxurious, slightly sweet drink, and the air will fill with a toasty, chocolate aroma. Letting it stand allows the center to liquefy gradually, creating a rich molten core. Avoid boiling the milk vigorously, which can scald and introduce bitter notes; gentle simmer is best. A common oversight is using very cold milk which delays melting and reduces the immediacy of the experience.
- You can either drink the warm milk and enjoy the molten chocolate at the bottom, or give everything a good stir for a soothing hot chocolate milk: Stirring creates an even, velvety drink with a balanced sweetness and deep cocoa notes. When stirred, you’ll see a glossy surface and steam rising with an inviting scent. If you prefer pockets of molten chocolate, leave it unstirred and sip slowly. One mistake is over stirring while the drink is too hot, which can make it thin and less creamy, so wait a moment if needed.
- Skewer the truffles on to cocktail sticks and refrigerate: Skewering is a fun presentation trick that chills the truffles evenly and makes them easy to serve. The skewered truffles will firm up and look elegant displayed vertically. Take care when inserting sticks to avoid squashing the center, and chill on a flat tray to prevent rolling. A frequent misstep is leaving them on sticks too long at room temperature, which makes them soften and drip.
- Melt a small bowl of your favorite chocolate over a pan of hot water until smooth: The melting chocolate should be glossy and pourable, with a fine cocoa aroma. Use gentle heat and stir often to keep it smooth; a water bath helps control temperature so it does not burn. If the chocolate becomes grainy, remove it from heat and add a small splash of warm cream to bring back gloss. Avoid introducing water into the chocolate bowl, which can seize it instantly.
- Place your truffles around the dish of melted chocolate, then dip and indulge: Dipping adds a beautiful, shiny shell that contrasts with the dusted ones, and the first crack of that shell is a delightful audio cue. As you dip, watch for smooth coverage and let excess chocolate drip back before setting on parchment. A common error is dipping when the coating chocolate is too cool, which results in thick, dull shells; keep the dip chocolate warm but not hot for best results.
Ways to Customize
These tips will help you adapt Muscovado Chocolate Truffle to your preferences, whether you want a softer center, a bolder coating, or a different presentation. Each point below highlights one focused tweak and why it matters.
- Adjust cream ratio — Increasing the amount of cream will yield a softer ganache that melts sooner on the tongue, ideal for pouring over hot milk, while reducing it makes firmer truffles better for precise shaping.
- Swap coating proportions — Altering the balance between cocoa powder and extra muscovado sugar changes the first impression of each bite, more cocoa for bitter contrast, more sugar for immediate sweetness.
- Temperature timing — Let the ganache cool at room temperature briefly before chilling to ensure an even texture that is neither grainy nor rock hard, giving you a reliable working window.
- Presentation switch — Roll some truffles smooth and dip others in melted chocolate for variety, combining matte and glossy finishes on a single platter for visual interest.
- Make ahead strategy — Freeze shaped truffles on a tray before transferring to a container, this keeps them uniform and makes portioning easy when you need a quick treat.
- Handling trick — Keep your hands slightly dusted with the dry mix to prevent sticking, this little step saves time and keeps surfaces tidy.
How to Serve Muscovado Chocolate Truffle
Serving these truffles can be as simple or as fancy as you like. They work wonderfully as an after dinner treat, a sweet addition to a tea tray, or a small gift tucked into boxes for guests. Below are detailed serving ideas and practical storage notes to keep them tasting their best.
- Elegant platter presentation — Arrange a mix of cocoa dusted and chocolate dipped truffles on a shallow plate, sprinkle a few extra grains of the extra muscovado sugar around the edge for a rustic look, and serve with small forks or picks for an upscale finish.
- Warm milk pairing — Serve a single truffle in a cup with hot milk for a cozy drink, allow two minutes to melt, then either sip the molten center first or stir it into a creamy hot chocolate experience.
- Party skewers — Thread chilled truffles onto cocktail sticks and chill before guests arrive, it makes service easy and adds height to your dessert table while keeping portions tidy.
- Gift box tips — Layer truffles in small boxes with parchment separators, include a note about serving at room temperature, and recommend removing from fridge 20 minutes before eating for best texture.
- Storage guidelines — Keep truffles in an airtight container in the fridge for up to two weeks, or freeze for longer storage, remembering to avoid moisture when thawing to preserve the coating.
- Occasion suggestions — Ideal for afternoon tea, festive gatherings, or as a thoughtful homemade gift during holidays and special occasions, these truffles fit many events without feeling over the top.
- Seasonal pairing — In colder months serve alongside hot beverages, and in milder weather present them slightly chilled as a neat, refreshing confection.
FAQ
Conclusion
What makes this recipe special is the marriage of deep, molasses rich muscovado sugar with intense dark chocolate, creating a truffle that feels luxurious yet approachable. I hope you give these Muscovado Chocolate Truffle a try, whether you are looking for a handmade gift or a little personal indulgence. The process is soothing, the results are impressive, and the payoff is a memorable bite that carries warmth and complexity. Enjoy making and sharing them, and see how small adjustments can make this recipe uniquely yours.
Muscovado Chocolate Truffle
Equipment
- Saucepan
- Mixing Bowl
- Whisk
- Tray
- Sieve
Ingredients
- 100 grams muscovado sugar Provide deep, molasses-rich sweetness and a touch of moisture to balance the intense chocolate, helping create a complex, caramel-like undertone in the truffle ganache. Add gradually to taste to avoid overpowering the chocolate and to maintain a smooth texture in the final product.
- pinch sea salt Enhance and lift the overall flavors by balancing sweetness and intensifying the chocolate notes; a tiny amount sharpens and rounds the ganache. Sprinkle sparingly and dissolve thoroughly to avoid salty pockets and to accentuate the sweetness.
- 250 grams double cream Contribute a luxurious, silky mouthfeel and act as the liquid base that blends with chocolate to form a stable ganache; heat gently to avoid separation. Whisk smoothly with sugar and salt so the final truffle center is creamy and cohesive.
- 250 grams chocolate 70% dark finest chocolate, broken into pieces Melt into the warm cream to provide the dominant cocoa flavor, structure, and richness for the ganache; broken pieces ensure even melting and easy incorporation. Use high-quality 70% dark chocolate to deliver depth, bittersweet balance, and a clean set when chilled.
- 50 grams cocoa powder Intensify cocoa flavor and deepen the chocolate profile while helping absorb excess moisture for a firmer truffle texture; sift to avoid lumps. Blend thoroughly into the melted chocolate mixture for an even, pronounced chocolate finish.
- 50 grams muscovado sugar Boost molasses notes and add chewiness and nuanced sweetness distinct from white sugar, complementing the chocolate’s bitterness. Stir in after heating to dissolve completely and contribute to a richer, more complex truffle flavor and color.
Instructions
- Bring the sugar, salt and cream to a simmer. Pour on to the chocolate in a bowl and whisk well until emulsified and glossy. Allow the ganache to cool, then refrigerate.: The kitchen will fill with a warm, caramel like scent as the cream heats and the muscovado sugar begins to dissolve, creating tiny wisps of steam. You want small bubbles forming around the edge, not a rolling boil, because gentle heat helps the cream carry the sugar without scorching. Stir slowly and watch for the sugar to fully dissolve, as any remaining grains can cause a slightly gritty ganache. A common mistake is overheating, which can separate the fats, so pull the pan off the heat at the first sign of simmering and let the residual heat finish the dissolve.
- When you are ready to roll your truffles, mix the cocoa powder and sugar together well until fully combined.: As the hot mixture hits the chopped chocolate , you will see the pieces soften and melt into glossy ribbons. The aroma deepens, becoming intensely chocolate forward with a hint of molasses. Use a whisk in steady circles to coax the fat and liquid into a smooth emulsion; the ganache should look shiny and fluid. If it seems grainy, give it a minute and whisk more slowly to bring everything together. A typical error here is whisking too vigorously when the chocolate is still cold, which can cause the mixture to seize, so let the heat do most of the work before fast whisking.
- Now, take a generous amount of the ganache and, having dipped your hands into the dry mixture, form your desired sphere – or feel free to leave the truffles rustic.: As the ganache cools, its texture will change from glossy and fluid to thick and spreadable, releasing a comforting scent that is less volatile than when hot. Place plastic wrap directly on the surface to prevent a skin from forming, and refrigerate until it's firm enough to shape. Cooling slowly helps the texture become velvety, while rapid chilling can make it too hard and dry. One mistake is leaving it out too long at room temperature, which will keep it too soft to roll; conversely, chilling until rock hard will require tempering at room temperature before shaping.
- Once shaped, re-roll the truffles through the dry powder to coat them. Store in an airtight container in the fridge – or even the freezer if you want a constant supply of emergency truffles.: The dry mix should be even and free of lumps, giving a balanced bitter and sweet coating. The aroma will be dry and cocoa forward, which contrasts with the ganache's richness. Dipping your hands into the dry mixture before handling helps prevent the ganache from sticking, and ensures the surface takes on an even amount of dusting. A common slip up is using a dusty, clumpy mix which results in uneven coating, so sieve the cocoa powder into the muscovado sugar and stir thoroughly.
- But be sure to enjoy them at room temperature.: When you press the ganache it should yield softly, and the center should feel creamy, not crumbly. The tactile feedback is important, as it tells you if the ganache is at the right firmness. If it sticks excessively, chill it a little longer; if it breaks apart, let it warm briefly in your palms. Avoid overworking the ganache, which can melt it too much and make the truffles glossy and misshapen.
- Bring a mugful of milk to a simmer, place one muscovado truffle in the bottom of your cup, then pour on the hot milk and allow to stand for 2 minutes.: Rolling gives a matte, rustic finish that highlights the contrast between the interior and exterior. You should hear a faint, dry rustle as the powder settles, and the surface will look velvety rather than shiny. If the coating seems patchy, press gently and roll again, but avoid compressing the truffle which can squeeze out the center. A common mistake is rolling in a humid environment, which can make the powder clump and adhere unevenly.
- You can either drink the warm milk and enjoy the molten chocolate at the bottom, or give everything a good stir for a soothing hot chocolate milk.: Chilled, the truffles hold their shape and gain a firmer bite, while freezing is convenient for long term storage. When refrigerated, the texture is smooth and slightly firm, releasing flavors slowly; frozen and allowed to temper yields a delightful snap and creamy center. Be mindful of condensation when moving from freezer to room temperature, as moisture can ruin the coating. A frequent error is stacking them without layers, which causes sticking and damage to the coating.
- Skewer the truffles on to cocktail sticks and refrigerate. Melt a small bowl of your favorite chocolate over a pan of hot water until smooth.: Bringing truffles to room temperature unlocks the full aromatic profile and creates that melt in the mouth sensation. I usually leave a batch on the counter for 20 to 30 minutes before serving so the center softens without becoming too warm. If served too cold, the flavors can be muted and the texture feels firmer than intended. Don’t hurry this step, as patience significantly improves the tasting experience.
- Place your truffles around the dish of melted chocolate, then dip and indulge.: The hot milk will melt the truffle into a luxurious, slightly sweet drink, and the air will fill with a toasty, chocolate aroma. Letting it stand allows the center to liquefy gradually, creating a rich molten core. Avoid boiling the milk vigorously, which can scald and introduce bitter notes; gentle simmer is best. A common oversight is using very cold milk which delays melting and reduces the immediacy of the experience.
- You can either drink the warm milk and enjoy the molten chocolate at the bottom, or give everything a good stir for a soothing hot chocolate milk: Stirring creates an even, velvety drink with a balanced sweetness and deep cocoa notes. When stirred, you’ll see a glossy surface and steam rising with an inviting scent. If you prefer pockets of molten chocolate, leave it unstirred and sip slowly. One mistake is over stirring while the drink is too hot, which can make it thin and less creamy, so wait a moment if needed.
- Skewer the truffles on to cocktail sticks and refrigerate: Skewering is a fun presentation trick that chills the truffles evenly and makes them easy to serve. The skewered truffles will firm up and look elegant displayed vertically. Take care when inserting sticks to avoid squashing the center, and chill on a flat tray to prevent rolling. A frequent misstep is leaving them on sticks too long at room temperature, which makes them soften and drip.
- Melt a small bowl of your favorite chocolate over a pan of hot water until smooth: The melting chocolate should be glossy and pourable, with a fine cocoa aroma. Use gentle heat and stir often to keep it smooth; a water bath helps control temperature so it does not burn. If the chocolate becomes grainy, remove it from heat and add a small splash of warm cream to bring back gloss. Avoid introducing water into the chocolate bowl, which can seize it instantly.
- Place your truffles around the dish of melted chocolate, then dip and indulge: Dipping adds a beautiful, shiny shell that contrasts with the dusted ones, and the first crack of that shell is a delightful audio cue. As you dip, watch for smooth coverage and let excess chocolate drip back before setting on parchment. A common error is dipping when the coating chocolate is too cool, which results in thick, dull shells; keep the dip chocolate warm but not hot for best results.
Notes
- Adjust cream ratio — Increasing the amount of cream will yield a softer ganache that melts sooner on the tongue, ideal for pouring over hot milk, while reducing it makes firmer truffles better for precise shaping.
- Swap coating proportions — Altering the balance between cocoa powder and extra muscovado sugar changes the first impression of each bite, more cocoa for bitter contrast, more sugar for immediate sweetness.
- Temperature timing — Let the ganache cool at room temperature briefly before chilling to ensure an even texture that is neither grainy nor rock hard, giving you a reliable working window.
- Presentation switch — Roll some truffles smooth and dip others in melted chocolate for variety, combining matte and glossy finishes on a single platter for visual interest.
- Make ahead strategy — Freeze shaped truffles on a tray before transferring to a container, this keeps them uniform and makes portioning easy when you need a quick treat.
- Handling trick — Keep your hands slightly dusted with the dry mix to prevent sticking, this little step saves time and keeps surfaces tidy.