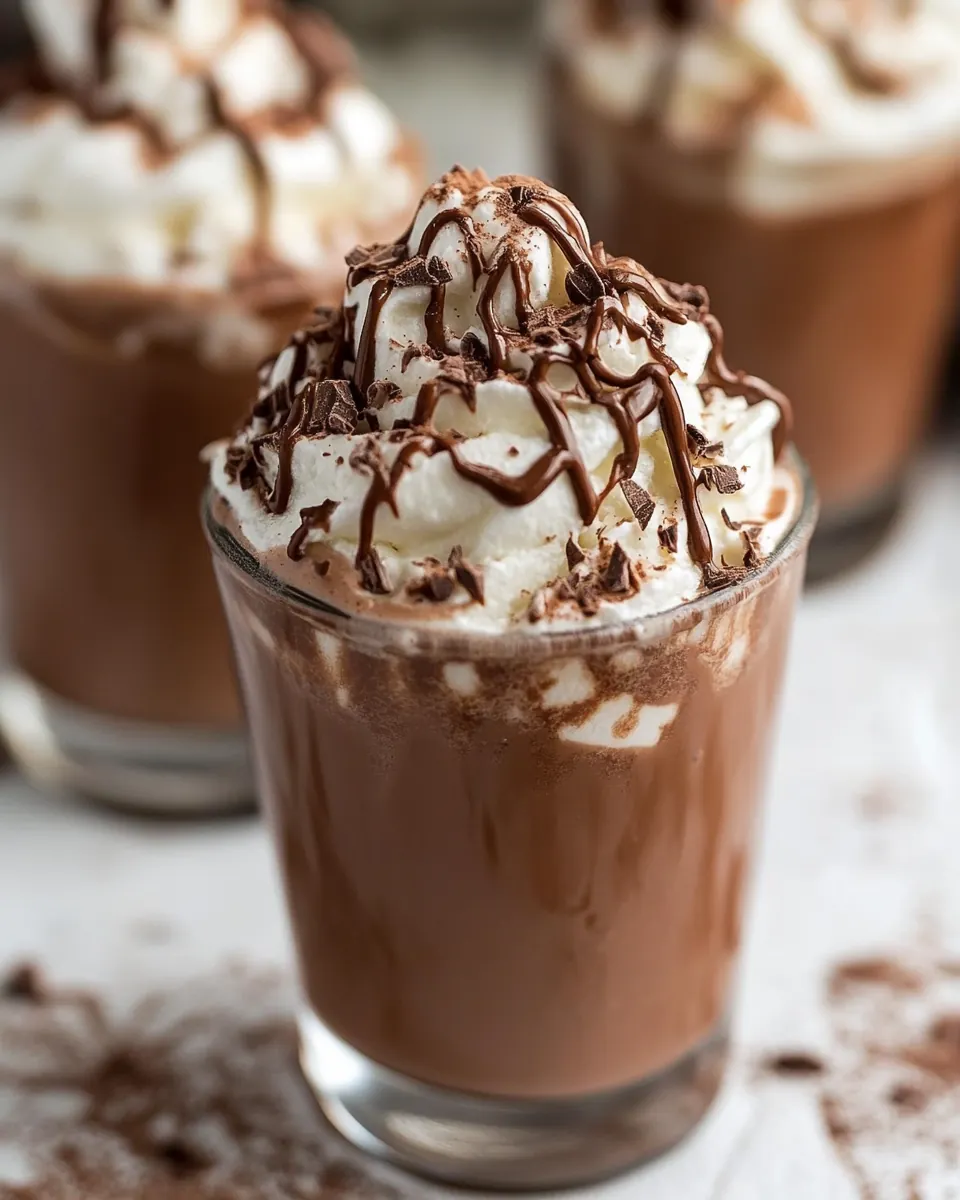
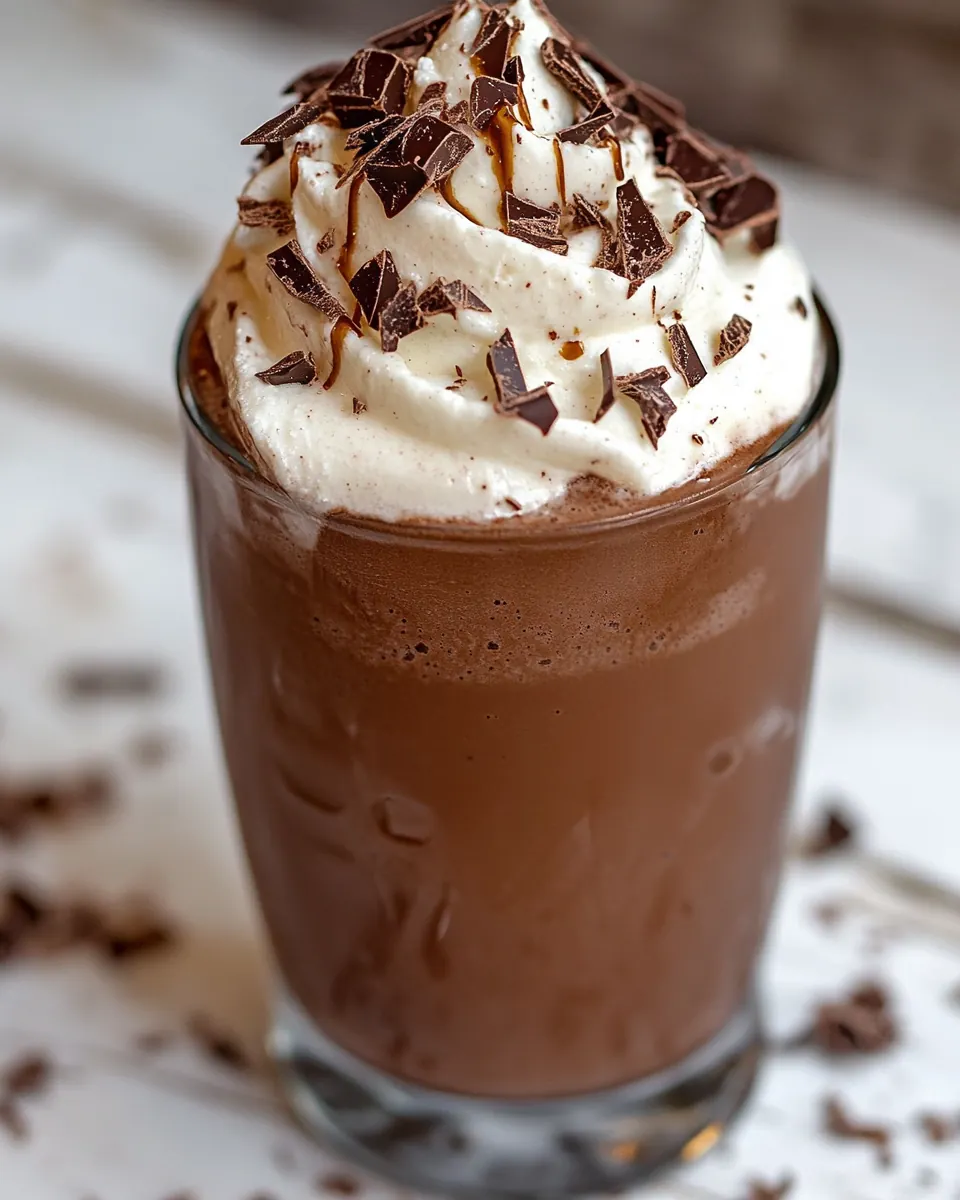
Frozen Hot Chocolate
Frozen Hot Chocolate was my go to when summer evenings demanded something cool yet deeply chocolatey. The first time I made it I was testing a cold drink that still felt indulgent and cozy, and this recipe delivered that warm chocolate comfort in a frosty glass. I remember juggling a blender and a pile of melting chocolate while guests laughed on the patio, and that moment of handing everyone a chilled cup felt like a tiny victory.
Over the years I tweaked small things until the texture sang, and that sense of playful experimentation really shows in this version. I love how the melted dark chocolate and the cold milk join forces, carrying notes of cocoa and a whisper of coffee that lift the whole drink. If you enjoy rich, creamy sips that are still refreshing, this is the one you’ll reach for when you want something special without a fuss.
Recipe Snapshot
6 mins
5 mins
1 mins
Easy
300 kcal
American
Gluten-Free, Low FODMAP
Desserts
Sauce pot, Blender, Measuring cups
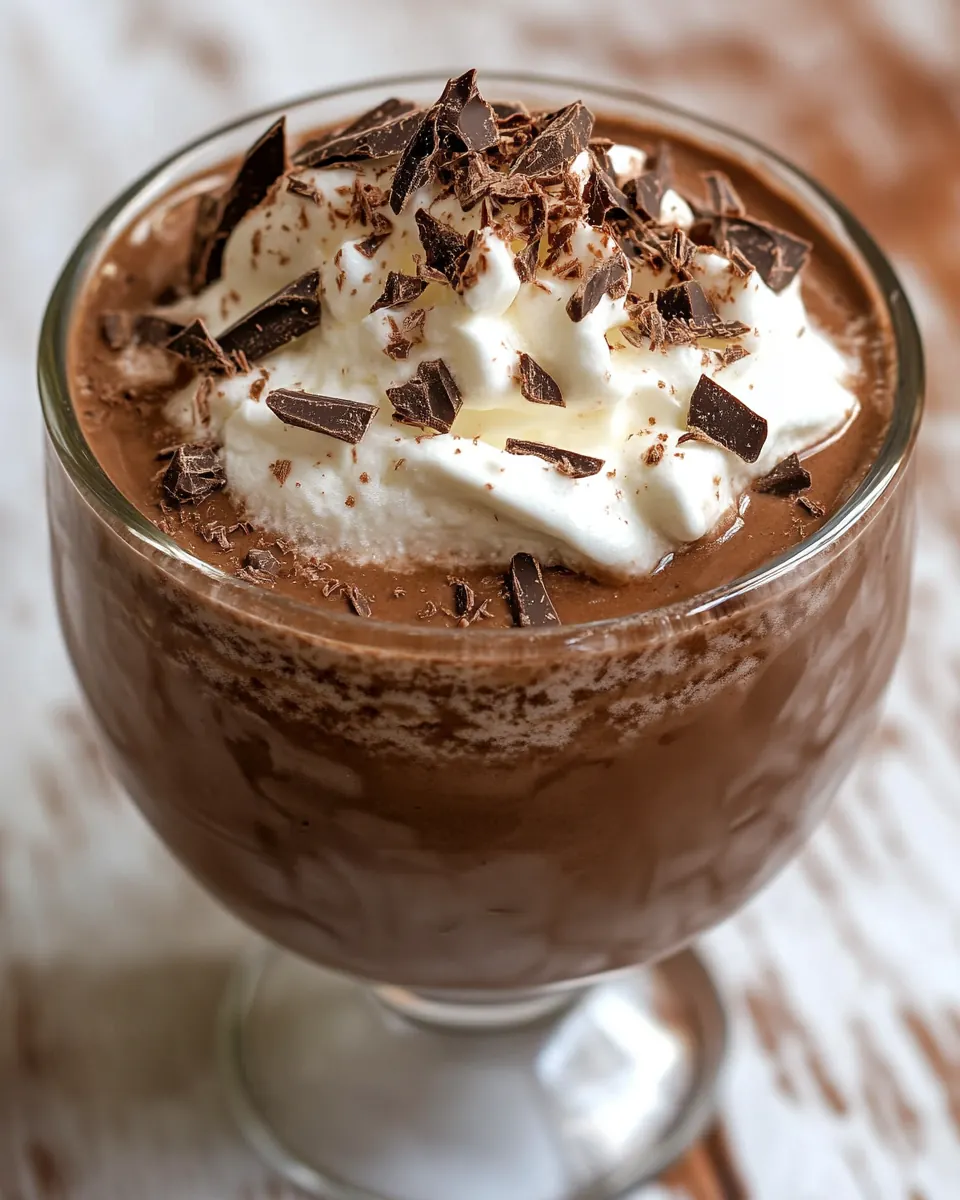
What Makes This Frozen Hot Chocolate Special
Deep, Concentrated Chocolate Flavor
I adore how the melting process concentrates the taste of dark chocolate, giving every sip a luxurious gravity. When you warm the chocolate with a little milk and granulated sugar, the flavors smooth out and bloom, creating a base that stands up to ice without tasting watered down.
Speed and Simplicity
There is something freeing about this recipe because it moves quickly. From the first stir to the final blend you can have glasses ready in minutes, which is why I often make it for unexpected guests or a quick treat after a hot day.
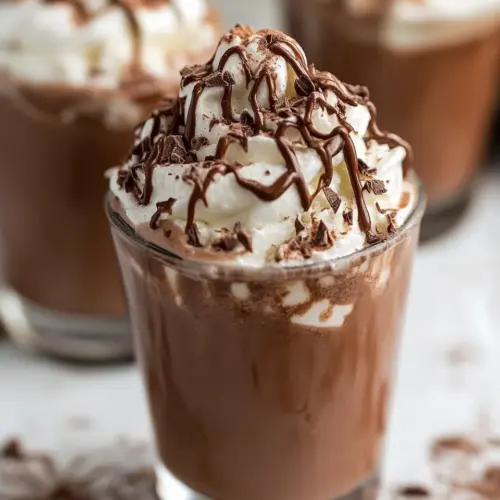
Flexible Garnish Moment
The garnish line up is playful and lets you personalize. Whether it is a crown of whipped cream or a drizzle of chocolate sauce, those finishing touches turn a cold drink into an event. I like to experiment with textures and colors when I plate drinks for friends.
Balanced Bitterness and Sweetness
The recipe strikes a charming balance, the slight bitterness of the dark chocolate paired with the sweetness from granulated sugar keeps it grown up but still dessert like. A touch of instant coffee granules lifts the overall profile without adding overt coffee flavor, which is a subtle trick I reach for often.
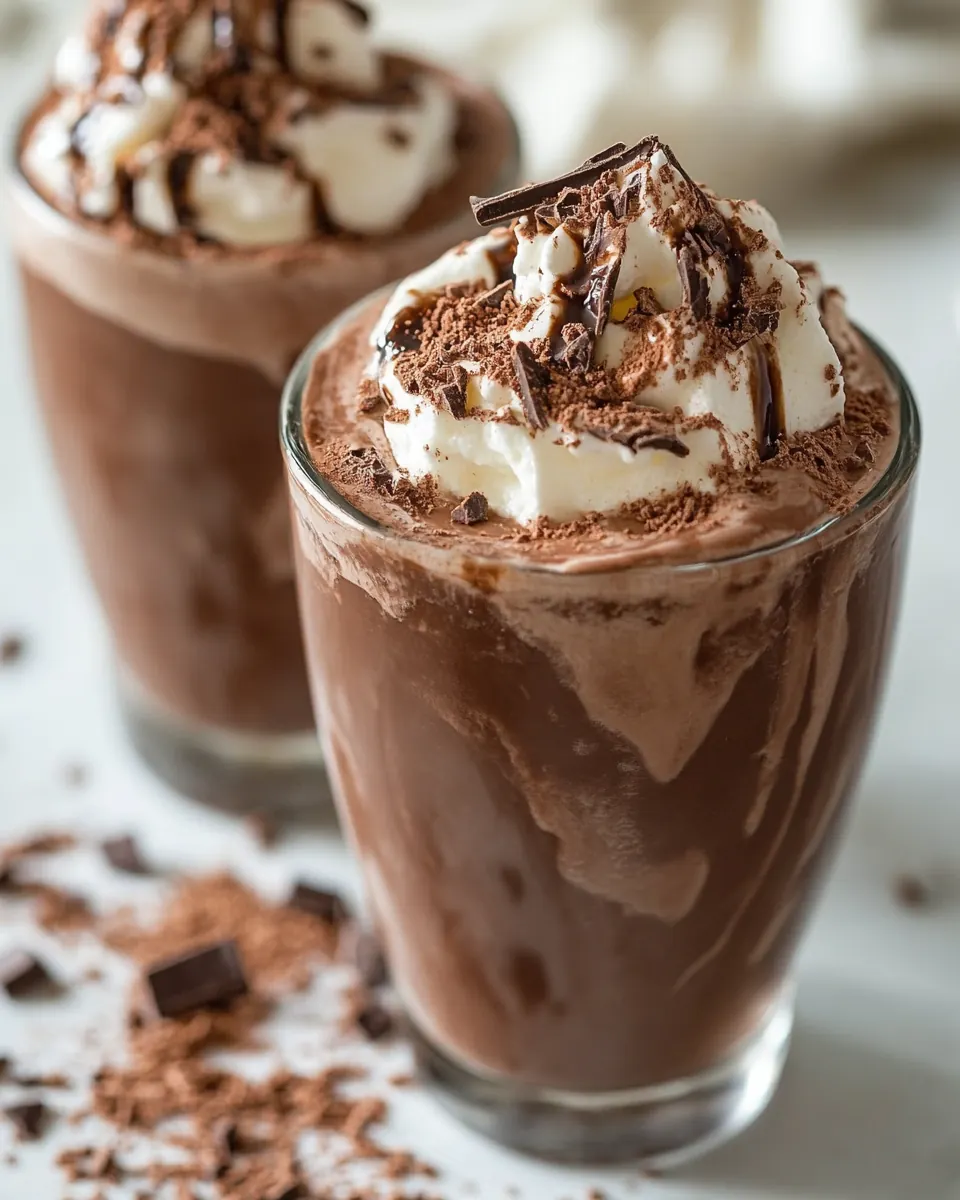
Great for Warm Weather Gatherings
Because it is cold and satisfying, this drink becomes an instant crowd pleaser at summer get togethers. It feels indulgent yet effortless to scale, which is one reason I keep it in regular rotation when friends drop by.
What to Gather for Frozen Hot Chocolate
These ingredients are intentionally simple so the chocolate can shine. The key players are the dark chocolate for body, the milk for creaminess, and the ice for that frozen texture. Small additions like unsweetened cocoa powder and instant coffee granules amplify the chocolate notes, while the vanilla extract softens any edge.
- 5 ounces dark chocolate, broken into pieces: Melted and incorporated to provide deep, rich chocolate flavor and a silky base; break into pieces to melt evenly and blend smoothly into the drink for a luxurious texture.
- 1/4 cup granulated sugar: Added to contribute balanced sweetness and enhance the chocolate profile; dissolve thoroughly to avoid grittiness while blending with the melted chocolate and liquids.
- 1 1/2 tablespoons unsweetened cocoa powder: Whisked in to intensify chocolate taste and add a dry cocoa backbone; sift or mix well to prevent lumps and to layer a concentrated cocoa note.
- 1 teaspoon instant coffee granules: Sprinkled in to boost chocolate's complexity with subtle bitter and roasted notes; dissolve in the hot melted chocolate or milk for an espresso-like depth.
- 1 teaspoon vanilla extract: Stirred in to round out flavors and add aromatic sweetness; add at the end of melting to preserve its fragrant profile and brighten the drink.
- 2 cups whole milk: Poured in to create a creamy, full-bodied consistency and carry the chocolate flavors; use whole milk for richness and to help emulsify the melted chocolate.
- 4 cups ice: Blended to chill and thicken into a slushy frozen texture; add gradually and pulse to control consistency and prevent large ice chunks.
- Possible garnishes: whipped cream, chocolate sauce, hot fudge, shaved chocolate curls, chopped nuts, caramel sauce, sprinkles: Used as optional toppings to add visual appeal, texture contrasts, and extra flavor accents; choose combinations like whipped cream or chocolate sauce to complement the frozen drink.
Making Frozen Hot Chocolate
This blend is straightforward but benefits from attention to detail at each turning point. I always take a moment to notice texture and aroma as I heat, melt, and blend, because those cues tell me when the drink is exactly where it needs to be. Keep tools ready and work with care when moving hot mixture to the blender.
- Place the chocolate, sugar, cocoa powder, instant coffee granules, and 1 cup milk in a small sauce pot. Warm over medium heat and stir until the chocolate has melted into the milk. Once smooth, remove from heat. Do not let the mixture boil.: As the pot begins to warm you will smell the first fragrant lift of cocoa with a subtle roasted sweetness. The dark chocolate pieces will start to soften at the edges, and the sugar will dissolve into the thinning milk . The reason we melt these together gently is to coax the cacao oils out for a silky mouthfeel, which prevents a grainy drink later. Watch closely so the mixture does not scorch, that is a common error that creates a bitter note. If the transfer to the blender is delayed, keep the pot off heat to prevent overcooking.
- Pour the chocolate mixture into a blender. Add the remaining milk to the blender, along with the vanilla extract and ice. Cover and blend until very smooth.: You will see the dark chocolate collapse into glossy ribbons, and the aroma will grow richer and slightly toasted. Stirring is important because it distributes heat and prevents hot spots that can cause the chocolate to seize. The texture should become smooth and velvety, with no visible lumps of chocolate, which signals readiness. A mistake here is turning up the heat too high, which can cause separation, so stay patient and keep stirring gently.
- Pour into glasses and add whipped cream and garnishes if desired!: When the surface gleams and the mixture looks homogeneous, take the pot off the burner so the residual heat does not push the blend to boil. Boiling risks evaporating delicate flavor and can make the sugar crystallize. The immediate cue is a glossy surface with tiny swirling currents. If you see bubbling at the edges, you waited too long, so let it cool slightly before blending to avoid dangerous splattering.
- Do not let the mixture boil: Maintaining a gentle warmth ensures the liquid stays cohesive and creamy. Boiling introduces harsh notes and can separate fats, which ruins the silky mouthfeel we are aiming for. If you accidentally get it too hot, remove from heat and whisk in a splash of cool milk to bring the temperature down and stabilize texture.
- Pour the chocolate mixture into a blender: When you pour, observe the glossy stream of chocolate as it coats the blender jug, that tells you it has the right viscosity. The blender is where the magic happens, turning the warm, concentrated chocolate into a cold, smooth slush. One practical tip is to let the pot sit a minute so the blend is warm, not piping, to avoid pressure build up in the blender.
- Add the remaining milk to the blender, along with the vanilla extract and ice: The addition of cold milk and ice immediately changes the temperature and consistency, so expect a visible clouding as the warm base meets the cold. The vanilla extract will scent the top layer and help unify flavors. The goal here is to reach a temperature where the ice shaves into fluffy crystals rather than large chunks, which gives that velvety frozen texture. Overloading the blender can stall the blades, so use measured amounts of ice as stated.
- Cover and blend until very smooth: As the motor runs you will hear the ice crackle into small, fine particles and the mixture will shift from liquid into a thick, silky slush. The smell will lift, showing intensified chocolate notes and a soft vanilla undertone. Blending time matters because under blending leaves icy grit, while over blending warms the mixture and makes it watery. A common mistake is pulsing too briefly, which yields uneven texture, so blend long enough for a homogeneous creaminess.
- Pour into glasses: The first pour should reveal a rich, velvety stream that sits thickly in the glass, hinting at a decadent sip ahead. Look for a smooth surface and small air pockets that indicate a light, whipped texture. If the drink separates quickly, it may have been over diluted by melt, so serve immediately for best structure.
- Add whipped cream and garnishes if desired: The final flourish creates contrast in mouthfeel and temperature, a cool dollop of whipped cream softens the cold intensity and toppings add crunch or extra chocolate notes. You can watch the garnish settle and drip slightly into the slush, creating a dynamic presentation. Avoid adding warm garnishes, which will melt and water down the drink prematurely.
Make It Your Own
I like to treat the garnish station as a small finishing bar so everyone can tailor their cup. These tips will help you personalize the experience while keeping the core Frozen Hot Chocolate identity intact. Small adjustments can amplify texture, sweetness, or presentation.
- Choose your chocolate wisely – Try different percentages of dark chocolate to find your preferred balance of richness and bitterness; 60 to 70 percent is a sweet spot for most palates.
- Adjust sweetness thoughtfully – If you want a less sweet drink, reduce the granulated sugar by a tablespoon at a time, tasting the warmed mix so you maintain harmony with the dark chocolate.
- Play with dairy options – While the recipe calls for whole milk, you can explore plant based milks for different textures, but expect a thinner mouthfeel compared to whole milk.
- Garnish for texture – Add shaved chocolate curls or chopped nuts to introduce crunch, which contrasts beautifully with the slushy base and gives each sip an interesting finish.
- Make ahead for parties – Warm and prepare the chocolate base ahead, cool it, then blend with ice just before serving to minimize last minute prep while hosting.
- Stick to immediate service – This drink is at its peak right after blending, so encourage guests to sip promptly to enjoy the ideal frozen texture.
Great Combinations for Frozen Hot Chocolate
This drink partners well with light bites and relaxed occasions, especially during warm weather when you crave something indulgent yet refreshing. Think casual gatherings, dessert after a summer meal, or a special treat for an afternoon wind down. Use the list below to match serving ideas, storage notes, and occasions.
- Light pastries – Pair with small cookies or biscotti for a crunchy companion to the smooth Frozen Hot Chocolate. The contrast between a crisp bite and the slushy drink is delightful.
- Ice cream sandwiches – For a playful dessert spread, offer ice cream sandwiches alongside the drink, letting guests alternate spoonfuls with cold sips for an over the top chocolate experience.
- Summer brunch – Serve as a sweet finish to a leisurely summer brunch, it works well alongside fresh fruit and yogurt items and brightens the table.
- Casual dinner dessert – After a relaxed dinner, bring out glasses of Frozen Hot Chocolate to round out the evening without heavy plating or fuss.
- Storage tip – The warmed chocolate base can be refrigerated for a day or two, but once blended with ice the drink should be consumed immediately to preserve texture.
- Seasonal pairing – Although it is perfect for warm weather, consider smaller servings during transitional seasons as a comforting yet cool treat.
- Serving style – Use tall clear glasses to show off layers of whipped cream and chocolate drizzle, it makes a visually pleasing dessert that invites people to indulge.
- Party scale – For gatherings, preheat the chocolate base and set up a blending station so guests can create their own garnished glasses quickly.
- Occasion fit – Ideal for casual entertaining, summer birthdays, or an after swim treat, this drink brings a small sense of celebration to ordinary afternoons.
- Practical plating – Serve with a small saucer for garnishes and a long spoon if you add chunky toppings like chopped nuts to scoop through the slush.
FAQ
Conclusion
This Frozen Hot Chocolate stands out because it delivers rich chocolate intensity in a refreshingly cold form. It is quick to prepare, easy to personalize, and satisfying for both casual moments and small gatherings. Give it a try the next warm afternoon, and invite a friend or two to share the experience. I promise the silky texture and lush chocolate flavor will make it a welcome addition to your recipe rotation.
Frozen Hot Chocolate
Equipment
- Sauce pot
- Blender
- Measuring Cups
Ingredients
- 5 ounces dark chocolate, broken into pieces Melted and incorporated to provide deep, rich chocolate flavor and a silky base; break into pieces to melt evenly and blend smoothly into the drink for a luxurious texture.
- 1/4 cup granulated sugar Added to contribute balanced sweetness and enhance the chocolate profile; dissolve thoroughly to avoid grittiness while blending with the melted chocolate and liquids.
- 1 1/2 tablespoons unsweetened cocoa powder Whisked in to intensify chocolate taste and add a dry cocoa backbone; sift or mix well to prevent lumps and to layer a concentrated cocoa note.
- 1 teaspoon instant coffee granules Sprinkled in to boost chocolate's complexity with subtle bitter and roasted notes; dissolve in the hot melted chocolate or milk for an espresso-like depth.
- 1 teaspoon vanilla extract Stirred in to round out flavors and add aromatic sweetness; add at the end of melting to preserve its fragrant profile and brighten the drink.
- 2 cups whole milk Poured in to create a creamy, full-bodied consistency and carry the chocolate flavors; use whole milk for richness and to help emulsify the melted chocolate.
- 4 cups ice Blended to chill and thicken into a slushy frozen texture; add gradually and pulse to control consistency and prevent large ice chunks.
- Possible garnishes: whipped cream, chocolate sauce, hot fudge, shaved chocolate curls, chopped nuts, caramel sauce, sprinkles Used as optional toppings to add visual appeal, texture contrasts, and extra flavor accents; choose combinations like whipped cream or chocolate sauce to complement the frozen drink.
Instructions
- Place the chocolate, sugar, cocoa powder, instant coffee granules, and 1 cup milk in a small sauce pot. Warm over medium heat and stir until the chocolate has melted into the milk. Once smooth, remove from heat. Do not let the mixture boil.: As the pot begins to warm you will smell the first fragrant lift of cocoa with a subtle roasted sweetness. The dark chocolate pieces will start to soften at the edges, and the sugar will dissolve into the thinning milk . The reason we melt these together gently is to coax the cacao oils out for a silky mouthfeel, which prevents a grainy drink later. Watch closely so the mixture does not scorch, that is a common error that creates a bitter note. If the transfer to the blender is delayed, keep the pot off heat to prevent overcooking.
- Pour the chocolate mixture into a blender. Add the remaining milk to the blender, along with the vanilla extract and ice. Cover and blend until very smooth.: You will see the dark chocolate collapse into glossy ribbons, and the aroma will grow richer and slightly toasted. Stirring is important because it distributes heat and prevents hot spots that can cause the chocolate to seize. The texture should become smooth and velvety, with no visible lumps of chocolate, which signals readiness. A mistake here is turning up the heat too high, which can cause separation, so stay patient and keep stirring gently.
- Pour into glasses and add whipped cream and garnishes if desired!: When the surface gleams and the mixture looks homogeneous, take the pot off the burner so the residual heat does not push the blend to boil. Boiling risks evaporating delicate flavor and can make the sugar crystallize. The immediate cue is a glossy surface with tiny swirling currents. If you see bubbling at the edges, you waited too long, so let it cool slightly before blending to avoid dangerous splattering.
- Do not let the mixture boil: Maintaining a gentle warmth ensures the liquid stays cohesive and creamy. Boiling introduces harsh notes and can separate fats, which ruins the silky mouthfeel we are aiming for. If you accidentally get it too hot, remove from heat and whisk in a splash of cool milk to bring the temperature down and stabilize texture.
- Pour the chocolate mixture into a blender: When you pour, observe the glossy stream of chocolate as it coats the blender jug, that tells you it has the right viscosity. The blender is where the magic happens, turning the warm, concentrated chocolate into a cold, smooth slush. One practical tip is to let the pot sit a minute so the blend is warm, not piping, to avoid pressure build up in the blender.
- Add the remaining milk to the blender, along with the vanilla extract and ice: The addition of cold milk and ice immediately changes the temperature and consistency, so expect a visible clouding as the warm base meets the cold. The vanilla extract will scent the top layer and help unify flavors. The goal here is to reach a temperature where the ice shaves into fluffy crystals rather than large chunks, which gives that velvety frozen texture. Overloading the blender can stall the blades, so use measured amounts of ice as stated.
- Cover and blend until very smooth: As the motor runs you will hear the ice crackle into small, fine particles and the mixture will shift from liquid into a thick, silky slush. The smell will lift, showing intensified chocolate notes and a soft vanilla undertone. Blending time matters because under blending leaves icy grit, while over blending warms the mixture and makes it watery. A common mistake is pulsing too briefly, which yields uneven texture, so blend long enough for a homogeneous creaminess.
- Pour into glasses: The first pour should reveal a rich, velvety stream that sits thickly in the glass, hinting at a decadent sip ahead. Look for a smooth surface and small air pockets that indicate a light, whipped texture. If the drink separates quickly, it may have been over diluted by melt, so serve immediately for best structure.
- Add whipped cream and garnishes if desired: The final flourish creates contrast in mouthfeel and temperature, a cool dollop of whipped cream softens the cold intensity and toppings add crunch or extra chocolate notes. You can watch the garnish settle and drip slightly into the slush, creating a dynamic presentation. Avoid adding warm garnishes, which will melt and water down the drink prematurely.
Notes
- Choose your chocolate wisely - Try different percentages of dark chocolate to find your preferred balance of richness and bitterness; 60 to 70 percent is a sweet spot for most palates.
- Adjust sweetness thoughtfully - If you want a less sweet drink, reduce the granulated sugar by a tablespoon at a time, tasting the warmed mix so you maintain harmony with the dark chocolate.
- Play with dairy options - While the recipe calls for whole milk, you can explore plant based milks for different textures, but expect a thinner mouthfeel compared to whole milk.
- Garnish for texture - Add shaved chocolate curls or chopped nuts to introduce crunch, which contrasts beautifully with the slushy base and gives each sip an interesting finish.
- Make ahead for parties - Warm and prepare the chocolate base ahead, cool it, then blend with ice just before serving to minimize last minute prep while hosting.
- Stick to immediate service - This drink is at its peak right after blending, so encourage guests to sip promptly to enjoy the ideal frozen texture.