Mississippi Mud Brownies
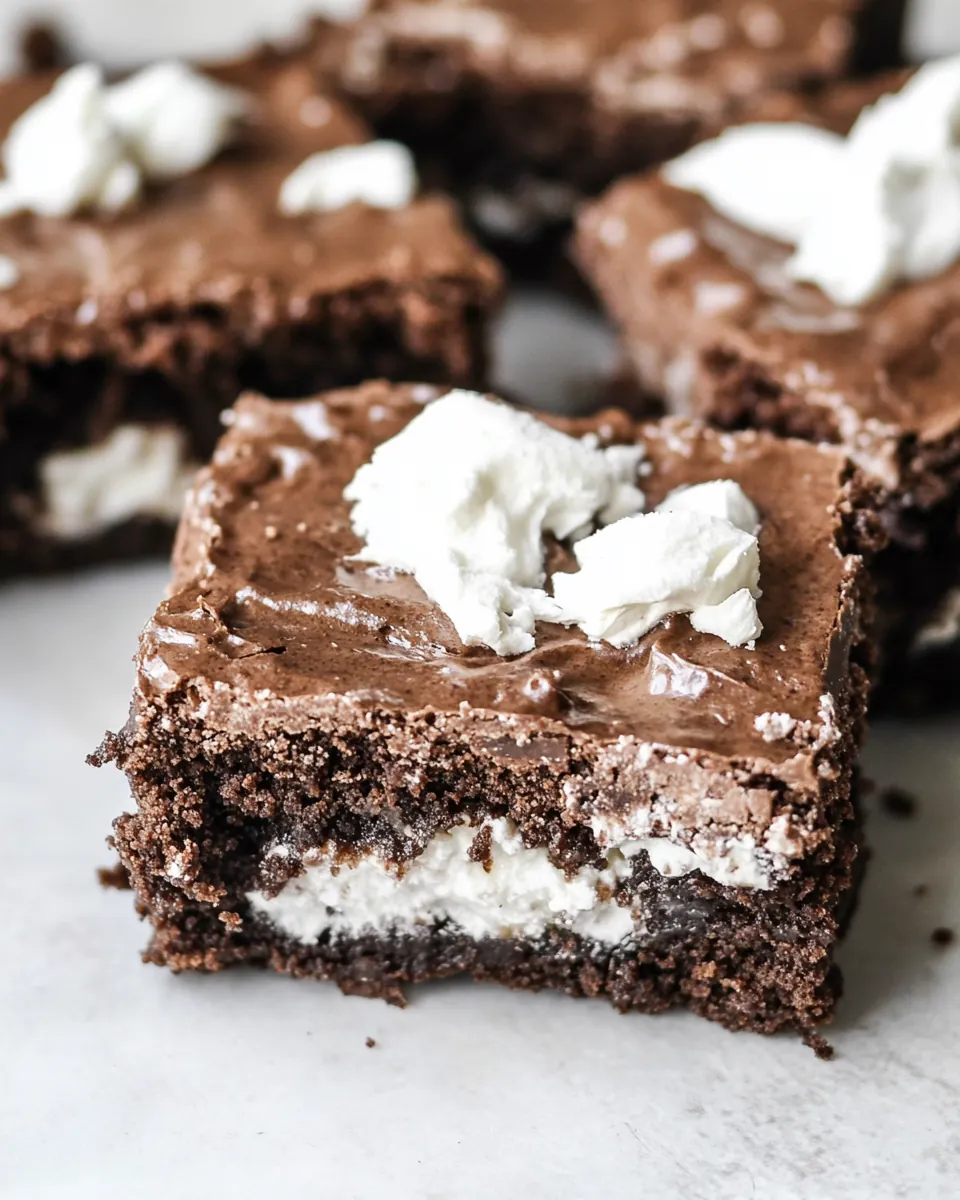
Mississippi Mud Brownies are the kind of dessert that turns an ordinary afternoon into a small celebration, and I still remember the first time I tasted one that a neighbor brought to a block party. The combination of dense chocolate brownie base, pillowy marshmallows, and glossy chocolate frosting felt comforting and a little indulgent all at once. I kept going back for one more square, and before long I was asking for the recipe, then tweaking it in my own kitchen until it felt just right.
Over the years I have made these for lazy potlucks, last minute dessert rescues, and afternoons when I wanted to impress someone without spending hours. They travel well, and they age in a very forgiving way, often tasting even better the next day when the flavors have had time to marry. When I pull a pan from the oven and the marshmallows are puffed and glossy, I know the room is going to get quieter in the best possible way. That hush is the sound of people savoring something nostalgic.
Recipe Snapshot
50 mins
20 mins
30 mins
Medium
250 kcal
American
Gluten-Free, Low FODMAP
Desserts
9×13 inch pan, Mixing bowl, Electric beaters, Spatula
Why This Mississippi Mud Brownies Is a Winner
Comforting Texture Contrast
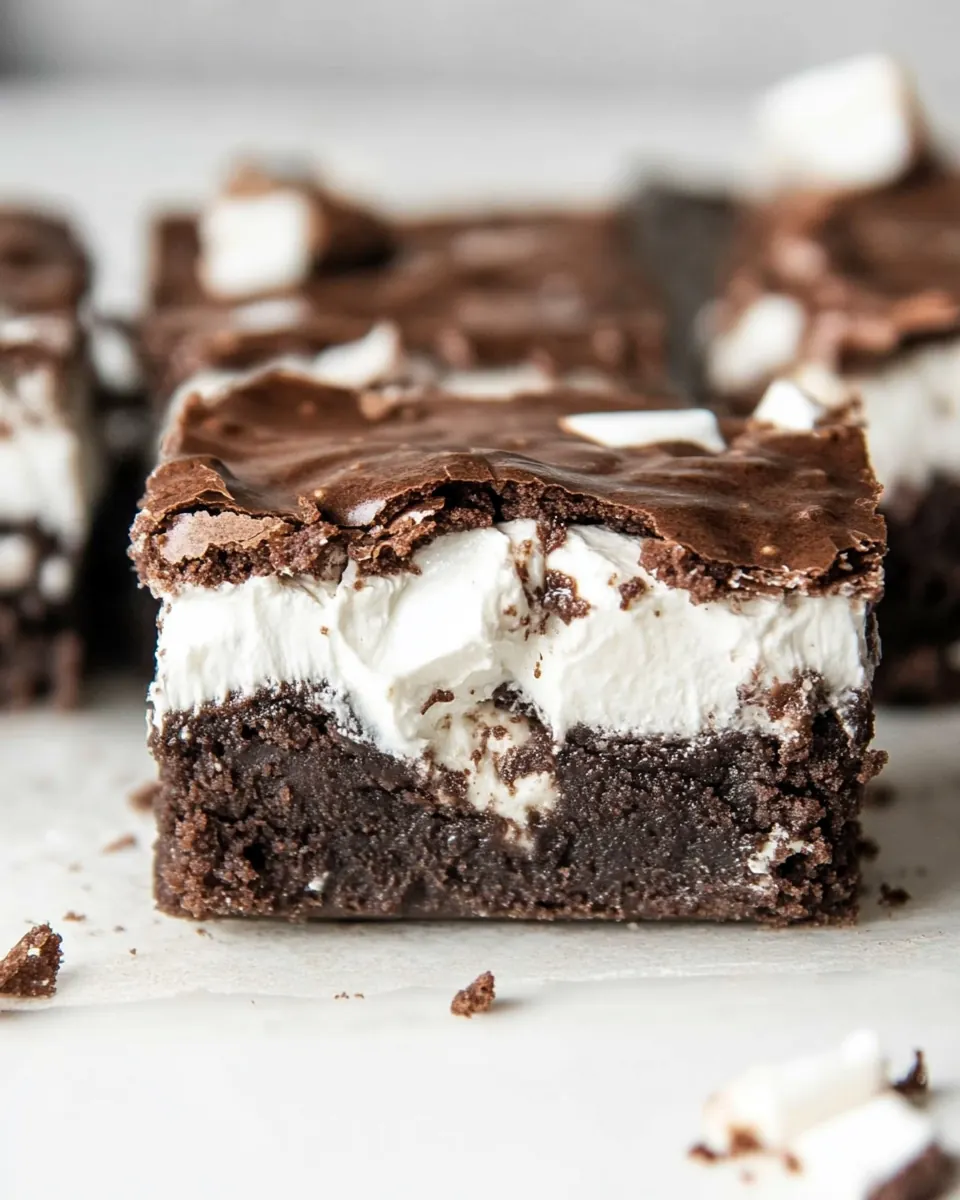
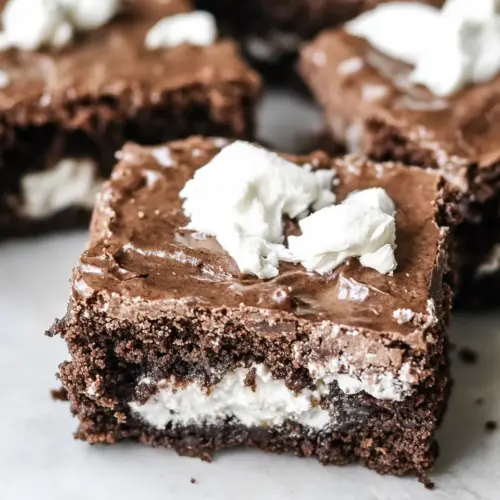
One thing I adore about Mississippi Mud Brownies is the dramatic contrast between the fudgy brownie base and the soft marshmallows on top. The brownie is rich and dense, while the marshmallows add an airy, cloud like finish. That interplay keeps each bite interesting, and I often find myself closing my eyes to enjoy the way the textures work together.
Simple, Trustworthy Ingredients
I love that the ingredient list is straightforward and pantry friendly. With staples like flour, sugar, butter, and cocoa powder you can make a pan at a moment’s notice. Because the ingredients are so common, I rarely have to plan ahead, which makes this one of my go to recipes when guests call and say they are on their way.
Playful and Customizable
These brownies invite small, delicious adjustments. I’ve mixed in chopped nuts for a rocky road vibe, and I often adjust the frosting consistency depending on whether I want a glossy glaze or a thick spreadable layer. That flexibility makes Mississippi Mud Brownies feel personal, not prescriptive, and I enjoy making it my own each time.
Great for Sharing and Storing
Practicality matters to me when I bake, and these brownies hold up beautifully for a day or two, and they freeze well too. If I need a make ahead dessert, I’ll frost them the night before so they slice cleanly the next day. They are a crowd pleaser, and I love bringing a pan to gatherings because they rarely come home with me.
Nostalgic Crowd Pleaser
There is a sentimental quality to Mississippi Mud Brownies that I find irresistible. They remind me of childhood desserts and community bake sales, evoking warm memories while still tasting modern and satisfying. Every time I bake them I feel like I’m sharing a little piece of comfort with the people I care about.
What You’ll Need for Mississippi Mud Brownies
These ingredients form a well balanced ensemble where fat, sugar, and cocoa create a fudgy base while marshmallows and a glossy chocolate frosting provide sweetness and lift. The key players are the cocoa powder for deep chocolate flavor, the combination of butter and oil for tenderness, and the powdered sugar for a silky frosting that sets just right. Together they produce that classic Mississippi mud contrast of dense and light.
- 1/3 cup unsweetened cocoa powder: Provides a concentrated chocolate flavor and deep color while contributing dry structure; whisk into the batter to dissolve fully and prevent lumps. Enhances overall cocoa intensity without adding sweetness, balancing the sugar in the recipe.
- 1/2 cup oil (vegetable or canola oil): Adds moistness and tender crumb while carrying fat-soluble flavors; pour in with other liquids and mix until incorporated. Neutral oil helps create a fudgy texture and extends shelf life.
- 1/2 cup butter, softened: Contributes richness, creaminess, and a velvety mouthfeel when creamed with sugar; soften to room temperature for even incorporation. Supplies butterfat that improves flavor, tenderness, and glossy finish.
- 2 cups granulated sugar: Sweetens the batter and helps with structure through sugar crystallization and moisture retention; measure and add during creaming with butter and oil. Also promotes browning and contributes to the chewy surface characteristic of brownies.
- 4 large eggs: Provides lift, structure, and richness; beat eggs into the batter one at a time for even distribution. Adds moisture and emulsification, helping bind ingredients and create a cohesive crumb.
- 2 teaspoons vanilla extract: Adds aromatic sweet-floral notes and enhances perceived sweetness; stir in with the wet ingredients toward the end of mixing. Small amount rounds out flavors and complements chocolate.
- 1 1/2 cups all-purpose flour: Supplies the primary dry structure and bulk of the brownies; sift or whisk to remove lumps and incorporate evenly. All-purpose flour develops gluten when mixed, giving chew and hold to the fudgy batter.
- 1 teaspoon salt: Balances sweetness and enhances flavor while strengthening gluten slightly; dissolve into the dry mix for even seasoning. Salt brightens chocolate and other flavors, preventing flatness.
- 3 cups mini marshmallows: Provides light, airy pockets and classic gooey topping when stirred into the baked layer; layer marshmallows atop and briefly bake or broil to achieve melting. Mini marshmallows melt quickly to create the signature pillowy topping.
- 1/2 cup butter, melted: Adds shine, richness, and helps dissolve cocoa and sugar in the topping while adding buttery flavor; pour melted butter over marshmallows for the glaze. Melted butter creates a smooth, spreadable consistency for the frosting.
- 1/3 cup unsweetened cocoa powder: Intensifies chocolate flavor in the frosting and contributes color; whisk into the melted butter mixture until smooth. Using the same cocoa as in the batter reinforces the chocolate profile across layers.
- 1/3 cup evaporated milk: Contributes creaminess and smooth mouthfeel to the frosting while thinning it slightly for spreadability; stir in gradually to reach desired consistency. Evaporated milk adds richness without excess sweetness.
- 1 teaspoon vanilla extract: Adds fragrant sweetness and rounds the frosting flavor; mix in to taste after other wet ingredients are combined. Vanilla deepens and harmonizes the chocolate and sugar components.
- 3 – 3 1/2 cups powdered sugar: Provides sweetness and body to the frosting while thickening to a pipeable consistency; sift or add gradually to avoid lumps and achieve smooth texture. Powdered sugar stabilizes the glaze and sets to a glossy finish.
Mississippi Mud Brownies Instructions
These instructions will guide you through each stage from mixing to frosting, and I will point out sensory cues so you know you are on the right track. I like to keep the kitchen warm and have all mise en place ready, it makes the process calmer and more predictable.
- Preheat oven to 350 degrees F. Grease a 9×13” pan with non-stick cooking spray.: When the oven warms to 350 degrees F , you should notice a gentle rise in ambient warmth and a faint dry smell, which signals it is ready to bake the batter evenly. Preheating matters because it ensures the batter begins cooking immediately, creating that slight top crust and fudgy interior we want. A common mistake is putting the pan into a colder oven, which can cause uneven baking and longer cook times; always wait for the oven to fully reach temperature before sliding the pan in.
- In a large mixing bowl, pour oil over cocoa powder and mix.: As you oil the 9×13” pan , run your fingers along the sides to feel for a thin, even coating; this simple step prevents sticking and helps the brownie pull away cleanly after baking. The light mist of spray also helps create a slightly crisp edge where the batter meets the pan, offering a pleasant contrast. Forgetting to grease thoroughly, especially in the corners, is a common oversight that can make squares difficult to remove intact.
- Add softened butter and mix until smooth. Add sugar and mix for 1 minute. Add eggs, one at a time, mixing after each addition. Add vanilla and mix.: When the oil meets the cocoa powder , it will darken and become glossy as the cocoa hydrates, releasing a concentrated chocolate aroma. Stirring until smooth helps dissolve lumps and creates a cohesive chocolate base, which contributes to a uniform flavor. If you skip this step and leave dry streaks, you may end up with pockets of undissolved cocoa that feel powdery in the finished brownie .
- Add flour and salt and stir to combine.: As you blend in the softened butter , the mixture will turn silkier and develop a slightly lighter sheen, indicating good emulsion between fat and cocoa. This texture helps the batter trap moisture and results in a tender crumb. Be careful not to use melted butter here, because that can make the batter too loose and change the final structure.
- Pour batter into prepared pan. Bake for 25-30 minutes or until a toothpick inserted into the center comes out clean.: When you add the sugar and mix, the batter will take on a grainy texture initially, then smooth out as the sugar integrates, and you will begin to smell the deepening chocolate sweetness. Mixing for the suggested time helps incorporate air, which supports even baking without making the brownie cakey. Overmixing after adding eggs can introduce too much air and change the texture, so stick to the stated timing.
- Remove brownies from the oven and sprinkle the marshmallows evenly on top. Return to the oven for 2-3 minutes or until the marshmallows are puffed. Remove from oven and allow them to cool completely.: As you add each egg , the batter will lighten and gain a glossy finish; this is the emulsion forming, which gives the brownie structure and moisture. Take note of the batter's sheen and smoothness as cues that the eggs are fully incorporated. Adding cold eggs may cause the mixture to seize or look curdled temporarily; letting eggs come to room temperature avoids that issue.
- Once brownies are cool, make the frosting.: Stirring in the vanilla extract should lift the aroma and round the chocolate notes, giving the batter an inviting scent. This small addition enhances depth and balance in the finished brownie . Using an impure or artificial flavored liquid can muddy the subtlety, so opt for a clean vanilla flavor when possible.
- Add melted butter, cocoa powder, evaporated milk, vanilla, and 2 cups of powdered sugar to a mixing bowl and beat with electric beaters until smooth.: When you fold in the flour and salt , mix just until you see streaks disappear, and the batter becomes uniform; overmixing will develop gluten and can make the texture chewy rather than fudgy. The batter should look thick and glossy, clinging slightly to the spoon. A frequent mistake is vigorous mixing here, which changes the final mouthfeel.
- Add more powdered sugar, a cup at a time, mixing well, until you reach your desired frosting consistency. I usually use about 3 1/4 cups powdered sugar.: As you transfer the batter into the greased pan, use a spatula to smooth the top so it bakes evenly and the marshmallows will sit flat later. The batter should flow slowly and have a dense, shiny appearance. If the surface is uneven, the marshmallows will cluster, so take a moment to level it before baking.
- Spread frosting over the cooled brownies and cut into squares. I've found a plastic knife works best to cut them, or if you make them 1 day in advance they are much easier to cut.: During baking you will notice a faint crackle on top and a chocolatey aroma filling the kitchen; these are good signs. Test with a toothpick at about 25 minutes; it should come out with a few moist crumbs but not raw batter. Leaving them in too long leads to dryness, while underbaking results in a gooey center that may not set when cooled.
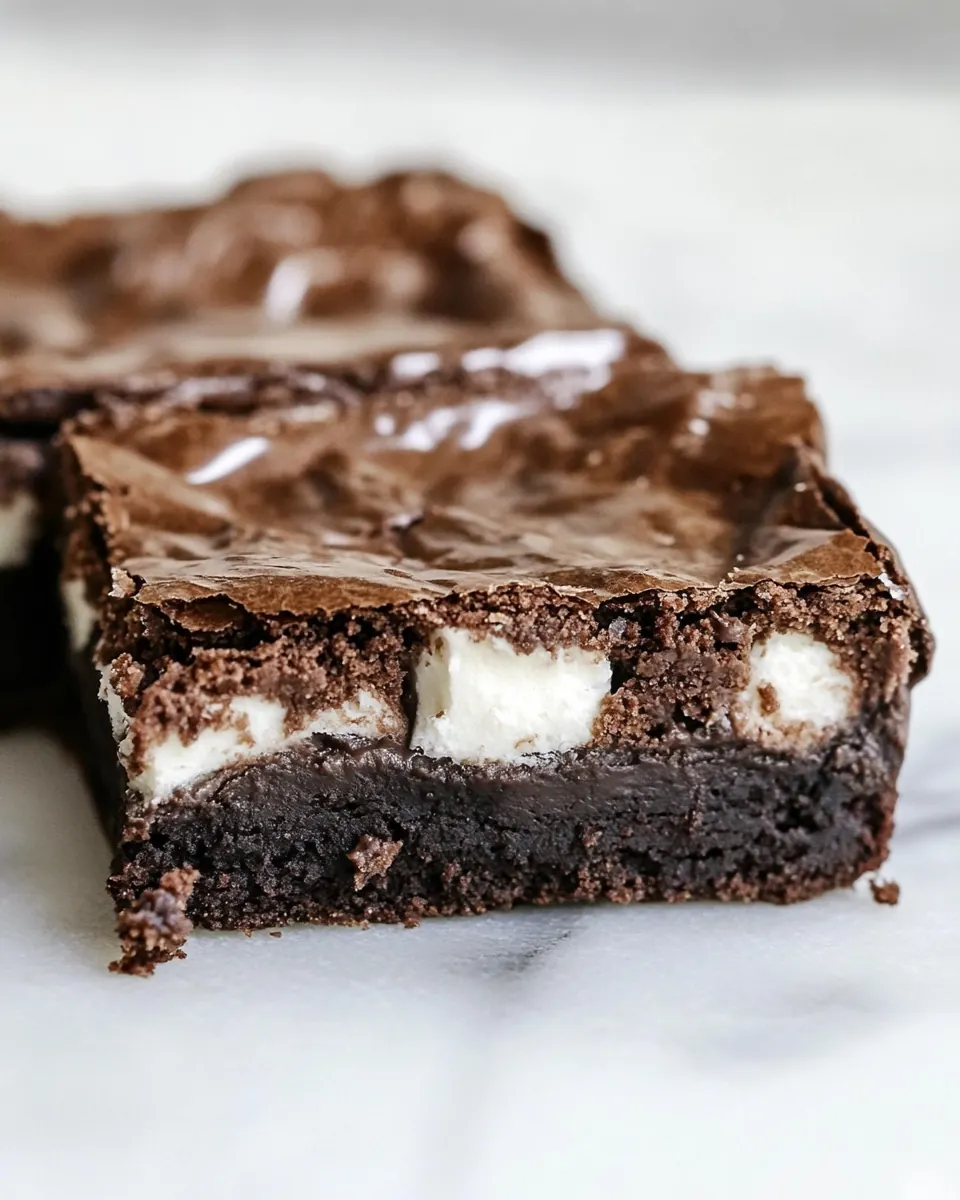
- Remove brownies from the oven and sprinkle the marshmallows evenly on top.: As soon as the pan is out, scatter the mini marshmallows so they start to soften from the residual heat; they will puff quickly and form a pillowy layer. The contrast between hot marshmallows and warm brownie is delightful, but wait for them to puff slightly before returning to the oven. If you let the pan cool completely before adding marshmallows, they may not adhere well and the top will lack cohesion.
- Return to the oven for 2-3 minutes or until the marshmallows are puffed.: Keep a close eye during this short return to the oven, because marshmallows can go from puffed to browned in moments; you want them soft and glossy, not overly toasted. The puffing indicates the marshmallows have softened and will meld with the brownie when cooled. Overbrowning will alter the soft texture and change the visual appeal.
- Remove from oven and allow them to cool completely.: Cooling lets the interior set and the frosting later spread smoothly, and you will notice the aroma shift from hot cocoa to a more settled chocolate scent. Patience here pays off because warm brownies can be too fragile to frost neatly. Cutting while too warm often results in gooey, misshapen squares.
- Once brownies are cool, make the frosting.: When you start the frosting, the kitchen will smell sweet and buttery, and the mixture should come together into a glossy chocolate spread. Preparing the frosting on a cool pan or in a cool bowl helps maintain consistency. If you try to frost warm brownies, the frosting can melt and slide off, so ensure full cooling for the best outcome.
- Add melted butter, cocoa powder, evaporated milk, vanilla, and 2 cups of powdered sugar to a mixing bowl and beat with electric beaters until smooth.: Combining these ingredients produces a silky, chocolate frosting that smells rich and looks glossy; start with the listed amounts and beat until fully smooth, watching the texture transform from runny to spreadable. The evaporated milk adds creaminess while the first portion of powdered sugar thickens the mixture. If the frosting is lumpy, sifting the powdered sugar first and ensuring the butter is well incorporated will fix it.
- Add more powdered sugar, a cup at a time, mixing well, until you reach your desired frosting consistency.: Gradually adding additional powdered sugar lets you control thickness; for a spreadable frosting aim for a scoopable but soft texture, while more sugar yields a thicker, pipeable consistency. The frosting should feel smooth on the beaters and hold light peaks. Adding too much at once can make the frosting grainy and overly stiff.
- Spread frosting over the cooled brownies and cut into squares.: As you spread the frosting, use a smooth, even motion so it lays glossy and uniform; a plastic knife often slices cleanly through the frosted squares without dragging. The contrast of shiny frosting and pillowy marshmallows is part of the charm, and chilled brownies slice more neatly. Cutting immediately while the frosting is soft can lead to messy edges, so chill slightly if you prefer tidy presentation.
- I've found a plastic knife works best to cut them, or if you make them 1 day in advance they are much easier to cut.: When you cut with a plastic knife or after a day of resting, the frosting firms just enough to give clean edges and polished squares, and the flavors tend to harmonize even more. Waiting a day can make serving easier and the texture more cohesive. The tradeoff is that they may not be warm and oozy, so choose based on your preference for presentation versus immediate indulgence.
Making Adjustments
Here are practical tips and notes to help you adapt Mississippi Mud Brownies for different needs and preferences. I include tried and true tweaks that I use in my kitchen to get consistent results.
- Tip for Cutting Frosted Brownies: Use a plastic knife. The frosting and marshmallows cut smoother and easier, without making a sticky mess, if you use a plastic knife to cut the brownies. Wiping the knife between cuts keeps edges neat.
- Rocky Road Variation: Mix in 1 cup nuts to the brownie batter or add nuts at the same time as the marshmallows. Toast the nuts lightly beforehand for extra flavor and crunch, but be mindful of allergies when serving to guests.
- Make Ahead: These brownies often taste better the next day after flavors settle; I sometimes make them a day ahead and store them covered at room temperature, which makes cutting easier and the texture more cohesive.
- Frosting Storage: The frosting can be made up to 2 weeks in advance and kept in an airtight container in the refrigerator; bring it to room temperature and beat briefly before spreading to restore its smooth, spreadable texture.
- Freezing Instructions: You can freeze frosted or unfrosted brownies, wrapped well, for up to 3 months; thaw at room temperature before serving so the texture returns and the frosting is not chilled solid.
What to Pair With Mississippi Mud Brownies
Mississippi Mud Brownies are rich and chocolate forward, so pairing choices should balance sweetness and add contrast. Serve them at casual gatherings, potlucks, holiday dessert tables, or as a sweet finish to a weeknight meal. The right accompaniments enhance the experience without competing with the brownies’ intense flavor.
- Light Coffee or Tea: A cup of coffee or black tea balances the sweetness and cleanses the palate between bites, making each square feel fresh. Choose a bold coffee for a robust contrast or a gentle black tea for a smoother pairing.
- Fresh Berries: Tart berries like raspberries or sliced strawberries add a bright, acidic note that cuts through the richness, offering a refreshing counterpoint and a touch of color on the plate.
- Vanilla Ice Cream: A scoop of plain vanilla ice cream provides a creamy, cool contrast that complements the warm chocolate and marshmallow textures, ideal for serving right after slicing warm squares.
- Casual Gatherings: These brownies are perfect for potlucks and parties because they transport well and can be made ahead; cut into bite sized pieces for easy sharing and place on a platter for guests to graze.
- Storage Tips: Store at room temperature in an airtight container for up to 3 days, or refrigerate for longer storage; return to room temperature before serving for the best texture, and freeze if you need extended preservation.
- Seasonal Pairings: In colder months, serve with a warm drink for cozy comfort; in summer, pair with fresh fruit or cool ice cream to lighten the experience and keep the dessert approachable.
FAQ
Conclusion
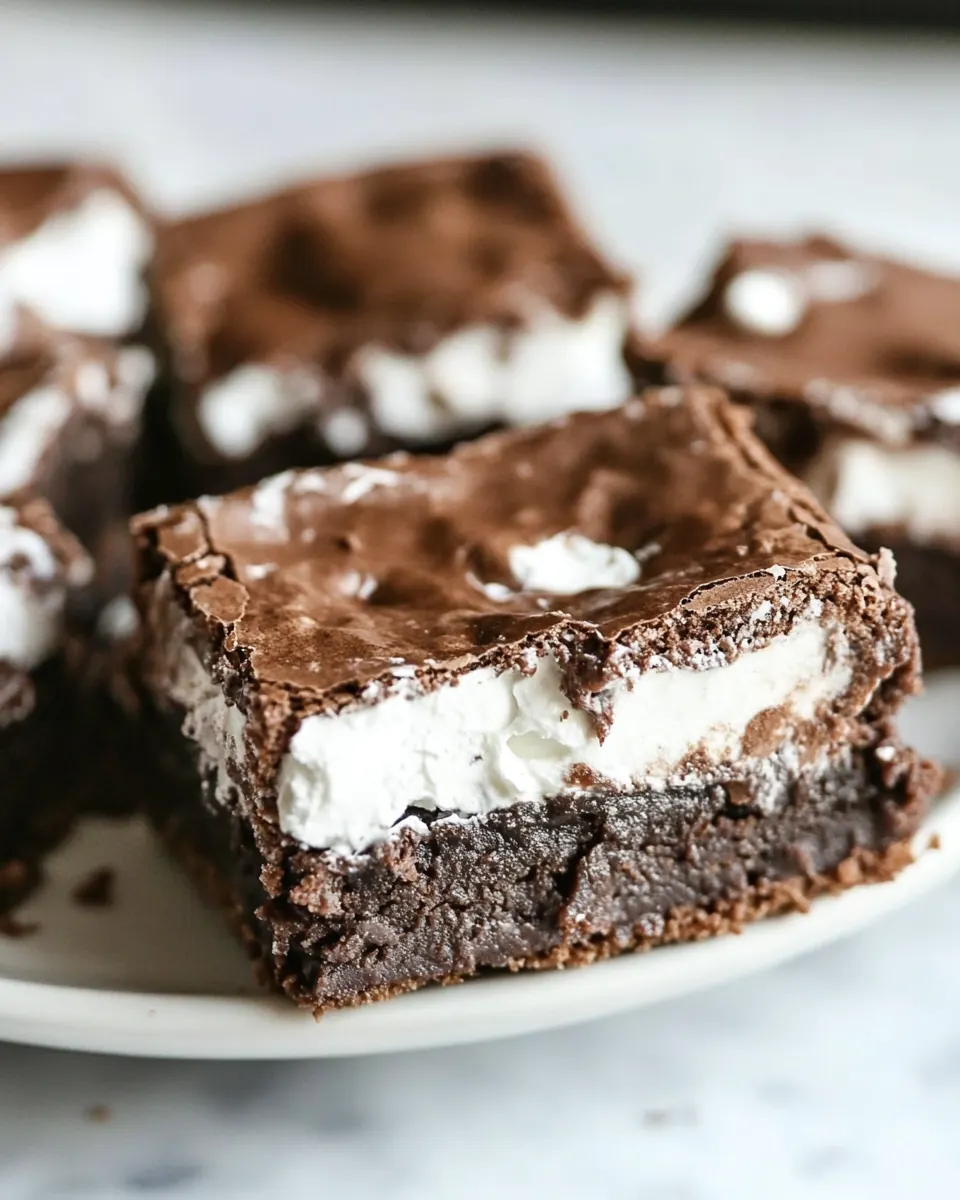
Mississippi Mud Brownies stand out because they combine a dense, fudgy base with pillowy marshmallows and a glossy chocolate frosting for an irresistible mix of textures and deep chocolate flavor. Give them a try the next time you want a dessert that feels both nostalgic and impressive, whether you are feeding a crowd or treating yourself. Warm from the oven or chilled for neat slices, these brownies are forgiving, portable, and endlessly adaptable, so have fun making them your own and enjoy the smiles they bring.
Mississippi Mud Brownies
Equipment
- 9×13-inch pan
- Mixing Bowl
- Electric beaters
- Spatula
Ingredients
- 1/3 cup unsweetened cocoa powder Provides a concentrated chocolate flavor and deep color while contributing dry structure; whisk into the batter to dissolve fully and prevent lumps. Enhances overall cocoa intensity without adding sweetness, balancing the sugar in the recipe.
- 1/2 cup oil (vegetable or canola oil) Adds moistness and tender crumb while carrying fat-soluble flavors; pour in with other liquids and mix until incorporated. Neutral oil helps create a fudgy texture and extends shelf life.
- 1/2 cup butter, softened Contributes richness, creaminess, and a velvety mouthfeel when creamed with sugar; soften to room temperature for even incorporation. Supplies butterfat that improves flavor, tenderness, and glossy finish.
- 2 cups granulated sugar Sweetens the batter and helps with structure through sugar crystallization and moisture retention; measure and add during creaming with butter and oil. Also promotes browning and contributes to the chewy surface characteristic of brownies.
- 4 large eggs Provides lift, structure, and richness; beat eggs into the batter one at a time for even distribution. Adds moisture and emulsification, helping bind ingredients and create a cohesive crumb.
- 2 teaspoons vanilla extract Adds aromatic sweet-floral notes and enhances perceived sweetness; stir in with the wet ingredients toward the end of mixing. Small amount rounds out flavors and complements chocolate.
- 1 1/2 cups all-purpose flour Supplies the primary dry structure and bulk of the brownies; sift or whisk to remove lumps and incorporate evenly. All-purpose flour develops gluten when mixed, giving chew and hold to the fudgy batter.
- 1 teaspoon salt Balances sweetness and enhances flavor while strengthening gluten slightly; dissolve into the dry mix for even seasoning. Salt brightens chocolate and other flavors, preventing flatness.
- 3 cups mini marshmallows Provides light, airy pockets and classic gooey topping when stirred into the baked layer; layer marshmallows atop and briefly bake or broil to achieve melting. Mini marshmallows melt quickly to create the signature pillowy topping.
- 1/2 cup butter, melted Adds shine, richness, and helps dissolve cocoa and sugar in the topping while adding buttery flavor; pour melted butter over marshmallows for the glaze. Melted butter creates a smooth, spreadable consistency for the frosting.
- 1/3 cup unsweetened cocoa powder Intensifies chocolate flavor in the frosting and contributes color; whisk into the melted butter mixture until smooth. Using the same cocoa as in the batter reinforces the chocolate profile across layers.
- 1/3 cup evaporated milk Contributes creaminess and smooth mouthfeel to the frosting while thinning it slightly for spreadability; stir in gradually to reach desired consistency. Evaporated milk adds richness without excess sweetness.
- 1 teaspoon vanilla extract Adds fragrant sweetness and rounds the frosting flavor; mix in to taste after other wet ingredients are combined. Vanilla deepens and harmonizes the chocolate and sugar components.
- 3 – 3 1/2 cups powdered sugar Provides sweetness and body to the frosting while thickening to a pipeable consistency; sift or add gradually to avoid lumps and achieve smooth texture. Powdered sugar stabilizes the glaze and sets to a glossy finish.
Instructions
- Preheat oven to 350 degrees F. Grease a 9×13” pan with non-stick cooking spray.: When the oven warms to 350 degrees F , you should notice a gentle rise in ambient warmth and a faint dry smell, which signals it is ready to bake the batter evenly. Preheating matters because it ensures the batter begins cooking immediately, creating that slight top crust and fudgy interior we want. A common mistake is putting the pan into a colder oven, which can cause uneven baking and longer cook times; always wait for the oven to fully reach temperature before sliding the pan in.
- In a large mixing bowl, pour oil over cocoa powder and mix.: As you oil the 9×13” pan , run your fingers along the sides to feel for a thin, even coating; this simple step prevents sticking and helps the brownie pull away cleanly after baking. The light mist of spray also helps create a slightly crisp edge where the batter meets the pan, offering a pleasant contrast. Forgetting to grease thoroughly, especially in the corners, is a common oversight that can make squares difficult to remove intact.
- Add softened butter and mix until smooth. Add sugar and mix for 1 minute. Add eggs, one at a time, mixing after each addition. Add vanilla and mix.: When the oil meets the cocoa powder , it will darken and become glossy as the cocoa hydrates, releasing a concentrated chocolate aroma. Stirring until smooth helps dissolve lumps and creates a cohesive chocolate base, which contributes to a uniform flavor. If you skip this step and leave dry streaks, you may end up with pockets of undissolved cocoa that feel powdery in the finished brownie .
- Add flour and salt and stir to combine.: As you blend in the softened butter , the mixture will turn silkier and develop a slightly lighter sheen, indicating good emulsion between fat and cocoa. This texture helps the batter trap moisture and results in a tender crumb. Be careful not to use melted butter here, because that can make the batter too loose and change the final structure.
- Pour batter into prepared pan. Bake for 25-30 minutes or until a toothpick inserted into the center comes out clean.: When you add the sugar and mix, the batter will take on a grainy texture initially, then smooth out as the sugar integrates, and you will begin to smell the deepening chocolate sweetness. Mixing for the suggested time helps incorporate air, which supports even baking without making the brownie cakey. Overmixing after adding eggs can introduce too much air and change the texture, so stick to the stated timing.
- Remove brownies from the oven and sprinkle the marshmallows evenly on top. Return to the oven for 2-3 minutes or until the marshmallows are puffed. Remove from oven and allow them to cool completely.: As you add each egg , the batter will lighten and gain a glossy finish; this is the emulsion forming, which gives the brownie structure and moisture. Take note of the batter's sheen and smoothness as cues that the eggs are fully incorporated. Adding cold eggs may cause the mixture to seize or look curdled temporarily; letting eggs come to room temperature avoids that issue.
- Once brownies are cool, make the frosting.: Stirring in the vanilla extract should lift the aroma and round the chocolate notes, giving the batter an inviting scent. This small addition enhances depth and balance in the finished brownie . Using an impure or artificial flavored liquid can muddy the subtlety, so opt for a clean vanilla flavor when possible.
- Add melted butter, cocoa powder, evaporated milk, vanilla, and 2 cups of powdered sugar to a mixing bowl and beat with electric beaters until smooth.: When you fold in the flour and salt , mix just until you see streaks disappear, and the batter becomes uniform; overmixing will develop gluten and can make the texture chewy rather than fudgy. The batter should look thick and glossy, clinging slightly to the spoon. A frequent mistake is vigorous mixing here, which changes the final mouthfeel.
- Add more powdered sugar, a cup at a time, mixing well, until you reach your desired frosting consistency. I usually use about 3 1/4 cups powdered sugar.: As you transfer the batter into the greased pan, use a spatula to smooth the top so it bakes evenly and the marshmallows will sit flat later. The batter should flow slowly and have a dense, shiny appearance. If the surface is uneven, the marshmallows will cluster, so take a moment to level it before baking.
- Spread frosting over the cooled brownies and cut into squares. I've found a plastic knife works best to cut them, or if you make them 1 day in advance they are much easier to cut.: During baking you will notice a faint crackle on top and a chocolatey aroma filling the kitchen; these are good signs. Test with a toothpick at about 25 minutes; it should come out with a few moist crumbs but not raw batter. Leaving them in too long leads to dryness, while underbaking results in a gooey center that may not set when cooled.
- Remove brownies from the oven and sprinkle the marshmallows evenly on top.: As soon as the pan is out, scatter the mini marshmallows so they start to soften from the residual heat; they will puff quickly and form a pillowy layer. The contrast between hot marshmallows and warm brownie is delightful, but wait for them to puff slightly before returning to the oven. If you let the pan cool completely before adding marshmallows, they may not adhere well and the top will lack cohesion.
- Return to the oven for 2-3 minutes or until the marshmallows are puffed.: Keep a close eye during this short return to the oven, because marshmallows can go from puffed to browned in moments; you want them soft and glossy, not overly toasted. The puffing indicates the marshmallows have softened and will meld with the brownie when cooled. Overbrowning will alter the soft texture and change the visual appeal.
- Remove from oven and allow them to cool completely.: Cooling lets the interior set and the frosting later spread smoothly, and you will notice the aroma shift from hot cocoa to a more settled chocolate scent. Patience here pays off because warm brownies can be too fragile to frost neatly. Cutting while too warm often results in gooey, misshapen squares.
- Once brownies are cool, make the frosting.: When you start the frosting, the kitchen will smell sweet and buttery, and the mixture should come together into a glossy chocolate spread. Preparing the frosting on a cool pan or in a cool bowl helps maintain consistency. If you try to frost warm brownies, the frosting can melt and slide off, so ensure full cooling for the best outcome.
- Add melted butter, cocoa powder, evaporated milk, vanilla, and 2 cups of powdered sugar to a mixing bowl and beat with electric beaters until smooth.: Combining these ingredients produces a silky, chocolate frosting that smells rich and looks glossy; start with the listed amounts and beat until fully smooth, watching the texture transform from runny to spreadable. The evaporated milk adds creaminess while the first portion of powdered sugar thickens the mixture. If the frosting is lumpy, sifting the powdered sugar first and ensuring the butter is well incorporated will fix it.
- Add more powdered sugar, a cup at a time, mixing well, until you reach your desired frosting consistency.: Gradually adding additional powdered sugar lets you control thickness; for a spreadable frosting aim for a scoopable but soft texture, while more sugar yields a thicker, pipeable consistency. The frosting should feel smooth on the beaters and hold light peaks. Adding too much at once can make the frosting grainy and overly stiff.
- Spread frosting over the cooled brownies and cut into squares.: As you spread the frosting, use a smooth, even motion so it lays glossy and uniform; a plastic knife often slices cleanly through the frosted squares without dragging. The contrast of shiny frosting and pillowy marshmallows is part of the charm, and chilled brownies slice more neatly. Cutting immediately while the frosting is soft can lead to messy edges, so chill slightly if you prefer tidy presentation.
- I've found a plastic knife works best to cut them, or if you make them 1 day in advance they are much easier to cut.: When you cut with a plastic knife or after a day of resting, the frosting firms just enough to give clean edges and polished squares, and the flavors tend to harmonize even more. Waiting a day can make serving easier and the texture more cohesive. The tradeoff is that they may not be warm and oozy, so choose based on your preference for presentation versus immediate indulgence.
Notes
- Tip for Cutting Frosted Brownies: Use a plastic knife. The frosting and marshmallows cut smoother and easier, without making a sticky mess, if you use a plastic knife to cut the brownies. Wiping the knife between cuts keeps edges neat.
- Rocky Road Variation: Mix in 1 cup nuts to the brownie batter or add nuts at the same time as the marshmallows. Toast the nuts lightly beforehand for extra flavor and crunch, but be mindful of allergies when serving to guests.
- Make Ahead: These brownies often taste better the next day after flavors settle; I sometimes make them a day ahead and store them covered at room temperature, which makes cutting easier and the texture more cohesive.
- Frosting Storage: The frosting can be made up to 2 weeks in advance and kept in an airtight container in the refrigerator; bring it to room temperature and beat briefly before spreading to restore its smooth, spreadable texture.
- Freezing Instructions: You can freeze frosted or unfrosted brownies, wrapped well, for up to 3 months; thaw at room temperature before serving so the texture returns and the frosting is not chilled solid.