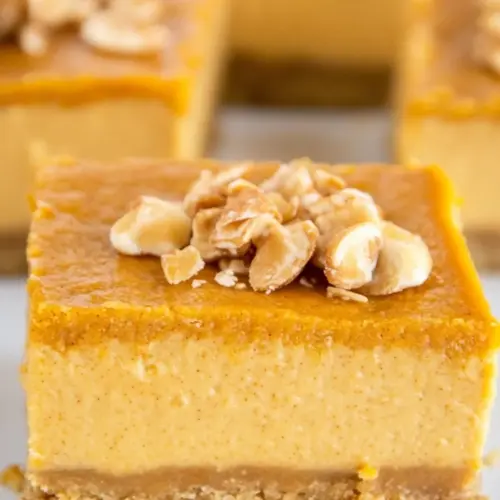
Maple Pumpkin Cheesecake Bars
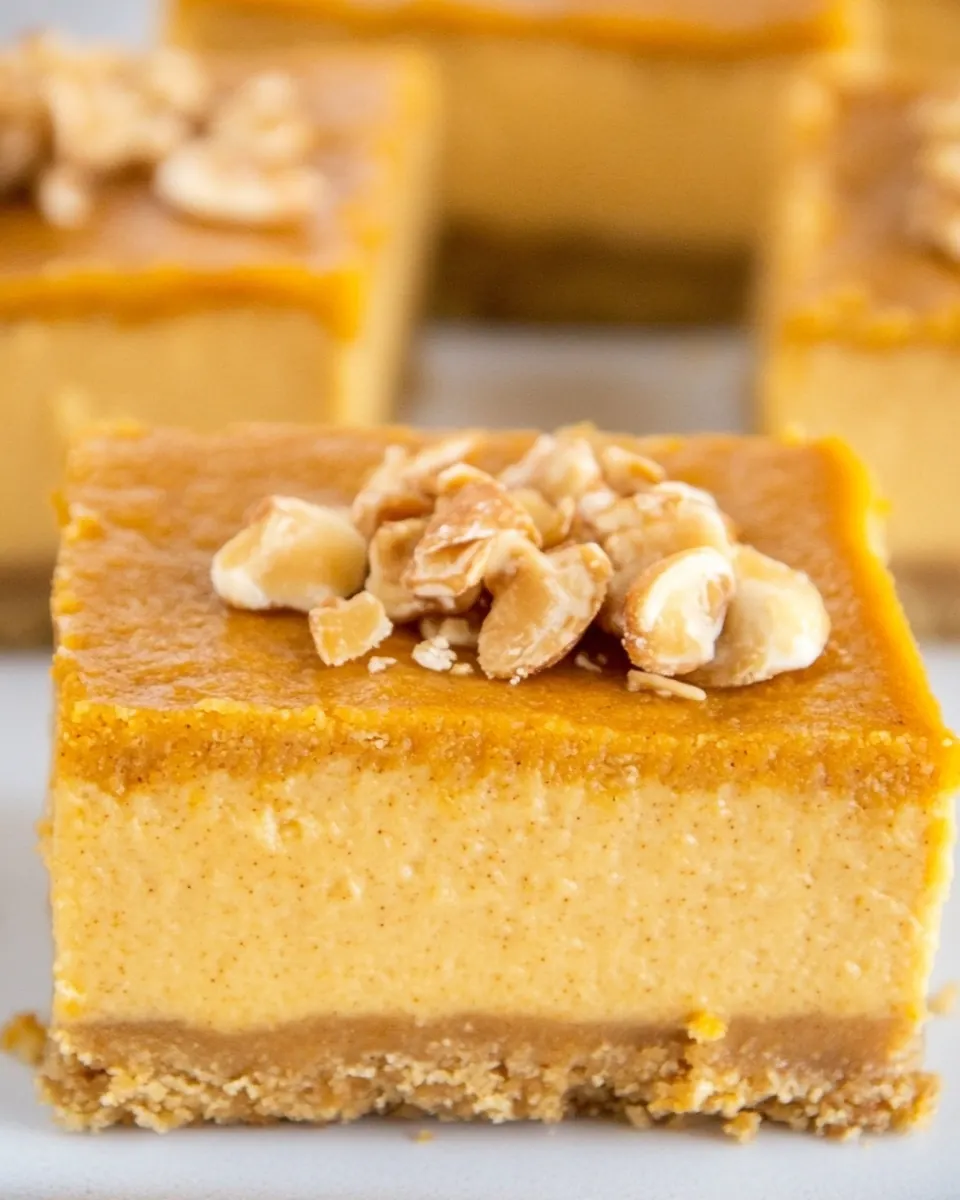
Maple Pumpkin Cheesecake Bars are the kind of treat I reach for when the air turns crisp and I want something that tastes like a cozy fall hug.
Years ago I brought these bars to a potluck and watched them disappear before I had a second slice, which taught me that the balance of spiced pumpkin and silky cheesecake is nearly impossible to resist. I remember the moment I pulled the pan from the oven, the kitchen filled with the aroma of pumpkin and cinnamon, and someone asked if they could have the last piece even though they swore they were full. That reaction stuck with me, and I started tweaking the recipe, dialing the maple just right so it sings but does not overwhelm the gentle tang of the cream cheese.
I love how these bars travel well, and how a simple sheet pan can produce something that looks fancy yet feels homey. I often make a double batch when family is coming, because they store beautifully in the fridge and make mornings somehow better. On a quiet afternoon, I like to warm a square for ten to fifteen seconds and spoon a dollop of cool whipped cream on top, letting it melt slowly into the spiced surface. You will notice textures play off each other here, the crumbly crust against the lush, custardy filling, and that contrast is exactly why this recipe has become a staple in my fall baking rotation.
Recipe Snapshot
60 mins
15 mins
45 mins
Medium
200 kcal
American
Gluten-Free, Low FODMAP
Desserts
Food processor, 9×13-inch baking pan, Parchment paper, Wire rack, Mixing bowl, Electric mixer
What We Adore About This Maple Pumpkin Cheesecake Bars
1. Comforting seasonal flavors
I adore how Maple Pumpkin Cheesecake Bars bring together classic fall notes. You get the warm, aromatic lift from cinnamon, a flash of clove, and that maple undertone which makes the pumpkin feel indulgent rather than plain. When I serve these, people close their eyes for a beat and smile, and that telltale pause is proof this combination works.
2. Crowd pleasing and portable
I make these when friends are coming over because they slice into neat squares that travel without drama. They are perfect for potlucks, school events, or a dessert tray for holiday gatherings. I once transported these across town with minimal spills because the crust holds up and the filling firms beautifully when chilled.
3. Balanced sweetness and texture
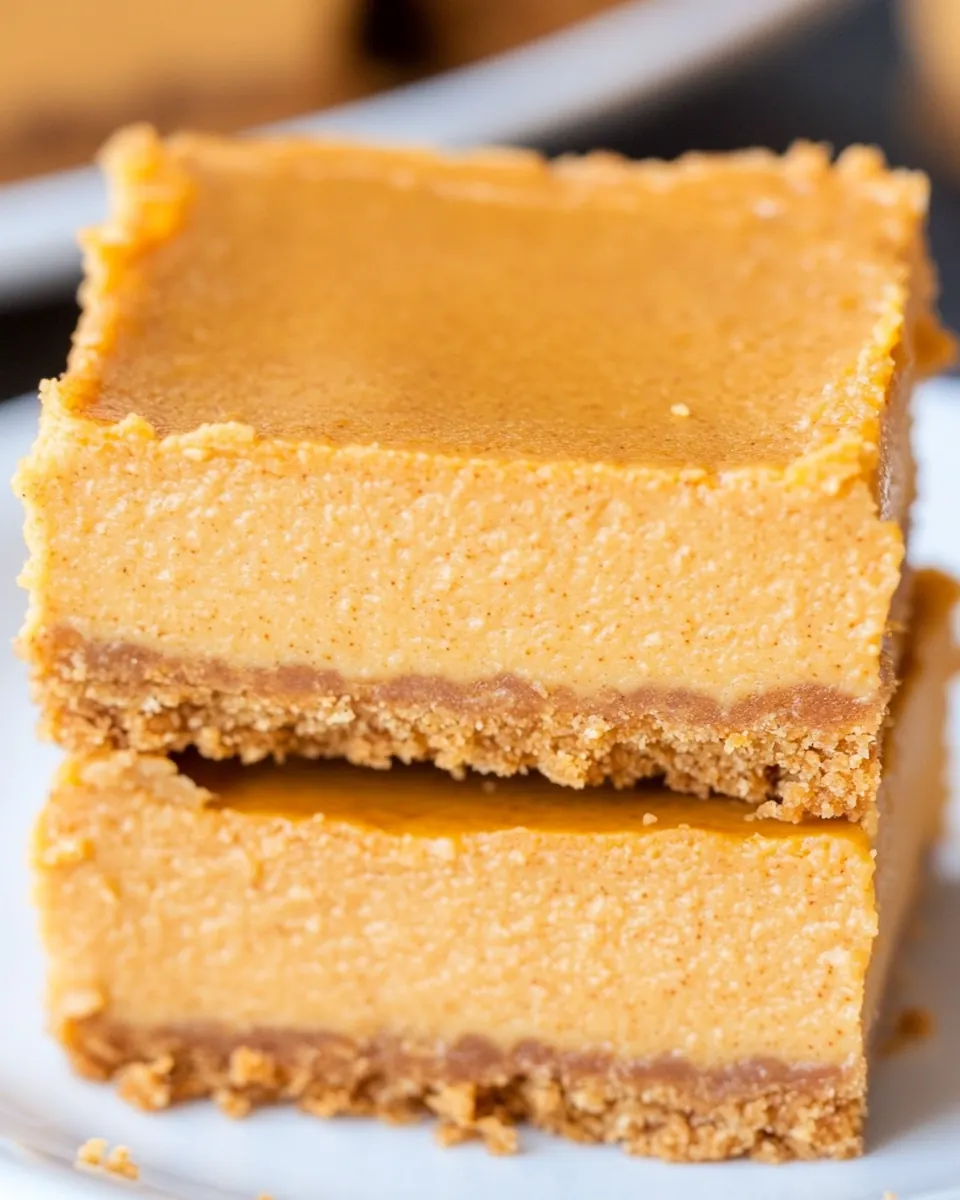
What I love is the interplay between the crisp, spiced gingersnap crust and the creamy cream cheese filling. The crust gives a slightly crunchy anchor, while the filling is silky and custardy. The maple keeps the sugars interesting, not cloying, which is something I always aim for in desserts.
4. Simple, pantry friendly ingredients
These bars use ingredients I normally keep on hand in the fall, so last minute baking is realistic. From canned pumpkin to evaporated milk and a sleeve of gingersnaps, you can pull this together quickly. I love recipes that reward a little attention with big flavor, and this one does just that.
5. Versatile serving options
I serve them warm for a softer bite or chilled for a cleaner slice, depending on the occasion. They work for afternoon coffee, a holiday dessert spread, or as a make ahead treat. Every time I change the temperature I notice a slightly different texture and flavor profile, which keeps things interesting.
What’s In This Maple Pumpkin Cheesecake Bars
The ingredient list here is modest yet purposeful. I focus on a sturdy spiced cookie crust that supports a lush, spiced cheesecake style pumpkin filling. The key players are the gingersnap cookies which add warmth and texture, the cream cheese for richness and tang, and the pumpkin plus spices for seasonal flavor. Each ingredient pulls its weight, creating a balance of sweet, spiced, and creamy that makes these bars addictive.
- 42 g ingersnap cookies, about 9 ounces: Crush to fine crumbs to form the base texture for the crust; provides a warm, spiced backbone when combined with butter and sugar. Use evenly packed crumbs to ensure a stable foundation that holds the cheesecake bars together during baking and slicing.
- 2 tablespoons granulated sugar: Sweeten lightly to balance the spiced cookie crust and enhance caramelized notes; dissolves into the crumbs for even sweetness throughout. Sprinkle and mix thoroughly so the sugar helps bind the crust when melted by the butter.
- 5 tablespoons unsalted butter, melted: Melt and pour to bind the cookie crumbs and sugar into a cohesive crust; contributes richness and aids browning during baking. Measure accurately and distribute evenly to ensure a firm, sliceable base with a smooth mouthfeel.
- 8 ounces (226.8 g) cream cheese, at room temperature: Soften and beat until smooth to create the creamy, tangy primary component of the filling; provides structure and a rich, silky texture. Bring to room temperature to avoid lumps and achieve a homogeneous, airy cheesecake layer.
- 1 cup (220 g) light brown sugar: Sweeten and add depth to the filling with molasses-like notes that complement pumpkin and spices; helps create a moist, tender custard. Pack firmly when measuring and incorporate fully to prevent graininess in the batter.
- 15 ounces (425.24 g) canned pumpkin puree (about 2 cups): Puree to lend concentrated pumpkin flavor, moisture, and color to the filling while contributing body and density; balances the sweetness and spices. Use canned pumpkin puree (not pumpkin pie filling) for consistent texture and flavor in the custard.
- 2 eggs: Bind and enrich the filling while helping it set into a custard-like texture; adds structure and gloss when whisked into the batter. Beat eggs lightly before adding to integrate evenly without overmixing, which can cause cracks.
- 12 ounces (340.2 ml) canned evaporated milk: Thin and enrich the custard with a creamy, slightly concentrated milk flavor that promotes a smooth, pourable filling; contributes to a silkier bake. Pour slowly while mixing to create a uniform batter and avoid curdling the cream cheese.
- 2 tablespoons pure maple syrup: Flavor and add a distinctive maple sweetness that complements brown sugar and pumpkin; brings aromatic depth and a subtle complexity. Measure precisely to avoid overpowering other flavors and fold in gently for even distribution.
- 1 teaspoon vanilla extract: Enhance sweetness perception and round out flavors with aromatic vanilla; provides warmth and improves overall balance. Use pure vanilla extract for best flavor, adding it toward the end of mixing to preserve aromatic compounds.
- 1 teaspoon ground cinnamon: Warm and aromatize the filling with classic pumpkin-pie spice notes; contributes subtle sweetness and depth without added sugar. Sift or measure carefully and incorporate evenly to avoid concentrated pockets of spice.
- 1/2 teaspoon (0.5 teaspoon) ground ginger: Brighten and add a sharp, peppery warmth that complements cinnamon and cloves; helps recreate traditional pumpkin-spice character. Use measured amounts to prevent overpowering the delicate cheesecake texture while still contributing complexity.
- 1/4 teaspoon (0.25 teaspoon) kosher salt: Season to enhance and balance sweet and spiced elements while elevating overall flavor clarity; helps round out the custard. Use kosher salt for cleaner seasoning and distribute evenly to avoid salty spots.
- Pinch ground cloves: Accentuate and deepen autumnal spice profile with a warm, slightly bitter finish; small pinches provide aromatic lift and complexity. Add sparingly and taste mentally against other spices to maintain balance in the filling.
The Method for Maple Pumpkin Cheesecake Bars
Baking these bars is a comforting, rhythmic process that rewards attention and patience. I find the most satisfying part is watching the filling transform in the oven from glossy to just set, and learning the subtle cues that tell you they are done. Below I walk through each step with sensory notes, reasons behind techniques, and common pitfalls to avoid so you get consistent results.
- Preheat oven to 350 degrees F. Grease a 9×13-inch baking pan and line with parchment paper so that it extends over each long side of the pan.: As the oven warms you will notice the kitchen start to smell faintly warm and dry, a quiet build up that readies everything. Proper oven temperature ensures even baking so the filling sets without cracking, and it helps the crust crisp up quickly. A common mistake is not waiting for the oven to fully preheat, which can make the crust soggy and the filling undercooked. If your oven runs hot or cool, consider using an oven thermometer to confirm accuracy.
- Make the Crust: In a food processor, pulse together the gingersnaps and sugar until they become fine crumbs. Add the melted butter and pulse a few more times to incorporate. Press the crumbs evenly into the bottom of the prepared pan. Bake for 10 minutes.: The feel of the parchment sliding into the pan makes assembly easier, and the overhang acts like little handles that lift the whole slab out when cooled. This method saves you from trying to pry bars out and damaging edges. A frequent oversight is using parchment that is too small, which complicates removal; be generous with the overhang so you can lift the bars cleanly.
- Making the Filling: While crust is baking, prepare the pumpkin filling. Beat together the cream cheese and the brown sugar on medium speed until smooth and creamy, scraping the sides of the bowl as needed, about 3 minutes. Add the pumpkin and mix on low speed until completely incorporated. Add the eggs one at a time, beating well until fully incorporated and scraping down the sides of the bowl between each addition. Add the evaporated milk, maple syrup and vanilla, and beat until well combined, about 1 minute. Add the cinnamon, ginger, salt, and cloves and mix on low to incorporate.: In a food processor, pulse together the gingersnaps and sugar until they become fine crumbs : As you pulse, you should hear a steady, granular sound and see a uniform, sandy texture. Fine crumbs bake into a cohesive base that presses well. If you pulse too little, the crust can be uneven and crumbly, and if you over process, it may become pasty. Aim for a sand like texture for best results.
- Pour the filling over the prepared crust and tap the pan on the counter to remove any air bubbles. Bake until the filling is set in the center, about 30 to 35 minutes. Remove from oven and set on a wire rack to cool. Once the bars have cooled to room temperature, you can cut and serve them, or you can refrigerate them and serve them chilled.: The melted butter will bind the crumbs so they hold together after baking. Once combined, the mixture should clump slightly when pinched, indicating enough fat to stay intact. A common issue is using butter that is too cold or too hot; cold butter will not incorporate, and overly hot butter can make the crumbs greasy. Let melted butter cool briefly before adding.
- Using the parchment paper overhangs, lift the bars from the pan and onto a cutting surface. Cut into squares and serve with whipped cream and candy corn, if desired. Store the bars in an airtight container in the refrigerator for up to 4 days.: Pressing with the bottom of a measuring cup gives an even density, creating a flat, compact base. The tactile feedback of firm, even pressure ensures the crust will support the filling and slice cleanly. If you press too lightly, bars may fall apart; press firmly but not so hard that the crust becomes overly dense.
- Bake for 10 minutes: During this brief bake the crumbs set and the aroma of baked gingersnap surfaces, turning slightly toasted. This step prevents a soggy bottom by firming the crust before the filling is added. Avoid extending the bake much longer, which can lead to a crust that is overly dry and crumbly; ten minutes is typically sufficient.
- Making the Filling: While crust is baking, prepare the pumpkin filling : Mixing while the crust bakes is efficient and keeps everything warm. You will be able to notice how textures change as you beat, from chunky to smooth, signaling readiness. Working in this order keeps timing tight and prevents the crust from cooling too much before assembly.
- Beat together the cream cheese and the brown sugar on medium speed until smooth and creamy, scraping the sides of the bowl as needed, about 3 minutes: As you beat you will see the cream cheese become glossy and free of lumps, a key visual cue that it is fully incorporated. Scraping the sides prevents pockets of unmixed cream cheese which could leave undesired lumps. A typical error is using cream cheese straight from the fridge, which resists smoothing; always bring it to room temperature first.
- Add the pumpkin and mix on low speed until completely incorporated: The mixture will take on a velvety, uniform color when fully blended. Mixing gently avoids over aerating the filling, which can lead to cracking or an undesired texture. If you mix too aggressively you might trap air, resulting in bubbles that form during baking; low speed is the safer choice here.
- Add the eggs one at a time, beating well until fully incorporated and scraping down the sides of the bowl between each addition: Incorporating eggs progressively makes for an even, stable mixture that sets consistently. You should notice the filling smooth and become slightly glossier with each egg. A common misstep is adding eggs too quickly which can create streaks or cause the mixture to curdle; patience here ensures a silky outcome.
- Add the evaporated milk, maple syrup and vanilla, and beat until well combined, about 1 minute: The evaporated milk enriches the filling and loosens it to a pourable consistency, while the maple syrup infuses a deeper sweetness. After about a minute the mixture should be cohesive and silky. If you overbeat, you may incorporate too much air, altering texture; stop once homogeneous.
- Add the cinnamon, ginger, salt, and cloves and mix on low to incorporate: Stirring these spices in on low keeps the filling smooth while ensuring they are evenly distributed, which is essential for balanced flavor in every bite. The aroma will brighten immediately, a cue you have the right spice levels. Avoid dumping spices in all at once without mixing, as that can create pockets of concentrated flavor.
- Pour the filling over the prepared crust and tap the pan on the counter to remove any air bubbles: You will see the glossy filling settle into the crust, and tapping releases trapped air that could otherwise form unsightly holes. The surface should look mostly even, with small ripples possible. If bubbles persist, run a thin knife through the top to pop them gently before baking.
- Bake until the filling is set in the center, about 30 to 35 minutes: As it bakes you will notice the edges become slightly puffed and the center appear just set, with a gentle jiggle like a soft pudding. This visual cue tells you the custard has set without overbaking which can make it dry. A common error is leaving it in too long, which can cause cracks or a cakey texture; pull it when the center barely moves.
- Remove from oven and set on a wire rack to cool: Cooling on a rack allows air to circulate and prevents the bottom from steaming. The bars will firm up as they cool and are easier to slice once at room temperature. Avoid cutting while hot, which leads to messy, unclean slices; patience here gives the best presentation.
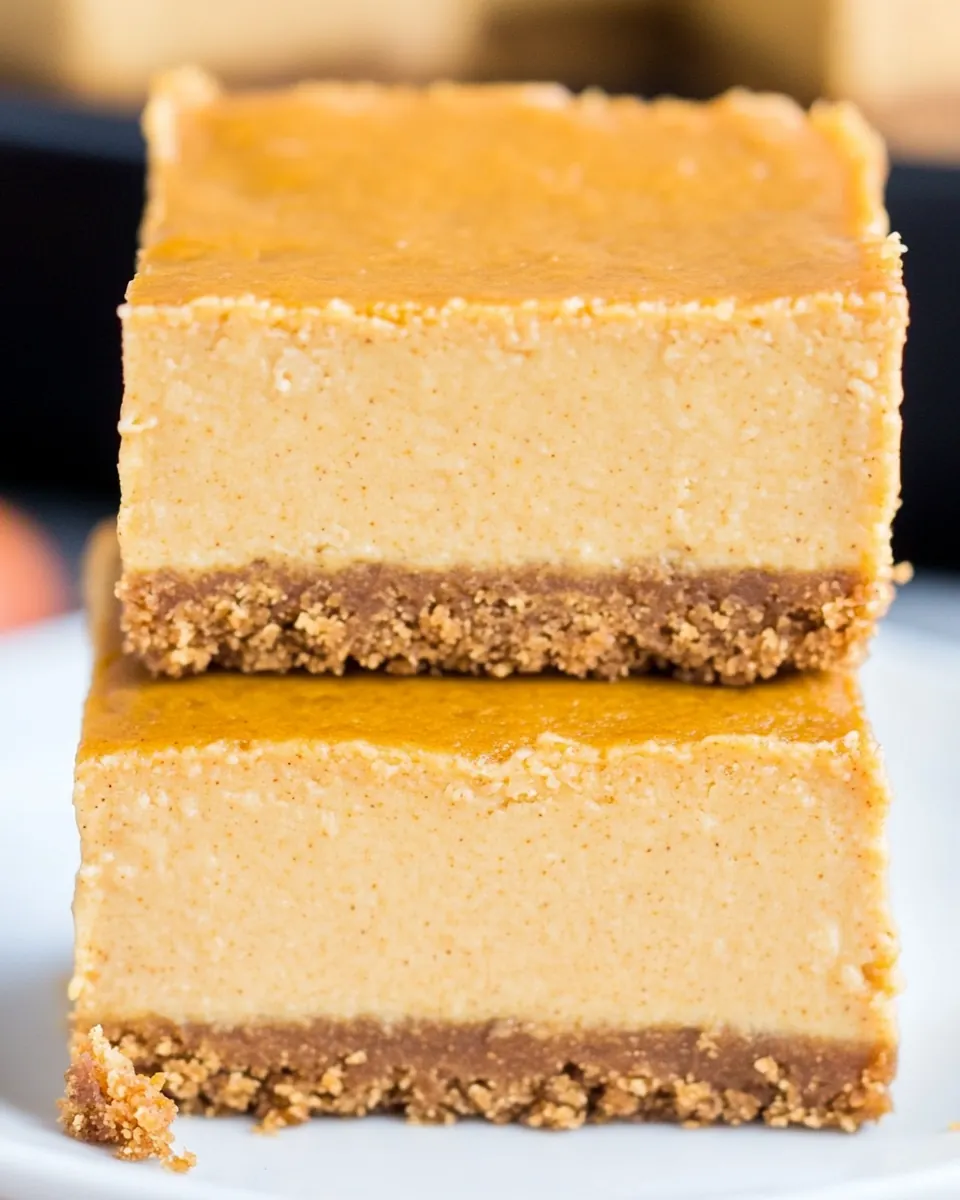
- Once the bars have cooled to room temperature, you can cut and serve them, or you can refrigerate them and serve them chilled: Chilling firms the filling for clean, neat squares and deepens flavors, while serving slightly warm yields a creamier mouthfeel. Decide based on preference, but note that refrigeration tightens the texture dramatically. A mistake is refrigerating immediately after baking without letting them cool, which can cause condensation and soggy tops.
- Using the parchment paper overhangs, lift the bars from the pan and onto a cutting surface: Lifting gently lets you transfer the entire slab without disturbing the edges. The tactile ease of using parchment overhangs is one reason I always line the pan this way. If you try to invert without parchment the bars may stick and break apart, so take the simple lift for best results.
- Cut into squares and serve with whipped cream and candy corn, if desired: As you slice you will feel the clean resistance of a well set bar and see neat edges if chilled. The garnish is optional but adds a festive look and a contrast of textures and temperatures. Avoid using a dull knife which can drag the filling; warm a sharp knife between cuts for perfectly clean slices.
- Store the bars in an airtight container in the refrigerator for up to 4 days: In the fridge they will maintain texture and flavor, and sealed storage prevents them from absorbing other odors. If you find they dry slightly, let them sit at room temperature for a few minutes before serving. A common error is leaving them uncovered which leads to a dry surface and loss of that fresh just baked quality.
Ways to Customize
These bars are a terrific canvas for small tweaks that tailor them to your taste or occasion. Below are practical customization ideas that keep the essence of the recipe while offering variety. Use these as starting points and adjust amounts gently to preserve balance.
- Swap or boost the spice level Adjust the amounts of cinnamon, ginger, or cloves to suit your palate, but increase gradually so the spices remain harmonious with the pumpkin.
- Make the crust more robust Pulse in a handful of finely chopped nuts to the gingersnap crumbs for additional texture and a nutty flavor, pressing them into the crust with the same firm technique.
- Control sweetness with maple Add a touch more or less maple syrup depending on whether you want a pronounced maple note or a subtler hint that supports the spices.
- Change the serving temperature Serve slightly warm for a creamier mouthfeel or chilled for neater slices, each offering a different sensory experience that highlights either texture or presentation.
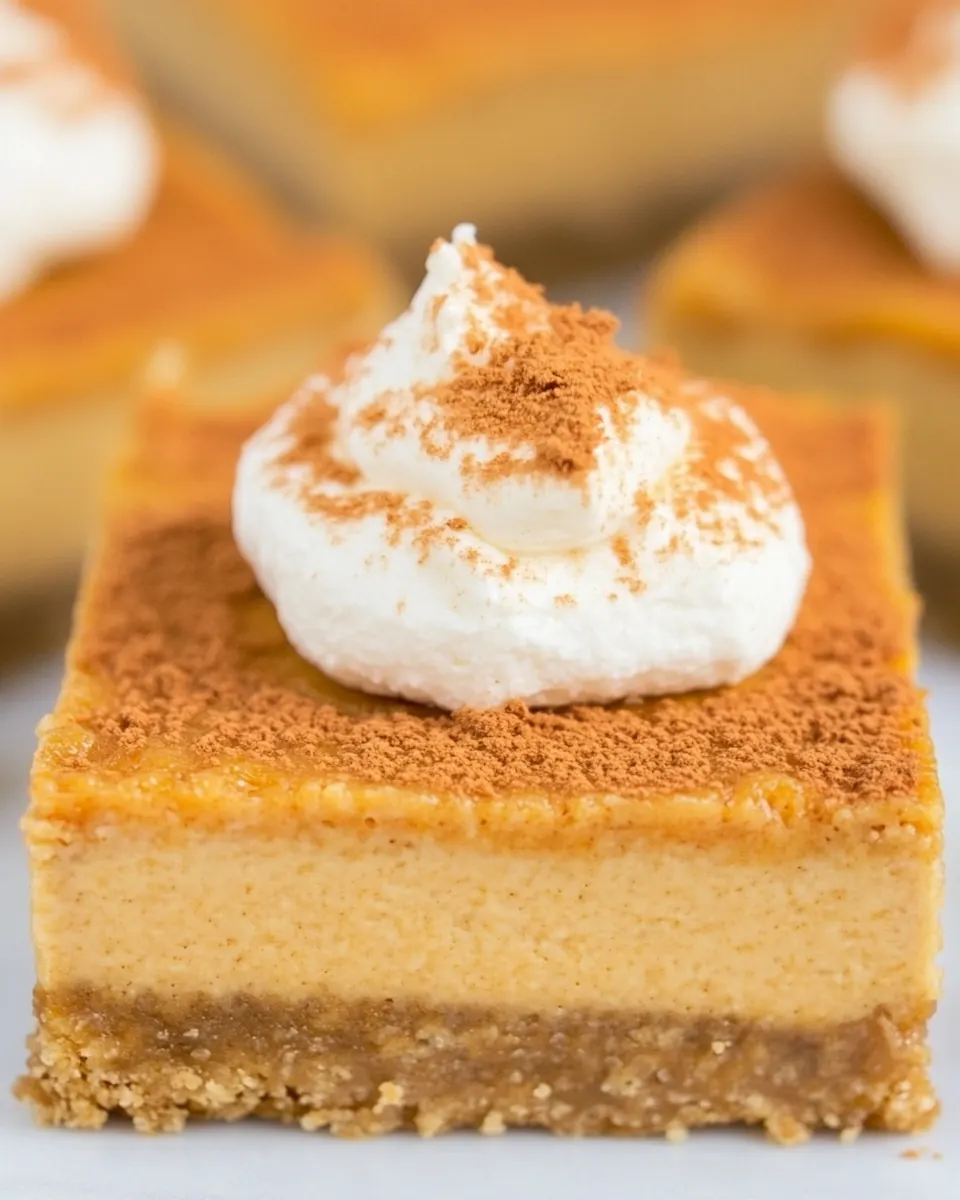
- Garnish strategically Top with a small spoonful of lightly sweetened whipped cream just before serving to add contrast in temperature and a soft, airy texture that complements the dense filling.
Serving Ideas for Maple Pumpkin Cheesecake Bars
These bars are versatile for many occasions and pair well with a range of sides and settings. Below I outline service ideas that highlight different aspects of the recipe, from casual snacks to holiday spreads. Use the suggestions to plan how you plate, store, and pair the bars.
- Holiday dessert platter Arrange squares on a large platter with small bowls of whipped cream and a sprinkle of extra ground cinnamon for guests to add as they like. This works beautifully for Thanksgiving or other fall gatherings.
- Afternoon coffee pairing Serve a bar with a strong cup of coffee or spiced tea; the richness of the filling contrasts nicely with the bitterness of coffee, making it perfect for cozy afternoons or casual get togethers.
- Make ahead for potlucks Bake the bars the day before and refrigerate wrapped; they travel well and present nicely when chilled, making them a reliable potluck option.
- Seasonal brunch feature Include a platter of these bars on a brunch buffet alongside fruit and savory items. Their sweet and spiced profile complements eggs and lighter brunch fare, giving guests a dessert like option that still feels at home at breakfast time.
- Storage and reheating tips Store in an airtight container in the fridge for up to four days, and warm briefly in the microwave for a softer bite, or serve chilled for cleaner slices. If the surface seems dry after storage, a small dollop of whipped cream refreshes each piece.
- Occasion specific styling For Thanksgiving, garnished squares with a small edible decoration or a light dusting of powdered sugar create a festive look without distracting from the flavor.
FAQ
Conclusion
What makes these bars special is the interplay between a spiced gingersnap crust and a silky, maple kissed pumpkin cheesecake filling, delivering cozy fall flavors in a perfectly sliceable form. Give them a try because they come together with pantry friendly ingredients and offer a reliable crowd pleaser for holidays or casual gatherings. I hope you enjoy the ritual of pulling them from the oven, letting that warm aroma fill your kitchen, and watching friends and family reach for seconds with a smile.
Maple Pumpkin Cheesecake Bars
Equipment
- Food Processor
- 9x13-inch Baking Pan
- Parchment Paper
- Wire Rack
- Mixing Bowl
- Electric Mixer
Ingredients
- 42 g ingersnap cookies, about 9 ounces Crush to fine crumbs to form the base texture for the crust; provides a warm, spiced backbone when combined with butter and sugar. Use evenly packed crumbs to ensure a stable foundation that holds the cheesecake bars together during baking and slicing.
- 2 tablespoons granulated sugar Sweeten lightly to balance the spiced cookie crust and enhance caramelized notes; dissolves into the crumbs for even sweetness throughout. Sprinkle and mix thoroughly so the sugar helps bind the crust when melted by the butter.
- 5 tablespoons unsalted butter, melted Melt and pour to bind the cookie crumbs and sugar into a cohesive crust; contributes richness and aids browning during baking. Measure accurately and distribute evenly to ensure a firm, sliceable base with a smooth mouthfeel.
- 8 ounces (226.8 g) cream cheese, at room temperature Soften and beat until smooth to create the creamy, tangy primary component of the filling; provides structure and a rich, silky texture. Bring to room temperature to avoid lumps and achieve a homogeneous, airy cheesecake layer.
- 1 cup (220 g) light brown sugar Sweeten and add depth to the filling with molasses-like notes that complement pumpkin and spices; helps create a moist, tender custard. Pack firmly when measuring and incorporate fully to prevent graininess in the batter.
- 15 ounces (425.24 g) canned pumpkin puree (about 2 cups) Puree to lend concentrated pumpkin flavor, moisture, and color to the filling while contributing body and density; balances the sweetness and spices. Use canned pumpkin puree (not pumpkin pie filling) for consistent texture and flavor in the custard.
- 2 eggs Bind and enrich the filling while helping it set into a custard-like texture; adds structure and gloss when whisked into the batter. Beat eggs lightly before adding to integrate evenly without overmixing, which can cause cracks.
- 12 ounces (340.2 ml) canned evaporated milk Thin and enrich the custard with a creamy, slightly concentrated milk flavor that promotes a smooth, pourable filling; contributes to a silkier bake. Pour slowly while mixing to create a uniform batter and avoid curdling the cream cheese.
- 2 tablespoons pure maple syrup Flavor and add a distinctive maple sweetness that complements brown sugar and pumpkin; brings aromatic depth and a subtle complexity. Measure precisely to avoid overpowering other flavors and fold in gently for even distribution.
- 1 teaspoon vanilla extract Enhance sweetness perception and round out flavors with aromatic vanilla; provides warmth and improves overall balance. Use pure vanilla extract for best flavor, adding it toward the end of mixing to preserve aromatic compounds.
- 1 teaspoon ground cinnamon Warm and aromatize the filling with classic pumpkin-pie spice notes; contributes subtle sweetness and depth without added sugar. Sift or measure carefully and incorporate evenly to avoid concentrated pockets of spice.
- 1/2 teaspoon (0.5 teaspoon) ground ginger Brighten and add a sharp, peppery warmth that complements cinnamon and cloves; helps recreate traditional pumpkin-spice character. Use measured amounts to prevent overpowering the delicate cheesecake texture while still contributing complexity.
- 1/4 teaspoon (0.25 teaspoon) kosher salt Season to enhance and balance sweet and spiced elements while elevating overall flavor clarity; helps round out the custard. Use kosher salt for cleaner seasoning and distribute evenly to avoid salty spots.
- Pinch ground cloves Accentuate and deepen autumnal spice profile with a warm, slightly bitter finish; small pinches provide aromatic lift and complexity. Add sparingly and taste mentally against other spices to maintain balance in the filling.
Instructions
- Preheat oven to 350 degrees F. Grease a 9×13-inch baking pan and line with parchment paper so that it extends over each long side of the pan.: As the oven warms you will notice the kitchen start to smell faintly warm and dry, a quiet build up that readies everything. Proper oven temperature ensures even baking so the filling sets without cracking, and it helps the crust crisp up quickly. A common mistake is not waiting for the oven to fully preheat, which can make the crust soggy and the filling undercooked. If your oven runs hot or cool, consider using an oven thermometer to confirm accuracy.
- Make the Crust: In a food processor, pulse together the gingersnaps and sugar until they become fine crumbs. Add the melted butter and pulse a few more times to incorporate. Press the crumbs evenly into the bottom of the prepared pan. Bake for 10 minutes.: The feel of the parchment sliding into the pan makes assembly easier, and the overhang acts like little handles that lift the whole slab out when cooled. This method saves you from trying to pry bars out and damaging edges. A frequent oversight is using parchment that is too small, which complicates removal; be generous with the overhang so you can lift the bars cleanly.
- Making the Filling: While crust is baking, prepare the pumpkin filling. Beat together the cream cheese and the brown sugar on medium speed until smooth and creamy, scraping the sides of the bowl as needed, about 3 minutes. Add the pumpkin and mix on low speed until completely incorporated. Add the eggs one at a time, beating well until fully incorporated and scraping down the sides of the bowl between each addition. Add the evaporated milk, maple syrup and vanilla, and beat until well combined, about 1 minute. Add the cinnamon, ginger, salt, and cloves and mix on low to incorporate.: In a food processor, pulse together the gingersnaps and sugar until they become fine crumbs : As you pulse, you should hear a steady, granular sound and see a uniform, sandy texture. Fine crumbs bake into a cohesive base that presses well. If you pulse too little, the crust can be uneven and crumbly, and if you over process, it may become pasty. Aim for a sand like texture for best results.
- Pour the filling over the prepared crust and tap the pan on the counter to remove any air bubbles. Bake until the filling is set in the center, about 30 to 35 minutes. Remove from oven and set on a wire rack to cool. Once the bars have cooled to room temperature, you can cut and serve them, or you can refrigerate them and serve them chilled.: The melted butter will bind the crumbs so they hold together after baking. Once combined, the mixture should clump slightly when pinched, indicating enough fat to stay intact. A common issue is using butter that is too cold or too hot; cold butter will not incorporate, and overly hot butter can make the crumbs greasy. Let melted butter cool briefly before adding.
- Using the parchment paper overhangs, lift the bars from the pan and onto a cutting surface. Cut into squares and serve with whipped cream and candy corn, if desired. Store the bars in an airtight container in the refrigerator for up to 4 days.: Pressing with the bottom of a measuring cup gives an even density, creating a flat, compact base. The tactile feedback of firm, even pressure ensures the crust will support the filling and slice cleanly. If you press too lightly, bars may fall apart; press firmly but not so hard that the crust becomes overly dense.
- Bake for 10 minutes: During this brief bake the crumbs set and the aroma of baked gingersnap surfaces, turning slightly toasted. This step prevents a soggy bottom by firming the crust before the filling is added. Avoid extending the bake much longer, which can lead to a crust that is overly dry and crumbly; ten minutes is typically sufficient.
- Making the Filling: While crust is baking, prepare the pumpkin filling : Mixing while the crust bakes is efficient and keeps everything warm. You will be able to notice how textures change as you beat, from chunky to smooth, signaling readiness. Working in this order keeps timing tight and prevents the crust from cooling too much before assembly.
- Beat together the cream cheese and the brown sugar on medium speed until smooth and creamy, scraping the sides of the bowl as needed, about 3 minutes: As you beat you will see the cream cheese become glossy and free of lumps, a key visual cue that it is fully incorporated. Scraping the sides prevents pockets of unmixed cream cheese which could leave undesired lumps. A typical error is using cream cheese straight from the fridge, which resists smoothing; always bring it to room temperature first.
- Add the pumpkin and mix on low speed until completely incorporated: The mixture will take on a velvety, uniform color when fully blended. Mixing gently avoids over aerating the filling, which can lead to cracking or an undesired texture. If you mix too aggressively you might trap air, resulting in bubbles that form during baking; low speed is the safer choice here.
- Add the eggs one at a time, beating well until fully incorporated and scraping down the sides of the bowl between each addition: Incorporating eggs progressively makes for an even, stable mixture that sets consistently. You should notice the filling smooth and become slightly glossier with each egg. A common misstep is adding eggs too quickly which can create streaks or cause the mixture to curdle; patience here ensures a silky outcome.
- Add the evaporated milk, maple syrup and vanilla, and beat until well combined, about 1 minute: The evaporated milk enriches the filling and loosens it to a pourable consistency, while the maple syrup infuses a deeper sweetness. After about a minute the mixture should be cohesive and silky. If you overbeat, you may incorporate too much air, altering texture; stop once homogeneous.
- Add the cinnamon, ginger, salt, and cloves and mix on low to incorporate: Stirring these spices in on low keeps the filling smooth while ensuring they are evenly distributed, which is essential for balanced flavor in every bite. The aroma will brighten immediately, a cue you have the right spice levels. Avoid dumping spices in all at once without mixing, as that can create pockets of concentrated flavor.
- Pour the filling over the prepared crust and tap the pan on the counter to remove any air bubbles: You will see the glossy filling settle into the crust, and tapping releases trapped air that could otherwise form unsightly holes. The surface should look mostly even, with small ripples possible. If bubbles persist, run a thin knife through the top to pop them gently before baking.
- Bake until the filling is set in the center, about 30 to 35 minutes: As it bakes you will notice the edges become slightly puffed and the center appear just set, with a gentle jiggle like a soft pudding. This visual cue tells you the custard has set without overbaking which can make it dry. A common error is leaving it in too long, which can cause cracks or a cakey texture; pull it when the center barely moves.
- Remove from oven and set on a wire rack to cool: Cooling on a rack allows air to circulate and prevents the bottom from steaming. The bars will firm up as they cool and are easier to slice once at room temperature. Avoid cutting while hot, which leads to messy, unclean slices; patience here gives the best presentation.
- Once the bars have cooled to room temperature, you can cut and serve them, or you can refrigerate them and serve them chilled: Chilling firms the filling for clean, neat squares and deepens flavors, while serving slightly warm yields a creamier mouthfeel. Decide based on preference, but note that refrigeration tightens the texture dramatically. A mistake is refrigerating immediately after baking without letting them cool, which can cause condensation and soggy tops.
- Using the parchment paper overhangs, lift the bars from the pan and onto a cutting surface: Lifting gently lets you transfer the entire slab without disturbing the edges. The tactile ease of using parchment overhangs is one reason I always line the pan this way. If you try to invert without parchment the bars may stick and break apart, so take the simple lift for best results.
- Cut into squares and serve with whipped cream and candy corn, if desired: As you slice you will feel the clean resistance of a well set bar and see neat edges if chilled. The garnish is optional but adds a festive look and a contrast of textures and temperatures. Avoid using a dull knife which can drag the filling; warm a sharp knife between cuts for perfectly clean slices.
- Store the bars in an airtight container in the refrigerator for up to 4 days: In the fridge they will maintain texture and flavor, and sealed storage prevents them from absorbing other odors. If you find they dry slightly, let them sit at room temperature for a few minutes before serving. A common error is leaving them uncovered which leads to a dry surface and loss of that fresh just baked quality.
Notes
- Swap or boost the spice level Adjust the amounts of cinnamon, ginger, or cloves to suit your palate, but increase gradually so the spices remain harmonious with the pumpkin.
- Make the crust more robust Pulse in a handful of finely chopped nuts to the gingersnap crumbs for additional texture and a nutty flavor, pressing them into the crust with the same firm technique.
- Control sweetness with maple Add a touch more or less maple syrup depending on whether you want a pronounced maple note or a subtler hint that supports the spices.
- Change the serving temperature Serve slightly warm for a creamier mouthfeel or chilled for neater slices, each offering a different sensory experience that highlights either texture or presentation.
- Garnish strategically Top with a small spoonful of lightly sweetened whipped cream just before serving to add contrast in temperature and a soft, airy texture that complements the dense filling.