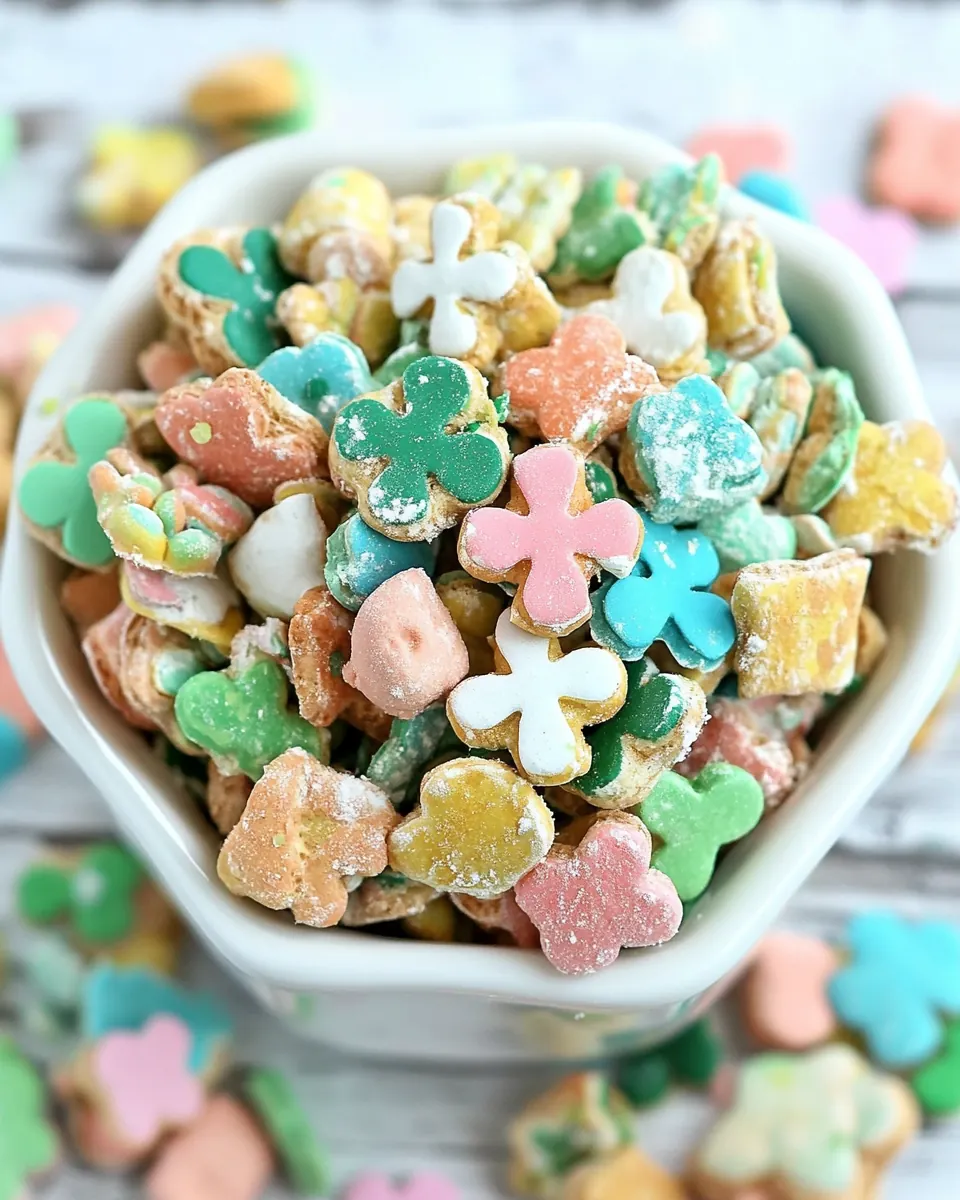
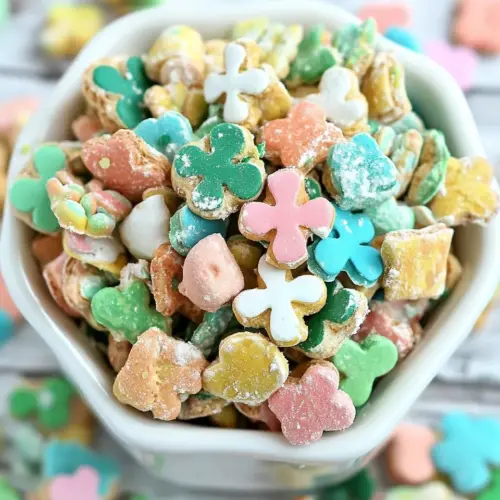
Lucky Leprechaun Munch
Lucky Leprechaun Munch is the kind of treat I reach for when a crowd needs a little whimsy and crunch, and a holiday calls for something playful rather than fussy.
Years ago I tossed together a bag of cereal and some candy melts for a last minute classroom party, and that first bowlful of crunchy, sweet pieces became an instant favorite. I remember standing at the counter, stirring the warm, glossy candy over the cereal while the kitchen smelled faintly of vanilla and sugar, and thinking that simple combinations can feel delightfully magical.
Every time I make Lucky Leprechaun Munch now, I change one tiny thing, sometimes the sprinkles, sometimes the mix ratio, but always keeping the same joyful spirit. Friends arrive and the snack disappears in minutes, the marshmallows popping with color against the pale candy coating, and I love that it requires almost no skill but delivers maximum smile potential.
When I serve it I like to pile it in a big bowl and let people help themselves, because that casual, communal vibe fits the recipe perfectly. It’s not about a perfect bite, it’s about grabbing a handful and remembering a small, carefree moment. I hope this recipe gives you that same easy joy.
Recipe Snapshot
25 mins
25 mins
Easy
150 kcal
American
Vegan, Gluten-Free
Desserts
Large mixing bowl, Spatula, Microwave safe bowl, Wax paper or parchment, Airtight container
The Magic of This Lucky Leprechaun Munch
Playful, not fussy
I love how Lucky Leprechaun Munch feels effortless, it’s a grab-and-go kind of snack that still looks dressed up. I can put it on the table five minutes before guests arrive and it reads like I planned something special, even though it took almost no time.
Texture party
The mix of crunchy Lucky Charms pieces and crisp Rice Chex gives every bite contrast, and when the candy coating dries it adds a satisfying snap. I always notice how people comment on the way it shatters and crumbles in their hands, which is why I keep the cereal ratios balanced.
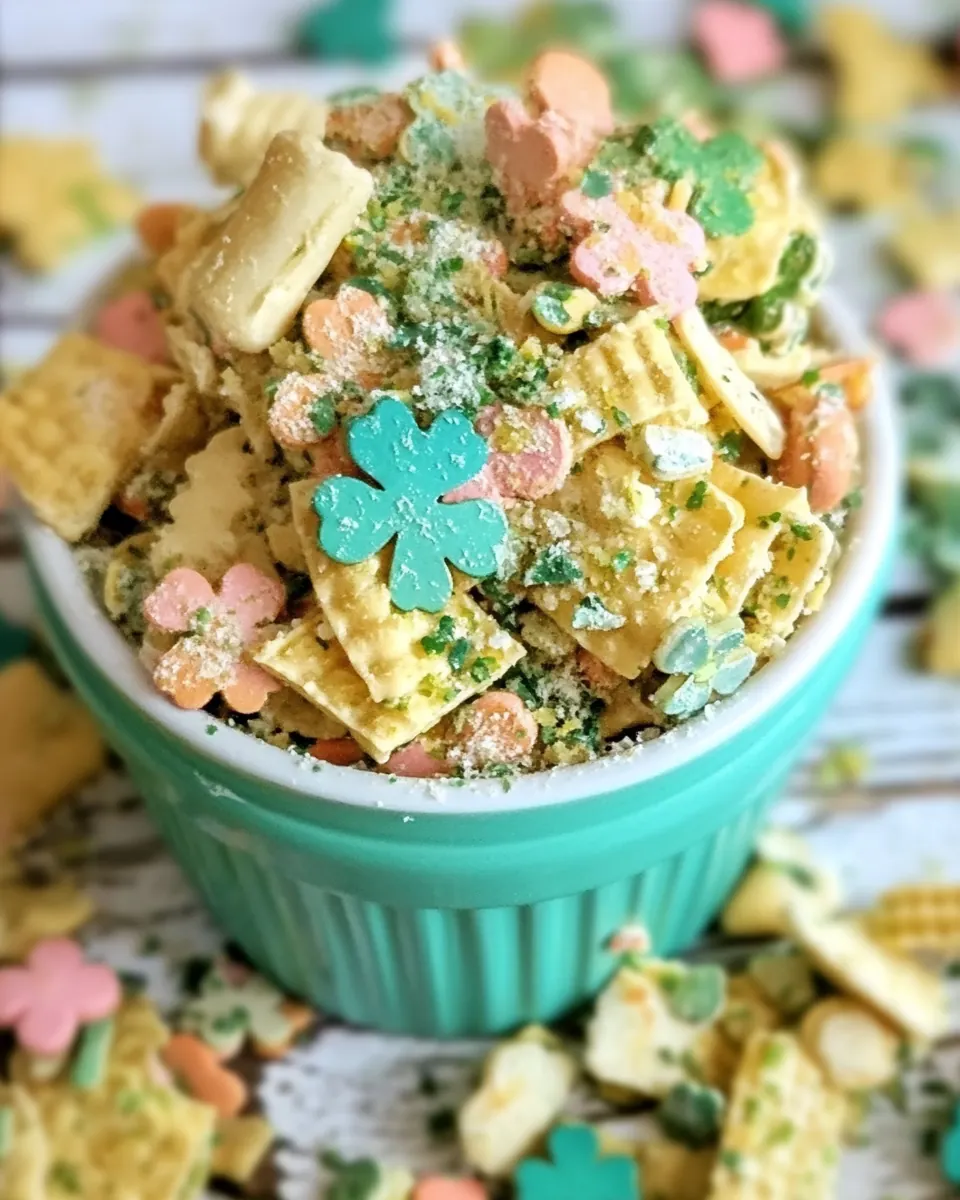
Customizable and colorful
Because the base is simple, I can change the color or sprinkle style to suit an occasion. For spring I go pastel, and I love how the marshmallows stand out after I press them into the coating. It’s easy to make it look seasonal with minimal effort.
Kid friendly and nostalgic
There is something inherently nostalgic about the marshmallows in Lucky Leprechaun Munch, and kids adore picking out the shapes. I get a little reminiscent when I watch them choose their favorites, and that makes this recipe a winner at family gatherings.
Simple ingredients, big payoff
I appreciate recipes that rely on pantry staples and still feel celebratory. With just a few items and basic technique, Lucky Leprechaun Munch produces a snack with personality and flavor that keeps people coming back for more.
What’s In This Lucky Leprechaun Munch
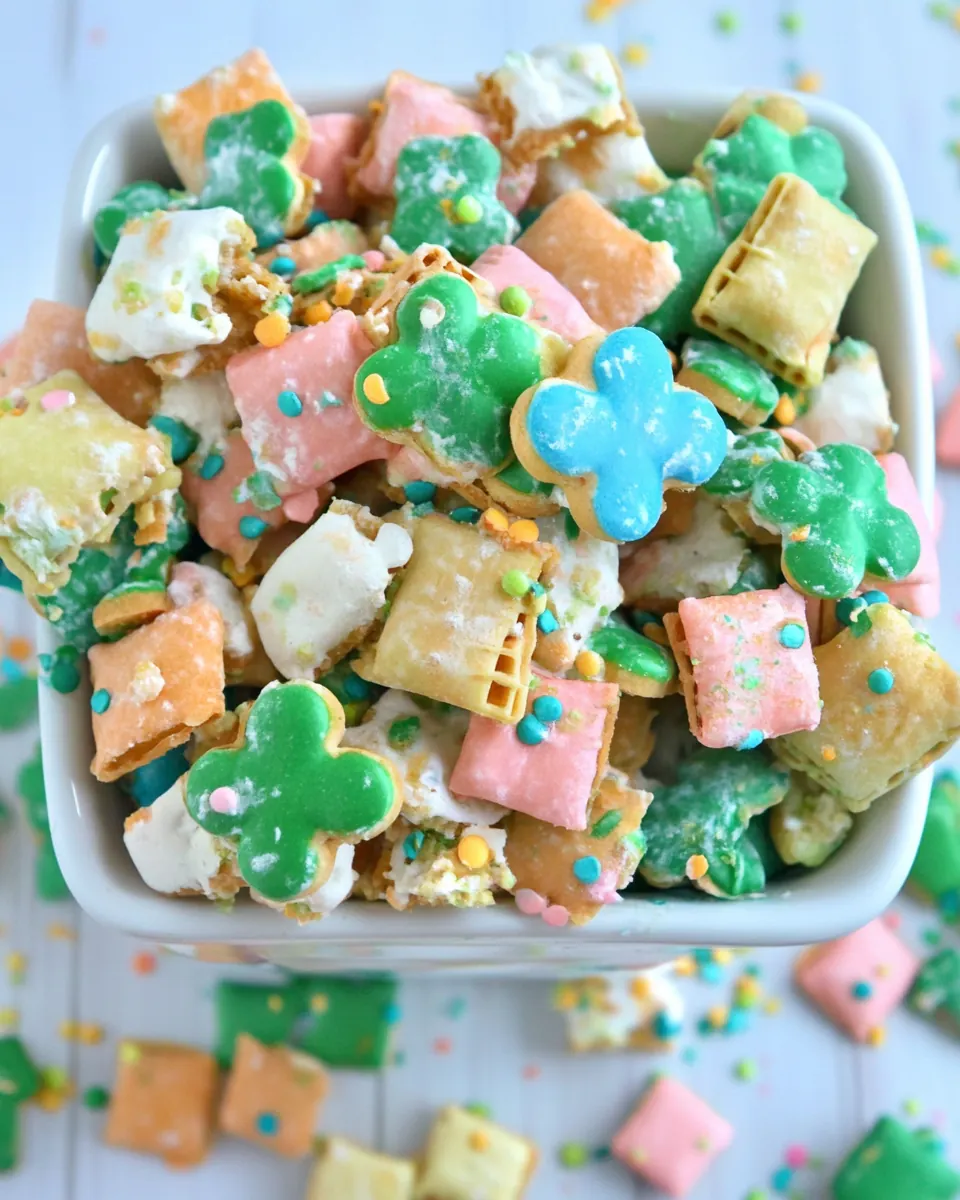
These components are chosen to create a balance of crunch, sweetness, and playful color. The key players are the cereals for texture, the candy melts for binding and gloss, and the marshmallows plus sprinkles for visual punch. Together they make a snack that feels festive while remaining simple to pull together.
- 11.05 oz box Lucky Charms® cereal: Crunchy toasted oat cereal adds iconic marshmallow-forward flavor and whimsical texture to the mix, providing sweetness and familiar charm; use whole box to retain recognizable Lucky Charms presence and colorful marshmallows throughout the treat.
- 6 cups Rice Chex®: Lightly toasted rice squares contribute airy crispness and neutral base that balances sweetness; fold in gently to preserve crunch and create structural contrast with coated elements.
- 212 oz bags green candy melts: Meltable confection coating delivers smooth, vibrant green color and glossy finish while binding ingredients together; temper and stir until fluid for even coating, then pour over dry mix to form cohesive clusters.
- 1/4 c. pastel sprinkles: Delicate pastel nonpareils provide festive color contrast and subtle textural pop when sprinkled over the coated clusters; add after coating sets slightly to adhere without losing shape and enhance visual appeal.
Instructions for Lucky Leprechaun Munch
I like to keep instructions conversational because this snack is so relaxed and forgiving. The method is mostly about timing and gentle handling, so focus on temperature when melting and on spreading the coated cereal thin enough to set quickly. Work on a clean surface and have your marshmallows and sprinkles ready before you pour the candy over the cereal.
- Pour the Lucky Charms out and take out all the marshmallows and set them aside.: The moment you remove the marshmallows you will notice the cereal looks less colorful but far more manageable for coating. Sensory note, the oat pieces will be light and brittle in your hands, and the marshmallows will be soft and squishy, almost pillowy, which is why you set them aside, so they do not melt into the candy coating and lose their shape. This step matters because it preserves the marshmallow texture and color for the final presentation. A common mistake is to skip this step and coat everything together which can lead to melted, misshapen marshmallows, so take a couple of minutes and sort them out carefully, using a bowl to keep them separate and reachable.
- In a large mixing bowl combine Rice Chex and 2 c. of the Lucky Charms cereal.: When you mix the Rice Chex and remaining Lucky Charms , you will hear a soft rustle as the pieces tumble together and notice a pleasing patchwork of pale and toasted bits. This combination creates a structural base that holds up under the candy coating, the airy Rice Chex helping prevent the final clusters from being overly dense. I like to gently fold the cereals with a large spoon so the pieces stay whole, avoiding crushing them. The mistake I see here is overmixing or pressing down too hard, which breaks the cereal and changes the texture of the finished snack, so be gentle and just combine until evenly distributed.
- Melt candy melts according to package directions. Pour over cereal mixture. Spread mixture onto wax paper. Sprinkle reserved marshmallows over cereal mixture, slightly pressing into mixture to help them stick. Sprinkle the sprinkles over the mixture. Let sit until candy melts are set and dry.: As you melt the candy melts , you will smell a sweet confectionery scent, and the mixture will go from chalky to a smooth, glossy pourable texture. Temperature control is key, you want lukewarm and fluid but not bubbling, so follow the package guidance and stir often to distribute heat and prevent scorching. The reason this technique matters is that a smooth melt coats evenly and sets with a crisp finish, creating attractive clusters. Watch for a grainy texture which signals overheating, and if that happens stop heating, remove from the microwave or heat source, and stir until smooth; overheating is the most common pitfall here.
- Break apart and store in airtight container.: When you pour the warm, glossy candy over the cereals, do it in a steady stream while gently folding the mixture so pieces are evenly coated, you should hear a faint crackle as the candy makes contact and see the sheen develop across the cereal. The visual cue you want is a light glaze on most pieces without large puddles of candy, which helps the clusters set uniformly. The why is simple, even coating ensures each bite has that sweet snap and helps the cereal pieces stick together. A typical mistake is dumping the candy in one spot and overmixing to compensate, which can crush the cereal, so pour gradually and fold carefully to maintain texture.
- Spread mixture onto wax paper: As you transfer the coated cereal to a sheet of wax paper, spread it into an even layer with a spatula, you will notice the candy begins to cool and thicken on the surface, losing some shine as it sets. This is the moment to press the reserved marshmallows gently into the top so they adhere without sinking, and to scatter the sprinkles while the surface is still tacky so they stick. The why is that spreading into a single layer allows the candy to set more quickly and makes the mix easier to break into clusters later. Avoid packing it too tightly, which prevents proper air circulation and can create sticky dense blocks instead of light clusters.
- Sprinkle reserved marshmallows over cereal mixture, slightly pressing into mixture to help them stick: Press each small cluster of marshmallows lightly but not firmly, you should feel the give as they settle into the tacky candy, and visually the colors will pop against the pale coating. This step matters because it ensures the marshmallows are displayed on the exterior, creating visual appeal and that nostalgic bite. One troubleshooting tip is to add them before the coating is completely hard, otherwise they will not adhere; the common error is waiting too long and then having to press them on, which can smash the cereal clusters.
- Sprinkle the sprinkles over the mixture: Toss the sprinkles across the surface for a playful finish, aim for even distribution so the color reads across the whole tray, and watch them catch on the glossy coating. This final decorative touch elevates the look and adds tiny crunchy pops. The reason this matters is aesthetic and textural, small additions like these make the snack feel celebratory. A mistake to avoid is overdoing the sprinkles which can overwhelm the other elements, so sprinkle modestly and evenly for the best result.
- Let sit until candy melts are set and dry: Allowing the tray to rest at room temperature gives the candy time to firm up, you will notice the surface losing gloss and becoming matte and crisp, and a gentle tap should release a slight snap. This resting phase is important because attempting to break or store the mix too early can cause it to stick together or deform. A troubleshooting pointer is to keep it away from heat or humidity while setting, as moisture will prevent proper hardening, which is the most common issue at this stage.
- Break apart and store in airtight container: Once fully set, use your hands or a spatula to break the slab into irregular clusters that feel light and crisp, the clean snap signals readiness and the pieces should hold shape without crumbling into dust. Store in an airtight container to preserve the crunch, and keep it in a cool, dry place away from direct sun which can soften the candy. The why is preservation, airtight storage keeps the coating from drawing moisture and keeps the texture crisp. A frequent error is using a loosely sealed container which leads to stale, limp clusters, so choose a firm seal to maintain freshness.
Substitutions and Tips

I like to keep tips actionable and simple. These suggestions focus on keeping texture and color intact while making the process smoother. Every tip starts with a bolded short phrase so you can scan quickly and pick what matters most to you.
- Use similar neutral cereal if you cannot find Rice Chex, choose another plain rice or corn crisp cereal of similar size to keep the texture balanced.
- Adjust candy melt colors to match an event, pick pastel shades for spring or bold colors for birthday parties, the technique stays the same.
- Prevent overheating heat the candy melts in short bursts and stir between intervals, stirring distributes heat and prevents graininess.
- Press marshmallows gently add reserved marshmallows while the coating is still tacky so they adhere without getting squished.
- Spread thin for quick set spreading the mixture into a thinner layer helps it firm up faster and makes portioning easier.
- Store airtight use a good sealing container to keep the clusters crisp and to protect color from humidity.
Side Dish Ideas for Lucky Leprechaun Munch
This snack pairs well with casual gatherings and kid centered events, and it travels and stores easily for later. Below are serving ideas, occasions, and storage suggestions written as a list so you can choose what fits your plan.
- Party bowl for casual gatherings pile Lucky Leprechaun Munch into a large communal bowl for impromptu parties or playdates, it invites people to grab a handful and mingle.
- Individual treat bags portion into small clear bags for school treats, favor bags, or holiday giveaways, sealing them preserves crunch and color.
- Seasonal display for spring or St Patricks events, arrange clusters around a themed centerpiece to add edible decoration that guests can nibble on between activities.
- Snack table variety include alongside popcorn, pretzel twists, or fruit for a mix of sweet and salty options, creating contrast on a buffet or dessert table.
- Travel friendly road snack pack in airtight containers for picnics or road trips, the dry environment helps maintain the candy coating.
- Storage guidance keep in a cool, dry cupboard in an airtight container for up to one week, avoid warm spots that can soften the candy coating.
- Kid events and classroom ideal for classroom parties, supervise distribution to keep portions even and to respect school allergy rules.
FAQ
Conclusion
Lucky Leprechaun Munch stands out because it turns a handful of pantry items into a playful, crunchy snack that looks and tastes like a celebration. Give it a try the next time you want an easy, colorful treat that kids and adults both enjoy. It’s forgiving, fast, and always a crowd pleaser, so make a batch, share it around, and enjoy the smiles it brings.
Lucky Leprechaun Munch
Equipment
- Large Mixing Bowl
- Spatula
- Microwave-safe Bowl
- Wax paper or parchment
- Airtight Container
Ingredients
- 11.05 oz box Lucky Charms® cereal Crunchy toasted oat cereal adds iconic marshmallow-forward flavor and whimsical texture to the mix, providing sweetness and familiar charm; use whole box to retain recognizable Lucky Charms presence and colorful marshmallows throughout the treat.
- 6 cups Rice Chex® Lightly toasted rice squares contribute airy crispness and neutral base that balances sweetness; fold in gently to preserve crunch and create structural contrast with coated elements.
- 212 oz bags green candy melts Meltable confection coating delivers smooth, vibrant green color and glossy finish while binding ingredients together; temper and stir until fluid for even coating, then pour over dry mix to form cohesive clusters.
- 1/4 c. pastel sprinkles Delicate pastel nonpareils provide festive color contrast and subtle textural pop when sprinkled over the coated clusters; add after coating sets slightly to adhere without losing shape and enhance visual appeal.
Instructions
- Pour the Lucky Charms out and take out all the marshmallows and set them aside.: The moment you remove the marshmallows you will notice the cereal looks less colorful but far more manageable for coating. Sensory note, the oat pieces will be light and brittle in your hands, and the marshmallows will be soft and squishy, almost pillowy, which is why you set them aside, so they do not melt into the candy coating and lose their shape. This step matters because it preserves the marshmallow texture and color for the final presentation. A common mistake is to skip this step and coat everything together which can lead to melted, misshapen marshmallows, so take a couple of minutes and sort them out carefully, using a bowl to keep them separate and reachable.
- In a large mixing bowl combine Rice Chex and 2 c. of the Lucky Charms cereal.: When you mix the Rice Chex and remaining Lucky Charms , you will hear a soft rustle as the pieces tumble together and notice a pleasing patchwork of pale and toasted bits. This combination creates a structural base that holds up under the candy coating, the airy Rice Chex helping prevent the final clusters from being overly dense. I like to gently fold the cereals with a large spoon so the pieces stay whole, avoiding crushing them. The mistake I see here is overmixing or pressing down too hard, which breaks the cereal and changes the texture of the finished snack, so be gentle and just combine until evenly distributed.
- Melt candy melts according to package directions. Pour over cereal mixture. Spread mixture onto wax paper. Sprinkle reserved marshmallows over cereal mixture, slightly pressing into mixture to help them stick. Sprinkle the sprinkles over the mixture. Let sit until candy melts are set and dry.: As you melt the candy melts , you will smell a sweet confectionery scent, and the mixture will go from chalky to a smooth, glossy pourable texture. Temperature control is key, you want lukewarm and fluid but not bubbling, so follow the package guidance and stir often to distribute heat and prevent scorching. The reason this technique matters is that a smooth melt coats evenly and sets with a crisp finish, creating attractive clusters. Watch for a grainy texture which signals overheating, and if that happens stop heating, remove from the microwave or heat source, and stir until smooth; overheating is the most common pitfall here.
- Break apart and store in airtight container.: When you pour the warm, glossy candy over the cereals, do it in a steady stream while gently folding the mixture so pieces are evenly coated, you should hear a faint crackle as the candy makes contact and see the sheen develop across the cereal. The visual cue you want is a light glaze on most pieces without large puddles of candy, which helps the clusters set uniformly. The why is simple, even coating ensures each bite has that sweet snap and helps the cereal pieces stick together. A typical mistake is dumping the candy in one spot and overmixing to compensate, which can crush the cereal, so pour gradually and fold carefully to maintain texture.
- Spread mixture onto wax paper: As you transfer the coated cereal to a sheet of wax paper, spread it into an even layer with a spatula, you will notice the candy begins to cool and thicken on the surface, losing some shine as it sets. This is the moment to press the reserved marshmallows gently into the top so they adhere without sinking, and to scatter the sprinkles while the surface is still tacky so they stick. The why is that spreading into a single layer allows the candy to set more quickly and makes the mix easier to break into clusters later. Avoid packing it too tightly, which prevents proper air circulation and can create sticky dense blocks instead of light clusters.
- Sprinkle reserved marshmallows over cereal mixture, slightly pressing into mixture to help them stick: Press each small cluster of marshmallows lightly but not firmly, you should feel the give as they settle into the tacky candy, and visually the colors will pop against the pale coating. This step matters because it ensures the marshmallows are displayed on the exterior, creating visual appeal and that nostalgic bite. One troubleshooting tip is to add them before the coating is completely hard, otherwise they will not adhere; the common error is waiting too long and then having to press them on, which can smash the cereal clusters.
- Sprinkle the sprinkles over the mixture: Toss the sprinkles across the surface for a playful finish, aim for even distribution so the color reads across the whole tray, and watch them catch on the glossy coating. This final decorative touch elevates the look and adds tiny crunchy pops. The reason this matters is aesthetic and textural, small additions like these make the snack feel celebratory. A mistake to avoid is overdoing the sprinkles which can overwhelm the other elements, so sprinkle modestly and evenly for the best result.
- Let sit until candy melts are set and dry: Allowing the tray to rest at room temperature gives the candy time to firm up, you will notice the surface losing gloss and becoming matte and crisp, and a gentle tap should release a slight snap. This resting phase is important because attempting to break or store the mix too early can cause it to stick together or deform. A troubleshooting pointer is to keep it away from heat or humidity while setting, as moisture will prevent proper hardening, which is the most common issue at this stage.
- Break apart and store in airtight container: Once fully set, use your hands or a spatula to break the slab into irregular clusters that feel light and crisp, the clean snap signals readiness and the pieces should hold shape without crumbling into dust. Store in an airtight container to preserve the crunch, and keep it in a cool, dry place away from direct sun which can soften the candy. The why is preservation, airtight storage keeps the coating from drawing moisture and keeps the texture crisp. A frequent error is using a loosely sealed container which leads to stale, limp clusters, so choose a firm seal to maintain freshness.
Notes
- Use similar neutral cereal if you cannot find Rice Chex, choose another plain rice or corn crisp cereal of similar size to keep the texture balanced.
- Adjust candy melt colors to match an event, pick pastel shades for spring or bold colors for birthday parties, the technique stays the same.
- Prevent overheating heat the candy melts in short bursts and stir between intervals, stirring distributes heat and prevents graininess.
- Press marshmallows gently add reserved marshmallows while the coating is still tacky so they adhere without getting squished.
- Spread thin for quick set spreading the mixture into a thinner layer helps it firm up faster and makes portioning easier.
- Store airtight use a good sealing container to keep the clusters crisp and to protect color from humidity.