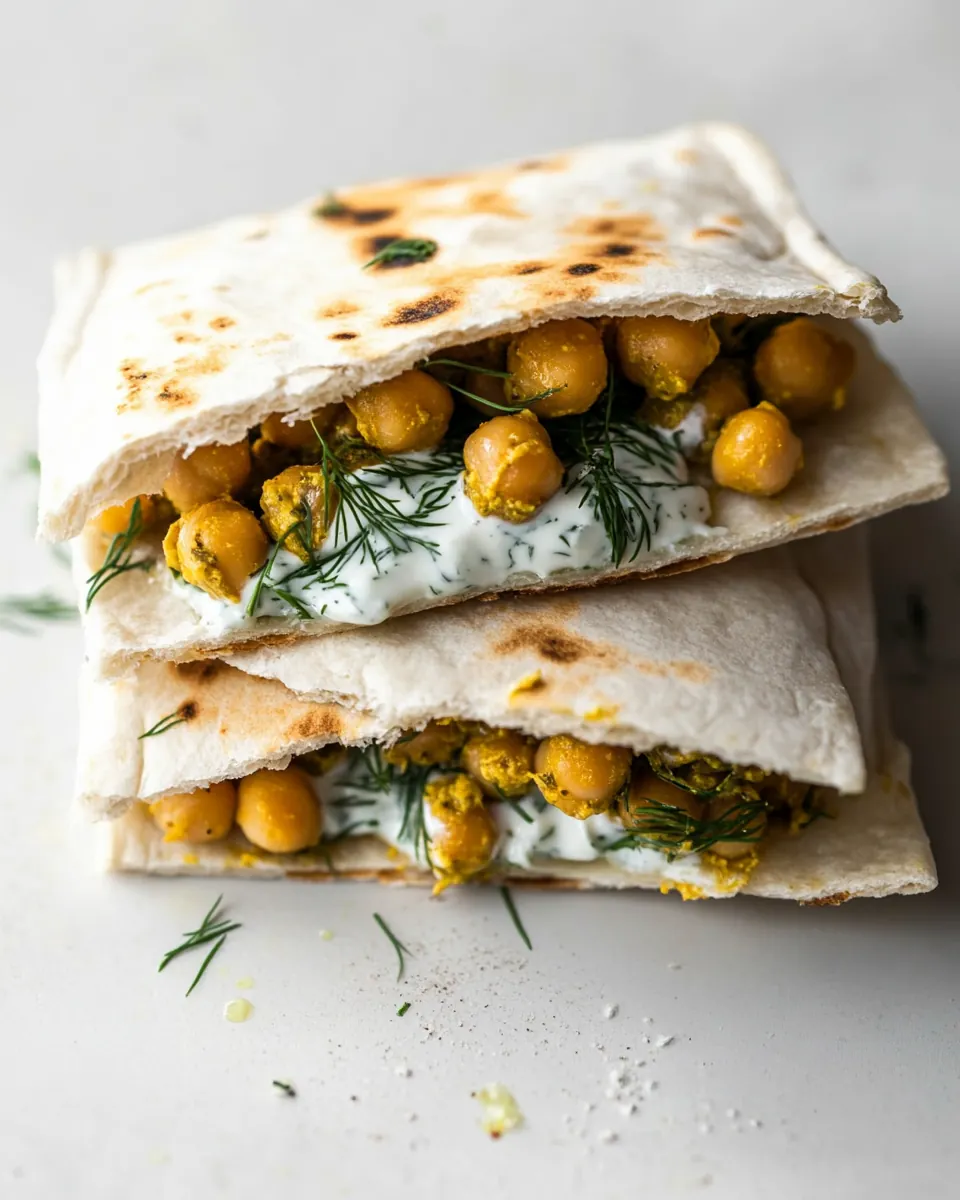
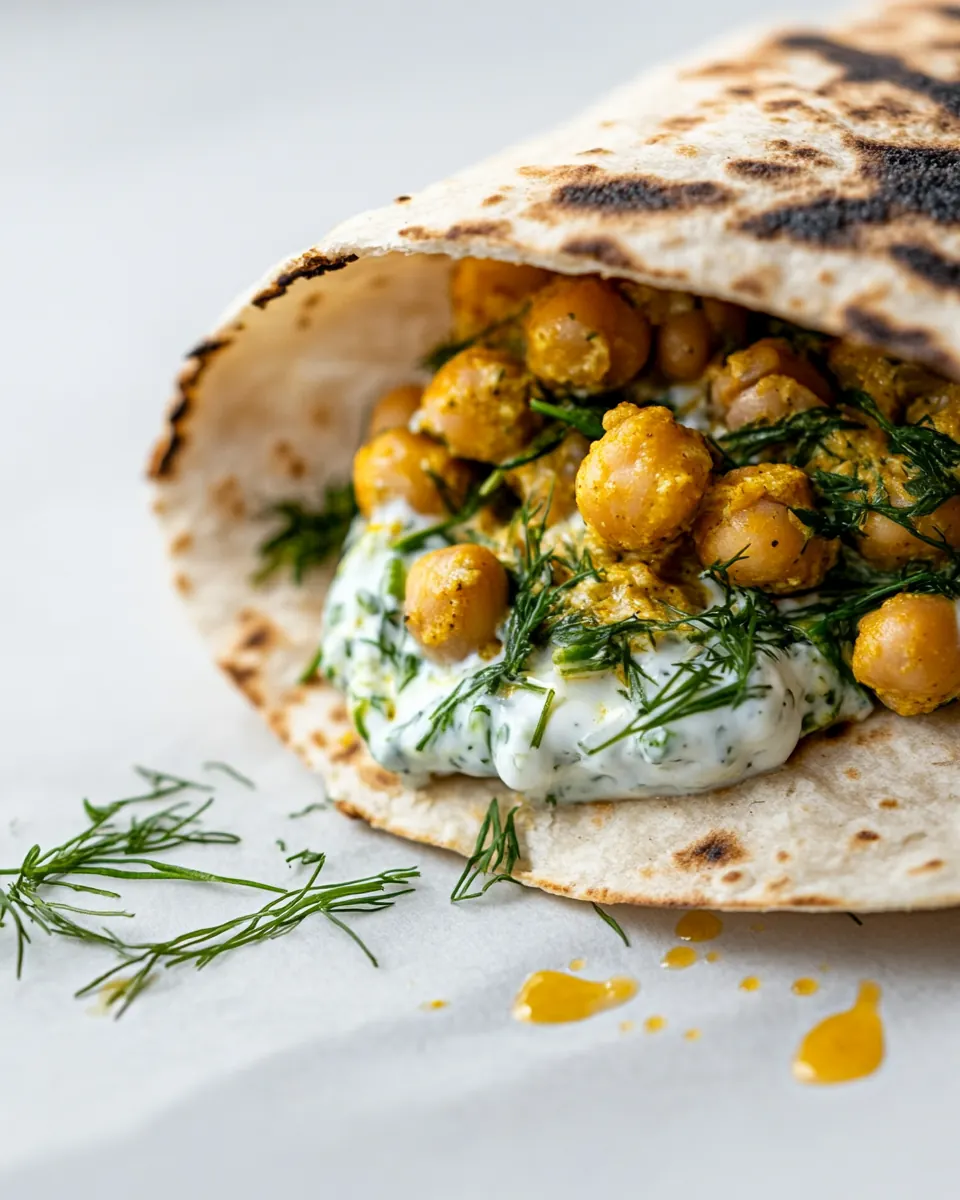
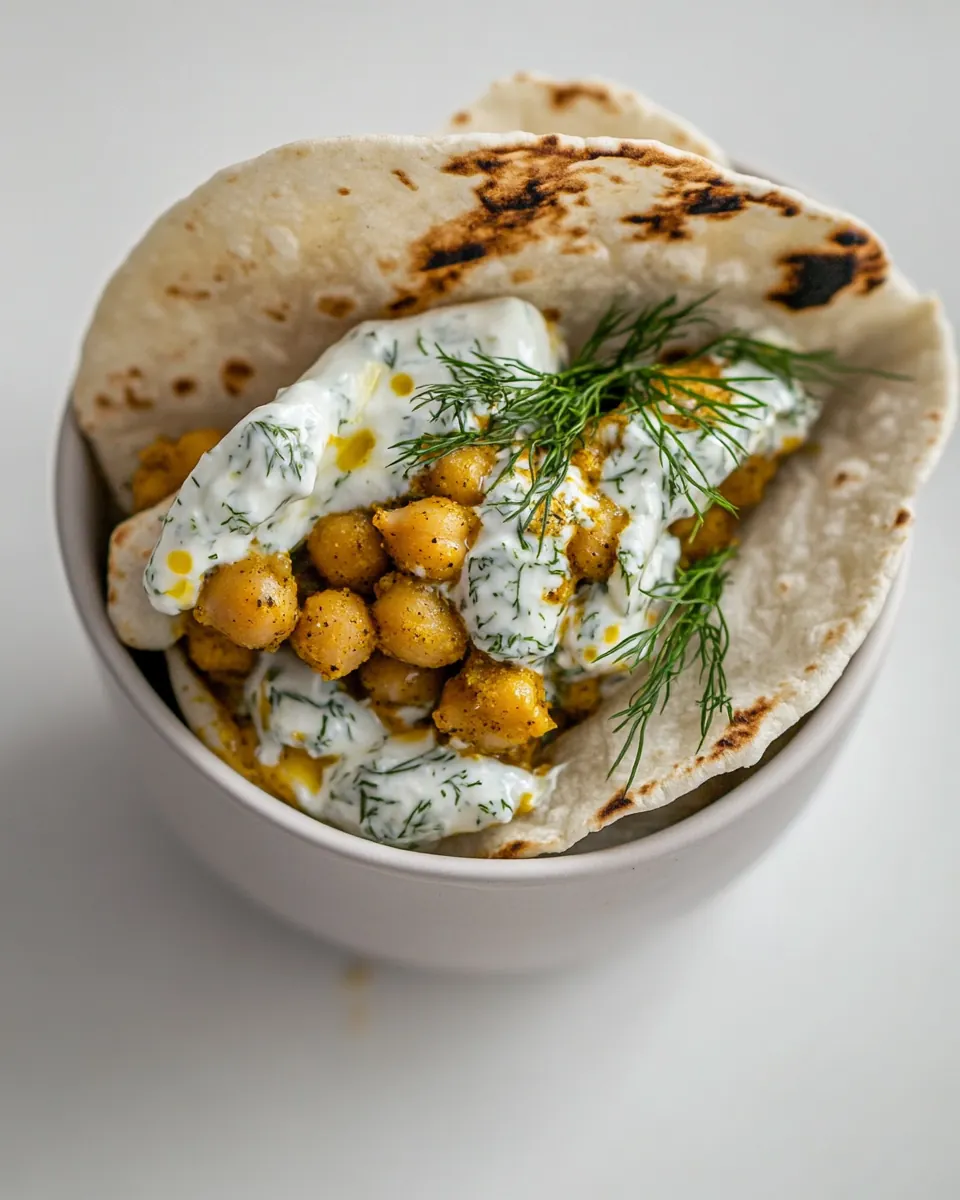
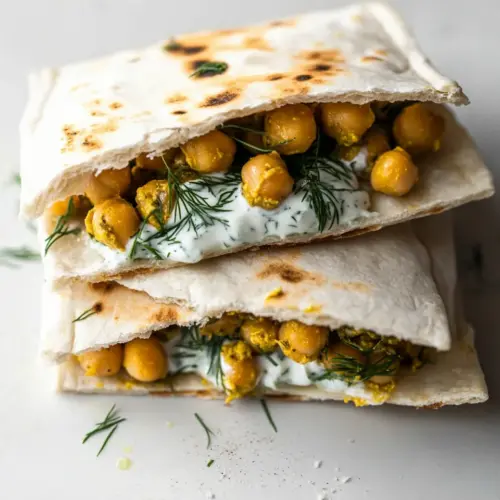
Chickpea Curry Stuffed Pita with Dill Yogurt
Chickpea Curry Stuffed Pita with Dill Yogurt has been one of those sandwiches I reach for when I want big flavor without fuss. The first time I threw together this combination I was short on time but craving something bright and satisfying, and the sharp pop of dill against warm, spiced chickpeas felt like a tiny celebration. I remember standing at the counter with a cup of tea, assembling the pockets and thinking how such simple pantry ingredients can taste elevated.
I often make this when friends drop by unexpectedly, because the filling comes together in minutes and the pita pockets make it easy to serve. One weekend morning I prepped extra yogurt sauce and tucked it in the fridge, then used leftovers for a grain bowl the next day. That adaptability is what keeps me coming back to this recipe, it plays well with what I already have. Over time I learned little tricks like rinsing canned chickpeas thoroughly to reduce saltiness, and warming the pita so it folds without cracking. Those small touches change the texture from ordinary to comforting.
When I write about this recipe I like to focus on the contrasts, the creamy herby sauce against the earthy curry kissed chickpeas, and the peppery bite of arugula. If you are feeding two people or packing lunches, it’s forgiving and fast. I especially enjoy how the yogurt sauce gives a cooling counterpoint to the warm spices, making every bite balanced and bright. Give yourself the freedom to tweak the curry level, but keep the core elements intact, they are the reason this sandwich sings.
Recipe Snapshot
20 mins
10 mins
10 mins
Easy
350 kcal
Mediterranean
Gluten-Free, Vegan
Dinner
Skillet, Small bowl
What Makes This Chickpea Curry Stuffed Pita with Dill Yogurt Special
Bright, Balanced Flavor
I love how Chickpea Curry Stuffed Pita with Dill Yogurt combines warmth and freshness. The spiced chickpeas carry savory, earthy notes while the herby yogurt brings a clean, cooling finish. I often find myself making this when I want something that is both comforting and lively, it never feels heavy.
Quick and Pantry Friendly
One huge reason I reach for this dish is how fast it comes together. Most of the ingredients are pantry staples, so I can pull it together in about twenty minutes. If I know guests are coming, I can prepare the sauce ahead and finish the chickpeas quickly on the stove, which keeps the last minute stress low.
Textural Contrast
The interplay between creamy yogurt, tender chickpeas, and the slight chew of warmed pita makes every mouthful interesting. I also love the peppery pop from the arugula, it adds brightness and a pleasant crunch that keeps the sandwich from feeling one note.
Flexible and Crowd Friendly
I appreciate that this recipe scales easily and adapts to dietary needs. For a casual dinner I might serve it alongside a simple salad, or I will double the filling for a week of easy lunches. It is one of those recipes I happily recommend to friends learning to cook because the steps are straightforward and forgiving.
Comfort with Personality
Finally, this sandwich gives you comfort food vibes without being heavy handed. The curry spices add personality while the dill yogurt keeps things bright. I often make it when I want food that feels homey and interesting at the same time.
What You Need for Chickpea Curry Stuffed Pita with Dill Yogurt
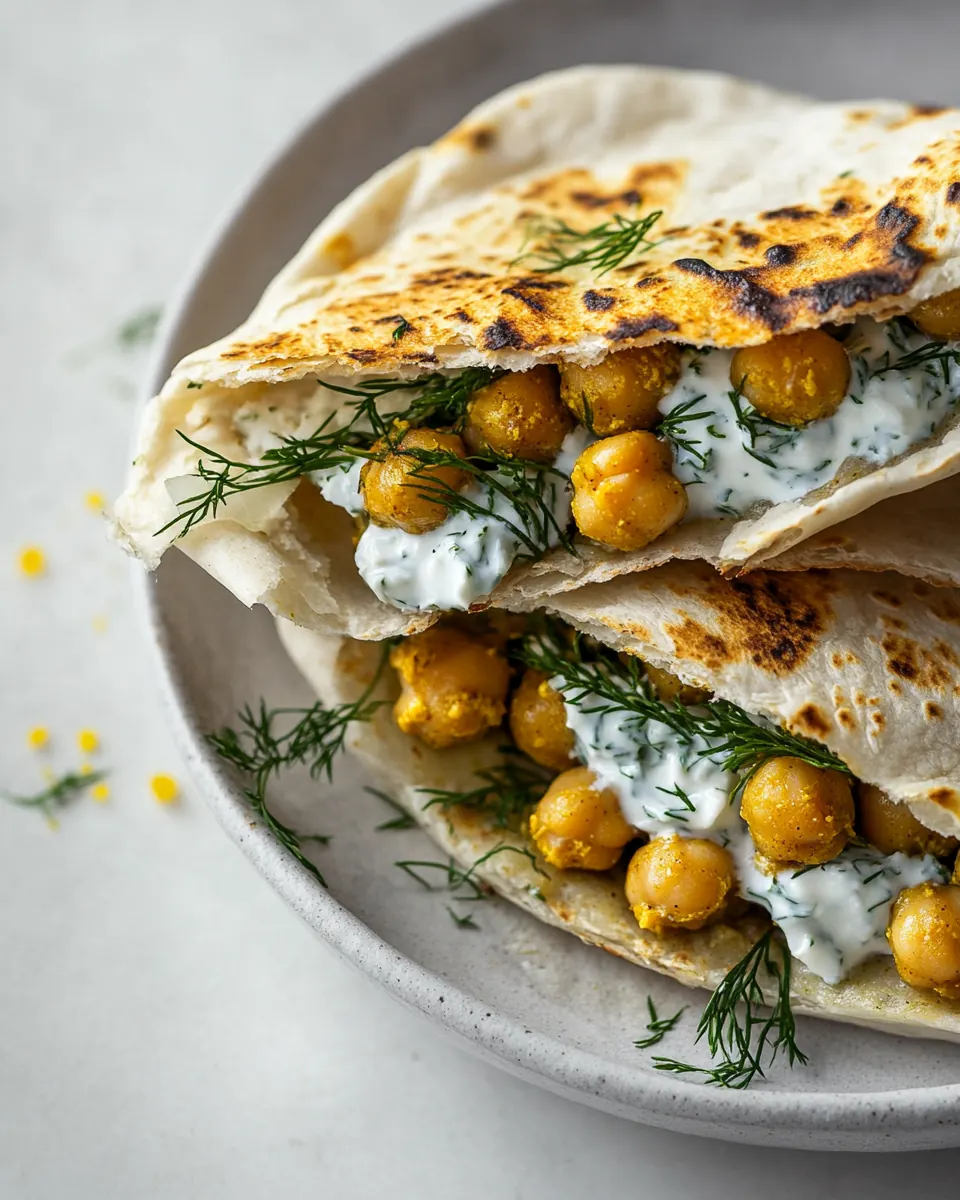
These ingredients work together to create a sandwich that balances spice, creaminess, and fresh herb brightness. The key players are the spiced chickpeas which provide body and warmth, the herbed yogurt that cools and ties flavors together, and the pita which serves as a convenient vessel. I choose simple, high quality staples so each component shines.
- 3 tablespoons minced fresh dill: Finely chop to release bright, anise-like flavors and fold into yogurt for a fresh, herbaceous sauce that complements the curry-spiced chickpeas.
- 1/2 cup plain (whole-milk yogurt): Provide a creamy, tangy base for the dill sauce; whisk with lemon and garlic to create a cooling contrast to the warm filling and add richness to the pita.
- 1 clove garlic (minced or grated): Minced or grated finely to infuse the yogurt with sharp, savory notes; balance heat and brighten the overall flavor when mixed into the dill yogurt.
- Juice from 1/2 a lemon: Squeeze fresh to add bright acidity that cuts through the yogurt's richness and enhances the herbs and spices, balancing the dish's flavors.
- 1/4 teaspoons ea salt: Season lightly to enhance and balance all components; sprinkle into the yogurt mixture and into the chickpea filling to bring out natural flavors.
- 2 teaspoons olive oil: Warm gently to sauté chickpeas and bloom the curry spices; add a silky mouthfeel and help carry aromatic flavors through the filling.
- 1 1/2 cup s1 can cooked chickpeas, drained and rinsed if using canned: Rinse if canned and drain before using; mash or pulse slightly to create a hearty, textured filling that soaks up spices and yogurt.
- 2 teaspoons curry spice blend: Toast briefly in oil to release its aromatic oils and coat the chickpeas with warm, complex flavor; adjust amount for desired intensity.
- Salt (to taste): Season at the end to taste to ensure balanced seasoning across the yogurt and chickpea filling; add small pinches until the flavor is right.
- 2 pita with pockets (warmed slightly (see note)): Warm slightly to make pockets more pliable and easier to fill; serve as the handheld vessel that holds the chickpea curry, arugula, and sauce.
- 1 cup baby arugula: Toss lightly to add peppery, fresh green notes and a crisp textural contrast inside the pita, providing brightness and a lively finish.
Cooking Instructions for Chickpea Curry Stuffed Pita with Dill Yogurt
I like to keep the cooking simple, focusing on developing flavor in the pan and building layers as I assemble the pockets. Move deliberately and taste as you go so the seasoning feels balanced. Below I rewrite each direction into detailed steps that cover sensory cues, why the technique matters, and common mistakes to watch for.
- Finely mince the dill and place in a small bowl along with the yogurt. Add in the minced/grated garlic, lemon juice, and salt. Stir to combine, set aside, and let rest while making the chickpeas.: As you mince the dill , you'll notice its fresh, slightly grassy scent intensify, which signals the herb is releasing its oils into the mix. After combining with the creamy yogurt , stir until the texture looks smooth and speckled with green. Let it sit so the flavors can marry, which softens the raw edge of both dill and garlic . A good sensory cue is a joined aroma of herb and dairy, not an overpowering sharpness. If the yogurt seems watery, strain briefly in a fine mesh to improve creaminess. Avoid skipping the resting time, or the sauce will taste one dimensional.
- Heat a skillet over medium-low heat. Add the olive oil followed by the chickpeas, curry powder, and salt if needed. Cook until the chickpeas are hot, about five minutes.: When you grate or mince the garlic , its pungent aroma will become apparent, and the tiny flecks should disperse evenly through the sauce. The bright tang of the lemon should cut through the richness, so add a little and then taste for balance. Stir until the sauce glistens slightly and coats the back of a spoon, indicating a good emulsion. Watch for overly sharp garlic, which can dominate; if that happens let the sauce rest longer or add another spoon of yogurt to mellow it. Over-salting at this stage is common, so season conservatively and adjust later if needed.
- Warm the pita bread then slice in half. Stuff with 1/4 of the arugula topped with 1/4 of the chickpeas and a drizzle of about 2 tablespoons of the yogurt sauce.: As the sauce rests, the aromas should blend into a unified herbal creaminess, and you will notice the edge of the lemon soften. This quiet pause matters because it develops a rounder, more integrated flavor when you serve it with warm filling. Keep the bowl covered lightly so the surface does not dry out. A typical mistake is using the sauce immediately, which leaves the components tasting separate rather than harmonious.
- Heat a skillet over medium-low heat: Place your skillet on medium to medium-low and let it warm until you feel steady heat rising from the surface, which usually takes a minute or two. The right pan temperature will gently sizzle when ingredients hit the surface without spattering aggressively, and that controlled heat helps cook the chickpeas through without burning the spice blend. If the pan is too hot the oil and spices can scorch, creating a bitter taste, so lower the heat if you see dark smoke or hear violent popping.
- Add the olive oil followed by the chickpeas, curry powder, and salt if needed: Pour the olive oil and let it shimmer, then add the chickpeas , scattering them so each one touches the pan. Sprinkle the curry and a little salt so the spices bloom in the fat and cling to the beans. As they heat, you will hear a light sizzle and smell warm, toasty spices, which is the cue that flavor is developing. Stir occasionally to encourage even browning and toasting, which brings out a nutty aroma. A mistake to avoid is crowding the pan or stirring too often, which prevents caramelization and leaves the chickpeas steamed rather than toasted.
- Cook until the chickpeas are hot, about five minutes: You will know the chickpeas are ready when they are heated through and begin to show slight golden spots, releasing a warm, spiced scent. The texture should be tender with a gentle resistance, not mushy. Taste one to check seasoning and texture, and adjust with a pinch of salt if it needs lift. If they start to brown too quickly, reduce the heat and add a splash of water to prevent drying. Overcooking can lead to a dry filling, which undermines the pleasant creaminess of the sauce.
- Warm the pita bread then slice in half: Warming the pita makes it pliable and enhances its aroma, creating a faint toasty bread scent. Heat briefly on a skillet or in a warm oven until it is soft and slightly puffy, then slice each round in half to form pockets. The sign you warmed it correctly is a gentle bend without cracking. If you overheat, the pita can become brittle and tear when stuffed, which makes assembly messy.
- Stuff with 1/4 of the arugula topped with 1/4 of the chickpeas and a drizzle of about 2 tablespoons of the yogurt sauce: Place a handful of peppery arugula into the pocket, then add the warm spiced chickpeas . Drizzle with the herbed yogurt so each bite has creamy contrast. The ideal mouthfeel comes from combining a bite of all three elements, where the cool sauce tames the warm, spiced filling and the arugula adds snap. Avoid overfilling which can cause the sauce to spill and the pita to split. If the pita feels tight, warm it a bit more to make it stretchable.
Make It Your Own
These tips will help you personalize the sandwich while keeping the balance of flavors intact. I expand on small techniques and choices that shift texture and taste so you can make it feel like your own version.
- Choose quality pita: Look for pocketed pita so stuffing is easy, and warm them briefly for pliability and a toasted aroma before slicing.
- Scale the spice: If you prefer milder food, start with half the listed curry and add more after tasting the cooked chickpeas.
- Herb timing: Mince the dill finely and let the sauce rest to allow the oils to infuse the yogurt for a rounder, integrated herb flavor.
- Pan technique: Use medium-low heat and give the chickpeas room in the skillet so they can brown slightly and develop a nutty aroma rather than steaming.
- Salt carefully: Season in stages, tasting after the chickpeas are heated, because different canned products have different salt levels.
- Make ahead: Prepare the yogurt sauce up to a day ahead, keep covered in the fridge, and finish the chickpeas when ready to serve for the best texture.
- Arugula timing: Add the arugula just before serving so it remains crisp and adds a fresh contrast to the warm filling.
Serving Options for Chickpea Curry Stuffed Pita with Dill Yogurt
This sandwich is versatile and works for casual lunches, light dinners, or packed meals. Here are ways I like to present and pair it depending on the occasion, plus storage and timing suggestions so it stays delicious.
- Simple lunch plate: Serve the stuffed pita with a side of raw vegetables for crunch and a wedge of lemon to brighten each bite.
- Weeknight dinner: Pair two stuffed pockets with a warm grain salad for a heartier meal that still comes together quickly.
- Picnic friendly: Pack the cooled chickpeas and sauce separately, then assemble on site so the pita remains intact and not soggy.
- Ramadan or special evenings: This can be a light option to break a fast, offering protein and gentle spices that are comfortable after a day without food.
- Storage tips: Store leftover cooked chickpeas in an airtight container for up to three days and keep the yogurt sauce chilled, assembling just before eating to preserve texture.
- Seasonal pairing: In warmer months I serve extra fresh herbs and sliced cucumber, while in cooler weather a spiced roasted vegetable side complements the curry notes.
- Presentation: Cut the filled pockets diagonally and serve on a platter with small bowls of extra sauce for dipping, making it easy for guests to customize their portions.
FAQ
Conclusion
This sandwich stands out because it pairs warmly spiced chickpeas with a cool, herby yogurt sauce for a balanced, satisfying bite. Try it when you want a fast, flavorful meal that feels thoughtful and homemade. It is forgiving, easy to scale, and perfect for lunch, a light dinner, or for packing on the go. I hope you enjoy assembling these pockets and that they become a regular quick meal in your rotation.
Chickpea Curry Stuffed Pita with Dill Yogurt
Equipment
- Skillet
- Small Bowl
Ingredients
- 3 tablespoons minced fresh dill Finely chop to release bright, anise-like flavors and fold into yogurt for a fresh, herbaceous sauce that complements the curry-spiced chickpeas.
- 1/2 cup plain (whole-milk yogurt) Provide a creamy, tangy base for the dill sauce; whisk with lemon and garlic to create a cooling contrast to the warm filling and add richness to the pita.
- 1 clove garlic (minced or grated) Minced or grated finely to infuse the yogurt with sharp, savory notes; balance heat and brighten the overall flavor when mixed into the dill yogurt.
- Juice from 1/2 a lemon Squeeze fresh to add bright acidity that cuts through the yogurt's richness and enhances the herbs and spices, balancing the dish's flavors.
- 1/4 teaspoons ea salt Season lightly to enhance and balance all components; sprinkle into the yogurt mixture and into the chickpea filling to bring out natural flavors.
- 2 teaspoons olive oil Warm gently to sauté chickpeas and bloom the curry spices; add a silky mouthfeel and help carry aromatic flavors through the filling.
- 1 1/2 cup s1 can cooked chickpeas, drained and rinsed if using canned Rinse if canned and drain before using; mash or pulse slightly to create a hearty, textured filling that soaks up spices and yogurt.
- 2 teaspoons curry spice blend Toast briefly in oil to release its aromatic oils and coat the chickpeas with warm, complex flavor; adjust amount for desired intensity.
- Salt (to taste) Season at the end to taste to ensure balanced seasoning across the yogurt and chickpea filling; add small pinches until the flavor is right.
- 2 pita with pockets (warmed slightly (see note)) Warm slightly to make pockets more pliable and easier to fill; serve as the handheld vessel that holds the chickpea curry, arugula, and sauce.
- 1 cup baby arugula Toss lightly to add peppery, fresh green notes and a crisp textural contrast inside the pita, providing brightness and a lively finish.
Instructions
- Finely mince the dill and place in a small bowl along with the yogurt. Add in the minced/grated garlic, lemon juice, and salt. Stir to combine, set aside, and let rest while making the chickpeas.: As you mince the dill , you'll notice its fresh, slightly grassy scent intensify, which signals the herb is releasing its oils into the mix. After combining with the creamy yogurt , stir until the texture looks smooth and speckled with green. Let it sit so the flavors can marry, which softens the raw edge of both dill and garlic . A good sensory cue is a joined aroma of herb and dairy, not an overpowering sharpness. If the yogurt seems watery, strain briefly in a fine mesh to improve creaminess. Avoid skipping the resting time, or the sauce will taste one dimensional.
- Heat a skillet over medium-low heat. Add the olive oil followed by the chickpeas, curry powder, and salt if needed. Cook until the chickpeas are hot, about five minutes.: When you grate or mince the garlic , its pungent aroma will become apparent, and the tiny flecks should disperse evenly through the sauce. The bright tang of the lemon should cut through the richness, so add a little and then taste for balance. Stir until the sauce glistens slightly and coats the back of a spoon, indicating a good emulsion. Watch for overly sharp garlic, which can dominate; if that happens let the sauce rest longer or add another spoon of yogurt to mellow it. Over-salting at this stage is common, so season conservatively and adjust later if needed.
- Warm the pita bread then slice in half. Stuff with 1/4 of the arugula topped with 1/4 of the chickpeas and a drizzle of about 2 tablespoons of the yogurt sauce.: As the sauce rests, the aromas should blend into a unified herbal creaminess, and you will notice the edge of the lemon soften. This quiet pause matters because it develops a rounder, more integrated flavor when you serve it with warm filling. Keep the bowl covered lightly so the surface does not dry out. A typical mistake is using the sauce immediately, which leaves the components tasting separate rather than harmonious.
- Heat a skillet over medium-low heat: Place your skillet on medium to medium-low and let it warm until you feel steady heat rising from the surface, which usually takes a minute or two. The right pan temperature will gently sizzle when ingredients hit the surface without spattering aggressively, and that controlled heat helps cook the chickpeas through without burning the spice blend. If the pan is too hot the oil and spices can scorch, creating a bitter taste, so lower the heat if you see dark smoke or hear violent popping.
- Add the olive oil followed by the chickpeas, curry powder, and salt if needed: Pour the olive oil and let it shimmer, then add the chickpeas , scattering them so each one touches the pan. Sprinkle the curry and a little salt so the spices bloom in the fat and cling to the beans. As they heat, you will hear a light sizzle and smell warm, toasty spices, which is the cue that flavor is developing. Stir occasionally to encourage even browning and toasting, which brings out a nutty aroma. A mistake to avoid is crowding the pan or stirring too often, which prevents caramelization and leaves the chickpeas steamed rather than toasted.
- Cook until the chickpeas are hot, about five minutes: You will know the chickpeas are ready when they are heated through and begin to show slight golden spots, releasing a warm, spiced scent. The texture should be tender with a gentle resistance, not mushy. Taste one to check seasoning and texture, and adjust with a pinch of salt if it needs lift. If they start to brown too quickly, reduce the heat and add a splash of water to prevent drying. Overcooking can lead to a dry filling, which undermines the pleasant creaminess of the sauce.
- Warm the pita bread then slice in half: Warming the pita makes it pliable and enhances its aroma, creating a faint toasty bread scent. Heat briefly on a skillet or in a warm oven until it is soft and slightly puffy, then slice each round in half to form pockets. The sign you warmed it correctly is a gentle bend without cracking. If you overheat, the pita can become brittle and tear when stuffed, which makes assembly messy.
- Stuff with 1/4 of the arugula topped with 1/4 of the chickpeas and a drizzle of about 2 tablespoons of the yogurt sauce: Place a handful of peppery arugula into the pocket, then add the warm spiced chickpeas . Drizzle with the herbed yogurt so each bite has creamy contrast. The ideal mouthfeel comes from combining a bite of all three elements, where the cool sauce tames the warm, spiced filling and the arugula adds snap. Avoid overfilling which can cause the sauce to spill and the pita to split. If the pita feels tight, warm it a bit more to make it stretchable.
Notes
- Choose quality pita: Look for pocketed pita so stuffing is easy, and warm them briefly for pliability and a toasted aroma before slicing.
- Scale the spice: If you prefer milder food, start with half the listed curry and add more after tasting the cooked chickpeas.
- Herb timing: Mince the dill finely and let the sauce rest to allow the oils to infuse the yogurt for a rounder, integrated herb flavor.
- Pan technique: Use medium-low heat and give the chickpeas room in the skillet so they can brown slightly and develop a nutty aroma rather than steaming.
- Salt carefully: Season in stages, tasting after the chickpeas are heated, because different canned products have different salt levels.
- Make ahead: Prepare the yogurt sauce up to a day ahead, keep covered in the fridge, and finish the chickpeas when ready to serve for the best texture.
- Arugula timing: Add the arugula just before serving so it remains crisp and adds a fresh contrast to the warm filling.