How to Cook Quinoa on the Stovetop
How to Cook Quinoa on the Stovetop is one of those humble kitchen skills I turn to when I want something nourishing, fast, and endlessly adaptable. The first time I learned it I was juggling a too full fridge and a hungry friend, and the neat little pearls of quinoa saved the night. I remember the steam lifting from the pot and that gentle, toasty scent that hinted at comfort, even though the meal was thrown together.
Over the years I have made this version for late night study sessions, midweek dinners, and even for an impromptu brunch. There is a comforting rhythm to the process, the soft rattle of a lid being set down, the tiny white rings appearing around each grain as they puff. Whenever I want a reliable base for a bowl, I reach for How to Cook Quinoa on the Stovetop, because it pairs with so many flavors and it never feels fussy.
What keeps me coming back is the way a simple pot of quinoa can be dressed up or down. Sometimes I stir in a pat of butter and a squeeze of lemon, other times I fold in chopped herbs and bright vegetables. The technique in this recipe makes the texture consistently fluffy, never gummy, and that dependable result is worth learning. I like sharing this method because it gives you space to improvise, and I always feel proud when someone tells me their quinoa turned out perfectly on the first try.
Recipe Snapshot
17 mins
2 mins
15 mins
Easy
220 kcal
American
Vegan, Gluten-Free
Side Dishes
Pot or deep saucepan, Fine mesh sieve, Fork
The Charm of This How to Cook Quinoa on the Stovetop
Reliable Texture Every Time
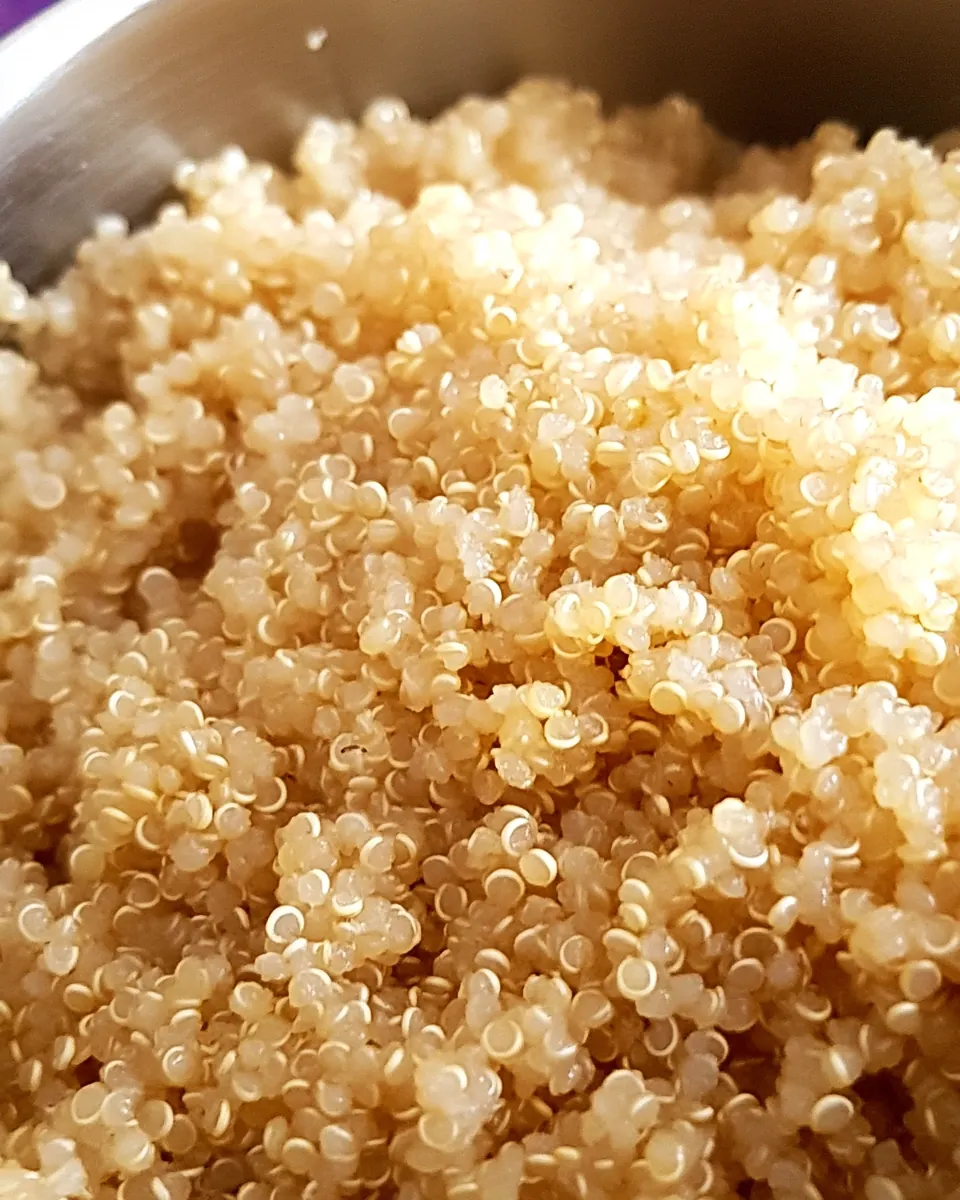
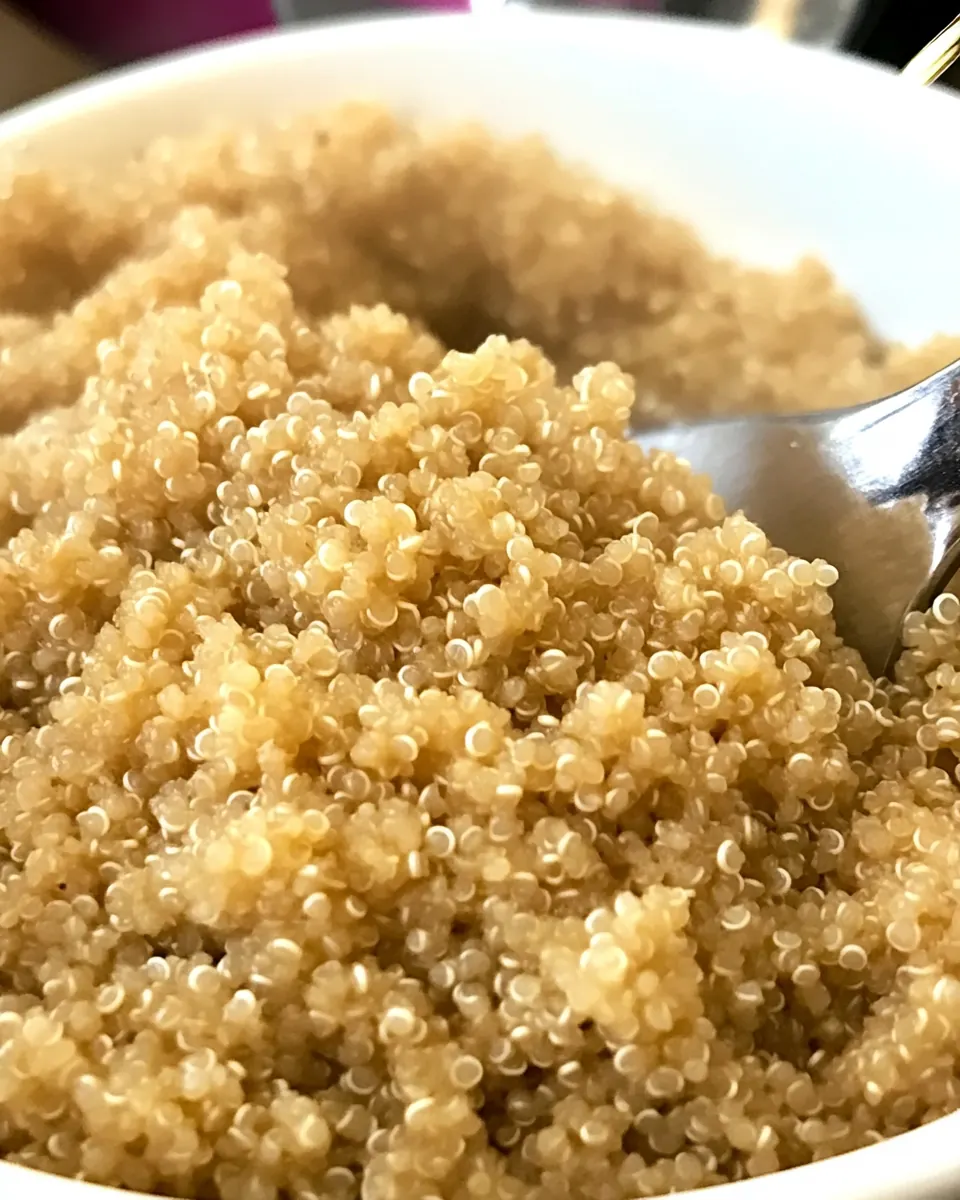
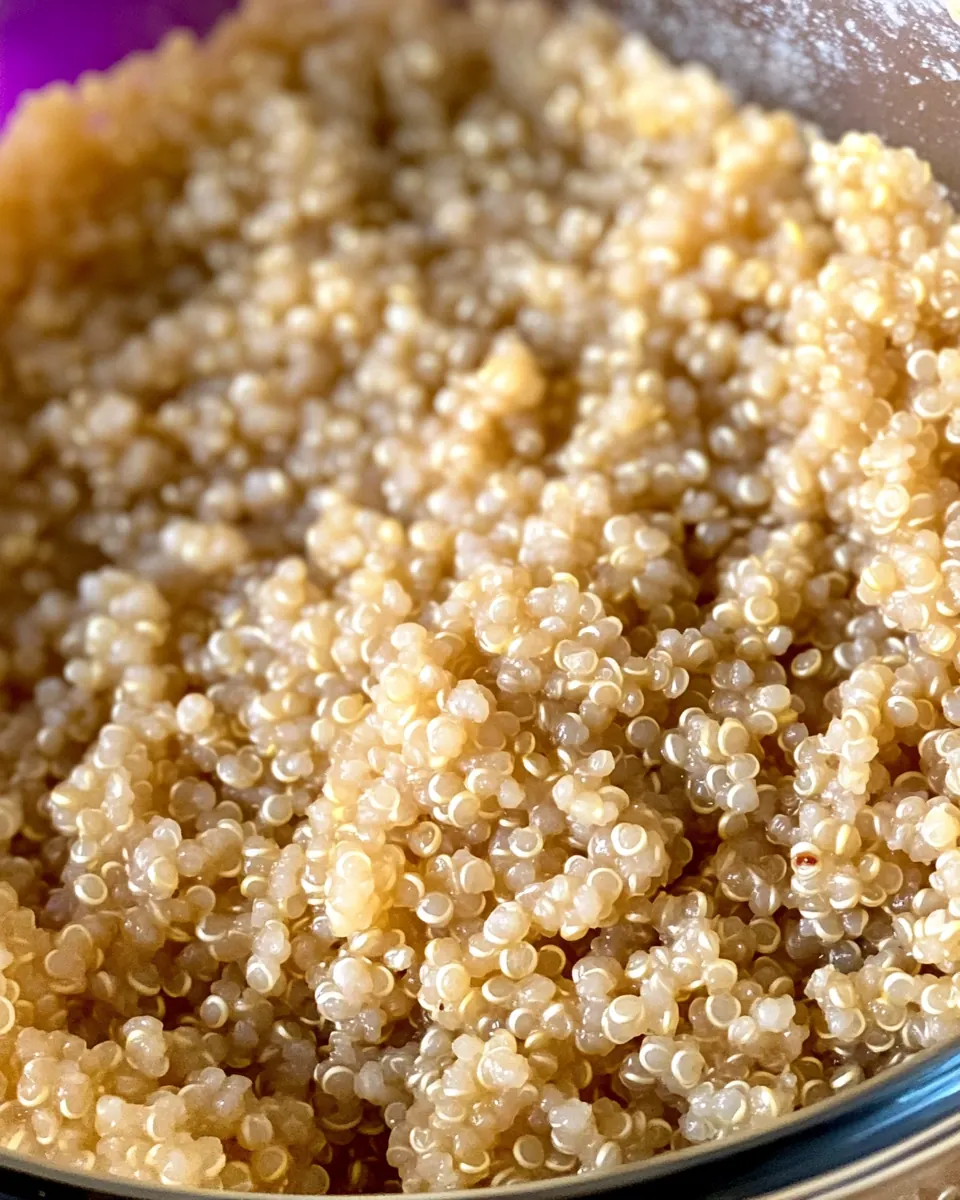
I love that How to Cook Quinoa on the Stovetop delivers a predictable, fluffy texture. When you rinse the quinoa first and use the right water ratio, the grains separate instead of clumping. I find that understanding this small step removes a lot of the anxiety around cooking whole grains.
Speed and Convenience
This method is fast, so I often make it on busy evenings. The active time is minimal, and while the pot is simmering you can prep a salad or roast some vegetables. I appreciate recipes that respect a hectic schedule and still give great results.
Versatility on the Plate
Quinoa is a brilliant blank canvas. I use this base for warm bowls, chilled salads, and even as a bed for sautéed vegetables. In my kitchen it transforms depending on what I have on hand, which makes the recipe feel endlessly useful.
Clear Visual Cues
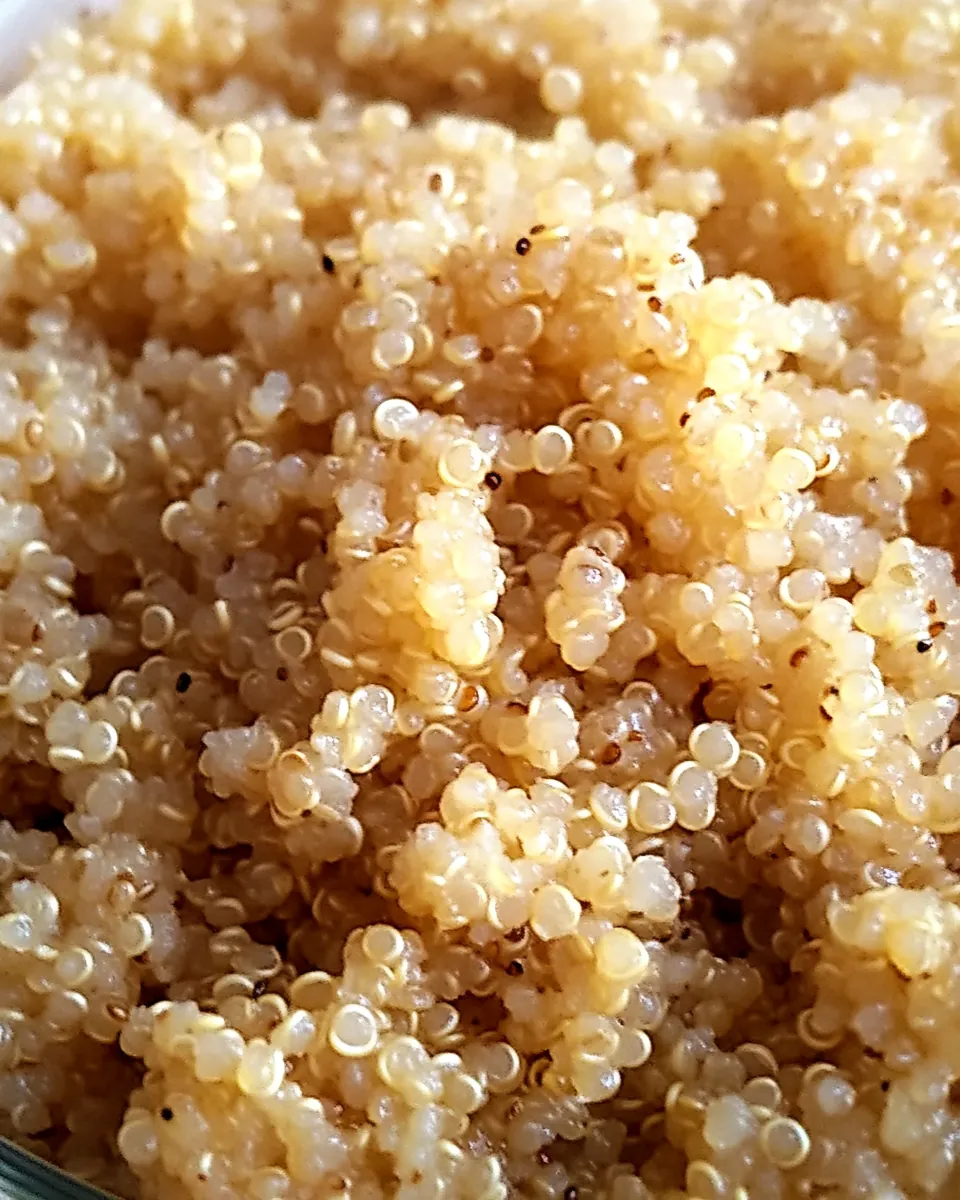
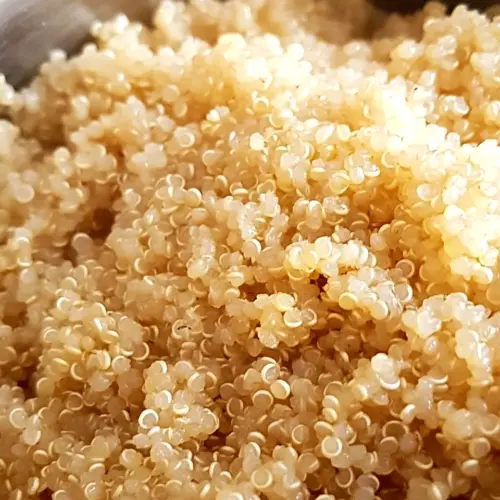
I teach people to watch for visual signs, like the tiny white rings that appear around each grain and the way steam changes as water is absorbed. Those cues make the technique approachable, and I love seeing the relief on someone’s face when they realize it is easier than they thought.
Healthy and Satisfying
This recipe gives you a hearty, protein rich base without fuss. I reach for it on days I want something filling but light, and it pairs beautifully with a wide range of flavors. That balance of health and comfort is why I keep returning to it.
What to Gather for How to Cook Quinoa on the Stovetop
These ingredients are minimal by design, each one playing a clear role. The quinoa provides the base and texture, the water or broth supplies cooking liquid and flavor, and the salt brings everything into focus. Together they form a simple, balanced trio that lets the grain shine while staying flexible for many meals.
- 1 cup quinoa white or tri-color/rainbow: Rinse thoroughly and toast briefly to remove any bitter saponins and enhance nutty flavor; provide the base grain texture for the final dish. Maintain a light fluffiness by properly rinsing and draining to prevent clumping. Use as the primary source of body and nutrition in the recipe.
- 2 cups water or broth: Bring to a boil then simmer gently to cook the quinoa and infuse flavor; act as the cooking medium that hydrates and softens the grains. Choose broth for extra savory depth or water for a neutral profile, adjusting for desired taste. Measure accurately to ensure proper quinoa-to-liquid ratio for ideal tenderness.
- 1/4 teaspoons salt: Season lightly at the start of cooking to enhance and balance flavors; contribute to overall taste and help bring out the quinoa's natural nuttiness. Adjust amount as needed for dietary preferences, adding gradually to avoid over-salting. Use fine salt so it dissolves evenly during simmering.
Putting Together How to Cook Quinoa on the Stovetop
Assembling this recipe is simple and calming. The steps are straightforward, and spending a few attentive minutes at the stove rewards you with a fluffy, versatile grain. Below I expand each direction into helpful, sensory rich guidance so you know exactly what to watch for and how to fix common hiccups.
- Rinse quinoa under cool water until water runs clear.: You will feel the tiny seeds tumble under your fingers as you rinse them, and the initial cloudiness will fade to clear, which is your visual confirmation that the bitter saponin coating is washing away. Use a fine mesh sieve so the small grains do not slip through, and swirl the quinoa vigorously, listening for the soft cascade sound as water moves through. If you skip this step the final dish can taste slightly soapy or bitter, so do not rush it. A common mistake is using hot water to rinse, which can start hydrating the grains prematurely; stick with cool water. After rinsing, shake off excess water so the measured liquid ratio remains accurate.
- Combine quinoa, salt, and 2 cups water in a pot or deep saucepan and bring to a boil. Reduce heat to low and let simmer, uncovered, until water is absorbed and white rings form around each grain, about 15 minutes. Add a small splash of water towards the end if quinoa becomes too dry.: As the pot warms, you will notice a toasty, grainlike aroma lifting from the pan, a nice hint of what is to come. The moment the surface begins to bubble vigorously is when the transformation starts, and that bright rolling boil signals that the heat is high enough. Use a snug fitting lid nearby, and position the pot on a burner that gives even heat distribution. Avoid a thin, flimsy pan which can scorch the bottom, and do not walk away during boiling. A common slip is letting the boil get too violent, which can cause foaming or spillage; aim for a steady, robust boil just long enough to start the cooking process.
- Cover pot, remove from heat, and let stand for about 5 minutes before fluffing with a fork.: The simmer stage is where texture is made, and you should hear a gentle whisper of bubbles rather than loud boiling. Watch closely as the surface calms and the pot's contents quiet down, a sign that the water is being absorbed. Visually inspect the grains; those tiny white rings or tails indicate the quinoa has expanded and released its germ, which is the hallmark of doneness. This period builds a tender but slightly springy bite, and maintaining low, even heat prevents boiling over or burning. If your burner runs hot, reduce to the lowest setting to avoid drying the grains too quickly. A common error here is covering the pot during simmer, which traps steam and can make the texture gummy; keep it uncovered as instructed.
- Add a small splash of water towards the end if quinoa becomes too dry.: As the grains near completion, you may notice some pockets that are still hard or excessively dry; a tablespoon or two of hot water can even out the cooking without restarting the process. Gently stir with a fork so you do not mash the grains, and feel for a light, fluffy texture as the water integrates. This small adjustment helps prevent uneven chewiness and keeps the final mouthfeel pleasant. Avoid adding cold water straight from the tap, which can shock the grains and lower the pot temperature significantly. A common misstep is overcompensating with too much water, which will push the texture toward mushy rather than fluffy.
- Cover pot, remove from heat, and let stand for about 5 minutes before fluffing with a fork.: The resting period allows trapped steam to finish the gentle cooking, and you will notice the surface settle and become slightly glossy. Keeping the lid on preserves warmth and yields a more even interior texture. After five minutes, use a fork to gently separate the grains, coaxing air into the pot so each seed puffs and loosens. The sound is subtle, a delicate rustle as the grains part, and the aroma becomes more pronounced, subtly toasted and nutty. If you try to fluff too early you risk compacting the grains, making them clump together. A frequent error is vigorously stirring with a spoon, which compresses the quinoa ; use a fork and light motions instead.
Pro Tips and Tweaks
I like to think of small adjustments as the difference between good and great quinoa. These tips expand on the basics, helping you tailor the texture and flavor to your needs, whether you want a neutral base or something more savory.
- Rinsing matters, always rinse in a fine mesh sieve to remove the natural saponins that can taste bitter and to ensure a clean, fresh tasting grain.
- Choose your liquid wisely, use water for neutrality or a mild broth for extra depth, remembering to reduce added salt if you pick a salty broth.
- Watch the simmer, keep the heat low after boiling so the quinoa cooks gently and swells without breaking, which preserves a pleasant bite.
- Fluff with a fork, after resting gently separate the grains with a fork to keep them light and airy instead of compacted.
- Adjust final moisture, if spots are still firm, add a small splash of hot water and cover briefly rather than reboiling, which helps avoid overcooking.
What Complements This How to Cook Quinoa on the Stovetop
How to Cook Quinoa on the Stovetop is a wonderfully adaptable base that suits casual lunches, weeknight dinners, and festive spreads alike. Here are thoughtful serving ideas and practical storage notes so you can make the most of every batch.
- Warm bowls, serve the quinoa as a foundation for warm bowl meals by topping with roasted vegetables and a dollop of yogurt or a drizzle of dressing for a complete, comforting plate.
- Chilled salads, cool the cooked quinoa and toss with chopped herbs, citrus, and a light vinaigrette for a refreshing salad suited to lunch or a picnic.
- Side for proteins, pair the grain with simply cooked proteins for a balanced dinner, using the neutral flavor as a companion rather than a competing element.
- Meal prep, store cooled quinoa in airtight containers in the refrigerator for up to four days to speed up weekday lunches and dinners.
- Freezing tips, freeze portions in freezer safe bags for up to three months and reheat gently with a splash of water to revive texture.
- Occasions, this dish suits everyday meals, Ramadan meal prep, light brunches, and casual gatherings, because it scales well and remains reliable.
FAQ
Conclusion
What makes this recipe special is its simplicity and dependability, yielding fluffy, flavorful quinoa with minimal fuss. Give How to Cook Quinoa on the Stovetop a try tonight and you might find it becomes a kitchen staple for weeknight bowls, salads, and meal prep. I hope you enjoy the comforting routine of stirring, resting, and fluffing this humble grain, and that it opens up lots of easy, satisfying meal possibilities.
How to Cook Quinoa on the Stovetop
Equipment
- Pot or deep saucepan
- Fine mesh sieve
- Fork
Ingredients
- 1 cup quinoa white or tri-color/rainbow Rinse thoroughly and toast briefly to remove any bitter saponins and enhance nutty flavor; provide the base grain texture for the final dish. Maintain a light fluffiness by properly rinsing and draining to prevent clumping. Use as the primary source of body and nutrition in the recipe.
- 2 cups water or broth Bring to a boil then simmer gently to cook the quinoa and infuse flavor; act as the cooking medium that hydrates and softens the grains. Choose broth for extra savory depth or water for a neutral profile, adjusting for desired taste. Measure accurately to ensure proper quinoa-to-liquid ratio for ideal tenderness.
- 1/4 teaspoons salt Season lightly at the start of cooking to enhance and balance flavors; contribute to overall taste and help bring out the quinoa's natural nuttiness. Adjust amount as needed for dietary preferences, adding gradually to avoid over-salting. Use fine salt so it dissolves evenly during simmering.
Instructions
- Rinse quinoa under cool water until water runs clear.: You will feel the tiny seeds tumble under your fingers as you rinse them, and the initial cloudiness will fade to clear, which is your visual confirmation that the bitter saponin coating is washing away. Use a fine mesh sieve so the small grains do not slip through, and swirl the quinoa vigorously, listening for the soft cascade sound as water moves through. If you skip this step the final dish can taste slightly soapy or bitter, so do not rush it. A common mistake is using hot water to rinse, which can start hydrating the grains prematurely; stick with cool water. After rinsing, shake off excess water so the measured liquid ratio remains accurate.
- Combine quinoa, salt, and 2 cups water in a pot or deep saucepan and bring to a boil. Reduce heat to low and let simmer, uncovered, until water is absorbed and white rings form around each grain, about 15 minutes. Add a small splash of water towards the end if quinoa becomes too dry.: As the pot warms, you will notice a toasty, grainlike aroma lifting from the pan, a nice hint of what is to come. The moment the surface begins to bubble vigorously is when the transformation starts, and that bright rolling boil signals that the heat is high enough. Use a snug fitting lid nearby, and position the pot on a burner that gives even heat distribution. Avoid a thin, flimsy pan which can scorch the bottom, and do not walk away during boiling. A common slip is letting the boil get too violent, which can cause foaming or spillage; aim for a steady, robust boil just long enough to start the cooking process.
- Cover pot, remove from heat, and let stand for about 5 minutes before fluffing with a fork.: The simmer stage is where texture is made, and you should hear a gentle whisper of bubbles rather than loud boiling. Watch closely as the surface calms and the pot's contents quiet down, a sign that the water is being absorbed. Visually inspect the grains; those tiny white rings or tails indicate the quinoa has expanded and released its germ, which is the hallmark of doneness. This period builds a tender but slightly springy bite, and maintaining low, even heat prevents boiling over or burning. If your burner runs hot, reduce to the lowest setting to avoid drying the grains too quickly. A common error here is covering the pot during simmer, which traps steam and can make the texture gummy; keep it uncovered as instructed.
- Add a small splash of water towards the end if quinoa becomes too dry.: As the grains near completion, you may notice some pockets that are still hard or excessively dry; a tablespoon or two of hot water can even out the cooking without restarting the process. Gently stir with a fork so you do not mash the grains, and feel for a light, fluffy texture as the water integrates. This small adjustment helps prevent uneven chewiness and keeps the final mouthfeel pleasant. Avoid adding cold water straight from the tap, which can shock the grains and lower the pot temperature significantly. A common misstep is overcompensating with too much water, which will push the texture toward mushy rather than fluffy.
- Cover pot, remove from heat, and let stand for about 5 minutes before fluffing with a fork.: The resting period allows trapped steam to finish the gentle cooking, and you will notice the surface settle and become slightly glossy. Keeping the lid on preserves warmth and yields a more even interior texture. After five minutes, use a fork to gently separate the grains, coaxing air into the pot so each seed puffs and loosens. The sound is subtle, a delicate rustle as the grains part, and the aroma becomes more pronounced, subtly toasted and nutty. If you try to fluff too early you risk compacting the grains, making them clump together. A frequent error is vigorously stirring with a spoon, which compresses the quinoa ; use a fork and light motions instead.
Notes
- Rinsing matters, always rinse in a fine mesh sieve to remove the natural saponins that can taste bitter and to ensure a clean, fresh tasting grain.
- Choose your liquid wisely, use water for neutrality or a mild broth for extra depth, remembering to reduce added salt if you pick a salty broth.
- Watch the simmer, keep the heat low after boiling so the quinoa cooks gently and swells without breaking, which preserves a pleasant bite.
- Fluff with a fork, after resting gently separate the grains with a fork to keep them light and airy instead of compacted.
- Adjust final moisture, if spots are still firm, add a small splash of hot water and cover briefly rather than reboiling, which helps avoid overcooking.