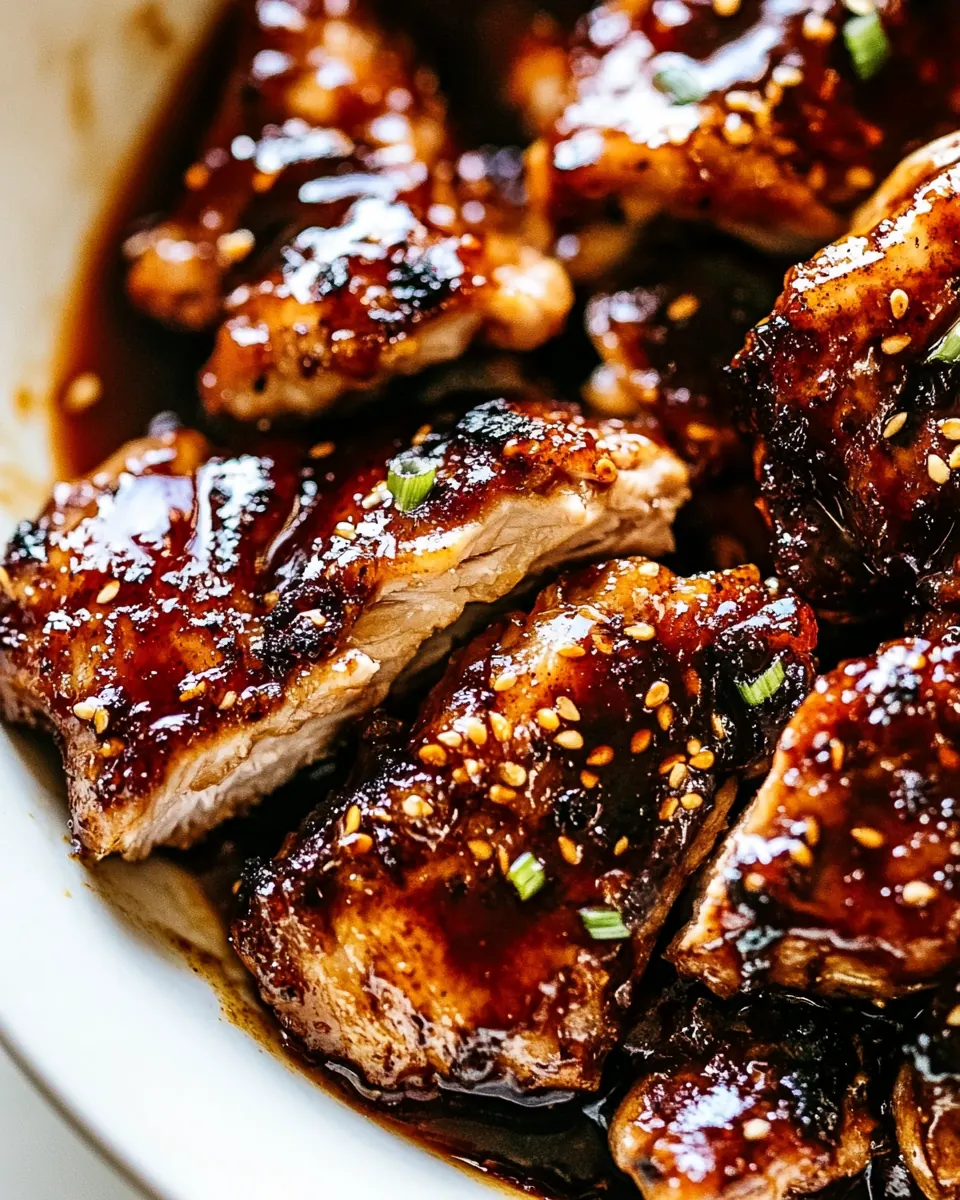
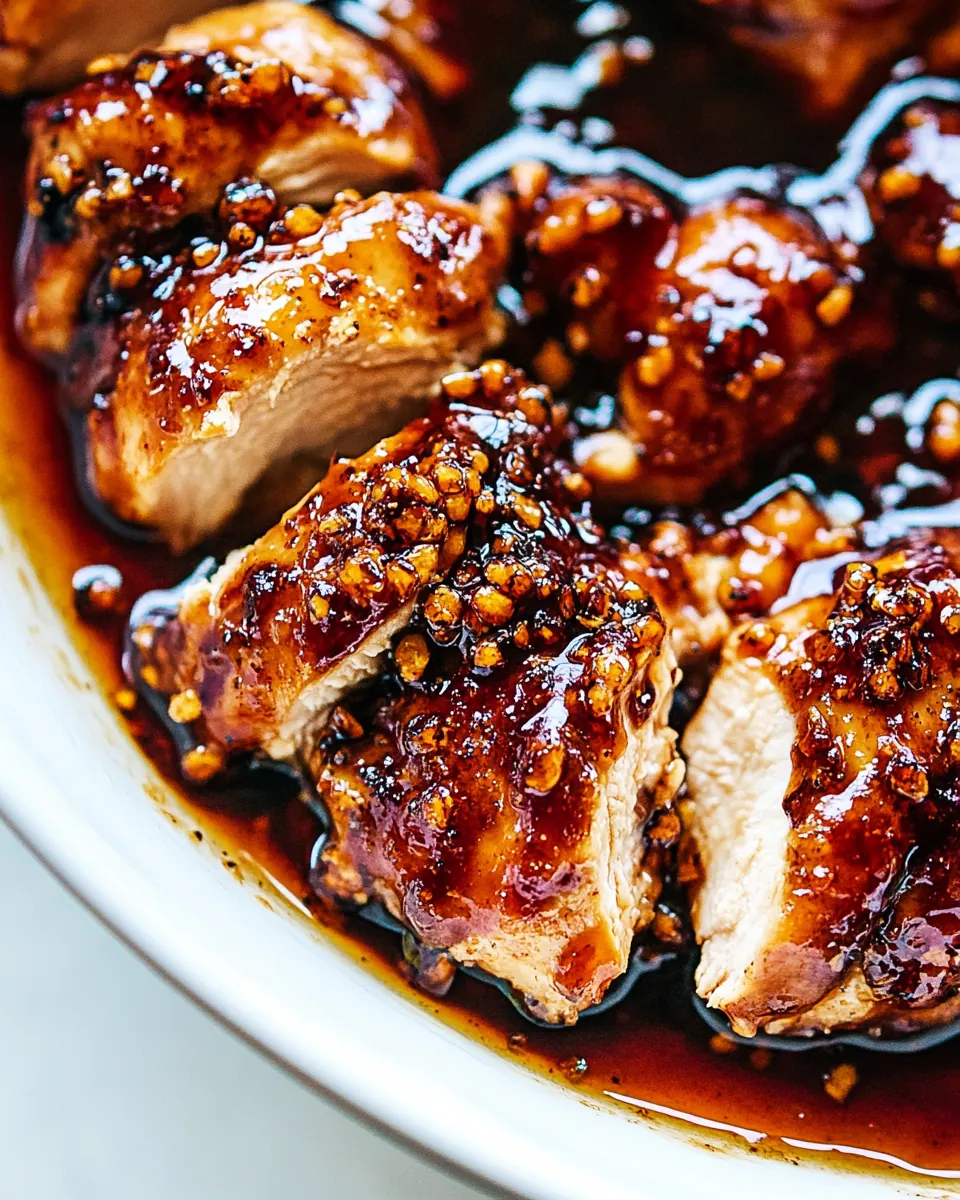
Hot Honey Chicken
Hot Honey Chicken is one of those dishes I fall back on when I want something quick, bold, and a little bit showy without a ton of fuss.
I learned this version on a rushed weeknight when I had a craving for something sweet, spicy, and sticky that would cheer up everyone at the table. I remember patting the chicken dry, dredging it in flour, and frying until the edges turned that warm, golden color that smells like comfort. The sauce came together in the same skillet, the honey bubbling and the chili paste releasing that sharp, assertive aroma that makes the kitchen hum.
What I really love about Hot Honey Chicken is how forgiving it is. If I am short on time I skip the exacting precision, and if I want to impress guests I plate it with extra sauce, a scatter of chili flakes, and a confident smile. The texture contrast of a lightly crisped exterior and a juicy interior keeps you reaching for one more bite, and the interplay of sweet and heat makes it memorable every time. I often tweak the cayenne for the people at my table, and that little adjustment always sparks conversation about spice tolerance and flavor balance.
Recipe Snapshot
25 mins
15 mins
10 mins
Medium
400 kcal
American
Gluten-Free, Paleo
Dinner
Large skillet, Shallow dish, Knife, Tongs
What Sets This Hot Honey Chicken Apart
Bold, Balanced Flavor
I love how Hot Honey Chicken walks the line between sweet and spicy. The honey brings a glossy sweetness that softens the heat, while the chili paste and cayenne add that punch that wakes up your palate. I find this contrast keeps each bite interesting and prevents the dish from feeling one dimensional.
Speed Without Sacrifice
This recipe is fast, yet it does not skimp on technique. I appreciate being able to get a full flavored meal on the table in under 30 minutes. Quick frying and finishing the chicken in the pan with the sauce gives you a concentrated glaze, so you get maximum flavor with minimum time.
Textural Delight
The light flour dredge creates a thin crust that crisps in the skillet, giving you a pleasing contrast to the tender meat inside. I always aim for that golden exterior because it adds visual appeal and a satisfying mouthfeel that makes the sweet sticky sauce sing.
Flexible and Friendly
I often adapt the heat level to who I am feeding, and this recipe tolerates tweaks well. Swap chili paste varieties or ease up on the cayenne, the core method still shines. That flexibility makes Hot Honey Chicken a reliable choice for family dinners or a casual get together.
Great for Leftovers
Leftover slices of chicken keep their flavor and reheat nicely, making this a practical pick for meal planning. The sauce clings to the meat, so reheated portions still feel fresh and indulgent.
Hot Honey Chicken Ingredients
These ingredients are chosen to create a quick, balanced glaze and a crisp exterior for the chicken. Each component has a job, from seasoning and structure to aroma and heat. The flour forms a light crust, the fats transfer heat and flavor, and the honey and chili paste create the glossy, spicy sauce.
- 1 pound chicken breast, boneless and skinless (2 fillets): Season generously to enhance flavor and help balance the sweetness and heat in the finished dish; use both salt and pepper to taste before cooking the chicken for best results. Create a simple seasoning base by sprinkling evenly and letting the chicken rest briefly to allow flavors to penetrate. Adjust amounts based on dietary needs or preference for a milder or more pronounced seasoning.
- Salt and pepper, to season: Season sparingly to provide basic savory balance and highlight the natural taste of the chicken without overpowering the sauce. Use coarse salt for crust formation when searing and freshly ground black pepper for brightness. Taste and adjust as you cook to maintain harmony between spicy and sweet elements.
- 1/3 cup flour: Coat lightly to create a crisp exterior when frying or sautéing, helping the sauce adhere to the chicken. Use a shallow dish for dredging so excess flour shakes off and avoids gummy coating. Combine with seasoning if desired to add an additional layer of flavor to the crust.
- 1 tablespoon cooking oil: Heat briefly to provide the cooking medium for searing the floured chicken and developing a golden-brown crust. Choose a neutral high-heat oil to prevent burning and allow even heat distribution across the pan. Add just enough to coat the pan thinly to promote proper browning without excess greasiness.
- 2 tablespoons unsalted butter: Melt gently to enrich the pan sauce and contribute a silky mouthfeel that complements the honey's sweetness. Use unsalted butter to allow precise control of the dish's overall salt level and add to the pan after searing for flavor and sauce creation. Clarify slightly in the pan to avoid burning before adding garlic and other aromatics.
- 4 cloves garlic, chopped or minced: Cook briefly to release pungent aromatics that form the flavor foundation of the sauce; mince or chop finely for even distribution. Add toward the end of frying the chicken or when melting butter to avoid burning and to infuse the sauce with savory depth. Stir constantly once added to prevent sticking and to encourage a fragrant base.
- 1 1/2 tablespoons chili paste (or Sriracha or Franks Red Hot Sauce): Incorporate carefully to provide concentrated heat and savory complexity; choose preferred brand for desired spice level. Mix into the sauce to create a balanced spicy-sweet profile and adjust quantity if using stronger or milder pastes. Combine with soy sauce and honey to marry umami and sweetness with a chili kick.
- 1 tablespoon soy sauce: Add to deepen umami and introduce salty-sweet savory notes that round out the sauce profile. Stir into the pan sauce to help balance the honey's sweetness and to provide depth that complements the chili paste. Use low-sodium if controlling overall saltiness is desired.
- 1/3 cup honey: Pour slowly to supply primary sweetness and viscosity, helping the sauce thicken and glaze the chicken. Warm slightly before mixing to blend smoothly with butter and chili paste, forming a glossy coating. Adjust amount to control final sweetness and sticky texture on the chicken.
- 3/4 teaspoon cayenne pepper, adjust to your taste: Sprinkle cautiously to introduce an additional dry heat element that amplifies the sauce's spiciness; adjust to personal tolerance. Use to fine-tune the balance between heat and sweetness without altering the sauce’s moisture. Start with less and add more incrementally to avoid overpowering the other flavors.
- 1/2 teaspoon garlic powder: Dust lightly to reinforce the garlic flavor profile and add subtle savory depth, especially when fresh garlic is used sparingly. Incorporate into the flour or sprinkle on the chicken before cooking to enhance overall aromatic presence. Use sparingly to prevent a powdery aftertaste while supporting the sauce's garlicky notes.
- 1/2 teaspoon red chili flakes: Shake sparingly to add bursts of concentrated chili heat and visual flecks in the finished glaze, enhancing perceived spiciness and texture. Toss into the sauce toward the end of cooking to preserve some of the flakes' heat and bright red color. Adjust amount for heat tolerance and preferred level of visible spice.
Making This Hot Honey Chicken

The method is straightforward and rewarding, letting you develop layers of flavor in a single skillet. I like to keep the pan handy and move deliberately so the sauce reduces to a glossy coating. Below, each core step from the recipe is laid out with sensory cues, reasons behind the technique, and common troubleshooting tips so you know exactly what to watch for.
- Cut the breasts in half horizontally to create 4 fillets. Season each side with salt and pepper. Set aside.: The first sensory cue is the way the meat gives under your knife, indicating a clean, even cut that will cook uniformly. Seasoning early lets the salt start to work on the surface, improving flavor and encouraging a better crust when seared. A common mistake here is uneven thickness, which leads to one piece overcooking while another is underdone; use your palm to steady the breast and slice slowly for consistent fillets.
- Place flour in a medium-sized shallow dish. Dredge chicken in flour; shake off excess.: You should see a light, even coating that clings without clumping, and it will feel slightly dusty to the touch. This thin flour layer is crucial because it browns quickly and forms the base of the crust that will hold the sauce. If you skip shaking off excess, the flour can gum up and create a gummy texture instead of a crisp one, so tap gently to remove loose flour.
- Heat 1 tablespoon of butter with the oil in a large skillet over medium-high heat.: Expect a shimmer across the oil and the butter melting into a foamy ribbon, producing a warm, nutty aroma. The mix raises the smoke point and gives you a balance of flavor and heat tolerance. If the pan is too cool the chicken will stick and not brown properly, while too hot will char the coating before the inside cooks; adjust heat so the fat sizzles but does not smoke aggressively.
- Place chicken in skillet and cook for 2–3 minutes on each side until golden. Remove chicken and set aside.: You want a clear sizzling sound and a visual cue of golden brown edges, signaling the Maillard reaction that creates flavor. The chicken should release from the pan easily when the crust is ready. If it pulls and tears, it probably needs a bit more time; do not prod constantly, let it form that crust. Overcooking at this stage will dry the meat, so aim for a brief, confident sear.
- Heat the remaining butter in the pan. Add the garlic and cook until fragrant, about 1 minute.: Watch the garlic soften and release a heady aroma, but be careful because it can shift from fragrant to bitter quickly. You should see gentle bubbling and a change to a lighter golden tint in the butter. If the garlic darkens too much, it will taste burnt, so lower the heat and stir constantly for an even, sweet result.
- Reduce heat to low. Add soy sauce, chili paste (Sriracha or hot sauce), honey, cayenne and garlic powder. Stir well to combine.: On low heat the sauce will come together with a glossy sheen and a layered scent of sweet, salty, and spicy. Stir until the honey dissolves and the ingredients create a cohesive glaze. If you leave the heat too high, the honey can burn and taste bitter, so maintain a gentle simmer for a balanced reduction.
- Add the chicken back into the pan and let simmer in the sauce for a further 30 seconds while coating the chicken with the sauce. Season with the chili flakes to your taste, and a little extra salt and pepper. (If the sauce gets too thick, mix through 1-2 tablespoons of water.): You should hear a soft simmer and see the sauce cling to the edges of the chicken , turning glossy as it reduces. The short simmer allows the flavors to marry while avoiding toughening the meat. A typical pitfall is over reducing, which yields a sticky, almost crystallized sauce; use the suggested water to loosen it if needed and taste before adding more salt.
- Immediately remove from stove. To serve, slice each piece of chicken into strips and drizzle with the remaining sauce left over in the pan.: The final moment is tactile and visual, the sliced chicken revealing a tender interior with a shiny glaze clinging to the surface. Letting it rest off heat briefly maintains juiciness, and the drizzled sauce adds the finishing flavor. If you slice too soon while piping hot, the juices can run out and leave the meat drier, so give it a short pause before cutting.
Tips for Success
This list expands on simple practices that make the recipe shine. I include practical, actionable tips that help control texture, heat, and flavor so you get consistent results each time you make Hot Honey Chicken.
- Dry and even fillets are essential for consistent cooking, so trim and press the breasts to an even thickness before slicing into fillets.
- Don’t overcrowd the skillet, give each fillet space so the pan temperature stays high and the crust forms rather than stewing in its own juices.
- Finish on low heat to meld the sauce without toughening the meat, a gentle simmer keeps the glaze glossy and balanced.
- Use a neutral oil with butter to combine flavor and a higher smoke point, preventing burnt butter notes while adding richness.
- Taste as you go and adjust the cayenne or chili paste gradually, especially if serving guests with different spice tolerances.
What to Pair With Hot Honey Chicken
I like to serve Hot Honey Chicken with simple, complementary sides that soak up the sauce and provide textural contrast. Think fresh, crisp, or steamed components that balance the sweet heat.
- Steamed rice is a classic base, its neutral texture absorbs the sauce and lets the flavor shine.
- Light green salad with a citrus vinaigrette cuts through the richness and adds freshness to each bite.
- Roasted vegetables like carrots or broccoli provide roasted notes that pair well with the honey glaze.
- Warm flatbreads or tortillas allow you to tear, wrap, and scoop up any extra sauce for a fun, casual meal.
- Casual occasions such as weeknight dinners, outdoor gatherings, or when you want a crowd pleasing main that is quick to prepare.
- Storage tips Keep leftovers in an airtight container for up to three days; reheat gently to preserve juiciness and loosen sauce with a splash of water if needed.
- Seasonal pairing works year round, but I especially enjoy this in cooler months when the sticky, warming glaze feels comforting.
FAQ
Conclusion
Hot Honey Chicken stands out because it pairs crisp seared meat with a glossy, spicy sweet glaze that is both comforting and exciting. Give it a try this week if you want a fast, flavorful meal that feels special without elaborate prep. I hope the tips and step by step notes help you get a perfectly glazed, juicy result that will have everyone reaching for seconds.

Hot Honey Chicken
Equipment
- Large Skillet
- Shallow Dish
- Knife
- Tongs
Ingredients
- 1 pound chicken breast, boneless and skinless (2 fillets) Season generously to enhance flavor and help balance the sweetness and heat in the finished dish; use both salt and pepper to taste before cooking the chicken for best results. Create a simple seasoning base by sprinkling evenly and letting the chicken rest briefly to allow flavors to penetrate. Adjust amounts based on dietary needs or preference for a milder or more pronounced seasoning.
- Salt and pepper, to season Season sparingly to provide basic savory balance and highlight the natural taste of the chicken without overpowering the sauce. Use coarse salt for crust formation when searing and freshly ground black pepper for brightness. Taste and adjust as you cook to maintain harmony between spicy and sweet elements.
- 1/3 cup flour Coat lightly to create a crisp exterior when frying or sautéing, helping the sauce adhere to the chicken. Use a shallow dish for dredging so excess flour shakes off and avoids gummy coating. Combine with seasoning if desired to add an additional layer of flavor to the crust.
- 1 tablespoon cooking oil Heat briefly to provide the cooking medium for searing the floured chicken and developing a golden-brown crust. Choose a neutral high-heat oil to prevent burning and allow even heat distribution across the pan. Add just enough to coat the pan thinly to promote proper browning without excess greasiness.
- 2 tablespoons unsalted butter Melt gently to enrich the pan sauce and contribute a silky mouthfeel that complements the honey's sweetness. Use unsalted butter to allow precise control of the dish's overall salt level and add to the pan after searing for flavor and sauce creation. Clarify slightly in the pan to avoid burning before adding garlic and other aromatics.
- 4 cloves garlic, chopped or minced Cook briefly to release pungent aromatics that form the flavor foundation of the sauce; mince or chop finely for even distribution. Add toward the end of frying the chicken or when melting butter to avoid burning and to infuse the sauce with savory depth. Stir constantly once added to prevent sticking and to encourage a fragrant base.
- 1 1/2 tablespoons chili paste (or Sriracha or Franks Red Hot Sauce) Incorporate carefully to provide concentrated heat and savory complexity; choose preferred brand for desired spice level. Mix into the sauce to create a balanced spicy-sweet profile and adjust quantity if using stronger or milder pastes. Combine with soy sauce and honey to marry umami and sweetness with a chili kick.
- 1 tablespoon soy sauce Add to deepen umami and introduce salty-sweet savory notes that round out the sauce profile. Stir into the pan sauce to help balance the honey's sweetness and to provide depth that complements the chili paste. Use low-sodium if controlling overall saltiness is desired.
- 1/3 cup honey Pour slowly to supply primary sweetness and viscosity, helping the sauce thicken and glaze the chicken. Warm slightly before mixing to blend smoothly with butter and chili paste, forming a glossy coating. Adjust amount to control final sweetness and sticky texture on the chicken.
- 3/4 teaspoon cayenne pepper, adjust to your taste Sprinkle cautiously to introduce an additional dry heat element that amplifies the sauce's spiciness; adjust to personal tolerance. Use to fine-tune the balance between heat and sweetness without altering the sauce’s moisture. Start with less and add more incrementally to avoid overpowering the other flavors.
- 1/2 teaspoon garlic powder Dust lightly to reinforce the garlic flavor profile and add subtle savory depth, especially when fresh garlic is used sparingly. Incorporate into the flour or sprinkle on the chicken before cooking to enhance overall aromatic presence. Use sparingly to prevent a powdery aftertaste while supporting the sauce's garlicky notes.
- 1/2 teaspoon red chili flakes Shake sparingly to add bursts of concentrated chili heat and visual flecks in the finished glaze, enhancing perceived spiciness and texture. Toss into the sauce toward the end of cooking to preserve some of the flakes' heat and bright red color. Adjust amount for heat tolerance and preferred level of visible spice.
Instructions
- Cut the breasts in half horizontally to create 4 fillets. Season each side with salt and pepper. Set aside.: The first sensory cue is the way the meat gives under your knife, indicating a clean, even cut that will cook uniformly. Seasoning early lets the salt start to work on the surface, improving flavor and encouraging a better crust when seared. A common mistake here is uneven thickness, which leads to one piece overcooking while another is underdone; use your palm to steady the breast and slice slowly for consistent fillets.
- Place flour in a medium-sized shallow dish. Dredge chicken in flour; shake off excess.: You should see a light, even coating that clings without clumping, and it will feel slightly dusty to the touch. This thin flour layer is crucial because it browns quickly and forms the base of the crust that will hold the sauce. If you skip shaking off excess, the flour can gum up and create a gummy texture instead of a crisp one, so tap gently to remove loose flour.
- Heat 1 tablespoon of butter with the oil in a large skillet over medium-high heat.: Expect a shimmer across the oil and the butter melting into a foamy ribbon, producing a warm, nutty aroma. The mix raises the smoke point and gives you a balance of flavor and heat tolerance. If the pan is too cool the chicken will stick and not brown properly, while too hot will char the coating before the inside cooks; adjust heat so the fat sizzles but does not smoke aggressively.
- Place chicken in skillet and cook for 2–3 minutes on each side until golden. Remove chicken and set aside.: You want a clear sizzling sound and a visual cue of golden brown edges, signaling the Maillard reaction that creates flavor. The chicken should release from the pan easily when the crust is ready. If it pulls and tears, it probably needs a bit more time; do not prod constantly, let it form that crust. Overcooking at this stage will dry the meat, so aim for a brief, confident sear.
- Heat the remaining butter in the pan. Add the garlic and cook until fragrant, about 1 minute.: Watch the garlic soften and release a heady aroma, but be careful because it can shift from fragrant to bitter quickly. You should see gentle bubbling and a change to a lighter golden tint in the butter. If the garlic darkens too much, it will taste burnt, so lower the heat and stir constantly for an even, sweet result.
- Reduce heat to low. Add soy sauce, chili paste (Sriracha or hot sauce), honey, cayenne and garlic powder. Stir well to combine.: On low heat the sauce will come together with a glossy sheen and a layered scent of sweet, salty, and spicy. Stir until the honey dissolves and the ingredients create a cohesive glaze. If you leave the heat too high, the honey can burn and taste bitter, so maintain a gentle simmer for a balanced reduction.
- Add the chicken back into the pan and let simmer in the sauce for a further 30 seconds while coating the chicken with the sauce. Season with the chili flakes to your taste, and a little extra salt and pepper. (If the sauce gets too thick, mix through 1-2 tablespoons of water.): You should hear a soft simmer and see the sauce cling to the edges of the chicken , turning glossy as it reduces. The short simmer allows the flavors to marry while avoiding toughening the meat. A typical pitfall is over reducing, which yields a sticky, almost crystallized sauce; use the suggested water to loosen it if needed and taste before adding more salt.
- Immediately remove from stove. To serve, slice each piece of chicken into strips and drizzle with the remaining sauce left over in the pan.: The final moment is tactile and visual, the sliced chicken revealing a tender interior with a shiny glaze clinging to the surface. Letting it rest off heat briefly maintains juiciness, and the drizzled sauce adds the finishing flavor. If you slice too soon while piping hot, the juices can run out and leave the meat drier, so give it a short pause before cutting.
Notes
- Dry and even fillets are essential for consistent cooking, so trim and press the breasts to an even thickness before slicing into fillets.
- Don’t overcrowd the skillet, give each fillet space so the pan temperature stays high and the crust forms rather than stewing in its own juices.
- Finish on low heat to meld the sauce without toughening the meat, a gentle simmer keeps the glaze glossy and balanced.
- Use a neutral oil with butter to combine flavor and a higher smoke point, preventing burnt butter notes while adding richness.
- Taste as you go and adjust the cayenne or chili paste gradually, especially if serving guests with different spice tolerances.