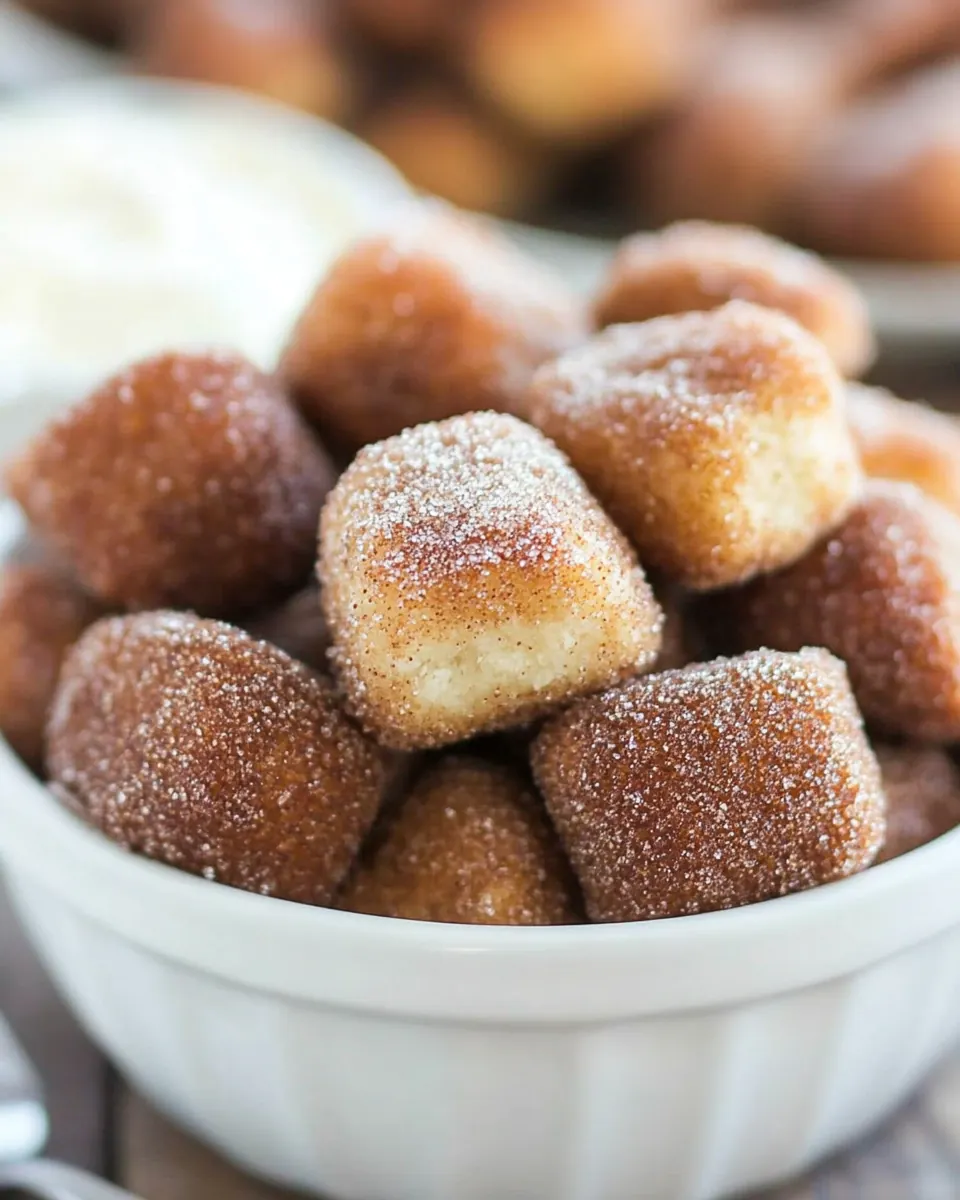
Easy Cinnamon Sugar Soft Pretzel Bites
Easy Cinnamon Sugar Soft Pretzel Bites are the kind of snack that makes a simple afternoon feel special, and I remember the first time I handed a warm bite to a skeptical friend who admitted later it changed their life. I was at a tiny weekend market, hands floured and a kettle on the stove, and that little batch of dough transformed into sticky, sugared comfort faster than I expected. The memory of that sweet buttery aroma still pulls me back to the stove whenever I want something cozy and shareable.
There is something honest about taking a can of store bought breadstick dough and turning it into a bite sized treat that becomes the centerpiece of conversation. I often make a double batch for movie nights because everyone reaches for seconds, and the ritual of boiling, baking, and tossing the warm pieces in a cinnamon sugar mix is wonderfully tactile. It reminds me that great snacks do not need fuss, just a few smart steps and good timing.
Recipe Snapshot
35 mins
20 mins
15 mins
Medium
150 kcal
American
Gluten-Free, Low FODMAP
Appetizers
Medium large pot, Baking sheets, Silicone baking mats or parchment paper, Slotted spoon, Mixing bowl, Microwave safe bowl
The Best Thing About This Easy Cinnamon Sugar Soft Pretzel Bites
I love how fast these come together
We frequently need quick recipes that still feel handcrafted, and Easy Cinnamon Sugar Soft Pretzel Bites deliver. Using canned breadstick dough cuts out long rising times, and the whole process moves from pantry to plate in under an hour, which means you can satisfy cravings without planning days ahead.
They are delightfully shareable
I make these when friends drop by unexpectedly because they are inherently communal. The bite size format invites sampling, and the warm butter and sugar coating makes them perfect for passing around a bowl at a party or movie night.
Texture contrast is the star
What stands out to me is the soft, pillowy interior against a slightly chewy exterior that develops after the soda bath and a brief bake. The quick boil in salted baking soda water gives the surface a gentle chew while preserving a tender crumb inside, and that contrast keeps every bite interesting.
Flexible finishing options
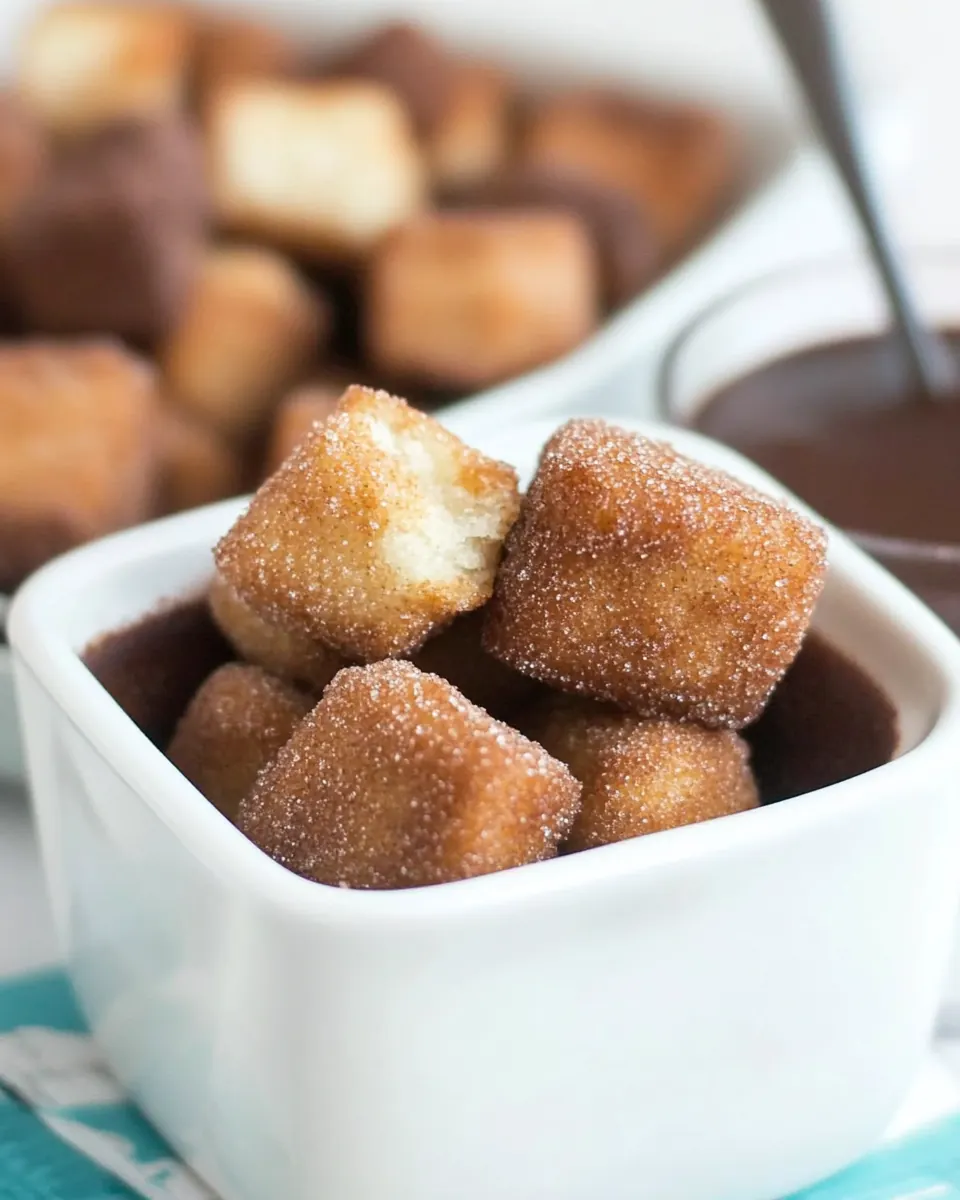
I often vary the finishing touches. The classic cinnamon sugar is cozy and nostalgic, while optional chocolate chips melted with heavy whipping cream make a luscious dip. You can adjust sweetness and salt to taste, and each variation still reads as the same comforting snack.
Perfect for cooler seasons and gatherings
With warm spices like cinnamon and a buttery finish, these bites feel especially right in the fall months. They pair beautifully with hot drinks, and because they are best on the day they are made, they create a lovely reason to host a spontaneous afternoon or evening get together.
Essential Ingredients for Easy Cinnamon Sugar Soft Pretzel Bites
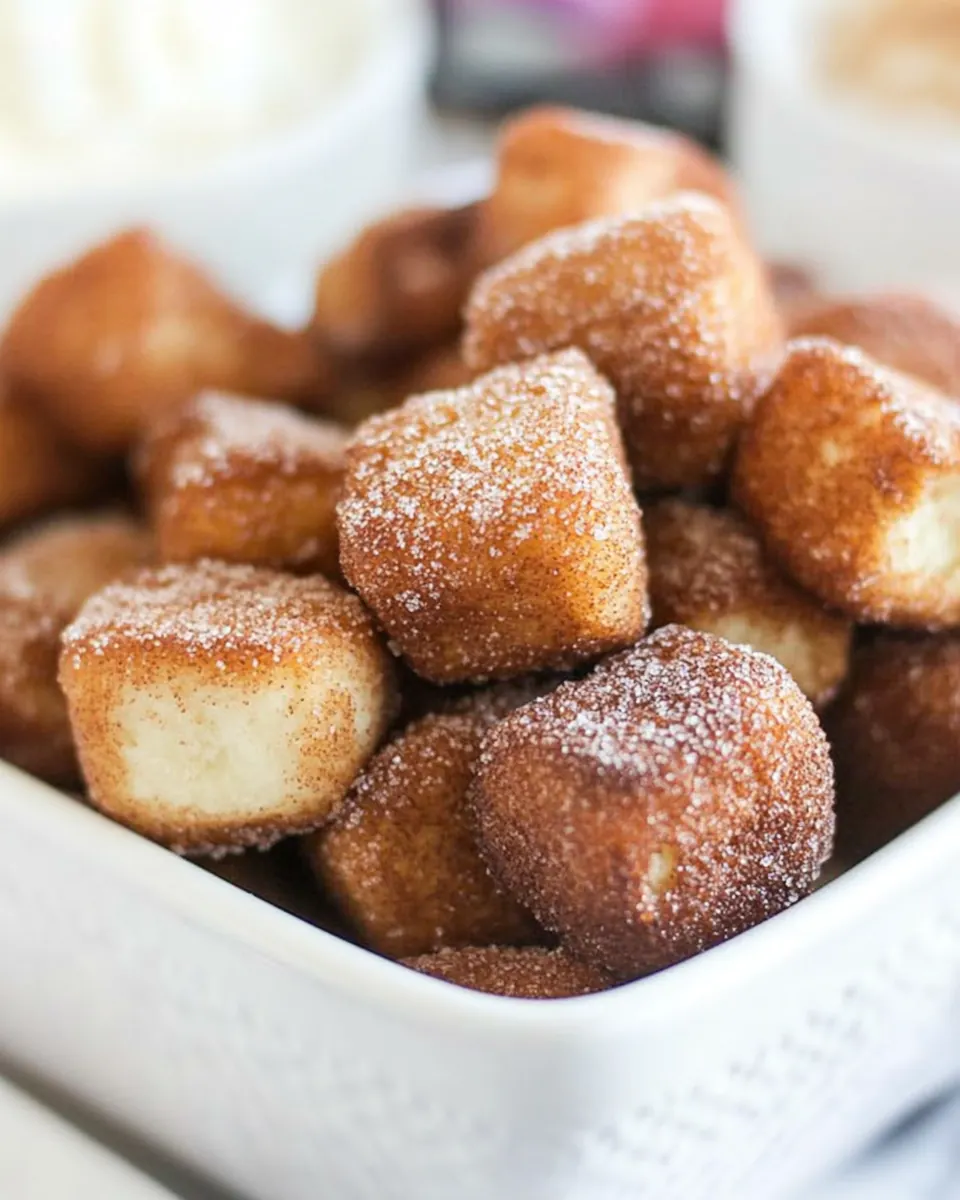
These ingredients are simple and purposeful. The recipe leans on a few star players that do all the heavy lifting: a store bought dough for speed, a baking soda bath for texture, and a butter sugar coating for that irresistible finish. Each item interacts to create soft centers, slightly chewy exteriors, and a sweet spiced surface that clings to every bite.
- 1 can of breadstick dough 16.5 ounces; I used Pillsbury Original Breadsticks: Provides pre-made dough for quick preparation and consistent texture; unroll into strips and cut into bite-sized pieces before shaping and baking. Supplies the primary structure and chewiness associated with soft pretzels, saving time compared to making dough from scratch.
- 8 cups of water: Creates a baking bath to give pretzels their classic chewy exterior when combined with baking soda; bring to a gentle boil and carefully submerge dough bites briefly. Helps dilute and distribute the baking soda solution so it reacts with the dough surface for color and texture.
- 1 tablespoon baking soda: Alkalizes the boiling water to promote the Maillard reaction and the deep brown pretzel crust; dissolve completely in the water before adding dough pieces. Also contributes to the characteristic slight tang and traditional pretzel flavor when used in the boiling step.
- 1 tablespoon kosher salt: Enhances flavor and balances sweetness when sprinkled on or incorporated into the dough handling; dissolve in the boiling bath if desired or use for seasoning. Adds savory contrast to the sweet cinnamon coating and helps elevate overall taste.
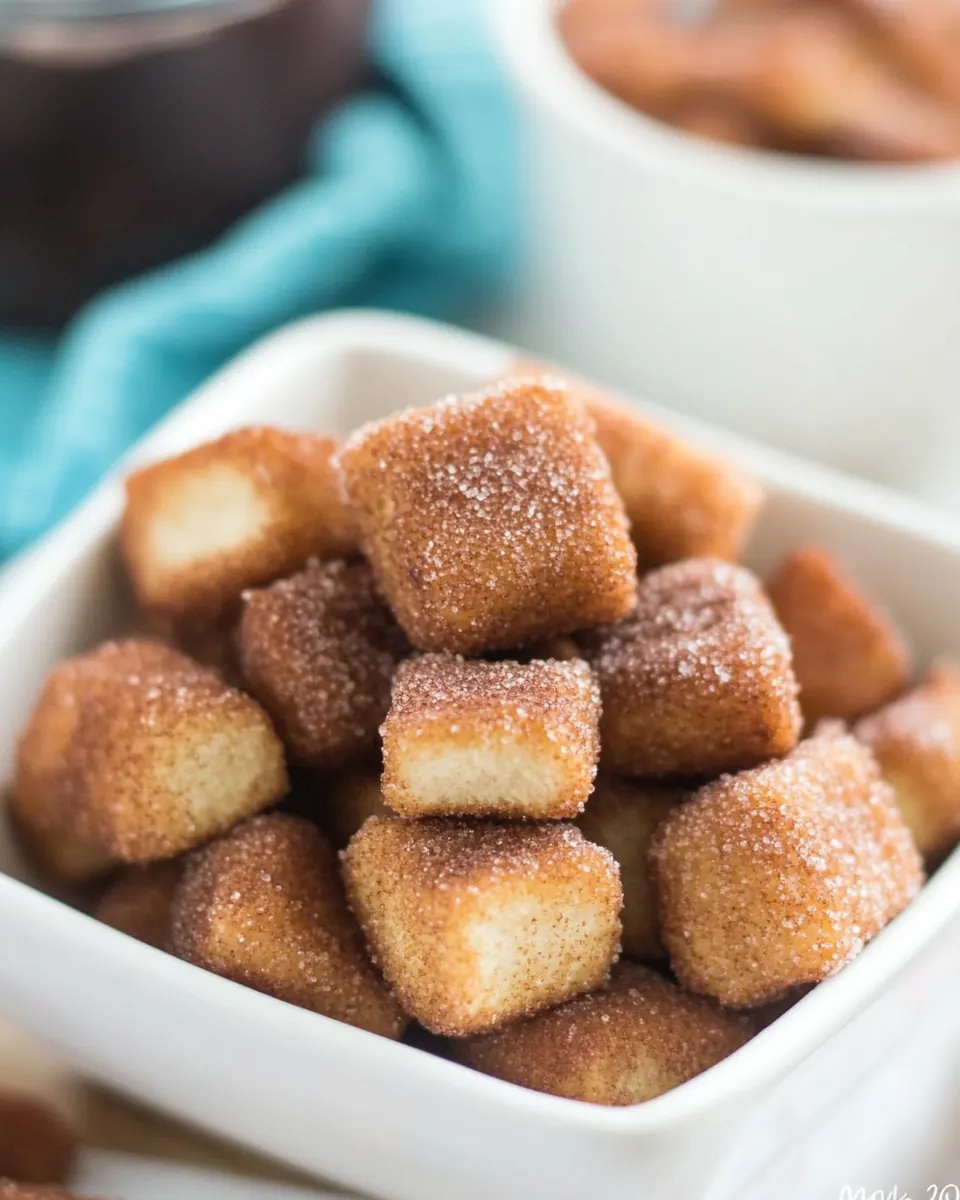
- 1 cup sugar: Sweetens the coating mixture for a classic cinnamon–sugar finish; combine with cinnamon to evenly coat warm pretzel bites after baking. Also helps create a sticky surface when mixed with melted butter so the sugar adheres well.
- 3 tablespoons cinnamon: Provides warm spiced flavor to the sugar coating; thoroughly mix with sugar to ensure even distribution and consistent flavor on each bite. Pairs with butter to form a fragrant glaze that complements the pretzel's buttery richness.
- 4 tablespoons salted butter: Adds richness and acts as the binder for the cinnamon–sugar coating; melt and toss baked pretzel bites to coat evenly and enhance mouthfeel. Contributes buttery flavor and helps the sugar–cinnamon mixture adhere for a glossy finish.
- 1/2 cup chocolate chips (optional): Introduces optional chocolate flavor and a melty contrast when stirred into warm pretzel bites or served as a dip; fold in sparingly to avoid overwhelming texture. Offers a customizable indulgence for those who prefer a sweet chocolate element.
- 1/2 cup + 1 tablespoon heavy whipping cream (optional): Provides optional creaminess for a richer glaze or dipping sauce when combined with melted butter and sugar; whisk into warm mixtures for smooth texture. Enhances mouthfeel and creates a more decadent coating or drizzle for the finished pretzel bites.
Making Easy Cinnamon Sugar Soft Pretzel Bites
These steps guide you through boiling, baking, and finishing each bite so they come out soft inside and lightly chewy outside. I like to prep my coating and baking sheets ahead of time so the workflow moves smoothly from pot to oven to bowl.
- Bring your water to a boil in a medium-large pot. Preheat oven to 350 F. Line two cookie sheets with silicone baking mats, or use parchment paper that’s been sprayed with cooking spray. (I highly recommend the silicone; the pretzels even stuck to those a little, parchment will be worse!): The moment the water reaches a rolling boil you will sense steam filling the kitchen and a faint metallic steam scent, which signals that the pot is ready for the baking soda addition. Adding the baking soda at this point raises the pH of the surface, which is essential for creating a slightly chewy exterior and encouraging browning during baking. A common error here is not using enough water, which causes the dough pieces to clump together and prevents even exposure to the soda, so make sure the pot is large enough to comfortably fit batches of dough pieces without overcrowding.
- Unroll and separate the breadstick dough. Use kitchen scissors or a serrated knife to cut each breadstick into four pieces, for a total 48.: Preheating ensures the oven environment is steady when the bites go in, producing consistent rise and color. You should feel warmth when you open the oven and see the racks at the right positions, which matters for heat circulation and even browning. If you skip proper preheating, the bites can take longer to set and may dry out while waiting for the oven to reach temperature, so always allow the oven to fully come up to 350 F before baking.
- When the water boils, add the baking soda and salt. Working in batches, place 4-6 pieces of dough in the boiling water for about 15-20 seconds. After a few seconds, flip them over. The dough will change slightly in color. Remove from the pan with a slotted spoon, tap to remove all water, and place on prepared cookie sheets. Continue until all pretzels are boiled.: Lining helps prevent sticking and encourages even bottom color. Silicone mats provide slight release and gentle browning, while parchment with spray can work but may stick more, especially when buttered. Pressing the dough pieces too firmly into the sheet can flatten them prematurely, so place them gently. If you notice sticking, let the sheet cool slightly before removing the pieces, which reduces tearing.
- Bake for 12-14 minutes, until they start to turn golden on top. (Mine took 13 minutes.): As you open the can and separate each piece of breadstick dough , you will feel the soft, slightly tacky surface of the dough, which indicates it is hydrated and ready to shape. Cutting each stick into four pieces gives consistent bite sizes that bake evenly. A common slip is cutting uneven pieces, which leads to inconsistent baking times, so aim for uniform sizes for predictable results.
- Melt butter in a small bowl. You should use salted butter for this step; if you only have unsalted, then add a pinch of salt to the butter. Add half the sugar and half the cinnamon to a gallon size ziploc bag, seal, and shake to combine. Dip pretzels into the butter and place in the cinnamon sugar (a few at a time) and shake carefully to coat. Place on a cookie sheet and repeat until all pretzels are done, replenishing the sugar/cinnamon about halfway through. (I found that my cinnamon sugar mixture started to get clumpy partway through because of the butter, which is why I suggest doing it in two parts.): The act of cutting produces soft dough scraps that might cling to tools, and using scissors keeps the shape cleaner than a blunt knife. The small, uniform pieces are what create that irresistible shareable format, and when you handle them gently you preserve a tender interior. If you press too hard while cutting, you can compress the dough and make the bites denser, so use a light touch.
- Serve warm or room temperature, with optional chocolate ganache for dipping. Best served the day of.: You will see the water react slightly when the baking soda is added, perhaps a subtle fizz, and the surface chemistry changes so the dough exterior firms quickly when dipped. Stir briefly so the soda dissolves, then prepare to work in batches, because adding too many pieces at once will lower the temperature and reduce the effect. If the water temperature drops too much, wait until it returns to a boil before continuing, otherwise the texture will be off.
- These didn’t taste as great on day 2! To make the ganache, add cream and chocolate chips to a microwave safe bowl (I use a glass measuring cup) and heat for 30-45 seconds. Whisk until chocolate melts and let sit at room temperature until it thickens slightly. You can do this before making the pretzels, or while they are in the oven.: As the pieces hit the bubbling water you will hear a soft pop and see the dough surface take on a slightly translucent sheen, which is a key visual cue that the soda bath is working. Flip them after a few seconds so both sides receive treatment. The brief soak firms the outside just enough to develop chew and color during baking. Avoid leaving them longer than suggested, because overboiling will leach flavor and make the centers gummy instead of tender, which is a frequent mishap.
- After a few seconds flip them over: Flipping ensures even contact with the alkaline water and creates symmetrical surface texture. When you lift the pieces out with a slotted spoon, tap to remove excess water; you should hear a soft drip rather than a heavy splash. Too much residual water can cause the coating to slide off and create soggy spots, so give them a light tap to remove most moisture before placing on the sheet.
- Remove from the pan with a slotted spoon tap to remove all water and place on prepared cookie sheets: The sound of droplets hitting the sink and the gleam of slightly tacky dough will tell you they are ready to bake. Arrange them with a little space so hot air circulates and they bake uniformly. Crowding the sheet can lead to uneven browning and steam trapped between pieces, making them softer than desired, so leave a small gap between each bite.
- Continue until all pretzels are boiled: Working methodically in this step keeps pace steady without rushing. As batches progress the pot might foam slightly, so watch for overflow and manage heat accordingly. A common issue is overfilling the pot with too many pieces at once, which reduces the water temperature and lengthens the process, so keep batches modest for consistent results.
- Bake for 12 to 14 minutes until they start to turn golden on top: When the finished bites emerge the kitchen will fill with a warm, toasty aroma and you will notice the tops shifting from pale to a gentle golden color; that is your visual cue to remove them. The baking time sets the exterior texture while preserving a soft interior. Pulling them too early results in underbaked centers, while letting them brown too long sacrifices tenderness for dryness.
- Melt butter in a small bowl: Melted butter should be warm and glossy, not smoking, and it acts as the adhesive for the cinnamon sugar. Dip each warm bite briefly in the butter to ensure the coating sticks. If the butter is too hot, it can make the sugar clump or partially dissolve, so allow it to cool slightly before dipping.
- Add half the sugar and half the cinnamon to a gallon size ziploc bag seal and shake to combine: Combining spices in a bag helps evenly distribute the sugar and cinnamon and makes for quick coating. The initial mixture will be powdery and aromatic, and shaking ensures no pockets of spice. Because butter can cause clumping, prepare the coating in two portions so the mixture stays dry enough to cling properly to subsequent batches.
- Dip pretzels into the butter and place in the cinnamon sugar a few at a time and shake carefully to coat: As you shake, listen for the gentle clink of pieces against the bag and notice the light dusting that adheres to the buttery surface. Work in small groups so each bite gets a full coating, and place them back on a sheet to set. If you try to coat too many at once, the butter will saturate the sugar and you will end up with clumpy, uneven coverage, which is why periodic replenishing helps maintain texture.
- Place on a cookie sheet and repeat until all pretzels are done replenishing the sugar cinnamon about halfway through: Laying the coated bites out gives them a moment to settle and the coating to adhere. You will see the sugar gain a slight sheen where it meets warm butter, signaling proper adhesion. If the coating starts to look wet or clumpy, refresh the mixture so the next batch gets a dry, even dusting.
- Serve warm or room temperature with optional chocolate ganache for dipping: Warm bites will be slightly softer and release more aroma, while room temperature ones hold shape a bit better. If you choose ganache, it adds a luxurious contrast. A typical mistake is serving everything too late, because these are best the day they are made and lose their peak texture overnight.
- Best served the day of: Freshness matters here, the bites shine when they are warm and recently coated, offering a soft interior and a slightly tacky sugar exterior. If stored, they will stiffen and lose the tender contrast that makes them special, so plan to enjoy them promptly for the best experience.
- To make the ganache add cream and chocolate chips to a microwave safe bowl and heat for 30 to 45 seconds: When warming the heavy whipping cream with chocolate chips you will see steam rise and the chocolate begin to melt into glossy streaks, which you then whisk into a smooth sauce. Let it rest until it thickens slightly before dipping, as very hot ganache will slide off the warm bites. Overheating can cause the chocolate to seize, so warm gently and stir constantly to achieve a silky dip.
- Whisk until chocolate melts and let sit at room temperature until it thickens slightly: The ganache will become glossy and coat the back of a spoon when ready, offering a perfect viscosity for dipping. If you make it too far ahead, it will firm up and require gentle reheating. Avoid vigorous reheating in short bursts which can separate the mixture, instead warm slowly and stir to return it to dipping consistency.
- You can do this before making the pretzels or while they are in the oven: Timing the ganache is flexible, and preparing it while the bites bake means everything is warm and ready together. Doing it too early risks cooling and thickening the ganache, but keeping it in a warm spot prevents that. If it firms prematurely, give it a short gentle heat to bring it back to a dip friendly state.
Helpful Hints
These hints help you get reliably tender centers and nicely coated exteriors. I include practical actions and troubleshooting notes so you can skip common pitfalls and preserve the best qualities of the bites.
- Prep your coating in two portions, especially if you are making a large batch, because the melted butter will eventually make the sugar clump; splitting the sugar and cinnamon prevents uneven coverage.
- Work in small boiling batches, place only four to six pieces in the water at once to keep the temperature steady, otherwise the soda bath will be less effective and the texture will suffer.
- Use a slotted spoon and tap excess water, removing most of the surface water before baking helps the coating stick and prevents soggy bottoms on the cookie sheet.
- Rotate oven racks if needed, if you notice uneven browning swap the sheets halfway through baking to encourage uniform color and texture across batches.
- Warm ganache gently, microwave in short intervals and whisk between bursts to avoid seizing the chocolate chips and to achieve a glossy dip.
Serving Options for Easy Cinnamon Sugar Soft Pretzel Bites
These bites are versatile for casual gatherings and cozy nights. Below are serving ideas, pairings, and storage notes to help you present them well and keep them tasting their best.
- Serve warm in a shallow bowl, arrange the Easy Cinnamon Sugar Soft Pretzel Bites on a platter with a small bowl of warm ganache in the center for dipping, which creates a tactile and social presentation ideal for movie nights or family snacks.
- Pair with hot beverages, these bites are lovely alongside tea or coffee in the fall season, making them a natural choice for afternoon gatherings or cozy mornings when a sweet, spiced bite completes the cup.
- Offer as a party appetizer, place them on a tiered stand for finger food style service at casual get togethers; they work well as a sweet counterpoint amid savory snacks and are easy for guests to pick at between conversations.
- Pack for a picnic or school snack, allow the bites to cool and place them in an airtight container, keeping the ganache separate to prevent sogginess, which makes them portable yet still indulgent.
- Storage tips, keep leftover bites at room temperature for short term storage in an airtight container, but know they are best the day of; refrigeration tends to dry them out, so reheat gently if needed to restore some softness.
- Seasonal serving, feature them at fall gatherings where the warm spice profile complements other seasonal items like hot cider or pumpkin treats, creating a cohesive menu feel.
FAQ
Conclusion
What makes this recipe special is its approachable swap of canned dough for the long process of traditional pretzel making, delivering soft, spiced bites with minimal fuss. Try the warm cinnamon sugar coating with a bit of melted butter and optional chocolate ganache to elevate a simple snack into something guests remember. I hope you give these Easy Cinnamon Sugar Soft Pretzel Bites a go on a cozy afternoon or for your next gathering, they are quick to assemble and very shareable.

Easy Cinnamon Sugar Soft Pretzel Bites
Equipment
- Medium large pot
- Baking Sheets
- Silicone baking mats or parchment paper
- Slotted Spoon
- Mixing Bowl
- Microwave-safe Bowl
Ingredients
- 1 can of breadstick dough 16.5 ounces; I used Pillsbury Original Breadsticks Provides pre-made dough for quick preparation and consistent texture; unroll into strips and cut into bite-sized pieces before shaping and baking. Supplies the primary structure and chewiness associated with soft pretzels, saving time compared to making dough from scratch.
- 8 cups of water Creates a baking bath to give pretzels their classic chewy exterior when combined with baking soda; bring to a gentle boil and carefully submerge dough bites briefly. Helps dilute and distribute the baking soda solution so it reacts with the dough surface for color and texture.
- 1 tablespoon baking soda Alkalizes the boiling water to promote the Maillard reaction and the deep brown pretzel crust; dissolve completely in the water before adding dough pieces. Also contributes to the characteristic slight tang and traditional pretzel flavor when used in the boiling step.
- 1 tablespoon kosher salt Enhances flavor and balances sweetness when sprinkled on or incorporated into the dough handling; dissolve in the boiling bath if desired or use for seasoning. Adds savory contrast to the sweet cinnamon coating and helps elevate overall taste.
- 1 cup sugar Sweetens the coating mixture for a classic cinnamon-sugar finish; combine with cinnamon to evenly coat warm pretzel bites after baking. Also helps create a sticky surface when mixed with melted butter so the sugar adheres well.
- 3 tablespoons cinnamon Provides warm spiced flavor to the sugar coating; thoroughly mix with sugar to ensure even distribution and consistent flavor on each bite. Pairs with butter to form a fragrant glaze that complements the pretzel's buttery richness.
- 4 tablespoons salted butter Adds richness and acts as the binder for the cinnamon-sugar coating; melt and toss baked pretzel bites to coat evenly and enhance mouthfeel. Contributes buttery flavor and helps the sugar-cinnamon mixture adhere for a glossy finish.
- 1/2 cup chocolate chips optional Introduces optional chocolate flavor and a melty contrast when stirred into warm pretzel bites or served as a dip; fold in sparingly to avoid overwhelming texture. Offers a customizable indulgence for those who prefer a sweet chocolate element.
- 1/2 cup + 1 tablespoon heavy whipping cream optional Provides optional creaminess for a richer glaze or dipping sauce when combined with melted butter and sugar; whisk into warm mixtures for smooth texture. Enhances mouthfeel and creates a more decadent coating or drizzle for the finished pretzel bites.
Instructions
- Bring your water to a boil in a medium-large pot. Preheat oven to 350 F. Line two cookie sheets with silicone baking mats, or use parchment paper that’s been sprayed with cooking spray. (I highly recommend the silicone; the pretzels even stuck to those a little, parchment will be worse!): The moment the water reaches a rolling boil you will sense steam filling the kitchen and a faint metallic steam scent, which signals that the pot is ready for the baking soda addition. Adding the baking soda at this point raises the pH of the surface, which is essential for creating a slightly chewy exterior and encouraging browning during baking. A common error here is not using enough water, which causes the dough pieces to clump together and prevents even exposure to the soda, so make sure the pot is large enough to comfortably fit batches of dough pieces without overcrowding.
- Unroll and separate the breadstick dough. Use kitchen scissors or a serrated knife to cut each breadstick into four pieces, for a total 48.: Preheating ensures the oven environment is steady when the bites go in, producing consistent rise and color. You should feel warmth when you open the oven and see the racks at the right positions, which matters for heat circulation and even browning. If you skip proper preheating, the bites can take longer to set and may dry out while waiting for the oven to reach temperature, so always allow the oven to fully come up to 350 F before baking.
- When the water boils, add the baking soda and salt. Working in batches, place 4-6 pieces of dough in the boiling water for about 15-20 seconds. After a few seconds, flip them over. The dough will change slightly in color. Remove from the pan with a slotted spoon, tap to remove all water, and place on prepared cookie sheets. Continue until all pretzels are boiled.: Lining helps prevent sticking and encourages even bottom color. Silicone mats provide slight release and gentle browning, while parchment with spray can work but may stick more, especially when buttered. Pressing the dough pieces too firmly into the sheet can flatten them prematurely, so place them gently. If you notice sticking, let the sheet cool slightly before removing the pieces, which reduces tearing.
- Bake for 12-14 minutes, until they start to turn golden on top. (Mine took 13 minutes.): As you open the can and separate each piece of breadstick dough , you will feel the soft, slightly tacky surface of the dough, which indicates it is hydrated and ready to shape. Cutting each stick into four pieces gives consistent bite sizes that bake evenly. A common slip is cutting uneven pieces, which leads to inconsistent baking times, so aim for uniform sizes for predictable results.
- Melt butter in a small bowl. You should use salted butter for this step; if you only have unsalted, then add a pinch of salt to the butter. Add half the sugar and half the cinnamon to a gallon size ziploc bag, seal, and shake to combine. Dip pretzels into the butter and place in the cinnamon sugar (a few at a time) and shake carefully to coat. Place on a cookie sheet and repeat until all pretzels are done, replenishing the sugar/cinnamon about halfway through. (I found that my cinnamon sugar mixture started to get clumpy partway through because of the butter, which is why I suggest doing it in two parts.): The act of cutting produces soft dough scraps that might cling to tools, and using scissors keeps the shape cleaner than a blunt knife. The small, uniform pieces are what create that irresistible shareable format, and when you handle them gently you preserve a tender interior. If you press too hard while cutting, you can compress the dough and make the bites denser, so use a light touch.
- Serve warm or room temperature, with optional chocolate ganache for dipping. Best served the day of.: You will see the water react slightly when the baking soda is added, perhaps a subtle fizz, and the surface chemistry changes so the dough exterior firms quickly when dipped. Stir briefly so the soda dissolves, then prepare to work in batches, because adding too many pieces at once will lower the temperature and reduce the effect. If the water temperature drops too much, wait until it returns to a boil before continuing, otherwise the texture will be off.
- These didn’t taste as great on day 2! To make the ganache, add cream and chocolate chips to a microwave safe bowl (I use a glass measuring cup) and heat for 30-45 seconds. Whisk until chocolate melts and let sit at room temperature until it thickens slightly. You can do this before making the pretzels, or while they are in the oven.: As the pieces hit the bubbling water you will hear a soft pop and see the dough surface take on a slightly translucent sheen, which is a key visual cue that the soda bath is working. Flip them after a few seconds so both sides receive treatment. The brief soak firms the outside just enough to develop chew and color during baking. Avoid leaving them longer than suggested, because overboiling will leach flavor and make the centers gummy instead of tender, which is a frequent mishap.
- After a few seconds flip them over: Flipping ensures even contact with the alkaline water and creates symmetrical surface texture. When you lift the pieces out with a slotted spoon, tap to remove excess water; you should hear a soft drip rather than a heavy splash. Too much residual water can cause the coating to slide off and create soggy spots, so give them a light tap to remove most moisture before placing on the sheet.
- Remove from the pan with a slotted spoon tap to remove all water and place on prepared cookie sheets: The sound of droplets hitting the sink and the gleam of slightly tacky dough will tell you they are ready to bake. Arrange them with a little space so hot air circulates and they bake uniformly. Crowding the sheet can lead to uneven browning and steam trapped between pieces, making them softer than desired, so leave a small gap between each bite.
- Continue until all pretzels are boiled: Working methodically in this step keeps pace steady without rushing. As batches progress the pot might foam slightly, so watch for overflow and manage heat accordingly. A common issue is overfilling the pot with too many pieces at once, which reduces the water temperature and lengthens the process, so keep batches modest for consistent results.
- Bake for 12 to 14 minutes until they start to turn golden on top: When the finished bites emerge the kitchen will fill with a warm, toasty aroma and you will notice the tops shifting from pale to a gentle golden color; that is your visual cue to remove them. The baking time sets the exterior texture while preserving a soft interior. Pulling them too early results in underbaked centers, while letting them brown too long sacrifices tenderness for dryness.
- Melt butter in a small bowl: Melted butter should be warm and glossy, not smoking, and it acts as the adhesive for the cinnamon sugar. Dip each warm bite briefly in the butter to ensure the coating sticks. If the butter is too hot, it can make the sugar clump or partially dissolve, so allow it to cool slightly before dipping.
- Add half the sugar and half the cinnamon to a gallon size ziploc bag seal and shake to combine: Combining spices in a bag helps evenly distribute the sugar and cinnamon and makes for quick coating. The initial mixture will be powdery and aromatic, and shaking ensures no pockets of spice. Because butter can cause clumping, prepare the coating in two portions so the mixture stays dry enough to cling properly to subsequent batches.
- Dip pretzels into the butter and place in the cinnamon sugar a few at a time and shake carefully to coat: As you shake, listen for the gentle clink of pieces against the bag and notice the light dusting that adheres to the buttery surface. Work in small groups so each bite gets a full coating, and place them back on a sheet to set. If you try to coat too many at once, the butter will saturate the sugar and you will end up with clumpy, uneven coverage, which is why periodic replenishing helps maintain texture.
- Place on a cookie sheet and repeat until all pretzels are done replenishing the sugar cinnamon about halfway through: Laying the coated bites out gives them a moment to settle and the coating to adhere. You will see the sugar gain a slight sheen where it meets warm butter, signaling proper adhesion. If the coating starts to look wet or clumpy, refresh the mixture so the next batch gets a dry, even dusting.
- Serve warm or room temperature with optional chocolate ganache for dipping: Warm bites will be slightly softer and release more aroma, while room temperature ones hold shape a bit better. If you choose ganache, it adds a luxurious contrast. A typical mistake is serving everything too late, because these are best the day they are made and lose their peak texture overnight.
- Best served the day of: Freshness matters here, the bites shine when they are warm and recently coated, offering a soft interior and a slightly tacky sugar exterior. If stored, they will stiffen and lose the tender contrast that makes them special, so plan to enjoy them promptly for the best experience.
- To make the ganache add cream and chocolate chips to a microwave safe bowl and heat for 30 to 45 seconds: When warming the heavy whipping cream with chocolate chips you will see steam rise and the chocolate begin to melt into glossy streaks, which you then whisk into a smooth sauce. Let it rest until it thickens slightly before dipping, as very hot ganache will slide off the warm bites. Overheating can cause the chocolate to seize, so warm gently and stir constantly to achieve a silky dip.
- Whisk until chocolate melts and let sit at room temperature until it thickens slightly: The ganache will become glossy and coat the back of a spoon when ready, offering a perfect viscosity for dipping. If you make it too far ahead, it will firm up and require gentle reheating. Avoid vigorous reheating in short bursts which can separate the mixture, instead warm slowly and stir to return it to dipping consistency.
- You can do this before making the pretzels or while they are in the oven: Timing the ganache is flexible, and preparing it while the bites bake means everything is warm and ready together. Doing it too early risks cooling and thickening the ganache, but keeping it in a warm spot prevents that. If it firms prematurely, give it a short gentle heat to bring it back to a dip friendly state.
Notes
- Prep your coating in two portions, especially if you are making a large batch, because the melted butter will eventually make the sugar clump; splitting the sugar and cinnamon prevents uneven coverage.
- Work in small boiling batches, place only four to six pieces in the water at once to keep the temperature steady, otherwise the soda bath will be less effective and the texture will suffer.
- Use a slotted spoon and tap excess water, removing most of the surface water before baking helps the coating stick and prevents soggy bottoms on the cookie sheet.
- Rotate oven racks if needed, if you notice uneven browning swap the sheets halfway through baking to encourage uniform color and texture across batches.
- Warm ganache gently, microwave in short intervals and whisk between bursts to avoid seizing the chocolate chips and to achieve a glossy dip.