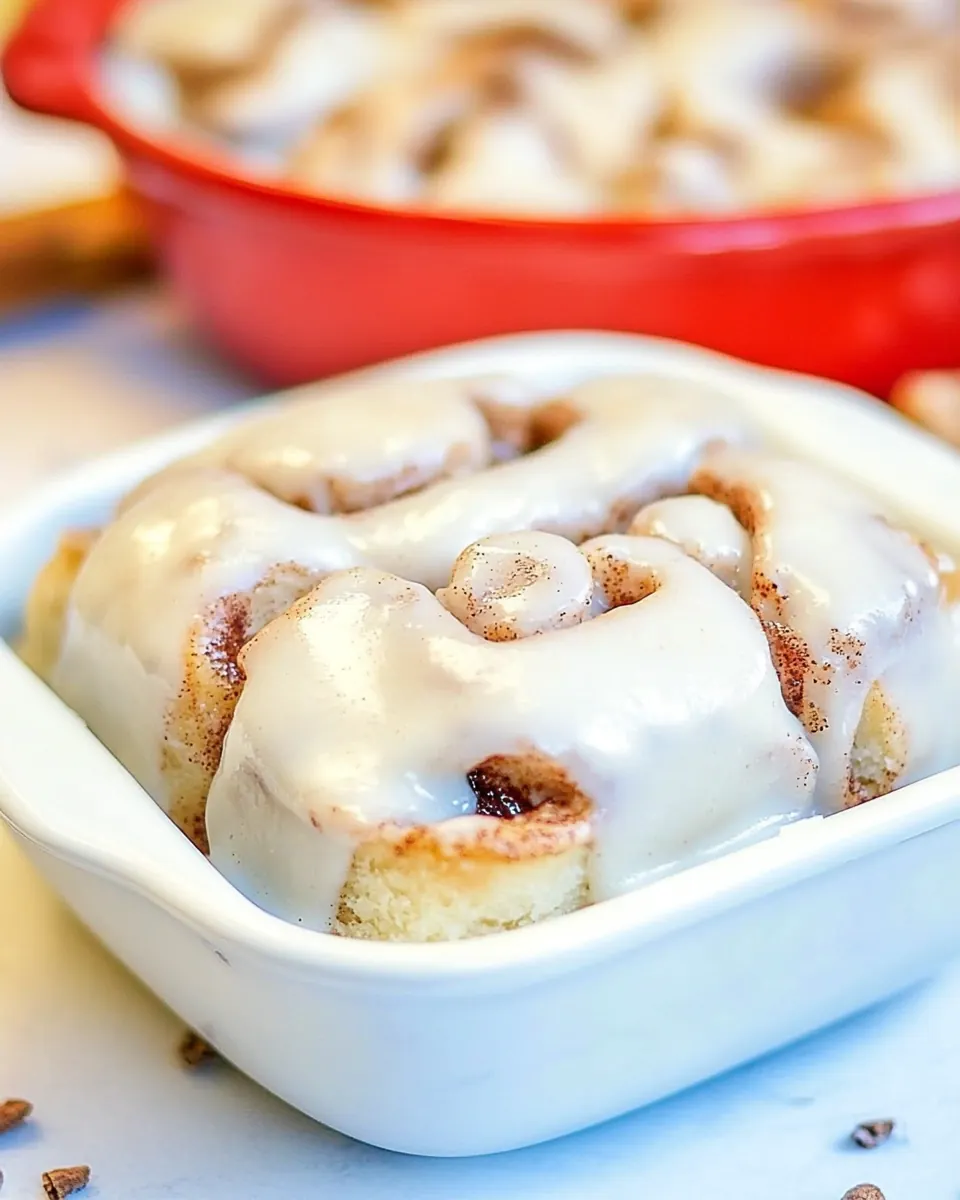
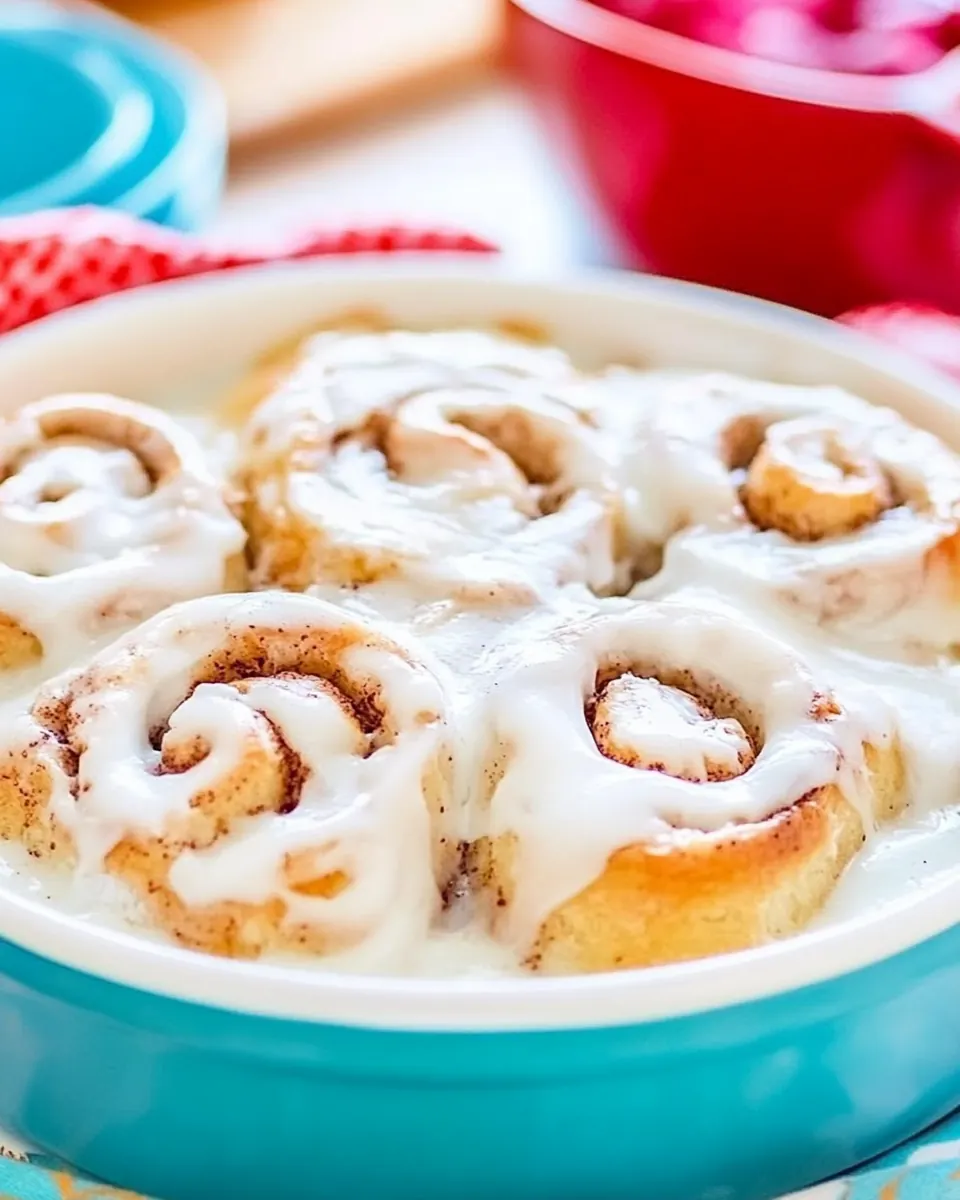
Homemade Cinnamon Rolls
Homemade Cinnamon Rolls are the kind of pastry that fills my kitchen with a warm, comforting aroma that makes neighbors pause at their doors. The first time I made these, I was half asleep but unable to resist the smell of yeast and butter coming from the oven, so I sat down with a mug of coffee and watched the tray slowly puff and turn golden. I love how a simple mixture of flour, sugar, butter and cinnamon can feel so indulgent yet give such honest, homespun pleasure.
There is a small ritual to making Homemade Cinnamon Rolls that I came to adore. Kneading the dough with flour-dusted hands, feeling it change from shaggy to silky, is oddly meditative. Rolling the sheet thin enough to hold the filling, but not so thin that it tears, always gives me a quiet moment of focus. You will hear the little sighs of the dough as it relaxes, and smell the sugar caramelizing in the oven as the rolls color to a perfect golden brown.
I often make these for a lazy weekend morning when friends drop by unexpectedly, or when I want to surprise my family with something special for a holiday brunch. They are forgiving, which is part of their charm. Even if your shaping is imperfect, the taste is generous and uplifting. I remember a time I mismeasured the sugar and still ended up with a batch everyone fought over, proof that technique matters, but warmth and patience matter more.
Recipe Snapshot
2 hr 30 mins
120 mins
30 mins
Hard
300 kcal
American
Gluten-Free, Low FODMAP
Breakfast
Mixing bowl, Wooden spoon, Rolling pin, 9 x 13 inch baking pan, Parchment paper, Mixer or whisk
The Beauty of This Homemade Cinnamon Rolls
1. Comforting aroma and texture
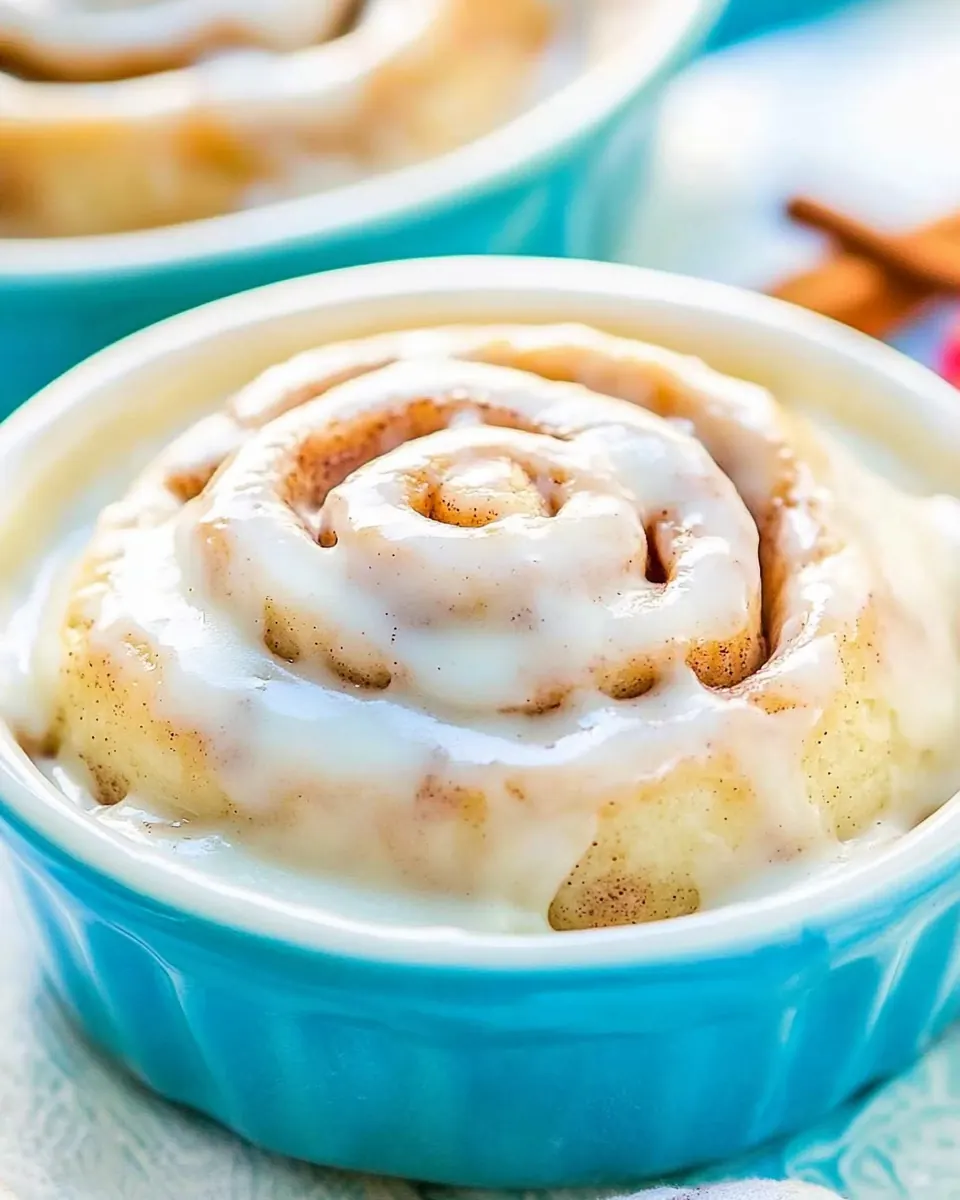
I adore how Homemade Cinnamon Rolls fill the house with a scent that feels like nostalgia. The slow bloom of yeast and the caramel notes of the filling combine to create an inviting, cozy scent profile. The interior crumb becomes pillowy and tender while the outer edges get slightly crisp, which gives a satisfying contrast in every bite. For me, it is the sensory memory of mornings that makes these rolls irresistible.
2. Versatile for gatherings
I’ve taken these to potlucks, weekday breakfasts and holiday brunches, and they always land well. They scale gracefully, you can make nine large rolls or tweak portions for a smaller batch, and they travel with minimal fuss. I usually wrap them warm and bring them along, which makes me a very popular guest. The forgiving nature of the dough means even when life interrupts the timetable, the rolls still turn out delightful.
3. Simple pantry staples
The ingredient list reads like a pantry tour. With all purpose flour, butter, sugar, eggs and milk, you have everything you need. I appreciate recipes that do not require obscure items, because I will often find myself improvising with what I already have. That accessibility makes these rolls a dependable favorite any time of year.
4. Creamy icing finish
The cream cheese icing balances the warm, spiced filling with tang and silkiness. I love how the sweetness is cut by a touch of salt and the cream cheese tang, and how the glaze melts into the warm spirals creating ribbons of glossy sweetness. When I spread the glaze while the rolls are still hot, it melts just enough to create that perfect, slightly gooey top layer.
5. Great for learning techniques
If you are new to enriched doughs, Homemade Cinnamon Rolls are a wonderful teaching recipe. You will learn to proof yeast, handle sticky dough, and shape rolls with confidence. I remember the early attempts that were lopsided, yet each batch taught me something small that improved the next batch. For home bakers, that makes this more than a recipe, it is a learning experience with delicious rewards.
Key Ingredients for Homemade Cinnamon Rolls
These ingredients come together to create soft, tender rolls with a rich, spiced filling and a tangy, creamy glaze. The core players are the leavening yeast that creates lift, the starchy structure from flour, and the fat from butter which keeps the crumb tender. Meanwhile, sugars and cinnamon form a caramelized, aromatic filling, and the cream cheese icing ties everything with silky richness.
- 1/3 cup warm water: Provide warm hydration to activate yeast and help dissolve sugars and salts; ensures dough achieves proper fermentation and elasticity when combined with flour and yeast.
- 2 1/4 teaspoon instant yeast 1 package: Leaven bread by producing carbon dioxide during fermentation; creates airy, tender dough structure and determines rise time for the rolls.
- 1 tablespoon granulated sugar: Add fermentable sweetness to feed yeast and enhance browning; balances flavors and contributes to a tender crumb in the finished rolls.
- 2 eggs room temperature: Incorporate liquid richness and structure while aiding emulsification; eggs contribute to tenderness, color, and binding of the dough components.
- 1 cup lukewarm milk: Offer additional liquid for proper dough consistency and a softer crumb; milk enriches flavor, improves browning, and helps create a tender texture.
- 1/2 cup granulated sugar: Provide sweetness and assist in caramelization during baking; contributes to flavor depth and helps tenderize the dough when combined with fats.
- 1/3 cup unsalted butter melted: Add fat for tenderness and moisture while improving dough handling; melted butter enriches flavor and contributes to a soft, delicate crumb.
- 4 cups all-purpose flour: Form the bulk structure of the dough by supplying gluten-forming proteins and starch; flour determines texture, chew, and overall body of the rolls.
- 1 teaspoon salt: Regulate yeast activity and strengthen gluten structure subtly; salt enhances flavor and controls fermentation rate for balanced dough development.
- 3/4 cup dark brown sugar packed: Create the sweet, sticky filling core that caramelizes during baking; packed brown sugar gives depth with molasses notes and moist texture.
- 2 tablespoons ground cinnamon: Impart warm, aromatic spice to the filling; cinnamon provides signature flavor and pairs with sugar and butter for classic roll taste.
- 1/2 cup unsalted butter softened: Provide a spreadable fat layer in the filling to bind spices and sugars; softened butter helps create swirls and a gooey center when baked.
- 8 oz cream cheese room temperature: Contribute creamy tang and richness to the frosting; room–temperature cream cheese yields smooth, spreadable icing with balanced acidity.
- 8 tablespoons unsalted butter softened: Add body and buttery flavor to the frosting, increasing richness and spreadability; softened butter helps achieve a silky icing texture.
- 2 cups powdered sugar: Sweeten and thicken the frosting for a smooth, pipeable finish; powdered sugar dissolves easily to create a glossy, stable icing.
- 1 tablespoon vanilla extract: Enhance the frosting with aromatic depth and balance sweetness; vanilla extract rounds flavors and complements cream cheese and butter.
- 1/8 teaspoon salt: Fine-tune the frosting flavor by subtly adjusting salt balance; a pinch of salt cuts sweetness and enhances overall taste harmony.
The Method for Homemade Cinnamon Rolls
I like to approach the method with a calm, steady pace. This lets the yeast relax and keeps the dough at an even temperature, which is essential for a tender crumb and well shaped rolls. Read each step, gather your ingredients, and allow small pauses for sensory checks like touch and smell to guide you.
- Whisk 4 cups of flour and salt in a large bowl and set aside.: The room smells of dry, wheaty flour and a faint mineral note from the salt when you combine them, which creates a neutral base for the richer ingredients to come. I always toss the flour and salt together to ensure even distribution, because salt in clumps can unevenly inhibit the yeast later on. A common issue is measuring too densely, so gently spoon and level the flour rather than scooping to avoid a heavy dough. If your flour mixture feels too thick, remember you will be adding liquids gradually; resist adding more than the recipe calls for. The visual cue here is a homogenous pale mixture with no visible salt specks.
- Add instant yeast, 1 tablespoon of sugar and lukewarm water to a medium bowl and whisk to combine. Let it rest for 5 minutes.: When you stir the instant yeast , sugar and warm water, you should notice tiny foam forming at the surface within a few minutes, an acoustic whisper of activity that signals a lively yeast. This brief rest lets the yeast wake up and begin producing tiny bubbles that will later puff the dough. If nothing happens after 10 minutes, your yeast might be old or the water temperature incorrect, in which case start over with fresh yeast and water that feels like a warm bath. Avoid using very hot water, which will kill the yeast and leave you with a flat dough. The smell at this stage is lightly sweet and yeasty, promising fermentation ahead.
- Add the eggs, milk, remaining 1/2 cup sugar and melted butter to the yeast mixture and whisk until well combined.: As you whisk in the eggs , milk , additional sugar and melted butter , the mixture becomes glossy and slightly viscous, with a sweet, milky scent that hints at the rich dough to come. This enriched liquid provides fat and tenderness to the final crumb, and the eggs contribute structure and color. If the melted butter is too hot it can cook the eggs into little strands, so let it cool until it is only warm to the touch. A common hiccup is adding cold eggs straight from the fridge, which can cool the mixture and slow yeast activity; bring them to room temperature for seamless incorporation.
- Add the yeast mixture to the flour mix and using a wooden spoon or spatula, stir until well combined.: At this point, the bowl begins to fill with a rough, sticky mass that smells faintly sweet and yeasty, and you will feel resistance as gluten starts to develop. Use a sturdy wooden spoon or large spatula to pull the ingredients together, scraping the sides so no dry pockets remain. Overmixing can lead to a tough outcome, while undermixing leaves flour streaks, so aim for a uniformly shaggy dough. If you notice very dry patches, add a teaspoon of warm water at a time until the dough comes together but remains tacky.
- The dough will be sticky. Cover with plastic wrap and let it rest for 10 minutes, preferably in a warm place.: You will feel the dough relax and become more cohesive after resting, with a slight tackiness that indicates hydration. This brief autolyse allows the flour to absorb liquids and gluten to begin relaxing, which makes kneading gentler and more effective. Covering prevents a skin from forming, and a warm spot helps the dough come closer to room temperature for better handling. A common mistake is skipping this rest and forcing aggressive kneading, which can make the dough tight and resistant rather than supple.
- In a small bowl whisk together the dark brown sugar with the ground cinnamon until fully combined. Set aside. You will use the butter to spread it on the dough.: As you whisk the dark brown sugar and cinnamon , the aroma of molasses and spice intensifies, a heady perfume that previews the filling. The texture should be uniformly sandy so it will adhere to the softened butter later. Packing the brown sugar tightly helps maintain consistent moisture, while freshly ground cinnamon yields brighter, livelier flavor. If the mixture seems damp or clumpy, break it up with a fork to ensure even sprinkling across the dough.
- Preheat oven to 350 F degrees. Place an oven rack into the middle of the oven.: The oven fills with a gentle, anticipatory warmth as you preheat to 350 F , a temperature that browns the rolls evenly without drying them out. Positioning the rack in the middle promotes steady top and bottom heat interaction, which helps the rolls rise and color uniformly. I always give the oven a few minutes at temperature before baking so thermal mass stabilizes. A common issue is placing the pan too close to the top element which can scorch the tops before the centers are fully baked.
- Line a 9 x 13 inch baking pan with parchment paper and spray it with baking spray.: Lining and spraying the pan prevents sticking and helps with an easy release, while the parchment keeps the bottoms from over-browning and makes cleanup effortless. The prepared pan should look clean and ready, with paper edges extending slightly for easy lift out. Avoid skipping the spray because butter alone may not prevent stubborn sticking along the edges. If you do not have parchment, butter and flour the pan thoroughly, focusing on corners.
- Flour a flat surface and roll the dough. You will need a good amount of flour, use it liberally on your hands, rolling pin and also sprinkle the dough with some.: As you dust the counter and tools with flour , the dough moves more freely under the rolling pin, and you will sense tactile resistance easing into smooth glide. Use a light dusting to prevent sticking, but be mindful that too much flour can dry the dough out and make the rolls dense. Keep extra flour nearby to rescue any sticky spots on the edges. The ideal tactile cue is a slightly tacky dough that no longer clings to the surface.
- Roll the dough until it's about 16 inches long by 13 inches wide and it should be about 1/4 inch thick. It is important for the dough to not be very thin, as it won't be able to hold well the filling.: You will see the dough flatten and stretch into a smooth sheet with faint stretch marks, and the surface will sheen slightly from the dissolved butter. The dimension and thickness ensure even spirals and that the filling stays put. If the dough becomes too thin and tears, patch it gently with a bit of dough and press to seal. Too thick and the rolls will be underfilled and heavy rather than tender and well layered.
- When rolling, make sure the dough doesn't stick to the surface.: Frequent turns of the dough and additional light dustings of flour under the sheet help maintain movement. If the dough begins to bind, lift and re flour the surface to avoid tearing. The sound is a light whisper as the rolling pin passes, and visually the dough should lift cleanly without stretching.
- Spread the 1/2 cup of softened butter over the entire surface of the dough.: Spreading the softened butter creates a rich barrier that lets the cinnamon sugar adhere and caramelize without soaking into the dough. Use an offset spatula to get an even layer to the edges, and the buttery sheen should look even and glossy. If the butter is too cold it will tear the dough, if too warm it will pool, so aim for a spreadable consistency.
- Sprinkle with the cinnamon sugar evenly over the surface of the dough.: When you sprinkle the cinnamon sugar, watch how it forms an even, caramel colored blanket across the butter, and the aroma becomes instantly warm and inviting. Press lightly with your fingers to help it attach, leaving a narrow border along the edge to help sealing the roll later. A common mistake is piling sugar in clumps which can create pockets of over sweetness and wetness that leak during baking.
- Starting at the long edge, away from you, roll the dough down to the bottom edge.: As you begin to roll from the long edge, the cinnamon sugar spirals inward creating taut coils. Rolling away from you gives control and helps form neat layers, while a steady pace prevents air pockets. If the roll stretches or becomes loose, tuck gently and roll again, aiming for an even, firm cylinder. The tactile feedback should be a smooth, continuous motion with no sudden tears.
- Cut the dough into 12 two-inch slices and place the rolls into the prepared baking pan.: Use a sharp knife or dental floss to slice so the cuts are clean and the spirals remain intact. The exposed layers should show a neat cinnamon spiral and the slices will puff slightly as you place them in the pan. Crowding can prevent even baking, so space them with a small gap for expansion. If the slices look compressed, let them rest a bit upright to regain shape.
- Let the rolls rest for 10 minutes, during which the will rise a bit.: During this short rest the rolls relax and begin a gentle final rise, their surfaces becoming slightly pillowy and the edges softening. It is a short proof to give them a final lift before heat, and you will notice a subtle increase in size and a softer feel when pressed lightly. Overproofing can cause overly flattened rolls in the oven, while underproofing yields tight, less tender interiors.
- Place the baking pan in the oven and bake for 20-25 minutes or until golden brown.: As the rolls bake the kitchen fills with a caramel scent as the sugars darken and the butter browns, and you may hear a faint crackle at the edges as moisture escapes. The visual cue is a warm golden top and slightly deepened color at the edges. If your oven runs hot, check earlier to avoid over-browning; conversely, a pale top after the full time may need a few more minutes. The center should feel set, not doughy, when gently pressed.
- Add the cream cheese and butter to a mixing bowl and beat until smooth.: The pairing of room temperature cream cheese and softened butter whips into a luxuriously smooth base for the glaze, smelling faintly tangy and rich. Beat until there are no visible lumps, scraping the bowl so everything emulsifies evenly. If the mixture looks curdled, keep beating at low speed until it comes together; cold ingredients are the usual cause.
- Add the powdered sugar, vanilla extract and pinch of salt and mix until smooth. Stop to scrape the sides and bottom of the bowl with a spatula.: As you incorporate the powdered sugar , the glaze becomes thick and satiny, and the vanilla extract lifts the flavor into a rounded, aromatic finish. The tiny pinch of salt balances the sweetness so the glaze tastes bright rather than cloying. Scraping ensures no dry pockets remain, and if the glaze seems grainy, allow a minute for the sugar to dissolve with continued mixing.
- If the icing is too stiff, add 1 tablespoon of milk.: A single tablespoon of milk will loosen the icing to a glossy, spreadable consistency that gently drapes over the warm rolls. Add slowly to avoid making the glaze runny, aiming for a ribbon that falls and settles rather than a pour. If you overshoot and make it too thin, add a bit more powdered sugar to thicken back up. The right texture should cling and pool lightly in the spiral centers.
- Once the rolls are done baking, remove from oven and immediately ice the rolls.: I love the moment when hot rolls meet cool, tangy glaze and the surface softens into shiny ribbons, steam rising in delicate curls. Spreading the glaze while the rolls are hot lets it seep into the spirals, making them luxuriously gooey. If you wait too long the glaze will sit on the surface and not meld into the layers, losing some of that gooey magic. Use a generous dollop and let it drip into the centers for maximum effect.
- Preferably serve warm, but they are great at room temperature as well.: Warm rolls have a melty interior and soft icing that invites immediate bites, with steam and scent that captivates the senses. At room temperature the texture firms slightly, which some people prefer for neat slicing. If you need to reheat, pop them in a low oven until gently warmed, covering loosely to avoid drying. Be mindful that microwaving can make them gummy rather than tender.
How to Switch It Up
I like to offer ways to personalize these rolls without losing what makes them special. Small changes to technique, filling ratios, or serving style can shift the profile while keeping the core comforting elements intact. Below are practical, tested tips you can use to vary texture, flavor, or presentation.
- Use less sugar in the dough to create a milder, less sweet roll that lets the filling shine more distinctly, especially if you prefer a tangier icing contrast.
- Swap dark brown sugar for light brown if you want a subtler molasses note; the color will be slightly paler and the flavor a touch less robust.
- Chill the roll log before cutting for cleaner, neater slices, especially helpful when making precise portions for gifting or serving.
- Brush with a light butter wash before baking to encourage deeper browning and a slightly crisper exterior, giving a nice contrast to the soft interior.
- Make-ahead and freeze by assembling and freezing the cut rolls on a tray, then transferring to a bag; thaw and bake when needed for fresh results.
Best Served With
These rolls are a hands down crowd pleaser, and how you serve them can make an ordinary morning feel festive. Whether you are planning a leisurely weekend brunch or a holiday breakfast, the pairing choices below add context and make the experience complete. I like to think about temperature, texture and seasonal accents when deciding what to serve alongside them.
- Serve warm with coffee or tea to enhance the spice aromatics and enjoy the rolls at their gooey, melty best during a relaxed breakfast gathering.
- Present on a platter for brunch alongside fresh fruit and small savory bites, creating a balanced spread for family or guests during special occasions.
- Package as gifts for neighbors or hosts, wrapped while still slightly warm, offering a thoughtful homemade treat that travels well to gatherings.
- Store leftovers properly by covering airtight and refrigerating; warm gently in the oven to revive texture and flavor before serving again.
- Pair seasonally with spiced apple compote in fall, or a bright citrus salad in spring to complement the warm cinnamon flavors and add freshness to the plate.
FAQ
Conclusion
What makes these rolls special is the combination of tender, enriched dough, a deeply spiced brown sugar filling, and a tangy cream cheese glaze that melts into the warm spirals. Try them when you want to turn an ordinary morning into a small celebration, or to impress guests with minimal fuss and maximum comfort. I hope you enjoy the process of making them as much as the eating, and that these rolls bring warmth and a little indulgence to your table soon.
Homemade Cinnamon Rolls
Equipment
- Mixing Bowl
- Wooden Spoon
- Rolling Pin
- 9 x 13-inch baking pan
- Parchment Paper
- Mixer or whisk
Ingredients
- 1/3 cup warm water Provide warm hydration to activate yeast and help dissolve sugars and salts; ensures dough achieves proper fermentation and elasticity when combined with flour and yeast.
- 2 1/4 teaspoon instant yeast 1 package Leaven bread by producing carbon dioxide during fermentation; creates airy, tender dough structure and determines rise time for the rolls.
- 1 tablespoon granulated sugar Add fermentable sweetness to feed yeast and enhance browning; balances flavors and contributes to a tender crumb in the finished rolls.
- 2 eggs room temperature Incorporate liquid richness and structure while aiding emulsification; eggs contribute to tenderness, color, and binding of the dough components.
- 1 cup lukewarm milk Offer additional liquid for proper dough consistency and a softer crumb; milk enriches flavor, improves browning, and helps create a tender texture.
- 1/2 cup granulated sugar Provide sweetness and assist in caramelization during baking; contributes to flavor depth and helps tenderize the dough when combined with fats.
- 1/3 cup unsalted butter melted Add fat for tenderness and moisture while improving dough handling; melted butter enriches flavor and contributes to a soft, delicate crumb.
- 4 cups all-purpose flour Form the bulk structure of the dough by supplying gluten-forming proteins and starch; flour determines texture, chew, and overall body of the rolls.
- 1 teaspoon salt Regulate yeast activity and strengthen gluten structure subtly; salt enhances flavor and controls fermentation rate for balanced dough development.
- 3/4 cup dark brown sugar packed Create the sweet, sticky filling core that caramelizes during baking; packed brown sugar gives depth with molasses notes and moist texture.
- 2 tablespoons ground cinnamon Impart warm, aromatic spice to the filling; cinnamon provides signature flavor and pairs with sugar and butter for classic roll taste.
- 1/2 cup unsalted butter softened Provide a spreadable fat layer in the filling to bind spices and sugars; softened butter helps create swirls and a gooey center when baked.
- 8 oz cream cheese room temperature Contribute creamy tang and richness to the frosting; room-temperature cream cheese yields smooth, spreadable icing with balanced acidity.
- 8 tablespoons unsalted butter softened Add body and buttery flavor to the frosting, increasing richness and spreadability; softened butter helps achieve a silky icing texture.
- 2 cups powdered sugar Sweeten and thicken the frosting for a smooth, pipeable finish; powdered sugar dissolves easily to create a glossy, stable icing.
- 1 tablespoon vanilla extract Enhance the frosting with aromatic depth and balance sweetness; vanilla extract rounds flavors and complements cream cheese and butter.
- 1/8 teaspoon salt Fine-tune the frosting flavor by subtly adjusting salt balance; a pinch of salt cuts sweetness and enhances overall taste harmony.
Instructions
- Whisk 4 cups of flour and salt in a large bowl and set aside.: The room smells of dry, wheaty flour and a faint mineral note from the salt when you combine them, which creates a neutral base for the richer ingredients to come. I always toss the flour and salt together to ensure even distribution, because salt in clumps can unevenly inhibit the yeast later on. A common issue is measuring too densely, so gently spoon and level the flour rather than scooping to avoid a heavy dough. If your flour mixture feels too thick, remember you will be adding liquids gradually; resist adding more than the recipe calls for. The visual cue here is a homogenous pale mixture with no visible salt specks.
- Add instant yeast, 1 tablespoon of sugar and lukewarm water to a medium bowl and whisk to combine. Let it rest for 5 minutes.: When you stir the instant yeast , sugar and warm water, you should notice tiny foam forming at the surface within a few minutes, an acoustic whisper of activity that signals a lively yeast. This brief rest lets the yeast wake up and begin producing tiny bubbles that will later puff the dough. If nothing happens after 10 minutes, your yeast might be old or the water temperature incorrect, in which case start over with fresh yeast and water that feels like a warm bath. Avoid using very hot water, which will kill the yeast and leave you with a flat dough. The smell at this stage is lightly sweet and yeasty, promising fermentation ahead.
- Add the eggs, milk, remaining 1/2 cup sugar and melted butter to the yeast mixture and whisk until well combined.: As you whisk in the eggs , milk , additional sugar and melted butter , the mixture becomes glossy and slightly viscous, with a sweet, milky scent that hints at the rich dough to come. This enriched liquid provides fat and tenderness to the final crumb, and the eggs contribute structure and color. If the melted butter is too hot it can cook the eggs into little strands, so let it cool until it is only warm to the touch. A common hiccup is adding cold eggs straight from the fridge, which can cool the mixture and slow yeast activity; bring them to room temperature for seamless incorporation.
- Add the yeast mixture to the flour mix and using a wooden spoon or spatula, stir until well combined.: At this point, the bowl begins to fill with a rough, sticky mass that smells faintly sweet and yeasty, and you will feel resistance as gluten starts to develop. Use a sturdy wooden spoon or large spatula to pull the ingredients together, scraping the sides so no dry pockets remain. Overmixing can lead to a tough outcome, while undermixing leaves flour streaks, so aim for a uniformly shaggy dough. If you notice very dry patches, add a teaspoon of warm water at a time until the dough comes together but remains tacky.
- The dough will be sticky. Cover with plastic wrap and let it rest for 10 minutes, preferably in a warm place.: You will feel the dough relax and become more cohesive after resting, with a slight tackiness that indicates hydration. This brief autolyse allows the flour to absorb liquids and gluten to begin relaxing, which makes kneading gentler and more effective. Covering prevents a skin from forming, and a warm spot helps the dough come closer to room temperature for better handling. A common mistake is skipping this rest and forcing aggressive kneading, which can make the dough tight and resistant rather than supple.
- In a small bowl whisk together the dark brown sugar with the ground cinnamon until fully combined. Set aside. You will use the butter to spread it on the dough.: As you whisk the dark brown sugar and cinnamon , the aroma of molasses and spice intensifies, a heady perfume that previews the filling. The texture should be uniformly sandy so it will adhere to the softened butter later. Packing the brown sugar tightly helps maintain consistent moisture, while freshly ground cinnamon yields brighter, livelier flavor. If the mixture seems damp or clumpy, break it up with a fork to ensure even sprinkling across the dough.
- Preheat oven to 350 F degrees. Place an oven rack into the middle of the oven.: The oven fills with a gentle, anticipatory warmth as you preheat to 350 F , a temperature that browns the rolls evenly without drying them out. Positioning the rack in the middle promotes steady top and bottom heat interaction, which helps the rolls rise and color uniformly. I always give the oven a few minutes at temperature before baking so thermal mass stabilizes. A common issue is placing the pan too close to the top element which can scorch the tops before the centers are fully baked.
- Line a 9 x 13 inch baking pan with parchment paper and spray it with baking spray.: Lining and spraying the pan prevents sticking and helps with an easy release, while the parchment keeps the bottoms from over-browning and makes cleanup effortless. The prepared pan should look clean and ready, with paper edges extending slightly for easy lift out. Avoid skipping the spray because butter alone may not prevent stubborn sticking along the edges. If you do not have parchment, butter and flour the pan thoroughly, focusing on corners.
- Flour a flat surface and roll the dough. You will need a good amount of flour, use it liberally on your hands, rolling pin and also sprinkle the dough with some.: As you dust the counter and tools with flour , the dough moves more freely under the rolling pin, and you will sense tactile resistance easing into smooth glide. Use a light dusting to prevent sticking, but be mindful that too much flour can dry the dough out and make the rolls dense. Keep extra flour nearby to rescue any sticky spots on the edges. The ideal tactile cue is a slightly tacky dough that no longer clings to the surface.
- Roll the dough until it's about 16 inches long by 13 inches wide and it should be about 1/4 inch thick. It is important for the dough to not be very thin, as it won't be able to hold well the filling.: You will see the dough flatten and stretch into a smooth sheet with faint stretch marks, and the surface will sheen slightly from the dissolved butter. The dimension and thickness ensure even spirals and that the filling stays put. If the dough becomes too thin and tears, patch it gently with a bit of dough and press to seal. Too thick and the rolls will be underfilled and heavy rather than tender and well layered.
- When rolling, make sure the dough doesn't stick to the surface.: Frequent turns of the dough and additional light dustings of flour under the sheet help maintain movement. If the dough begins to bind, lift and re flour the surface to avoid tearing. The sound is a light whisper as the rolling pin passes, and visually the dough should lift cleanly without stretching.
- Spread the 1/2 cup of softened butter over the entire surface of the dough.: Spreading the softened butter creates a rich barrier that lets the cinnamon sugar adhere and caramelize without soaking into the dough. Use an offset spatula to get an even layer to the edges, and the buttery sheen should look even and glossy. If the butter is too cold it will tear the dough, if too warm it will pool, so aim for a spreadable consistency.
- Sprinkle with the cinnamon sugar evenly over the surface of the dough.: When you sprinkle the cinnamon sugar, watch how it forms an even, caramel colored blanket across the butter, and the aroma becomes instantly warm and inviting. Press lightly with your fingers to help it attach, leaving a narrow border along the edge to help sealing the roll later. A common mistake is piling sugar in clumps which can create pockets of over sweetness and wetness that leak during baking.
- Starting at the long edge, away from you, roll the dough down to the bottom edge.: As you begin to roll from the long edge, the cinnamon sugar spirals inward creating taut coils. Rolling away from you gives control and helps form neat layers, while a steady pace prevents air pockets. If the roll stretches or becomes loose, tuck gently and roll again, aiming for an even, firm cylinder. The tactile feedback should be a smooth, continuous motion with no sudden tears.
- Cut the dough into 12 two-inch slices and place the rolls into the prepared baking pan.: Use a sharp knife or dental floss to slice so the cuts are clean and the spirals remain intact. The exposed layers should show a neat cinnamon spiral and the slices will puff slightly as you place them in the pan. Crowding can prevent even baking, so space them with a small gap for expansion. If the slices look compressed, let them rest a bit upright to regain shape.
- Let the rolls rest for 10 minutes, during which the will rise a bit.: During this short rest the rolls relax and begin a gentle final rise, their surfaces becoming slightly pillowy and the edges softening. It is a short proof to give them a final lift before heat, and you will notice a subtle increase in size and a softer feel when pressed lightly. Overproofing can cause overly flattened rolls in the oven, while underproofing yields tight, less tender interiors.
- Place the baking pan in the oven and bake for 20-25 minutes or until golden brown.: As the rolls bake the kitchen fills with a caramel scent as the sugars darken and the butter browns, and you may hear a faint crackle at the edges as moisture escapes. The visual cue is a warm golden top and slightly deepened color at the edges. If your oven runs hot, check earlier to avoid over-browning; conversely, a pale top after the full time may need a few more minutes. The center should feel set, not doughy, when gently pressed.
- Add the cream cheese and butter to a mixing bowl and beat until smooth.: The pairing of room temperature cream cheese and softened butter whips into a luxuriously smooth base for the glaze, smelling faintly tangy and rich. Beat until there are no visible lumps, scraping the bowl so everything emulsifies evenly. If the mixture looks curdled, keep beating at low speed until it comes together; cold ingredients are the usual cause.
- Add the powdered sugar, vanilla extract and pinch of salt and mix until smooth. Stop to scrape the sides and bottom of the bowl with a spatula.: As you incorporate the powdered sugar , the glaze becomes thick and satiny, and the vanilla extract lifts the flavor into a rounded, aromatic finish. The tiny pinch of salt balances the sweetness so the glaze tastes bright rather than cloying. Scraping ensures no dry pockets remain, and if the glaze seems grainy, allow a minute for the sugar to dissolve with continued mixing.
- If the icing is too stiff, add 1 tablespoon of milk.: A single tablespoon of milk will loosen the icing to a glossy, spreadable consistency that gently drapes over the warm rolls. Add slowly to avoid making the glaze runny, aiming for a ribbon that falls and settles rather than a pour. If you overshoot and make it too thin, add a bit more powdered sugar to thicken back up. The right texture should cling and pool lightly in the spiral centers.
- Once the rolls are done baking, remove from oven and immediately ice the rolls.: I love the moment when hot rolls meet cool, tangy glaze and the surface softens into shiny ribbons, steam rising in delicate curls. Spreading the glaze while the rolls are hot lets it seep into the spirals, making them luxuriously gooey. If you wait too long the glaze will sit on the surface and not meld into the layers, losing some of that gooey magic. Use a generous dollop and let it drip into the centers for maximum effect.
- Preferably serve warm, but they are great at room temperature as well.: Warm rolls have a melty interior and soft icing that invites immediate bites, with steam and scent that captivates the senses. At room temperature the texture firms slightly, which some people prefer for neat slicing. If you need to reheat, pop them in a low oven until gently warmed, covering loosely to avoid drying. Be mindful that microwaving can make them gummy rather than tender.
Notes
- Use less sugar in the dough to create a milder, less sweet roll that lets the filling shine more distinctly, especially if you prefer a tangier icing contrast.
- Swap dark brown sugar for light brown if you want a subtler molasses note; the color will be slightly paler and the flavor a touch less robust.
- Chill the roll log before cutting for cleaner, neater slices, especially helpful when making precise portions for gifting or serving.
- Brush with a light butter wash before baking to encourage deeper browning and a slightly crisper exterior, giving a nice contrast to the soft interior.
- Make-ahead and freeze by assembling and freezing the cut rolls on a tray, then transferring to a bag; thaw and bake when needed for fresh results.