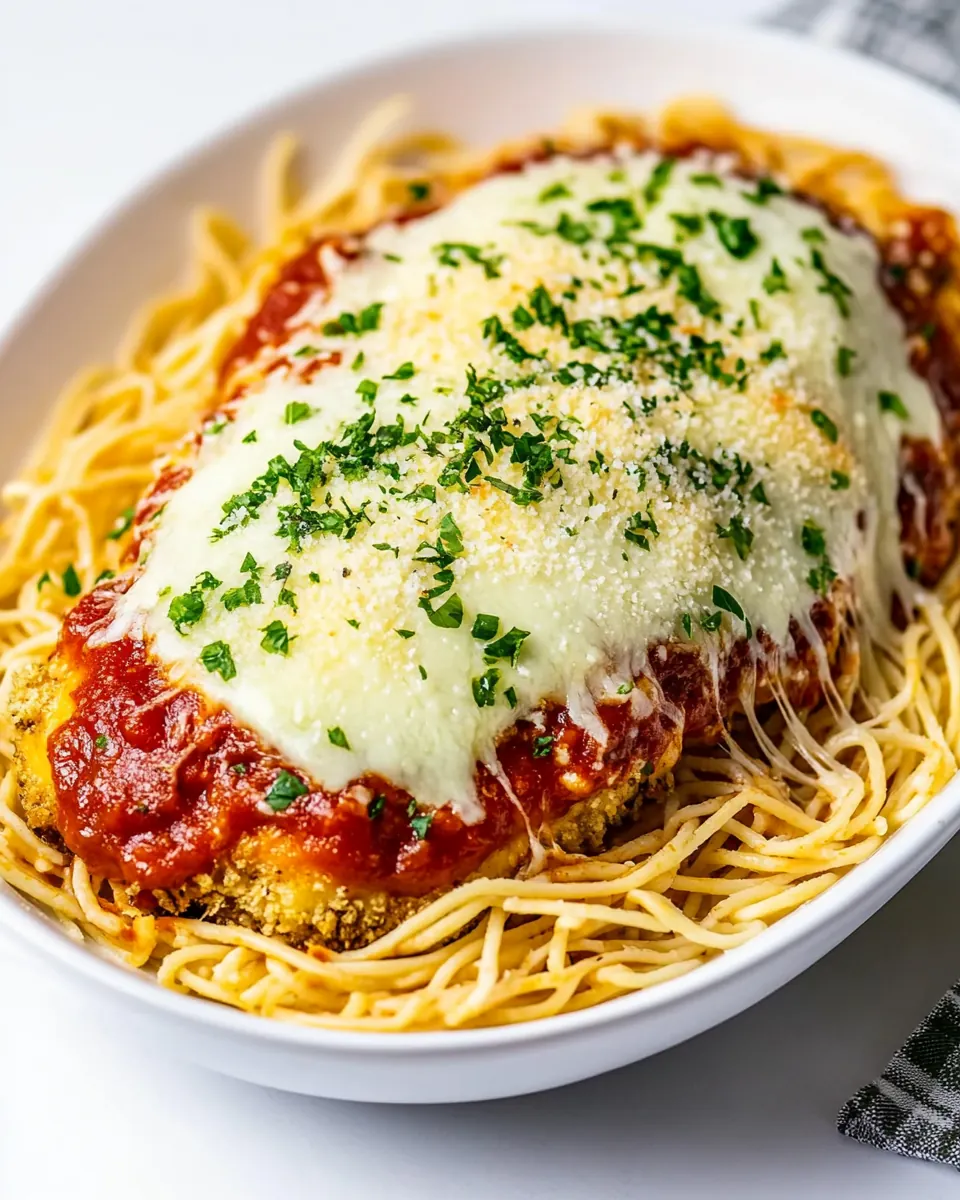
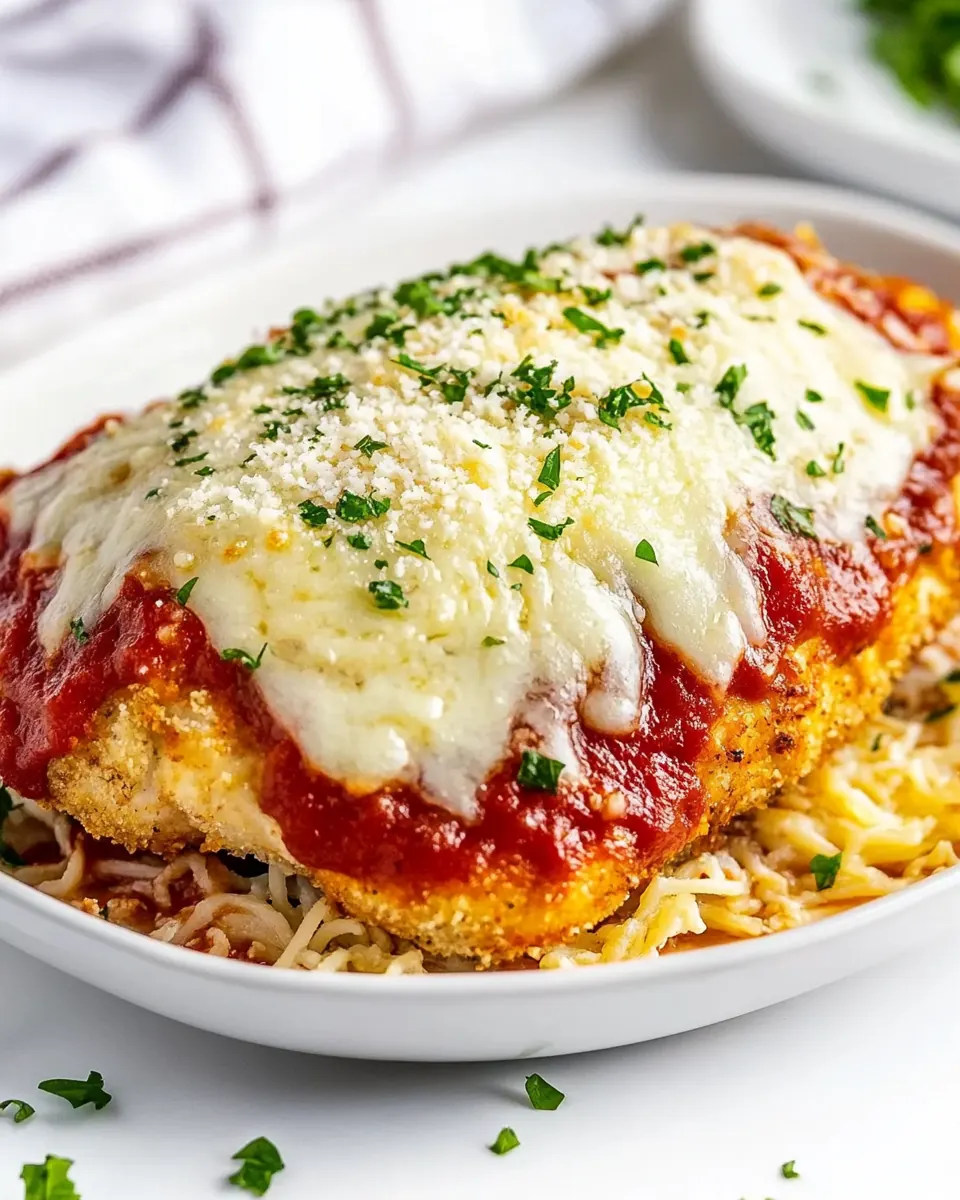
Baked Chicken Parmesan
Baked Chicken Parmesan is one of those recipes I reach for when I want comfort food that still feels a little special. The first time I made this I remember the kitchen filling with the warm, toasty scent of browned crumbs while the oven hummed, and how the melted mozzarella stretched with every forkful. That memory stuck with me, and now this dish is my go to when I want friends to leave full and happy.
I like to tell the story of how a simple weeknight turned into a small celebration thanks to this recipe. We had a frantic afternoon, and I needed something fast but impressive. The crisped, golden coating on the chicken and the bubbling marinara sauce on top felt like an upgrade from a plain roast. I served it over a nest of al dente pasta, and everyone lingered at the table longer than usual.
After that night I started tweaking small details, learning which spices sing and how to keep the breading crisp without extra fuss. Over time I made it reliably quick, flavorful, and forgiving for cooks at any level. When guests ask for the recipe I always smile, because it proves easy food can be elegant. Give this one a try when you want a cozy dinner that still impresses.
Recipe Snapshot
35 mins
10 mins
25 mins
Medium
450 kcal
Italian
Gluten-Free, Low FODMAP
Dinner
Oven, Baking sheet, Aluminum foil, Shallow dishes, Meat pounder or rolling pin, Instant read thermometer
Why This Baked Chicken Parmesan Shines
Comfort with a Crunch
One thing I love about Baked Chicken Parmesan is the contrast between the crunchy coating and the tender chicken beneath. That texture plays into every bite, making dinner satisfying without feeling heavy. I often tell people that a properly crisped crust transforms ordinary chicken into something worth celebrating.
Fast Enough for Weeknights
This recipe moves quickly from prep to plate, so it’s become my favorite for busy evenings. You still get flavorful results, yet it does not require hours or complicated techniques. When I am juggling work and family, this is the meal that reliably delivers without drama.
Big Flavors from Simple Ingredients
I adore how a handful of pantry staples like parmesan cheese, panko bread crumbs, and a jar of marinara sauce combine to create big, familiar flavors. I find that modest additions, like a pinch of oregano or a little garlic powder, add depth without stealing the show. This makes it accessible, since you do not need specialty items.
Meal Prep Friendly
If you like prepping ahead, this dish is forgiving. You can bread the chicken in advance, refrigerate, and then finish in the oven when it is time to eat. I often prep the pieces earlier in the day, which means after a long afternoon I only need to slide a pan into the oven and relax while dinner cooks.
Kid Approved and Crowd Ready
Finally, the familiar flavors make it a crowd pleaser. I have served Baked Chicken Parmesan to picky eaters and enthusiastic foodies alike, and it gets smiles all around. It is an easy way to make an everyday dinner feel like a small occasion.
Ingredient List for Baked Chicken Parmesan
These ingredients are chosen to balance crisp texture, savory depth, and bright tomato finish. The key players are the coating elements that provide crunch, the dairy that brings richness, and the sauce which adds acidity and comfort. Together they create a satisfying, layered plate where each part supports the others.
- 2 tablespoons olive oil: Sauté gently to provide a flavorful cooking medium and help crisp the breaded chicken exterior while preventing sticking; adds a subtle fruity richness that complements tomato sauce. Use at medium heat to avoid smoking and to promote even browning. Measure precisely to control calories and prevent greasy results.
- 4 chicken breasts: Pound thin or slice evenly to ensure uniform cooking and tender texture; serves as the main protein and structural base for the dish. Pat dry before breading to help coatings adhere and to achieve a crisp crust. Cook until internal temperature reaches safe levels for poultry.
- 2 large eggs: Beat lightly and use as a binding agent to help bread crumbs adhere to the chicken, forming a cohesive coating. Whisk with a splash of water or milk for easier dipping and even coverage. Provides slight moisture and helps create a golden exterior.
- 1 cup Italian panko bread crumbs: Coat generously to create a crunchy, golden crust that contrasts with the tender chicken and melted cheese. Season or combine with herbs for added flavor and texture in each bite. Choose Italian seasoned panko for extra savory notes and better crispiness.
- 1/4 cup parmesan cheese fresh grated: Sprinkle finely to add a savory, nutty umami hit that enhances overall depth and complements the cheese topping. Mix into the breading or sprinkle over finished chicken for extra flavor. Use freshly grated for best melting and aromatic qualities.
- 1/2 teaspoon dried oregano: Season sparingly to impart warm, Mediterranean herbal notes that pair well with tomato sauce and cheese. Blend into the breading mixture for subtle aromatic complexity. Adjust amount to taste, keeping balance with other seasonings.
- 1/2 teaspoon garlic powder: Season lightly to contribute a mellow, garlicky background note without overpowering the dish; works well in the breading mix for balanced flavor. Use powdered form for even distribution. Combine with other dry spices for depth.
- 1 teaspoon kosher salt: Season thoroughly to enhance overall taste and bring out natural flavors of the chicken and breading; helps balance tomato acidity and cheese richness. Dissolve slightly when mixed with egg for improved seasoning distribution. Adjust to dietary needs if reducing sodium.
- 1/2 teaspoon black pepper: Season coarsely to add a sharp, aromatic bite that complements savory components and brightens the dish. Grind fresh for increased fragrance and subtle heat. Balance with salt to maintain palatability.
- Non-stick cooking spray: Spray lightly on baking surface to prevent sticking and promote even browning without adding excess oil; helps maintain crisp breading when baking instead of frying. Use a thin, even coating from a distance for best results. Avoid over-spraying to keep coating from becoming soggy.
- 1 cup marinara sauce: Spoon over baked chicken to provide moistness, acidity, and classic Italian tomato flavor, acting as the primary sauce for the Parmesan preparation. Warm gently before using to avoid cooling the chicken. Choose a smooth or chunky variety depending on texture preference.
- 1 1/2 cups shredded mozzarella: Melt evenly to create a gooey, milky topping that binds other components and adds a creamy, melty finish; provides visual appeal and rich mouthfeel. Sprinkle atop sauce-covered chicken and bake until bubbly and golden. Use freshly shredded for better melting characteristics.
- 2 tablespoons minced parsley for garnish (optional): Garnish finely to add fresh herbal brightness and a pop of color that enhances presentation and flavor contrast. Sprinkle after baking to retain green color and delicate taste. Use minced parsley sparingly to avoid overpowering other flavors.
- Spaghetti to serve with (optional): Serve alongside to provide a hearty, starchy accompaniment that soaks up sauce and complements the main dish with texture contrast. Cook pasta al dente to maintain bite and prevent mushiness when mixed with sauce. Offer as optional for diners seeking a fuller meal.
Recipe Directions for Baked Chicken Parmesan
I like to walk through these directions as if you are standing beside me in the kitchen. This recipe has clear, satisfying stages from prep to broil, and following the sensory cues will help you nail the timing each time.
- Preheat the oven to 400 degrees Fahrenheit. Adjust rack in oven so it is in the second from top position.: You will notice a warm, dry smell when the oven reaches temperature and the heat will gradually fill the kitchen, which signals the right environment for crisping the coating. Preheating is critical because placing the chicken into a hot oven encourages immediate cooking at the surface, promoting a golden crust rather than a soggy one. A common mistake is skipping this step, which often leads to a limp coating and extended cook times. If your oven runs hot, use an oven thermometer to ensure accuracy, because even small temperature swings change browning and internal doneness.
- Line a baking sheet with aluminum foil. Brush with olive oil. Set aside.: When you press a finger gently on the oiled foil you should feel a slick surface, which will help the crust release easily. The foil catches any drips and makes cleanup fast, while the olive oil promotes even browning under the panko bread crumbs . If you skip oiling the foil the crumbs can stick, tearing the crust when you remove the pieces. Make sure the oil forms a thin, even layer and avoid puddles which can create uneven cooking.
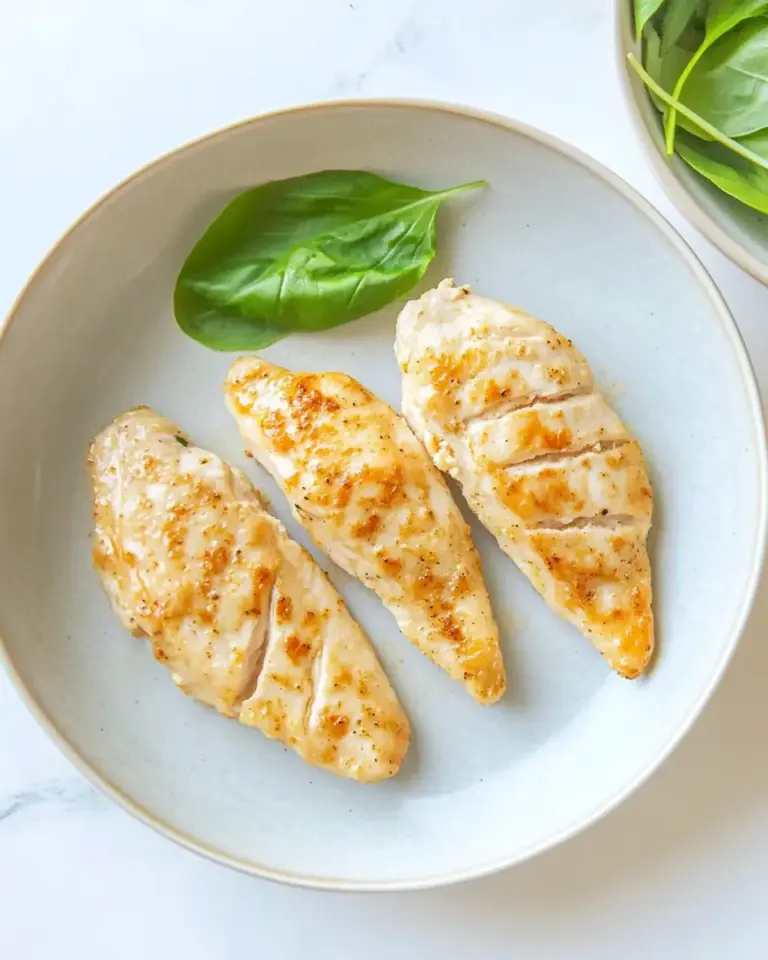
- Place the chicken breasts, one at a time, into a gallon sized zip top bag, seal it, then pound it to an even thickness using a meat pounder or a rolling pin. You can also place the chicken breasts between two layers of cling wrap instead of a zip top bag if you prefer.: As you pound, you will hear a rhythmic thudding and see the breast flatten to a uniform profile, which helps it cook evenly. Even thickness prevents dry edges and undercooked centers, and creates consistent browning across pieces. A common error is over pounding into a paste, which breaks fibers and can cause the chicken to become mushy. Use gentle, controlled strikes until the meat is 1 to 1 and a half centimeters thick in the center for consistent results.
- Remove chicken breasts from the bag and pat the chicken breasts dry with a paper towel.: Drying the surface removes excess moisture that would otherwise steam the coating, so you should feel the flesh become tacky not wet, which helps the eggs and crumbs adhere. You will notice fewer steam clouds when the pieces go into the oven, and the crust will crisp more reliably. Skipping this step often results in an uneven, soggy finish, so blot gently until the surface is matte and slightly dry.
- In one shallow dish, mix together panko bread crumbs, grated parmesan cheese, salt, pepper, garlic powder, oregano, and black pepper.: As you stir, the aroma of the dried spices will become noticeable and the texture will feel airy and coarse. This dry mix is the flavor backbone of the coating, and the cheese melts into the crumbs while the herbs toast in the oven. A common trap is overhandling and compressing the crumbs, which produces a dense layer, so keep the mixture light and evenly combined for maximum crispness.
- In another shallow dish, whisk the egg.: Whisking creates a smooth, slightly frothy liquid that will spread evenly over the meat surface, forming a sticky base for the crumb mixture. You should see tiny bubbles and a uniform color when the egg is ready, which helps with consistent coating. If the egg is not beaten well, you will get gaps in coverage, so whisk until homogenous for the best adhesion.
- Dip one chicken breast into the egg, then into the bread crumb mixture. Make sure the chicken breast is fully coated in the crumb mixture, and gently press with your hand to help the crumbs stick to the chicken, flip and repeat with the other side. Place chicken breast on the prepared baking sheet, repeat with remaining pieces of chicken. Spray the top of the chicken with non-stick spray.: As you press the crumbs onto the meat you will feel them cling and hear a slight crunch as the crumbs compress. The surface should look thoroughly coated and slightly textured. Pat gently to help the crumbs adhere firmly, because loose crumbs can fall off during baking and create uneven browning. A frequent mistake is dipping with wet hands, which can cause the crumbs to clump instead of forming an even crust.
- Place the baking sheet in the oven on the second from the top rack. Bake for 20-25 minutes, or until cooked through to an internal temperature of 165 degrees F. The cooking time will depend on the size of chicken breast and thickness.: Once on the sheet you will notice a pleasant contrast between the pale interior and the golden flecked coating, and a light spritz over the top encourages even browning and helps the crust crisp without excess oil. Listen for the oven door closing and anticipate the aroma that will develop as proteins start to sear. Avoid heavy spraying which can make puddles and steam the crumbs.
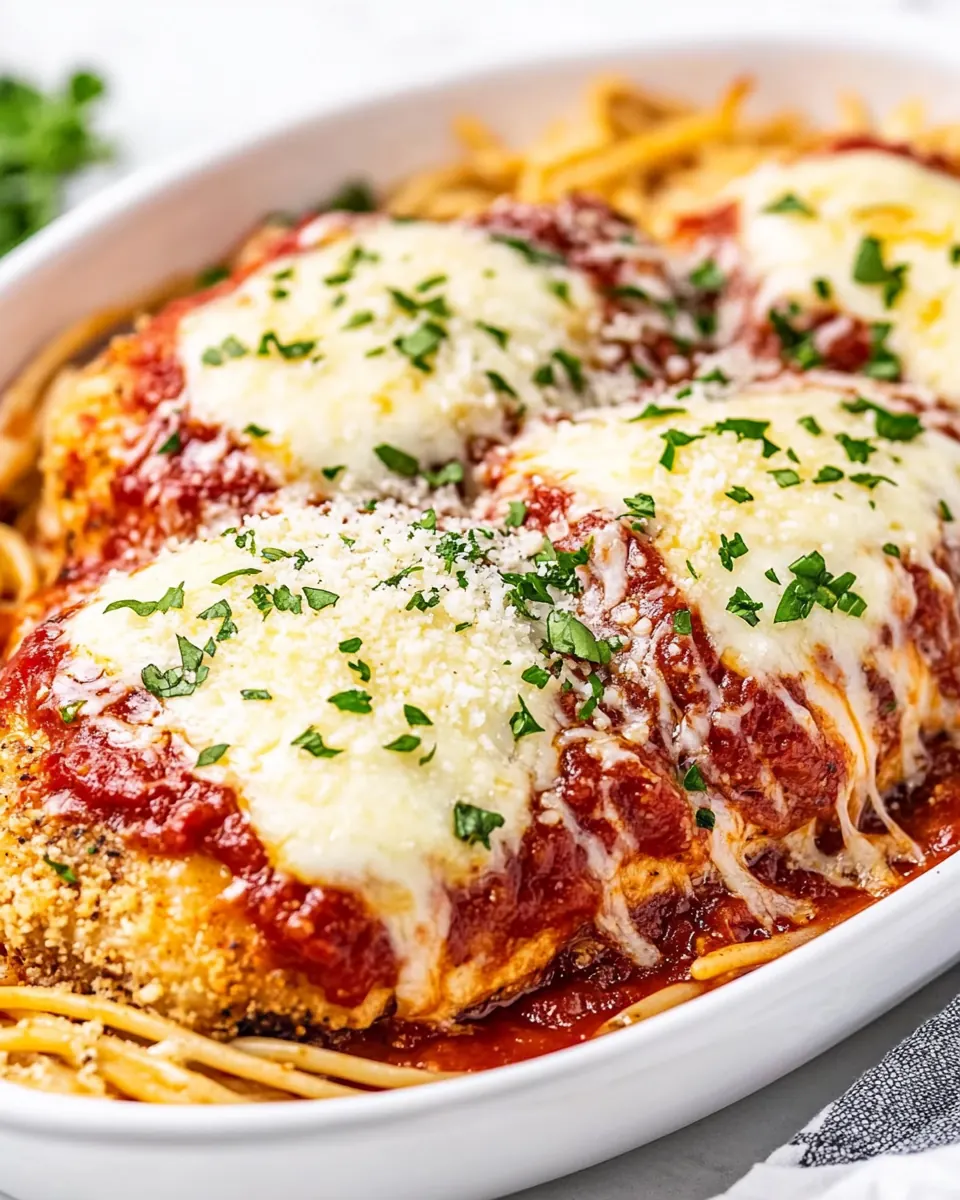
- Flip chicken, pour 1/4 cup of marinara sauce over each piece of chicken, then top with grated mozzarella cheese. Place back in the oven. Turn on the broiler. Broil for 2-4 minutes, until the cheese is melted, bubbly and golden brown and edges of chicken are browning.: During baking you will see the crust deepen in color, and hear a faint sizzling as moisture escapes. The internal temperature is the true gauge of doneness, so use a reliable thermometer inserted into the thickest part of the chicken . If you notice the outside browning too quickly, move the tray to a lower rack or tent with foil to avoid burning. Undercooking leaves the center unsafe and overcooking dries the meat out, so watch for that steady golden hue and check temperature toward the end.
- Remove from the oven, garnish with chopped parsley if desired.: As the cheese melts you will see it bubble and then take on small brown spots, creating a glossy, slightly blistered surface that is irresistible. The brief broil creates visual contrast and a toasty flavor from the proteins and sugars in the cheese. Stay attentive under the broiler because it can go from perfect to burnt quickly, and keep the oven door slightly open if your oven manual suggests it for broiling.
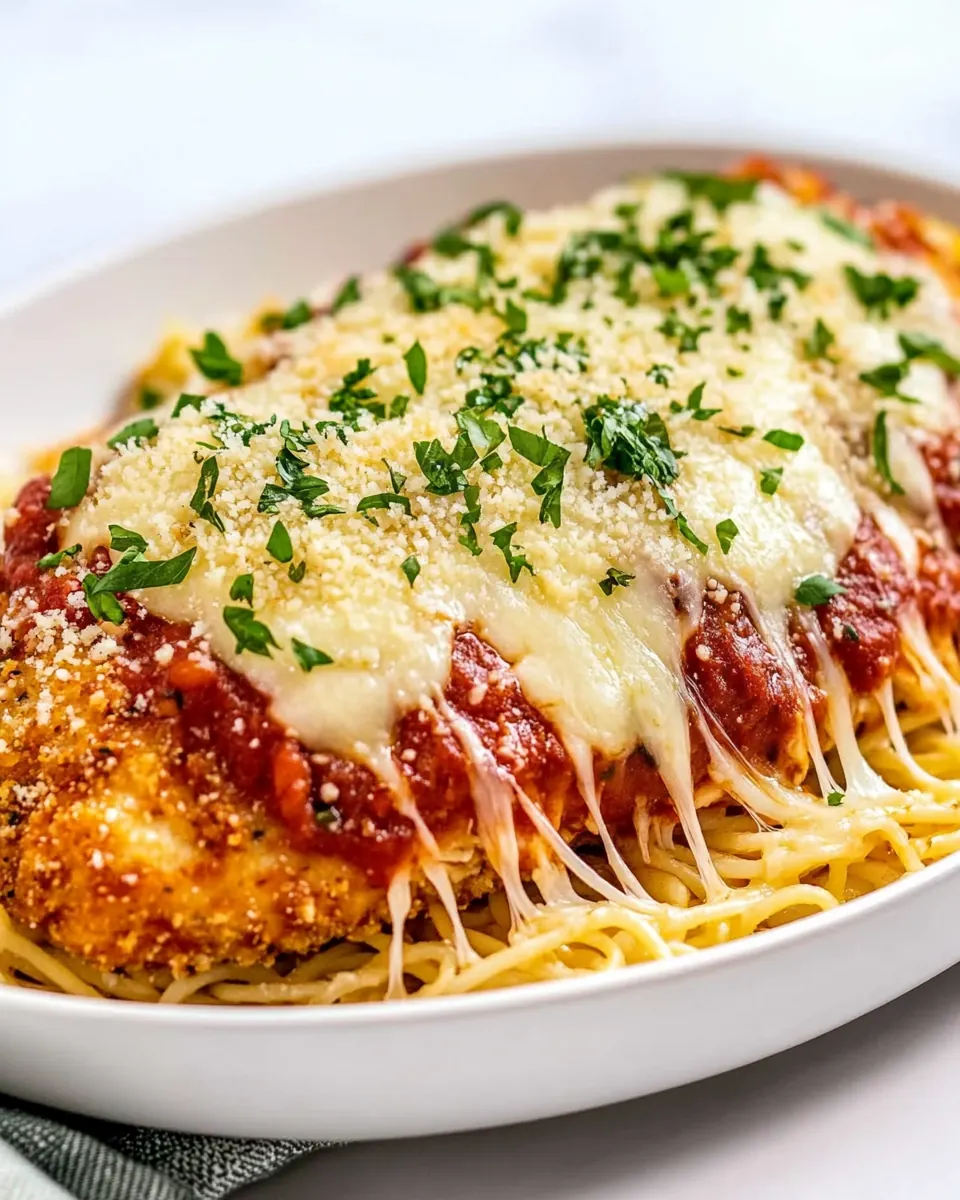
- Serve on top of prepared spaghetti if desired.: When you take the tray out you will smell the combined notes of toasted crumbs, warm cheese, and tomato. Garnishing with minced parsley adds a fresh color and a hint of herbaceous brightness that cuts the richness. Let the pieces rest briefly so juices redistribute, because cutting too soon can cause loss of moisture. Resist serving immediately from a hot tray if you want cleaner slices and less runoff.
- Serve on top of prepared spaghetti if desired: Serving the cutlets over warm spaghetti creates a harmony of textures as the pasta soaks up sauce and the crisped edges mingle with tender strands. You should notice the sauce clinging to the pasta and the cheese stretching as you lift a forkful, which signals a successful assembly. Avoid stacking cutlets too high or the bottom pieces can lose crunch from trapped steam.
Making Adjustments
This section covers ways to tweak texture, flavor, and serve time so the recipe fits your kitchen and schedule. Small swaps and timing adjustments can make the dish work for different occasions while keeping the core profile intact.
- Trim and pound evenly — If your chicken breasts vary in thickness, trim the fattier edges and pound them uniformly so they bake in the same time. This ensures even cooking and avoids dry or underdone parts.
- Adjust seasoning level — Taste the crumb mix before you coat a test bite of breadcrumb to ensure the salt and herbs are balanced, because individual palates vary and small tweaks can prevent bland results.
- Make ahead — You can bread the chicken up to a day ahead and refrigerate on a tray covered lightly, which saves active time on a busy night without compromising final texture when baked from cold.
- Freeze portions — Wrap cooled pieces in foil and place in a freezer bag for long term storage; thaw fully before reheating in the oven to maintain better texture than microwaving.
- Switch the cheese — If you prefer a milder melt, use part mozzarella and part provolone for a creamier finish, keeping the overall quantity the same so the bake time is not altered.
What to Serve Alongside Baked Chicken Parmesan
This dish pairs beautifully with simple sides that either soak up sauce or provide a fresh contrast to the baked richness. Consider the balance of textures and flavors when composing your plate.
- Classic spaghetti — Serve the cutlets over al dente spaghetti tossed lightly with extra marinara sauce to turn the meal into a hearty, family style dinner.
- Simple green salad — A crisp salad with a bright vinaigrette offers a refreshing counterpoint to the cheesy, crunchy main, helping the meal feel lighter for weeknight dining.
- Steamed vegetables — Lightly steamed seasonal veg adds color and nutrition, while the neutral flavors allow the chicken and sauce to remain the focal point.
- Garlic bread — For a crowd pleasing option, warm garlic bread complements the saucy elements and is perfect for sopping up any leftover marinara sauce.
- Occasions — This recipe is ideal for weeknight family dinners, casual Sunday suppers, or small gatherings where you want a comforting main course that feels special without a lot of fuss.
- Storage — Store cooled leftovers in an airtight container in the fridge for 3 to 4 days; reheat in the oven to help restore crispness rather than the microwave which will soften the crust.
- Seasonal pairings — In colder months I serve it with heartier sides like roasted root vegetables, while in spring and summer I lean toward bright salads and grilled greens.
FAQ
Conclusion
What makes this Baked Chicken Parmesan special is the satisfying contrast of a crunchy, golden coating and melting, bubbly cheese finished with bright tomato sauce. It feels comforting and impressive at the same time, delivering big flavors without complicated steps. Try it when you want a dependable weeknight winner that also shines for guests. I hope you enjoy the ritual of crisping the crumbs, the warm scent as the cheese bubbles, and the simple pleasure of serving something hearty and familiar.
Baked Chicken Parmesan
Equipment
- Oven
- Baking Sheet
- Aluminum Foil
- Shallow Dishes
- Meat pounder or rolling pin
- Instant read thermometer
Ingredients
- 2 tablespoons olive oil Sauté gently to provide a flavorful cooking medium and help crisp the breaded chicken exterior while preventing sticking; adds a subtle fruity richness that complements tomato sauce. Use at medium heat to avoid smoking and to promote even browning. Measure precisely to control calories and prevent greasy results.
- 4 chicken breasts Pound thin or slice evenly to ensure uniform cooking and tender texture; serves as the main protein and structural base for the dish. Pat dry before breading to help coatings adhere and to achieve a crisp crust. Cook until internal temperature reaches safe levels for poultry.
- 2 large eggs Beat lightly and use as a binding agent to help bread crumbs adhere to the chicken, forming a cohesive coating. Whisk with a splash of water or milk for easier dipping and even coverage. Provides slight moisture and helps create a golden exterior.
- 1 cup Italian panko bread crumbs Coat generously to create a crunchy, golden crust that contrasts with the tender chicken and melted cheese. Season or combine with herbs for added flavor and texture in each bite. Choose Italian seasoned panko for extra savory notes and better crispiness.
- 1/4 cup parmesan cheese fresh grated Sprinkle finely to add a savory, nutty umami hit that enhances overall depth and complements the cheese topping. Mix into the breading or sprinkle over finished chicken for extra flavor. Use freshly grated for best melting and aromatic qualities.
- 1/2 teaspoon dried oregano Season sparingly to impart warm, Mediterranean herbal notes that pair well with tomato sauce and cheese. Blend into the breading mixture for subtle aromatic complexity. Adjust amount to taste, keeping balance with other seasonings.
- 1/2 teaspoon garlic powder Season lightly to contribute a mellow, garlicky background note without overpowering the dish; works well in the breading mix for balanced flavor. Use powdered form for even distribution. Combine with other dry spices for depth.
- 1 teaspoon kosher salt Season thoroughly to enhance overall taste and bring out natural flavors of the chicken and breading; helps balance tomato acidity and cheese richness. Dissolve slightly when mixed with egg for improved seasoning distribution. Adjust to dietary needs if reducing sodium.
- 1/2 teaspoon black pepper Season coarsely to add a sharp, aromatic bite that complements savory components and brightens the dish. Grind fresh for increased fragrance and subtle heat. Balance with salt to maintain palatability.
- Non-stick cooking spray Spray lightly on baking surface to prevent sticking and promote even browning without adding excess oil; helps maintain crisp breading when baking instead of frying. Use a thin, even coating from a distance for best results. Avoid over-spraying to keep coating from becoming soggy.
- 1 cup marinara sauce Spoon over baked chicken to provide moistness, acidity, and classic Italian tomato flavor, acting as the primary sauce for the Parmesan preparation. Warm gently before using to avoid cooling the chicken. Choose a smooth or chunky variety depending on texture preference.
- 1 1/2 cups shredded mozzarella Melt evenly to create a gooey, milky topping that binds other components and adds a creamy, melty finish; provides visual appeal and rich mouthfeel. Sprinkle atop sauce-covered chicken and bake until bubbly and golden. Use freshly shredded for better melting characteristics.
- 2 tablespoons minced parsley optional for garnish Garnish finely to add fresh herbal brightness and a pop of color that enhances presentation and flavor contrast. Sprinkle after baking to retain green color and delicate taste. Use minced parsley sparingly to avoid overpowering other flavors.
- Spaghetti to serve with optional Serve alongside to provide a hearty, starchy accompaniment that soaks up sauce and complements the main dish with texture contrast. Cook pasta al dente to maintain bite and prevent mushiness when mixed with sauce. Offer as optional for diners seeking a fuller meal.
Instructions
- Preheat the oven to 400 degrees Fahrenheit. Adjust rack in oven so it is in the second from top position.: You will notice a warm, dry smell when the oven reaches temperature and the heat will gradually fill the kitchen, which signals the right environment for crisping the coating. Preheating is critical because placing the chicken into a hot oven encourages immediate cooking at the surface, promoting a golden crust rather than a soggy one. A common mistake is skipping this step, which often leads to a limp coating and extended cook times. If your oven runs hot, use an oven thermometer to ensure accuracy, because even small temperature swings change browning and internal doneness.
- Line a baking sheet with aluminum foil. Brush with olive oil. Set aside.: When you press a finger gently on the oiled foil you should feel a slick surface, which will help the crust release easily. The foil catches any drips and makes cleanup fast, while the olive oil promotes even browning under the panko bread crumbs . If you skip oiling the foil the crumbs can stick, tearing the crust when you remove the pieces. Make sure the oil forms a thin, even layer and avoid puddles which can create uneven cooking.
- Place the chicken breasts, one at a time, into a gallon sized zip top bag, seal it, then pound it to an even thickness using a meat pounder or a rolling pin. You can also place the chicken breasts between two layers of cling wrap instead of a zip top bag if you prefer.: As you pound, you will hear a rhythmic thudding and see the breast flatten to a uniform profile, which helps it cook evenly. Even thickness prevents dry edges and undercooked centers, and creates consistent browning across pieces. A common error is over pounding into a paste, which breaks fibers and can cause the chicken to become mushy. Use gentle, controlled strikes until the meat is 1 to 1 and a half centimeters thick in the center for consistent results.
- Remove chicken breasts from the bag and pat the chicken breasts dry with a paper towel.: Drying the surface removes excess moisture that would otherwise steam the coating, so you should feel the flesh become tacky not wet, which helps the eggs and crumbs adhere. You will notice fewer steam clouds when the pieces go into the oven, and the crust will crisp more reliably. Skipping this step often results in an uneven, soggy finish, so blot gently until the surface is matte and slightly dry.
- In one shallow dish, mix together panko bread crumbs, grated parmesan cheese, salt, pepper, garlic powder, oregano, and black pepper.: As you stir, the aroma of the dried spices will become noticeable and the texture will feel airy and coarse. This dry mix is the flavor backbone of the coating, and the cheese melts into the crumbs while the herbs toast in the oven. A common trap is overhandling and compressing the crumbs, which produces a dense layer, so keep the mixture light and evenly combined for maximum crispness.
- In another shallow dish, whisk the egg.: Whisking creates a smooth, slightly frothy liquid that will spread evenly over the meat surface, forming a sticky base for the crumb mixture. You should see tiny bubbles and a uniform color when the egg is ready, which helps with consistent coating. If the egg is not beaten well, you will get gaps in coverage, so whisk until homogenous for the best adhesion.
- Dip one chicken breast into the egg, then into the bread crumb mixture. Make sure the chicken breast is fully coated in the crumb mixture, and gently press with your hand to help the crumbs stick to the chicken, flip and repeat with the other side. Place chicken breast on the prepared baking sheet, repeat with remaining pieces of chicken. Spray the top of the chicken with non-stick spray.: As you press the crumbs onto the meat you will feel them cling and hear a slight crunch as the crumbs compress. The surface should look thoroughly coated and slightly textured. Pat gently to help the crumbs adhere firmly, because loose crumbs can fall off during baking and create uneven browning. A frequent mistake is dipping with wet hands, which can cause the crumbs to clump instead of forming an even crust.
- Place the baking sheet in the oven on the second from the top rack. Bake for 20-25 minutes, or until cooked through to an internal temperature of 165 degrees F. The cooking time will depend on the size of chicken breast and thickness.: Once on the sheet you will notice a pleasant contrast between the pale interior and the golden flecked coating, and a light spritz over the top encourages even browning and helps the crust crisp without excess oil. Listen for the oven door closing and anticipate the aroma that will develop as proteins start to sear. Avoid heavy spraying which can make puddles and steam the crumbs.
- Flip chicken, pour 1/4 cup of marinara sauce over each piece of chicken, then top with grated mozzarella cheese. Place back in the oven. Turn on the broiler. Broil for 2-4 minutes, until the cheese is melted, bubbly and golden brown and edges of chicken are browning.: During baking you will see the crust deepen in color, and hear a faint sizzling as moisture escapes. The internal temperature is the true gauge of doneness, so use a reliable thermometer inserted into the thickest part of the chicken . If you notice the outside browning too quickly, move the tray to a lower rack or tent with foil to avoid burning. Undercooking leaves the center unsafe and overcooking dries the meat out, so watch for that steady golden hue and check temperature toward the end.
- Remove from the oven, garnish with chopped parsley if desired.: As the cheese melts you will see it bubble and then take on small brown spots, creating a glossy, slightly blistered surface that is irresistible. The brief broil creates visual contrast and a toasty flavor from the proteins and sugars in the cheese. Stay attentive under the broiler because it can go from perfect to burnt quickly, and keep the oven door slightly open if your oven manual suggests it for broiling.
- Serve on top of prepared spaghetti if desired.: When you take the tray out you will smell the combined notes of toasted crumbs, warm cheese, and tomato. Garnishing with minced parsley adds a fresh color and a hint of herbaceous brightness that cuts the richness. Let the pieces rest briefly so juices redistribute, because cutting too soon can cause loss of moisture. Resist serving immediately from a hot tray if you want cleaner slices and less runoff.
- Serve on top of prepared spaghetti if desired: Serving the cutlets over warm spaghetti creates a harmony of textures as the pasta soaks up sauce and the crisped edges mingle with tender strands. You should notice the sauce clinging to the pasta and the cheese stretching as you lift a forkful, which signals a successful assembly. Avoid stacking cutlets too high or the bottom pieces can lose crunch from trapped steam.
Notes
- Trim and pound evenly — If your chicken breasts vary in thickness, trim the fattier edges and pound them uniformly so they bake in the same time. This ensures even cooking and avoids dry or underdone parts.
- Adjust seasoning level — Taste the crumb mix before you coat a test bite of breadcrumb to ensure the salt and herbs are balanced, because individual palates vary and small tweaks can prevent bland results.
- Make ahead — You can bread the chicken up to a day ahead and refrigerate on a tray covered lightly, which saves active time on a busy night without compromising final texture when baked from cold.
- Freeze portions — Wrap cooled pieces in foil and place in a freezer bag for long term storage; thaw fully before reheating in the oven to maintain better texture than microwaving.
- Switch the cheese — If you prefer a milder melt, use part mozzarella and part provolone for a creamier finish, keeping the overall quantity the same so the bake time is not altered.