
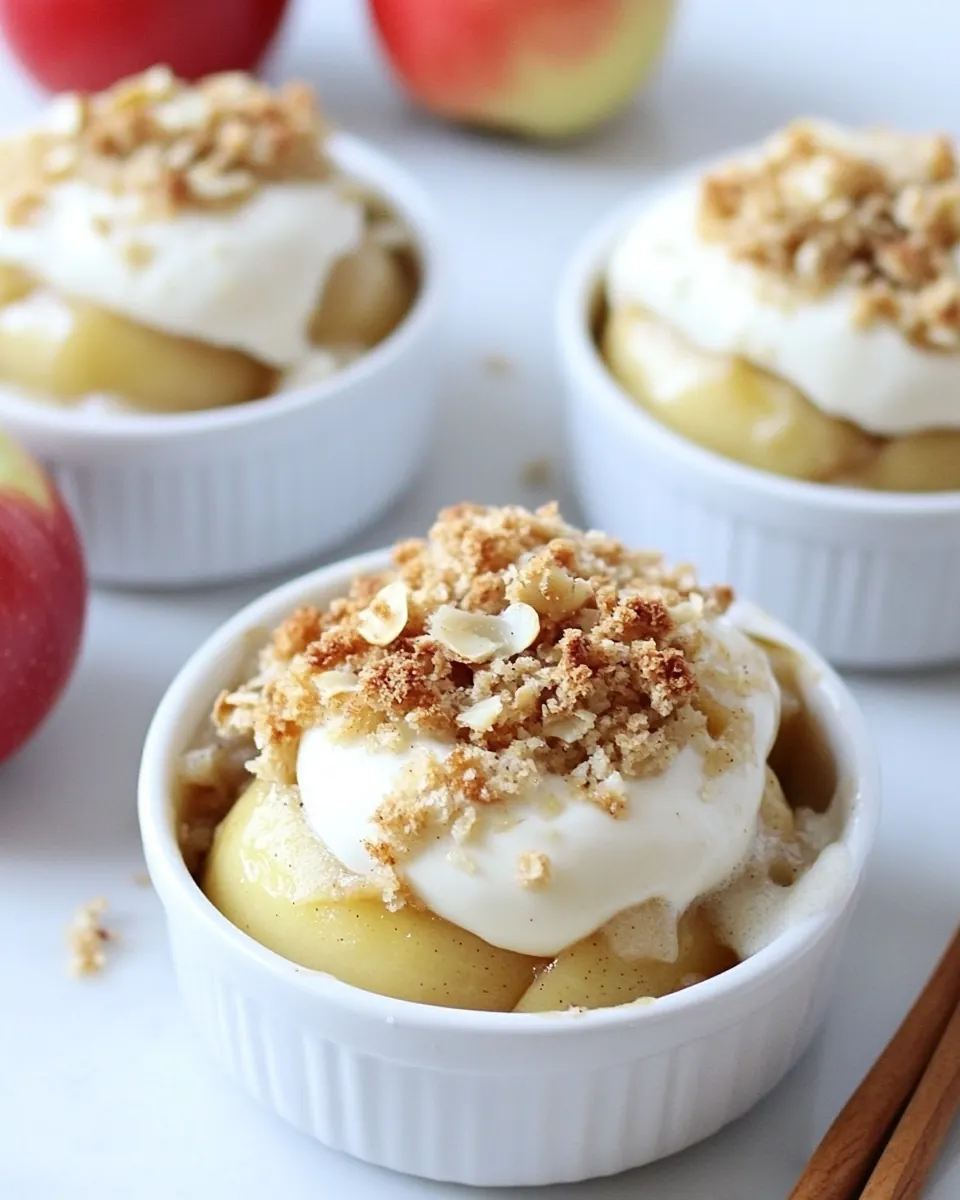
Kid Friendly Baked Apples
Kid Friendly Baked Apples have been my secret weapon for turning a fussy afternoon into a cozy family moment. The first time I made them, the kitchen smelled like warm spices and caramelizing fruit, and my smallest dared to try a spoonful before dinner, eyes wide and grin spreading. That memory still makes me smile, and it is exactly why I keep this recipe in my regular rotation, especially when I want something both simple and comforting.
I remember one rainy Saturday when I had four apples and nothing else planned. I pulled out a few pantry staples, rolled up my sleeves, and let the house fill with the scent of baking apples and butter. The kids hovered, curious about the sound of the filling sizzling and the sight of apple halves turning soft and glossy. We talked about school, about the funny shape of an apple core, and in between bites we tasted the warm, cinnamon spiced oats. Those small conversations, sparked by food, are what I cook for.
Recipe Snapshot
55 mins
15 mins
40 mins
Medium
200 kcal
American
Gluten-Free, Vegan
Desserts
Baking dish, Mixing bowl, Measuring cups
Why This Kid Friendly Baked Apples Hits Different
They are utterly approachable
I love that Kid Friendly Baked Apples need no fancy skills. I can prep everything with one bowl and a spoon, which makes it a go to when I want a reliable finish that still feels homemade. The simple steps mean kids can help, which turns cooking into a shared activity rather than a chore.
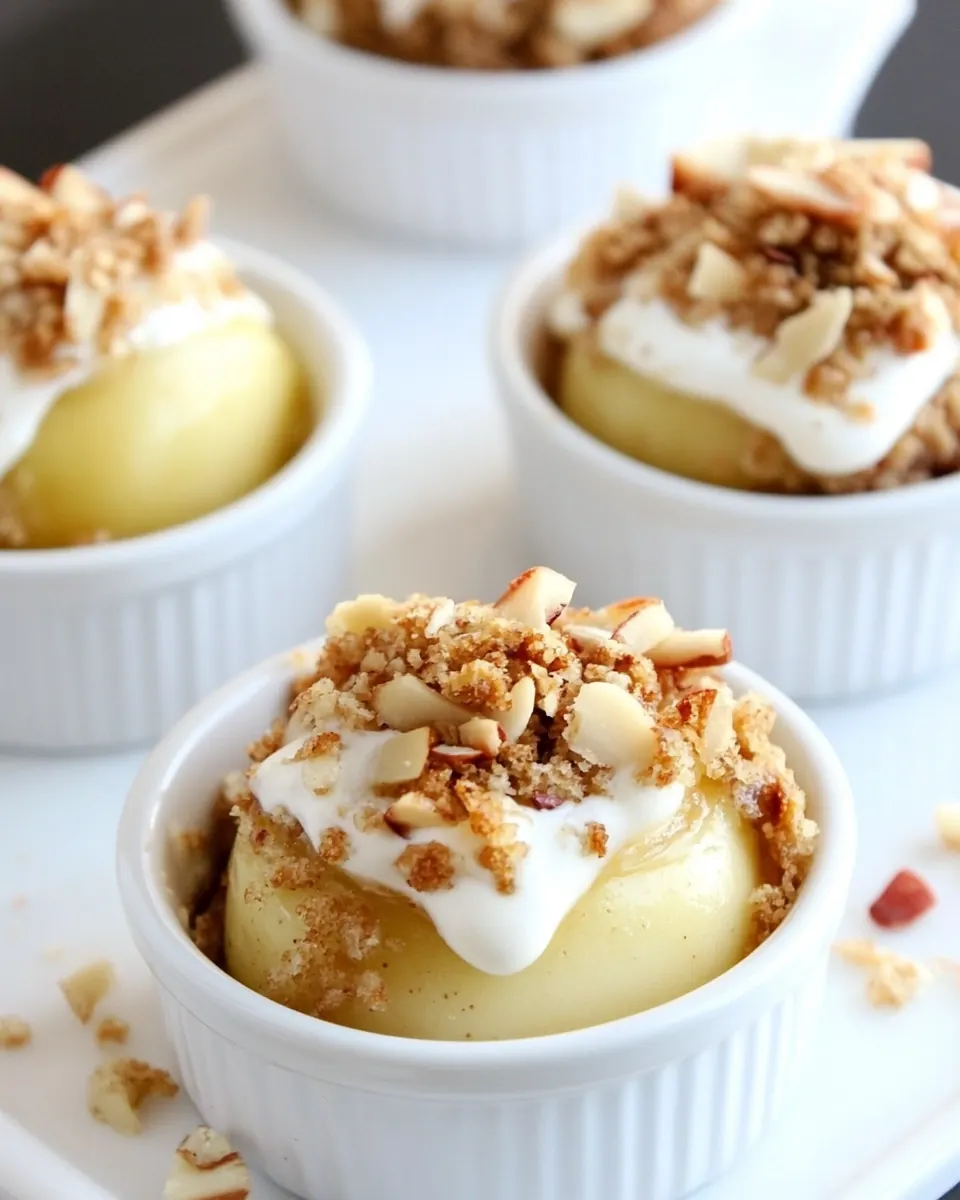
Textures that charm picky eaters
The contrast between soft, tender apple and the slightly crunchy, buttery oat topping is where this recipe wins hearts. I find that the oat filling gives a gentle chew that many kids find fun, while the apple becomes melt in your mouth. That play of textures helps coax little ones into trying fruit in a new way.
Flexible and forgiving
One reason I keep making Kid Friendly Baked Apples is how forgiving it is. If I am short on brown sugar, the sweetness can be nudged up or down. If an apple is larger, I simply adjust the packing of the filling. The recipe adapts to what I have in the pantry without compromising the final outcome.
Comforting aroma and presentation
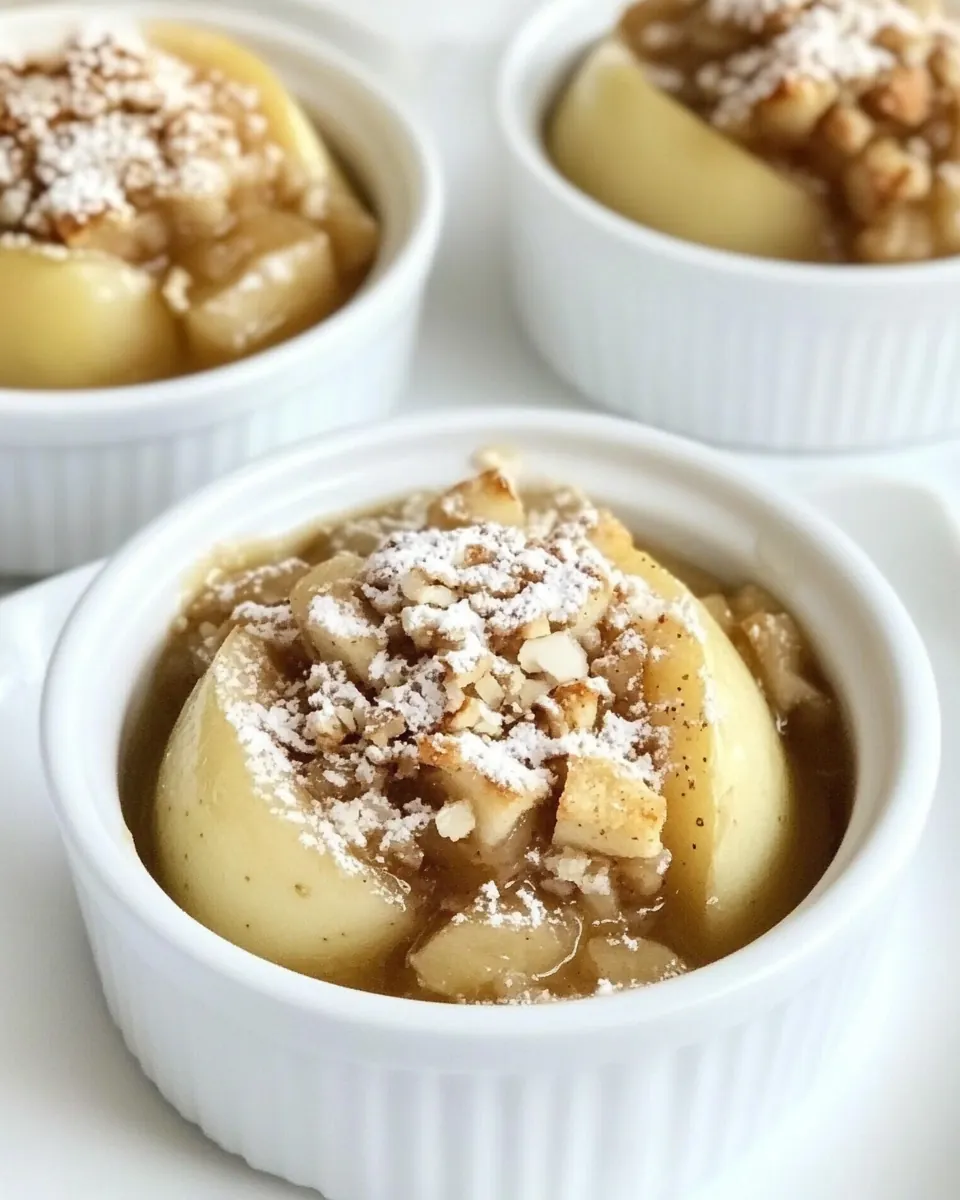
There is something deeply comforting about an oven full of baking fruit. When I bring the dish to the table and the steam rises, everyone leans in. The rustic, slightly heaped topping looks cozy and homemade, and that visual alone makes the dish irresistible to both kids and adults.
Perfect for sharing and seasons
Because it uses apple and warming spices like cinnamon and pumpkin pie spice, I reach for this recipe in cooler months, when the house needs a little extra warmth. It scales easily for more mouths, so it is ideal for a casual weekend dessert or a holiday table treat without fuss.
Recipe Ingredients for Kid Friendly Baked Apples
These ingredients are intentionally simple and pantry friendly, working together to produce a cozy filling that complements the natural sweetness of the fruit. The oats provide chew and body, the flour helps bind and thicken as it bakes, and the brown sugar and spices create a warm, caramel like note. A touch of butter gives richness, while the cream adds a silky finish as it melts into the filling. The four apples act as edible bowls, becoming soft and fragrant as they roast.
- 1/4 cup oats, dry: Provide a chewy, nutritious base that adds texture and whole-grain flavor to the filling; soak slightly from the cream and melted butter during baking to create a tender crumb topping that contrasts with the softened apples.
- 1/4 cup flour, all-purpose: Supply structure and lightness to the oat mixture while helping bind the streusel; whisk into the dry mix so it browns evenly and gives a subtle floury backbone to the topping.
- 1/4 cup brown sugar: Bring caramel-like sweetness and depth that enhances the apples; sprinkle into the oat-flour mixture to create a rich, slightly molasses-forward streusel that melts into the fruit as it bakes.
- 1/2 teaspoon cinnamon: Add warm, aromatic spice that complements the apples; stir into the topping or filling for a classic apple-pie flavor and gentle warmth without overpowering the kids' palate.
- 1/4 teaspoon ginger, ground: Introduce a mild, peppery warmth that layers with cinnamon; measure sparingly to brighten the fruit filling and add subtle complexity to the overall spice profile.
- 1/4 teaspoon pumpkin pie spice: Contribute a blend of warm spices that rounds out the flavor; incorporate into the topping or filling to provide a familiar, seasonal aroma that pairs well with both apple and brown sugar.
- 2 tablespoon butter, unsalted: Provide richness and help bind the dry ingredients into a cohesive streusel; cut or melt into the oat mixture so it forms golden, slightly crisp clusters during baking.
- 4 medium apple: Serve as the main component that becomes tender and sweet when baked; core and stuff with the oat-streusel, then roast until soft so each apple holds its warm, spoonable filling.
- 4 tablespoon heavy whipping cream: Add creamy moisture and a lightly sweet coating that helps the topping brown; drizzle over or spoon into the cavities before baking to create a luscious, slightly custardy finish.
How to Cook Kid Friendly Baked Apples
This method is straightforward and comforting, with each step tuned to build flavor and texture. I like to move deliberately, paying attention to the aroma as the butter warms and to the visual cues in the oven. Follow the sequence and you will end up with tender apples and a nicely browned topping.
- Preheat oven to 350 degrees F.: When the oven warms, you will notice a gentle, dry heat that encourages even baking and helps the tops of the filling brown. Preheating matters because placing apples in a cold oven can stretch the baking time and cause uneven softening, leaving centers firmer than the edges. A common mistake is not waiting for the full preheat; that can yield a soggy filling and undercooked fruit.
- In a bowl add the first 7 ingredients, and use your hands to mix well.: As you press the mixture together, the aroma of brown sugar and cinnamon will become more pronounced, and the butter will start to coat the oats, creating a cohesive crumbly filling. Mixing by hand gives you tactile feedback, so you can feel if the butter is evenly distributed; uneven mixing means some pockets will be dry or greasy. Avoid overworking the mix into a paste, you want distinct pieces that toast up in the oven.
- Core the apples, and cut each in half. Place them in a baking dish, face up, and fill each apple with an even amount of oats. Pack it lightly until heaped over the top. Drizzle with cream. Bake for 40 minutes or until filling is golden and apple is soft.: As you core and halve the apple , the exposed flesh will glisten. Packing the filling into each cavity until slightly heaped ensures a generous bite that browns on top. A key sensory cue is the weight of the filled apple; it should feel balanced, not top heavy. If you cut too deep while coring, you risk a thin base that can leak juices; core carefully to preserve a small cup of fruit.
- Cool for 10 minutes, then serve; add more cream if desired.: Lightly pressing the mixture helps it settle without compressing it into a dense mass, which allows the oats to toast and the interior to soften properly. You will notice the filling mound slightly as you work, promising a crisp edge once baked. Overpacking will prevent steam from escaping and can result in a gummy texture, so err on the side of airy packing.
- Drizzle with cream.: The sight of shimmering cream soaking into the oat topping is a lovely cue that the filling will become luscious as it bakes. The cream melts and creates small pockets of richness, melding the flavors and preventing the oats from drying out. A mistake to avoid is pouring too much in one spot; distribute evenly so each apple benefits.
- Bake for 40 minutes or until filling is golden and apple is soft.: During baking you will hear a faint bubbling and smell the spices intensify as the sugar caramelizes; the filling will turn golden, and the apple flesh will yield when pierced. The visual cue to watch for is a golden topping and fruit that gives slightly under a fork. Underbaking leaves the apple firm and the oats pale, while overbaking can cause the fruit to collapse, so test gently at 40 minutes and add time in small increments if needed.
- Cool for 10 minutes, then serve; add more cream if desired.: Cooling lets the juices settle, making the filling easier to eat and enhancing flavor meld. You will notice steam rise when you cut into the apple, releasing a concentrated aroma. Serving too hot can scald, while serving too cold flattens the textures; aim for warm and slightly steamy. If you skip the cooling, the filling may spill and lose its structure.
Recipe Notes about Kid Friendly Baked Apples
These notes will help you get consistent results and make small adjustments to suit your family. I often add a couple of these tweaks when I want a slightly different texture or when I am using what I have on hand.
- Toast oats briefly before mixing if you like a nuttier flavor, watch closely so they do not burn.
- Brown the butter slightly for a deeper, nutty aroma but cool it before combining with dry ingredients to avoid melting them completely.
- Adjust sweetness by swapping a tablespoon of brown sugar for maple syrup for a different sweetness profile, add cautiously.
- Use a variety of apples if you want nuanced flavor, balancing tart and sweet keeps the final bite interesting.
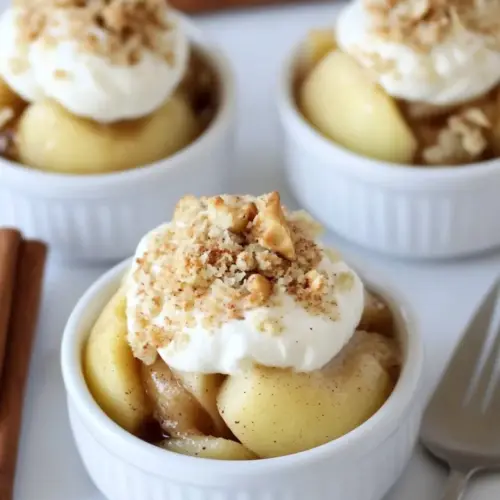
- Serve with extra cream or a scoop of ice cream for an indulgent finish, especially on cooler days.
Perfect Matches for Kid Friendly Baked Apples
These serving ideas and pairings will help you turn the dish into a fuller experience, whether for an afternoon snack or a cozy dessert. I often choose one or two of these depending on the occasion and the season.
- Warm with a drizzle of cream, the simple finish keeps the dish comforting and highlights the warm spices.
- Great for casual family desserts, especially after a light dinner when you want something sweet but not heavy.
- Serve at seasonal gatherings in fall when apples are at their peak, it complements cozy, cool weather menus beautifully.
- Pack for a picnic or potluck, cooled slightly and transported in a shallow dish, they make a rustic, shareable treat.
- Storage tip, refrigerate leftovers in an airtight container for up to three days and gently rewarm in the oven to revive texture.
FAQ
Conclusion
These Kid Friendly Baked Apples shine because they combine tender, oven roasted fruit with a buttery, spiced oat topping that kids and adults both love. Give them a try when you want something warm, simple, and comforting that still feels a little special. Once you taste the meld of soft apple, caramelized sugar, and melt in your mouth cream pockets, you will understand why I return to this recipe again and again. It is approachable, flexible, and perfect for sharing, whether as an after school treat or a low fuss dessert after dinner.
Kid Friendly Baked Apples
Equipment
- Baking Dish
- Mixing Bowl
- Measuring Cups
Ingredients
- 1/4 cup oats, dry Provide a chewy, nutritious base that adds texture and whole-grain flavor to the filling; soak slightly from the cream and melted butter during baking to create a tender crumb topping that contrasts with the softened apples.
- 1/4 cup flour, all-purpose Supply structure and lightness to the oat mixture while helping bind the streusel; whisk into the dry mix so it browns evenly and gives a subtle floury backbone to the topping.
- 1/4 cup brown sugar Bring caramel-like sweetness and depth that enhances the apples; sprinkle into the oat-flour mixture to create a rich, slightly molasses-forward streusel that melts into the fruit as it bakes.
- 1/2 teaspoon cinnamon Add warm, aromatic spice that complements the apples; stir into the topping or filling for a classic apple-pie flavor and gentle warmth without overpowering the kids' palate.
- 1/4 teaspoon ginger, ground Introduce a mild, peppery warmth that layers with cinnamon; measure sparingly to brighten the fruit filling and add subtle complexity to the overall spice profile.
- 1/4 teaspoon pumpkin pie spice Contribute a blend of warm spices that rounds out the flavor; incorporate into the topping or filling to provide a familiar, seasonal aroma that pairs well with both apple and brown sugar.
- 2 tablespoon butter, unsalted Provide richness and help bind the dry ingredients into a cohesive streusel; cut or melt into the oat mixture so it forms golden, slightly crisp clusters during baking.
- 4 medium apple Serve as the main component that becomes tender and sweet when baked; core and stuff with the oat-streusel, then roast until soft so each apple holds its warm, spoonable filling.
- 4 tablespoon heavy whipping cream Add creamy moisture and a lightly sweet coating that helps the topping brown; drizzle over or spoon into the cavities before baking to create a luscious, slightly custardy finish.
Instructions
- Preheat oven to 350 degrees F.: When the oven warms, you will notice a gentle, dry heat that encourages even baking and helps the tops of the filling brown. Preheating matters because placing apples in a cold oven can stretch the baking time and cause uneven softening, leaving centers firmer than the edges. A common mistake is not waiting for the full preheat; that can yield a soggy filling and undercooked fruit.
- In a bowl add the first 7 ingredients, and use your hands to mix well.: As you press the mixture together, the aroma of brown sugar and cinnamon will become more pronounced, and the butter will start to coat the oats, creating a cohesive crumbly filling. Mixing by hand gives you tactile feedback, so you can feel if the butter is evenly distributed; uneven mixing means some pockets will be dry or greasy. Avoid overworking the mix into a paste, you want distinct pieces that toast up in the oven.
- Core the apples, and cut each in half. Place them in a baking dish, face up, and fill each apple with an even amount of oats. Pack it lightly until heaped over the top. Drizzle with cream. Bake for 40 minutes or until filling is golden and apple is soft.: As you core and halve the apple , the exposed flesh will glisten. Packing the filling into each cavity until slightly heaped ensures a generous bite that browns on top. A key sensory cue is the weight of the filled apple; it should feel balanced, not top heavy. If you cut too deep while coring, you risk a thin base that can leak juices; core carefully to preserve a small cup of fruit.
- Cool for 10 minutes, then serve; add more cream if desired.: Lightly pressing the mixture helps it settle without compressing it into a dense mass, which allows the oats to toast and the interior to soften properly. You will notice the filling mound slightly as you work, promising a crisp edge once baked. Overpacking will prevent steam from escaping and can result in a gummy texture, so err on the side of airy packing.
- Drizzle with cream.: The sight of shimmering cream soaking into the oat topping is a lovely cue that the filling will become luscious as it bakes. The cream melts and creates small pockets of richness, melding the flavors and preventing the oats from drying out. A mistake to avoid is pouring too much in one spot; distribute evenly so each apple benefits.
- Bake for 40 minutes or until filling is golden and apple is soft.: During baking you will hear a faint bubbling and smell the spices intensify as the sugar caramelizes; the filling will turn golden, and the apple flesh will yield when pierced. The visual cue to watch for is a golden topping and fruit that gives slightly under a fork. Underbaking leaves the apple firm and the oats pale, while overbaking can cause the fruit to collapse, so test gently at 40 minutes and add time in small increments if needed.
- Cool for 10 minutes, then serve; add more cream if desired.: Cooling lets the juices settle, making the filling easier to eat and enhancing flavor meld. You will notice steam rise when you cut into the apple, releasing a concentrated aroma. Serving too hot can scald, while serving too cold flattens the textures; aim for warm and slightly steamy. If you skip the cooling, the filling may spill and lose its structure.
Notes
- Toast oats briefly before mixing if you like a nuttier flavor, watch closely so they do not burn.
- Brown the butter slightly for a deeper, nutty aroma but cool it before combining with dry ingredients to avoid melting them completely.
- Adjust sweetness by swapping a tablespoon of brown sugar for maple syrup for a different sweetness profile, add cautiously.
- Use a variety of apples if you want nuanced flavor, balancing tart and sweet keeps the final bite interesting.
- Serve with extra cream or a scoop of ice cream for an indulgent finish, especially on cooler days.