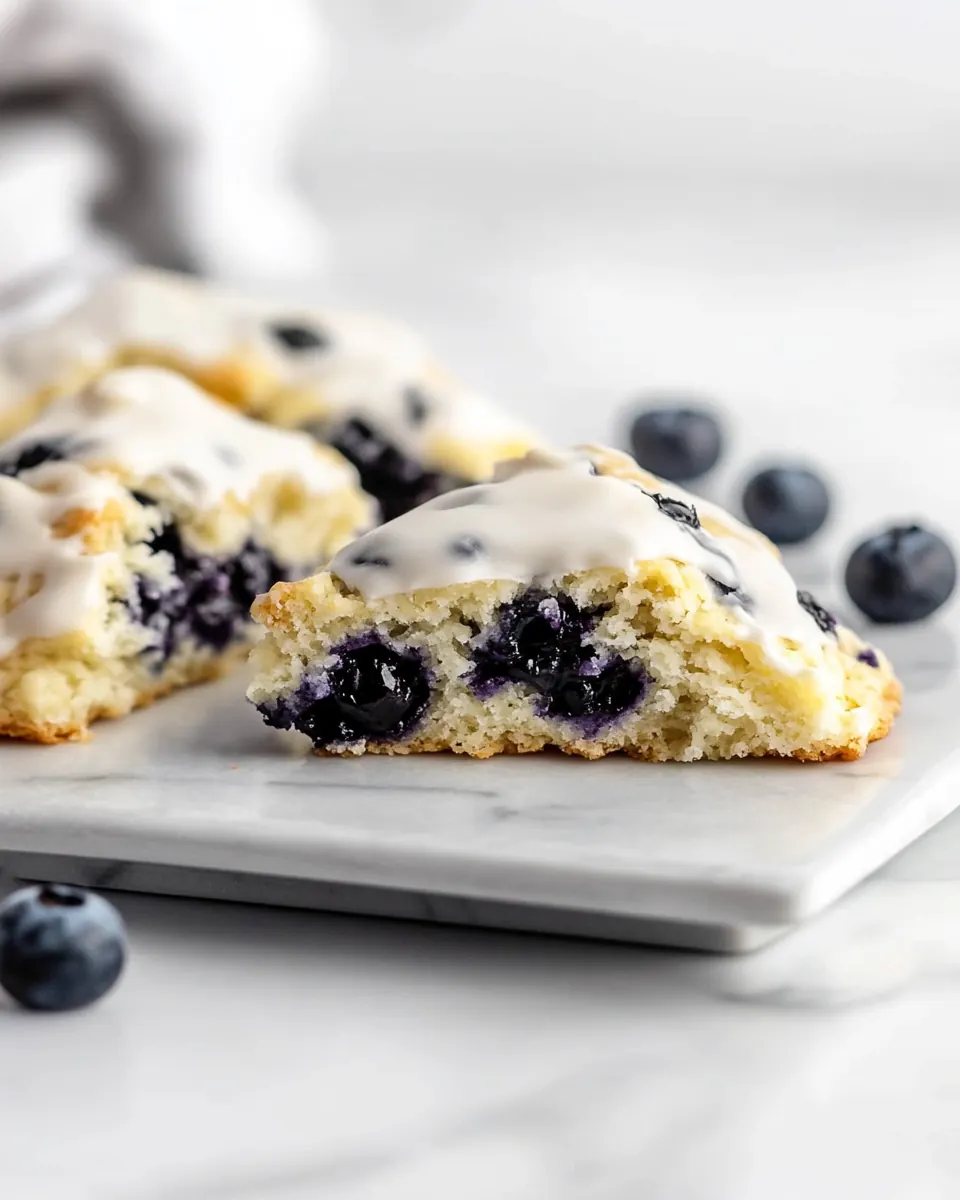
Gluten Free Scones With Blueberries
Gluten Free Scones With Blueberries are the kind of treat I reach for when I want something that feels both cozy and a little celebratory, a pastry that pairs perfectly with a slow morning and a strong cup of tea. The first time I made these, I was chasing a memory of bite size bakery scones from my childhood, but I needed them to be gluten free for a friend. I adapted the method until the texture hit that balance of tender crumb and slightly crisp exterior, and that bright pop of blueberries in every bite sealed the deal.
There is something about the ritual of making scones that slows me down in the best way. I love grating cold butter because the small shards melt differently in the oven, creating layers that flake apart when you break a scone open. I also enjoy the quick citrus lift from lemon juice and zest which brightens the batter and plays beautifully with the natural sweetness of the blueberries. When friends visit, these scones vanish fast, so I always feel vindicated when the tray comes back empty.
Recipe Snapshot
50 mins
10 mins
40 mins
Medium
200 kcal
American
Gluten-Free, Low FODMAP
Desserts
Baking sheet, Parchment paper, Large bowl, Medium bowl, Cheese grater, Whisk, Sharp knife or bench scraper
Why We Love This Gluten Free Scones With Blueberries
1. Texture that surprises
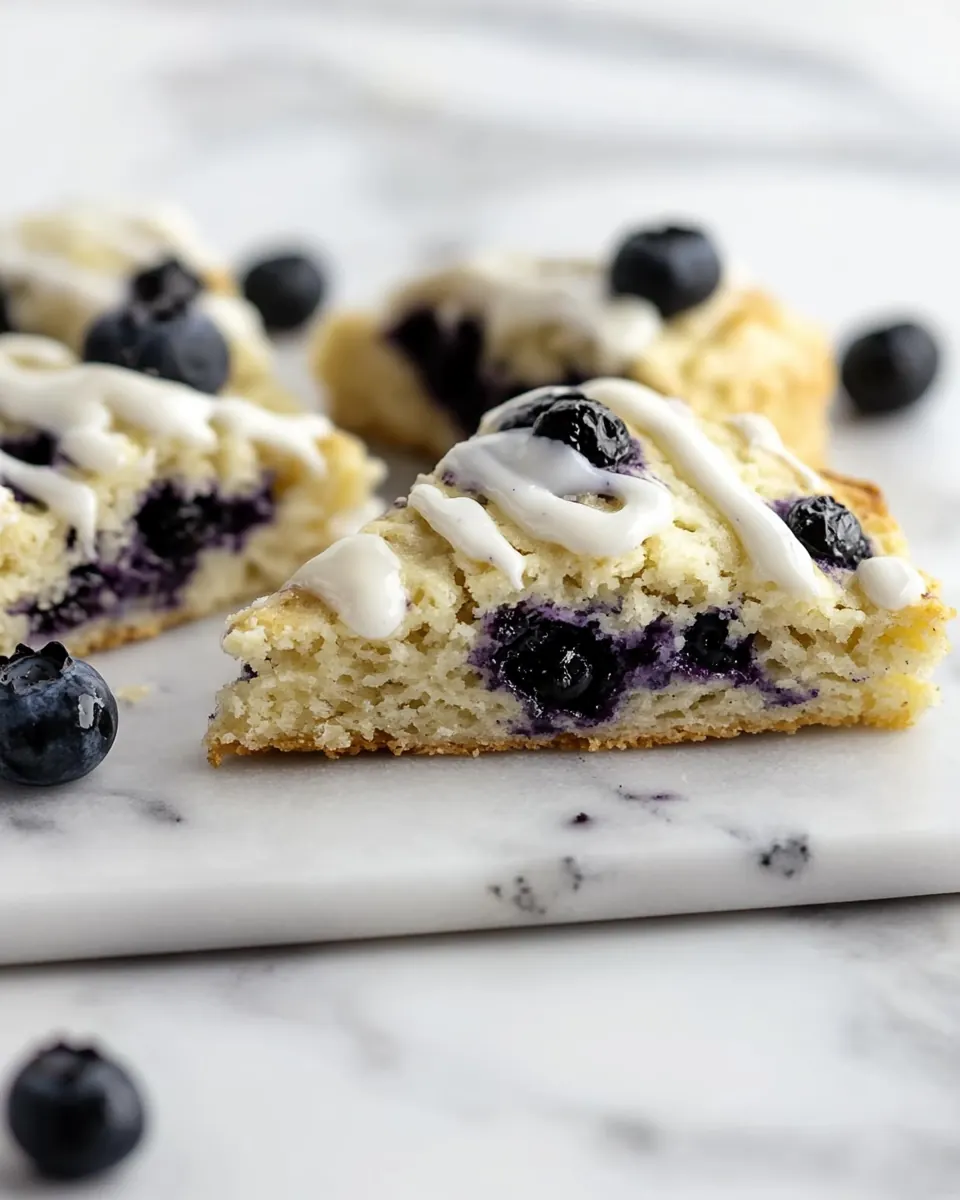
I adore how these Gluten Free Scones With Blueberries achieve a tender, flaky interior without gluten. Using a cold butter technique and a 1 to 1 gluten free flour makes the crumb delicate, while the exterior gets a pleasing crust. I notice the moment they turn a deep golden at the edges, the aroma shifts and you know the interior will be light, not gummy like some gluten free baked goods.
2. Bright, balanced flavor
The combination of fresh blueberries, lemon juice, and lemon zest lifts these scones from simple to memorable. The lemon cuts through the richness of the butter and the sweetness of the glaze, giving each bite a lively finish. I often taste the batter to check the lemon note, and a little more zest can make a huge difference without overwhelming the fruit.
3. Simple, reliable method
I love that this recipe does not rely on complicated techniques or specialty tools. Grating the butter, mixing the wet and dry separately, and chilling before baking are small steps that produce consistent results. For busy mornings, knowing these few moves deliver bakery quality scones is incredibly satisfying.
4. Flexible and forgiving
These scones adapt well to small swaps. If you prefer a different non dairy milk or want to omit the xanthan gum if your flour blend already contains it, the recipe still behaves. The glaze can be adjusted for thickness, and the cane sugar sprinkle gives a pleasant crunch on top. I often tinker a little based on what I have, and it rarely fails.
5. Great for gatherings
Whether I bring them to a spring brunch or serve them at a casual coffee with friends, these Gluten Free Scones With Blueberries read as thoughtful and homemade. They travel well, and warming them gently before serving brings back that freshly baked feeling. I find people appreciate the combination of approachable technique and delightful results.
What’s In This Gluten Free Scones With Blueberries
These ingredients are chosen to create a balance of structure, tenderness, and flavor. The key players are the gluten free 1:1 flour which provides the body, cold butter for flakiness, and fresh blueberries for bursts of juicy sweetness. Citrus elements like lemon juice and lemon zest brighten the dough while the glaze finishes the scones with glossy sweetness.
- 2 cups gluten-free 1:1 flour (285 g): Measure carefully to provide structure and bulk to the scones; gluten–free 1:1 flour mimics regular flour and helps create a tender, yet stable crumb when properly combined with leaveners and fats. Ensure the flour is spooned and leveled for consistent texture and weigh if possible to maintain recipe accuracy.
- 6 tablespoons sugar: Sweeten moderately to balance tartness from the lemon and blueberries; sugar adds moisture retention and helps with gentle browning on the scone surface. Adjust slightly if using sweeter mix-ins but keep quantity to preserve intended texture and crumb.
- 1 1/2 teaspoons baking powder: Leaven and lighten the dough by producing carbon dioxide during baking; baking powder promotes rise and contributes to a light, tender interior in these scones. Verify it is fresh for reliable lift, especially important in gluten–free batters that rely on chemical leavening.
- 1/2 teaspoon xanthan gum omit if your flour already contains it: Bind and improve texture by stabilizing the dough and preventing crumbliness if your flour lacks it; xanthan gum provides elasticity and mimics gluten’s network. Omit only when the chosen gluten–free flour blend already contains an appropriate amount to avoid gumminess.
- 1/2 teaspoon salt: Enhance and balance flavor while supporting the structure with ionic interaction; salt strengthens gluten–free flours' overall taste and reduces flatness. Use measured amounts to avoid over-salting, which can overpower the sweet and citrus notes.
- 1/2 cup butter cold: Cut into small pieces and keep cold to create flaky layers and tender pockets; butter melts during baking to produce richness and desirable crumb. Use chilled butter and work quickly to maintain bits of fat that yield flakiness without overdeveloping the dough.
- 1 egg: Whisk to bind ingredients and contribute richness, color, and structure; egg adds moisture, emulsifies fats, and helps with gentle rise when combined with leaveners. Beat lightly before adding for even distribution throughout the dough.
- 1/2 cup milk of choice I used unsweetened almond milk: Pour at room temperature to help combine dry ingredients and form dough; milk adds moisture, tenderness, and helps dissolve sugar for uniform texture. Choose dairy or plant-based milk based on preference, noting slight flavor differences may occur.
- 1 1/2 tablespoons freshly squeezed lemon juice: Squeeze fresh to brighten the flavor profile and activate citrus aromatics; lemon juice adds acidity that balances sweetness and can react slightly with leaveners to aid lift. Use freshly squeezed juice for the cleanest, most vibrant flavor.
- 1 tablespoon lemon zest: Grate freshly to infuse fragrant citrus oils and concentrated flavor; lemon zest delivers aromatic intensity that complements blueberries and enhances overall scone brightness. Avoid the bitter white pith and zest only the colored outer layer for best results.
- 1/2 teaspoon vanilla extract: Add a subtle vanilla note to deepen overall flavor; vanilla extract rounds out sweetness and complements both citrus and berries. Use pure vanilla for a more complex aroma versus artificial extract if available.
- 1 cup fresh blueberries: Fold in gently to distribute bursts of juicy fruit without breaking them; fresh blueberries contribute moisture, tartness, and visual appeal to the scones. Toss berries in a bit of flour before adding to help prevent sinking during baking.
- 1 tablespoon cream or full-fat coconut milk: Brush or mix sparingly to enrich glaze or topping and add sheen; cream or full-fat coconut milk provides fat that smooths the glaze and enhances mouthfeel. Use whichever option fits dietary needs, noting coconut will add a hint of tropical flavor.
- 1/2 tablespoon raw organic cane sugar: Sprinkle lightly for crunchy exterior texture and subtle caramel flavor; raw organic cane sugar works well as a finishing touch on top of scones. Apply just before baking or on the glaze to preserve sparkle and provide a pleasant contrast.
- 1 cup + 2 tablespoons powdered sugar: Sift to remove lumps and produce a smooth sweet glaze base; powdered sugar dissolves readily with liquid to create a silky icing for drizzling over cooled scones. Adjust thickness by adding small amounts of liquid until desired consistency is reached.
- 1 1/2 tablespoons freshly squeezed lemon juice: Stir in to provide bright acidity and a zesty finish for the glaze; freshly squeezed lemon juice balances powdered sugar with tang and enhances overall flavor harmony. Add gradually until the glaze reaches a pourable, spreadable consistency suited for drizzling.
How to Assemble Gluten Free Scones With Blueberries
These scones come together in a sequence of small, intentional moves. I find that separating the dry and wet steps and keeping the butter cold are the real keys to success. Follow each step slowly and pay attention to the sensory cues described below.
- Preheat your oven to 400°F and line a baking sheet with parchment paper.: The warm, faint scent of the oven as it reaches 400°F signals you are ready to bake, and a lined pan prevents sticking, aiding in even browning. A properly preheated oven delivers immediate spring to the dough, creating a tender interior and crisp exterior. One common mistake is skipping preheating because it shortens bake time and yields uneven rise, so allow the oven to fully reach temperature before baking.
- In a large bowl, whisk the flour, sugar, baking powder, xanthan gum (if using), and salt.: As you whisk the dry mixture, you should notice a uniform pale color and a slightly sweet aroma from the sugar. This even distribution of dry ingredients ensures consistent lift and flavor in every scone. A misstep here is failing to thoroughly mix, which can create pockets of baking powder or salt and lead to uneven texture or bursts of flavor.
- Grate the butter using a cheese grater and add it in. Use your hands to blend the butter in to the flour mixture until it looks like coarse sand. A pastry cutter works, too.: The grated butter will feel cool and granular against your palms, and the mixture should resemble coarse sand with visible small flakes of butter . Those flecks are crucial because they melt during baking and create pockets of steam, which yield flakiness. Avoid overworking the dough here, since too much warmth from your hands can melt the butter and reduce the flakiness.
- In a separate medium bowl, whisk the egg, milk, lemon juice, lemon zest, and vanilla.: Whisking these wet ingredients should produce a smooth, slightly frothy mixture with a bright citrus perfume from the zest. This step hydrates and flavors the dough uniformly, so the acidic lemon juice and aromatics get evenly distributed. A common error is using warm milk or a warm egg, which can soften the butter prematurely and affect texture.
- Add the wet ingredients into the dry ingredients and mix. Stir in the blueberries and stir until well mixed.: As the wet meets the dry, the dough will come together, feeling sticky but cohesive. When you fold in the blueberries , do so gently to avoid crushing them, otherwise the dough can become purple and soggy in spots. The goal is an even distribution with visible berries. Overmixing at this stage can activate binders too much, producing a dense result, so mix until combined.
- Pour the dough onto the pan and shape into a circle about 8 inches wide in diameter (it will be sticky). Use a sharp knife or bench scraper to cut the dough into 8 portions.: The dough will feel tacky but should hold shape when formed into an 8 inch circle. Press lightly to even thickness, then score into 8 wedges. The visual cue is a smooth, even disk with visible berry pockets. A frequent slip is trying to roll the dough like pastry, which compresses the layers and reduces flakiness, so handle minimally.
- Brush the tops with cream and sprinkle with the cane sugar.: Brushing with cream gives a glossy sheen and promotes a golden color as the sugar caramelizes slightly. The cane sugar will cling and create a light crunch after baking. If you brush too vigorously you can flatten the scored edges, so apply a light, even coat to preserve shape.
- Refrigerate for at least 15 minutes.: Chilling solidifies the butter again, which helps the scones stay flaky during baking. You will feel the dough firm up when touched, and it is easier to handle. Skipping this rest can lead to spreading and a denser interior because the butter will melt too soon in the oven.
- Once chilled, bake until the edges are deep golden brown and the tops are lightly browned, about 30 to 40 minutes, depending on your oven.: During baking you will notice an enticing aroma as the top browns and the blueberries soften. The edges turning deep golden is the key visual cue that the scones are done, and a skewer inserted near the center should come out mostly dry. A common mistake is relying solely on a short timer rather than visual cues, which can result in underbaked interiors or overly hard exteriors.
- Remove from oven and let cool completely in the pan.: Cooling on the pan allows the crumb to set and prevents the glaze from sliding off when applied. The scones will lose some of their oven heat and the interior will finish cooking gently. Cutting into them too soon often yields a gummy center, so patience produces the best texture.
- Once cooled, whisk together the glaze ingredients and drizzle over the scones.: The glaze should be smooth and glossy, with a bright lemon fragrance, and it will set to a silky finish when drizzled. The contrast of a sweet glaze on a tender, slightly crisp scone is a finishing touch. Lumping the powdered sugar or adding too much liquid makes a runny glaze, so whisk to the right consistency before drizzling.
Recipe Tips about Gluten Free Scones With Blueberries

These tips reflect small adjustments I use to make the process smoother and the results more consistent. They expand on technique, ingredient notes, and final touches that preserve the fresh fruit flavor and the tender crumb.
- Measure by weight when possible, because gluten free flours vary between brands; weighing ensures consistent texture and prevents a dry or overly wet dough.
- Grate cold butter to create small shards that remain cold in the dough, yielding pockets of steam that produce flakiness during baking.
- Use fresh berries for a better texture and flavor; frozen blueberries can be used but toss them in a tablespoon of flour first to reduce bleeding.
- Chill shaped dough for at least 15 minutes to let the butter firm up, which helps the scones rise and keeps the edges from spreading.
- Adjust glaze consistency by adding lemon juice sparingly until you reach a drizzling texture; too thin and it runs off, too thick and it will clump.
- Store properly in an airtight container at room temperature for a day, then refrigerate or freeze for longer storage, and reheat gently to restore texture.
What to Serve Alongside Gluten Free Scones With Blueberries
These scones make a lovely centerpiece for morning gatherings, light lunches, or a springtime brunch. They pair well with both hot and cold beverages, and a few thoughtful accompaniments elevate the experience without overshadowing the fruit forward flavor.
- Warm beverages, like tea or coffee, are classic companions; the heat and bitterness contrast the sweet glaze and buttery crumb.
- Fruit plates with citrus segments or additional berries complement the lemon and blueberry notes without adding heavy flavors.
- Light spreads such as a citrus curd or a neutral jam can be offered, but the scones are delightful on their own because of the glaze and fruit.
- Occasions include weekend brunches, spring gatherings, or casual tea time; the recipe scales well for guests and travel friendly when cooled and wrapped.
- Storage tips suggest keeping scones in an airtight container up to two days at room temperature, refrigerate for up to five days, or freeze for up to one month; warm briefly in a low oven before serving to refresh texture.
- Seasonal pairing leans into spring flavors, so light salads or citrusy side dishes work well if you serve these scones as part of a broader brunch spread.
FAQ
Conclusion
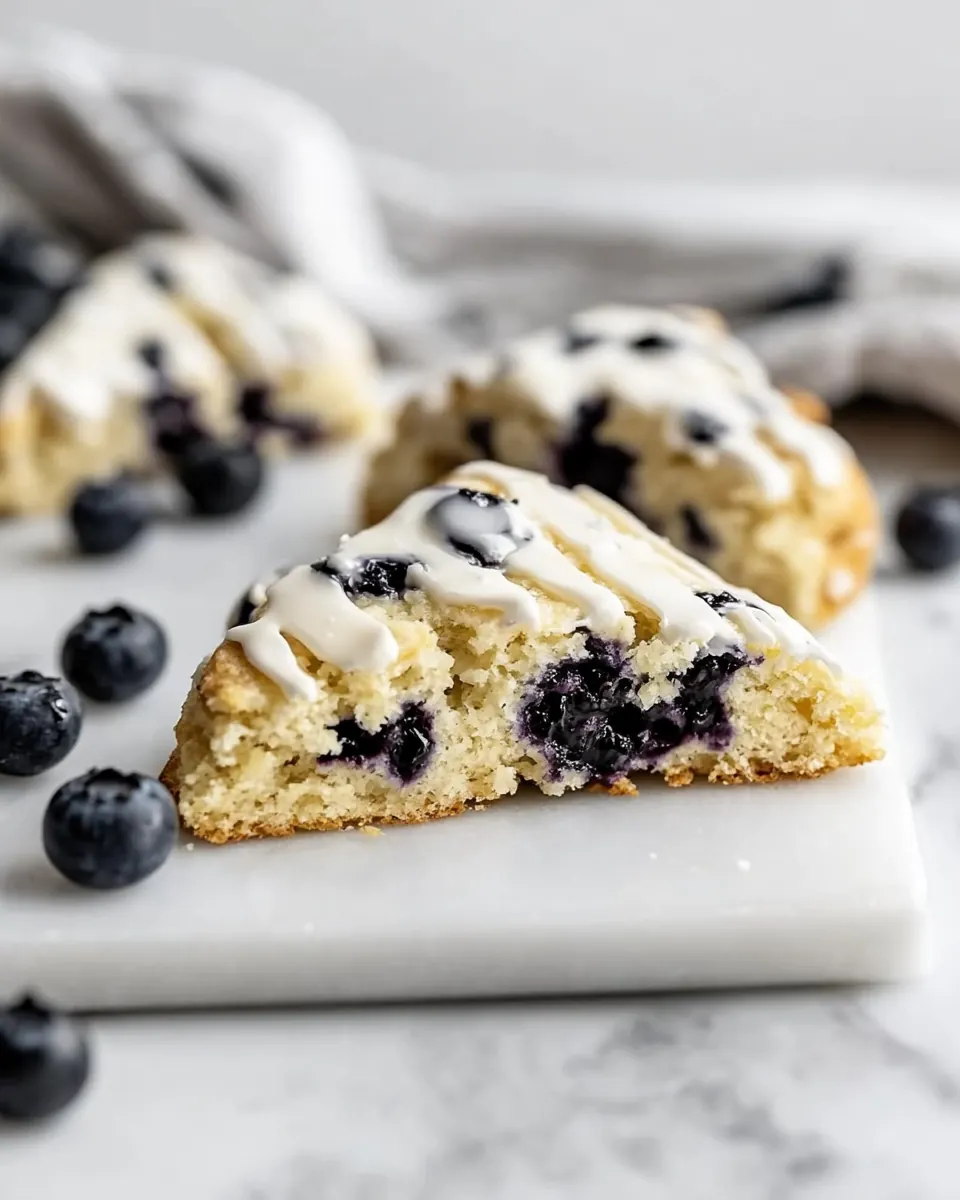
These Gluten Free Scones With Blueberries pair tender, flaky texture with bright citrus and juicy berry bursts, which is what makes them stand out. Give them a try for a weekend brunch or to brighten a weekday morning, you will appreciate how approachable the method is and how satisfying the results feel. Enjoy the ritual of grating cold butter and the small moments of aroma as they bake, and don’t be surprised if they become a repeat request from friends and family.

Gluten Free Scones With Blueberries
Equipment
- Baking Sheet
- Parchment Paper
- Large Bowl
- Medium Bowl
- Cheese grater
- Whisk
- Sharp knife or bench scraper
Ingredients
- 2 cups gluten-free 1:1 flour (285 g) Measure carefully to provide structure and bulk to the scones; gluten-free 1:1 flour mimics regular flour and helps create a tender, yet stable crumb when properly combined with leaveners and fats. Ensure the flour is spooned and leveled for consistent texture and weigh if possible to maintain recipe accuracy.
- 6 tablespoons sugar Sweeten moderately to balance tartness from the lemon and blueberries; sugar adds moisture retention and helps with gentle browning on the scone surface. Adjust slightly if using sweeter mix-ins but keep quantity to preserve intended texture and crumb.
- 1 1/2 teaspoons baking powder Leaven and lighten the dough by producing carbon dioxide during baking; baking powder promotes rise and contributes to a light, tender interior in these scones. Verify it is fresh for reliable lift, especially important in gluten-free batters that rely on chemical leavening.
- 1/2 teaspoon xanthan gum omit if your flour already contains it Bind and improve texture by stabilizing the dough and preventing crumbliness if your flour lacks it; xanthan gum provides elasticity and mimics gluten’s network. Omit only when the chosen gluten-free flour blend already contains an appropriate amount to avoid gumminess.
- 1/2 teaspoon salt Enhance and balance flavor while supporting the structure with ionic interaction; salt strengthens gluten-free flours' overall taste and reduces flatness. Use measured amounts to avoid over-salting, which can overpower the sweet and citrus notes.
- 1/2 cup butter cold Cut into small pieces and keep cold to create flaky layers and tender pockets; butter melts during baking to produce richness and desirable crumb. Use chilled butter and work quickly to maintain bits of fat that yield flakiness without overdeveloping the dough.
- 1 egg Whisk to bind ingredients and contribute richness, color, and structure; egg adds moisture, emulsifies fats, and helps with gentle rise when combined with leaveners. Beat lightly before adding for even distribution throughout the dough.
- 1/2 cup milk of choice I used unsweetened almond milk Pour at room temperature to help combine dry ingredients and form dough; milk adds moisture, tenderness, and helps dissolve sugar for uniform texture. Choose dairy or plant-based milk based on preference, noting slight flavor differences may occur.
- 1 1/2 tablespoons freshly squeezed lemon juice Squeeze fresh to brighten the flavor profile and activate citrus aromatics; lemon juice adds acidity that balances sweetness and can react slightly with leaveners to aid lift. Use freshly squeezed juice for the cleanest, most vibrant flavor.
- 1 tablespoon lemon zest Grate freshly to infuse fragrant citrus oils and concentrated flavor; lemon zest delivers aromatic intensity that complements blueberries and enhances overall scone brightness. Avoid the bitter white pith and zest only the colored outer layer for best results.
- 1/2 teaspoon vanilla extract Add a subtle vanilla note to deepen overall flavor; vanilla extract rounds out sweetness and complements both citrus and berries. Use pure vanilla for a more complex aroma versus artificial extract if available.
- 1 cup fresh blueberries Fold in gently to distribute bursts of juicy fruit without breaking them; fresh blueberries contribute moisture, tartness, and visual appeal to the scones. Toss berries in a bit of flour before adding to help prevent sinking during baking.
- 1 tablespoon cream or full-fat coconut milk Brush or mix sparingly to enrich glaze or topping and add sheen; cream or full-fat coconut milk provides fat that smooths the glaze and enhances mouthfeel. Use whichever option fits dietary needs, noting coconut will add a hint of tropical flavor.
- 1/2 tablespoon raw organic cane sugar Sprinkle lightly for crunchy exterior texture and subtle caramel flavor; raw organic cane sugar works well as a finishing touch on top of scones. Apply just before baking or on the glaze to preserve sparkle and provide a pleasant contrast.
- 1 cup + 2 tablespoons powdered sugar Sift to remove lumps and produce a smooth sweet glaze base; powdered sugar dissolves readily with liquid to create a silky icing for drizzling over cooled scones. Adjust thickness by adding small amounts of liquid until desired consistency is reached.
- 1 1/2 tablespoons freshly squeezed lemon juice Stir in to provide bright acidity and a zesty finish for the glaze; freshly squeezed lemon juice balances powdered sugar with tang and enhances overall flavor harmony. Add gradually until the glaze reaches a pourable, spreadable consistency suited for drizzling.
Instructions
- Preheat your oven to 400°F and line a baking sheet with parchment paper.: The warm, faint scent of the oven as it reaches 400°F signals you are ready to bake, and a lined pan prevents sticking, aiding in even browning. A properly preheated oven delivers immediate spring to the dough, creating a tender interior and crisp exterior. One common mistake is skipping preheating because it shortens bake time and yields uneven rise, so allow the oven to fully reach temperature before baking.
- In a large bowl, whisk the flour, sugar, baking powder, xanthan gum (if using), and salt.: As you whisk the dry mixture, you should notice a uniform pale color and a slightly sweet aroma from the sugar. This even distribution of dry ingredients ensures consistent lift and flavor in every scone. A misstep here is failing to thoroughly mix, which can create pockets of baking powder or salt and lead to uneven texture or bursts of flavor.
- Grate the butter using a cheese grater and add it in. Use your hands to blend the butter in to the flour mixture until it looks like coarse sand. A pastry cutter works, too.: The grated butter will feel cool and granular against your palms, and the mixture should resemble coarse sand with visible small flakes of butter . Those flecks are crucial because they melt during baking and create pockets of steam, which yield flakiness. Avoid overworking the dough here, since too much warmth from your hands can melt the butter and reduce the flakiness.
- In a separate medium bowl, whisk the egg, milk, lemon juice, lemon zest, and vanilla.: Whisking these wet ingredients should produce a smooth, slightly frothy mixture with a bright citrus perfume from the zest. This step hydrates and flavors the dough uniformly, so the acidic lemon juice and aromatics get evenly distributed. A common error is using warm milk or a warm egg, which can soften the butter prematurely and affect texture.
- Add the wet ingredients into the dry ingredients and mix. Stir in the blueberries and stir until well mixed.: As the wet meets the dry, the dough will come together, feeling sticky but cohesive. When you fold in the blueberries , do so gently to avoid crushing them, otherwise the dough can become purple and soggy in spots. The goal is an even distribution with visible berries. Overmixing at this stage can activate binders too much, producing a dense result, so mix until combined.
- Pour the dough onto the pan and shape into a circle about 8 inches wide in diameter (it will be sticky). Use a sharp knife or bench scraper to cut the dough into 8 portions.: The dough will feel tacky but should hold shape when formed into an 8 inch circle. Press lightly to even thickness, then score into 8 wedges. The visual cue is a smooth, even disk with visible berry pockets. A frequent slip is trying to roll the dough like pastry, which compresses the layers and reduces flakiness, so handle minimally.
- Brush the tops with cream and sprinkle with the cane sugar.: Brushing with cream gives a glossy sheen and promotes a golden color as the sugar caramelizes slightly. The cane sugar will cling and create a light crunch after baking. If you brush too vigorously you can flatten the scored edges, so apply a light, even coat to preserve shape.
- Refrigerate for at least 15 minutes.: Chilling solidifies the butter again, which helps the scones stay flaky during baking. You will feel the dough firm up when touched, and it is easier to handle. Skipping this rest can lead to spreading and a denser interior because the butter will melt too soon in the oven.
- Once chilled, bake until the edges are deep golden brown and the tops are lightly browned, about 30 to 40 minutes, depending on your oven.: During baking you will notice an enticing aroma as the top browns and the blueberries soften. The edges turning deep golden is the key visual cue that the scones are done, and a skewer inserted near the center should come out mostly dry. A common mistake is relying solely on a short timer rather than visual cues, which can result in underbaked interiors or overly hard exteriors.
- Remove from oven and let cool completely in the pan.: Cooling on the pan allows the crumb to set and prevents the glaze from sliding off when applied. The scones will lose some of their oven heat and the interior will finish cooking gently. Cutting into them too soon often yields a gummy center, so patience produces the best texture.
- Once cooled, whisk together the glaze ingredients and drizzle over the scones.: The glaze should be smooth and glossy, with a bright lemon fragrance, and it will set to a silky finish when drizzled. The contrast of a sweet glaze on a tender, slightly crisp scone is a finishing touch. Lumping the powdered sugar or adding too much liquid makes a runny glaze, so whisk to the right consistency before drizzling.
Notes
- Measure by weight when possible, because gluten free flours vary between brands; weighing ensures consistent texture and prevents a dry or overly wet dough.
- Grate cold butter to create small shards that remain cold in the dough, yielding pockets of steam that produce flakiness during baking.
- Use fresh berries for a better texture and flavor; frozen blueberries can be used but toss them in a tablespoon of flour first to reduce bleeding.
- Chill shaped dough for at least 15 minutes to let the butter firm up, which helps the scones rise and keeps the edges from spreading.
- Adjust glaze consistency by adding lemon juice sparingly until you reach a drizzling texture; too thin and it runs off, too thick and it will clump.
- Store properly in an airtight container at room temperature for a day, then refrigerate or freeze for longer storage, and reheat gently to restore texture.