
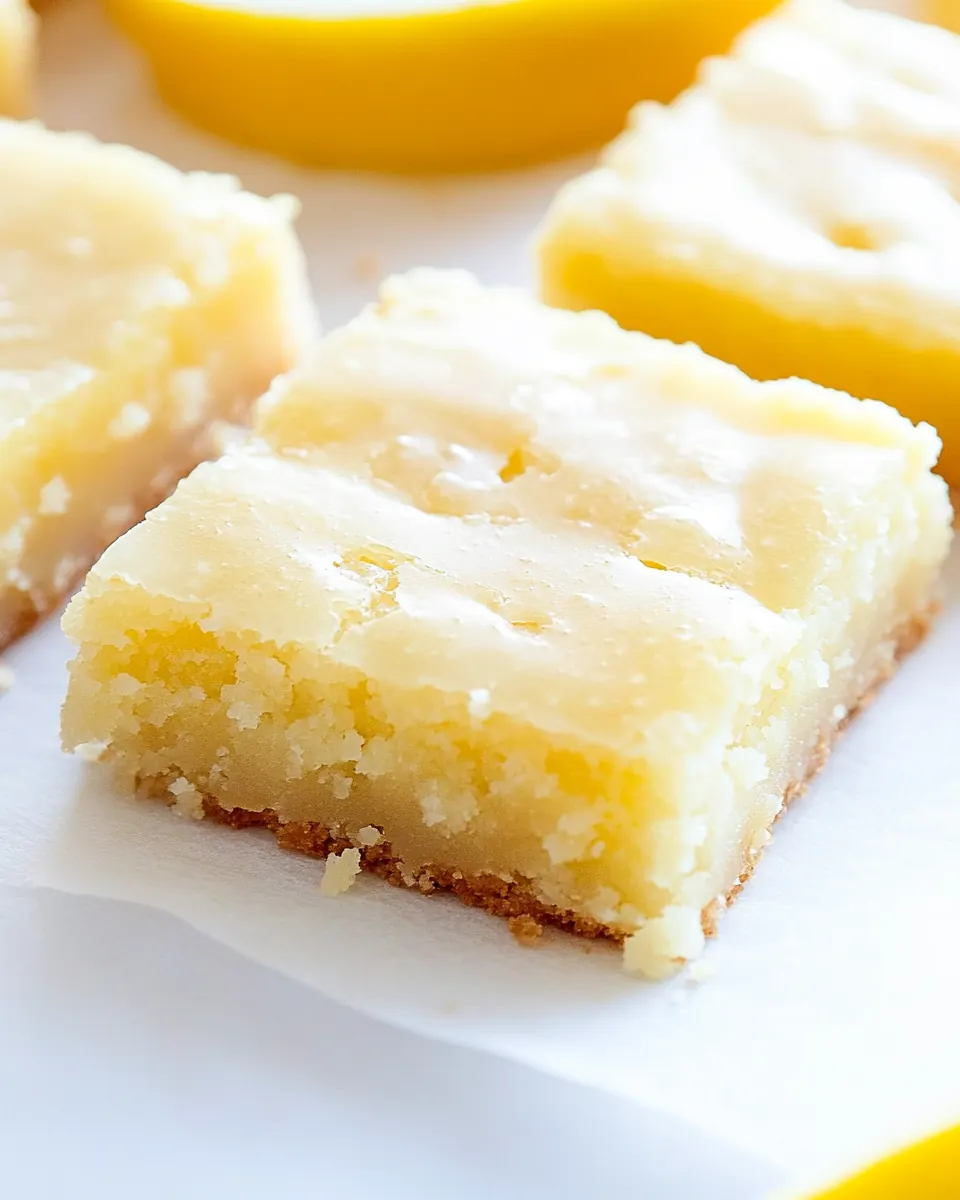
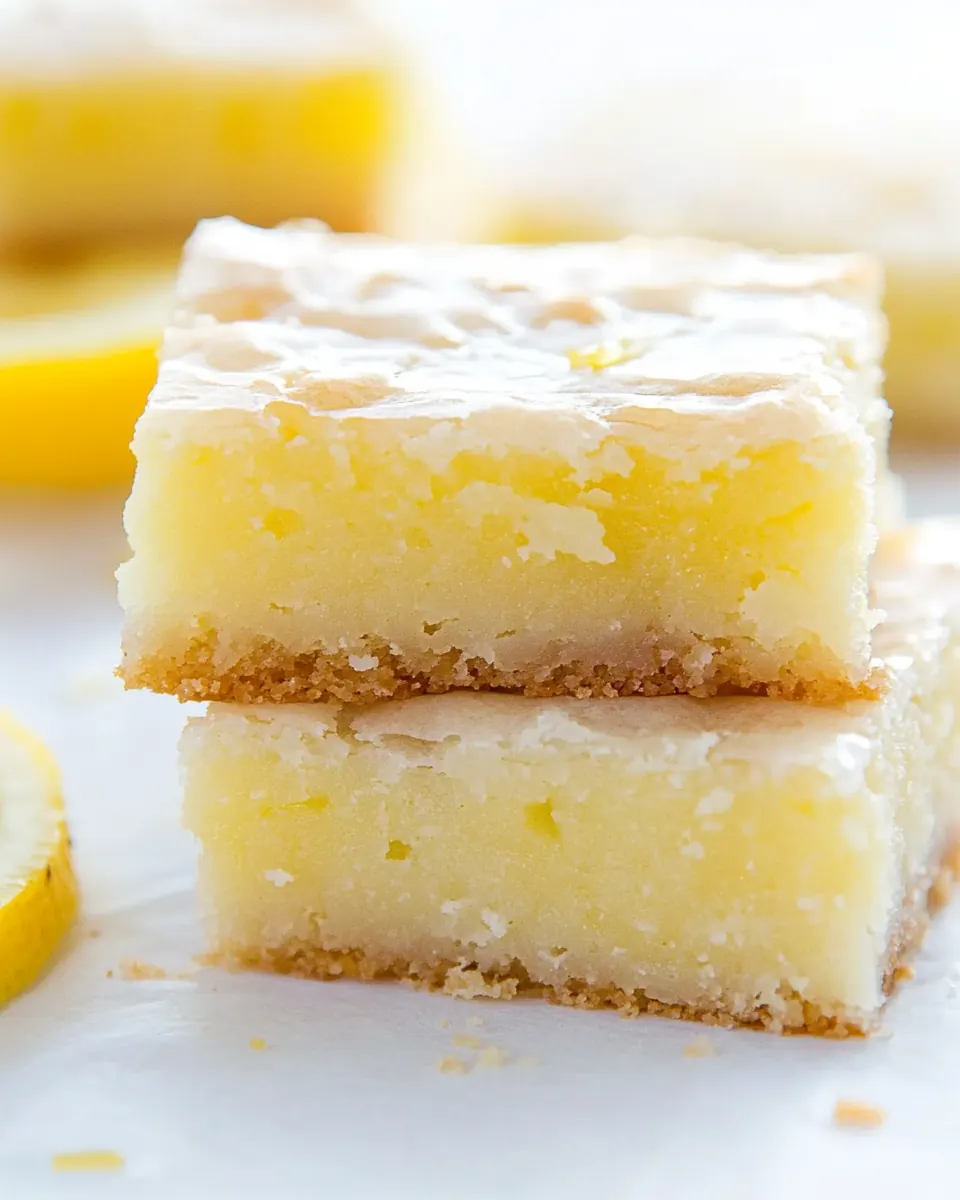
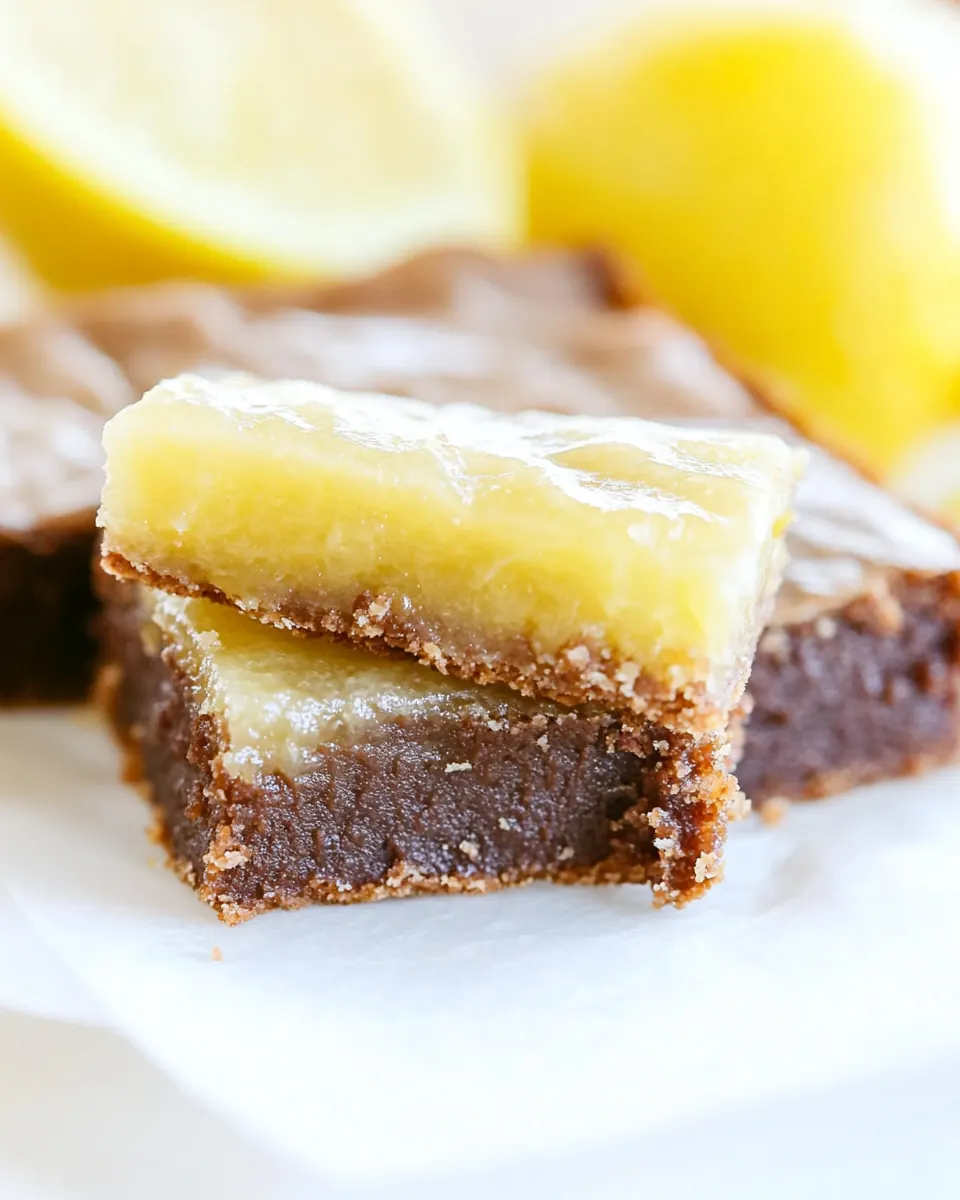
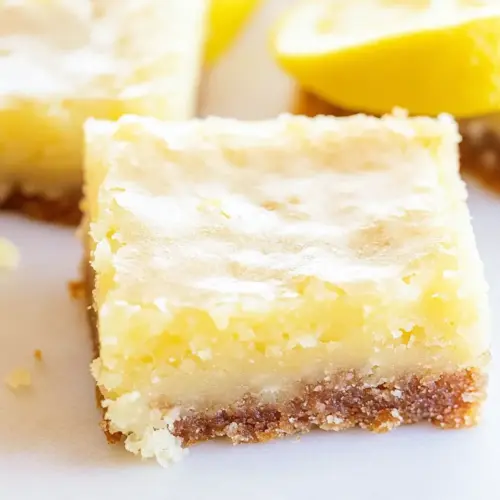
Glazed Lemon Brownies
Glazed Lemon Brownies came into my kitchen on a bright spring afternoon when I wanted something that felt like a cross between a brownie and a citrus bar, playful and unexpectedly bright. I remember pulling out a small pan, impatient for that first scent of butter and lemon to fill the house, and how the contrast between fudgy edges and a glossy lemon finish made everyone at the table pause. That first bite felt like a tiny celebration, a citrus note cutting through rich texture, and I kept thinking about how such a simple ingredient list could produce something so memorable.
I learned to make these after tweaking a handful of recipes, keeping what worked and discarding what felt fussy. Over time I found the trick is in gentle mixing and letting the batter rest just a moment while the oven preheats, so the zest infuses into the sugar and the butter stays warm enough to marry with the eggs. Friends who favor chocolate were surprised by how comforting and familiar these bites felt, even though they are bright and zesty. I love serving them when I want a small sweet that still feels springlike, and they have become my go to when someone asks for something with lemon but not too tart.
Recipe Snapshot
30 mins
5 mins
25 mins
Medium
150 kcal
American
Gluten-Free, Low FODMAP
Desserts
8 x 8 inch baking pan, Parchment paper, Hand mixer, Mixing bowls, Whisk, Offset spatula or spoon
Why You’ll Love This Glazed Lemon Brownies
Brightness with Balance
I adore how Glazed Lemon Brownies deliver intense lemon flavor without becoming sour. The pairing of lemon zest with granulated sugar releases aromatic oils that perfume every bite, while the powdered sugar glaze softens the tang into a smooth finish. I find this balance keeps the bars lively, not puckery, and makes them approachable for all palates.
Unexpected Texture Play
These bars give you a tender crumb that still holds together, so you get a satisfying chew and soft center. The unsalted butter and vegetable oil combination creates a slightly fudgy mouthfeel that contrasts beautifully with the shiny glaze. Serving them cooled preserves that texture, and when you cut into them, you notice clean edges and tender interiors, which I always appreciate.
Simple Techniques, Big Results
I love that this recipe relies on straightforward techniques I use all the time, like whisking dry ingredients and creaming butter with sugar. Those basic moves are forgiving, so even if you are new to baking you can still achieve a professional result. I often tell friends that the little details matter, like warming the butter and letting the glaze set, and they reward the extra attention with glossy tops and vivid lemon notes.
Fast and Friendly for Gatherings
Because these bake quickly and slice into shareable squares, they are my go to for casual get togethers. I can whisk the glaze while the bars cool and be ready to plate in under an hour. I appreciate recipes that let me spend less time in the kitchen and more time visiting with people, and these bars do exactly that.
Adaptable and Homey
Finally, I value recipes that welcome small tweaks. The core of Glazed Lemon Brownies is sturdy, so you can scale quantities or add a decorative lemon twist without losing the essence. I like that it feels both nostalgic and new, so it fits a weekend coffee or a spring celebration with equal charm.
What Goes Into Glazed Lemon Brownies
I think of these ingredients as a tight little team, each doing a clear job. The flour, leavening, and salt build the structure, while the granulated sugar and lemon zest bring fragrant sweetness. The fats make the texture tender and slightly fudgy, and the eggs bind everything together so the bars slice neatly. The glaze is the punctuation mark, smoothing the surface and amplifying citrus notes.
- 3/4 cup all-purpose flour: Provides structure and tenderness to the brownies; contributes gluten for chew and helps bind wet ingredients. Sifts or gently folds to avoid overmixing, preserving a soft crumb in the final bake.
- 1/4 teaspoon baking powder: Leavens subtly to give a light lift without making the dense brownie cake-like; balances crumb texture when combined with eggs. Measure precisely to avoid an overly aerated or metallic taste.
- 1/4 teaspoon salt: Enhances flavor by balancing sweetness and strengthening gluten formation; also helps control the rise and texture alongside baking powder. Dissolve evenly into dry mix to ensure uniform distribution.
- 3/4 cup granulated sugar: Adds sweetness and bulk while contributing to moistness and caramelized flavor during baking; helps with browning of the top crust. Creams with butter and eggs to incorporate air and create a tender crumb.
- 2 teaspoons lemon zest about half a lemon: Contributes bright citrus aroma and concentrated lemon oil for an intense, fresh lemon flavor; provides fragrant accents throughout the batter. Zest finely to avoid bitter white pith and distribute evenly for consistent lemon bursts.
- 1/2 cup melted unsalted butter: Provides rich fat for moistness, flavor, and a tender crumb; aids in creating a fudgy texture when used melted. Combine with sugar and eggs to produce a glossy batter and promote even baking.
- 1 tablespoon vegetable oil: Supplies additional fat that keeps brownies moist and improves texture without adding strong flavor; helps thin melted butter for smoother incorporation. Use measured amount to maintain correct fat balance for fudginess.
- 2 large eggs: Adds structure, richness, and emulsification, contributing to lift and a soft, cohesive crumb; eggs help bind the batter and set during baking. Beat briefly with sugar and fats to integrate air and achieve uniform texture.
- 1 tablespoon fresh lemon juice: Imparts fresh, bright lemon acidity and flavor that balances sweetness and enhances overall taste; provides a clean, zesty note to the batter. Add with other liquids to distribute lemon flavor evenly throughout brownies.
- 1/2 cup powdered sugar: Creates a smooth, sweet glaze when combined with lemon juice, adding a glossy finish and additional sweetness; helps set a thin coating on top of the cooled brownies. Sift to remove lumps before mixing with lemon juice for an even glaze.
- 1 tablespoon fresh lemon juice: Provides acidity for the glaze, cutting sweetness and delivering a fresh citrus finish; helps thin the powdered sugar into a pourable consistency. Whisk into powdered sugar until smooth to achieve desired glaze thickness.
- 2 teaspoons lemon zest about half a lemon: Adds concentrated lemon aroma and small bursts of citrus flavor in the glaze, reinforcing the lemon profile of the brownies. Finely grate and mix into the glaze to distribute lively lemon notes without overpowering sweetness.
Directions for Glazed Lemon Brownies
I like to walk through these steps with a calm rhythm, so the baking process feels manageable. Read each step before you begin and assemble ingredients ahead, so you can focus on sensory cues like smell and texture as you work. Baking is part craft and part feel, and these directions will guide both.
- Preheat oven to 350 degrees Fahrenheit. Line an 8 x 8 x 2-inch pan with parchment paper and spray lightly with nonstick cooking spray. Set aside.: As the oven warms you will notice a gentle heat and anticipation in the kitchen, which is the first sensory sign that baking is on its way. The parchment plus a light spray prevents sticking and helps you lift the bars out cleanly, avoiding ragged edges. I like to press the parchment so it fits snugly, trimming overhang for neat corners. One common mistake is not securing the parchment, which can shift and cause uneven baking, so make sure it lies flat. The visual cue to look for is an evenly preheated oven and a prepared pan that feels ready to accept batter, which ensures even heat distribution from the start.
- Add 3/4 cup all-purpose flour, 1/4 teaspoon baking powder, and 1/4 teaspoon salt to a small bowl and whisk to combine.: Whisking these dry ingredients blends leavening and salt evenly through the flour, ensuring consistent texture. You will see the flour lighten and take on a uniform appearance, and the whisking introduces a tiny amount of air which helps with a gentle lift. The sound is subtle a soft swish as the whisk moves, and the smell is neutral but clean. If you skip thorough whisking you risk pockets of baking powder or uneven salt, resulting in uneven rise or off bites. A common troubleshooting tip is to tap the bowl after whisking to settle the flour and double check there are no clumps.
- Combine 3/4 cup granulated sugar and 2 teaspoons lemon zest in a small bowl with a spoon or a fork to allow the zest to release its oils into the sugar.: Rubbing the zest into the sugar is aromatic alchemy, releasing bright citrus oils that scent the whole batter. As you mix, inhale deeply and you will notice the sugar carry the fresh lemon perfume, signaling the flavor is infusing. The texture will remain grainy but fragrant, and the visual will show tiny yellow flecks suspended in white sugar. Avoid using pre zested or dried zest, which lacks the same punch. If the zest is not rubbed enough the lemon flavor will feel muted in the final bar, so take a little extra time here for payoff.
- Add 1/2 cup melted unsalted butter, 1 tablespoon vegetable oil, and the lemon sugar to a large bowl and beat with a hand mixer until combined.: When you beat the warm butter and oil with the lemon sugar, the mixture becomes glossy and fragrant, releasing a rich butter aroma married to citrus. The hand mixer brings air into the blend, yet you want to stop once everything is uniform to avoid over aeration that could make the texture too cake like. Visually you will see a smooth, slightly thick batter with tiny zest specks evenly distributed. A frequent mistake is adding hot butter straight from the stove which can scramble eggs later, so let it cool slightly if piping hot. The why here is that combining fats early ensures even moisture and a tender crumb in the finished bars.
- Add 2 large eggs and 1 tablespoon fresh lemon juice and mix until combined. Add the flour mixture and mix until combined.: At this stage the batter will darken slightly and smell richer, while the eggs help bind and provide structure. The lemon juice cuts some richness, giving a gentle lift to the flavor profile. When you add the dry mixture, fold just until no streaks remain to preserve the fudgy texture; the batter should be smooth but not overworked. A common error is overmixing, which creates a tougher crumb, so stop mixing as soon as the flour disappears. The tactile cue is a batter that yields to a spoon but holds its shape a bit, signaling correct consistency.
- Pour the batter into the prepared pan and bake for about 18-20 minutes, until a toothpick inserted into the center comes out with just a few crumbs. Remove and let the brownies cool completely.: During baking the oven will fill with warm, buttery citrus notes, and you may hear faint crackling as edges set. Watch for the top to set and for the edges to pull slightly from the pan, a visual cue that signals doneness. The toothpick test is your final check, and you want a few moist crumbs, not wet batter, to ensure a fudgy interior. If you overbake you will lose the moist chew, so check a few minutes early if your oven runs hot. Allowing complete cooling is essential, because the glaze sets best on a cool surface and cutting while warm often causes the glaze to slide off.
- Once they are fully cooled, make the glaze by adding 1/2 cup powdered sugar, 1 tablespoon fresh lemon juice, and 2 teaspoons lemon zest to a small bowl and whisking together.: Whisking the glaze yields a glossy, pourable mixture that smells of sweet lemon and looks silky. The powdered sugar dissolves quickly, forming a smooth syrup that will form a thin coating on the bars. If the glaze seems too thick, add a drop of lemon juice until it reaches a spreadable consistency; too thin and it will run off, too thick and it will clump. A common pitfall is not tasting the glaze as you go, so adjust sweetness and tang to your preference. The texture should be smooth and shiny before you move to spreading.
- Use a spoon or an offset spatula to spread the glaze evenly over the cooled brownies.: Spreading the glaze is a quiet, satisfying step where you can see the transformation, the shiny top catching light and the zest flecks dotting the surface. Start in the center and push outward for an even layer, and let it set at room temperature until slightly firm to the touch. If you want cleaner slices, chill briefly to firm the glaze before cutting. A mistake I see is glazing warm bars, which causes the glaze to melt and seep into the crumb, so ensure bars are fully cooled first. Once set, the visual should be a smooth, even sheen that promises bright flavor in every square.
Tips and Variations
I like sharing options that help these bars fit different occasions, so you can tweak texture and presentation with small changes. Below are practical tips and a few variations I’ve tested and enjoyed. Each tip starts with a bold prompt so you can scan quickly.
- Measure flour properly by spooning it into your measuring cup and leveling off, rather than scooping directly, to avoid dense bars from too much flour.
- Warm the butter then cool slightly so it blends easily with sugar but is not hot enough to affect the eggs, ensuring a smooth batter.
- Rub zest into sugar to release aromatic oils, which heightens lemon flavor without increasing acidity.
- Watch baking time closely and test with a toothpick early, removing as soon as a few moist crumbs cling to preserve a fudgy center.
- Chill briefly before cutting for cleaner squares, especially if you prefer perfectly neat edges for serving or gifting.
What Goes Well With This Glazed Lemon Brownies
These bars pair well with simple accompaniments and suit a range of gatherings from casual coffee times to spring celebrations. Here are thoughtful serving ideas and storage notes to help you present them beautifully.
- Serve with tea or coffee for an afternoon treat, the lemon brightness complements warm beverages and keeps flavors balanced.
- Plate for brunch alongside fresh fruit and light pastries, offering a sweet citrus option that feels seasonal and bright.
- Bring to a picnic packed in a single layer, as the glaze keeps them attractive and easy to share outdoors.
- Store at room temperature in an airtight container for up to two days, or refrigerate for longer keeping, which also firms the glaze for neat slicing.
- Serve chilled for a firmer texture if you prefer a more compact slice, chilling tightens the crumb and sets the glaze firmly.
FAQ
Conclusion
These Glazed Lemon Brownies stand out for their lively lemon flavor balanced with a tender, slightly fudgy texture, and a glossy sweet glaze that ties everything together. Try them because they are quick to make, carry a surprising depth from rubbed zest, and scale easily for sharing with friends or for a simple treat at home. Baking them is rewarding and approachable, and they bring a fresh, springlike note to any table while being warm and welcoming in presentation.
Glazed Lemon Brownies
Equipment
- 8 x 8-inch baking pan
- Parchment Paper
- Hand Mixer
- Mixing Bowls
- Whisk
- Offset spatula or spoon
Ingredients
- 3/4 cup all-purpose flour Provides structure and tenderness to the brownies; contributes gluten for chew and helps bind wet ingredients. Sifts or gently folds to avoid overmixing, preserving a soft crumb in the final bake.
- 1/4 teaspoon baking powder Leavens subtly to give a light lift without making the dense brownie cake-like; balances crumb texture when combined with eggs. Measure precisely to avoid an overly aerated or metallic taste.
- 1/4 teaspoon salt Enhances flavor by balancing sweetness and strengthening gluten formation; also helps control the rise and texture alongside baking powder. Dissolve evenly into dry mix to ensure uniform distribution.
- 3/4 cup granulated sugar Adds sweetness and bulk while contributing to moistness and caramelized flavor during baking; helps with browning of the top crust. Creams with butter and eggs to incorporate air and create a tender crumb.
- 2 teaspoons lemon zest about half a lemon Contributes bright citrus aroma and concentrated lemon oil for an intense, fresh lemon flavor; provides fragrant accents throughout the batter. Zest finely to avoid bitter white pith and distribute evenly for consistent lemon bursts.
- 1/2 cup melted unsalted butter Provides rich fat for moistness, flavor, and a tender crumb; aids in creating a fudgy texture when used melted. Combine with sugar and eggs to produce a glossy batter and promote even baking.
- 1 tablespoon vegetable oil Supplies additional fat that keeps brownies moist and improves texture without adding strong flavor; helps thin melted butter for smoother incorporation. Use measured amount to maintain correct fat balance for fudginess.
- 2 large eggs Adds structure, richness, and emulsification, contributing to lift and a soft, cohesive crumb; eggs help bind the batter and set during baking. Beat briefly with sugar and fats to integrate air and achieve uniform texture.
- 1 tablespoon fresh lemon juice Imparts fresh, bright lemon acidity and flavor that balances sweetness and enhances overall taste; provides a clean, zesty note to the batter. Add with other liquids to distribute lemon flavor evenly throughout brownies.
- 1/2 cup powdered sugar Creates a smooth, sweet glaze when combined with lemon juice, adding a glossy finish and additional sweetness; helps set a thin coating on top of the cooled brownies. Sift to remove lumps before mixing with lemon juice for an even glaze.
- 1 tablespoon fresh lemon juice Provides acidity for the glaze, cutting sweetness and delivering a fresh citrus finish; helps thin the powdered sugar into a pourable consistency. Whisk into powdered sugar until smooth to achieve desired glaze thickness.
- 2 teaspoons lemon zest about half a lemon Adds concentrated lemon aroma and small bursts of citrus flavor in the glaze, reinforcing the lemon profile of the brownies. Finely grate and mix into the glaze to distribute lively lemon notes without overpowering sweetness.
Instructions
- Preheat oven to 350 degrees Fahrenheit. Line an 8 x 8 x 2-inch pan with parchment paper and spray lightly with nonstick cooking spray. Set aside.: As the oven warms you will notice a gentle heat and anticipation in the kitchen, which is the first sensory sign that baking is on its way. The parchment plus a light spray prevents sticking and helps you lift the bars out cleanly, avoiding ragged edges. I like to press the parchment so it fits snugly, trimming overhang for neat corners. One common mistake is not securing the parchment, which can shift and cause uneven baking, so make sure it lies flat. The visual cue to look for is an evenly preheated oven and a prepared pan that feels ready to accept batter, which ensures even heat distribution from the start.
- Add 3/4 cup all-purpose flour, 1/4 teaspoon baking powder, and 1/4 teaspoon salt to a small bowl and whisk to combine.: Whisking these dry ingredients blends leavening and salt evenly through the flour, ensuring consistent texture. You will see the flour lighten and take on a uniform appearance, and the whisking introduces a tiny amount of air which helps with a gentle lift. The sound is subtle a soft swish as the whisk moves, and the smell is neutral but clean. If you skip thorough whisking you risk pockets of baking powder or uneven salt, resulting in uneven rise or off bites. A common troubleshooting tip is to tap the bowl after whisking to settle the flour and double check there are no clumps.
- Combine 3/4 cup granulated sugar and 2 teaspoons lemon zest in a small bowl with a spoon or a fork to allow the zest to release its oils into the sugar.: Rubbing the zest into the sugar is aromatic alchemy, releasing bright citrus oils that scent the whole batter. As you mix, inhale deeply and you will notice the sugar carry the fresh lemon perfume, signaling the flavor is infusing. The texture will remain grainy but fragrant, and the visual will show tiny yellow flecks suspended in white sugar. Avoid using pre zested or dried zest, which lacks the same punch. If the zest is not rubbed enough the lemon flavor will feel muted in the final bar, so take a little extra time here for payoff.
- Add 1/2 cup melted unsalted butter, 1 tablespoon vegetable oil, and the lemon sugar to a large bowl and beat with a hand mixer until combined.: When you beat the warm butter and oil with the lemon sugar, the mixture becomes glossy and fragrant, releasing a rich butter aroma married to citrus. The hand mixer brings air into the blend, yet you want to stop once everything is uniform to avoid over aeration that could make the texture too cake like. Visually you will see a smooth, slightly thick batter with tiny zest specks evenly distributed. A frequent mistake is adding hot butter straight from the stove which can scramble eggs later, so let it cool slightly if piping hot. The why here is that combining fats early ensures even moisture and a tender crumb in the finished bars.
- Add 2 large eggs and 1 tablespoon fresh lemon juice and mix until combined. Add the flour mixture and mix until combined.: At this stage the batter will darken slightly and smell richer, while the eggs help bind and provide structure. The lemon juice cuts some richness, giving a gentle lift to the flavor profile. When you add the dry mixture, fold just until no streaks remain to preserve the fudgy texture; the batter should be smooth but not overworked. A common error is overmixing, which creates a tougher crumb, so stop mixing as soon as the flour disappears. The tactile cue is a batter that yields to a spoon but holds its shape a bit, signaling correct consistency.
- Pour the batter into the prepared pan and bake for about 18-20 minutes, until a toothpick inserted into the center comes out with just a few crumbs. Remove and let the brownies cool completely.: During baking the oven will fill with warm, buttery citrus notes, and you may hear faint crackling as edges set. Watch for the top to set and for the edges to pull slightly from the pan, a visual cue that signals doneness. The toothpick test is your final check, and you want a few moist crumbs, not wet batter, to ensure a fudgy interior. If you overbake you will lose the moist chew, so check a few minutes early if your oven runs hot. Allowing complete cooling is essential, because the glaze sets best on a cool surface and cutting while warm often causes the glaze to slide off.
- Once they are fully cooled, make the glaze by adding 1/2 cup powdered sugar, 1 tablespoon fresh lemon juice, and 2 teaspoons lemon zest to a small bowl and whisking together.: Whisking the glaze yields a glossy, pourable mixture that smells of sweet lemon and looks silky. The powdered sugar dissolves quickly, forming a smooth syrup that will form a thin coating on the bars. If the glaze seems too thick, add a drop of lemon juice until it reaches a spreadable consistency; too thin and it will run off, too thick and it will clump. A common pitfall is not tasting the glaze as you go, so adjust sweetness and tang to your preference. The texture should be smooth and shiny before you move to spreading.
- Use a spoon or an offset spatula to spread the glaze evenly over the cooled brownies.: Spreading the glaze is a quiet, satisfying step where you can see the transformation, the shiny top catching light and the zest flecks dotting the surface. Start in the center and push outward for an even layer, and let it set at room temperature until slightly firm to the touch. If you want cleaner slices, chill briefly to firm the glaze before cutting. A mistake I see is glazing warm bars, which causes the glaze to melt and seep into the crumb, so ensure bars are fully cooled first. Once set, the visual should be a smooth, even sheen that promises bright flavor in every square.
Notes
- Measure flour properly by spooning it into your measuring cup and leveling off, rather than scooping directly, to avoid dense bars from too much flour.
- Warm the butter then cool slightly so it blends easily with sugar but is not hot enough to affect the eggs, ensuring a smooth batter.
- Rub zest into sugar to release aromatic oils, which heightens lemon flavor without increasing acidity.
- Watch baking time closely and test with a toothpick early, removing as soon as a few moist crumbs cling to preserve a fudgy center.
- Chill briefly before cutting for cleaner squares, especially if you prefer perfectly neat edges for serving or gifting.