Easy Turkey Dry Brine Recipe
Easy Turkey Dry Brine Recipe is the little trick that has saved more holiday dinners for me than I can count. The first time I tried a dry brine, I was wary, thinking it sounded like skipping the real work, but after one Thanksgiving when the turkey came out with a crisp, golden skin and deeply seasoned meat, I was converted. I remember pacing the kitchen, smelling the citrus and thyme, and feeling oddly proud of letting time and salt do the hard work.
Over the years I’ve adjusted the balance, learning that a few simple ingredients, some patience, and a cool refrigerator corner make all the difference. I like to prep while sipping coffee and reading mail, treating the turkey like a long, slow conversation rather than a sprint. Friends always ask how the meat stays so juicy, and I tell them the same thing every time, with a grin: it is all in the brine and the quiet overnight magic.
Recipe Snapshot
24 hr 1 mins
1440 mins
1 mins
Hard
350 kcal
American
Gluten-Free, Low FODMAP
Dinner
Roasting pan, Roasting rack, Small bowl, Paper towels
What You’ll Enjoy About This Easy Turkey Dry Brine Recipe
Deep flavor without fuss
I love that Easy Turkey Dry Brine Recipe seasons the entire bird through, not just the surface. By rubbing in kosher salt, brown sugar, and aromatics, you build layers of savory and subtle sweetness that penetrate the meat. The result is turkey that tastes like it was basted from the inside out.
Better texture, reliably
One reason I reach for this method is texture. The salt draws out moisture then reabsorbs it, carrying flavor back into the muscle and breaking down proteins so every slice is tender. You get a crisp skin and juicy slices with minimal hands on time, which for me is a game changer during a busy holiday.
Simple pantry ingredients
This recipe uses straightforward items like orange zest, black pepper, and fresh thyme leaves. I can usually pull everything together in one bowl while the turkey sits in the fridge doing its work. It feels approachable whether you are cooking your first turkey or your fifteenth.
Flexible timing for real life
I appreciate that the process works over a range of time. Letting the bird rest in the fridge for 24 to 36 hours gives dependable results, so if your schedule shifts a bit you still win. That breathing room makes the holiday less stressful, and it’s saved me from frantic last minute changes more than once.
Minimal equipment, maximum payoff
There is no complicated gear required. A small bowl for mixing, a roasting pan and rack, and a refrigerator corner are all you need. That low barrier to entry is why I recommend this method to friends who feel intimidated by roasting a turkey. It’s the simplest path to show stopping results.
Ingredients to Make Easy Turkey Dry Brine Recipe
I think of these ingredients as a team where each player has a clear job. Kosher salt is the workhorse that seasons and helps the meat retain moisture. Brown sugar adds a touch of caramelized sweetness that balances the salt. Bright accents like orange zest and herbal notes from fresh thyme leaves lift the finished turkey, while black pepper gives a warm edge. The turkey itself is the canvas that benefits from this restrained, intentional approach.
- 3 tablespoons kosher salt must be kosher!: Enhance flavor and promote a crisp, well-seasoned skin by providing measured salt that draws out moisture and concentrates natural turkey juices; use kosher salt specifically for its coarse grains and predictable salting strength. Apply evenly over and under the skin to ensure thorough penetration and improved texture during roasting.
- 1 1/2 tablespoons brown sugar: Balance savory saltiness with a touch of mellow sweetness that encourages browning and complements savory aromatics; brown sugar helps create a lightly caramelized exterior on the turkey. Use sparingly so it enhances flavor without making the surface overly sweet or prone to burning.
- 1 orange zested: Add bright citrus aroma and subtle acidity by incorporating finely zested orange peel, which lifts the overall flavor profile and pairs well with poultry herbs. Distribute zest evenly in the brine mixture to impart a fresh, fragrant note that complements both skin and meat.
- 1 teaspoon black pepper: Provide a warm, gently pungent heat and aromatic depth that enhances the turkey's savory profile while remaining subtle when used sparingly. Grind or measure pepper evenly into the brine mix to contribute complexity without overpowering the other flavors.
- 1 tablespoon fresh thyme leaves: Offer herbal earthiness and floral notes that marry well with poultry, contributing aromatic complexity and a fresh finish to the brined turkey. Strip or chop thyme leaves before mixing so the oil-rich bits release flavor during the brining period and roasting.
- 12 pound turkey completely defrosted: Serve as the primary protein to be seasoned and brined, requiring full defrosting to ensure even salt penetration and safe cooking; a 12-pound size cooks predictably within common timing guidelines. Position turkey uncovered in the refrigerator while brining to allow the dry brine to work effectively on skin and meat.
The Method for Easy Turkey Dry Brine Recipe
I like to approach the method like a calm, deliberate routine. These steps walk you through preparing the bird, applying the brine, and finishing the turkey for roasting, while helping you read the sensory cues so you know you are on track. Keep a clean surface and a sense of patience, because the real work happens over time.
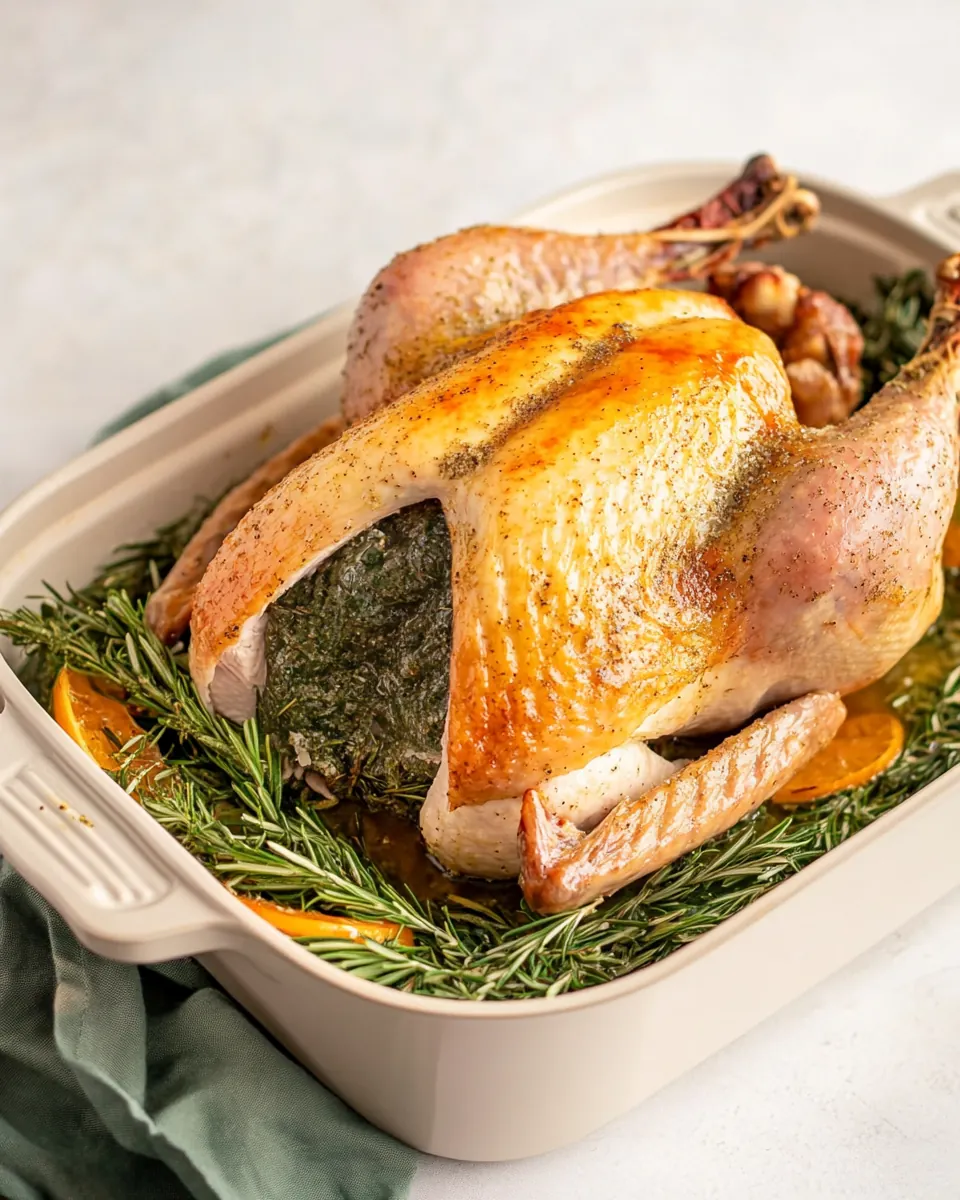
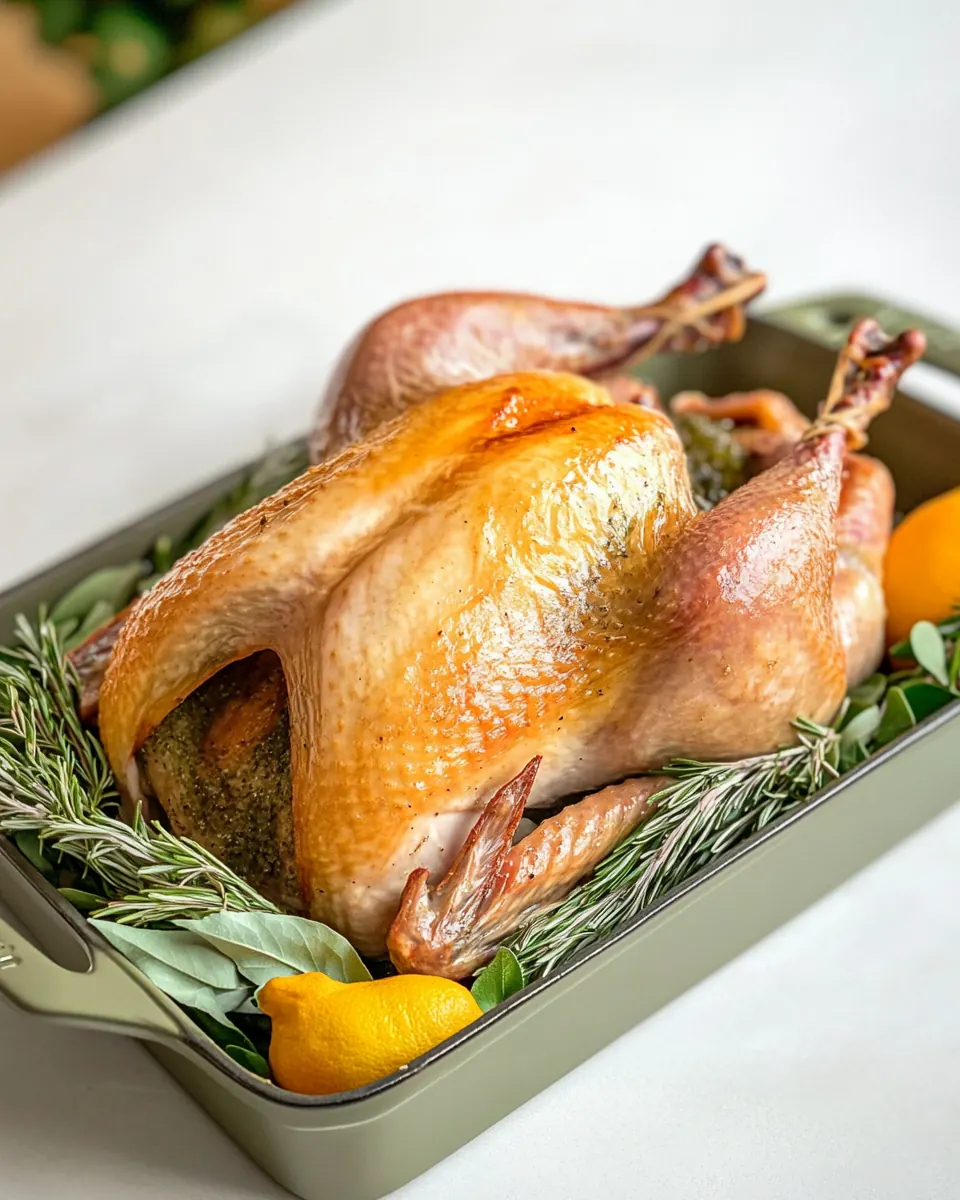
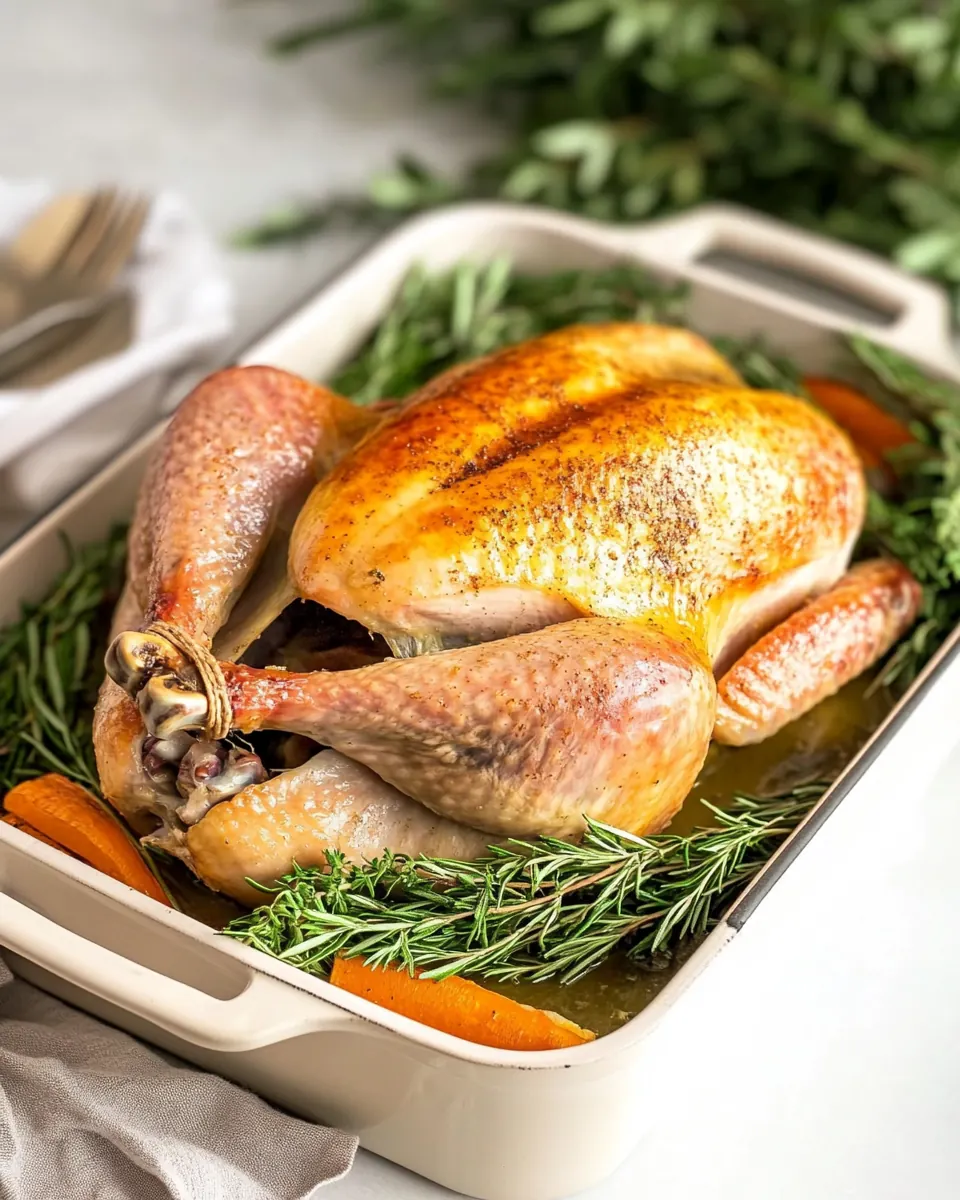
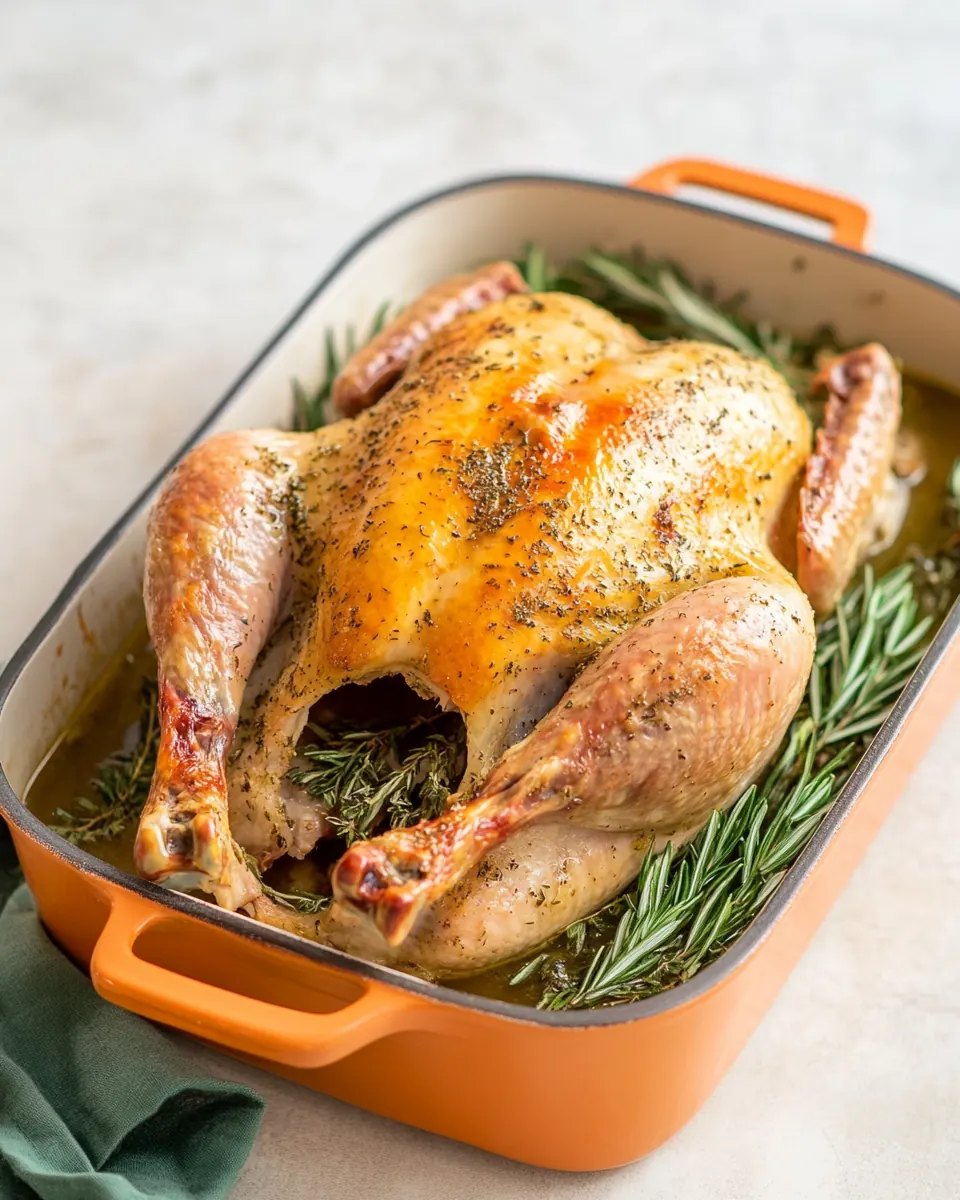
- Remove neck and any giblets from your fully defrosted (or fresh) turkey. Blot with paper towels (inside and out) to dry completely. Place onto roasting rack inside roasting pan. Set aside.: The first sensory cue is the clean, slightly metallic smell of cold poultry and the firm, cool touch of the cavity, which tells you the bird is properly thawed. Doing this step clears the interior so flavors and heat circulate evenly during roasting. Common mistake to avoid, forgetting to check all pockets and crevices for plastic bags or packaging, which can melt or cause uneven cooking if left inside.
- In a small bowl, combine kosher salt, brown sugar, orange zest, pepper and thyme. Rub entire mixture on the exterior of the turkey. Your turkey will start releasing moisture and look damp after a few minutes. This is completely normal!: You will feel and hear the slight friction as you pat the skin, and over a minute the surface will become noticeably less damp, which is crucial so the brine adheres. Dry skin also crisps better in the oven, creating that coveted crackle when roasted. Avoid blotting too vigorously, which can tear delicate skin and expose meat that will dry out during cooking.
- Place turkey uncovered into the refrigerator for 24-36 hours. After this time, your turkey should be completely dry! (All that moisture you saw on the bird the day before has been reabsorbed.): The visual is important here, because the turkey should sit elevated so air can circulate beneath the cavity, producing even browning. The rack supports the weight and prevents the skin from steaming against the pan. A common pitfall is placing the bird directly in the pan without a rack, which can trap juices and lead to a soggy underside.
- After turkey is done brining, use paper towels to remove any dried orange zest bits or thyme leaves off the turkey so they don't burn. Wipe out any excess moisture that has accumulated in the bottom of the roasting pan. (There shouldn't be much at all.): When you let the turkey rest briefly before applying the brine, you give yourself a window to finish mixing ingredients, and the cool surface steadies. The quiet pause also lets you check seasoning and equipment. A misstep is leaving the turkey uncovered in a warm room where bacteria can multiply, so keep it cool and proceed promptly to the brining step.
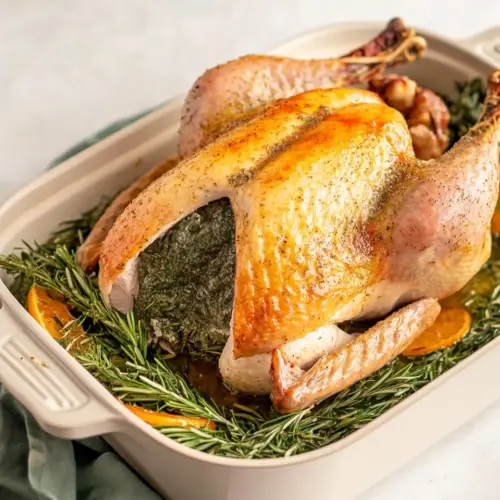
- Fill turkey cavity with any desired aromatics, such as onion, garlic, apples, orange/lemon wedges or fresh herbs. Fold wings down and back, tie legs together and roast turkey as desired.: As you mix these elements, the aroma will bloom, with citrus oils from the orange zest and herbaceous notes from the thyme rising first. This blend is the backbone of the brine, and thorough mixing ensures even flavor. Avoid grinding the sugar too hard, which may create dense clumps that do not distribute evenly over the skin.
- Rub entire mixture on the exterior of the turkey.: The tactile sense of spreading the dry mixture over the skin is satisfying, and you should feel a light graininess as salt and sugar contact the surface. Focus on even coverage rather than pressing hard, because the salt needs to sit in contact with the skin to draw moisture out and later reabsorb it. Common error, rubbing only the top and neglecting the thighs and legs, which will result in uneven seasoning.
- Your turkey will start releasing moisture and look damp after a few minutes.: You will notice droplets forming and the surface darkening slightly, which indicates the salt is pulling liquid out. This is exactly what you want, because that moisture will later be reabsorbed carrying the seasoning into the meat. If you see excessive pools of liquid, check that you did not use an overly salty mix for your bird size, as that can concentrate flavors too strongly.
- Place turkey uncovered into the refrigerator for 24 to 36 hours.: Over this resting time, the refrigerator will feel cool and quiet, and the turkey will gradually firm and dry on the surface. The time window allows the salt to penetrate and the skin to dry so it crisps beautifully during roasting. A common mishap is wrapping the bird, which traps moisture and prevents the skin from drying properly, so keep it uncovered.
- After this time your turkey should be completely dry.: The skin will look matte rather than glossy, and when you press it lightly it should feel taut, which signals proper brining. This dryness is what produces a deep golden skin and concentrated, seasoned meat. If the skin still feels damp, give it a few extra hours in the refrigerator, because roasting with damp skin reduces the crispness.
- After turkey is done brining use paper towels to remove any dried orange zest bits or thyme leaves off the turkey so they do not burn.: You will see small flecks that may darken quickly in the oven, so removing them avoids bitter burnt specks on the skin. Lightly wiping the surface also reduces the chance of smoke during high heat. Avoid scraping too forcefully, which could tear the skin and expose meat that dries while roasting.
- Wipe out any excess moisture that has accumulated in the bottom of the roasting pan.: This step keeps the oven environment clean and prevents spattering, and you will notice only a little fluid most times. A dry pan helps the rack keep the turkey elevated and reduces the risk of steaming the underside. Common mistake, leaving a large pool in the pan which can interfere with browning on the bottom of the bird.
- Fill turkey cavity with any desired aromatics such as onion garlic apples orange or lemon wedges or fresh herbs.: When you add aromatics, the cavity becomes a flavor chamber, releasing perfumes during roasting that subtly scent the meat from inside. The combination of fruit, herbs, or vegetables will steam and mingle with drippings for complex aroma. One caution, avoid overstuffing which can block heat circulation and lengthen cooking time.
- Fold wings down and back tie legs together and roast turkey as desired.: The final visual should be compact and secure, promoting even exposure to heat so the skin browns consistently. As it roasts you will hear soft sizzling and smell a nutty, caramelizing scent as sugars brown. A typical error is leaving the legs untied which can lead to uneven cooking between the breast and thighs, so truss lightly for a uniform result.
Substitutions and Tips
This section offers practical notes and expanded tips drawn from my experience making the Easy Turkey Dry Brine Recipe. These suggestions help you adjust salt ratios, timing, and finishing touches so the turkey turns out consistently excellent, whether it is your first brine or your fifteenth.
- Salt ratio guidance. Use one tablespoon of Morton Kosher Salt per four pounds of turkey as a baseline adjustment rule, it helps scale the recipe accurately for different bird sizes.
- Timing flexibility. If your schedule is tight aim for at least 24 hours in the fridge, but if you can do 36 hours you may notice a slightly deeper seasoning without losing moisture.
- Adjusting sweetness. If you prefer less caramel notes, reduce the brown sugar slightly, but do not remove it entirely as it aids in browning and balance.
- Herb handling. Use fresh thyme for the best aromatic lift, and check the skin before roasting to remove any leaves that might burn.
- Orange zest prep. Zest only the colored part of the peel to capture essential oils, avoiding the bitter white pith underneath.
Serving Suggestions
Serving a turkey treated with the Easy Turkey Dry Brine Recipe is a chance to highlight its crisp skin and juicy meat. Choose complementary sides and plan plating that celebrates slices of tender breast and richly flavored dark meat. Consider timing so the bird rests while you finish warm accompaniments.
- Classic holiday platter. Arrange carved slices of turkey with warm gravy on the side, and include seasonal sides like roasted root vegetables to balance the savory bird.
- Casual family meal. Serve thick slices with mashed potatoes and a simple green salad for an easy weeknight style dinner that still feels special.
- Leftover ideas. Shred or slice reserved meat for sandwiches with a smear of cranberry sauce, using the deeply seasoned turkey to add immediate flavor to next day lunches.
- Storage tips. Cool carved turkey quickly and store in airtight containers in the refrigerator for up to four days, or freeze portions for longer keeping, labeling with dates for clarity.
- Seasonal pairings. This brined turkey pairs well with citrus forward sides in late fall and roasted vegetables in colder months, offering comforting and balanced plates.
- Occasion planning. The method works for Thanksgiving, family dinners, or any gathering where fuss free, reliable results are prized; plan brining the day before to free up time on the day of service.
FAQ
Conclusion
What makes the Easy Turkey Dry Brine Recipe special is its elegant simplicity, combining a short list of pantry items with time to produce a deeply seasoned, juicy turkey and crackling skin. This method rewards patience more than technique, and the payoff is a reliably impressive centerpiece without complicated steps. Give it a try for your next holiday or family dinner, and enjoy the ease of a high impact result that frees up your time on the big day.
Easy Turkey Dry Brine Recipe
Equipment
- Roasting Pan
- Roasting rack
- Small Bowl
- Paper towels
Ingredients
- 3 tablespoons kosher salt must be kosher! Enhance flavor and promote a crisp, well-seasoned skin by providing measured salt that draws out moisture and concentrates natural turkey juices; use kosher salt specifically for its coarse grains and predictable salting strength. Apply evenly over and under the skin to ensure thorough penetration and improved texture during roasting.
- 1 1/2 tablespoons brown sugar Balance savory saltiness with a touch of mellow sweetness that encourages browning and complements savory aromatics; brown sugar helps create a lightly caramelized exterior on the turkey. Use sparingly so it enhances flavor without making the surface overly sweet or prone to burning.
- 1 orange zested Add bright citrus aroma and subtle acidity by incorporating finely zested orange peel, which lifts the overall flavor profile and pairs well with poultry herbs. Distribute zest evenly in the brine mixture to impart a fresh, fragrant note that complements both skin and meat.
- 1 teaspoon black pepper Provide a warm, gently pungent heat and aromatic depth that enhances the turkey's savory profile while remaining subtle when used sparingly. Grind or measure pepper evenly into the brine mix to contribute complexity without overpowering the other flavors.
- 1 tablespoon fresh thyme leaves Offer herbal earthiness and floral notes that marry well with poultry, contributing aromatic complexity and a fresh finish to the brined turkey. Strip or chop thyme leaves before mixing so the oil-rich bits release flavor during the brining period and roasting.
- 12 pound turkey completely defrosted Serve as the primary protein to be seasoned and brined, requiring full defrosting to ensure even salt penetration and safe cooking; a 12-pound size cooks predictably within common timing guidelines. Position turkey uncovered in the refrigerator while brining to allow the dry brine to work effectively on skin and meat.
Instructions
- Remove neck and any giblets from your fully defrosted (or fresh) turkey. Blot with paper towels (inside and out) to dry completely. Place onto roasting rack inside roasting pan. Set aside.: The first sensory cue is the clean, slightly metallic smell of cold poultry and the firm, cool touch of the cavity, which tells you the bird is properly thawed. Doing this step clears the interior so flavors and heat circulate evenly during roasting. Common mistake to avoid, forgetting to check all pockets and crevices for plastic bags or packaging, which can melt or cause uneven cooking if left inside.
- In a small bowl, combine kosher salt, brown sugar, orange zest, pepper and thyme. Rub entire mixture on the exterior of the turkey. Your turkey will start releasing moisture and look damp after a few minutes. This is completely normal!: You will feel and hear the slight friction as you pat the skin, and over a minute the surface will become noticeably less damp, which is crucial so the brine adheres. Dry skin also crisps better in the oven, creating that coveted crackle when roasted. Avoid blotting too vigorously, which can tear delicate skin and expose meat that will dry out during cooking.
- Place turkey uncovered into the refrigerator for 24-36 hours. After this time, your turkey should be completely dry! (All that moisture you saw on the bird the day before has been reabsorbed.): The visual is important here, because the turkey should sit elevated so air can circulate beneath the cavity, producing even browning. The rack supports the weight and prevents the skin from steaming against the pan. A common pitfall is placing the bird directly in the pan without a rack, which can trap juices and lead to a soggy underside.
- After turkey is done brining, use paper towels to remove any dried orange zest bits or thyme leaves off the turkey so they don't burn. Wipe out any excess moisture that has accumulated in the bottom of the roasting pan. (There shouldn't be much at all.): When you let the turkey rest briefly before applying the brine, you give yourself a window to finish mixing ingredients, and the cool surface steadies. The quiet pause also lets you check seasoning and equipment. A misstep is leaving the turkey uncovered in a warm room where bacteria can multiply, so keep it cool and proceed promptly to the brining step.
- Fill turkey cavity with any desired aromatics, such as onion, garlic, apples, orange/lemon wedges or fresh herbs. Fold wings down and back, tie legs together and roast turkey as desired.: As you mix these elements, the aroma will bloom, with citrus oils from the orange zest and herbaceous notes from the thyme rising first. This blend is the backbone of the brine, and thorough mixing ensures even flavor. Avoid grinding the sugar too hard, which may create dense clumps that do not distribute evenly over the skin.
- Rub entire mixture on the exterior of the turkey.: The tactile sense of spreading the dry mixture over the skin is satisfying, and you should feel a light graininess as salt and sugar contact the surface. Focus on even coverage rather than pressing hard, because the salt needs to sit in contact with the skin to draw moisture out and later reabsorb it. Common error, rubbing only the top and neglecting the thighs and legs, which will result in uneven seasoning.
- Your turkey will start releasing moisture and look damp after a few minutes.: You will notice droplets forming and the surface darkening slightly, which indicates the salt is pulling liquid out. This is exactly what you want, because that moisture will later be reabsorbed carrying the seasoning into the meat. If you see excessive pools of liquid, check that you did not use an overly salty mix for your bird size, as that can concentrate flavors too strongly.
- Place turkey uncovered into the refrigerator for 24 to 36 hours.: Over this resting time, the refrigerator will feel cool and quiet, and the turkey will gradually firm and dry on the surface. The time window allows the salt to penetrate and the skin to dry so it crisps beautifully during roasting. A common mishap is wrapping the bird, which traps moisture and prevents the skin from drying properly, so keep it uncovered.
- After this time your turkey should be completely dry.: The skin will look matte rather than glossy, and when you press it lightly it should feel taut, which signals proper brining. This dryness is what produces a deep golden skin and concentrated, seasoned meat. If the skin still feels damp, give it a few extra hours in the refrigerator, because roasting with damp skin reduces the crispness.
- After turkey is done brining use paper towels to remove any dried orange zest bits or thyme leaves off the turkey so they do not burn.: You will see small flecks that may darken quickly in the oven, so removing them avoids bitter burnt specks on the skin. Lightly wiping the surface also reduces the chance of smoke during high heat. Avoid scraping too forcefully, which could tear the skin and expose meat that dries while roasting.
- Wipe out any excess moisture that has accumulated in the bottom of the roasting pan.: This step keeps the oven environment clean and prevents spattering, and you will notice only a little fluid most times. A dry pan helps the rack keep the turkey elevated and reduces the risk of steaming the underside. Common mistake, leaving a large pool in the pan which can interfere with browning on the bottom of the bird.
- Fill turkey cavity with any desired aromatics such as onion garlic apples orange or lemon wedges or fresh herbs.: When you add aromatics, the cavity becomes a flavor chamber, releasing perfumes during roasting that subtly scent the meat from inside. The combination of fruit, herbs, or vegetables will steam and mingle with drippings for complex aroma. One caution, avoid overstuffing which can block heat circulation and lengthen cooking time.
- Fold wings down and back tie legs together and roast turkey as desired.: The final visual should be compact and secure, promoting even exposure to heat so the skin browns consistently. As it roasts you will hear soft sizzling and smell a nutty, caramelizing scent as sugars brown. A typical error is leaving the legs untied which can lead to uneven cooking between the breast and thighs, so truss lightly for a uniform result.
Notes
- Salt ratio guidance. Use one tablespoon of Morton Kosher Salt per four pounds of turkey as a baseline adjustment rule, it helps scale the recipe accurately for different bird sizes.
- Timing flexibility. If your schedule is tight aim for at least 24 hours in the fridge, but if you can do 36 hours you may notice a slightly deeper seasoning without losing moisture.
- Adjusting sweetness. If you prefer less caramel notes, reduce the brown sugar slightly, but do not remove it entirely as it aids in browning and balance.
- Herb handling. Use fresh thyme for the best aromatic lift, and check the skin before roasting to remove any leaves that might burn.
- Orange zest prep. Zest only the colored part of the peel to capture essential oils, avoiding the bitter white pith underneath.