Glazed Lemon Brownies
Glazed Lemon Brownies started showing up in my kitchen the spring I wanted something bright but comforting to bring to a neighbor’s book club. I recall pulling a warm pan from the oven, the whole house filling with a tart, citrusy perfume that cut through the usual sweet brownie aroma, and thinking that a lemon twist had quietly reinvented an old favorite. I was nervous about balancing tang and sweetness, yet that first bite proved the combo was effortless, playful, and sincere.
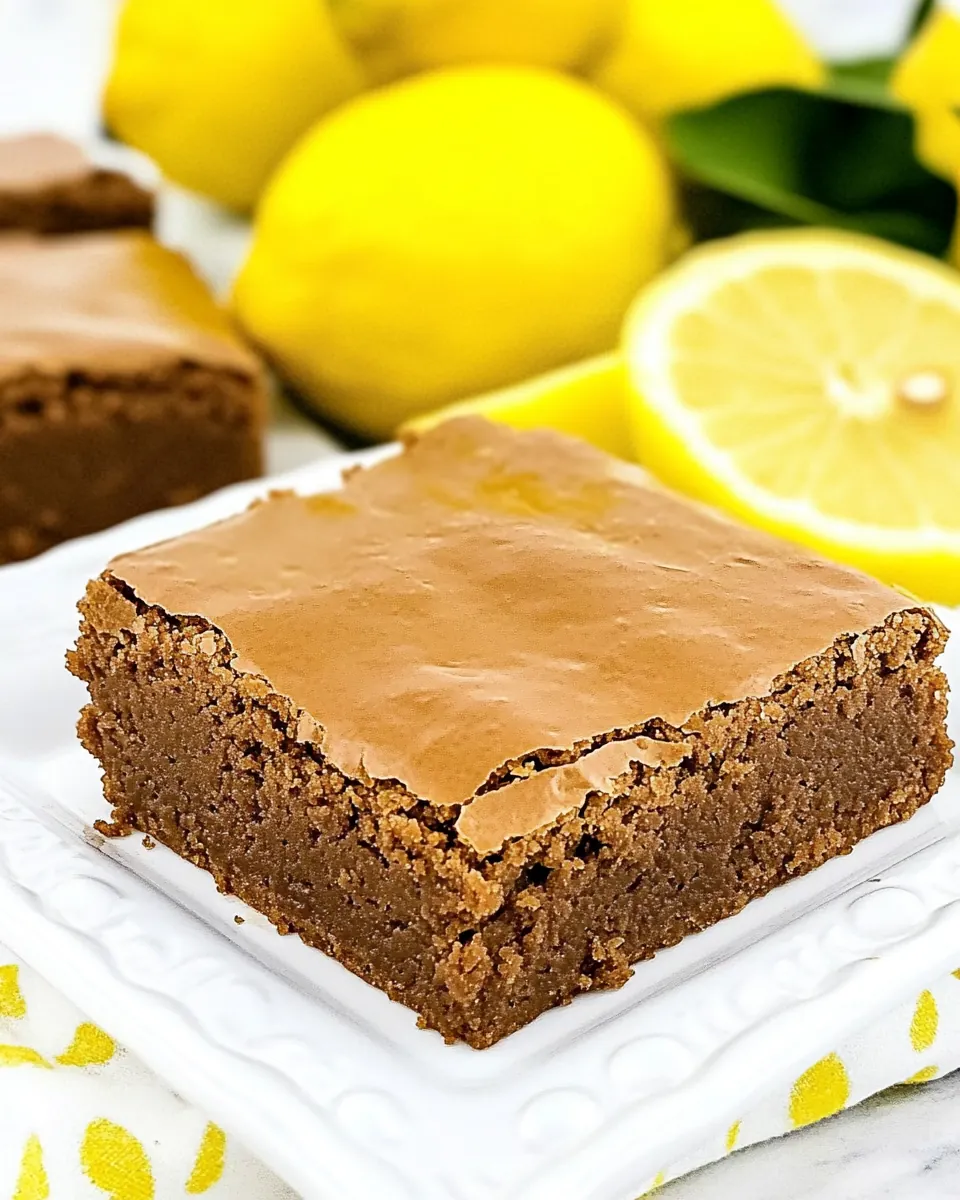
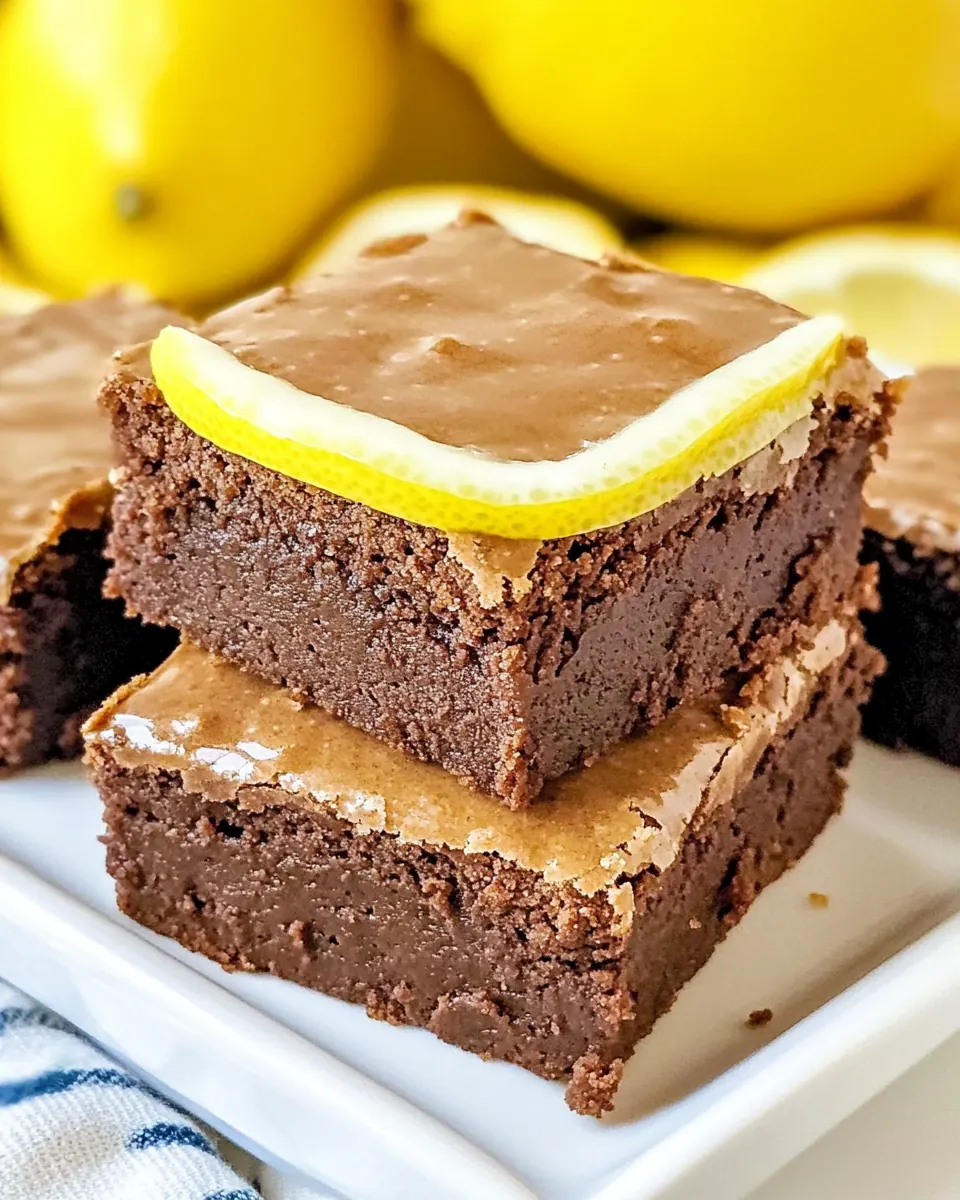
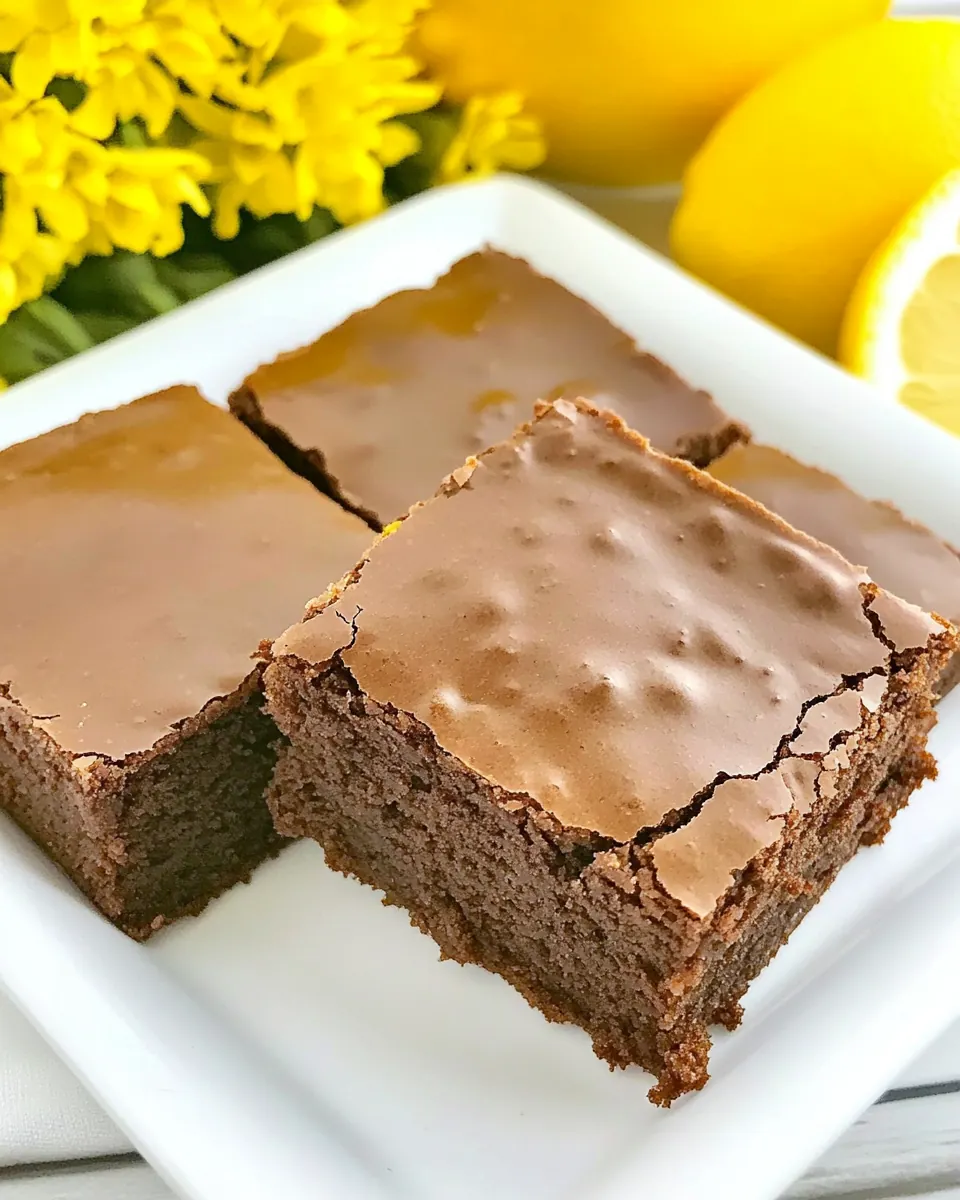
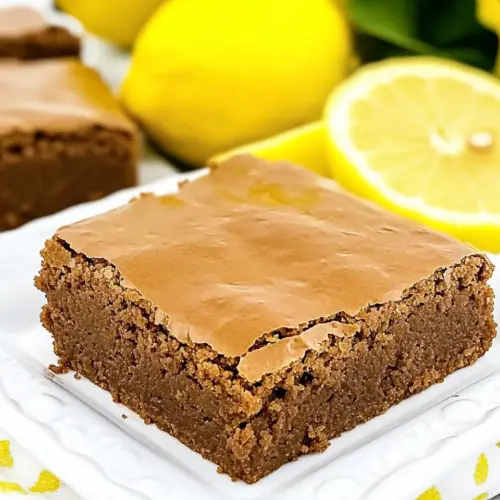
Since then, Glazed Lemon Brownies have become my go to when I need a dessert that feels both festive and unfussy. I love how the texture sits between cakey and fudgy, and how a thin, glossy glaze makes every square look like it came from a bakery. I’ll often grab the zester and juice a couple lemons while reminiscing about that book club evening, and by the time the batter is in the pan, I’m already anticipating the first glossy drizzle.
Recipe Snapshot
40 mins
10 mins
30 mins
Easy
200 kcal
American
Gluten-Free, Low FODMAP
Desserts
Hand Mixer, 9×13-inch Cake Pan, Microplate Zester
Why We Love This Glazed Lemon Brownies
Bright, balanced flavor that stands out
I find the strongest reason to love these bars is the balance between sweet and tart. The lemon juice and lemon zest cut through the richness of the butter and sugar, creating a sharp lift that keeps each bite lively. I often remark that this contrast makes the dessert feel less heavy, so it disappears fast at gatherings.
Simple, pantry friendly ingredients
We only use ingredients that are likely already in your kitchen. The mix of all purpose flour, sugar, and eggs forms a reliable base, while the lemon additions transform it. Because the list is short, you can whip these up without a special grocery trip, which is something I appreciate on busy afternoons.
Textural harmony
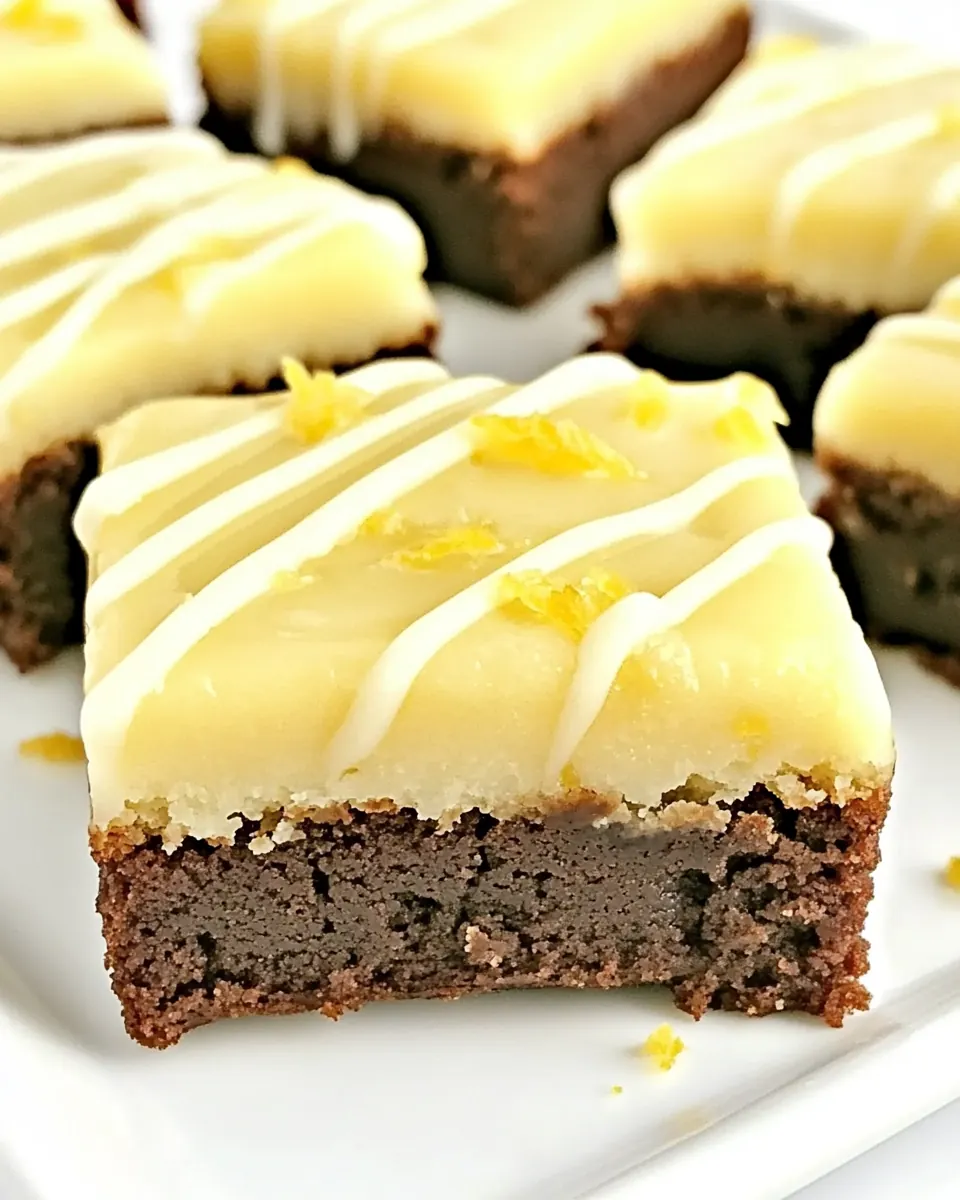
The texture is intentionally between cakey and dense, so each square feels substantial without being gummy. The batter bakes into a firm crumb that soaks up a thin glaze, creating a shiny finish that adds a gentle crunch and extra lemon punch. I love serving a batch warm so the glaze settles into the top, creating a beautiful contrast of textures.
Versatile for occasions
Personally, I find these are equally at home at brunch, potlucks, or a casual dessert after dinner. They cut cleanly into squares, travel well, and look polished with minimal effort. Because they are not overloaded with frosting, they remain easy to store and share for days.
Quick rewarding bake
From start to finish, you get big flavor with modest hands on time. I appreciate recipes that reward minimal fuss with excellent results, and these bars reliably deliver. The glaze is forgiving, and the overall process is straightforward for beginners yet satisfying for seasoned bakers like me.
Glazed Lemon Brownies Ingredients
These ingredients form a compact team that works together to create bright, tender bars. The butter and sugar provide richness and structure, the eggs add lift and moisture, and the pairing of lemon juice and lemon zest delivers citrus aroma and acidity. The flour and salt stabilize the batter, while a separate glaze of powdered sugar, lemon juice, and lemon zest finishes the bars with a glossy tang.
- 1 cup butter, softened: Softened to spread evenly and create tenderness in the brownie batter; provides rich flavor and helps dissolve sugar for a smooth texture. Contributes to the moist crumb and golden edges when baked, and aids in carrying lemon aroma throughout the cake.
- 2 cups sugar: Granulated to sweeten and structure the brownies; integrates with butter to create a light, tender crumb through creaming. Balances lemon acidity and encourages proper browning for a desirable crust.
- 6 large eggs: Beaten to bind the batter and incorporate air for lift; adds moisture and richness that set the brownies during baking. Also contributes to a tender, slightly custardy texture when combined with the other wet ingredients.
- 6 tbsp lemon juice: Freshly squeezed to provide bright citrus flavor and acidity that balances sweetness; reacts with other ingredients to enhance overall lemon profile. Adds liquid to the batter without overpowering, ensuring a vivid lemon taste.
- 2 tbsp lemon zest: Finely grated to intensify lemon aroma and concentrated citrus oils; distributes bright zesty flavor throughout the batter. Enhances perceived freshness and complements the glaze for layered lemon notes.
- 2 cups all-purpose flour: Measured and sifted to provide structure and body to the brownies; forms the gluten network that gives chew and stability after baking. Blends with wet ingredients to determine overall density and texture.
- 1/2 tsp salt: Added sparingly to enhance overall flavor and balance sweetness; strengthens gluten slightly and supports leavening balance. Also highlights the lemon notes by contrasting with a touch of seasoning.
- 1 cup powdered sugar: Confectioners' to sweeten and thicken the glaze for a smooth, glossy finish; dissolves quickly for a silky lemon topping. Helps create a shiny, delicate crust that sets on top of the brownies.
- 2 tbsp lemon juice: Mixed into the glaze to impart concentrated lemon tang and thin the powdered sugar to a pourable consistency; boosts brightness of the topping. Ensures the glaze has a clear citrus flavor without graininess.
- 1 tbsp lemon zest: Grated for the glaze to add aromatic intensity and a fresh citrus punch; gives the finishing layer a fragrant lift. Complements the powdered sugar to balance sweetness with zesty complexity.
Making This Glazed Lemon Brownies
These instructions guide you through a straightforward process that rewards attention to texture and aroma. Work methodically so each stage builds on the previous one, and enjoy the tactile moments like creaming and zesting that make baking so satisfying.
- Preheat oven to 350°F. Spray a 9×13-inch cake pan with cooking spray.: As the oven warms, you will start to notice a gentle warmth in the kitchen that signals the beginning of a bake session. Preheating ensures the batter meets consistent heat right away, which promotes even rise and sets the edges properly. The sound of the oven clicking on is a nice cue that the process is underway. A common mistake is not preheating, which can lead to underbaked centers or uneven texture. Make sure the oven reaches 350°F before the pan goes in, and prepare the 9×13-inch cake pan by spraying so the bars release cleanly.
- In the bowl on an electric mixer, cream together butter and sugar until light and fluffy. Add eggs one at a time, beating until fully incorporated. Add the lemon juice and lemon zest. Slowly add the flour and salt, mixing until just combined.: You will feel the butter soften and the sugar dissolve slightly as they cream, creating a pale, airy mixture that smells faintly sweet. The texture becomes noticeably smoother, and when you add the eggs one by one, the batter glosses over and thickens. When the lemon juice and lemon zest join, the room fills with a bright citrus scent that wakes up your senses. Slowly folding in the all-purpose flour and salt prevents overdevelopment of gluten, which keeps the bars tender. If you beat too vigorously after adding flour, the crumb can tighten and become tough, so mix just until combined.
- Pour batter into prepared pan. Bake for 30 minutes. Remove from the oven and cool.: The batter will pour with a slightly thick ribbon, settling into the greased pan in an even layer. As it bakes for 30 minutes , you may notice the aroma deepen and the edges pulling slightly away from the pan, which are visual hints that the bars are nearly done. A toothpick inserted near the center should come out with a few moist crumbs, not wet batter. Remove the pan and feel the residual warmth rising off the surface, which continues to set the crumb as it cools. A common error is overbaking, which yields dryness; watch the color and texture in the final minutes to avoid that.
- To prepare glaze, combine powdered sugar, lemon juice and lemon zest. Pour over cooled cake and allow to set up before cutting into bars.: The glaze comes together into a glossy, pourable mixture that smells intensely of citrus. Pouring it over the cooled top creates a smooth, shiny layer that will slightly firm as it sits. You may hear a faint settling sound as the glaze meets the still-warm surface, and the visual cue to watch for is a uniform sheen with little ridges smoothing out. Letting the glaze set prevents it from running off when you cut the bars. A frequent slip up is glazing too soon while the cake is hot, which makes the glaze run thin instead of resting on top; wait until the bars are cool to the touch.
Substitutions and Tips
Below are practical tips and small substitution ideas to help you adapt this recipe while preserving its bright lemon character. These notes will help whether you are baking for a crowd or just practicing your citrus glazing technique.
- Room temperature butter: Chilling the butter will make it difficult to cream with the sugar, so plan ahead and let it soften for at least 30 minutes to avoid lumps.
- Fresh lemon juice: Fresh lemon juice greatly improves aroma and brightness compared to bottled options, the delicate citrus notes become far more pronounced.
- Zesting tip: Use the smallest holes of your zester to capture just the yellow peel of the lemon, avoiding the bitter pith which can ruin the glaze and batter flavor.
- Mixing approach: Add the eggs one at a time and scrape the bowl between additions to ensure full incorporation and a smooth, emulsified batter.
- Glaze consistency: Add the second portion of lemon juice to the powdered sugar slowly to reach a pourable glaze that is not too thin, aiming for a ribbon that settles evenly across the surface.
- Pan release: Lightly grease the 9×13-inch cake pan and consider lining with parchment for the cleanest removal and neatest edges when cutting squares.
Perfect Pairings for Glazed Lemon Brownies
These squares pair beautifully with light beverages and seasonal servings. Below I outline serving suggestions, storage tips, and occasions where these bars shine most.
- Afternoon tea or coffee: Serve a warm square with a cup of coffee or a gentle herbal tea to balance the tangy glaze with a hot beverage.
- Brunch addition: Add a platter of these bars to a brunch spread alongside fruit and pastries for a citrus forward sweet option that complements savory items.
- Potluck friendly: Because they cut neatly and travel well, these are ideal for potlucks and get togethers where you want a dessert that looks polished with little fuss.
- Seasonal spring dessert: The bright lemon profile pairs well with spring produce like strawberries or a light salad, making it a fresh choice for warm weather gatherings.
- Storage tips: Store bars in an airtight container at room temperature for up to three days, or refrigerate for up to a week to keep the glaze firm; bring back to room temperature before serving for best texture.
- Gift idea: Pack a few squares in a decorative box for a simple, thoughtful homemade gift that travels well and presents beautifully.
FAQ
Conclusion
What makes these bars special is their lively lemon profile balanced against a rich, buttery base, yielding a dessert that feels both celebratory and approachable. I encourage you to try the recipe because it delivers bold citrus flavor with minimal fuss, and it’s an easy way to brighten any gathering. Once you bake a pan, you’ll find them to be an indispensable recipe for springtime sharing and casual entertaining, a small slice of sunshine on your dessert table.
Glazed Lemon Brownies
Equipment
- Hand Mixer
- 9×13-inch Cake Pan
- Microplate Zester
Ingredients
- 1 cup butter, softened Softened to spread evenly and create tenderness in the brownie batter; provides rich flavor and helps dissolve sugar for a smooth texture. Contributes to the moist crumb and golden edges when baked, and aids in carrying lemon aroma throughout the cake.
- 2 cups sugar Granulated to sweeten and structure the brownies; integrates with butter to create a light, tender crumb through creaming. Balances lemon acidity and encourages proper browning for a desirable crust.
- 6 large eggs Beaten to bind the batter and incorporate air for lift; adds moisture and richness that set the brownies during baking. Also contributes to a tender, slightly custardy texture when combined with the other wet ingredients.
- 6 tbsp lemon juice Freshly squeezed to provide bright citrus flavor and acidity that balances sweetness; reacts with other ingredients to enhance overall lemon profile. Adds liquid to the batter without overpowering, ensuring a vivid lemon taste.
- 2 tbsp lemon zest Finely grated to intensify lemon aroma and concentrated citrus oils; distributes bright zesty flavor throughout the batter. Enhances perceived freshness and complements the glaze for layered lemon notes.
- 2 cups all-purpose flour Measured and sifted to provide structure and body to the brownies; forms the gluten network that gives chew and stability after baking. Blends with wet ingredients to determine overall density and texture.
- 1/2 tsp salt Added sparingly to enhance overall flavor and balance sweetness; strengthens gluten slightly and supports leavening balance. Also highlights the lemon notes by contrasting with a touch of seasoning.
- 1 cup powdered sugar Confectioners' to sweeten and thicken the glaze for a smooth, glossy finish; dissolves quickly for a silky lemon topping. Helps create a shiny, delicate crust that sets on top of the brownies.
- 2 tbsp lemon juice Mixed into the glaze to impart concentrated lemon tang and thin the powdered sugar to a pourable consistency; boosts brightness of the topping. Ensures the glaze has a clear citrus flavor without graininess.
- 1 tbsp lemon zest Grated for the glaze to add aromatic intensity and a fresh citrus punch; gives the finishing layer a fragrant lift. Complements the powdered sugar to balance sweetness with zesty complexity.
Instructions
- Preheat oven to 350°F. Spray a 9×13-inch cake pan with cooking spray.: As the oven warms, you will start to notice a gentle warmth in the kitchen that signals the beginning of a bake session. Preheating ensures the batter meets consistent heat right away, which promotes even rise and sets the edges properly. The sound of the oven clicking on is a nice cue that the process is underway. A common mistake is not preheating, which can lead to underbaked centers or uneven texture. Make sure the oven reaches 350°F before the pan goes in, and prepare the 9×13-inch cake pan by spraying so the bars release cleanly.
- In the bowl on an electric mixer, cream together butter and sugar until light and fluffy. Add eggs one at a time, beating until fully incorporated. Add the lemon juice and lemon zest. Slowly add the flour and salt, mixing until just combined.: You will feel the butter soften and the sugar dissolve slightly as they cream, creating a pale, airy mixture that smells faintly sweet. The texture becomes noticeably smoother, and when you add the eggs one by one, the batter glosses over and thickens. When the lemon juice and lemon zest join, the room fills with a bright citrus scent that wakes up your senses. Slowly folding in the all-purpose flour and salt prevents overdevelopment of gluten, which keeps the bars tender. If you beat too vigorously after adding flour, the crumb can tighten and become tough, so mix just until combined.
- Pour batter into prepared pan. Bake for 30 minutes. Remove from the oven and cool.: The batter will pour with a slightly thick ribbon, settling into the greased pan in an even layer. As it bakes for 30 minutes , you may notice the aroma deepen and the edges pulling slightly away from the pan, which are visual hints that the bars are nearly done. A toothpick inserted near the center should come out with a few moist crumbs, not wet batter. Remove the pan and feel the residual warmth rising off the surface, which continues to set the crumb as it cools. A common error is overbaking, which yields dryness; watch the color and texture in the final minutes to avoid that.
- To prepare glaze, combine powdered sugar, lemon juice and lemon zest. Pour over cooled cake and allow to set up before cutting into bars.: The glaze comes together into a glossy, pourable mixture that smells intensely of citrus. Pouring it over the cooled top creates a smooth, shiny layer that will slightly firm as it sits. You may hear a faint settling sound as the glaze meets the still-warm surface, and the visual cue to watch for is a uniform sheen with little ridges smoothing out. Letting the glaze set prevents it from running off when you cut the bars. A frequent slip up is glazing too soon while the cake is hot, which makes the glaze run thin instead of resting on top; wait until the bars are cool to the touch.
Notes
- Room temperature butter: Chilling the butter will make it difficult to cream with the sugar, so plan ahead and let it soften for at least 30 minutes to avoid lumps.
- Fresh lemon juice: Fresh lemon juice greatly improves aroma and brightness compared to bottled options, the delicate citrus notes become far more pronounced.
- Zesting tip: Use the smallest holes of your zester to capture just the yellow peel of the lemon, avoiding the bitter pith which can ruin the glaze and batter flavor.
- Mixing approach: Add the eggs one at a time and scrape the bowl between additions to ensure full incorporation and a smooth, emulsified batter.
- Glaze consistency: Add the second portion of lemon juice to the powdered sugar slowly to reach a pourable glaze that is not too thin, aiming for a ribbon that settles evenly across the surface.
- Pan release: Lightly grease the 9×13-inch cake pan and consider lining with parchment for the cleanest removal and neatest edges when cutting squares.