Cinnamon Blondies
Cinnamon Blondies is one of those treats I turn to when I want something warmly spiced, easy to make, and impossible to resist. The first time I baked these, I was chasing the comfort of a bakery counter after a rainy afternoon walk, and the tiny scent of cinnamon and brown sugar filled my kitchen so quickly that neighbors started knocking. I remember thinking how a few pantry staples could become something that felt indulgent without being fussy.
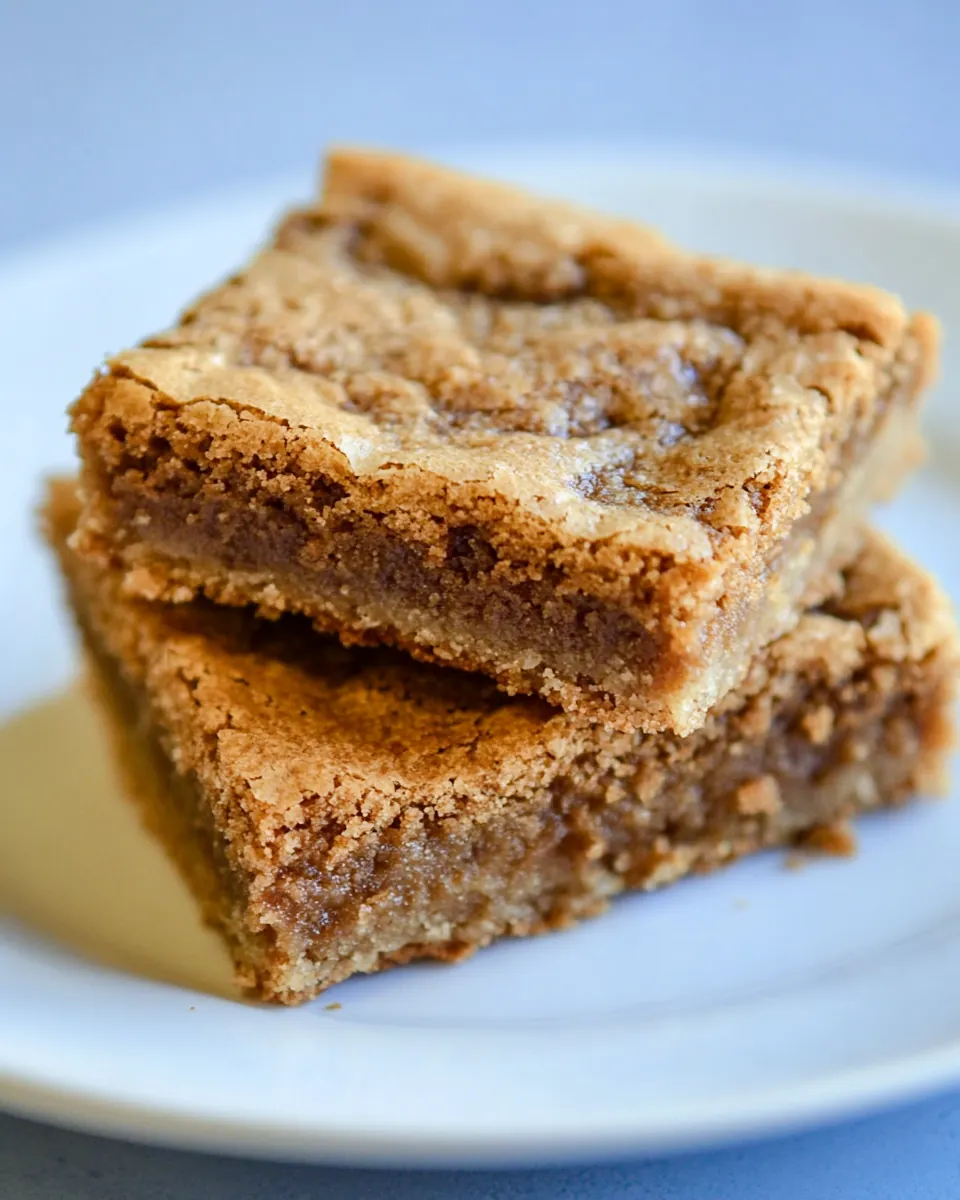
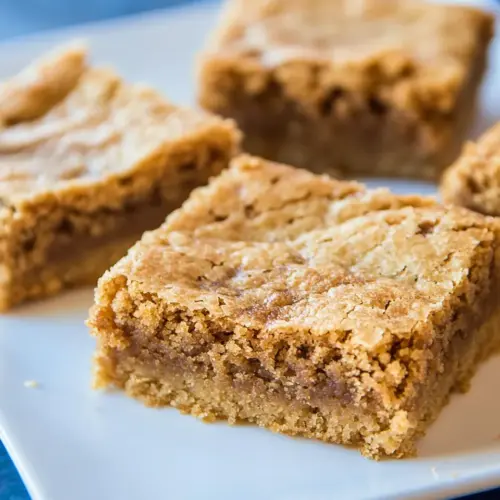
I like to braid memory into recipes, so these Cinnamon Blondies always remind me of a weekend morning when an impromptu tray of bars kept a houseful of friends happily snacking while we talked over coffee. They sliced easily, held their slightly chewy centers, and had a sparkle of sugary topping that caught the light. Every bite has a buttery base, a warm whisper of cinnamon, and that familiar caramel note from packed brown sugar. Over the years I adjusted the balance to keep them tender but with enough structure to cut into neat bars.
What I love most is how forgiving the batter is. Even if you get distracted mid mix, these Cinnamon Blondies forgive small missteps and still come out golden and fragrant. They are a fast fix whenever I want to bring something to a potluck, or when I crave a sweet that pairs perfectly with a mug of tea. I often catch myself slicing one more piece than I planned, and then another, until the pan is suddenly lighter. That warm, cozy feeling is exactly why these remain a staple.
Recipe Snapshot
40 mins
10 mins
30 mins
Easy
200 kcal
American
Gluten-Free, Low FODMAP
Desserts
Mixing bowls, Spatula, 8 inch baking dish, Wire rack
Why This Cinnamon Blondies Shines
Simple pantry magic
I adore how Cinnamon Blondies transform a handful of everyday items into a treat that tastes like effort and care. With only a few staples you get texture and depth. The butter and packed brown sugar create that butterscotch like backbone, and the small list makes this a go to when your pantry is modest.
Comforting spice profile
I find the cinnamon and a whisper of nutmeg give the bars a layered warmth that appeals to anyone who likes cozy flavors. The spices are subtle, they do not overpower, and they let the buttery sweetness sing instead of competing with it.
Easy to scale and serve
I’ve doubled this recipe for casual gatherings and it holds up well in a larger pan. The batter spreads evenly and the bars keep nicely for several days, which makes them excellent for prepping ahead. You can slice them into small squares for a party, or cut generous bars to enjoy with a hot beverage.
Textural balance
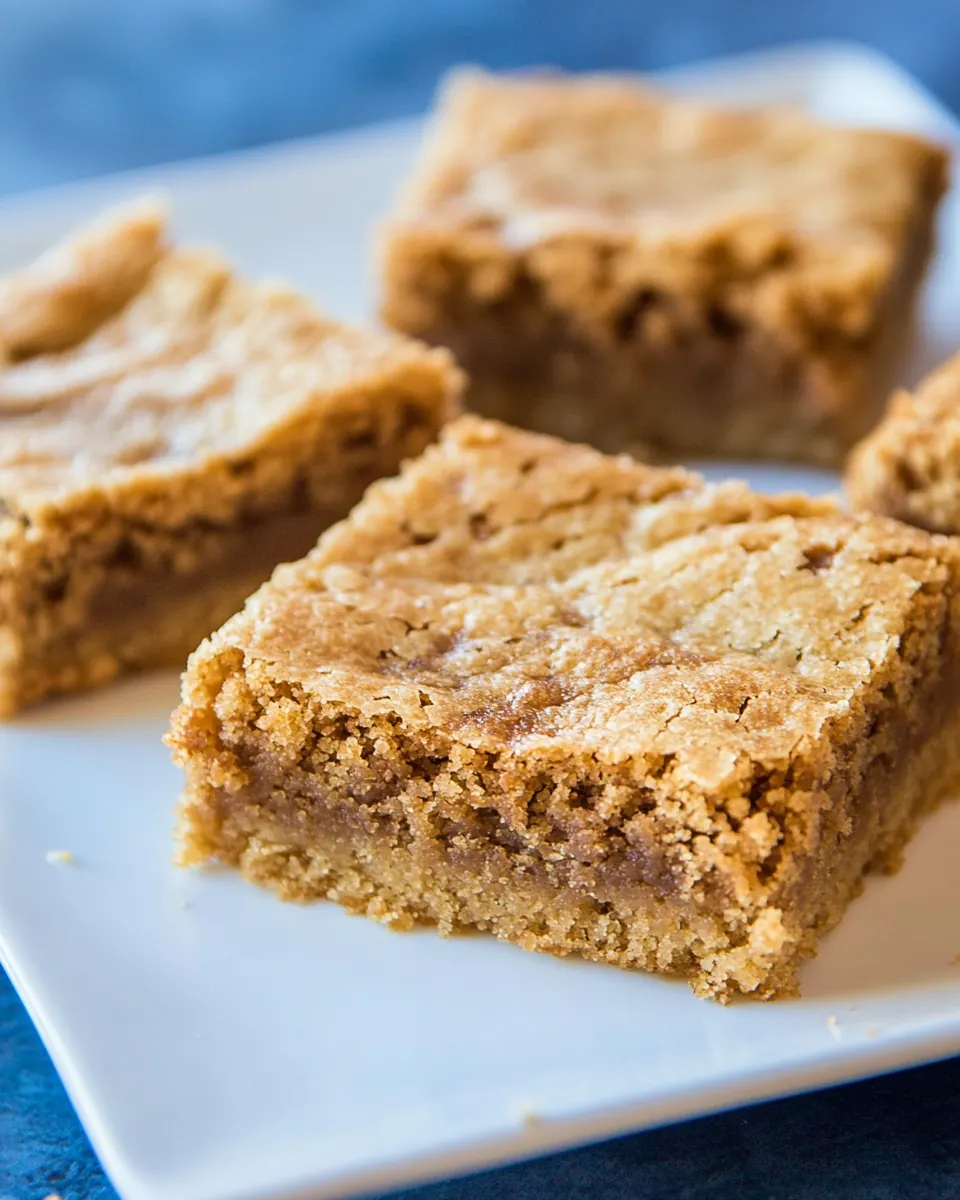
These blondies have a tender, slightly chewy crumb with a thin golden crust on top. The small sprinkling of topping adds a delicate crunch that contrasts the soft interior. That contrast is what makes every bite interesting, and why they rarely last long in my kitchen.
Forgiving technique
I appreciate a recipe that lets you breathe between steps. The mixing is straightforward, the baking window is flexible, and minor timing differences rarely ruin the results. For home bakers who want reliable comfort food, these are winners.
What Goes Into Cinnamon Blondies
These ingredients form a concise, harmonious team. The recipe leans on a simple trio of fat, sugar, and flour for structure while spices and a light topping add personality. The key players are the butter and brown sugar which give the bars a rich, caramel like base, while the flour and baking powder provide lift and body. Small amounts of cinnamon and nutmeg layer in warm notes.
- 1/2 cup butter, softened: Soften and cream to create a tender, rich base that helps bind sugar and fat for moist blondies; contributes flavor and aids leavening when beaten with the egg.
- 1 cup packed brown sugar: Sweeten deeply and add a molasses note that enriches the batter; pack firmly to measure consistently and help produce chewy texture and caramelized edges.
- 2 teaspoons vanilla extract: Enhance depth and aroma by adding warm, floral vanilla flavor that rounds out the sweetness; distribute evenly to balance the overall taste profile.
- 1 large egg, room temperature: Whisk in at room temperature to help emulsify fats and liquids, providing structure and moisture; beaten egg also aids leavening and gives the blondies a tender crumb.
- 1 1/3 cups all-purpose flour: Provide the primary structure and bulk for the blondies, supplying gluten for chew and crumb; sift or spoon into the cup for accurate measurement and even mixing.
- 1 teaspoon baking powder: Lightly leaven to give a modest lift and help create a soft, slightly cake-like texture without making the blondies overly airy.
- 1 teaspoon ground cinnamon: Impart warm, sweet-spicy notes that characterize cinnamon blondies; mix into the dry ingredients to distribute the warm flavor throughout the batter.
- 1/8 teaspoon ground nutmeg: Add subtle earthy warmth and complexity with a hint of nuttiness, balancing the sweetness; use sparingly to avoid overpowering the cinnamon.
- 1/4 teaspoon salt: Season and enhance overall flavor by sharpening sweetness and rounding out spices; ensure even distribution to maintain balanced taste.
- TOPPING: Designate the final finishing layer that will add texture and a burst of flavor contrast when sprinkled on before or after baking.
- 1 1/4 teaspoons sugar: Provide a crunchy, sweet sprinkle that caramelizes slightly when baked or toasted, adding a pleasant contrast to the tender blondie center.
- 1/4 teaspoon ground cinnamon: Deliver an extra pop of warm spice on top to reinforce interior cinnamon flavor and create an inviting aroma when baked.
Cooking Instructions for Cinnamon Blondies
These directions are straightforward, and I like to approach them with a calm, step by step rhythm. You will move from creaming through to baking, and the small details make a big difference. Read each step and use your senses to know when things are right.
- Preheat oven to 350° F and grease an 8-inch baking dish. Cream butter and brown sugar until light and fluffy. Beat in the vanilla. Beat in the egg. In another bowl, whisk together flour, baking powder, spices and salt; gradually beat into creamed mixture. Spread into the prepared pan.: The warm oven smell signals that the environment is ready, and a greased dish ensures easy release. When the oven reaches temperature the heat should feel consistent as you open the door, and the metal pan will feel slightly warm to the touch. Using a glass dish will show bubbling edges sooner than metal, so watch visual cues. A common mistake is skipping greasing, which can make the bars stick; to avoid this, line the dish with parchment for foolproof removal.
- Mix topping ingredients; sprinkle over top. Bake until set and golden brown, 25-30 minutes. Cool completely in pan on a wire rack. Cut into bars.: The mixture will change from dense to airy, and you should hear a gentle, steady whirling as air incorporates. Visually it becomes paler and slightly ribbon like when lifted with a spatula. This step builds structure and depth of flavor as the sugars dissolve into the fat. Overworking at high speed can incorporate too much air and risk a cracked top, so stop when you see a soft, creamy texture.
- Beat in the vanilla: Adding vanilla releases a fragrant note that lifts the batter, and you will notice the aroma deepen immediately. It blends quickly into the creamed base, smoothing the flavor profile. If the vanilla is added when the mixture is too warm, the aroma can dissipate, so keep the butter at softened, not melted, temperature.
- Beat in the egg: As the egg blends in, the batter will look more cohesive and slightly glossy; this emulsion helps with chew and structure. If the egg is room temperature it incorporates seamlessly without curdling. A frequent error is adding a cold egg, which can cause the butter to firm up into lumps; tempering the egg by adding a spoonful of the creamed mixture first prevents that.
- In another bowl, whisk together flour, baking powder, spices and salt; gradually beat into creamed mixture: The dry ingredients should smell faintly of spice when whisked, and adding them gradually prevents flour clouds and over mixing. This technique ensures even distribution of baking powder and cinnamon , which matters for consistent rise and flavor. Avoid vigorous mixing once the flour is added, or the gluten will tighten and make the bars tough.
- Spread into the prepared pan: The batter will be thick and glossy, and smoothing it evenly ensures uniform baking. Use a spatula dipped in warm water for a silky finish if you want a perfectly flat top. An uneven surface can cause thin edges to bake faster than the center, so aim for consistent thickness to avoid an overbaked perimeter.
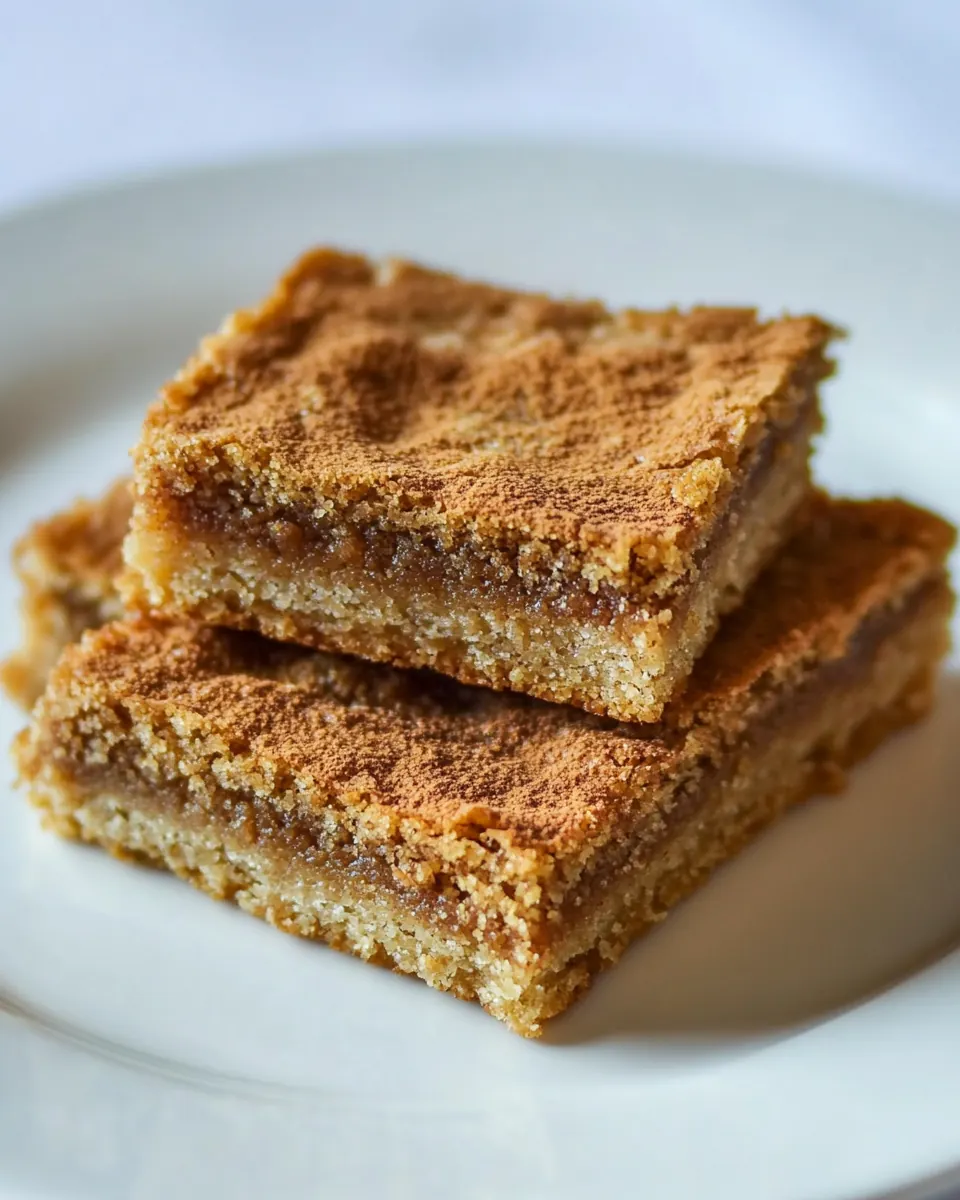
- Mix topping ingredients; sprinkle over top: Combining the sugar and cinnamon creates a tiny, fragrant dusting that melts partly and crisps during baking, giving that signature sparkle. The aroma of toasted sugar will become evident in the final minutes of baking. Over applying the topping can make the surface too sweet or grainy, so use it lightly for the best contrast.
- Bake until set and golden brown, 25-30 minutes: As the bars bake you will notice the edges pulling away slightly from the pan and the top turning a gentle golden brown, releasing a warm, inviting scent. The center should no longer look wet, though it will remain tender. An inserted toothpick should come out with a few moist crumbs, not raw batter. Opening the oven too often lowers the temperature and lengthens bake time, so resist peeking until at least 20 minutes have passed.
- Cool completely in pan on a wire rack: Cooling allows the crumb to set and finish cooking gently from residual heat, and you will hear a subtle settling silence as steam escapes. The bars firm up and slice cleanly after cooling, which preserves their texture. Cutting too soon is a common mistake that leads to ragged, gooey pieces, so be patient and let them reach room temperature.
- Cut into bars: Use a sharp knife and a confident motion to slice, wiping the blade between cuts for neat edges. The finished pieces should reveal a golden crust with a moist, slightly chewy interior and a sprinkle of topping on each square. If pieces crumble, it usually means they were cut too early or the pan was not greased well enough; chilling briefly can help achieve cleaner slices.
Ways to Adapt This Recipe

These adaptations make Cinnamon Blondies flexible for different needs, from scaling for a crowd to tweaking texture and topping. Each tip focuses on a small change that has a reliable impact.
- Double the recipe: If you need more bars, double the ingredients and bake in a 9×13-inch pan, checking for doneness at about 30 to 35 minutes to account for the larger volume. The center may require a few extra minutes to set, so monitor visual cues rather than relying solely on time.
- Make-ahead and storage: Store cooled bars in an airtight container at room temperature for up to three days, or refrigerate for up to a week. To refresh slightly, warm a piece for a few seconds in the microwave to restore softness and aroma.
- Change the topping: Instead of the simple sugar and cinnamon, try a light sprinkle of coarse sugar for extra crunch. Apply sparingly to avoid overly sweet surfaces and to preserve the balance with the buttery base.
- Adjust spice levels: If you prefer a more pronounced warm profile, increase the cinnamon by a small increment, but avoid adding too much nutmeg as it can overpower the flavor. Small changes go a long way in maintaining harmony.
- Pan choice matters: A metal pan yields crisper edges, while a glass pan bakes more evenly in the center. Choose based on whether you like pronounced edge caramelization or a uniform bake.
- Cutting technique: For clean edges, chill briefly or warm the knife under hot water, dry it, and slice in a single confident motion, wiping the blade between cuts to maintain tidy bars.
Side Dish Ideas for Cinnamon Blondies
These bars pair well with simple accompaniments and fit many occasions. Below are serving ideas, seasonal pairings, and storage suggestions presented as practical options to help you share or savor these treats.
- Afternoon tea pairing: Serve the bars with a pot of black or herbal tea for a cozy tea time; the warm cinnamon notes complement lighter teas and create a comforting balance.
- Breakfast tray: Arrange small squares alongside fresh fruit and yogurt for a casual breakfast or brunch; the bars add a sweet element without needing elaborate sides.
- Potluck contribution: Cut into small bite sized pieces for easy sharing at gatherings and place them on a platter with labels to avoid confusion with other desserts.
- Holiday hosts: These suit holiday dessert tables when you want something simple yet seasonal; their warm spice profile works well during fall entertaining and festive mornings.
- Storage tips: Keep leftovers in an airtight container at room temperature for a few days, or freeze individual squares wrapped tightly for up to one month; thaw at room temperature before serving.
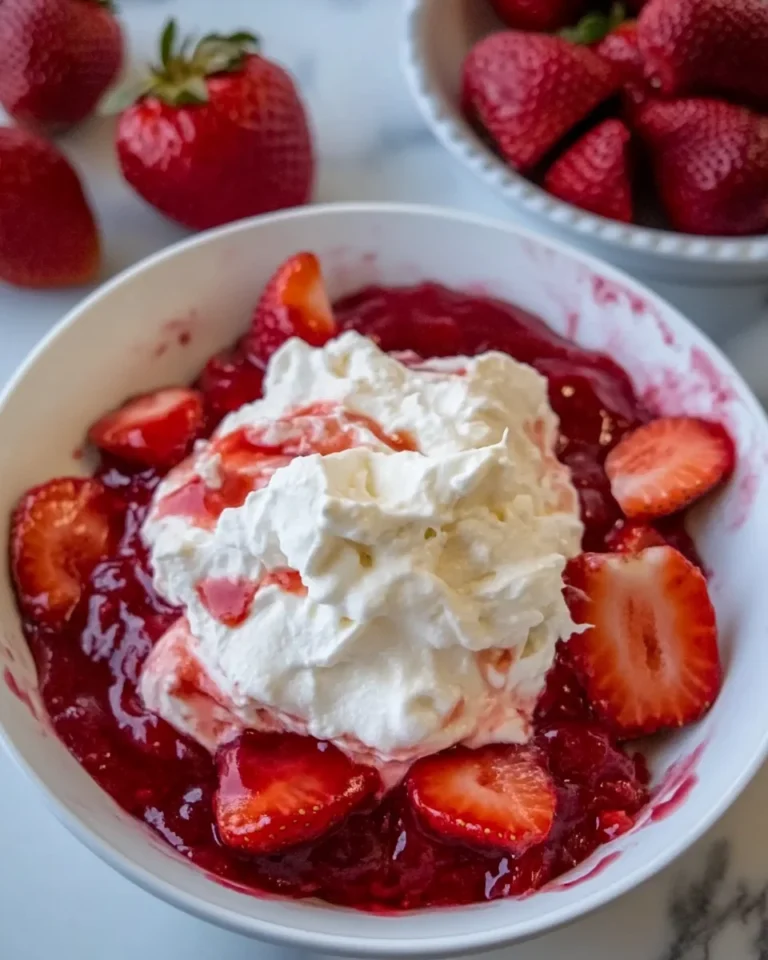
- Seasonal twist: In fall, pair with spiced apple slices or a dollop of unsweetened whipped cream to honor the warm spice theme without adding competing flavors.
FAQ
Conclusion
These Cinnamon Blondies stand out because they combine buttery richness with a warm spice profile in a simple, forgiving recipe. They are quick to pull together, require minimal equipment, and reward you with tender, chewy bars that look as good as they taste. I encourage you to give them a try whether you need a last minute treat for friends or a cozy bake for yourself. Enjoy the aroma as they come out of the oven, savor a warm piece with a cup of tea, and notice how such modest ingredients can create a homey, memorable dessert.
Cinnamon Blondies
Equipment
- Mixing Bowls
- Spatula
- 8 inch baking dish
- Wire Rack
Ingredients
- 1/2 cup butter, softened Soften and cream to create a tender, rich base that helps bind sugar and fat for moist blondies; contributes flavor and aids leavening when beaten with the egg.
- 1 cup packed brown sugar Sweeten deeply and add a molasses note that enriches the batter; pack firmly to measure consistently and help produce chewy texture and caramelized edges.
- 2 teaspoons vanilla extract Enhance depth and aroma by adding warm, floral vanilla flavor that rounds out the sweetness; distribute evenly to balance the overall taste profile.
- 1 large egg, room temperature Whisk in at room temperature to help emulsify fats and liquids, providing structure and moisture; beaten egg also aids leavening and gives the blondies a tender crumb.
- 1 -1/3 cups all-purpose flour Provide the primary structure and bulk for the blondies, supplying gluten for chew and crumb; sift or spoon into the cup for accurate measurement and even mixing.
- 1 teaspoon baking powder Lightly leaven to give a modest lift and help create a soft, slightly cake-like texture without making the blondies overly airy.
- 1 teaspoon ground cinnamon Impart warm, sweet-spicy notes that characterize cinnamon blondies; mix into the dry ingredients to distribute the warm flavor throughout the batter.
- 1/8 teaspoon ground nutmeg Add subtle earthy warmth and complexity with a hint of nuttiness, balancing the sweetness; use sparingly to avoid overpowering the cinnamon.
- 1/4 teaspoon salt Season and enhance overall flavor by sharpening sweetness and rounding out spices; ensure even distribution to maintain balanced taste.
- TOPPING: Designate the final finishing layer that will add texture and a burst of flavor contrast when sprinkled on before or after baking.
- 1 -1/4 teaspoons sugar Provide a crunchy, sweet sprinkle that caramelizes slightly when baked or toasted, adding a pleasant contrast to the tender blondie center.
- 1/4 teaspoon ground cinnamon Deliver an extra pop of warm spice on top to reinforce interior cinnamon flavor and create an inviting aroma when baked.
Instructions
- Preheat oven to 350° F and grease an 8-inch baking dish. Cream butter and brown sugar until light and fluffy. Beat in the vanilla. Beat in the egg. In another bowl, whisk together flour, baking powder, spices and salt; gradually beat into creamed mixture. Spread into the prepared pan.: The warm oven smell signals that the environment is ready, and a greased dish ensures easy release. When the oven reaches temperature the heat should feel consistent as you open the door, and the metal pan will feel slightly warm to the touch. Using a glass dish will show bubbling edges sooner than metal, so watch visual cues. A common mistake is skipping greasing, which can make the bars stick; to avoid this, line the dish with parchment for foolproof removal.
- Mix topping ingredients; sprinkle over top. Bake until set and golden brown, 25-30 minutes. Cool completely in pan on a wire rack. Cut into bars.: The mixture will change from dense to airy, and you should hear a gentle, steady whirling as air incorporates. Visually it becomes paler and slightly ribbon like when lifted with a spatula. This step builds structure and depth of flavor as the sugars dissolve into the fat. Overworking at high speed can incorporate too much air and risk a cracked top, so stop when you see a soft, creamy texture.
- Beat in the vanilla: Adding vanilla releases a fragrant note that lifts the batter, and you will notice the aroma deepen immediately. It blends quickly into the creamed base, smoothing the flavor profile. If the vanilla is added when the mixture is too warm, the aroma can dissipate, so keep the butter at softened, not melted, temperature.
- Beat in the egg: As the egg blends in, the batter will look more cohesive and slightly glossy; this emulsion helps with chew and structure. If the egg is room temperature it incorporates seamlessly without curdling. A frequent error is adding a cold egg, which can cause the butter to firm up into lumps; tempering the egg by adding a spoonful of the creamed mixture first prevents that.
- In another bowl, whisk together flour, baking powder, spices and salt; gradually beat into creamed mixture: The dry ingredients should smell faintly of spice when whisked, and adding them gradually prevents flour clouds and over mixing. This technique ensures even distribution of baking powder and cinnamon , which matters for consistent rise and flavor. Avoid vigorous mixing once the flour is added, or the gluten will tighten and make the bars tough.
- Spread into the prepared pan: The batter will be thick and glossy, and smoothing it evenly ensures uniform baking. Use a spatula dipped in warm water for a silky finish if you want a perfectly flat top. An uneven surface can cause thin edges to bake faster than the center, so aim for consistent thickness to avoid an overbaked perimeter.
- Mix topping ingredients; sprinkle over top: Combining the sugar and cinnamon creates a tiny, fragrant dusting that melts partly and crisps during baking, giving that signature sparkle. The aroma of toasted sugar will become evident in the final minutes of baking. Over applying the topping can make the surface too sweet or grainy, so use it lightly for the best contrast.
- Bake until set and golden brown, 25-30 minutes: As the bars bake you will notice the edges pulling away slightly from the pan and the top turning a gentle golden brown, releasing a warm, inviting scent. The center should no longer look wet, though it will remain tender. An inserted toothpick should come out with a few moist crumbs, not raw batter. Opening the oven too often lowers the temperature and lengthens bake time, so resist peeking until at least 20 minutes have passed.
- Cool completely in pan on a wire rack: Cooling allows the crumb to set and finish cooking gently from residual heat, and you will hear a subtle settling silence as steam escapes. The bars firm up and slice cleanly after cooling, which preserves their texture. Cutting too soon is a common mistake that leads to ragged, gooey pieces, so be patient and let them reach room temperature.
- Cut into bars: Use a sharp knife and a confident motion to slice, wiping the blade between cuts for neat edges. The finished pieces should reveal a golden crust with a moist, slightly chewy interior and a sprinkle of topping on each square. If pieces crumble, it usually means they were cut too early or the pan was not greased well enough; chilling briefly can help achieve cleaner slices.
Notes
- Double the recipe: If you need more bars, double the ingredients and bake in a 9x13-inch pan, checking for doneness at about 30 to 35 minutes to account for the larger volume. The center may require a few extra minutes to set, so monitor visual cues rather than relying solely on time.
- Make-ahead and storage: Store cooled bars in an airtight container at room temperature for up to three days, or refrigerate for up to a week. To refresh slightly, warm a piece for a few seconds in the microwave to restore softness and aroma.
- Change the topping: Instead of the simple sugar and cinnamon, try a light sprinkle of coarse sugar for extra crunch. Apply sparingly to avoid overly sweet surfaces and to preserve the balance with the buttery base.
- Adjust spice levels: If you prefer a more pronounced warm profile, increase the cinnamon by a small increment, but avoid adding too much nutmeg as it can overpower the flavor. Small changes go a long way in maintaining harmony.
- Pan choice matters: A metal pan yields crisper edges, while a glass pan bakes more evenly in the center. Choose based on whether you like pronounced edge caramelization or a uniform bake.
- Cutting technique: For clean edges, chill briefly or warm the knife under hot water, dry it, and slice in a single confident motion, wiping the blade between cuts to maintain tidy bars.