
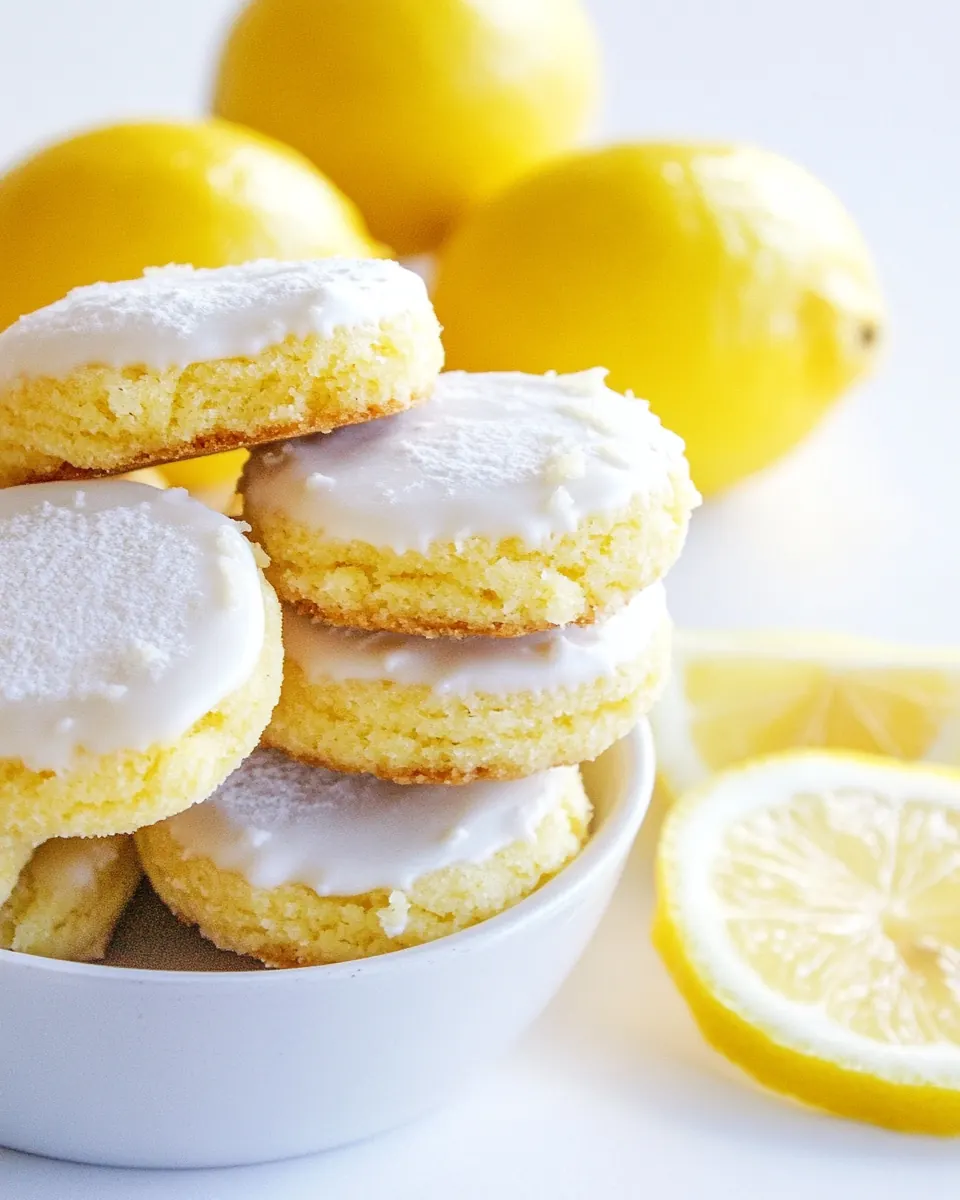
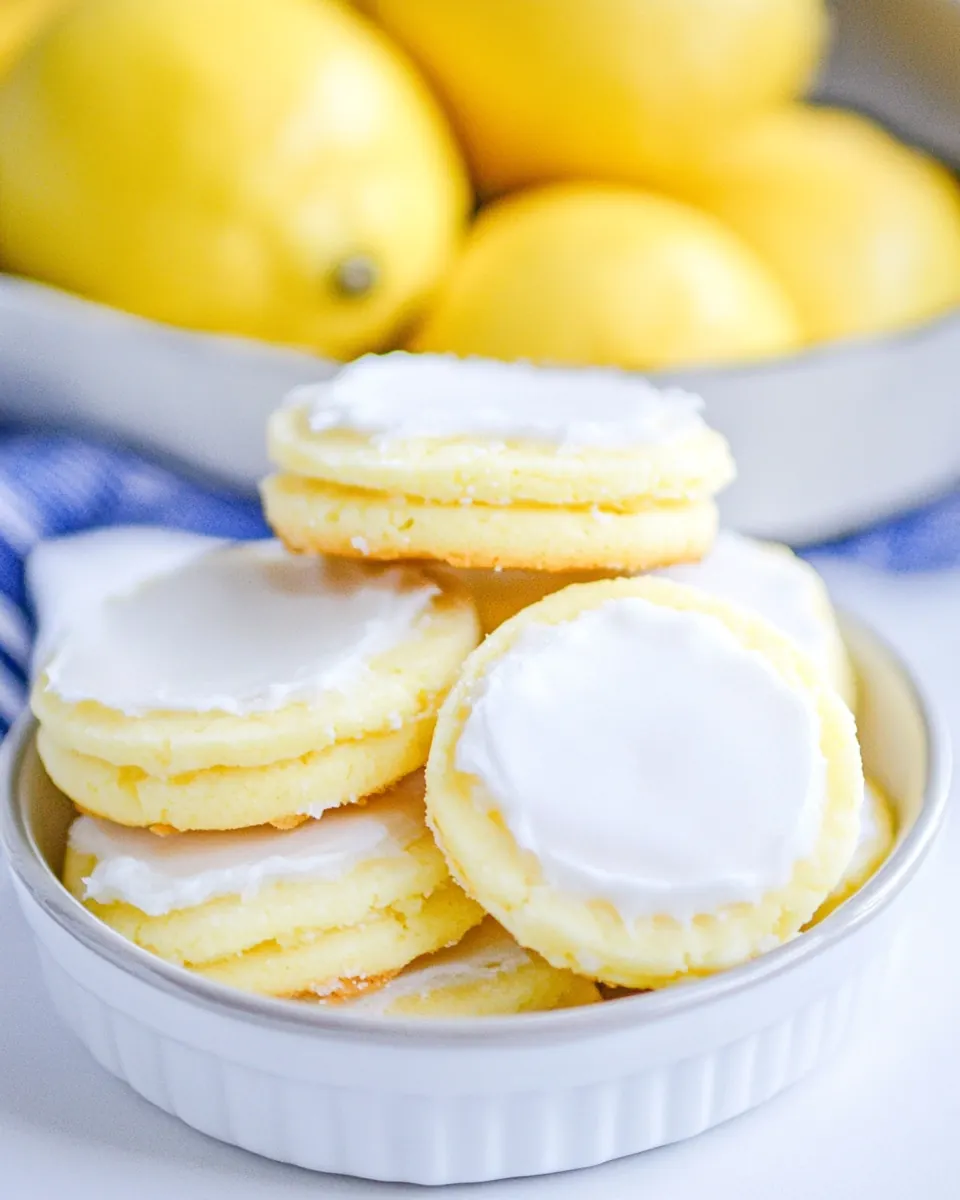
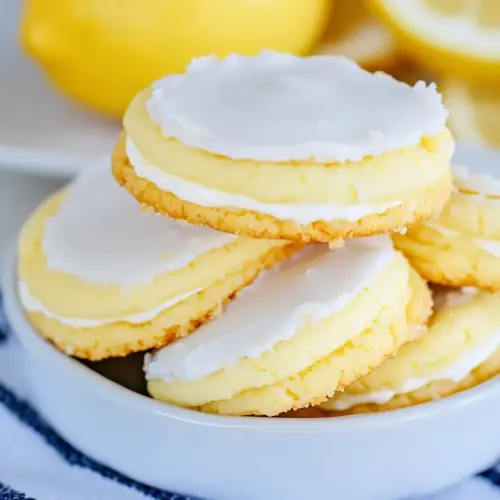
Girl Scout Lemon Cookies Copycat Recipe
Girl Scout Lemon Cookies Copycat Recipe is one of those nostalgic bakes that takes me right back to sunny afternoons and the tiny thrill of finding a fresh box of cookies on the pantry shelf.
I still remember the first time I tried to recreate these cookies in my small apartment kitchen, balancing a bowl on my knee while a radio played softly in the background, and learning how a simple touch of lemon can transform a classic cookie into something bright and unexpectedly elegant. The texture is what hooked me: a tender crumb that gives way to a clean lemon zing, and a glossy glaze that crackles just a little when you bite into it. It felt like capturing a memory, and that kind of cooking always sticks with me.
Over the years I’ve adjusted the proportions, learned which techniques keep the dough from becoming tough, and discovered how room temperature egg and properly creamed butter make all the difference. I like to make a double batch when guests are coming because they vanish fast, and because the glaze gives them such a pretty finish for a casual get together. If you enjoy baking with company, this recipe is forgiving enough to be a group activity, and precise enough to satisfy a perfectionist.
Recipe Snapshot
45 mins
30 mins
15 mins
Medium
150 kcal
American
Gluten-Free, Low FODMAP
Desserts
Electric mixer, Mixing bowls, Baking sheets, Parchment paper, Wire cooling rack, Sharp knife
Why You’ll Love This Girl Scout Lemon Cookies Copycat Recipe
Bright, Clean Citrus Flavor
I love how the lemon elements in Girl Scout Lemon Cookies Copycat Recipe cut through the sweetness and leave a fresh, lively finish. The combination of lemon zest, fresh lemon juice, and just a touch of lemon extract layers citrus aromas so you get that sunny perfume in every bite. When I squeeze fresh lemon juice into the glaze, the acidity wakes up the entire cookie.
Buttery, Tender Texture
The backbone is the proper creaming of butter and granulated sugar. I can tell you from experience that taking the time to beat them until light and fluffy produces a melt in your mouth crumb that is worth the extra minute. That silken texture is what makes these feel indulgent, yet not heavy.
Simple Ingredient List
I appreciate recipes I can pull together with pantry staples. With all purpose flour, a couple of eggs, and standard baking basics, this copycat keeps things approachable. Including the optional yellow gel food coloring is just for fun, but the core flavors work without any gimmicks.
Flexible Finishing Options
The glaze is straightforward, and you can control its thickness to suit your preference. I often thin it for a translucent sheen and thicker it when I want a snow white finish that holds lemon zest in place. That control lets you decide whether you want a subtle gloss or a bold, decorative look.
Great for Sharing and Gifting
These cookies store well for a few days, and they travel nicely, which makes them a go to when I need a last minute gift or a treat to bring to a gathering. They feel special, but they are not fussy, so you can make them often and still keep them exciting.
What You Need for Girl Scout Lemon Cookies Copycat Recipe
These ingredients are deliberately simple, and that is the point. The core players like all purpose flour, butter, and sugar form the structure and mouthfeel, while the trio of lemon zest, fresh lemon juice, and lemon extract give bright, layered citrus notes. The glaze ties everything together, providing a sweet tangy finish that sets up into a pretty sheen.
- 2 cups all-purpose flour: Provide structure and bulk to the cookies while yielding a tender crumb when properly measured and mixed; sift if needed to remove lumps and ensure even incorporation with the butter and eggs.
- 1/4 teaspoons salt: Enhance overall flavor balance by subtly brightening the lemon notes and controlling sweetness; dissolve evenly into the dry ingredients to avoid salty pockets.
- 1 cup unsalted butter softened: Cream with sugar to create a light, aerated base that traps air for a delicate texture; soften to room temperature for even mixing and smooth dough consistency.
- Yellow gel food coloring (optional): Add optional bright color to the dough or icing for visual appeal without affecting texture; use sparingly to avoid altering flavor and to achieve the desired shade.
- 1 cup granulated sugar: Sweeten the dough and help with creaming to provide lift and fine crumb; measure accurately and beat with butter until light and slightly fluffy for best results.
- 1 egg room temperature: Bind ingredients together while contributing moisture and richness; bring to room temperature to emulsify smoothly into the batter and help create a uniform dough.
- 1 egg yolk room temperature: Contribute extra richness and tenderness while intensifying the cookie's golden color; incorporate with the egg for additional fat and improved mouthfeel.
- 1 tablespoon lemon zest finely grated: Deliver concentrated citrus oils that provide intense lemon aroma and flavor; finely grate only the yellow outer peel to avoid bitter pith and evenly distribute through the dough.
- 2 tablespoons lemon juice fresh squeezed: Introduce fresh citric brightness and acidity to balance sweetness and activate flavor; strain if necessary to remove seeds and mix thoroughly for consistent taste.
- 1/2 teaspoon lemon extract: Layer in concentrated lemon flavor that reinforces freshness without adding liquid volume; add cautiously as it is potent and can dominate if overused.
- 1 teaspoon vanilla extract: Provide complementary aromatic sweetness and depth to enhance the lemon profile; use a high-quality extract and add after creaming to preserve its delicate notes.
- 1 cup powdered sugar: Create a smooth, sweet coating or glaze that adds a melt-in-your-mouth finish and helps carry lemon flavor; sift to remove lumps and mix until silky for even spreading.
- 1 2 tablespoons lemon juice: Adjust glaze consistency and brightness with additional acidity; add gradually to the powdered sugar until desired pourable texture and balanced tang are achieved.
Putting Together Girl Scout Lemon Cookies Copycat Recipe

These directions walk you through from mixing to glazing, with little pointers I picked up over years of baking. Take your time at each stage because patience here pays off in texture and flavor.
- In a medium bowl mix flour and salt. Set aside.: The first scent you notice is the dry, slightly nutty aroma of all purpose flour combined with the faint sharpness of salt , which seems subtle but plays a major role in flavor balance. Mixing them first ensures even distribution, so when the wet ingredients are incorporated you avoid pockets of unseasoned flour that can create dry spots. A common mistake is rushing this step and adding the flour too quickly, which can lead to overmixing later when you try to incorporate it. Keep the bowl close at hand, and set this mixture aside so the next steps flow smoothly.
- In a large bowl, using an electric mixer beat butter and granulated sugar on medium speed until light and fluffy.: You will hear the soft whir of the mixer and see the butter turn paler as tiny air bubbles become suspended; this aeration is what gives the cookies that tender, slightly cakey interior. The texture should be noticeably lighter and the smell richer, like sweet cream. Resist the urge to crank the speed too high, which can warm the butter and make the mixture greasy. If your kitchen is warm, pause and let the bowl rest so the mixture stays stable.
- Add egg, egg yolk, lemon zest, lemon juice, lemon and vanilla extract, and a few drops of food coloring, if using. Mix well until combined.: The bowl releases a bright citrus perfume as you add the egg , lemon zest , and lemon juice . Stirring brings a glossy sheen as the components emulsify, and the aroma becomes more pronounced when the extracts are added. Because these ingredients are responsible for flavor and structure, mixing until just blended avoids tough cookies caused by overworked gluten. One mistake people make is adding cold eggs straight from the fridge; room temperature eggs integrate more smoothly and produce a uniform texture.
- Gradually beat in on low speed the flour mixture until just combined. Divide the batter in half and shape each half into a log about 9 inches long and 1 1/2-2 inches in diameter. Wrap in wax paper and refrigerate for 1 hour or until firm.: As the dry mixture disappears into the wet, you will see the dough transform from sticky to cohesive, and the sound of the mixer will soften. Working on low speed preserves tenderness by minimizing gluten development. Once divided and rolled into logs, the dough feels cool and pliable; chilling firms the fat, which helps the cookies hold their shape and slice cleanly. A common pitfall is under chilling, which leads to misshapen cookies, or over chilling, which makes them hard to slice. Aim for a firm, but not rock solid, texture.
- Preheat oven to 350°F.: The oven gives off a dry warmth that prepares the baking environment; setting it early ensures it reaches 350°F so the cookies start baking at the right temperature. A properly preheated oven promotes even spread and browning at the edges. If you put the cookies into an oven that is still heating, they may spread incorrectly and lose that delicate edge crispness, so give it time to reach temperature before baking.
- Slice the dough into 1/4-inch thick slices and arrange on ungreased baking sheets covered with parchment paper.: When you slice the chilled logs, the knife should glide through and produce neat discs with clean edges. You may hear a faint snap as the chilled dough yields, and the raw disks will feel cool and slightly firm. Placing them on parchment prevents sticking and facilitates easy transfer to racks. A frequent error is slicing too thick or too thin; too thick yields underbaked centers, too thin produces brittle cookies, so aim for consistent 1/4 inch slices.
- Bake for 12 to 15 minutes or until very lightly browned on the edges.: During baking you will notice a tender cookie taking shape and a faint scent of baked butter and lemon . The edges should develop a whisper of golden color while the centers remain pale, which signals doneness. Baking longer than recommended will dry them out and reduce the soft interior, so keep an eye through the oven window starting at 12 minutes. If your oven runs hot, err toward the lower end of the time range to preserve tenderness.
- Cool on baking sheets for 1 minute, after that transfer the cookies to wire racks to cool completely.: The cookies will release a warm, toasty aroma as they rest. Letting them sit briefly allows the structure to set so they do not break when moved. Transferring to a wire rack lets air circulate, preventing sogginess on the bottom and helping the cookies reach room temperature for glazing. A common mistake is leaving them on the baking sheet too long, which can cause residual heat to overbake the bottoms.
- Mix the powdered sugar and lemon juice in a medium bowl. Stir until smooth. For a thinner glaze, add more lemon juice, a teaspoon at a time. For a thicker glaze, add more powdered sugar, a tablespoon at a time.: When you stir the powdered sugar into the lemon juice , the mixture transforms into a glossy, opaque glaze with a bright, citrus scent. Start with small additions of liquid or sugar to reach your desired viscosity; the sheen will be shiny and the aroma tart. Over thinning will make the glaze run off the cookies, while over thickening yields clumpy, matte results. Adjust very gradually to control consistency.
- Dip the bottom (or top if desired) of each cookie into the glaze, then gently set the cookie with the glaze side up, onto a wire cooling rack to allow the glaze to set up.: Dipping gives you a smooth coating that sets with a faint crackle. As the glaze dries you may hear a barely audible tack as it loses moisture, and the surface will matte slightly while retaining a pleasant gloss. Allowing them to set on a rack avoids pooling and keeps the bottom crisp. One mistake is glazing too soon while cookies are warm, which causes the glaze to thin and run, so ensure cookies are fully cooled before dipping.
- If desired top with lemon zest immediately, for it to stick.: The final flourish of fresh lemon zest adds aroma and visual contrast, and pressing it in while the glaze is tacky helps it adhere. The tiny citrus oils will lift the scent, enhancing the first inhale before a bite. If you wait until the glaze is fully hard, the zest will not stick well and will fall off during handling, so apply right away for best results.
Expert Tips about Girl Scout Lemon Cookies Copycat Recipe
These tips reflect small adjustments that make a big difference in texture, flavor, and presentation. A few technique tweaks will help you achieve bakery style results at home.
- Room temperature eggs: Bring your egg and extra egg yolk to room temperature for a smoother emulsion and more consistent dough texture.
- Proper creaming: Beat the butter and granulated sugar until pale and fluffy to trap air that yields a light interior in the baked cookie.
- Control chilling: Chill the logs for about an hour to firm the fat, which helps the cookies hold shape and slice cleanly without crumbling.
- Even slices: Use a ruler or guide when slicing the chilled logs to keep all cookies the same thickness so they bake evenly.
- Adjust glaze consistency: Add lemon juice slowly to reach a glaze that is either translucent for a light sheen or thicker for a bright white coating that holds zest.
- Watch the oven: Start checking at the lower end of the time range so you catch the moment the edges turn just golden without over baking the centers.
What Complements This Girl Scout Lemon Cookies Copycat Recipe
These cookies pair well with light beverages and make a lovely addition to seasonal gatherings. Consider serving them alongside subtle, complementary flavors that highlight the citrus brightness.
- Tea service: Serve the cookies with a delicate cup of green or white tea to accentuate the lemon notes without overpowering them.
- Brunch or dessert table: Include them on a brunch spread or dessert plate where their pretty glaze and citrus punch can add variety and freshness.
- Gift boxes: Pack them in parchment lined boxes for parties or hostess gifts; they travel well and present beautifully.
- Storage tips: Store in an airtight container at room temperature for up to three days, or refrigerate for longer keeping, allowing them to come to room temperature before serving.
- Seasonal pairings: These work wonderfully in spring celebrations, complementing light salads, floral decorations, and outdoor gatherings.
FAQ
Conclusion
These cookies stand out for their bright lemon flavor and tender, buttery texture. They combine straightforward ingredients with a few simple techniques to produce a nostalgic, bakery style result that is both pretty and satisfying. I encourage you to give this recipe a try, whether you bake for friends, family, or simply for a peaceful afternoon treat. With a little attention to chilling and glazing, you’ll pull together a batch that looks special and disappears quickly at the table.
Girl Scout Lemon Cookies Copycat Recipe
Equipment
- Electric Mixer
- Mixing Bowls
- Baking Sheets
- Parchment Paper
- wire cooling rack
- Sharp Knife
Ingredients
- 2 cups all-purpose flour Provide structure and bulk to the cookies while yielding a tender crumb when properly measured and mixed; sift if needed to remove lumps and ensure even incorporation with the butter and eggs.
- 1/4 teaspoons salt Enhance overall flavor balance by subtly brightening the lemon notes and controlling sweetness; dissolve evenly into the dry ingredients to avoid salty pockets.
- 1 cup unsalted butter softened Cream with sugar to create a light, aerated base that traps air for a delicate texture; soften to room temperature for even mixing and smooth dough consistency.
- Yellow gel food coloring optional Add optional bright color to the dough or icing for visual appeal without affecting texture; use sparingly to avoid altering flavor and to achieve the desired shade.
- 1 cup granulated sugar Sweeten the dough and help with creaming to provide lift and fine crumb; measure accurately and beat with butter until light and slightly fluffy for best results.
- 1 egg room temperature Bind ingredients together while contributing moisture and richness; bring to room temperature to emulsify smoothly into the batter and help create a uniform dough.
- 1 egg yolk room temperature Contribute extra richness and tenderness while intensifying the cookie's golden color; incorporate with the egg for additional fat and improved mouthfeel.
- 1 tablespoon lemon zest finely grated Deliver concentrated citrus oils that provide intense lemon aroma and flavor; finely grate only the yellow outer peel to avoid bitter pith and evenly distribute through the dough.
- 2 tablespoons lemon juice fresh squeezed Introduce fresh citric brightness and acidity to balance sweetness and activate flavor; strain if necessary to remove seeds and mix thoroughly for consistent taste.
- 1/2 teaspoon lemon extract Layer in concentrated lemon flavor that reinforces freshness without adding liquid volume; add cautiously as it is potent and can dominate if overused.
- 1 teaspoon vanilla extract Provide complementary aromatic sweetness and depth to enhance the lemon profile; use a high-quality extract and add after creaming to preserve its delicate notes.
- 1 cup powdered sugar Create a smooth, sweet coating or glaze that adds a melt-in-your-mouth finish and helps carry lemon flavor; sift to remove lumps and mix until silky for even spreading.
- 1 -2 tablespoons lemon juice Adjust glaze consistency and brightness with additional acidity; add gradually to the powdered sugar until desired pourable texture and balanced tang are achieved.
Instructions
- In a medium bowl mix flour and salt. Set aside.: The first scent you notice is the dry, slightly nutty aroma of all purpose flour combined with the faint sharpness of salt , which seems subtle but plays a major role in flavor balance. Mixing them first ensures even distribution, so when the wet ingredients are incorporated you avoid pockets of unseasoned flour that can create dry spots. A common mistake is rushing this step and adding the flour too quickly, which can lead to overmixing later when you try to incorporate it. Keep the bowl close at hand, and set this mixture aside so the next steps flow smoothly.
- In a large bowl, using an electric mixer beat butter and granulated sugar on medium speed until light and fluffy.: You will hear the soft whir of the mixer and see the butter turn paler as tiny air bubbles become suspended; this aeration is what gives the cookies that tender, slightly cakey interior. The texture should be noticeably lighter and the smell richer, like sweet cream. Resist the urge to crank the speed too high, which can warm the butter and make the mixture greasy. If your kitchen is warm, pause and let the bowl rest so the mixture stays stable.
- Add egg, egg yolk, lemon zest, lemon juice, lemon and vanilla extract, and a few drops of food coloring, if using. Mix well until combined.: The bowl releases a bright citrus perfume as you add the egg , lemon zest , and lemon juice . Stirring brings a glossy sheen as the components emulsify, and the aroma becomes more pronounced when the extracts are added. Because these ingredients are responsible for flavor and structure, mixing until just blended avoids tough cookies caused by overworked gluten. One mistake people make is adding cold eggs straight from the fridge; room temperature eggs integrate more smoothly and produce a uniform texture.
- Gradually beat in on low speed the flour mixture until just combined. Divide the batter in half and shape each half into a log about 9 inches long and 1 1/2-2 inches in diameter. Wrap in wax paper and refrigerate for 1 hour or until firm.: As the dry mixture disappears into the wet, you will see the dough transform from sticky to cohesive, and the sound of the mixer will soften. Working on low speed preserves tenderness by minimizing gluten development. Once divided and rolled into logs, the dough feels cool and pliable; chilling firms the fat, which helps the cookies hold their shape and slice cleanly. A common pitfall is under chilling, which leads to misshapen cookies, or over chilling, which makes them hard to slice. Aim for a firm, but not rock solid, texture.
- Preheat oven to 350°F.: The oven gives off a dry warmth that prepares the baking environment; setting it early ensures it reaches 350°F so the cookies start baking at the right temperature. A properly preheated oven promotes even spread and browning at the edges. If you put the cookies into an oven that is still heating, they may spread incorrectly and lose that delicate edge crispness, so give it time to reach temperature before baking.
- Slice the dough into 1/4-inch thick slices and arrange on ungreased baking sheets covered with parchment paper.: When you slice the chilled logs, the knife should glide through and produce neat discs with clean edges. You may hear a faint snap as the chilled dough yields, and the raw disks will feel cool and slightly firm. Placing them on parchment prevents sticking and facilitates easy transfer to racks. A frequent error is slicing too thick or too thin; too thick yields underbaked centers, too thin produces brittle cookies, so aim for consistent 1/4 inch slices.
- Bake for 12 to 15 minutes or until very lightly browned on the edges.: During baking you will notice a tender cookie taking shape and a faint scent of baked butter and lemon . The edges should develop a whisper of golden color while the centers remain pale, which signals doneness. Baking longer than recommended will dry them out and reduce the soft interior, so keep an eye through the oven window starting at 12 minutes. If your oven runs hot, err toward the lower end of the time range to preserve tenderness.
- Cool on baking sheets for 1 minute, after that transfer the cookies to wire racks to cool completely.: The cookies will release a warm, toasty aroma as they rest. Letting them sit briefly allows the structure to set so they do not break when moved. Transferring to a wire rack lets air circulate, preventing sogginess on the bottom and helping the cookies reach room temperature for glazing. A common mistake is leaving them on the baking sheet too long, which can cause residual heat to overbake the bottoms.
- Mix the powdered sugar and lemon juice in a medium bowl. Stir until smooth. For a thinner glaze, add more lemon juice, a teaspoon at a time. For a thicker glaze, add more powdered sugar, a tablespoon at a time.: When you stir the powdered sugar into the lemon juice , the mixture transforms into a glossy, opaque glaze with a bright, citrus scent. Start with small additions of liquid or sugar to reach your desired viscosity; the sheen will be shiny and the aroma tart. Over thinning will make the glaze run off the cookies, while over thickening yields clumpy, matte results. Adjust very gradually to control consistency.
- Dip the bottom (or top if desired) of each cookie into the glaze, then gently set the cookie with the glaze side up, onto a wire cooling rack to allow the glaze to set up.: Dipping gives you a smooth coating that sets with a faint crackle. As the glaze dries you may hear a barely audible tack as it loses moisture, and the surface will matte slightly while retaining a pleasant gloss. Allowing them to set on a rack avoids pooling and keeps the bottom crisp. One mistake is glazing too soon while cookies are warm, which causes the glaze to thin and run, so ensure cookies are fully cooled before dipping.
- If desired top with lemon zest immediately, for it to stick.: The final flourish of fresh lemon zest adds aroma and visual contrast, and pressing it in while the glaze is tacky helps it adhere. The tiny citrus oils will lift the scent, enhancing the first inhale before a bite. If you wait until the glaze is fully hard, the zest will not stick well and will fall off during handling, so apply right away for best results.
Notes
- Room temperature eggs: Bring your egg and extra egg yolk to room temperature for a smoother emulsion and more consistent dough texture.
- Proper creaming: Beat the butter and granulated sugar until pale and fluffy to trap air that yields a light interior in the baked cookie.
- Control chilling: Chill the logs for about an hour to firm the fat, which helps the cookies hold shape and slice cleanly without crumbling.
- Even slices: Use a ruler or guide when slicing the chilled logs to keep all cookies the same thickness so they bake evenly.
- Adjust glaze consistency: Add lemon juice slowly to reach a glaze that is either translucent for a light sheen or thicker for a bright white coating that holds zest.
- Watch the oven: Start checking at the lower end of the time range so you catch the moment the edges turn just golden without over baking the centers.