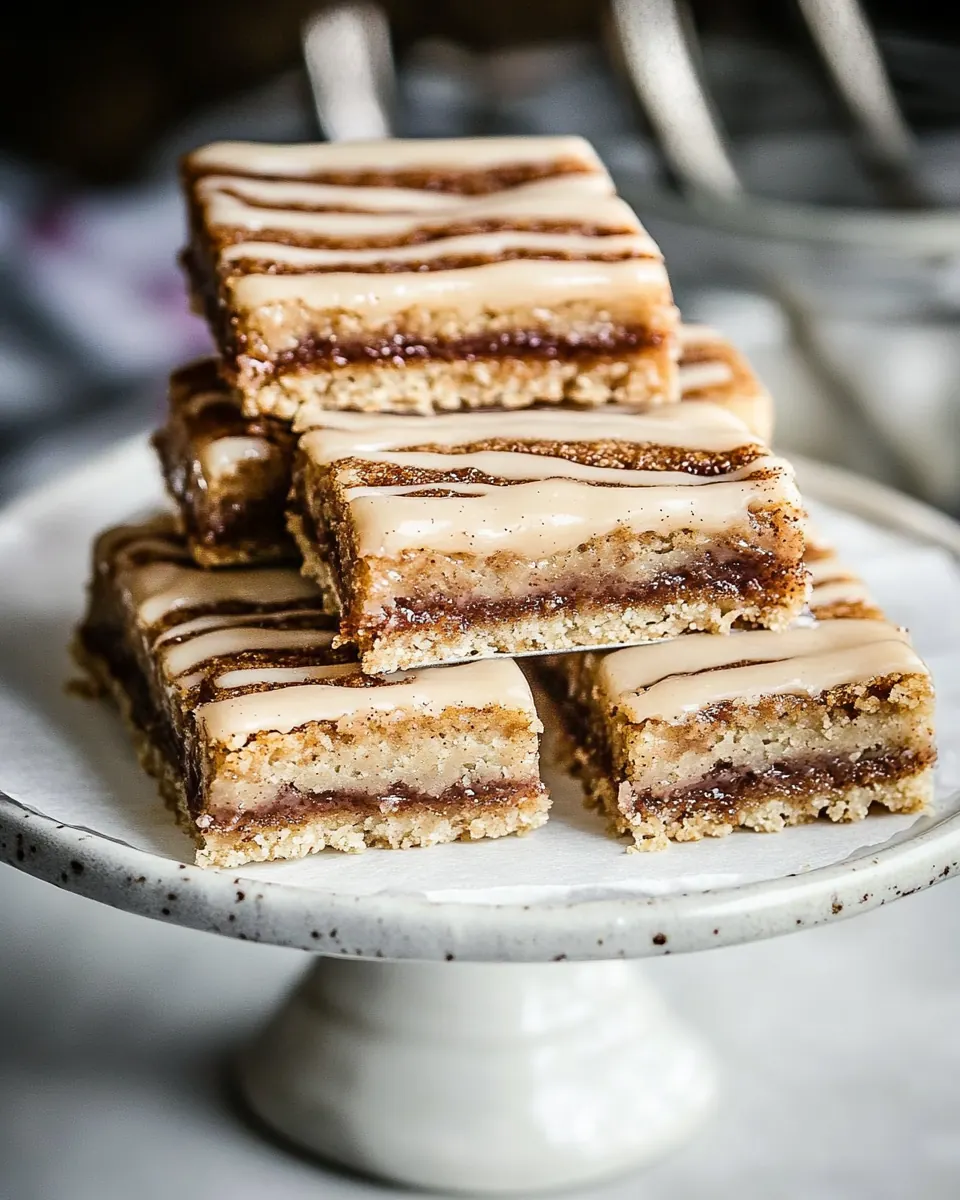
Frosted Brown Sugar Cinnamon Pop Tart Bars
Frosted Brown Sugar Cinnamon Pop Tart Bars started showing up in my weekend baking rotations the moment I needed a sweet that felt nostalgic but also substantial enough to feed a crowd. I first made these on an overcast Sunday when a friend dropped by unexpectedly, and the smell of brown sugar and cinnamon baking together filled the house like a warm memory. I remember tearing off a corner piece while the frosting was still tacky, and the contrast between the tender, buttery crust and the caramel leaning filling made me grin like a kid with a sugar secret.
Since that first batch, I have tweaked the technique a few times, learning how to press the dough just so, how long to chill for stability, and how to judge that golden edge in the oven. These tweaks matter because this recipe is all about texture contrasts, and getting them right means you get bars that hold together when you slice, yet still have that flaky, pop tart inspired crumb. I love serving these for breakfast gatherings, coffee dates, and dessert buffets, because they travel well and they look charmingly rustic.
Recipe Snapshot
1 hr 15 mins
30 mins
45 mins
Medium
250 kcal
American
Gluten-Free, Vegan
Desserts
Electric mixer, 9×9 inch baking dish, Parchment paper, Rolling pin, Spatula, Mixing bowls
The Beauty of This Frosted Brown Sugar Cinnamon Pop Tart Bars
Comfort with a Twist
I love how Frosted Brown Sugar Cinnamon Pop Tart Bars take a childhood classic and give it more body. The filling tastes familiar, yet the brown sugar depth makes each bite feel richer, and the frosting brightens the whole bar so it never feels cloying.
Simple components, big payoff
These bars rely on pantry-friendly staples like all-purpose flour, butter, and powdered sugar. Because each ingredient plays a clear role, the technique matters more than fancy additions. I appreciate recipes where small steps lead to a noticeable lift in texture and flavor.
Reliable for gatherings
I turn to this recipe when hosting because it slices into neat bars and stores at room temperature for a couple of days. The structure of the crust and filling means you can make it ahead, frost later, and still have them look freshly made when company arrives.
Layered, balanced sweetness
What stands out is the balance between the caramel notes of brown sugar and the warm bite of cinnamon. The frosting, with its maple and powdered sugar, cuts through the richness so each mouthful feels balanced, not overpowering.
Easy to personalize
While I keep the core recipe intact most times, these bars invite small personal touches for flavor contrast or presentation. A sprinkle of coarse sugar adds a nostalgic crunch, and a touch more vanilla in the crust always makes the aroma sing in a way guests notice and ask about.
Ingredients for Frosted Brown Sugar Cinnamon Pop Tart Bars
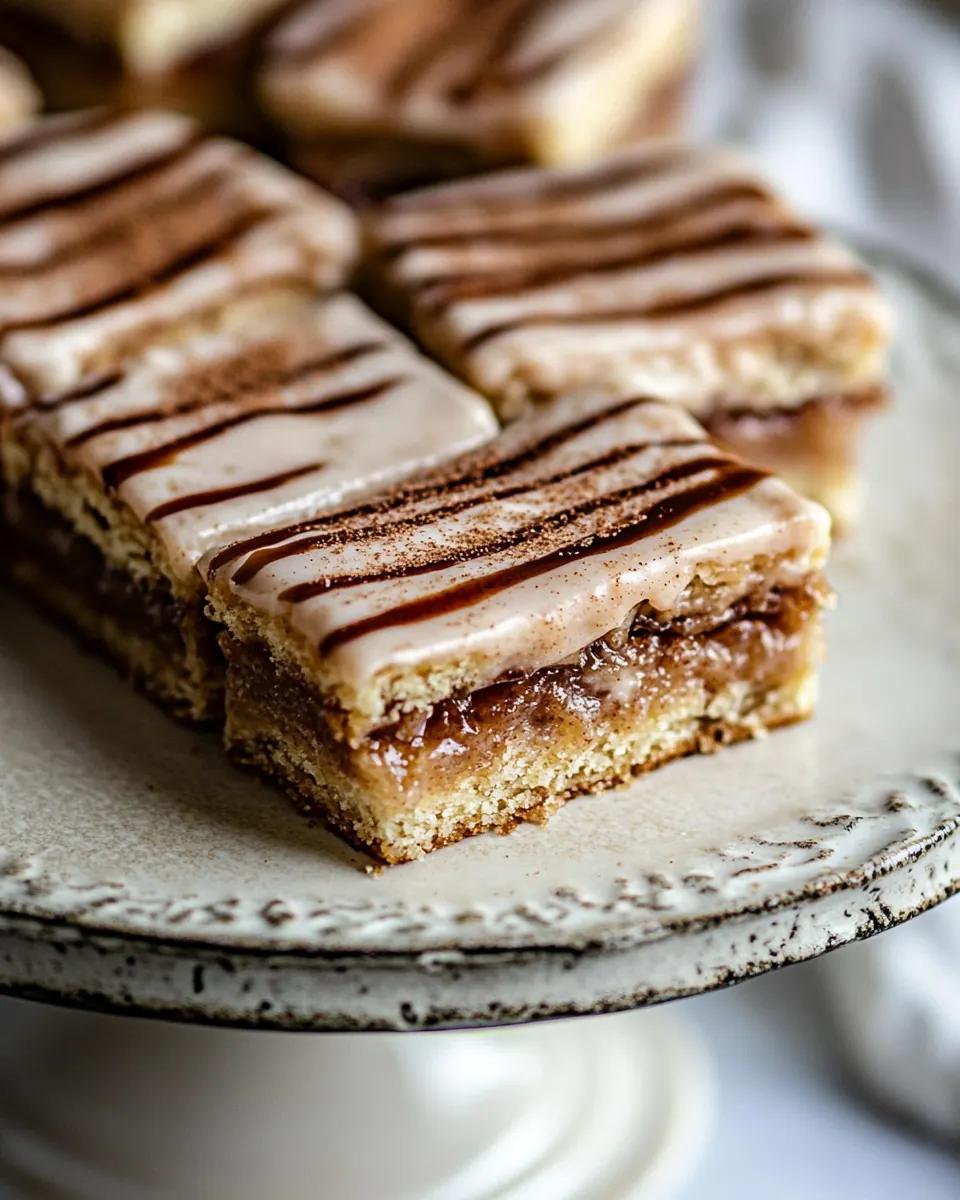
These ingredients are straightforward and intentional. The recipe leans on a sturdy, buttery crust to hold a spiced, brown sugar forward filling, finished with a sweet maple frosting. The key players are the all-purpose flour for structure, the butter for richness and flakiness, and the pairing of dark brown sugar with cinnamon for that warm, cozy center. Together they create layers of texture that echo the classic pop tart, but in a bar format that slices and shares easily.
- 2 1/2 cups all-purpose flour: Provide structure and bulk to the dough, creating a tender but sturdy pastry when properly mixed and hydrated; sift or whisk to ensure even texture and prevent lumps before combining with cold butter.
- 1/2 cup dark brown sugar: Add deep, molasses-like sweetness and moisture to fillings or dough, contributing rich flavor and a slightly chewy texture; measure firmly and press into the mixture for consistent sweetness.
- 2 sticks (1 cup) cold salted butter, shredded: Contribute cold fat that creates flakiness and layers in the pastry; keep chilled and shred or grate to distribute evenly for a tender, flaky crust.
- 1 tablespoon vanilla extract: Impart warm, floral aroma and enhance overall sweetness while rounding flavors; fold into the dough or filling sparingly to avoid overpowering other elements.
- 1 cup dark brown sugar: Provide a more intense, caramel-like sweetness for the filling or topping, balancing spices and butteriness; pack into the measuring cup for accurate measurement.
- 1 tablespoon all-purpose flour: Act as a light binder and thickener in the filling to absorb excess moisture and help create a spreadable consistency; mix thoroughly with sugars and spices.
- 1 tablespoon ground cinnamon: Deliver warm, aromatic spice that defines the pop tart flavor profile and pairs with brown sugar and apple butter; blend evenly to avoid concentrated pockets of spice.
- 2 tablespoons salted butter, melted: Add rich fat and glossy sheen to the filling while enhancing mouthfeel; pour melted butter into the filling mixture and stir until fully incorporated.
- 1/4 cup apple butter: Provide concentrated apple flavor and sweetness that brings classic pop tart taste without excess liquid; spread evenly as the primary filling component.
- 2 teaspoons vanilla extract: Boost and brighten flavors with vanilla’s sweet, aromatic notes; stir into both dough and filling mixtures to create cohesive flavor layers.
- 1 teaspoon salt: Enhance overall flavor balance by amplifying sweetness and reducing bitterness; dissolve into dough or filling to ensure even seasoning.
- 2 cups powdered sugar: Supply smooth sweetness and a silky texture to the glaze, helping it set and coat the bars evenly; sift before mixing to avoid lumps for a glossy finish.
- 1/4 cup maple syrup: Introduce rich maple flavor and additional sweetness to the glaze, complementing brown sugar and cinnamon notes; whisk into powdered sugar for a pourable consistency.
- 1 tablespoon vanilla extract: Add warm, sweet aromatic complexity to the glaze or filling, harmonizing with maple and brown sugar; stir in last to preserve its fragrant character.
- 1 teaspoon ground cinnamon: Provide subtle spicy warmth that echoes the filling’s cinnamon note and ties the flavor profile together; sprinkle into the filling or glaze for balanced spice.
- coarse salt or sugar, for sprinkling () (optional): Offer a final crunchy or sparkling finish when lightly scattered on top, enhancing visual appeal and texture; apply sparingly to avoid overwhelming the glaze.
How to Make Frosted Brown Sugar Cinnamon Pop Tart Bars
This method walks you through building a sturdy crust, a sticky spiced filling, and a glossy frosting. I like to keep my mise en place tidy, because small steps like chilling and rolling at the right time make a big difference in texture and finish.
- To make the cookie dough. In a bowl using an electric mixer, beat together the flour, sugar, and butter. Add the vanilla and 1/3 cup cold water. Beating until just combined, adding 1-2 tablespoons additional water as needed until the dough forms a ball. Preheat the oven to 350° F. Line a 9×9 inch baking dish with parchment paper. Divide the dough in half. Press half the dough into the prepared baking dish. Trace the 9×9 inch baking dish out on a sheet of parchment paper. Now, roll the remaining dough out just past the edges of the traced-out square. Set aside. To make the filling. Combine all ingredients in a bowl. Evenly spread the filling dough into the baking dish. Carefully invert the reserved dough square over the filling, pressing down gently to secure. Trim away any excess dough. Freeze the bars for 15 minutes. Bake for 40 – 45 minutes, until just set in the center. Let cool. To make the frosting. In a bowl, whisk together all of the ingredients and 1-2 tablespoons of water until smooth. If your frosting is too thick, thin with 1-2 tablespoons of additional water. Spread the frosting over the pop-tart bars. Let set a few minutes, then top with salt/sugar (optional). Let dry, then cut into bars. Serve or store in an airtight container for up to 3 days at room temperature.: The air will smell faintly sweet and buttery as you combine the dry ingredients, and the dough will feel cool and slightly crumbly before you add water; this is important because overworking or adding too much water will develop gluten and make the crust tough. If you sense the mixture becoming warm, pause and chill the bowl briefly. One common mistake is adding all the water at once, which can make the dough sticky; add water gradually until a cohesive ball forms.
- In a bowl using an electric mixer, beat together the flour, sugar, and butter: As the mixer runs the texture shifts from coarse crumbs to a sandy, almost pebbly mix, and you will notice the butter breaking into pea sized pieces that will puff slightly when baked. This texture signals that you will get flakiness in the final crust because those butter pockets steam during baking. Avoid running the mixer too long, which will over soften the butter and lose the desired pockets, leading to a dense crust.
- Add the vanilla and 1/3 cup cold water: A brief floral warm note from the vanilla extract will lift the otherwise neutral dough aroma; the cold water helps bring the mixture together. Start with the stated amount so the dough remains manageable; if you add too much, the dough will be sticky and hard to handle. If your bowl feels warm, chill the dough for a few minutes to firm the butter back up.
- Beating until just combined, adding 1-2 tablespoons additional water as needed until the dough forms a ball: You should feel the dough give way into a single cohesive mass, with a slight tackiness but not wetness, and it should hold together when squeezed. This balance ensures the crust will be tender rather than gummy. A frequent error is overmixing at this stage, which makes the dough elastic and results in a tougher bake; mix only to bring it together.
- Preheat the oven to 350° F: You will notice the kitchen warm as the oven comes up, and preheating ensures even baking so the edges set without the center becoming overbaked. Accurate oven temperature is crucial because too hot will brown the crust before the filling sets, while too cool yields a pale, underbaked texture. A common slip is skipping preheat, which shifts bake times unpredictably.
- Line a 9×9 inch baking dish with parchment paper: The parchment prevents sticking and makes it simple to lift the whole slab for glazing and slicing; you will appreciate how clean the pan stays. Ensure the paper sits flat against the pan to avoid uneven edges. People sometimes use only a single small piece, which can shift during pressing, so cut it to cover the entire bottom with overhang for easy removal.
- Divide the dough in half: The dough should feel evenly distributed into two portions, one that will form the base and one that will become the top seal. Working with chilled, divided dough keeps handling gentle so it does not soften too much. A typical mistake is dividing unevenly, which can lead to too thin a top layer that tears during transfer; weigh or eyeball evenly for best results.
- Press half the dough into the prepared baking dish: When you press the dough, you should see a uniform, slightly compacted surface that gives under gentle finger pressure, creating the base. This tactile firmness ensures the filling will sit on a stable platform when baked. Avoid over pressing until it becomes paper thin, which would make the bottom overly crisp and prone to cracking when sliced.
- Trace the 9×9 inch baking dish out on a sheet of parchment paper: The traced square acts as a template so the top layer will match the base, and you will appreciate how easy it becomes to transfer a rolled sheet into the pan. Keep the traced lines unobtrusive so they do not stick to the dough. A common oversight is not leaving enough overhang on the traced paper, making it awkward to invert cleanly.
- Now, roll the remaining dough out just past the edges of the traced-out square: Rolling produces a smooth surface with a few tiny cracks that will reseal when handled gently; you want it thin but not fragile, so it drapes over the filling without tearing. If the dough resists rolling, chill it for five to ten minutes. People often roll too thin trying to cover the filling in one go, which leads to ripping during transfer.
- Set aside: The rolled dough should be cool and pliable when set aside; this brief rest helps relax any gluten so it will lie flatter when placed over the filling. Keep it covered to prevent a skin from forming on the surface. Forgetting to cover invites dryness and cracking when you try to invert it.
- To make the filling: The filling will smell robustly of molasses and spice as you combine the dark brown sugar , cinnamon , and melted butter , and you should notice a glossy, thick paste forming; that glossy quality indicates proper binding so it will hold during baking. Take care not to overmix to keep some texture; overworking can make the filling overly smooth and less interesting. A pitfall is adding too much liquid here, which can cause the filling to weep in the oven.
- Combine all ingredients in a bowl: As the ingredients meld, you should be able to drag a spoon and see the mixture hold shape while still spreading easily; this balance ensures it will set but remain tender. If it seems too dry, a splash of melted butter corrects it; if too loose, a pinch more flour will firm it up. Mixing too vigorously will incorporate excess air, which can create bubbling and uneven set while baking.
- Evenly spread the filling dough into the baking dish: Use a spatula to get a smooth, even layer that reaches all edges and sits level, because an even fill ensures uniform baking and clean slices. The surface should look glossy and slightly domed before topping. A typical mistake is piling the filling thicker in the center, which leads to an underbaked middle when the edges finish first.
- Carefully invert the reserved dough square over the filling, pressing down gently to secure: As you set the top, you may hear a faint soft tack as it contacts the filling, and pressing gently creates a seal that prevents filling from oozing out. Avoid aggressive pressing, which can push filling out the sides and make the edges messy. People sometimes attempt to stretch the top to cover gaps, which causes tears and uneven thickness.
- Trim away any excess dough: The trimmed edges should be neat and even, giving a tidy perimeter that bakes uniformly. Neat edges promote even browning along the sides when baking. An error to watch for is leaving folded edges that can bake denser than the rest of the crust.
- Freeze the bars for 15 minutes: Chilling firms the butter again, which helps the bars keep their shape in the oven; you will notice the dough feels cold and slightly firmer to the touch after this rest. This step reduces spreading so the filling sets correctly. Skipping this is a common shortcut that can lead to a saggy, distorted top layer.
- Bake for 40 to 45 minutes, until just set in the center: You'll see the edges become golden and the center will look set though slightly soft, and the aroma will deepen to caramelized notes. This precise doneness yields a tender center that still slices cleanly after cooling. Overbaking will dry the bars and make them crumbly, so watch for the visual cue of a faint wobble rather than raw dough.
- Let cool: The bars will continue to set as they cool, and the filling will firm up to a sliceable consistency; resist the urge to cut while hot or the filling may smear. Cooling also helps the flavors meld and the frosting adhere later. Cutting too soon is the most common mistake here because the bars will fall apart when warm.
- To make the frosting: Whisking the powdered sugar and maple syrup creates a glossy, flowing glaze; you should hear a faint whisking sound and see it become smooth without lumps. The texture should be thick enough to coat but thin enough to drizzle. If it seems grainy, sieve the sugar first; a common error is adding too much water at once, making the glaze runny.
- In a bowl, whisk together all of the ingredients and 1 to 2 tablespoons of water until smooth: The fragrance of maple syrup will come forward and the mixture should develop into a shine coated syrup that slowly falls from the whisk. This sheen signals proper consistency for spreading. If the glaze is too thick, thin carefully with small amounts of water so it does not become translucent and runny.
- If your frosting is too thick, thin with 1 to 2 tablespoons of additional water: Adding water gradually keeps the texture controlled, and you will notice the glaze loosen and become more spreadable while retaining opacity. Small additions prevent overshooting to a watery finish. Rushing this step often yields a glaze that pools and runs off the bars.
- Spread the frosting over the pop tart bars: A thin, even layer will set to a delicate crust that contrasts the soft filling, and the act of spreading should feel smooth with a light drag across the surface. Aim for a uniform coat so each bar looks consistent. Avoid piling frosting as it can ooze into seams and make cutting messy.
- Let set a few minutes, then top with salt or sugar: This final flourish gives a crunchy or saline counterpoint that enhances sweetness; you should see a slight sheen dull as the frosting skins over. The small textural contrast elevates each bite. Applying the sprinkle too early can cause sinking into the glaze, so wait until the surface begins to set.
- Let dry, then cut into bars: Once fully dry to the touch, the bars slice with a clean edge and the layers hold neatly; the knife should glide through with little resistance. Cutting after full set prevents smudged frosting and maintains tidy presentation. Cutting prematurely is the most common reason for sticky, uneven bars.
- Serve or store in an airtight container for up to 3 days at room temperature: Stored properly, the flavors continue to meld and the texture remains pleasant for a few days; place parchment between layers to avoid sticking. Room temperature storage preserves the tender crumb better than refrigeration, which can dry them out. Storing in a warm spot or in direct sunlight will soften the frosting excessively, so keep them cool but not cold.
Making Adjustments
Small adjustments can personalize these bars for taste or texture reasons. Below are practical ways I often tweak the formula to fit the occasion, climate, or ingredient availability while keeping the integrity of the original bars intact.
- Adjust chilling time If your kitchen is warm, lengthen the chilling periods so the butter stays solid; this prevents the dough from becoming greasy and ensures flakiness.
- Control frosting thickness Thin the frosting with water one teaspoon at a time until you reach a spreadable consistency, this helps you avoid a runny glaze that will seep into seams.
- Even filling spread Press filling gently with an offset spatula to level the surface, this prevents a center-heavy bake and guarantees uniform slices across the pan.
- Swap sugar textures carefully If your dark brown sugar is hard, break it up before measuring so you do not under-measure and affect both sweetness and moisture balance.
- Use parchment overhang Line the pan so you can lift the whole slab out once cooled, this makes glazing and cutting much cleaner and preserves the bars’ edges.
Side Dish Ideas for Frosted Brown Sugar Cinnamon Pop Tart Bars
These bars are most often enjoyed as a sweet treat or breakfast accompaniment. Here are serving ideas and pairings that match different occasions and seasons. Think about texture contrasts and complementary flavors when you plan the plate.
- Breakfast spread Serve slices alongside a pot of strong coffee or a warm chai for a cozy morning offering that feels indulgent but approachable.
- Brunch centerpiece Arrange the bars on a platter with fresh fruit and yogurt, the bright fruit tones balance the brown sugar depth for an elegant brunch table.
- After school snack Pack a single bar with a cold glass of milk for a nostalgic treat that travels well and holds up in a lunchbox or tote.
- Holiday morning These fit well into a fall or winter holiday breakfast spread, paired with spiced beverages and warm fruit compotes for extra seasonal flair.
- Storage guidance Store in an airtight container at room temperature for up to three days; separate layers with parchment to prevent sticking and maintain the frosting finish.
- Seasonal pairing In autumn, pair with baked apples or a simple spiced compote; in spring, offer bright citrus segments to cut through the richness.
- Occasion styling For casual gatherings, cut into larger squares and stack on a rustic board; for tea service, slice smaller and present on a tiered stand for a delicate display.
- Make ahead strategy Bake and cool the bars, then frost the day you plan to serve so the topping looks freshest; the base and filling keep well overnight.
- Transport tips Use a rigid container with parchment layers to keep the bars from shifting and the frosting from smudging while you travel to a gathering.
- Pairing with beverages Try a maple latte or milky tea, the warm spices in the bars play beautifully with creamy, lightly sweet drinks.
FAQ
Conclusion
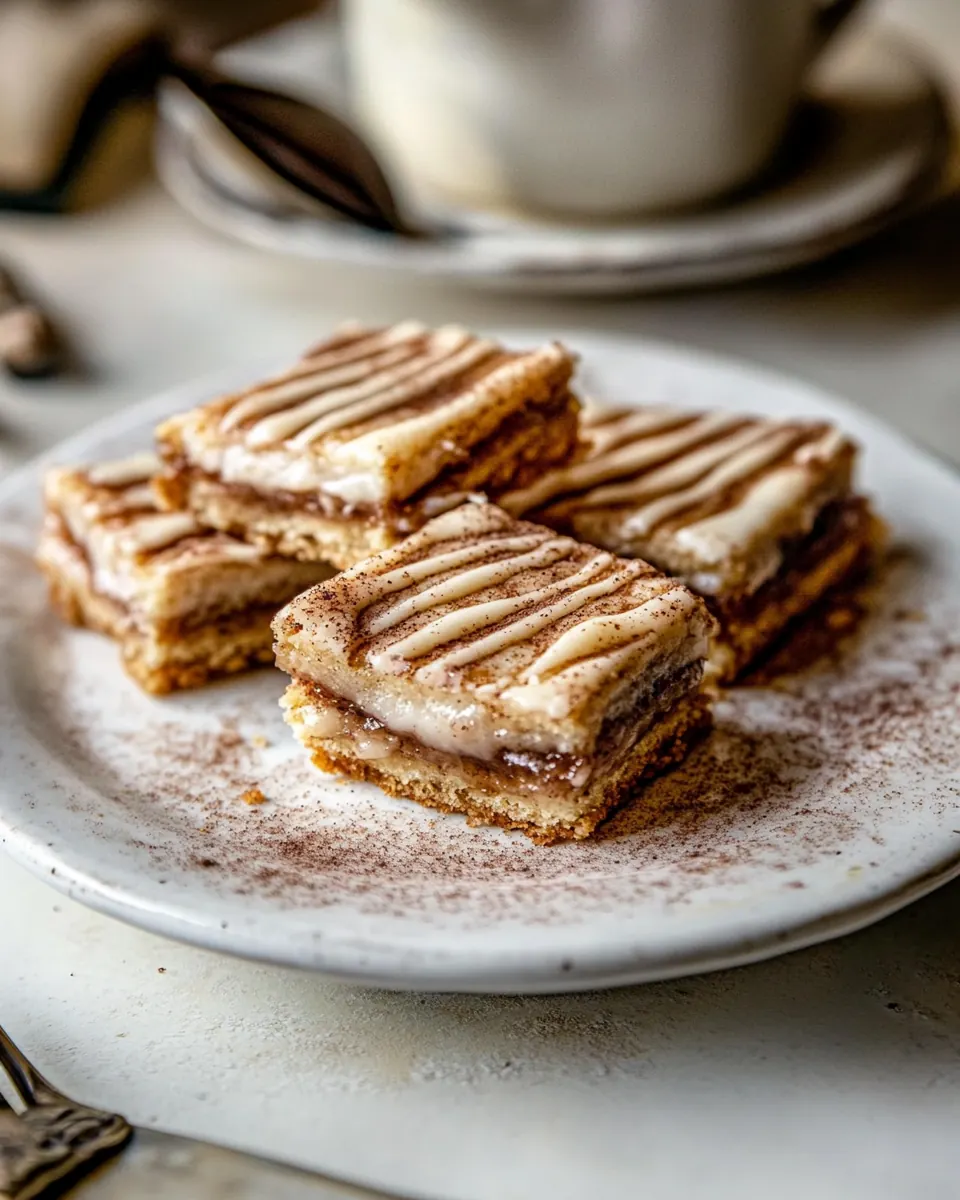
What makes these bars special is the way they combine a buttery, slightly flaky crust with a deeply flavored brown sugar and cinnamon filling, all topped with a glossy maple frosting that lifts each bite. Give them a try when you want something nostalgic but a little grown up, perfect for brunches or weekend baking sessions with friends. They are easy to slice, travel well, and store at room temperature for a few days, making them a reliable sweet for hosting or gifting.

Frosted Brown Sugar Cinnamon Pop Tart Bars
Equipment
- Electric Mixer
- 9×9 inch Baking Dish
- Parchment Paper
- Rolling Pin
- Spatula
- Mixing Bowls
Ingredients
- 2 1/2 cups all-purpose flour Provide structure and bulk to the dough, creating a tender but sturdy pastry when properly mixed and hydrated; sift or whisk to ensure even texture and prevent lumps before combining with cold butter.
- 1/2 cup dark brown sugar Add deep, molasses-like sweetness and moisture to fillings or dough, contributing rich flavor and a slightly chewy texture; measure firmly and press into the mixture for consistent sweetness.
- 2 sticks (1 cup) cold salted butter, shredded Contribute cold fat that creates flakiness and layers in the pastry; keep chilled and shred or grate to distribute evenly for a tender, flaky crust.
- 1 tablespoon vanilla extract Impart warm, floral aroma and enhance overall sweetness while rounding flavors; fold into the dough or filling sparingly to avoid overpowering other elements.
- 1 cup dark brown sugar Provide a more intense, caramel-like sweetness for the filling or topping, balancing spices and butteriness; pack into the measuring cup for accurate measurement.
- 1 tablespoon all-purpose flour Act as a light binder and thickener in the filling to absorb excess moisture and help create a spreadable consistency; mix thoroughly with sugars and spices.
- 1 tablespoon ground cinnamon Deliver warm, aromatic spice that defines the pop tart flavor profile and pairs with brown sugar and apple butter; blend evenly to avoid concentrated pockets of spice.
- 2 tablespoons salted butter, melted Add rich fat and glossy sheen to the filling while enhancing mouthfeel; pour melted butter into the filling mixture and stir until fully incorporated.
- 1/4 cup apple butter Provide concentrated apple flavor and sweetness that brings classic pop tart taste without excess liquid; spread evenly as the primary filling component.
- 2 teaspoons vanilla extract Boost and brighten flavors with vanilla’s sweet, aromatic notes; stir into both dough and filling mixtures to create cohesive flavor layers.
- 1 teaspoon salt Enhance overall flavor balance by amplifying sweetness and reducing bitterness; dissolve into dough or filling to ensure even seasoning.
- 2 cups powdered sugar Supply smooth sweetness and a silky texture to the glaze, helping it set and coat the bars evenly; sift before mixing to avoid lumps for a glossy finish.
- 1/4 cup maple syrup Introduce rich maple flavor and additional sweetness to the glaze, complementing brown sugar and cinnamon notes; whisk into powdered sugar for a pourable consistency.
- 1 tablespoon vanilla extract Add warm, sweet aromatic complexity to the glaze or filling, harmonizing with maple and brown sugar; stir in last to preserve its fragrant character.
- 1 teaspoon ground cinnamon Provide subtle spicy warmth that echoes the filling’s cinnamon note and ties the flavor profile together; sprinkle into the filling or glaze for balanced spice.
- coarse salt or sugar, for sprinkling (optional) Offer a final crunchy or sparkling finish when lightly scattered on top, enhancing visual appeal and texture; apply sparingly to avoid overwhelming the glaze.
Instructions
- To make the cookie dough. In a bowl using an electric mixer, beat together the flour, sugar, and butter. Add the vanilla and 1/3 cup cold water. Beating until just combined, adding 1-2 tablespoons additional water as needed until the dough forms a ball. Preheat the oven to 350° F. Line a 9×9 inch baking dish with parchment paper. Divide the dough in half. Press half the dough into the prepared baking dish. Trace the 9×9 inch baking dish out on a sheet of parchment paper. Now, roll the remaining dough out just past the edges of the traced-out square. Set aside. To make the filling. Combine all ingredients in a bowl. Evenly spread the filling dough into the baking dish. Carefully invert the reserved dough square over the filling, pressing down gently to secure. Trim away any excess dough. Freeze the bars for 15 minutes. Bake for 40 – 45 minutes, until just set in the center. Let cool. To make the frosting. In a bowl, whisk together all of the ingredients and 1-2 tablespoons of water until smooth. If your frosting is too thick, thin with 1-2 tablespoons of additional water. Spread the frosting over the pop-tart bars. Let set a few minutes, then top with salt/sugar (optional). Let dry, then cut into bars. Serve or store in an airtight container for up to 3 days at room temperature.: The air will smell faintly sweet and buttery as you combine the dry ingredients, and the dough will feel cool and slightly crumbly before you add water; this is important because overworking or adding too much water will develop gluten and make the crust tough. If you sense the mixture becoming warm, pause and chill the bowl briefly. One common mistake is adding all the water at once, which can make the dough sticky; add water gradually until a cohesive ball forms.
- In a bowl using an electric mixer, beat together the flour, sugar, and butter: As the mixer runs the texture shifts from coarse crumbs to a sandy, almost pebbly mix, and you will notice the butter breaking into pea sized pieces that will puff slightly when baked. This texture signals that you will get flakiness in the final crust because those butter pockets steam during baking. Avoid running the mixer too long, which will over soften the butter and lose the desired pockets, leading to a dense crust.
- Add the vanilla and 1/3 cup cold water: A brief floral warm note from the vanilla extract will lift the otherwise neutral dough aroma; the cold water helps bring the mixture together. Start with the stated amount so the dough remains manageable; if you add too much, the dough will be sticky and hard to handle. If your bowl feels warm, chill the dough for a few minutes to firm the butter back up.
- Beating until just combined, adding 1-2 tablespoons additional water as needed until the dough forms a ball: You should feel the dough give way into a single cohesive mass, with a slight tackiness but not wetness, and it should hold together when squeezed. This balance ensures the crust will be tender rather than gummy. A frequent error is overmixing at this stage, which makes the dough elastic and results in a tougher bake; mix only to bring it together.
- Preheat the oven to 350° F: You will notice the kitchen warm as the oven comes up, and preheating ensures even baking so the edges set without the center becoming overbaked. Accurate oven temperature is crucial because too hot will brown the crust before the filling sets, while too cool yields a pale, underbaked texture. A common slip is skipping preheat, which shifts bake times unpredictably.
- Line a 9×9 inch baking dish with parchment paper: The parchment prevents sticking and makes it simple to lift the whole slab for glazing and slicing; you will appreciate how clean the pan stays. Ensure the paper sits flat against the pan to avoid uneven edges. People sometimes use only a single small piece, which can shift during pressing, so cut it to cover the entire bottom with overhang for easy removal.
- Divide the dough in half: The dough should feel evenly distributed into two portions, one that will form the base and one that will become the top seal. Working with chilled, divided dough keeps handling gentle so it does not soften too much. A typical mistake is dividing unevenly, which can lead to too thin a top layer that tears during transfer; weigh or eyeball evenly for best results.
- Press half the dough into the prepared baking dish: When you press the dough, you should see a uniform, slightly compacted surface that gives under gentle finger pressure, creating the base. This tactile firmness ensures the filling will sit on a stable platform when baked. Avoid over pressing until it becomes paper thin, which would make the bottom overly crisp and prone to cracking when sliced.
- Trace the 9×9 inch baking dish out on a sheet of parchment paper: The traced square acts as a template so the top layer will match the base, and you will appreciate how easy it becomes to transfer a rolled sheet into the pan. Keep the traced lines unobtrusive so they do not stick to the dough. A common oversight is not leaving enough overhang on the traced paper, making it awkward to invert cleanly.
- Now, roll the remaining dough out just past the edges of the traced-out square: Rolling produces a smooth surface with a few tiny cracks that will reseal when handled gently; you want it thin but not fragile, so it drapes over the filling without tearing. If the dough resists rolling, chill it for five to ten minutes. People often roll too thin trying to cover the filling in one go, which leads to ripping during transfer.
- Set aside: The rolled dough should be cool and pliable when set aside; this brief rest helps relax any gluten so it will lie flatter when placed over the filling. Keep it covered to prevent a skin from forming on the surface. Forgetting to cover invites dryness and cracking when you try to invert it.
- To make the filling: The filling will smell robustly of molasses and spice as you combine the dark brown sugar , cinnamon , and melted butter , and you should notice a glossy, thick paste forming; that glossy quality indicates proper binding so it will hold during baking. Take care not to overmix to keep some texture; overworking can make the filling overly smooth and less interesting. A pitfall is adding too much liquid here, which can cause the filling to weep in the oven.
- Combine all ingredients in a bowl: As the ingredients meld, you should be able to drag a spoon and see the mixture hold shape while still spreading easily; this balance ensures it will set but remain tender. If it seems too dry, a splash of melted butter corrects it; if too loose, a pinch more flour will firm it up. Mixing too vigorously will incorporate excess air, which can create bubbling and uneven set while baking.
- Evenly spread the filling dough into the baking dish: Use a spatula to get a smooth, even layer that reaches all edges and sits level, because an even fill ensures uniform baking and clean slices. The surface should look glossy and slightly domed before topping. A typical mistake is piling the filling thicker in the center, which leads to an underbaked middle when the edges finish first.
- Carefully invert the reserved dough square over the filling, pressing down gently to secure: As you set the top, you may hear a faint soft tack as it contacts the filling, and pressing gently creates a seal that prevents filling from oozing out. Avoid aggressive pressing, which can push filling out the sides and make the edges messy. People sometimes attempt to stretch the top to cover gaps, which causes tears and uneven thickness.
- Trim away any excess dough: The trimmed edges should be neat and even, giving a tidy perimeter that bakes uniformly. Neat edges promote even browning along the sides when baking. An error to watch for is leaving folded edges that can bake denser than the rest of the crust.
- Freeze the bars for 15 minutes: Chilling firms the butter again, which helps the bars keep their shape in the oven; you will notice the dough feels cold and slightly firmer to the touch after this rest. This step reduces spreading so the filling sets correctly. Skipping this is a common shortcut that can lead to a saggy, distorted top layer.
- Bake for 40 to 45 minutes, until just set in the center: You'll see the edges become golden and the center will look set though slightly soft, and the aroma will deepen to caramelized notes. This precise doneness yields a tender center that still slices cleanly after cooling. Overbaking will dry the bars and make them crumbly, so watch for the visual cue of a faint wobble rather than raw dough.
- Let cool: The bars will continue to set as they cool, and the filling will firm up to a sliceable consistency; resist the urge to cut while hot or the filling may smear. Cooling also helps the flavors meld and the frosting adhere later. Cutting too soon is the most common mistake here because the bars will fall apart when warm.
- To make the frosting: Whisking the powdered sugar and maple syrup creates a glossy, flowing glaze; you should hear a faint whisking sound and see it become smooth without lumps. The texture should be thick enough to coat but thin enough to drizzle. If it seems grainy, sieve the sugar first; a common error is adding too much water at once, making the glaze runny.
- In a bowl, whisk together all of the ingredients and 1 to 2 tablespoons of water until smooth: The fragrance of maple syrup will come forward and the mixture should develop into a shine coated syrup that slowly falls from the whisk. This sheen signals proper consistency for spreading. If the glaze is too thick, thin carefully with small amounts of water so it does not become translucent and runny.
- If your frosting is too thick, thin with 1 to 2 tablespoons of additional water: Adding water gradually keeps the texture controlled, and you will notice the glaze loosen and become more spreadable while retaining opacity. Small additions prevent overshooting to a watery finish. Rushing this step often yields a glaze that pools and runs off the bars.
- Spread the frosting over the pop tart bars: A thin, even layer will set to a delicate crust that contrasts the soft filling, and the act of spreading should feel smooth with a light drag across the surface. Aim for a uniform coat so each bar looks consistent. Avoid piling frosting as it can ooze into seams and make cutting messy.
- Let set a few minutes, then top with salt or sugar: This final flourish gives a crunchy or saline counterpoint that enhances sweetness; you should see a slight sheen dull as the frosting skins over. The small textural contrast elevates each bite. Applying the sprinkle too early can cause sinking into the glaze, so wait until the surface begins to set.
- Let dry, then cut into bars: Once fully dry to the touch, the bars slice with a clean edge and the layers hold neatly; the knife should glide through with little resistance. Cutting after full set prevents smudged frosting and maintains tidy presentation. Cutting prematurely is the most common reason for sticky, uneven bars.
- Serve or store in an airtight container for up to 3 days at room temperature: Stored properly, the flavors continue to meld and the texture remains pleasant for a few days; place parchment between layers to avoid sticking. Room temperature storage preserves the tender crumb better than refrigeration, which can dry them out. Storing in a warm spot or in direct sunlight will soften the frosting excessively, so keep them cool but not cold.
Notes
- Adjust chilling time If your kitchen is warm, lengthen the chilling periods so the butter stays solid; this prevents the dough from becoming greasy and ensures flakiness.
- Control frosting thickness Thin the frosting with water one teaspoon at a time until you reach a spreadable consistency, this helps you avoid a runny glaze that will seep into seams.
- Even filling spread Press filling gently with an offset spatula to level the surface, this prevents a center-heavy bake and guarantees uniform slices across the pan.
- Swap sugar textures carefully If your dark brown sugar is hard, break it up before measuring so you do not under-measure and affect both sweetness and moisture balance.
- Use parchment overhang Line the pan so you can lift the whole slab out once cooled, this makes glazing and cutting much cleaner and preserves the bars' edges.