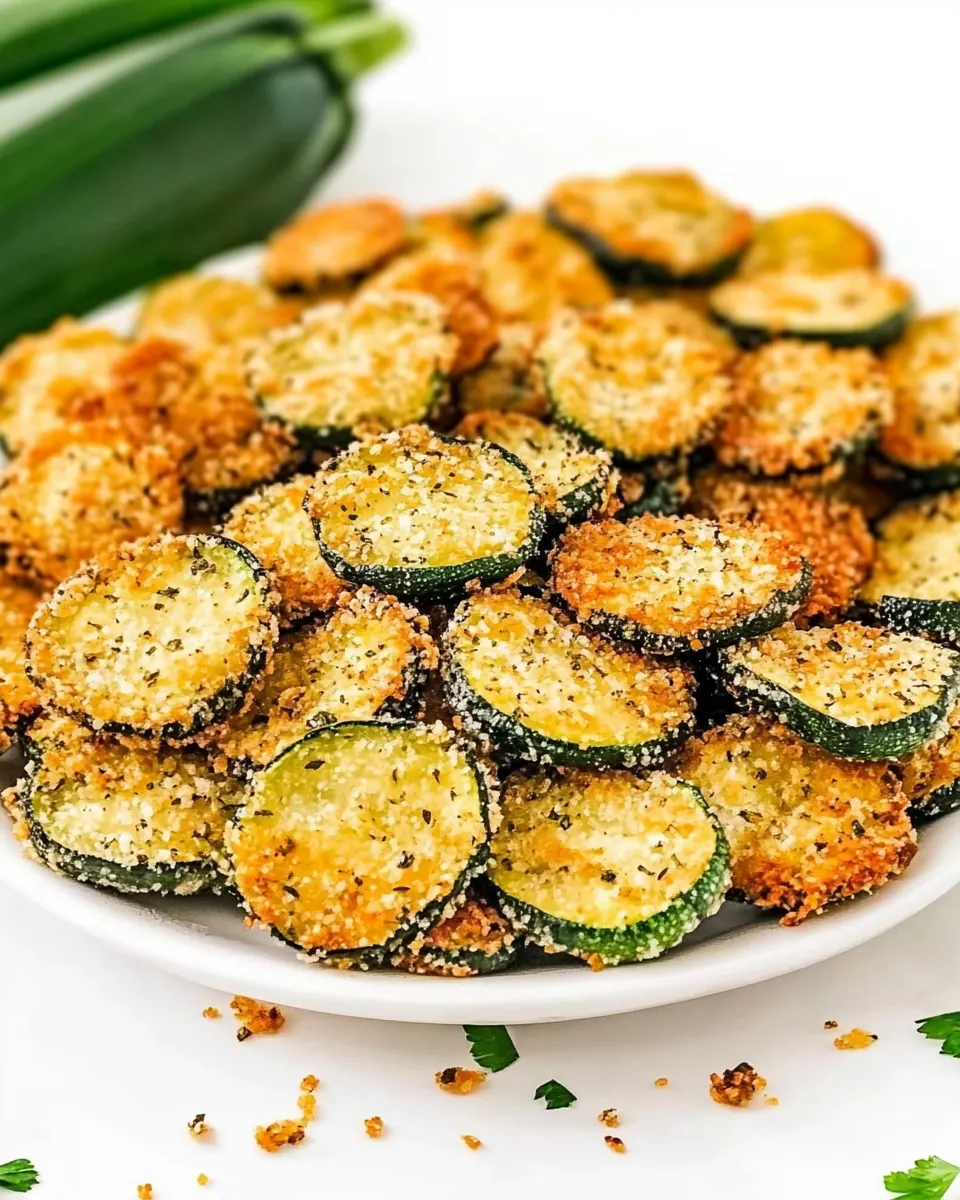
Fried Zucchini
Fried Zucchini has been my go to summer snack ever since I learned to turn backyard produce into something crunchy and irresistible. The first sentence of that story is true, and it begins with the simple pleasure of slicing into a firm zucchini and imagining the crisp, golden finish that awaits. I remember a humid afternoon when I tested this exact method while my kids chased sprinklers, and the kitchen filled with the warm, toasty smell of frying vegetable oil, which somehow made the whole house feel cozier.
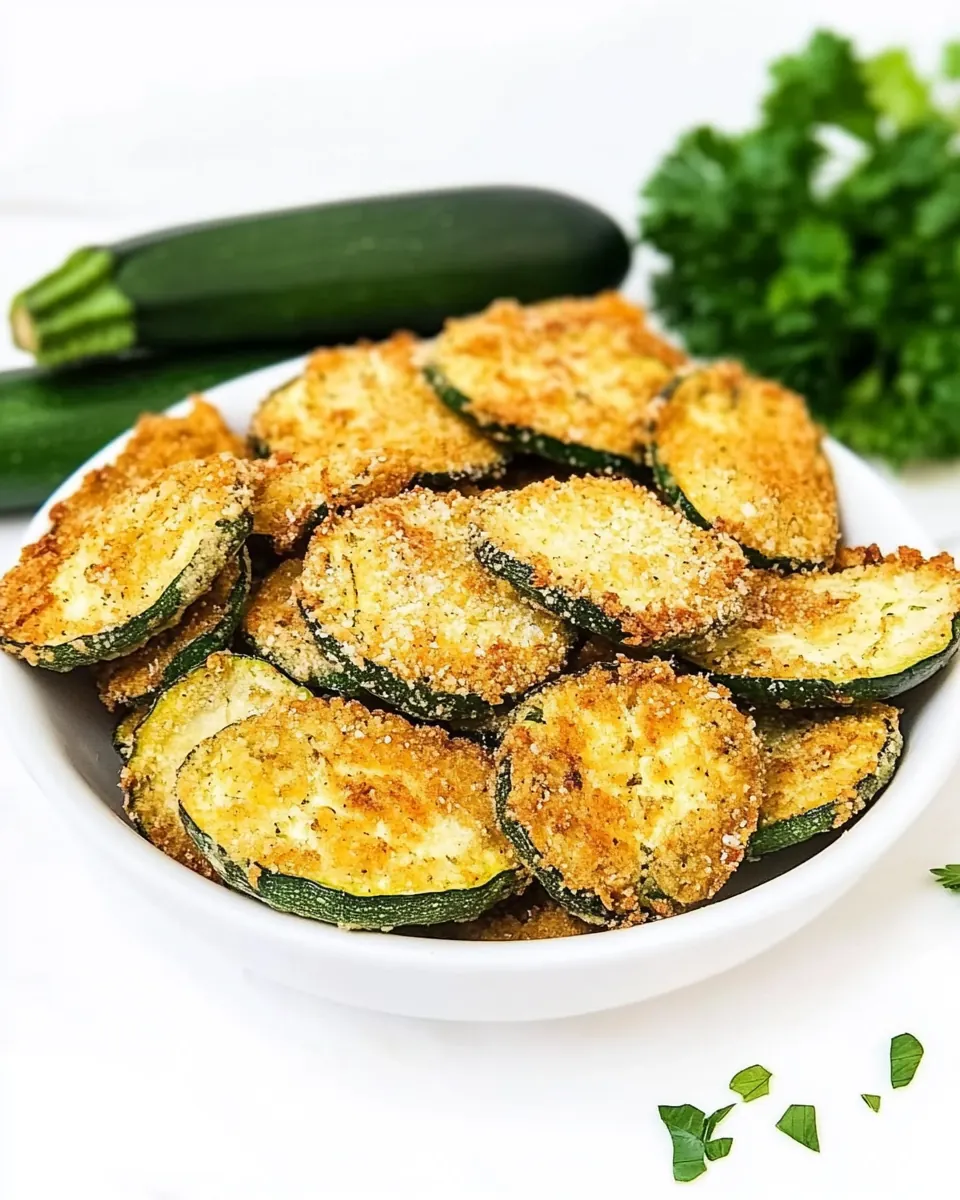
I found that the technique in this recipe lets the delicate, slightly sweet flavor of the zucchini shine through while creating a shell that is impossibly crunchy. Over the years I have tweaked quantities and coatings until the texture was just right, and I still get a little thrill when the first batch sizzles in the pan and turns that perfect golden color. Friends have shown up at my door thinking they were coming for dinner, and left with a paper towel lined baking dish emptied by conversation and appetite.
When you make Fried Zucchini you will appreciate the contrast between the warm tender interior and the coarse, savory crust. This recipe feels casual, but it rewards attention to temperature, timing, and the way you handle each slice. I like preparing the coating station ahead of time so frying becomes a rhythmic, rewarding task instead of a scramble. Between the gentle salt, the hint of parmesan, and the crunch of panko, every bite tells a story about simple ingredients treated well.
Recipe Snapshot
25 mins
15 mins
10 mins
Medium
250 kcal
American
Low FODMAP, Gluten-Free
Appetizers
10-inch skillet, Candy or oil thermometer, Gallon Ziploc bags, Slotted spoon, Paper towels
What’s Great About This Fried Zucchini
Crispy Texture That Stays Crisp
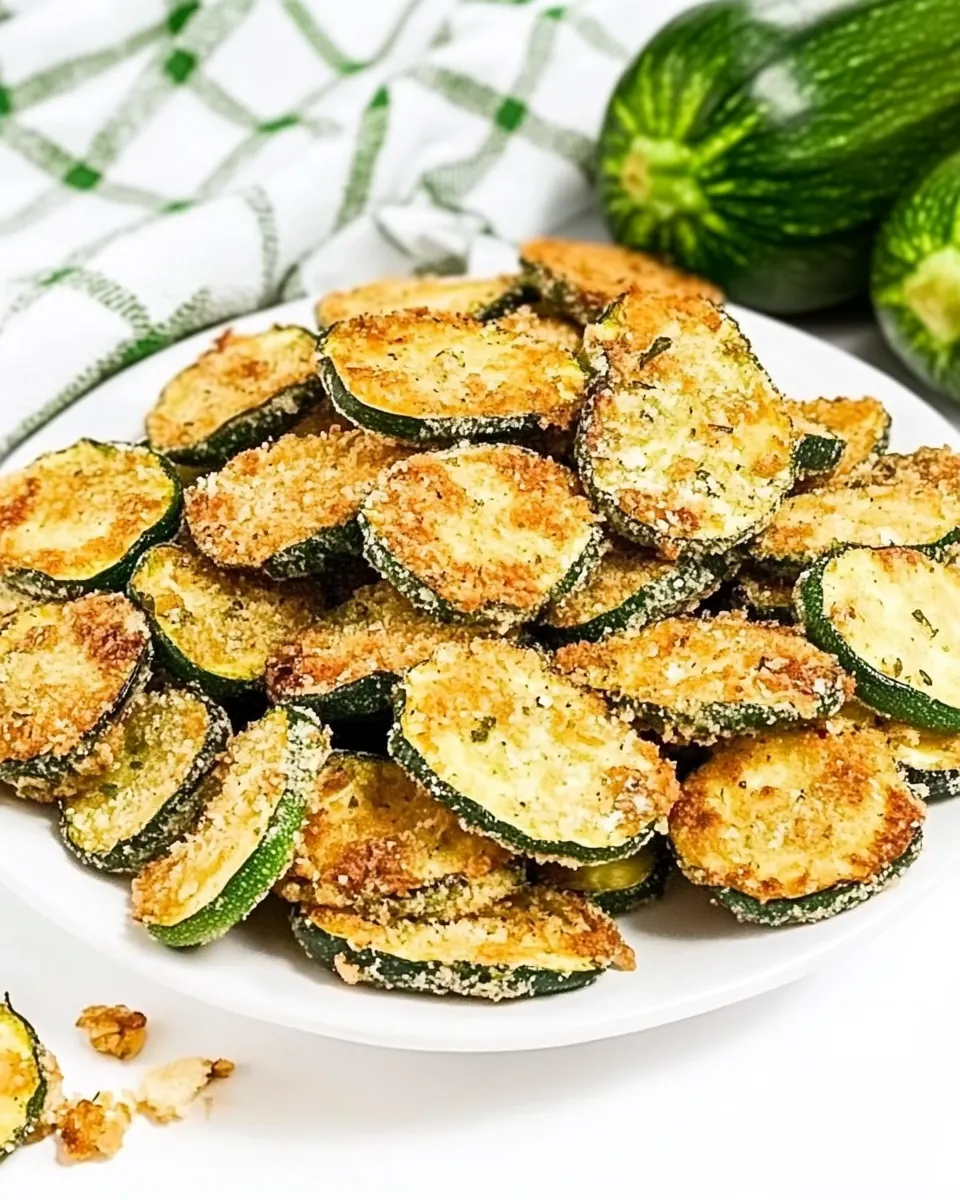
I love how Fried Zucchini develops a crunchy exterior that does not collapse into sogginess the moment it is plated. Using a mix of panko and plain bread crumbs, plus a light dusting of flour, creates multiple layers that trap air and produce a satisfying crunch. I have learned to avoid overcrowding the pan, because nothing kills that texture faster than steam buildup.
Simple Pantry Ingredients
The ingredient list reads like an everyday pantry raid. With all purpose flour, eggs, milk, and breadcrumbs, you can pull this together quickly. I appreciate recipes that don’t demand obscure items, and this one lets the zucchini‘s flavor come forward while the coating adds savory and toasty notes.
Flexible for Serving Occasions
I often serve Fried Zucchini as a crowd pleasing appetizer or as a casual side for dinner. It scales easily, so whether I am frying for two or ten, the technique stays the same. I like that you can plate it with simple dips or let it stand alone, and it still feels special.
Fast and Rewarding Prep
From wash to plate this recipe moves quickly. The few minutes spent slicing and setting up a coating station are repaid in minutes of frying and savoring. I find the rhythm of coating each slice oddly meditative, and the payoff is immediate when you bite into that first golden piece.
Flavor Boosters That Aren’t Fussy
A little grated parmesan cheese and dried Italian seasoning transform the crust without overcomplicating things. These small additions introduce umami and herbaceous notes that pair beautifully with the sweet, tender zucchini. I like how inexpensive touches can make an ordinary vegetable feel celebratory.
What Goes Into Fried Zucchini
The philosophy here is straightforward, I rely on contrasting textures and modest seasoning to let the zucchini be the star. The coating components create a layered crust that browns evenly while locking in moisture. The key players are the flour for initial adhesion, the egg and milk for binding, and the combination of panko, bread crumbs, and parmesan cheese for that craveable crunch and savory lift.
- 3 medium zucchini (washed and dried): Slice thinly and pat dry to remove excess moisture; provides the main vegetable base with tender texture when fried and slightly sweet flavor. Maintain even slices for uniform cooking and crisp exterior while keeping a soft interior that complements the breading.
- 1 cup whole milk: Warm slightly and whisk with eggs to create a thin soaking liquid that helps the coating adhere; adds mild richness without overpowering other flavors. Use whole milk for its balance of fat and water, which promotes a tender bite under a crispy crust.
- 2 large eggs: Beat until homogenous and combine with milk to bind the flour and crumbs to the zucchini; contributes structure and helps the coating cling during frying. Use large eggs for reliable volume and emulsification, ensuring an even, golden crust.
- 3 cups all-purpose flour (divided): Reserve part for dredging and part for thicker batter; acts as the primary dry component to absorb moisture and form a cohesive layer before frying. Use all-purpose flour for its neutral taste and consistent gluten content, which aids in crispness and browning.
- 2 cups plain panko bread crumbs: Provide a coarse, crunchy outer layer that yields pronounced crispiness and airy texture when fried; works well mixed with finer crumbs for contrast. Plain panko keeps the coating light and flaky while enhancing visual appeal and crunch.
- 1 cup plain bread crumbs: Offer a finer crumb texture to fill gaps between panko and flour, creating a more uniform adhesion and balanced crunch. Plain bread crumbs help the coating seal to the zucchini, promoting an even golden-brown finish.
- 1/3 cup grated parmesan cheese: Add savory umami and subtle nuttiness when mixed into the breading; enhances overall depth and complements the mild zucchini flavor. Use grated parmesan sparingly in the coating to boost flavor without making the crust overly salty.
- 2 teaspoons dried Italian seasoning: Season the coating with aromatic, herb-forward notes that evoke Mediterranean flavors and complement the vegetable. Dried Italian seasoning mixes basil, oregano, and other herbs to provide consistent herbal complexity in the breading.
- 2 teaspoons kosher salt: Season the flour and crumbs to bring out the zucchini's natural flavor and balance the richness from frying; dissolves slightly in wet mixture to distribute saltiness evenly. Kosher salt's flake size makes it easy to control seasoning without overwhelming the dish.
- 1 1/2 teaspoons fresh cracked black pepper: Add pungent heat and aromatic complexity to the seasoning mix, sharpening the overall flavor profile of the fried zucchini. Freshly cracked black pepper offers brighter, more complex spice than pre-ground pepper when incorporated into the coating.
- 2 cups vegetable oil: Provide the frying medium that transfers heat rapidly to create a crisp, golden exterior while cooking the zucchini through; maintain proper oil temperature for best results. Use vegetable oil for its neutral flavor and high smoke point suitable for shallow or deep frying.
How to Make Fried Zucchini
Frying zucchini is a paced, sensory-driven process. Set up your dredge, wet, and dry stations in advance so you can move efficiently. Keep paper towels ready and maintain oil temperature for even browning and crisp results.
- Slice the zucchini tops and bottoms off. Slice into 1/4-inch pieces. You can either slice on the bias or straight across.: When you slice the zucchini to a quarter inch thickness you should feel a slight resistance under the knife, and the exposed flesh will look moist but not wet. The edges will be smooth and the surfaces glossy, which tells you the vegetable is fresh. If you slice on the bias you will get longer ovals that crisp differently at the ends, while straight across slices yield uniform rounds. A common mistake is cutting uneven pieces, which leads to inconsistent frying times and some slices overcooked while others remain underdone.
- Using a large shallow bowl, add the milk and eggs. Whisk until completely incorporated and uniform in color (pale yellow).: As you whisk the milk and eggs together, watch the mixture turn from streaky to a smooth, pale yellow emulsion that shines slightly under light. The sound is muted as the whisk moves, and you want no visible streaks of white or yolk. This uniform texture ensures even coating adhesion. If you rush and leave clumps, the coating will stick unevenly and create blotchy patches in the crust.
- Place one cup of flour into a gallon Ziploc bag. Working in small batches, place the sliced zucchini into the bag. Shake to coat the slices with flour, then remove with a slotted spoon making sure to knock off any excess flour.: Coating with a dusting of flour is about tamping down surface moisture. When you shake the bag, listen for the muffled rattling of slices against the flour and watch the flour cling to the surfaces creating a thin matte layer. Knock off excess so the eggs can adhere rather than sliding off. Leaving too much flour causes a gummy interior after frying, so be gentle but thorough.
- Add the flour-coated zucchini into the egg mixture, and toss to coat completely.: As you drop the lightly floured slices into the egg mixture, they should glisten and become uniformly wet, taking on a glossy sheen. Toss gently so every face picks up the binder. The reason this step matters is that the eggs fill micro crevices in the flour layer, creating strong adhesion for the crumb mix. A frequent error is overhandling the slices, which can strip the flour and lead to a patchy crust.
- Add the remaining 2 cups of flour, breadcrumbs, grated parmesan, Italian seasoning, kosher salt, and cracked black pepper to a gallon-size Ziploc bag. Shake to combine the dry ingredients. Set it aside.: Combining the dry ingredients by shaking them ensures even distribution of the parmesan cheese , seasoning , and salt, which leads to consistent flavor in every bite. You will hear the ingredients shift and settle, and the mixture should look uniformly speckled. If you skip mixing thoroughly, some pieces may come out under seasoned or clump in the bag.
- Add the oil to a 10-inch skillet over high heat and heat to 325°F. A candy/oil thermometer will help with gauging when your oil is ready to fry.: When heating the vegetable oil , watch for a faint shimmer across the surface and tiny faint wisps of steam, signals that you are approaching frying temperature. The thermometer should read steady at 325°F before you begin. Maintaining this range is essential because too low and the crust absorbs oil, becoming greasy, too high and it will brown and burn before the interior cooks. If the oil smokes, reduce heat and allow it to cool slightly before continuing.
- While the oil is heating, remove the zucchini from the egg mixture using a slotted spoon and add to the Ziploc with the dry coating mixture. Shake to coat and make sure the pieces are separated, so all sides get coated. It is best to do this in batches. You can dust the bottom of a baking dish with the dry coating to help with keeping the coated zucchini dry.: When you transfer the wet slices to the dry bag, they should rattle softly as the crumbs adhere and the parmesan cheese melds with the panko . Shake gently until the pieces look evenly cloaked in crumbs and no wet spots remain. Keep pieces separated to avoid clumping; crowded pieces will stick together and prevent even browning. One slip is trying to coat too many slices at once, which leads to inconsistent coverage and soggy patches.
- Once the oil reaches temperature, carefully add a small batch to the oil. Lower the heat if the oil temperature goes above 345-350°F. Cook for 1 to 1 1/2 minutes, flip and continue cooking the other side for 1 to 1 1/2 minutes until golden. Remove the zucchini from the oil to a baking dish lined with a paper towel. Repeat until all the zucchini is cooked. Eat immediately.: As you add a small batch to the hot oil you will hear an energetic sizzle that is lively but not frantic. The slices should float and develop a deepening golden color within a minute. Flip to expose the other side and listen for a steadier sizzle that signals even cooking. Remove to a paper towel lined dish where steam is wicked away and the crust remains crisp. A common mistake is leaving fried pieces in a crowded pan or stacking them, which traps steam and ruins the crunch. Serve right away for best texture.
Recipe Notes about Fried Zucchini
These notes capture what I wish I had known the first few times I made Fried Zucchini. They cover handling, timing, and small adjustments that make a big difference in texture and flavor.
- Batch Size Matters Keep each frying batch small so the oil temperature recovers quickly and the slices crisp evenly rather than turning greasy.
- Prep Station Order Arrange stations left to right for a smooth flow: flour, egg mixture, dry coating. This minimizes handling and keeps the process efficient.
- Parmesan Distribution Finely grate the parmesan cheese so it integrates into the crumbs rather than clumping and burning during frying.
- Oil Temperature Control If the oil climbs above the suggested range, reduce heat a little and wait for it to stabilize before adding more slices.
- Keep it Crisp Transfer fried pieces to a single layer on paper towels and avoid stacking, which traps steam and softens the crust.
Serve This Fried Zucchini With
Fried Zucchini is a versatile dish that works as an appetizer, side, or casual snack. I like to pair it with bright dips or include it on a relaxed summer table. The suggestions below will help you plan occasions and complementary flavors.
- Casual Appetizer Plate Serve warm on a platter with simple dipping sauces for gatherings; the contrast of hot, crunchy slices and cool dip is always popular.
- Weeknight Side Plate alongside a protein and a green salad for an easy weeknight meal that feels indulgent without being fussy.
- Picnic or Potluck Bring them freshly fried or reheat briefly in a hot oven to restore crispness, they travel well when kept in a single layer.
- Seasonal Pairings In summer, enjoy with light, citrusy sauces or herb yogurts to complement the zucchini’s natural sweetness.
- Storage Tips Store leftovers in a single layer in the refrigerator for up to two days and re-crisp in a hot oven or air fryer; avoid microwaving which softens the crust.
FAQ
Conclusion
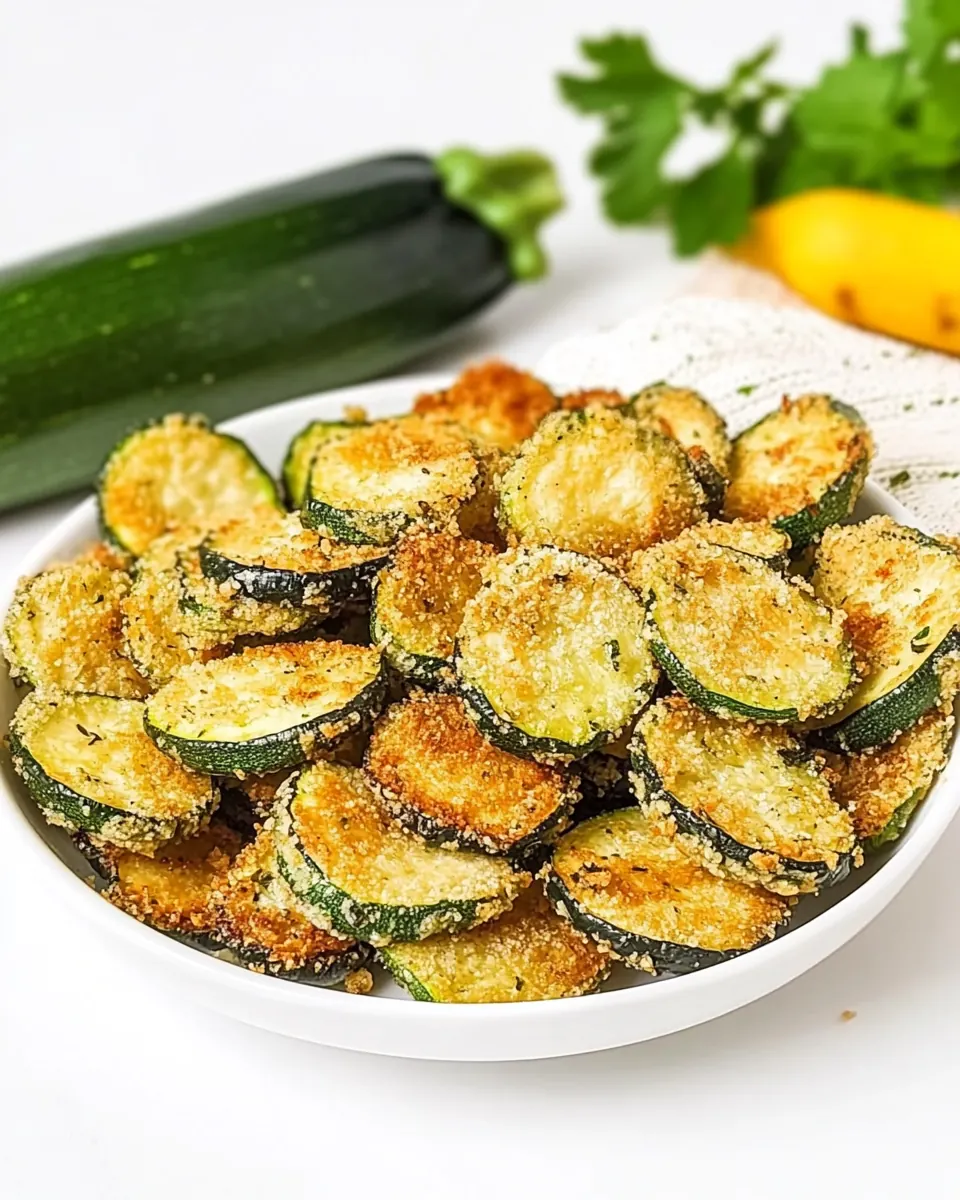
Fried Zucchini stands out because it transforms simple summer squash into crispy, savory bites that disappear fast at the table. Give it a try the next time you have summer zucchini on hand, and enjoy the satisfying crunch and balance of flavors. Once you taste that golden crust and tender interior, you may find yourself making this recipe for casual dinners, backyard gatherings, or whenever you crave something crunchy and comforting.
Fried Zucchini
Equipment
- 10-inch Skillet
- Candy or oil thermometer
- Gallon Ziploc bags
- Slotted Spoon
- Paper towels
Ingredients
- 3 medium zucchini (washed and dried) Slice thinly and pat dry to remove excess moisture; provides the main vegetable base with tender texture when fried and slightly sweet flavor. Maintain even slices for uniform cooking and crisp exterior while keeping a soft interior that complements the breading.
- 1 cup whole milk Warm slightly and whisk with eggs to create a thin soaking liquid that helps the coating adhere; adds mild richness without overpowering other flavors. Use whole milk for its balance of fat and water, which promotes a tender bite under a crispy crust.
- 2 large eggs Beat until homogenous and combine with milk to bind the flour and crumbs to the zucchini; contributes structure and helps the coating cling during frying. Use large eggs for reliable volume and emulsification, ensuring an even, golden crust.
- 3 cups all-purpose flour (divided) Reserve part for dredging and part for thicker batter; acts as the primary dry component to absorb moisture and form a cohesive layer before frying. Use all-purpose flour for its neutral taste and consistent gluten content, which aids in crispness and browning.
- 2 cups plain panko bread crumbs Provide a coarse, crunchy outer layer that yields pronounced crispiness and airy texture when fried; works well mixed with finer crumbs for contrast. Plain panko keeps the coating light and flaky while enhancing visual appeal and crunch.
- 1 cup plain bread crumbs Offer a finer crumb texture to fill gaps between panko and flour, creating a more uniform adhesion and balanced crunch. Plain bread crumbs help the coating seal to the zucchini, promoting an even golden-brown finish.
- 1/3 cup grated parmesan cheese Add savory umami and subtle nuttiness when mixed into the breading; enhances overall depth and complements the mild zucchini flavor. Use grated parmesan sparingly in the coating to boost flavor without making the crust overly salty.
- 2 teaspoons dried Italian seasoning Season the coating with aromatic, herb-forward notes that evoke Mediterranean flavors and complement the vegetable. Dried Italian seasoning mixes basil, oregano, and other herbs to provide consistent herbal complexity in the breading.
- 2 teaspoons kosher salt Season the flour and crumbs to bring out the zucchini's natural flavor and balance the richness from frying; dissolves slightly in wet mixture to distribute saltiness evenly. Kosher salt's flake size makes it easy to control seasoning without overwhelming the dish.
- 1 1/2 teaspoons fresh cracked black pepper Add pungent heat and aromatic complexity to the seasoning mix, sharpening the overall flavor profile of the fried zucchini. Freshly cracked black pepper offers brighter, more complex spice than pre-ground pepper when incorporated into the coating.
- 2 cups vegetable oil Provide the frying medium that transfers heat rapidly to create a crisp, golden exterior while cooking the zucchini through; maintain proper oil temperature for best results. Use vegetable oil for its neutral flavor and high smoke point suitable for shallow or deep frying.
Instructions
- Slice the zucchini tops and bottoms off. Slice into 1/4-inch pieces. You can either slice on the bias or straight across.: When you slice the zucchini to a quarter inch thickness you should feel a slight resistance under the knife, and the exposed flesh will look moist but not wet. The edges will be smooth and the surfaces glossy, which tells you the vegetable is fresh. If you slice on the bias you will get longer ovals that crisp differently at the ends, while straight across slices yield uniform rounds. A common mistake is cutting uneven pieces, which leads to inconsistent frying times and some slices overcooked while others remain underdone.
- Using a large shallow bowl, add the milk and eggs. Whisk until completely incorporated and uniform in color (pale yellow).: As you whisk the milk and eggs together, watch the mixture turn from streaky to a smooth, pale yellow emulsion that shines slightly under light. The sound is muted as the whisk moves, and you want no visible streaks of white or yolk. This uniform texture ensures even coating adhesion. If you rush and leave clumps, the coating will stick unevenly and create blotchy patches in the crust.
- Place one cup of flour into a gallon Ziploc bag. Working in small batches, place the sliced zucchini into the bag. Shake to coat the slices with flour, then remove with a slotted spoon making sure to knock off any excess flour.: Coating with a dusting of flour is about tamping down surface moisture. When you shake the bag, listen for the muffled rattling of slices against the flour and watch the flour cling to the surfaces creating a thin matte layer. Knock off excess so the eggs can adhere rather than sliding off. Leaving too much flour causes a gummy interior after frying, so be gentle but thorough.
- Add the flour-coated zucchini into the egg mixture, and toss to coat completely.: As you drop the lightly floured slices into the egg mixture, they should glisten and become uniformly wet, taking on a glossy sheen. Toss gently so every face picks up the binder. The reason this step matters is that the eggs fill micro crevices in the flour layer, creating strong adhesion for the crumb mix. A frequent error is overhandling the slices, which can strip the flour and lead to a patchy crust.
- Add the remaining 2 cups of flour, breadcrumbs, grated parmesan, Italian seasoning, kosher salt, and cracked black pepper to a gallon-size Ziploc bag. Shake to combine the dry ingredients. Set it aside.: Combining the dry ingredients by shaking them ensures even distribution of the parmesan cheese , seasoning , and salt, which leads to consistent flavor in every bite. You will hear the ingredients shift and settle, and the mixture should look uniformly speckled. If you skip mixing thoroughly, some pieces may come out under seasoned or clump in the bag.
- Add the oil to a 10-inch skillet over high heat and heat to 325°F. A candy/oil thermometer will help with gauging when your oil is ready to fry.: When heating the vegetable oil , watch for a faint shimmer across the surface and tiny faint wisps of steam, signals that you are approaching frying temperature. The thermometer should read steady at 325°F before you begin. Maintaining this range is essential because too low and the crust absorbs oil, becoming greasy, too high and it will brown and burn before the interior cooks. If the oil smokes, reduce heat and allow it to cool slightly before continuing.
- While the oil is heating, remove the zucchini from the egg mixture using a slotted spoon and add to the Ziploc with the dry coating mixture. Shake to coat and make sure the pieces are separated, so all sides get coated. It is best to do this in batches. You can dust the bottom of a baking dish with the dry coating to help with keeping the coated zucchini dry.: When you transfer the wet slices to the dry bag, they should rattle softly as the crumbs adhere and the parmesan cheese melds with the panko . Shake gently until the pieces look evenly cloaked in crumbs and no wet spots remain. Keep pieces separated to avoid clumping; crowded pieces will stick together and prevent even browning. One slip is trying to coat too many slices at once, which leads to inconsistent coverage and soggy patches.
- Once the oil reaches temperature, carefully add a small batch to the oil. Lower the heat if the oil temperature goes above 345-350°F. Cook for 1 to 1 1/2 minutes, flip and continue cooking the other side for 1 to 1 1/2 minutes until golden. Remove the zucchini from the oil to a baking dish lined with a paper towel. Repeat until all the zucchini is cooked. Eat immediately.: As you add a small batch to the hot oil you will hear an energetic sizzle that is lively but not frantic. The slices should float and develop a deepening golden color within a minute. Flip to expose the other side and listen for a steadier sizzle that signals even cooking. Remove to a paper towel lined dish where steam is wicked away and the crust remains crisp. A common mistake is leaving fried pieces in a crowded pan or stacking them, which traps steam and ruins the crunch. Serve right away for best texture.
Notes
- Batch Size Matters Keep each frying batch small so the oil temperature recovers quickly and the slices crisp evenly rather than turning greasy.
- Prep Station Order Arrange stations left to right for a smooth flow: flour, egg mixture, dry coating. This minimizes handling and keeps the process efficient.
- Parmesan Distribution Finely grate the parmesan cheese so it integrates into the crumbs rather than clumping and burning during frying.
- Oil Temperature Control If the oil climbs above the suggested range, reduce heat a little and wait for it to stabilize before adding more slices.
- Keep it Crisp Transfer fried pieces to a single layer on paper towels and avoid stacking, which traps steam and softens the crust.