
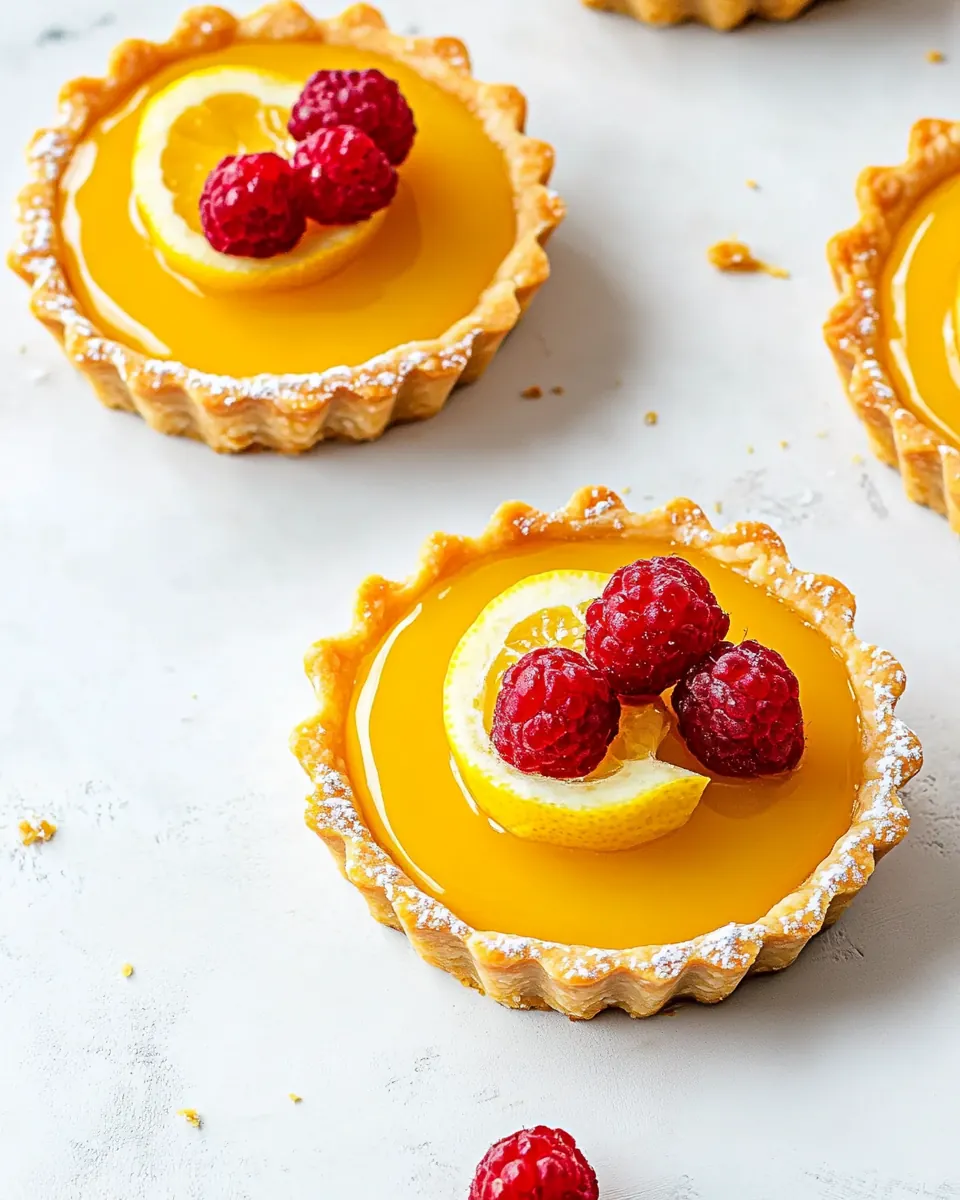
Lemon Curd Tarts
Lemon Curd Tarts have been one of my favorite ways to brighten a table since I first learned to coax curd from eggs and citrus in my tiny kitchen. The very first time I made them I was juggling a baby on my hip and a mixer in my hand, and the bright, tangy smell of lemon filled the apartment and felt like sunshine in a jar. I still remember the small triumph of a smooth, glossy curd that set perfectly in a buttery shell, and the way a single fresh raspberry perched on a swirl of whipped cream made everyone at the table smile.
Over the years I’ve tweaked the technique to make each element sing on its own while working together as a harmonious whole. I love how the silky butter in the curd softens the citrus edge, and how the crisp pie crust gives just enough bite. There is comfort in the repetition of whisking, and joy in the small, precise moments like lining tart pans and pressing the dough to the edges. For me these Lemon Curd Tarts are a small celebration, an easy dessert for company that still feels thoughtful and homey.
Recipe Snapshot
35 mins
15 mins
20 mins
Medium
220 kcal
American
Gluten-Free, Low FODMAP
Desserts
Mini Tart Pan Set, Vanilla Extract, Granulated Sugar
What’s Great About This Lemon Curd Tarts
Bright, unforgettable flavor
I adore how these Lemon Curd Tarts deliver an immediate pop of citrus that sings without being too sharp. The balance of lemon juice, lemon zest, and granulated sugar creates a bright backbone while butter brings a velvet finish. When I serve them, people comment first on the clean, lively taste.
Contrast of textures
There is something so satisfying about the contrast between a crisp pie crust and a creamy lemon curd. I like to think of texture as a conversation on the plate, where the flaky shell answers the silky filling, and the gentle give of whipped cream and the juicy burst of a raspberry finish the discussion.
Approachable technique
Though curd has a reputation for being tricky, this version is forgiving when you keep your heat low and whisk constantly. I often tell friends that once you master slow, steady whisking, you’ll feel confident making custards and curds any time. The recipe’s steps are straightforward, which makes it a lovely recipe to teach to someone who wants a dessert that looks elegant without intimidation.
Ideal for gatherings
These tarts are small and portable, perfect for parties and family dinners. I love bringing a tray to a spring brunch or a late afternoon coffee meet up. They travel well when the curd and shells are prepared in advance, and assembling them last minute keeps the shells crisp and the topping fresh.
Room for creativity
Finally, I appreciate the simple canvas these Lemon Curd Tarts provide. You can keep them classic with whipped cream and raspberries, or add a twist with a sprinkle of citrus zest or a tiny herb leaf. For me, the sweetness is just a base for personal touches that make each batch feel special.
Ingredients Required for Lemon Curd Tarts

The ingredients here are purposeful and familiar. I favor items that create a balance between bright acidity and rich mouthfeel. The curd relies on eggs and sugar to set and provide structure, while lemon juice and lemon zest bring the vibrant note. The pie crust and butter add texture and a comforting fat element, and the fresh raspberries and whipped cream add freshness and creaminess.
- 1/3 cup granulated sugar: Provide sweetness and balance the lemon’s acidity while helping to thicken the curd as it cooks; dissolves into the egg mixture to create a smooth, glossy texture and caramelizes subtly if overcooked, enhancing flavor.
- 1 large whole egg: Bind the curd and contribute body and richness; when tempered with the hot lemon mixture, coagulates to set the curd to a silky custard consistency and adds structure to the filling.
- 2 large egg yolks: Concentrate the custard’s richness and increase stability; yolks provide concentrated fat and lecithin that give the curd its dense, creamy texture and help it hold when cooled.
- 1/3 cup lemon juice: Deliver bright acidity and fresh citrus flavor that defines the recipe; acid helps the curd set properly by interacting with the eggs and balances the sweetness for a tangy finish.
- 1 tablespoon lemon zest: Contribute concentrated citrus oils and aromatic intensity to heighten lemon character; zest adds fragrant top notes that improve complexity without altering acidity.
- 4 tablespoons butter: Enrich the curd with a glossy, velvety mouthfeel and rounded flavor; butter is stirred in off-heat to emulsify and create a smooth, spreadable texture.
- 1/2 teaspoon pure vanilla extract: Enhance overall flavor with a subtle aromatic sweetness; a small amount of vanilla rounds sharp citrus notes and adds complexity without overpowering the lemon.
- 1 raw pie crust, store bought or homemade: Provide the structural shell to hold the curd and toppings; store–bought or homemade crust offers buttery, flaky contrast to the smooth filling and can be prebaked for a crisp base.
- 1 cup fresh raspberries: Add a fresh, tart contrast and bright color as a topping; raspberries bring natural acidity and texture that complements the creamy lemon curd and balances sweetness.
- 1 cup fresh whipped cream: Introduce light, airy richness and a creamy finish as a garnish; whipped cream softens the tart’s intensity and provides a smooth mouthfeel when paired with the curd and fruit.
Directions for Lemon Curd Tarts
These directions guide you from a simple stovetop curd to beautiful tartlets ready for company. I’ll walk you through each phase with sensory cues and small troubleshooting tips so you know exactly when you’re on the right track. Keep your tools close and take your time with the curd, it rewards patience.
- Add the granulated sugar, egg, and egg yolks to a small saucepan and whisk until well combined and pale yellow, about 1 minute.: From the first whisk you should see the mixture become smoother and slightly lighter in tone, with tiny bubbles forming at the surface. The sound is a soft, continuous whisking rhythm, and you should notice the sugar dissolving into the eggs, creating a silky base. This blending matters because undissolved sugar can lead to grainy curd, and a uniform mixture warms more evenly. Troubleshooting tip, if you see larger air pockets or a foamy mess, slow your whisk and scrape the sides to reintegrate. Avoid heating before everything is fully combined, as warm egg mixture can start to cook unevenly.
- Add the lemon juice and lemon zest to the pan. Whisk to combine.: As you add the lemon juice , watch how the mixture shifts, taking on a paler, slightly opaque look. The zest will float briefly, releasing vibrant citrus oils that perfume the kitchen, and you'll smell fresh citrus immediately. This acidity activates the thickening process with the eggs, so even distribution is key. Why this step matters, it ensures every spoonful carries bright citrus and the curd develops consistent flavor. Common mistake, if the juice is cold it can shock the mixture, so allow juice to come to room temperature if possible.
- Set the pan over low heat and cook, whisking constantly for 4-5 minutes or until the curd has thickened enough to coat the back of a spoon. Make sure to keep whisking the whole time so the curd doesn’t scorch or curdle.: On low heat, you will hear the softest, almost inaudible hiss as the pan warms. The mixture slowly thickens, clinging to the whisk and spoon, creating a ribbon when lifted. The smell deepens from citrus to a cooked citrus perfume. Constant whisking prevents hot spots and scrambling, which is the main reason this technique is crucial. Troubleshooting, if you notice small cooked bits of egg, immediately remove from heat and strain, that rescues texture and keeps it smooth.
- Once the curd has thickened, remove it from the heat and whisk in the butter and vanilla.: Off the heat, add the butter in small pieces, whisking as each one melts into a glossy sheen; the curd will gain a silky, almost satin look. The vanilla rounds the edges of the citrus and lifts aroma. This step matters because adding fat off-heat keeps the emulsion stable and prevents separation. A common pitfall is adding all the butter at once while hot, which can cause the fat to separate, so add it slowly and whisk steadily.
- Once the butter has combined, pour the curd through a fine mesh sieve to remove the lemon zest and any bits of egg that may have scrambled.: As you strain, watch the curd fall into the bowl below, leaving behind any unwanted bits; the texture becomes impeccably smooth and glossy. The sieve also catches the coarser bits of zest, preserving the flavor without textural surprises. This matters for a refined mouthfeel, especially in small tarts. Troubleshooting, if the curd seems very thick and slow to pass, use a spatula to gently coax it through, but do not force it through a finer mesh which could create friction heat.
- Place a piece of plastic wrap so that it is touching the surface of the lemon curd and then refrigerate the curd until it is completely cool, about 2 hours.: Resting with plastic directly on the surface prevents a skin from forming and keeps the curd uniformly cool. The aroma will mellow in the fridge and the curd will firm to a spreadable consistency. This chilling is important because warm curd can make the crust soggy and will not hold shape when piped. A tip, rapid cooling will cause condensation; don’t stack lids tightly on warm curd, allow gentle cooling before sealing if you can.
- Preheat your oven to 400 degrees F and spray 4 small tartlet pans with nonstick baking spray.: As the oven warms, the air inside becomes dry and hot, perfect for crisping pastry. You’ll sometimes see a faint paper smell from the pans as they heat up. Spraying the tartlet pans ensures the shells release cleanly after baking. Why this matters, a properly preheated oven creates even lift and browning in a short time frame. Trouble to avoid, do not skip the spray or dusting, a sticky crust will tear when unmolding.
- Roll out your pie crust to 1/8 inch thick and cut out four circles that are 1/4 inch larger than the base of your tart pans.: Roll with even pressure to avoid thin spots and rotate the dough to check thickness. You should see a near translucent edge when held to light, but the center remains slightly opaque. Cutting slightly larger circles ensures the dough reaches the sides and forms a neat rim. This precision matters for even baking and a tidy appearance. Common error, if the dough is too cold it will crack, so let it rest a minute if that happens before continuing.
- Press each pie crust into a tart pan and then poke the bottom a few times with a fork.: Press gently and evenly so the dough conforms to the pan without stretching, and use fork pricks to vent the base and avoid bubbling. You’ll feel the dough give as it settles into fluted edges, and the pricking sound is faint but assuring. This step prevents large air pockets while baking and keeps the base flat for filling. Troubleshooting, if the edge shrinks during blind baking, chill the shells briefly before returning to the oven.
- Place a piece of parchment paper over each crust and fill the center with pie weights or dried beans or rice.: The parchment will cradle your weights and distribute pressure evenly so the crust bakes flat. You can hear a soft settle as the weights press into the dough; it’s comforting tactile feedback. Using weights prevents puffing and ensures a crisp, even base. A mistake to watch for is using weights that are too heavy or unevenly distributed, which can create uneven baking, so spread them gently and evenly.
- Bake for 10 minutes, then remove the pie weights and bake for an additional 5 minutes.: During the first stage the crust sets and begins to pale, and after removing weights it browns to a warm golden tone. You will notice a toasty, buttery aroma as the second stage completes. This two-step approach guarantees a fully baked base without sogginess. If the crust browns too quickly, tent with foil to prevent burning while the interior finishes baking.
- When the crusts are golden brown, remove them from the oven and allow them to cool completely before filling.: Cooling is essential, the crusts firm up and shrink slightly away from the pan edge as residual heat dissipates, making unmolding easier. The top will feel cool to the touch and the aroma will settle into a gentle, baked butter note. Filling warm shells can cause the curd to soften and leak, so patience here keeps everything tidy. A common misstep is rushing this phase, which results in soggy or misshapen tarts.
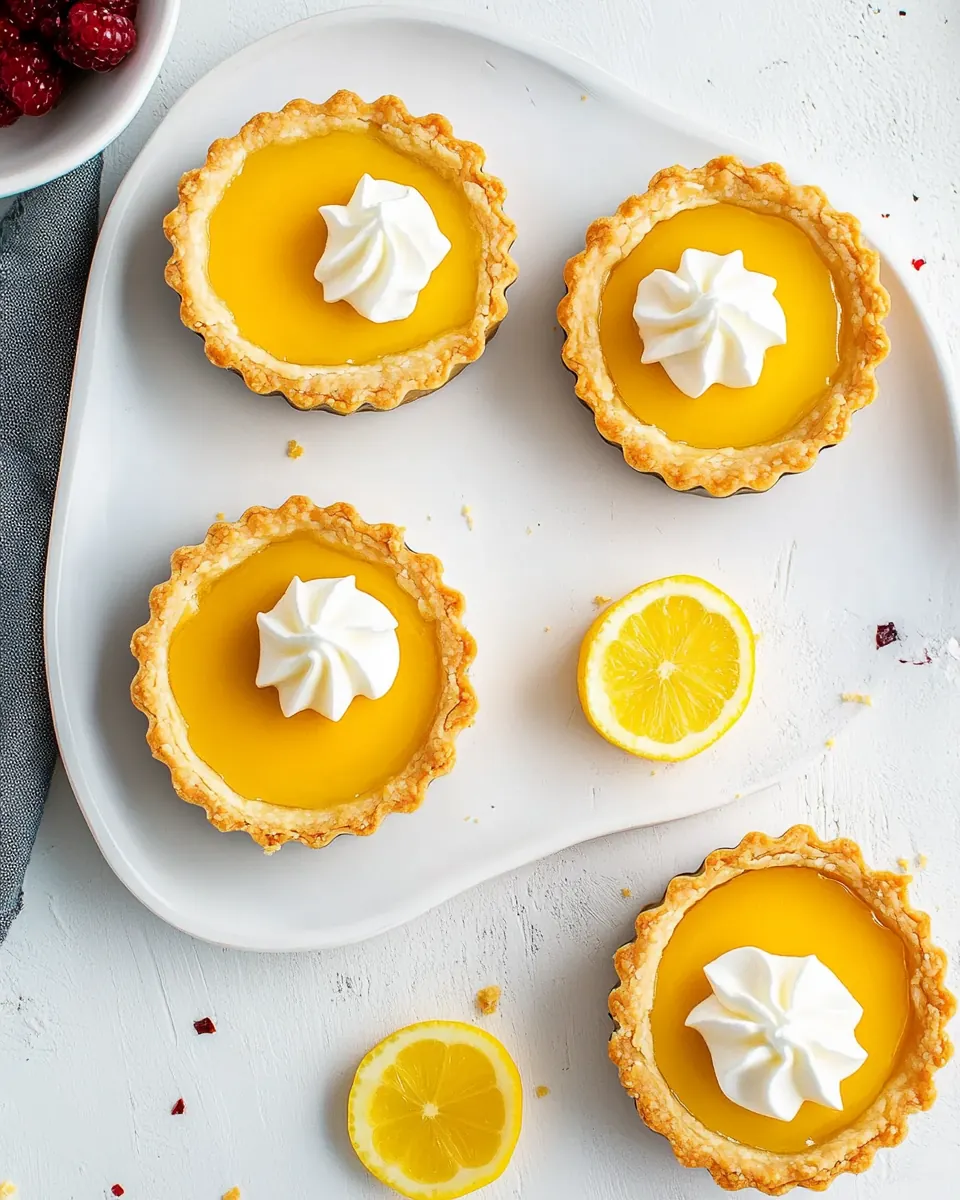
- To assemble, remove a cooled crust from the tart pan and fill the center with lemon curd. Spread (or pipe) whipped cream on top and garnish with fresh raspberries.: When you spoon the cold curd into the shell it should mound slightly and shine, reflecting light. If piping, the curd holds shape but still yields to a gentle press from a spoon. The whipped cream adds a soft cloud that contrasts the curd, and the raspberries add a burst of color and texture. This assembly matters for presentation and for maintaining the crispness of the shell. Avoid stacking tarts while assembled, as the cream can smear and berries can bruise.
- Serve immediately. Unfilled pie crusts can be kept in an airtight container at room temperature for up to three days. The lemon curd can be kept in an airtight container in the fridge for up to five days.: When served right away the tarts show their best contrast of textures and the cream is at its lightest. Stored components let you assemble quickly for guests and keep textures optimal. If you prepare in advance, refrigerate curd and assemble shortly before serving to keep the shells crisp. A storage note, if the curd thickens more than desired in the fridge, bring it to room temperature and whisk gently before using.
Making Adjustments
These tips help you adjust for texture, sweetness, and presentation while keeping the integrity of the recipe. I include workable tweaks I use in my kitchen when I need different yields or a slightly different finish.
- Adjust sweetness: If your lemon juice is especially tart, add up to an extra tablespoon of granulated sugar in small increments, tasting as you go, to balance without losing brightness.
- Texture control: For a firmer curd set, allow it to chill fully for the full two hours, and if needed, refrigerate an extra hour; gentle chilling yields a creamier mouthfeel, while extended chilling firms the structure.
- Crust crispness: If you want extra crisp shells, bake them a couple minutes longer after removing weights, watching for a deep golden color, then cool fully before filling to maintain crunch.
- Make ahead strategy: Prepare the curd up to five days in advance and store in an airtight container; bake crusts a day ahead and store in a sealed container to speed final assembly.
- Presentation tweak: Pipe whipped cream using a star tip for a decorative top, then place three raspberries in a triangle for a classic, polished look.
How to Enjoy Lemon Curd Tarts
These tarts are delightful at many occasions, and how you serve them affects the whole experience. I like to consider temperature, accompaniments, and atmosphere when bringing them to the table.
- Spring brunch centerpiece: Serve a platter of Lemon Curd Tarts with a pot of tea and small finger sandwiches for a light, elegant spread that feels seasonal and fresh.
- After dinner treat: Present them at the end of a meal alongside coffee or herbal tea; the clean citrus finish is a lovely palate cleanser after heavier courses.
- Storage guidance: Keep unfilled tart shells at room temperature in an airtight container up to three days and store the lemon curd in the fridge up to five days; assemble shortly before serving to keep textures bright.
- Serving temperature: I prefer the curd chilled and the cream slightly cool; this contrast keeps the shell crisp and the flavors focused, so remove from fridge just a few minutes before serving.
- Seasonal pairing: In spring, the bright citrus works well with fresh berries and light salads, making these tarts a natural choice for sunny gatherings and celebrations.
- Portion suggestion: These are mini tartlets, perfect as a single portion dessert at a dinner party, letting guests sample without feeling weighed down.
FAQ
Conclusion
What makes these Lemon Curd Tarts special is the balance of bright, silky citrus curd and a crisp buttery shell, finished with airy whipped cream and fresh raspberries. This recipe rewards patience and gentle technique, giving you an elegant dessert that still feels approachable and homey. Give them a try for your next gathering, and enjoy the little ritual of whisking, straining, and assembling a dessert that delights both the eyes and the palate.

Lemon Curd Tarts
Equipment
- Mini Tart Pan Set
- Vanilla Extract
- Granulated Sugar
Ingredients
- 1/3 cup granulated sugar Provide sweetness and balance the lemon’s acidity while helping to thicken the curd as it cooks; dissolves into the egg mixture to create a smooth, glossy texture and caramelizes subtly if overcooked, enhancing flavor.
- 1 large whole egg Bind the curd and contribute body and richness; when tempered with the hot lemon mixture, coagulates to set the curd to a silky custard consistency and adds structure to the filling.
- 2 large egg yolks Concentrate the custard’s richness and increase stability; yolks provide concentrated fat and lecithin that give the curd its dense, creamy texture and help it hold when cooled.
- 1/3 cup lemon juice Deliver bright acidity and fresh citrus flavor that defines the recipe; acid helps the curd set properly by interacting with the eggs and balances the sweetness for a tangy finish.
- 1 tablespoon lemon zest Contribute concentrated citrus oils and aromatic intensity to heighten lemon character; zest adds fragrant top notes that improve complexity without altering acidity.
- 4 tablespoons butter Enrich the curd with a glossy, velvety mouthfeel and rounded flavor; butter is stirred in off-heat to emulsify and create a smooth, spreadable texture.
- 1/2 teaspoon pure vanilla extract Enhance overall flavor with a subtle aromatic sweetness; a small amount of vanilla rounds sharp citrus notes and adds complexity without overpowering the lemon.
- 1 raw pie crust, store bought or homemade Provide the structural shell to hold the curd and toppings; store-bought or homemade crust offers buttery, flaky contrast to the smooth filling and can be prebaked for a crisp base.
- 1 cup fresh raspberries Add a fresh, tart contrast and bright color as a topping; raspberries bring natural acidity and texture that complements the creamy lemon curd and balances sweetness.
- 1 cup fresh whipped cream Introduce light, airy richness and a creamy finish as a garnish; whipped cream softens the tart’s intensity and provides a smooth mouthfeel when paired with the curd and fruit.
Instructions
- Add the granulated sugar, egg, and egg yolks to a small saucepan and whisk until well combined and pale yellow, about 1 minute.: From the first whisk you should see the mixture become smoother and slightly lighter in tone, with tiny bubbles forming at the surface. The sound is a soft, continuous whisking rhythm, and you should notice the sugar dissolving into the eggs, creating a silky base. This blending matters because undissolved sugar can lead to grainy curd, and a uniform mixture warms more evenly. Troubleshooting tip, if you see larger air pockets or a foamy mess, slow your whisk and scrape the sides to reintegrate. Avoid heating before everything is fully combined, as warm egg mixture can start to cook unevenly.
- Add the lemon juice and lemon zest to the pan. Whisk to combine.: As you add the lemon juice , watch how the mixture shifts, taking on a paler, slightly opaque look. The zest will float briefly, releasing vibrant citrus oils that perfume the kitchen, and you'll smell fresh citrus immediately. This acidity activates the thickening process with the eggs, so even distribution is key. Why this step matters, it ensures every spoonful carries bright citrus and the curd develops consistent flavor. Common mistake, if the juice is cold it can shock the mixture, so allow juice to come to room temperature if possible.
- Set the pan over low heat and cook, whisking constantly for 4-5 minutes or until the curd has thickened enough to coat the back of a spoon. Make sure to keep whisking the whole time so the curd doesn’t scorch or curdle.: On low heat, you will hear the softest, almost inaudible hiss as the pan warms. The mixture slowly thickens, clinging to the whisk and spoon, creating a ribbon when lifted. The smell deepens from citrus to a cooked citrus perfume. Constant whisking prevents hot spots and scrambling, which is the main reason this technique is crucial. Troubleshooting, if you notice small cooked bits of egg, immediately remove from heat and strain, that rescues texture and keeps it smooth.
- Once the curd has thickened, remove it from the heat and whisk in the butter and vanilla.: Off the heat, add the butter in small pieces, whisking as each one melts into a glossy sheen; the curd will gain a silky, almost satin look. The vanilla rounds the edges of the citrus and lifts aroma. This step matters because adding fat off-heat keeps the emulsion stable and prevents separation. A common pitfall is adding all the butter at once while hot, which can cause the fat to separate, so add it slowly and whisk steadily.
- Once the butter has combined, pour the curd through a fine mesh sieve to remove the lemon zest and any bits of egg that may have scrambled.: As you strain, watch the curd fall into the bowl below, leaving behind any unwanted bits; the texture becomes impeccably smooth and glossy. The sieve also catches the coarser bits of zest, preserving the flavor without textural surprises. This matters for a refined mouthfeel, especially in small tarts. Troubleshooting, if the curd seems very thick and slow to pass, use a spatula to gently coax it through, but do not force it through a finer mesh which could create friction heat.
- Place a piece of plastic wrap so that it is touching the surface of the lemon curd and then refrigerate the curd until it is completely cool, about 2 hours.: Resting with plastic directly on the surface prevents a skin from forming and keeps the curd uniformly cool. The aroma will mellow in the fridge and the curd will firm to a spreadable consistency. This chilling is important because warm curd can make the crust soggy and will not hold shape when piped. A tip, rapid cooling will cause condensation; don’t stack lids tightly on warm curd, allow gentle cooling before sealing if you can.
- Preheat your oven to 400 degrees F and spray 4 small tartlet pans with nonstick baking spray.: As the oven warms, the air inside becomes dry and hot, perfect for crisping pastry. You’ll sometimes see a faint paper smell from the pans as they heat up. Spraying the tartlet pans ensures the shells release cleanly after baking. Why this matters, a properly preheated oven creates even lift and browning in a short time frame. Trouble to avoid, do not skip the spray or dusting, a sticky crust will tear when unmolding.
- Roll out your pie crust to 1/8 inch thick and cut out four circles that are 1/4 inch larger than the base of your tart pans.: Roll with even pressure to avoid thin spots and rotate the dough to check thickness. You should see a near translucent edge when held to light, but the center remains slightly opaque. Cutting slightly larger circles ensures the dough reaches the sides and forms a neat rim. This precision matters for even baking and a tidy appearance. Common error, if the dough is too cold it will crack, so let it rest a minute if that happens before continuing.
- Press each pie crust into a tart pan and then poke the bottom a few times with a fork.: Press gently and evenly so the dough conforms to the pan without stretching, and use fork pricks to vent the base and avoid bubbling. You’ll feel the dough give as it settles into fluted edges, and the pricking sound is faint but assuring. This step prevents large air pockets while baking and keeps the base flat for filling. Troubleshooting, if the edge shrinks during blind baking, chill the shells briefly before returning to the oven.
- Place a piece of parchment paper over each crust and fill the center with pie weights or dried beans or rice.: The parchment will cradle your weights and distribute pressure evenly so the crust bakes flat. You can hear a soft settle as the weights press into the dough; it’s comforting tactile feedback. Using weights prevents puffing and ensures a crisp, even base. A mistake to watch for is using weights that are too heavy or unevenly distributed, which can create uneven baking, so spread them gently and evenly.
- Bake for 10 minutes, then remove the pie weights and bake for an additional 5 minutes.: During the first stage the crust sets and begins to pale, and after removing weights it browns to a warm golden tone. You will notice a toasty, buttery aroma as the second stage completes. This two-step approach guarantees a fully baked base without sogginess. If the crust browns too quickly, tent with foil to prevent burning while the interior finishes baking.
- When the crusts are golden brown, remove them from the oven and allow them to cool completely before filling.: Cooling is essential, the crusts firm up and shrink slightly away from the pan edge as residual heat dissipates, making unmolding easier. The top will feel cool to the touch and the aroma will settle into a gentle, baked butter note. Filling warm shells can cause the curd to soften and leak, so patience here keeps everything tidy. A common misstep is rushing this phase, which results in soggy or misshapen tarts.
- To assemble, remove a cooled crust from the tart pan and fill the center with lemon curd. Spread (or pipe) whipped cream on top and garnish with fresh raspberries.: When you spoon the cold curd into the shell it should mound slightly and shine, reflecting light. If piping, the curd holds shape but still yields to a gentle press from a spoon. The whipped cream adds a soft cloud that contrasts the curd, and the raspberries add a burst of color and texture. This assembly matters for presentation and for maintaining the crispness of the shell. Avoid stacking tarts while assembled, as the cream can smear and berries can bruise.
- Serve immediately. Unfilled pie crusts can be kept in an airtight container at room temperature for up to three days. The lemon curd can be kept in an airtight container in the fridge for up to five days.: When served right away the tarts show their best contrast of textures and the cream is at its lightest. Stored components let you assemble quickly for guests and keep textures optimal. If you prepare in advance, refrigerate curd and assemble shortly before serving to keep the shells crisp. A storage note, if the curd thickens more than desired in the fridge, bring it to room temperature and whisk gently before using.
Notes
- Adjust sweetness: If your lemon juice is especially tart, add up to an extra tablespoon of granulated sugar in small increments, tasting as you go, to balance without losing brightness.
- Texture control: For a firmer curd set, allow it to chill fully for the full two hours, and if needed, refrigerate an extra hour; gentle chilling yields a creamier mouthfeel, while extended chilling firms the structure.
- Crust crispness: If you want extra crisp shells, bake them a couple minutes longer after removing weights, watching for a deep golden color, then cool fully before filling to maintain crunch.
- Make ahead strategy: Prepare the curd up to five days in advance and store in an airtight container; bake crusts a day ahead and store in a sealed container to speed final assembly.
- Presentation tweak: Pipe whipped cream using a star tip for a decorative top, then place three raspberries in a triangle for a classic, polished look.