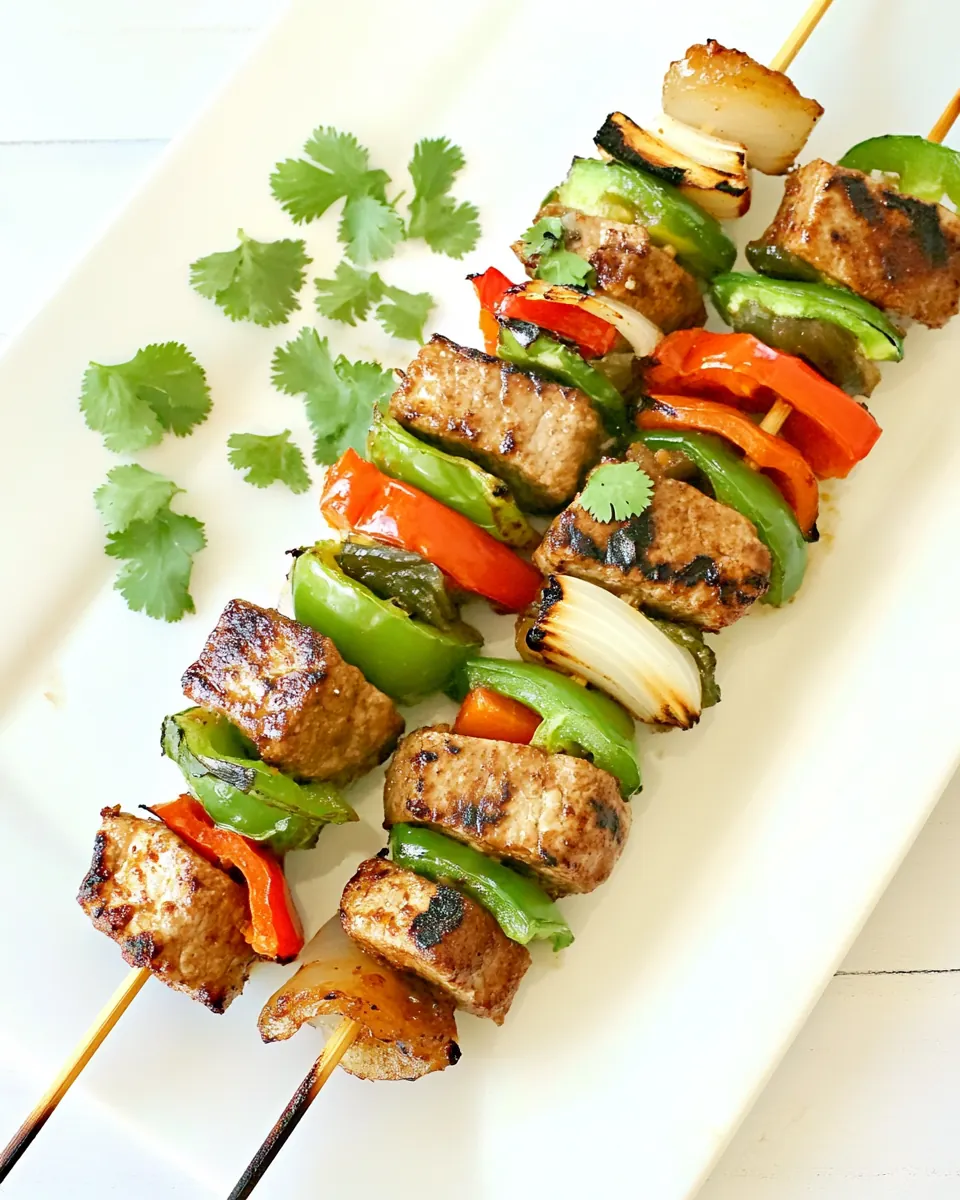
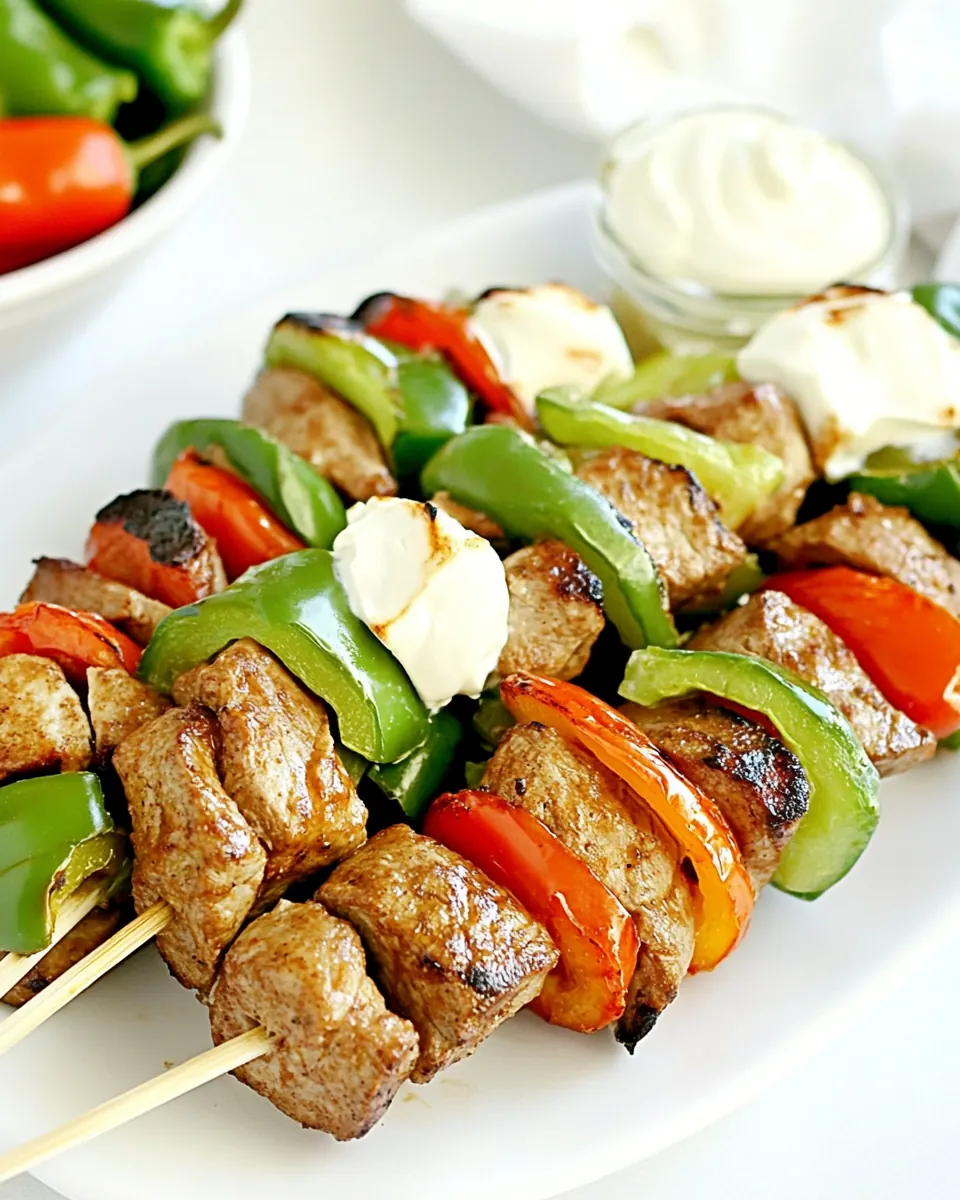
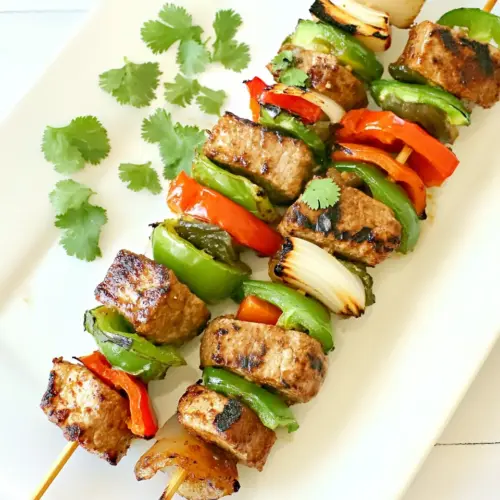
Fajitas on a Stick
Fajitas on a Stick started showing up at my summer barbecues the year I decided to stop fussing over plates and embrace handheld fun. I remember juggling a tray of skewers, laughing with friends as everyone grabbed a warm tortilla and assembled their own, the mess turning into part of the enjoyment. That first batch taught me that food served this way invites conversation, encourages customization, and keeps people moving between the grill and the shade.
Over several seasons I refined the balance of char, tenderness, and brightness that makes these skewers memorable. I learned to respect the little details that transform simple ingredients into something addictive, like how a quick soak keeps wooden skewers from burning, or how placing an onion next to a cube of chicken helps both pick up flavor as they cook. Now I make them whenever friends drop by, because they are practical, festive, and reliably tasty.
Recipe Snapshot
20 mins
10 mins
10 mins
Easy
350 kcal
Mexican
Gluten-Free, Keto
Dinner
Grill, Wooden skewers, Medium bowls, Tongs
What Makes This Fajitas on a Stick Special
They are playful and social
I love that Fajitas on a Stick turn a meal into an activity. Guests can build their own tacos, chat while choosing toppings, and enjoy the casual rhythm of a backyard gathering. This approach lowers the pressure on the host, and it makes the meal feel more like a party.
Perfect summer grilling
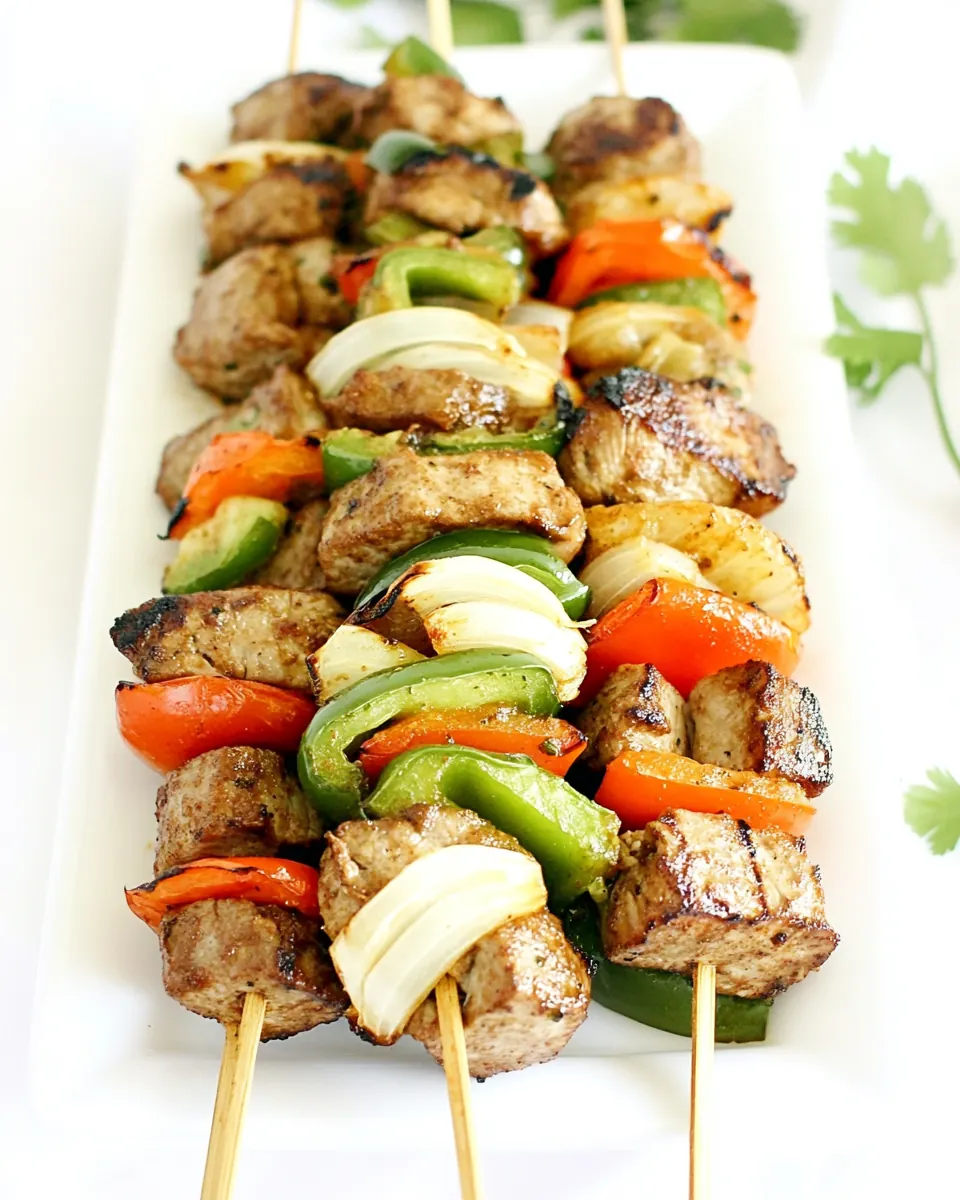
For outdoor cooks, these skewers shine because they take full advantage of quick, high heat. The mix of red bell pepper, green bell pepper, and onion chars beautifully while the chicken stays juicy. I find the contrast between caramelized edges and bright lime juice gives a complete flavor arc in each bite.
Customizable for everyone
One thing I always point out is how friendly this recipe is to preferences. The tortillas and toppings let each person control spice and richness. I often set out bowls of shredded cheese, guacamole, and sour cream so everyone can build their perfect bite.
Effortless prep
These skewers come together fast, which I really appreciate on busy days. A short marinate with Old El Paso fajita seasoning mix and a splash of lime juice infuse the chicken with flavor without an all-day commitment. The simplicity makes this a go to for easy weeknight dinners or casual weekend cookouts.
Family friendly and shareable
I like serving these at gatherings because they suit kids and adults. The pieces are bite sized, which helps with portion control and makes them easy to eat without a fork. That flexibility is why I keep this recipe in my summer rotation.
Recipe Ingredients for Fajitas on a Stick
I choose ingredients that are straightforward and complementary, so every component has a role. The chicken is the protein backbone, the bell peppers and onion add sweetness and crunch, and the fajita seasoning and lime juice bring the bright, savory notes that make each bite sing. Together they create a balance of charred, juicy, and tangy that works perfectly when wrapped in a warm tortilla.
- 1/2 white onion, cut into 1 inch pieces: Sautéed to sweeten and soften, adding aromatic depth and a mild bite to balance the dish; cut into 1-inch pieces for even grilling on skewers and quick cooking alongside other ingredients.
- 1 red bell pepper, seeded and cut into 1 inch pieces: Chopped and grilled to contribute a sweet, juicy flavor and vibrant color; seeded and cut into 1-inch pieces so it chars evenly on skewers and complements the onion and chicken.
- 1 green bell pepper, seeded and cut into 1 inch pieces: Sliced and cooked to provide a slightly bitter, fresh contrast and bright green color; seeded and cut into 1-inch pieces for consistent texture and uniform cooking with the other vegetables.
- 2 tablespoons vegetable oil: Used to coat and prevent sticking while helping distribute spices and aid in browning; measured for tossing the chicken and vegetables to achieve even searing on the grill or skillet.
- 1 1/2 pounds of boneless skinless chicken breasts, cut into 1-inch cubes: Cubed for tender, protein-rich bites that absorb seasoning and char nicely; cut into 1-inch pieces to ensure quick, uniform cooking on skewers and to match the vegetable sizes.
- 1 2 tablespoons fresh lime juice: Squeezed to add bright acidity and balance the richness, enhancing overall flavor and tenderizing the chicken slightly; adjusted between 1 and 2 tablespoons to taste.
- 2 tablespoons Old El Paso™ fajita seasoning mix, (from a 1 oz package): Sprinkled to provide the classic fajita spice profile with chili, cumin, and garlic notes; measured as 2 tablespoons from a 1 oz package to season the chicken and vegetables evenly.
- Wooden skewers: Soaked and used as a convenient handle for assembling kebab-style fajitas, keeping pieces secure for grilling or broiling while allowing even exposure to heat.
- 8 Old El Paso™ Stand 'N Stuff™ soft tortillas: Wrapped to serve and hold the sliced meat and vegetables, providing a soft, warm vehicle for fillings; eight tortillas yield portions for sharing or family-style serving.
- Toppings: shredded cheese, guacamole, sour cream, etc.: Added as optional finishing elements to customize texture and flavor, offering creaminess, tang, and richness; include shredded cheese, guacamole, sour cream, or other preferred condiments.
Fajitas on a Stick Instructions
These directions are straightforward and built for clarity, so you can relax at the grill. I walk through each stage with sensory cues and small troubleshooting notes to help you get consistent results. With this method you will know when to turn, when to rest, and when to serve for maximum flavor.
- Preheat grill to medium heat and oil grate. Soak wooden skewers in water for 20 minutes to prevent burning.: The scent that rises when a well oiled grate meets heat is part of the ritual of grilling. You want a steady medium heat so the chicken cooks through without charring too fast, and the vegetables blister rather than blacken. Run a paper towel soaked in a little vegetable oil over the grates with tongs to help prevent sticking. If the grill is too hot the outside will char before the inside cooks; if it is too cool you won’t get that satisfying sizzle.
- In a medium bowl, add the onion, red bell pepper, and green bell pepper. Drizzle with 1 tablespoon of oil and toss to coat.: Soaking the wooden skewers is a quiet but essential step. You will smell the faint woody steam as they sit in water, and this moisture keeps them from catching fire on the grill. If you skip the soak you risk charred ends and embers, which can ruin the presentation. A common oversight is under soaking, so give them the full 20 minutes for safety.
- In another medium bowl, add the chicken and remaining tablespoon of oil. Sprinkle with lime juice and 2 tablespoons fajita seasoning mix. Toss to coat.: When you toss these vegetables in a bowl you will notice their bright colors and fresh aroma, which foreshadow the flavor they will bring once grilled. Drizzle with 1 tablespoon of vegetable oil , and toss to coat so each piece gets a sheen; this promotes even browning. Uneven pieces will cook inconsistently, so ensure uniform 1 inch cuts to avoid some bits being raw while others are charred.
- Assemble the skewers. Thread the onion, bell peppers, and chicken onto the skewers. Use about 4-5 pieces of chicken per skewer placing the peppers and onions in between. I like to place the onion next to the chicken so that it gives it flavor.: That quick coating will reduce sticking and encourage caramelization, producing a sweet, nutty fragrance as sugars begin to brown. Oil also helps the spices adhere later on. Too much oil can trigger flare ups and greasy results, so use just enough for a light sheen. If your vegetables look overly slick you’ve added too much.
- Grill for 4-6 minutes per side or until chicken is no longer pink. A tip: The chicken is not ready to turn if it is sticking. It will let go of the grill when it's ready.: Handling the chicken now is tactile and immediate; the cubes should feel moist but not dripping. The oil assures that heat transfers evenly and helps the seasoning cling. Overcrowding the bowl can lead to clumps and uneven seasoning distribution, so use a bowl that gives the pieces room to tumble.
- Serve immediately in warmed tortillas and top with your favorite toppings.: The aroma of the fajita seasoning hitting the chicken is lively, bringing savory and peppery notes. The lime juice brightens the profile by adding citrusy acidity. If you marinate too long in lime alone the surface may begin to firm up; for these quick skewers a brief toss is sufficient to impart flavor.
- Toss to coat: Tossing creates an even distribution of flavor and oil so each cube sears consistently. The sound of the pieces nudging each other in the bowl tells you they are well coated. If you leave pockets of seasoning the taste will be uneven; take a moment to mix thoroughly so every piece gets its share.
- Assemble the skewers: Thread the onion , bell peppers , and chicken onto the skewers using about 4 to 5 pieces of chicken per skewer and placing the peppers and onions in between: As you assemble, you will feel the rhythm of stacking pieces, and the visual contrast of colors makes the skewers inviting. Placing an onion next to the chicken helps transfer flavor during grilling. Avoid packing pieces too tightly, because closely jammed cubes steam instead of sear, resulting in less caramelization.
- Use about 4-5 pieces of chicken per skewer placing the peppers and onions in between: This spacing ensures the skewers cook evenly and fit neatly into a tortilla later. When the chicken is spaced this way, heat circulates and each side can brown. If you use too many pieces the interior may remain undercooked while the exterior overcooks, so keep the suggested count for balance.
- I like to place the onion next to the chicken so that it gives it flavor: Having the onion adjacent to the chicken promotes sweet, savory mingling as they cook. The juices released by the chicken will mingle with the onion, creating deeper flavor. One error people make is separating the vegetables too far from the meat, which reduces this shared caramelization effect.
- Grill for 4-6 minutes per side or until chicken is no longer pink: On the grill you will hear a steady sizzle as the surface sears and smell the sugars caramelizing from the vegetables. Cook until the chicken is opaque throughout, aiming for that tender center. A reliable cue is that the pieces will release cleanly from the grate when they are ready to turn; if they stick firmly, wait a moment. Cutting a piece too early is a common mistake that leads to juices running out and drying the meat.
- A tip: The chicken is not ready to turn if it is sticking : That sticking sensation means the Maillard reaction has not fully developed, and the piece needs more time to form a crust. Waiting yields a better sear and prevents tearing. If you force the turn you risk pulling off the crust and creating uneven texture, so be patient until the piece releases easily.
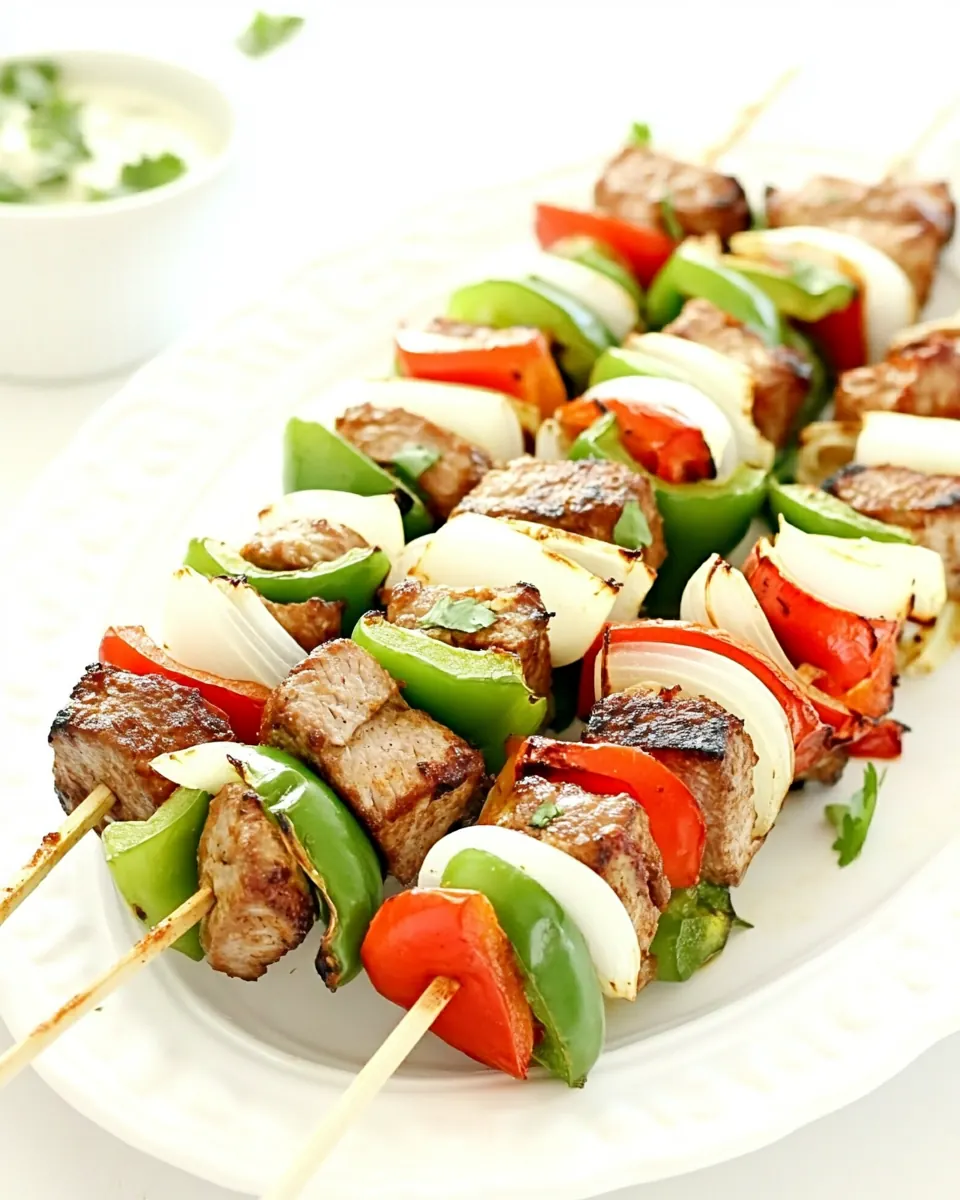
- Serve immediately in warmed tortillas and top with your favorite toppings: Serving right away preserves the contrast between smoky char and soft tortilla. Warmed tortillas wrap around the skewers easily and meld the ingredients. Set out the toppings so everyone can personalize their taco. Serving too late allows steam to soften the char, and the experience becomes less vibrant, so serve while hot.
Recipe Notes about Fajitas on a Stick
These notes collect practical insights I use every time I make Fajitas on a Stick. They reflect hands on experience, so the ideas are focused on timing, safety, and maximizing flavor. Read them before you start to avoid common pitfalls and to streamline the cooking process.
- Soak skewers for at least 20 minutes to prevent burning and splintering, which keeps presentation neat and safe.
- Keep cuts uniform at 1 inch so chicken and vegetables finish at the same time and nothing is undercooked.
- Use medium heat on the grill to allow the exterior to sear while the interior cooks through without drying.
- Do not overcrowd the skewers; spacing prevents steaming and encourages browning for better texture and flavor.
- Serve immediately after grilling while the char is vibrant and the juices are still locked in, this preserves the ideal contrast of textures.
Best Served With
These skewers are flexible and festive, ideal for casual meals or weekend gatherings. Below I outline ways to serve them and the occasions that suit them best. Think about the season and the crowd to craft the perfect meal.
- Warm tortillas: Serve each skewer in a warmed tortilla for effortless tacos, keeping the tortillas pliable and soft to prevent tearing when wrapping.
- Cheese and creamy toppings: Set out bowls of shredded cheese, guacamole, and sour cream so guests can tailor richness and cooling elements to balance the smoky chicken.
- Casual gatherings: These are perfect for backyard barbecues and summer parties where people mingle and assemble their own portions, reducing the need for plated service.
- Family meals: The bite sized pieces make them kid friendly and easy to portion, which is great for weekday dinners when you want speed without sacrificing flavor.
- Storage tips: Leftover chicken and vegetables refrigerate well for up to three days; store in an airtight container and reheat gently to avoid drying.
- Seasonal pairings: In summer serve with fresh salsas or a crisp salad, the bright produce complements the grilled notes and keeps the plate lively.
FAQ
Conclusion
Fajitas on a Stick are special because they combine sizzling charred chicken with blistered peppers and warm tortillas for a playful and delicious meal. Give them a try the next time you want an easy, social dinner that lets everyone customize their bite. The method is forgiving, the flavors are bright, and the presentation always draws compliments. Serve them hot, set out a few toppings, and enjoy the relaxed, festive energy they bring to the table.
Fajitas on a Stick
Equipment
- Grill
- Wooden Skewers
- Medium bowls
- Tongs
Ingredients
- 1/2 white onion, cut into 1 inch pieces Sautéed to sweeten and soften, adding aromatic depth and a mild bite to balance the dish; cut into 1-inch pieces for even grilling on skewers and quick cooking alongside other ingredients.
- 1 red bell pepper, seeded and cut into 1 inch pieces Chopped and grilled to contribute a sweet, juicy flavor and vibrant color; seeded and cut into 1-inch pieces so it chars evenly on skewers and complements the onion and chicken.
- 1 green bell pepper, seeded and cut into 1 inch pieces Sliced and cooked to provide a slightly bitter, fresh contrast and bright green color; seeded and cut into 1-inch pieces for consistent texture and uniform cooking with the other vegetables.
- 2 tablespoons vegetable oil Used to coat and prevent sticking while helping distribute spices and aid in browning; measured for tossing the chicken and vegetables to achieve even searing on the grill or skillet.
- 1 1/2 pounds of boneless skinless chicken breasts, cut into 1-inch cubes Cubed for tender, protein-rich bites that absorb seasoning and char nicely; cut into 1-inch pieces to ensure quick, uniform cooking on skewers and to match the vegetable sizes.
- 1 -2 tablespoons fresh lime juice Squeezed to add bright acidity and balance the richness, enhancing overall flavor and tenderizing the chicken slightly; adjusted between 1 and 2 tablespoons to taste.
- 2 tablespoons Old El Paso™ fajita seasoning mix, (from a 1 oz package) Sprinkled to provide the classic fajita spice profile with chili, cumin, and garlic notes; measured as 2 tablespoons from a 1 oz package to season the chicken and vegetables evenly.
- Wooden skewers Soaked and used as a convenient handle for assembling kebab-style fajitas, keeping pieces secure for grilling or broiling while allowing even exposure to heat.
- 8 Old El Paso™ Stand 'N Stuff™ soft tortillas Wrapped to serve and hold the sliced meat and vegetables, providing a soft, warm vehicle for fillings; eight tortillas yield portions for sharing or family-style serving.
- Toppings: shredded cheese, guacamole, sour cream, etc. Added as optional finishing elements to customize texture and flavor, offering creaminess, tang, and richness; include shredded cheese, guacamole, sour cream, or other preferred condiments.
Instructions
- Preheat grill to medium heat and oil grate. Soak wooden skewers in water for 20 minutes to prevent burning.: The scent that rises when a well oiled grate meets heat is part of the ritual of grilling. You want a steady medium heat so the chicken cooks through without charring too fast, and the vegetables blister rather than blacken. Run a paper towel soaked in a little vegetable oil over the grates with tongs to help prevent sticking. If the grill is too hot the outside will char before the inside cooks; if it is too cool you won’t get that satisfying sizzle.
- In a medium bowl, add the onion, red bell pepper, and green bell pepper. Drizzle with 1 tablespoon of oil and toss to coat.: Soaking the wooden skewers is a quiet but essential step. You will smell the faint woody steam as they sit in water, and this moisture keeps them from catching fire on the grill. If you skip the soak you risk charred ends and embers, which can ruin the presentation. A common oversight is under soaking, so give them the full 20 minutes for safety.
- In another medium bowl, add the chicken and remaining tablespoon of oil. Sprinkle with lime juice and 2 tablespoons fajita seasoning mix. Toss to coat.: When you toss these vegetables in a bowl you will notice their bright colors and fresh aroma, which foreshadow the flavor they will bring once grilled. Drizzle with 1 tablespoon of vegetable oil , and toss to coat so each piece gets a sheen; this promotes even browning. Uneven pieces will cook inconsistently, so ensure uniform 1 inch cuts to avoid some bits being raw while others are charred.
- Assemble the skewers. Thread the onion, bell peppers, and chicken onto the skewers. Use about 4-5 pieces of chicken per skewer placing the peppers and onions in between. I like to place the onion next to the chicken so that it gives it flavor.: That quick coating will reduce sticking and encourage caramelization, producing a sweet, nutty fragrance as sugars begin to brown. Oil also helps the spices adhere later on. Too much oil can trigger flare ups and greasy results, so use just enough for a light sheen. If your vegetables look overly slick you’ve added too much.
- Grill for 4-6 minutes per side or until chicken is no longer pink. A tip: The chicken is not ready to turn if it is sticking. It will let go of the grill when it's ready.: Handling the chicken now is tactile and immediate; the cubes should feel moist but not dripping. The oil assures that heat transfers evenly and helps the seasoning cling. Overcrowding the bowl can lead to clumps and uneven seasoning distribution, so use a bowl that gives the pieces room to tumble.
- Serve immediately in warmed tortillas and top with your favorite toppings.: The aroma of the fajita seasoning hitting the chicken is lively, bringing savory and peppery notes. The lime juice brightens the profile by adding citrusy acidity. If you marinate too long in lime alone the surface may begin to firm up; for these quick skewers a brief toss is sufficient to impart flavor.
- Toss to coat: Tossing creates an even distribution of flavor and oil so each cube sears consistently. The sound of the pieces nudging each other in the bowl tells you they are well coated. If you leave pockets of seasoning the taste will be uneven; take a moment to mix thoroughly so every piece gets its share.
- Assemble the skewers: Thread the onion , bell peppers , and chicken onto the skewers using about 4 to 5 pieces of chicken per skewer and placing the peppers and onions in between: As you assemble, you will feel the rhythm of stacking pieces, and the visual contrast of colors makes the skewers inviting. Placing an onion next to the chicken helps transfer flavor during grilling. Avoid packing pieces too tightly, because closely jammed cubes steam instead of sear, resulting in less caramelization.
- Use about 4-5 pieces of chicken per skewer placing the peppers and onions in between: This spacing ensures the skewers cook evenly and fit neatly into a tortilla later. When the chicken is spaced this way, heat circulates and each side can brown. If you use too many pieces the interior may remain undercooked while the exterior overcooks, so keep the suggested count for balance.
- I like to place the onion next to the chicken so that it gives it flavor: Having the onion adjacent to the chicken promotes sweet, savory mingling as they cook. The juices released by the chicken will mingle with the onion, creating deeper flavor. One error people make is separating the vegetables too far from the meat, which reduces this shared caramelization effect.
- Grill for 4-6 minutes per side or until chicken is no longer pink: On the grill you will hear a steady sizzle as the surface sears and smell the sugars caramelizing from the vegetables. Cook until the chicken is opaque throughout, aiming for that tender center. A reliable cue is that the pieces will release cleanly from the grate when they are ready to turn; if they stick firmly, wait a moment. Cutting a piece too early is a common mistake that leads to juices running out and drying the meat.
- A tip: The chicken is not ready to turn if it is sticking : That sticking sensation means the Maillard reaction has not fully developed, and the piece needs more time to form a crust. Waiting yields a better sear and prevents tearing. If you force the turn you risk pulling off the crust and creating uneven texture, so be patient until the piece releases easily.
- Serve immediately in warmed tortillas and top with your favorite toppings: Serving right away preserves the contrast between smoky char and soft tortilla. Warmed tortillas wrap around the skewers easily and meld the ingredients. Set out the toppings so everyone can personalize their taco. Serving too late allows steam to soften the char, and the experience becomes less vibrant, so serve while hot.
Notes
- Soak skewers for at least 20 minutes to prevent burning and splintering, which keeps presentation neat and safe.
- Keep cuts uniform at 1 inch so chicken and vegetables finish at the same time and nothing is undercooked.
- Use medium heat on the grill to allow the exterior to sear while the interior cooks through without drying.
- Do not overcrowd the skewers; spacing prevents steaming and encourages browning for better texture and flavor.
- Serve immediately after grilling while the char is vibrant and the juices are still locked in, this preserves the ideal contrast of textures.