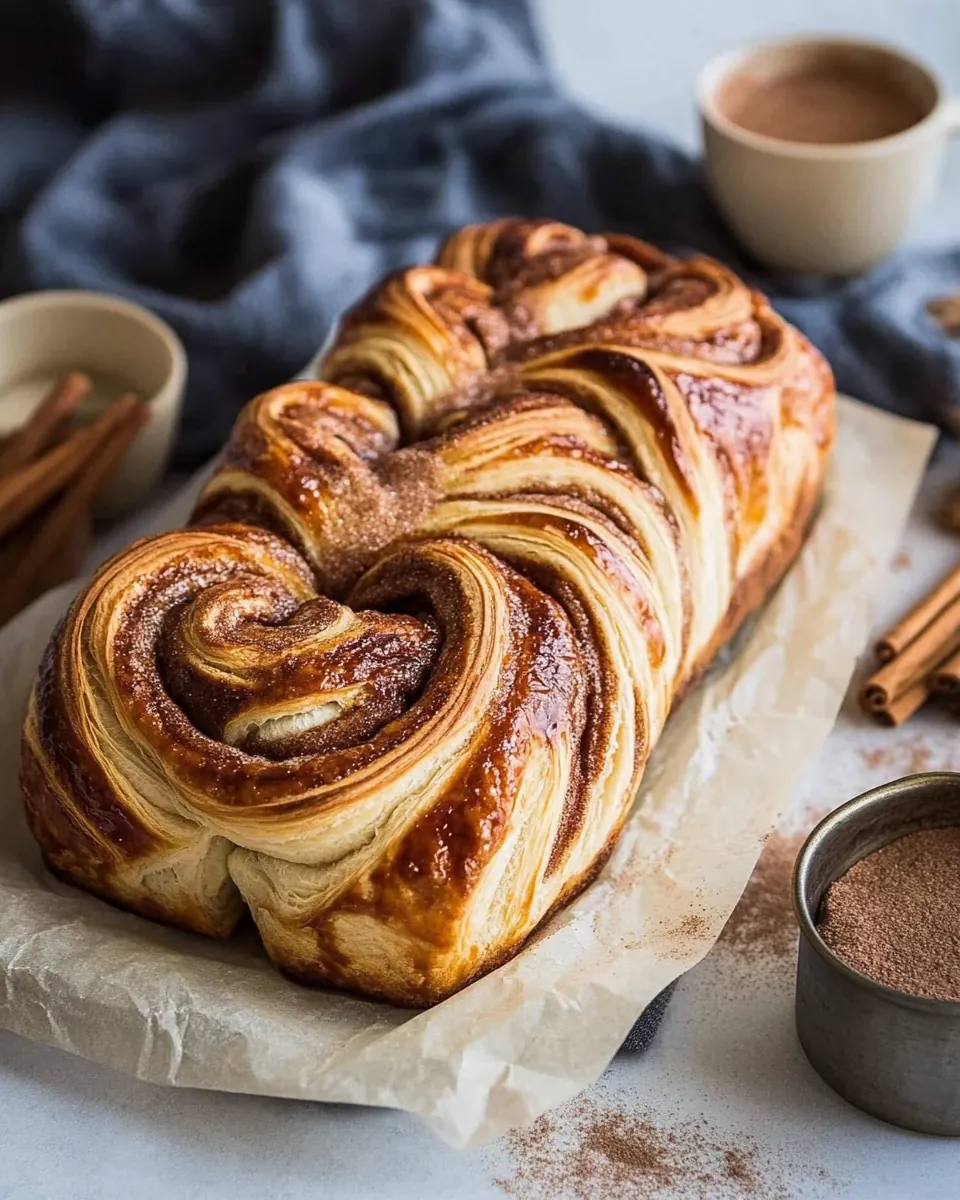
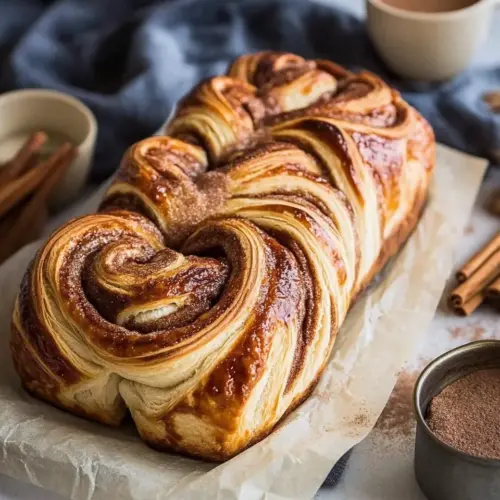
Easy Swirled Cinnamon Sugar Croissant Loaf
Easy Swirled Cinnamon Sugar Croissant Loaf began as a weekend project that turned my kitchen into a cozy, buttery laboratory of scent and texture. I remember the first time I rolled that glossy, layered dough and smelled the warm notes of cinnamon mingle with baked butter, and I knew I had something worth repeating. That morning I had a pot of coffee, a playlist of old favorites, and enough patience to follow the folds slowly, enjoying how the dough responded to touch.
Over several trials, I learned to read the dough like a friend. Some mornings it felt elastic and eager, other times slightly stubborn, but always forgiving if I treated it gently. I found secrets in pauses, those rest periods when the cold butter settled into layers and the dough relaxed. The finished loaves rewarded those pauses with delicate lamination, soft crumb, and ribbons of cinnamon sugar that peek out when you slice into a warm piece.
Recipe Snapshot
2 hr 10 mins
90 mins
40 mins
Hard
250 kcal
American
Gluten-Free, Low FODMAP
Desserts
Stand mixer, Dough hook, 9 x 5 inch bread pans, Rimmed baking sheet, Mixing bowls, Rolling pin, Plastic wrap, Cooling rack
The Appeal of This Easy Swirled Cinnamon Sugar Croissant Loaf
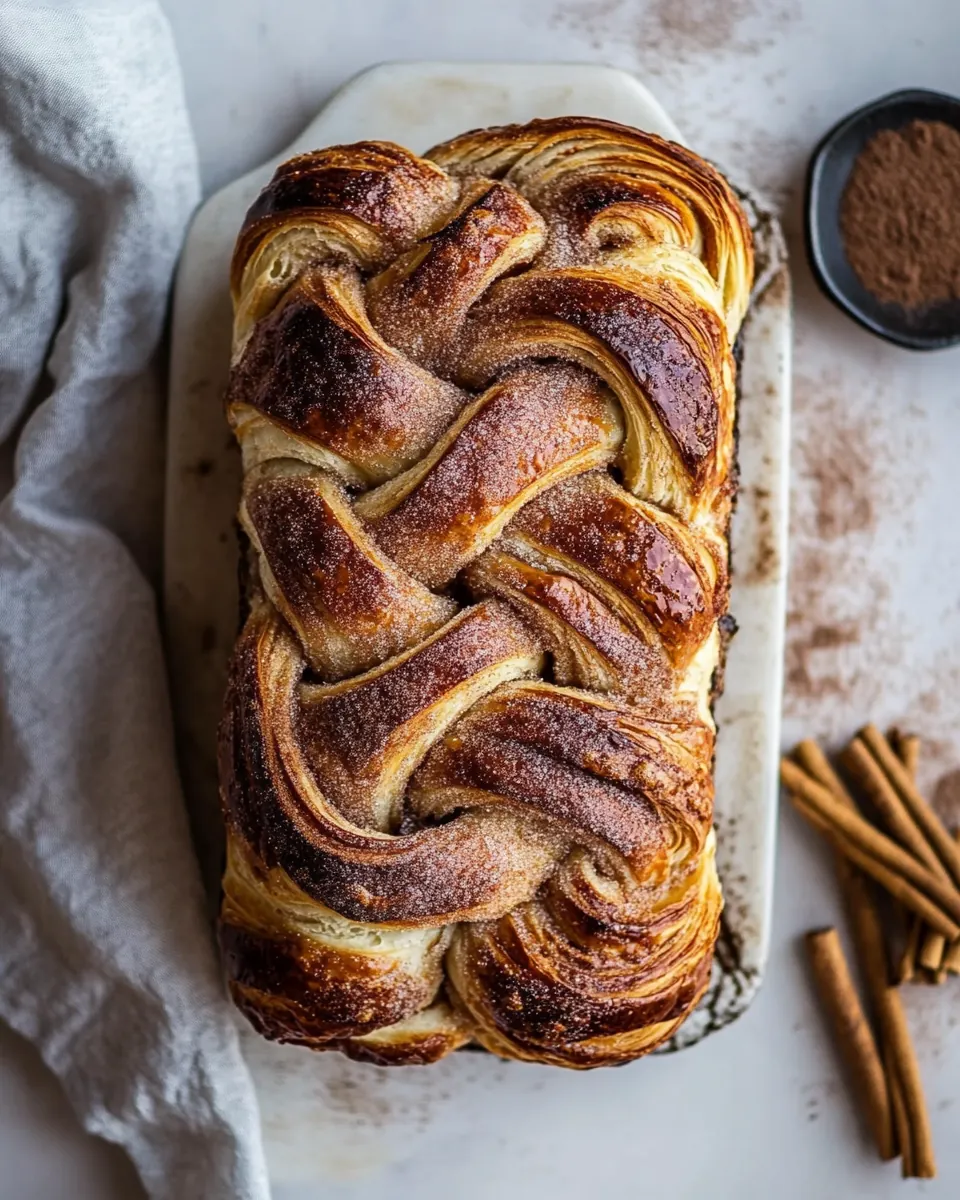
Layered, Flaky Texture
I love how this loaf mimics croissant lamination without requiring professional technique. By alternating rolls and short rests, you get distinct layers that flake and pull apart when baked. The contrast between the tender interior and the slightly crisp exterior makes every bite interesting, and I always pause to admire the striations before serving.
Comforting, Familiar Flavors
There is something universally comforting about cinnamon and sugar swirling through bread. This recipe balances sweet and buttery notes so you get a nostalgic aroma that fills the house. I often catch myself hovering near the oven, inhaling that warm, sweet perfume, which makes it perfect for relaxed weekend breakfasts or casual coffee dates at home.
Great for Sharing
This recipe produces two generous loaves, making it ideal when friends drop by or when you want to gift something homemade. I like slicing one loaf for neighbors and keeping the other for late morning toast. The structure is sturdy enough to transport, yet soft enough to feel indulgent when you sit down with a slice and a cup of tea.
Flexible Make Ahead Options
I appreciate recipes that let me control timing, and this one plays nicely with planning. You can pause after the lamination steps and chill or freeze the dough, which saves a frantic morning. When I need to stretch my time, I prep through the shaping step, refrigerate overnight, and bake the next day for fresh bread without waking up extra early.
Impressive, Yet Accessible
Finally, I adore that the final loaf looks like it took hours of skill, but it is genuinely approachable. Small technical notes, like using cold butter slices and resting in the freezer briefly, make a huge visual difference. When I bring a loaf to brunch, people always ask how I did it, and I tell them the truth, that it just takes a little patience and attention to feel.
Main Ingredients for Easy Swirled Cinnamon Sugar Croissant Loaf
These ingredients are chosen to create a layered, enriched dough that bakes into soft loaves with defined ribbons of filling. The dough relies on a balance of flour, milk, butter, and a touch of honey to feed the yeast, while the cold laminated butter and simple cinnamon sugar produce those flaky swirls. Each component plays a role in texture, flavor, and structure, working together to make a tender interior and golden crust.
- 1 3/4 cups warm whole milk: Warm and foamy, activates the yeast and creates a tender dough by providing hydration and warmth for fermentation.
- 1 tablespoon instant yeast: Instantly leavens the dough, speeding rise times and producing lightness and lift during proofing for a fluffy loaf.
- 2 tablespoons honey: Adds natural sweetness and helps feed the yeast while contributing subtle flavor and browning to the crust.
- 4 1/2 5 cups all-purpose flour, plus more for rolling: All-purpose flour builds the dough’s structure and gluten network, giving the loaf chew and volume; more for rolling ensures workable dough.
- 2 teaspoons kosher salt: Kosher salt strengthens gluten structure, balances sweetness, and enhances overall flavor without overpowering the cinnamon swirl.
- 6 tablespoons salted butter, at room temperature: Softened salted butter enriches the dough, increasing tenderness and flavor while aiding in a richer crumb and mouthfeel.
- 2 sticks (1 cup) cold salted butter, sliced into thin pieces: Cold sliced salted butter is layered into the dough to create laminated swirls and flaky separation in the loaf’s interior.
- 1/2 cup granulated sugar: Granulated sugar sweetens the dough and filling, aiding caramelization and contributing to the cinnamon–sugar swirl’s texture.
- 1 tablespoon ground cinnamon: Ground cinnamon provides warm, aromatic spice for the swirl, complementing sugar and butter with classic cinnamon flavor.
- 1 egg, beaten, for brushing: Beaten egg creates a glossy, golden finish when brushed on before baking and helps achieve an attractive, sealed crust.
Instructions for Easy Swirled Cinnamon Sugar Croissant Loaf
This recipe has stages where patience is rewarded, from mixing the dough to laminating with cold butter and shaping the loaves. I encourage you to move with intention, noticing how the dough feels and responds. The directions below expand each original step so you can sense, solve, and savor each moment.
- In the bowl of a stand mixer, combine the milk, honey, 4 1/2 cups flour, yeast, and salt. Using the dough hook, mix until the flour is completely incorporated, about 4-5 minutes. Add 4 tablespoons room temp butter and mix until combined, about 2-3 minutes more, adding the additional 1/2 cup flour as needed, until the dough pulls away from the sides of the bowl. Cover the bowl with plastic wrap and let sit at room temperature for 45 minutes to 1 hour or until doubled in size. Punch the dough down and roll out onto a lightly floured surface, creating a large rectangle that’s about 12 x 18 inches. Layer the thin slices of cold butter down the middle 1/3 of the dough, pressing gently to adhere and layering the slices together to create a rectangle of butter. Gently push the butter together with your hands. First fold: Fold 1/3 of the dough over the butter, then fold the other 1/3 over top of the first layer so you have 3 dough layers (like an envelope). Roll the dough out again into a large rectangle, fold into thirds. Wrap the dough in plastic wrap and transfer to the freezer for 20 minutes. Second Fold: Remove the dough from the freezer. Roll the dough into a rectangle (about 12 x 18 inches) and fold into envelope. Wrap the dough in plastic wrap and transfer to the freezer for 20 minutes. Meanwhile, butter two (9 x 5 inch) bread pans. In a small bowl, combine the sugar and cinnamon. Remove the dough from the freezer. Roll the dough into a rectangle. Spread the dough with 2 tablespoons softened butter and sprinkle the cinnamon sugar over the butter. Starting with the edge of dough closest to you, roll the dough into a log, keeping it tight as you go. When you reach the edge, pinch along the edges to seal. Cut the dough log in half. Cut each half into 10-11 rolls. Arrange each roll into the prepared bread pans. You can place them seam side down, or alternate each roll to show more of the filling. Cover and let rise 15 minutes. Preheat the oven to 350 degrees F. Place the bread pans on a rimmed baking sheet and brush each loaf with the beaten egg. Transfer to the oven and bake 35-40 minutes or until dark brown on top. Let cool in the pans for 5 minutes, then flip out onto a cooling rack. Slice and serve warm or at room temperature.: The moment these ingredients meet, you can already smell faint sweetness from the honey . Use the paddle briefly if needed to distribute the yeast and salt before switching to the dough hook. The texture should be shaggy at first, with visible clumps of flour absorbing the warm milk . Why this matters, I think, is that even distribution prevents pockets of dry flour or concentrated salt . A common mistake here is adding all the flour at once without gauging hydration, which can produce a stiff dough. If your mixture seems too dry, add a tablespoon of warm milk at a time; if too wet, hold off on more flour until initial mixing finishes.
- Using the dough hook, mix until the flour is completely incorporated, about 4 to 5 minutes: As you mix, listen for a change in the sound from loud scraping to a quieter, smoother hum, which is a good sign the dough is coming together. The surface will look more cohesive and slightly elastic. This stage helps develop gluten gently, giving structure without toughness. Avoid overmixing to the point the dough becomes tight and resistant. If your mixer strains or the dough feels overly stiff, stop, cover, and let it rest for 10 minutes before continuing.
- Add 4 tablespoons room temp butter and mix until combined, about 2 to 3 minutes more, adding the additional 1/2 cup flour as needed, until the dough pulls away from the sides of the bowl: When you add the softened butter , the dough will become silkier and slightly glossy. The butter integrates and enriches the crumb so it bakes tender. I watch for the dough to clean the sides of the bowl in a slow ribbon rather than sticking. If you need the optional additional flour , add it sparingly to avoid a dry outcome. A mistake is adding all the extra flour at once, which can over-dry the dough; instead, add gradually until the dough just pulls away.
- Cover the bowl with plastic wrap and let sit at room temperature for 45 minutes to 1 hour or until doubled in size: During this rise, the aroma changes as the yeast ferments, releasing a faint, breadlike scent. The dough will feel pillowy when gently pressed and will spring back slowly. This fermentation develops flavor and lightness. A too-quick rise may signal overly warm surroundings, resulting in weaker structure, so aim for a moderate, steady rise. If your kitchen is cold, extend the time and consider placing the bowl in a slightly warm oven with the light on.
- Punch the dough down and roll out onto a lightly floured surface, creating a large rectangle that’s about 12 x 18 inches: After punching down, you'll notice a release of yeasty fragrance and small pockets of air deflating. Rolling the dough into a 12 by 18 inch rectangle gives you the workspace to layer the cold butter . Use light dustings of all purpose flour to prevent sticking, but avoid excess which will dry the dough surface. If the dough resists rolling, let it rest for 10 minutes to relax the gluten. A common error is rolling too thinly, which can make laminations leak butter during handling.
- Layer the thin slices of cold butter down the middle 1 third of the dough, pressing gently to adhere and layering the slices together to create a rectangle of butter: The tactile pleasure here is noticeable as cold butter meets soft dough, and you will feel the chilled lumps against the palm. Arrange the slices so they slightly overlap to create a solid butter block. Press lightly so the dough sticks to the edges, but do not press hard enough to tear the dough. Keeping the butter cold is crucial; if it softens, chill the assembly for a few minutes. Avoid letting fingers warm the butter , which can smear it into the dough instead of layering it.
- Gently push the butter together with your hands: This step smooths gaps and creates a unified block, which gives consistent laminations when folded. The block should be compact yet cold, with no large voids. A good visual cue is a continuous rectangle of pale butter bordered by dough. Handle quickly and with cool hands to prevent melting. If the butter becomes tacky, pop the dough into the freezer for a short chill rather than continuing at room temperature.
- First fold: Fold 1 third of the dough over the butter, then fold the other 1 third over top of the first layer so you have 3 dough layers like an envelope : The envelope fold traps the butter inside and starts creating layers. After folding, the dough’s feel shifts toward laminated sheets. This motion is why keeping the butter cold matters, it separates into layers instead of absorbing. A common misstep is stretching while folding; gentle, measured movements prevent tearing. If seams open, pinch them closed and chill briefly before rolling.
- Roll the dough out again into a large rectangle, fold into thirds. Wrap the dough in plastic wrap and transfer to the freezer for 20 minutes: Rolling after the first fold extends and reorients the layers. The freezer pause firms the butter so subsequent handling keeps distinct laminations. You may hear a slight crackle as the dough chills, which is normal. Avoid skipping this chill, as warm butter blurs layers. If you notice the dough warming during rolling, use shorter rolls and return to the freezer sooner.
- Second Fold: Remove the dough from the freezer. Roll the dough into a rectangle about 12 x 18 inches and fold into envelope. Wrap the dough in plastic wrap and transfer to the freezer for 20 minutes : Repeating the fold multiplies layers and develops that croissant like structure. After this second chill, the dough should feel firm and easy to handle. The repeated rest prevents the butter from smearing and ensures visible swirls in the final loaf. A mistake is rushing and skipping the second chill which leads to flatter, less distinct layers.
- Meanwhile, butter two 9 x 5 inch bread pans: Preparing the pans ahead prevents scrambling at shaping time. The lightly greased surface helps the loaves release and promotes even browning at the edges. Use softened salted butter to coat the pans evenly. Avoid excess greasing which can cause slipping during rising; a thin, even layer is sufficient.
- In a small bowl, combine the sugar and cinnamon: Mixing the sugar and ground cinnamon creates the aromatic filling that will caramelize in the oven. Stir them until the color is uniformly speckled, and smell the potent warmth of the cinnamon . Store this mixture in a covered bowl while you work so it stays dry. A common error is making the mixture too coarse; if the sugar is clumped, break it up for even distribution on the dough.
- Remove the dough from the freezer. Roll the dough into a rectangle: As you unwrap and roll, the dough will give a slight chill to your hands and exhibit the layered cross section if you slice a small edge. Achieve a rectangle similar to previous sizes, so the filling spreads evenly. If the dough resists, let it sit for a few minutes to relax. Keep the surface dusted lightly with all purpose flour to prevent sticking but avoid overflouring which will disrupt the filling adhesion.
- Spread the dough with 2 tablespoons softened butter and sprinkle the cinnamon sugar over the butter: The softened butter acts like glue for the filling and also adds richness to the inner crumb. Spread it evenly so the swirl is consistent, then dust the combined cinnamon and sugar evenly across the surface. Press the filling lightly into the dough so it does not slide during rolling. A mistake at this step is uneven distribution, which yields pockets of dry dough and pockets of over sweet areas.
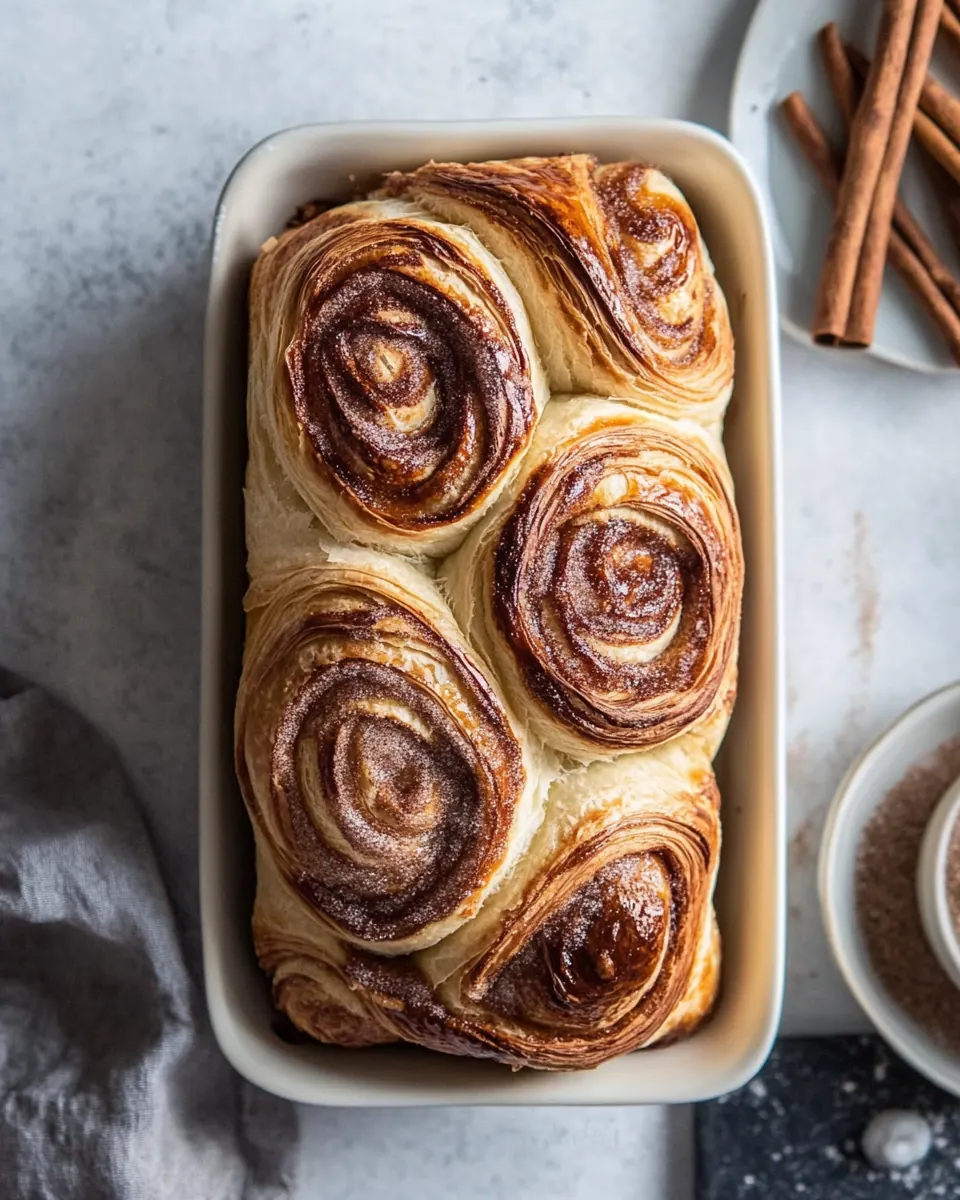
- Starting with the edge of dough closest to you, roll the dough into a log, keeping it tight as you go: Rolling tightly produces neat, well defined spirals that bake into beautiful swirls. The sound is a soft resistance as the dough winds, and the log should feel firm but not compressed. When rolling, tuck the dough slightly under the edge to form a smooth seam. If the roll becomes loose, respread and roll again, but avoid rolling so tightly that the dough is strained and springs back.
- When you reach the edge, pinch along the edges to seal: Sealing prevents filling leakage and helps the log hold shape during cutting and proofing. Use gentle pressure to close seams without flattening the roll. If seams open during shaping, dampen a fingertip and press again to reseal. A common mistake is leaving gaps which cause butter and sugar to escape and create flat spots during baking.
- Cut the dough log in half: Splitting the log makes it manageable and sets you up for even portions. Use a sharp bench knife or serrated blade so you get clean cuts and minimal smearing of filling. You may notice the cut faces show distinct rings of filling, which is a good sign of successful lamination. If the log squashes while cutting, chill briefly for firmer handling.
- Cut each half into 10 to 11 rolls: The number of rolls depends on your desired size and the width of your log. Aim for uniform slices so they bake evenly. A gentle sawing motion preserves the spiral without compressing it. If slices vary greatly, some will bake faster than others; re-slice to even sizes when necessary.
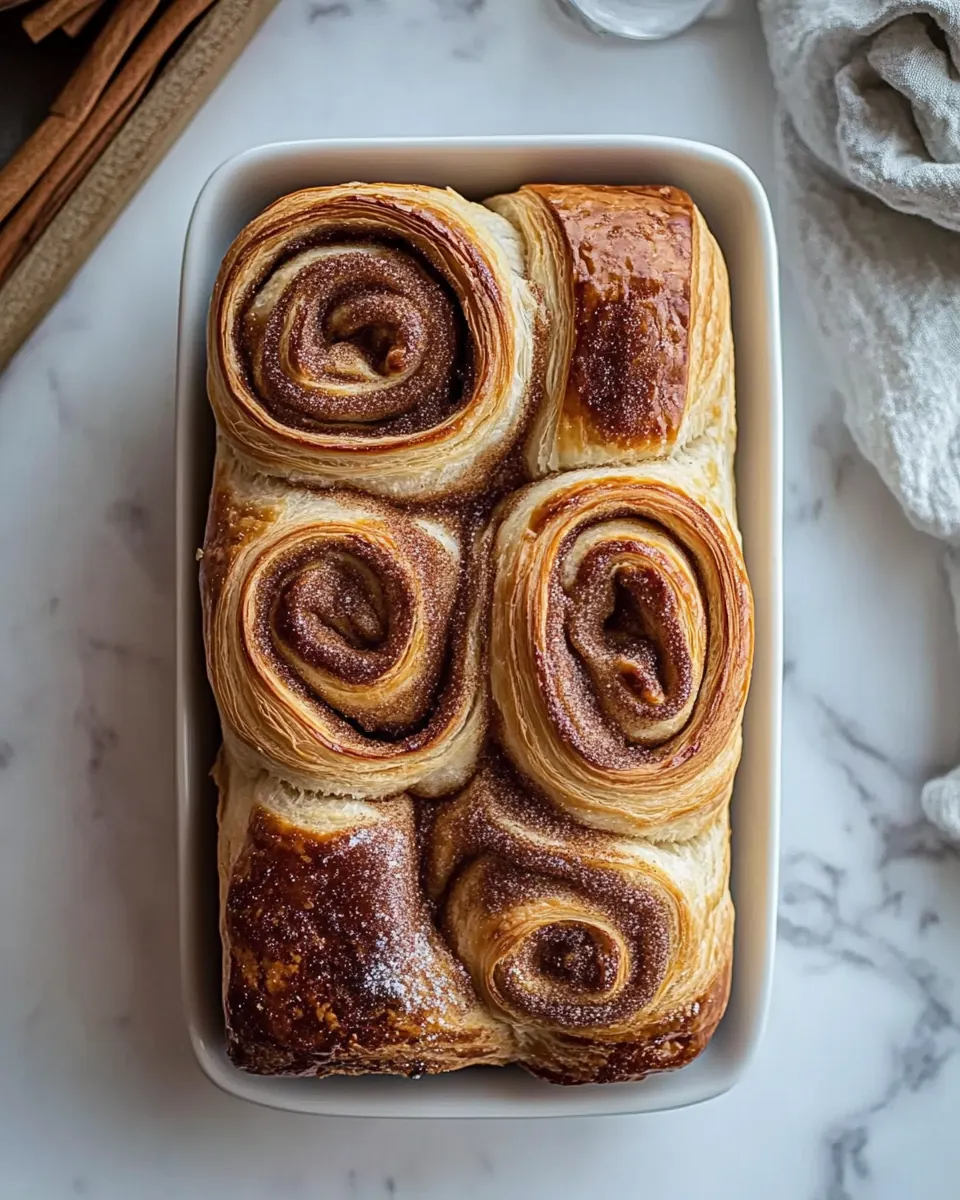
- Arrange each roll into the prepared bread pans. You can place them seam side down, or alternate each roll to show more of the filling: The arrangement affects the final loaf appearance. Seam side down yields a cleaner top, while alternating rolls reveals more filling in the baked surface. Place the rolls with slight space to allow a short rise. Pressing them too tightly prevents expansion. If the rolls look uneven, rotate them for a balanced pan.
- Cover and let rise 15 minutes: This short final rise relaxes the dough and firms up the rolls before baking, producing a tender crumb without overproofing. You will notice a slight puff and a softening of the dough surface. Avoid a long final rise which can cause collapse in the oven. If your kitchen is cool, extend the time slightly until you see a gentle increase in size.
- Preheat the oven to 350 degrees F: Preheating sets the environment for even browning and the oven spring that helps these loaves open up. A fully preheated oven at the specified temperature ensures the butter melts at the right rate and the crust sets quickly. Use an oven thermometer if you suspect temperature variance. Do not place the pans into a not fully heated oven, as uneven bake and greening of texture can occur.
- Place the bread pans on a rimmed baking sheet and brush each loaf with the beaten egg: Brushing with the beaten egg provides a glossy, golden top and helps any exposed filling caramelize attractively. The rimmed sheet catches any drips and keeps your oven clean. Brush gently to avoid pooling in creases. Over brushing can lead to darker spots where the egg pools, so a thin even coat is best.
- Transfer to the oven and bake 35 to 40 minutes or until dark brown on top: During baking the smell of caramelizing sugar and roasted butter becomes more pronounced, and the crust turns a deep, inviting brown. The loaves should sound hollow when tapped on the bottom and register an internal temperature near 190 to 200 degrees F for enriched breads. A common issue is underbaking, leaving a gummy center; if the top browns too quickly, tent with foil and continue baking until fully done.
- Let cool in the pans for 5 minutes, then flip out onto a cooling rack: The brief rest allows the structure to set slightly, which eases removal. Flipping onto a rack prevents steam buildup under the loaf which would soften the crust. You will still smell sweet, warm aromas as steam lifts, and the texture will continue to firm as it cools. If you cut too soon, the crumb may compress; allow the brief pan rest then slice when fully cooled to your preference.
- Slice and serve warm or at room temperature: Serving warm showcases the soft interior and slightly melty filling, while room temperature brings out a firmer texture for neat slices. I enjoy a warm slice with tea, noting how the layers pull apart. Store leftovers wrapped, and reheat gently to revive that fresh from oven quality. Avoid microwaving straight from fridge as it can make the crumb gummy; toast or oven warm for best results.
Ways to Adapt This Recipe
You can adjust timing and handling to fit your schedule, from chilling to freezing dough, and still get remarkable results. Below are practical adaptations that keep the structure intact while offering convenience and variation.
- Use active dry yeast option: If you prefer active dry yeast, bloom 2 1/4 teaspoons in the warm milk with the honey for 5 to 10 minutes until frothy before adding to the dry flour mixture, which helps ensure a robust rise.
- Make ahead refrigeration: Prepare the dough through shaping but skip the final room temperature rise; cover the loaves and refrigerate overnight. Remove 30 minutes before baking to take the chill off, then bake as directed for fresh morning bread.
- Freeze before baking: After shaping and placing rolls in pans through the shaping step, cover tightly and freeze for up to three months. Thaw on the counter for 2 to 3 hours, then proceed with the final brief rise and bake as directed for convenient future baking.
- Freeze after baking: Allow baked loaves to cool completely, wrap tightly in plastic wrap, and freeze in a freezer safe container for up to three months. Thaw on the counter and warm gently before serving to revive the texture.
- Adjust sweetness level: If you prefer a less sweet bread, reduce the sugar in the filling slightly, while keeping the dough enrichment the same to maintain structure and crumb.
Best Served With
This loaf pairs beautifully with simple accompaniments and fits many occasions, from relaxed weekend breakfasts to festive brunches. Below are serving ideas, storage notes, and pairing suggestions to elevate the experience.
- Warm with tea or coffee: Serve slices warm alongside a morning coffee or tea for a cozy breakfast, the steam releasing aromatic cinnamon and melted butter for immediate enjoyment.
- Brunch centerpiece: Place a loaf at the center of a brunch table with spreads on the side so guests can choose how to enjoy their slice, making it ideal for casual gatherings and holiday mornings.
- Gifting and potlucks: Wrap a cooled loaf in parchment and twine for a thoughtful homemade gift, or bring a loaf to potlucks where the generous yield feeds a small crowd and presents attractively when sliced.
- Storage tips: Store cooled loaves wrapped at room temperature for up to two days, refrigerate up to four days, or freeze for up to three months. To refresh, warm in a 300 degrees F oven for 10 to 12 minutes or toast slices gently to revive crisp edges.
- Seasonal pairing: This loaf works well in fall brunches when cinnamon notes match seasonal produce and warm beverages, but it is also comforting year round for weekend breakfasts and special occasions.
- Occasion suggestions: Serve at relaxed family breakfasts, holiday brunch spreads, or during Ramadan mornings as a sweet, shareable option to break a fast gently with familiar, comforting flavors.
FAQ
Conclusion
This loaf stands out because it combines laminated, croissant like layers with a familiar, sweet cinnamon swirl to create an impressive yet approachable bake. Give it a try when you have a leisurely morning and a willingness to enjoy a few timed rests, and you will be rewarded with fragrant, buttery loaves that look and taste special. Share one loaf with friends and savor the way the flaky layers and warm filling bring a moment of comfort to ordinary days.
Easy Swirled Cinnamon Sugar Croissant Loaf
Equipment
- Stand mixer
- Dough Hook
- 9 x 5 inch bread pans
- Rimmed Baking Sheet
- Mixing Bowls
- Rolling Pin
- Plastic Wrap
- Cooling rack
Ingredients
- 1 3/4 cups warm whole milk Warm and foamy, activates the yeast and creates a tender dough by providing hydration and warmth for fermentation.
- 1 tablespoon instant yeast Instantly leavens the dough, speeding rise times and producing lightness and lift during proofing for a fluffy loaf.
- 2 tablespoons honey Adds natural sweetness and helps feed the yeast while contributing subtle flavor and browning to the crust.
- 4 1/2 - 5 cups all-purpose flour, plus more for rolling All-purpose flour builds the dough’s structure and gluten network, giving the loaf chew and volume; more for rolling ensures workable dough.
- 2 teaspoons kosher salt Kosher salt strengthens gluten structure, balances sweetness, and enhances overall flavor without overpowering the cinnamon swirl.
- 6 tablespoons salted butter, at room temperature Softened salted butter enriches the dough, increasing tenderness and flavor while aiding in a richer crumb and mouthfeel.
- 2 sticks (1 cup) cold salted butter, sliced into thin pieces Cold sliced salted butter is layered into the dough to create laminated swirls and flaky separation in the loaf’s interior.
- 1/2 cup granulated sugar Granulated sugar sweetens the dough and filling, aiding caramelization and contributing to the cinnamon-sugar swirl’s texture.
- 1 tablespoon ground cinnamon Ground cinnamon provides warm, aromatic spice for the swirl, complementing sugar and butter with classic cinnamon flavor.
- 1 egg, beaten, for brushing Beaten egg creates a glossy, golden finish when brushed on before baking and helps achieve an attractive, sealed crust.
Instructions
- In the bowl of a stand mixer, combine the milk, honey, 4 1/2 cups flour, yeast, and salt. Using the dough hook, mix until the flour is completely incorporated, about 4-5 minutes. Add 4 tablespoons room temp butter and mix until combined, about 2-3 minutes more, adding the additional 1/2 cup flour as needed, until the dough pulls away from the sides of the bowl. Cover the bowl with plastic wrap and let sit at room temperature for 45 minutes to 1 hour or until doubled in size. Punch the dough down and roll out onto a lightly floured surface, creating a large rectangle that’s about 12 x 18 inches. Layer the thin slices of cold butter down the middle 1/3 of the dough, pressing gently to adhere and layering the slices together to create a rectangle of butter. Gently push the butter together with your hands. First fold: Fold 1/3 of the dough over the butter, then fold the other 1/3 over top of the first layer so you have 3 dough layers (like an envelope). Roll the dough out again into a large rectangle, fold into thirds. Wrap the dough in plastic wrap and transfer to the freezer for 20 minutes. Second Fold: Remove the dough from the freezer. Roll the dough into a rectangle (about 12 x 18 inches) and fold into envelope. Wrap the dough in plastic wrap and transfer to the freezer for 20 minutes. Meanwhile, butter two (9 x 5 inch) bread pans. In a small bowl, combine the sugar and cinnamon. Remove the dough from the freezer. Roll the dough into a rectangle. Spread the dough with 2 tablespoons softened butter and sprinkle the cinnamon sugar over the butter. Starting with the edge of dough closest to you, roll the dough into a log, keeping it tight as you go. When you reach the edge, pinch along the edges to seal. Cut the dough log in half. Cut each half into 10-11 rolls. Arrange each roll into the prepared bread pans. You can place them seam side down, or alternate each roll to show more of the filling. Cover and let rise 15 minutes. Preheat the oven to 350 degrees F. Place the bread pans on a rimmed baking sheet and brush each loaf with the beaten egg. Transfer to the oven and bake 35-40 minutes or until dark brown on top. Let cool in the pans for 5 minutes, then flip out onto a cooling rack. Slice and serve warm or at room temperature.: The moment these ingredients meet, you can already smell faint sweetness from the honey . Use the paddle briefly if needed to distribute the yeast and salt before switching to the dough hook. The texture should be shaggy at first, with visible clumps of flour absorbing the warm milk . Why this matters, I think, is that even distribution prevents pockets of dry flour or concentrated salt . A common mistake here is adding all the flour at once without gauging hydration, which can produce a stiff dough. If your mixture seems too dry, add a tablespoon of warm milk at a time; if too wet, hold off on more flour until initial mixing finishes.
- Using the dough hook, mix until the flour is completely incorporated, about 4 to 5 minutes: As you mix, listen for a change in the sound from loud scraping to a quieter, smoother hum, which is a good sign the dough is coming together. The surface will look more cohesive and slightly elastic. This stage helps develop gluten gently, giving structure without toughness. Avoid overmixing to the point the dough becomes tight and resistant. If your mixer strains or the dough feels overly stiff, stop, cover, and let it rest for 10 minutes before continuing.
- Add 4 tablespoons room temp butter and mix until combined, about 2 to 3 minutes more, adding the additional 1/2 cup flour as needed, until the dough pulls away from the sides of the bowl: When you add the softened butter , the dough will become silkier and slightly glossy. The butter integrates and enriches the crumb so it bakes tender. I watch for the dough to clean the sides of the bowl in a slow ribbon rather than sticking. If you need the optional additional flour , add it sparingly to avoid a dry outcome. A mistake is adding all the extra flour at once, which can over-dry the dough; instead, add gradually until the dough just pulls away.
- Cover the bowl with plastic wrap and let sit at room temperature for 45 minutes to 1 hour or until doubled in size: During this rise, the aroma changes as the yeast ferments, releasing a faint, breadlike scent. The dough will feel pillowy when gently pressed and will spring back slowly. This fermentation develops flavor and lightness. A too-quick rise may signal overly warm surroundings, resulting in weaker structure, so aim for a moderate, steady rise. If your kitchen is cold, extend the time and consider placing the bowl in a slightly warm oven with the light on.
- Punch the dough down and roll out onto a lightly floured surface, creating a large rectangle that’s about 12 x 18 inches: After punching down, you'll notice a release of yeasty fragrance and small pockets of air deflating. Rolling the dough into a 12 by 18 inch rectangle gives you the workspace to layer the cold butter . Use light dustings of all purpose flour to prevent sticking, but avoid excess which will dry the dough surface. If the dough resists rolling, let it rest for 10 minutes to relax the gluten. A common error is rolling too thinly, which can make laminations leak butter during handling.
- Layer the thin slices of cold butter down the middle 1 third of the dough, pressing gently to adhere and layering the slices together to create a rectangle of butter: The tactile pleasure here is noticeable as cold butter meets soft dough, and you will feel the chilled lumps against the palm. Arrange the slices so they slightly overlap to create a solid butter block. Press lightly so the dough sticks to the edges, but do not press hard enough to tear the dough. Keeping the butter cold is crucial; if it softens, chill the assembly for a few minutes. Avoid letting fingers warm the butter , which can smear it into the dough instead of layering it.
- Gently push the butter together with your hands: This step smooths gaps and creates a unified block, which gives consistent laminations when folded. The block should be compact yet cold, with no large voids. A good visual cue is a continuous rectangle of pale butter bordered by dough. Handle quickly and with cool hands to prevent melting. If the butter becomes tacky, pop the dough into the freezer for a short chill rather than continuing at room temperature.
- First fold: Fold 1 third of the dough over the butter, then fold the other 1 third over top of the first layer so you have 3 dough layers like an envelope : The envelope fold traps the butter inside and starts creating layers. After folding, the dough’s feel shifts toward laminated sheets. This motion is why keeping the butter cold matters, it separates into layers instead of absorbing. A common misstep is stretching while folding; gentle, measured movements prevent tearing. If seams open, pinch them closed and chill briefly before rolling.
- Roll the dough out again into a large rectangle, fold into thirds. Wrap the dough in plastic wrap and transfer to the freezer for 20 minutes: Rolling after the first fold extends and reorients the layers. The freezer pause firms the butter so subsequent handling keeps distinct laminations. You may hear a slight crackle as the dough chills, which is normal. Avoid skipping this chill, as warm butter blurs layers. If you notice the dough warming during rolling, use shorter rolls and return to the freezer sooner.
- Second Fold: Remove the dough from the freezer. Roll the dough into a rectangle about 12 x 18 inches and fold into envelope. Wrap the dough in plastic wrap and transfer to the freezer for 20 minutes : Repeating the fold multiplies layers and develops that croissant like structure. After this second chill, the dough should feel firm and easy to handle. The repeated rest prevents the butter from smearing and ensures visible swirls in the final loaf. A mistake is rushing and skipping the second chill which leads to flatter, less distinct layers.
- Meanwhile, butter two 9 x 5 inch bread pans: Preparing the pans ahead prevents scrambling at shaping time. The lightly greased surface helps the loaves release and promotes even browning at the edges. Use softened salted butter to coat the pans evenly. Avoid excess greasing which can cause slipping during rising; a thin, even layer is sufficient.
- In a small bowl, combine the sugar and cinnamon: Mixing the sugar and ground cinnamon creates the aromatic filling that will caramelize in the oven. Stir them until the color is uniformly speckled, and smell the potent warmth of the cinnamon . Store this mixture in a covered bowl while you work so it stays dry. A common error is making the mixture too coarse; if the sugar is clumped, break it up for even distribution on the dough.
- Remove the dough from the freezer. Roll the dough into a rectangle: As you unwrap and roll, the dough will give a slight chill to your hands and exhibit the layered cross section if you slice a small edge. Achieve a rectangle similar to previous sizes, so the filling spreads evenly. If the dough resists, let it sit for a few minutes to relax. Keep the surface dusted lightly with all purpose flour to prevent sticking but avoid overflouring which will disrupt the filling adhesion.
- Spread the dough with 2 tablespoons softened butter and sprinkle the cinnamon sugar over the butter: The softened butter acts like glue for the filling and also adds richness to the inner crumb. Spread it evenly so the swirl is consistent, then dust the combined cinnamon and sugar evenly across the surface. Press the filling lightly into the dough so it does not slide during rolling. A mistake at this step is uneven distribution, which yields pockets of dry dough and pockets of over sweet areas.
- Starting with the edge of dough closest to you, roll the dough into a log, keeping it tight as you go: Rolling tightly produces neat, well defined spirals that bake into beautiful swirls. The sound is a soft resistance as the dough winds, and the log should feel firm but not compressed. When rolling, tuck the dough slightly under the edge to form a smooth seam. If the roll becomes loose, respread and roll again, but avoid rolling so tightly that the dough is strained and springs back.
- When you reach the edge, pinch along the edges to seal: Sealing prevents filling leakage and helps the log hold shape during cutting and proofing. Use gentle pressure to close seams without flattening the roll. If seams open during shaping, dampen a fingertip and press again to reseal. A common mistake is leaving gaps which cause butter and sugar to escape and create flat spots during baking.
- Cut the dough log in half: Splitting the log makes it manageable and sets you up for even portions. Use a sharp bench knife or serrated blade so you get clean cuts and minimal smearing of filling. You may notice the cut faces show distinct rings of filling, which is a good sign of successful lamination. If the log squashes while cutting, chill briefly for firmer handling.
- Cut each half into 10 to 11 rolls: The number of rolls depends on your desired size and the width of your log. Aim for uniform slices so they bake evenly. A gentle sawing motion preserves the spiral without compressing it. If slices vary greatly, some will bake faster than others; re-slice to even sizes when necessary.
- Arrange each roll into the prepared bread pans. You can place them seam side down, or alternate each roll to show more of the filling: The arrangement affects the final loaf appearance. Seam side down yields a cleaner top, while alternating rolls reveals more filling in the baked surface. Place the rolls with slight space to allow a short rise. Pressing them too tightly prevents expansion. If the rolls look uneven, rotate them for a balanced pan.
- Cover and let rise 15 minutes: This short final rise relaxes the dough and firms up the rolls before baking, producing a tender crumb without overproofing. You will notice a slight puff and a softening of the dough surface. Avoid a long final rise which can cause collapse in the oven. If your kitchen is cool, extend the time slightly until you see a gentle increase in size.
- Preheat the oven to 350 degrees F: Preheating sets the environment for even browning and the oven spring that helps these loaves open up. A fully preheated oven at the specified temperature ensures the butter melts at the right rate and the crust sets quickly. Use an oven thermometer if you suspect temperature variance. Do not place the pans into a not fully heated oven, as uneven bake and greening of texture can occur.
- Place the bread pans on a rimmed baking sheet and brush each loaf with the beaten egg: Brushing with the beaten egg provides a glossy, golden top and helps any exposed filling caramelize attractively. The rimmed sheet catches any drips and keeps your oven clean. Brush gently to avoid pooling in creases. Over brushing can lead to darker spots where the egg pools, so a thin even coat is best.
- Transfer to the oven and bake 35 to 40 minutes or until dark brown on top: During baking the smell of caramelizing sugar and roasted butter becomes more pronounced, and the crust turns a deep, inviting brown. The loaves should sound hollow when tapped on the bottom and register an internal temperature near 190 to 200 degrees F for enriched breads. A common issue is underbaking, leaving a gummy center; if the top browns too quickly, tent with foil and continue baking until fully done.
- Let cool in the pans for 5 minutes, then flip out onto a cooling rack: The brief rest allows the structure to set slightly, which eases removal. Flipping onto a rack prevents steam buildup under the loaf which would soften the crust. You will still smell sweet, warm aromas as steam lifts, and the texture will continue to firm as it cools. If you cut too soon, the crumb may compress; allow the brief pan rest then slice when fully cooled to your preference.
- Slice and serve warm or at room temperature: Serving warm showcases the soft interior and slightly melty filling, while room temperature brings out a firmer texture for neat slices. I enjoy a warm slice with tea, noting how the layers pull apart. Store leftovers wrapped, and reheat gently to revive that fresh from oven quality. Avoid microwaving straight from fridge as it can make the crumb gummy; toast or oven warm for best results.
Notes
- Use active dry yeast option: If you prefer active dry yeast, bloom 2 1/4 teaspoons in the warm milk with the honey for 5 to 10 minutes until frothy before adding to the dry flour mixture, which helps ensure a robust rise.
- Make ahead refrigeration: Prepare the dough through shaping but skip the final room temperature rise; cover the loaves and refrigerate overnight. Remove 30 minutes before baking to take the chill off, then bake as directed for fresh morning bread.
- Freeze before baking: After shaping and placing rolls in pans through the shaping step, cover tightly and freeze for up to three months. Thaw on the counter for 2 to 3 hours, then proceed with the final brief rise and bake as directed for convenient future baking.
- Freeze after baking: Allow baked loaves to cool completely, wrap tightly in plastic wrap, and freeze in a freezer safe container for up to three months. Thaw on the counter and warm gently before serving to revive the texture.
- Adjust sweetness level: If you prefer a less sweet bread, reduce the sugar in the filling slightly, while keeping the dough enrichment the same to maintain structure and crumb.