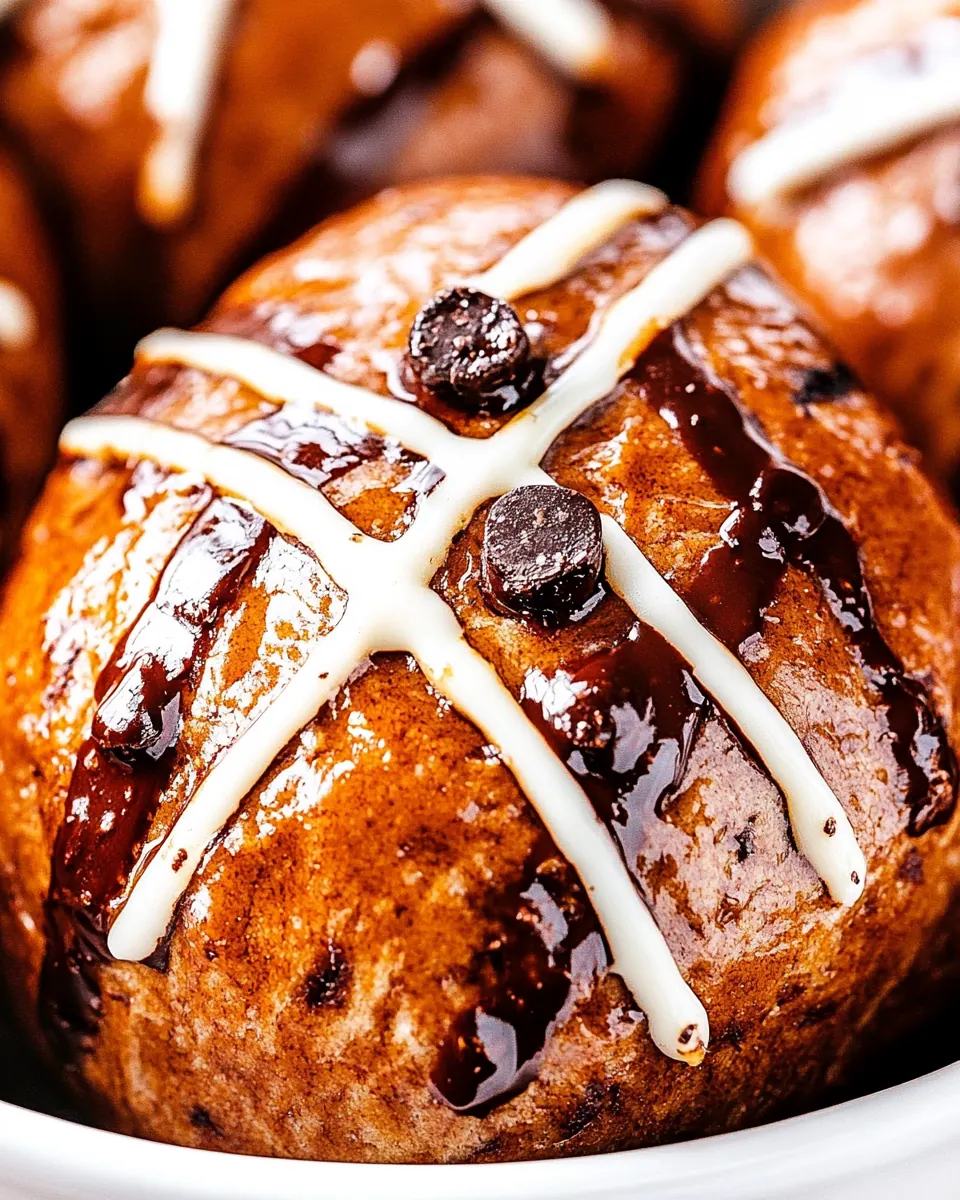
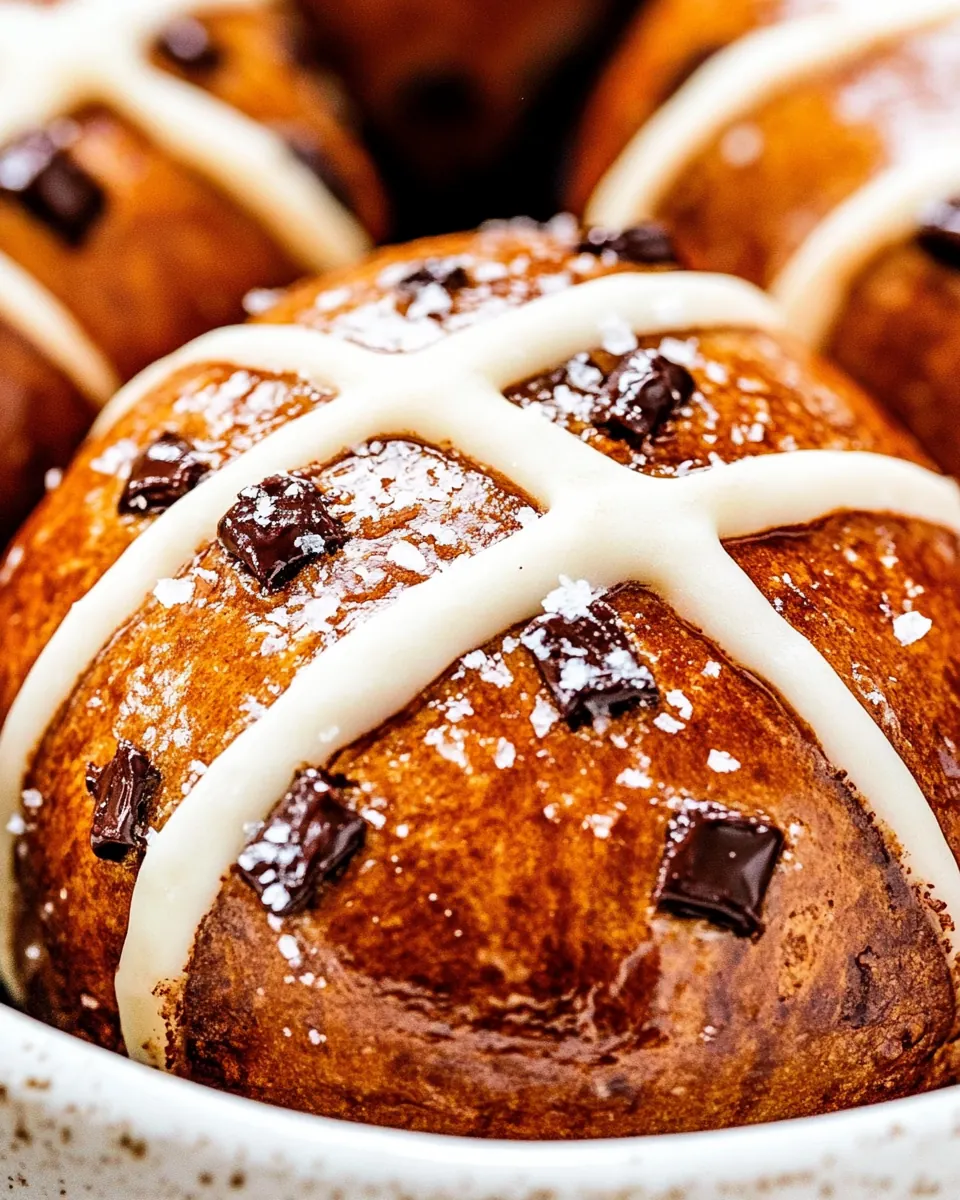
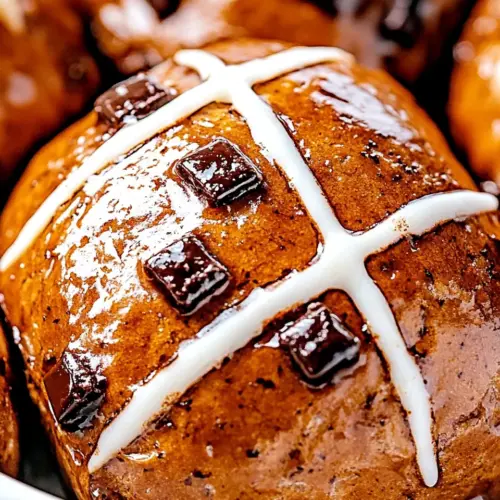
Easy Hot Cross Buns
Easy Hot Cross Buns have a special place in my baking rotation, and the moment I mix the dough I feel like I m revisiting childhood kitchens and Saturday mornings. I can still recall the warm, yeasty perfume that filled the house the first time I tried these, how the tiny flecks of cinnamon and allspice promised comfort, and how the chocolate chips made them sneakily irresistible. From that first batch, these buns became my go to for cozy brunches and last minute guests.
There s something quietly satisfying about making Easy Hot Cross Buns from scratch, the tactile rhythm of kneading, the soft give of dough as it springs back, and the satisfying pop when you press chocolate chips into each roll. Over time I ve learned to read the dough more than the clock, and that attention makes a huge difference in texture and crumb. I often find myself chatting with whoever s around as the loaves rise, stealing a warm nibble while the others are still proofing.
Recipe Snapshot
55 mins
30 mins
25 mins
Medium
200 kcal
American
Gluten-Free, Low FODMAP
Desserts
Large bowl, Wooden spoon, Baking sheet, Parchment paper, Microwave safe bowl, Ziplock bag, Pastry brush
Why Try This Easy Hot Cross Buns
Comforting familiar flavors
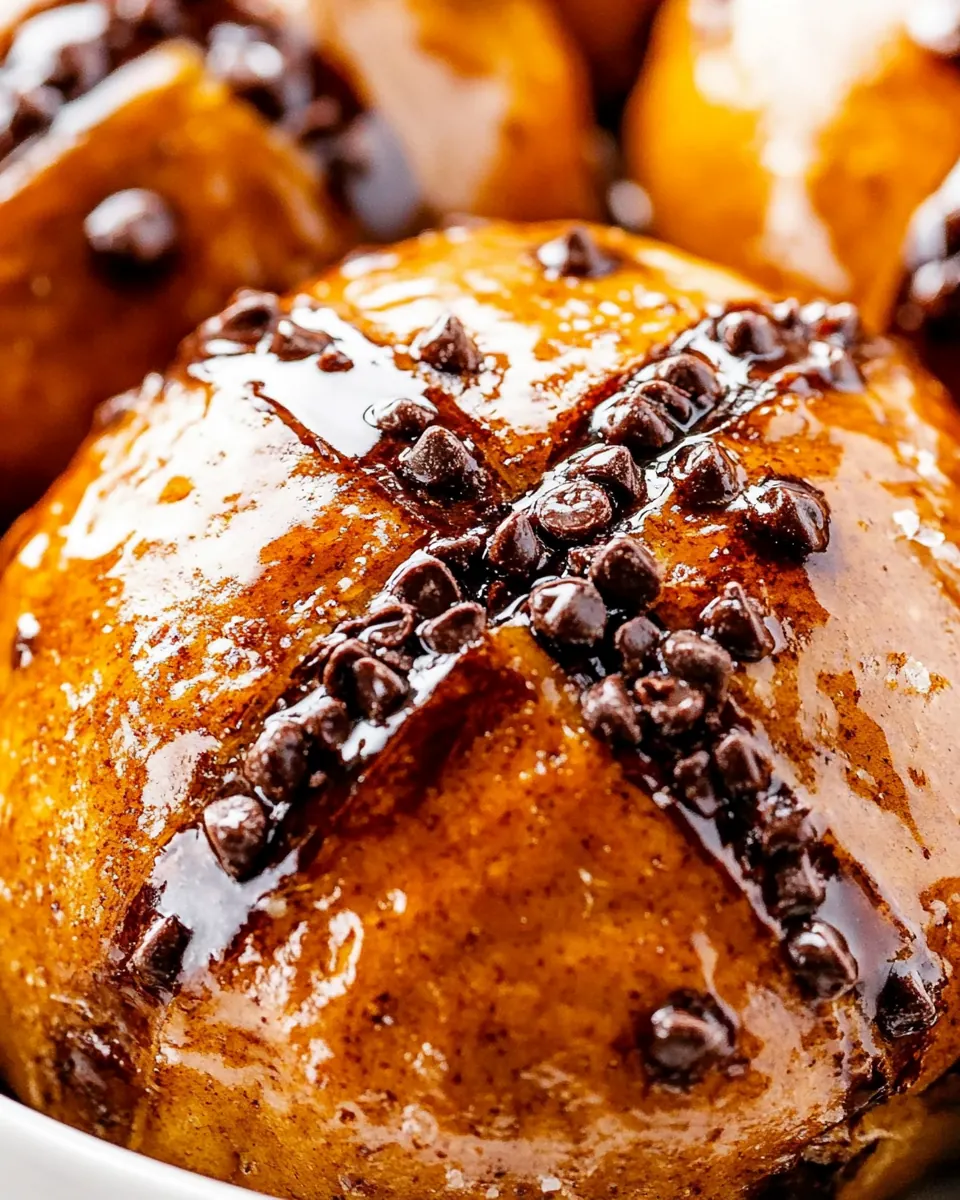
I love how Easy Hot Cross Buns balance spice and sweetness in a way that feels both nostalgic and fresh. The combination of cinnamon and all spice gives each bite a warm undertone, while the semi sweet chocolate chips add playful pockets of gooey sweetness. These buns bring back memories for guests, and I enjoy watching people close their eyes at the first bite, smiling at how something simple can feel elevated.
Simple enough for weeknight baking
We often think enriched doughs are fussy, but this recipe is forgiving, especially if you use instant yeast. I appreciate that you can pull together the wet and dry ingredients quickly and still end up with a tender crumb. The method is straightforward, and that s why I recommend these when you want a treat without an all day commitment.
Great for sharing and gifting
These buns travel well and make a thoughtful homemade gift. I ve wrapped them in a kitchen towel and given them to neighbors, and they always go down a treat. Because they can be portioned into 12 or 15, they re adaptable for a small family breakfast or a larger brunch spread.
Textural contrasts that win
What stands out to me is the contrast between the tender interior and the slightly crisp golden exterior after baking. The glossy apricot glaze finishes them with a shine and a subtle fruity note, while the piped crosses add classic visual charm. These little details turn simple dough into a memorable bite.
Forgiving for baker levels
Whether you re new to yeast baking or comfortable with dough, this recipe offers clear cues to get it right. I ve taught friends the technique by focusing on feel and visual signs rather than strict timing, and that approach consistently delivers fluffy, flavorful buns.
Ingredients to Make Easy Hot Cross Buns
These ingredients are built to create a tender, enriched bun with warm spice and pockets of chocolate. The dry ingredients form the structure, the milk and butter enrich the crumb, and the instant yeast ensures a reliable rise. The chocolate chips are the indulgent surprise, while the apricot jam glaze adds shine and a subtle fruit note that complements the spices.
- 3 1/2 cups bread flour or all purpose or plain: Measure precisely to provide the primary structure and gluten network for the dough, allowing the buns to rise and hold shape; choose bread flour for chewier texture or all-purpose for a softer crumb. Sift if lumpy and mix thoroughly with dry ingredients to ensure even hydration and consistent dough development.
- 1 tablespoon instant yeast or rapid rise yeast, quick-rise yeast: Activate quickly to leaven the dough, producing carbon dioxide that makes the buns light and airy; instant or rapid–rise varieties mix directly with dry ingredients for convenience. Use the specified amount to balance fermentation speed and flavor without overproofing, and store unused yeast in a cool, dry place.
- 1/2 cup sugar caster or superfine sugar preferred: Sweeten and tenderize the dough while feeding the yeast for fermentation, contributing to crust color and overall flavor; superfine or caster sugar dissolves more readily for even sweetness. Adjust slightly only if dietary needs require, since sugar also affects yeast activity and browning during baking.
- 1/2 teaspoons salt: Season subtly to enhance overall flavor balance and strengthen gluten slightly, preventing blandness in the final buns. Dissolve into the dry mix so that salt distributes evenly and does not contact yeast directly, which can inhibit fermentation if added in excess.
- 2 teaspoons ground cinnamon: Infuse warm aromatic spice throughout the dough to provide the classic hot cross bun flavor; cinnamon pairs well with dried fruit or chocolate additions. Mix thoroughly with the other spices to ensure consistent distribution in every bun.
- 1 teaspoon all spice: Add depth and warmth to the spice profile, complementing cinnamon with a slightly peppery, clove-like note that enhances complexity. Use in small amounts to avoid overpowering the dough, and blend into the dry spices for even flavor.
- 1 cup milk warm, temperature at 110°F (45°C): Provide lukewarm liquid to hydrate the dough, activate the yeast, and dissolve sugar; maintain about 110°F (45°C) to ensure yeast viability without killing it. Warm milk also contributes richness and a tender crumb through its fats and proteins, so measure temperature carefully.
- 1/4 cup butter melted: Enrich the dough with fat for tenderness, moisture, and richer flavor while helping crust color and softness; melted butter mixes easily into warm liquids. Cool slightly before adding to avoid shocking or killing yeast, and incorporate evenly for consistent texture.
- 1 large egg at room temperature: Bind and enrich the dough while contributing to structure, moisture, and a richer crumb; room–temperature eggs incorporate more uniformly than cold eggs. Beat lightly before adding to ensure even distribution and to help with browning and a tender interior.
- 2 cups semi sweet chocolate chips mini or regular: Provide sweet, chocolatey pockets throughout the buns for texture and flavor contrast, with mini chips distributing more evenly than regular chips. Fold in gently during shaping to avoid crushing the chips and to keep them evenly dispersed in each bun.
- 2 tablespoons apricot jam: Glaze finished buns with a glossy, slightly sweet coating that enhances appearance and adds a hint of fruitiness; apricot jam also helps preserve softness. Warm and strain the jam if necessary to remove lumps, then brush lightly over hot buns for best shine.
- 1 tablespoon hot water: Thin the jam to a brushable consistency and loosen any preserves for glazing, using hot water to dissolve and smooth the apricot jam. Mix thoroughly until uniform and apply immediately for an even, shiny finish that sets as it cools.
Easy Hot Cross Buns Instructions
These directions guide you through the dough, shaping, and finishing. I like to work with a warm, draft free space and keep sensory cues in mind, like the feel of the dough and the smell as it bakes. Follow each core step and use the descriptive cues to know when you re on track.
- Sift the flour into a large bowl. Add the yeast, sugar, salt and spices and mix well to combine.: You should notice the dry mix smelling faintly of cinnamon and all spice , which signals the spices are evenly distributed and will flavor the dough consistently. Mixing first prevents clumps of yeast or salt touching wet ingredients directly, which can inhibit yeast action. A common mistake is not sifting, which can lead to uneven pockets of spices or yeast; if you see clumps, break them up with your fingers before adding liquids. The texture should be powdery and uniform, not patchy.
- Make a well in the centre and pour in the milk and butter. Stir the liquid into each other, then add in the egg. Mix with a wooden spoon then bring the dough together with your hands, pressing into it until it forms a sticky ball. (If the dough is too dry add a little water in tablespoon increments (up to 1/2 cup if needed) until the dough is just sticky to touch.): At this stage you will feel the transformation from dry to tacky, the bowl warming slightly as fats and proteins combine. The dough should be cohesive but still a little sticky, which means it will be soft and tender after baking. If it feels dry or crumbly, add water in tiny tablespoon increments, up to 1/2 cup; adding too much liquid at once is a common error and makes the dough overly slack. The aroma will shift as the egg and butter integrate, becoming richer and more fragrant.
- Transfer dough onto a lightly floured surface and knead for 5-10 minutes until it becomes smooth and springy.: While kneading, listen for the soft scrape of dough against your surface and watch it change from shaggy to elastic. Your hands will pick up a faint sheen from the butter. Proper gluten development gives the dough a smooth surface and a bounce when pressed, which ensures a good crumb structure. Over kneading is rare by hand but can make the dough feel tight, while under kneading leaves it sticky and fragile; aim for a satiny texture that springs back when poked.
- Transfer dough back into the bowl and cover with plastic wrap (or a clean, damp tea towel). Leave in a warm place to rise until doubled in size (about 1 hour depending on how warm the room is).: As the dough proofs, you will notice it growing and releasing a yeasty, slightly sweet scent. This rise creates air pockets for a light interior. If the room is cold, the rise can take longer, so patience is key. A common mistake is letting it overproof until it collapses, which causes dense buns, so check visually for about double volume rather than relying solely on time.
- Lightly grease a large baking sheet or line with parchment paper. Set aside.: Preparing the tray ahead of shaping prevents delays that can deflate the dough. You should feel the smoothness of parchment under your palms and appreciate that the buns will transfer with minimal sticking. If you skip lining, buns may stick and tear when removed, so taking a minute now avoids frustration later.
- Punch down dough and transfer onto lightly floured surface. Sprinkle with 3/4 of the chocolate chips and knead the dough for 2-3 minutes.: The act of punching down redistributes gases and evens the crumb; you ll hear a soft sigh as trapped air escapes. As you knead in the chocolate chips , they become embedded and form pockets of melted chocolate in the final bake. Be gentle, because aggressive handling can break up air pockets too much; if chips clump, gently fold rather than forcefully knead.
- Divide dough into 12 or 15 even portions (depending on how many buns you need). Roll each piece into round smooth balls and arrange on baking sheet, leaving space between each bun to allow them to rise. Press remaining chocolate chips on top of each bun.: Rolling creates surface tension that helps buns rise tall and even, which you can observe as a smooth sheen on each ball. Pressing a few chips on top gives a pretty finish and guarantees some chips on the crust. A frequent misstep is making uneven portions, which results in inconsistent baking; use a scale or careful eyeballing to keep sizes uniform.
- Cover with plastic wrap (or damp tea towel) and place in a warm place once again to prove for 20-30 mins, until doubled and just touching. Preheat oven to 400°F (200°C).: During this final proof you will see buns swell and edges begin to soften; they should be puffy and just touching. Preheating the oven ensures a strong initial oven spring, producing a lighter bun. If you skip preheating, the buns may bake unevenly and remain pale. Use visual cues, not just time, to judge readiness.
- When oven is hot, bake buns for 20 minutes until they are golden brown and sound hollow inside when tapped.: As they bake, the kitchen will fill with a toasty aroma and the tops will turn an even golden brown. Tapping the base should produce a hollow sound, signaling they are cooked through. A common error is underbaking; if the center feels soft, give them a few more minutes while watching the color to prevent overbrowning. Proper bake time yields a crisp exterior and soft interior.
- Melt the remaining chocolate in the microwave in 30 second increments until melted. Transfer chocolate to a ziplock bag and snip a small hole in a bottom corner (the larger the hole the wider the crosses will be).: Melted chocolate should be glossy and smooth, without grainy bits, indicating it s been heated gently. Using a bag lets you pipe neat crosses, and adjusting the hole size changes line thickness. Overheating chocolate is a common problem, which causes it to seize; if this happens, stir in a small amount of warm oil or discard and remelt carefully at lower power.
- Allow buns to cool slightly and pipe crosses onto your buns. Allow them to set before glazing.: Cooling a bit prevents the piping from sliding off and keeps the crosses defined rather than melting into the crust. You ll see the chocolate hold shape as it firms, giving a classic cross look. Piping while buns are too hot will smear the design, so wait until they are warm but not piping hot.
- Mix together the jam and warm water to combine, and brush the glaze evenly over each bun using a pastry brush.: Brushing the apricot jam glaze adds shine and a subtle fruit note, and the warmth helps it spread evenly over the surface. The finished buns should glisten and smell slightly fruity, which lifts the spice. If your glaze is too thin it won t hold, if too thick it will be sticky, so adjust with tiny water amounts for the right gloss.
Tips and Variations
Small changes can yield big differences in texture and presentation. Below are practical tips and variations that I use regularly, explained so you can customize with confidence.
- Choose your flour wisely, bread flour gives more structure and chew while all purpose yields a softer crumb; pick based on your texture preference and the result will match your expectation.
- Prefer quick rise yeast, if you want a faster turnaround, use instant or rapid rise yeast as recommended, and you ll still get a good lift without extra fuss.
- Keep milk warm, around 110°F, to activate yeast effectively; too hot will kill yeast and too cool will slow the rise significantly.
- Knead to feel, aim for a smooth, springy dough rather than strict timing, as humidity and flour type change how long kneading needs to be.
- Distribute mix ins gently, fold in chocolate chips with care to avoid crushing air pockets and creating uneven density in buns.
- Glaze for shine, warm the apricot jam and strain if needed for a clear, glossy finish that enhances presentation and flavor.
- Adjust proofing by environment, if your kitchen is cool, place the bowl near a warm oven or on top of a warm appliance to encourage consistent rising.
Accompaniments for Easy Hot Cross Buns
These buns pair beautifully with simple spreads and warm drinks, and they re versatile for many occasions. Below are serving suggestions, storage tips, and seasonal ideas formatted as a list for easy reference.
- Breakfast spread: Serve slightly warm with a selection of plain butter, honey, or a light fruit jam for a comforting morning treat.
- Brunch centerpiece: Arrange on a platter with fresh fruit and yogurt for a casual buffet style brunch where guests can help themselves.
- Tea time: Pair with hot tea or coffee, the spice and chocolate complement classic blends and make a cozy afternoon snack.
- Holiday table: For occasions like Easter, present them warm as part of a festive brunch, accenting the table with spring flowers and simple garnishes.
- Storage tips: Keep at room temperature in an airtight container for up to two days, or freeze cooled buns individually wrapped for up to one month; thaw before warming gently in the oven.
- Serving temperature: Reheat briefly at low oven heat to revive the crust and melt the chocolate slightly for an inviting texture contrast.
- Portion planning: Because the recipe yields 12 to 15 buns, adjust portions based on occasion size, and serve on multiple trays if hosting a crowd.
- Seasonal pairing: In spring, complement with light citrus marmalade or a herbal tea to echo fresh seasonal flavors.
FAQ
Conclusion
These Easy Hot Cross Buns are special because they combine classic spice with melty chocolate and a glossy apricot finish for a bakery style result you can make at home. Give them a try for your next brunch or holiday table, and enjoy the warm aromas and happy faces they inspire. Baking these buns is a relaxed ritual that rewards attention to feel and timing, and once you taste the tender crumb and sweet pockets of chocolate, you ll be reaching for the recipe again and again.
Easy Hot Cross Buns
Equipment
- Large Bowl
- Wooden Spoon
- Baking Sheet
- Parchment Paper
- Microwave-safe Bowl
- Ziplock bag
- Pastry Brush
Ingredients
- 3 1/2 cups bread flour or all purpose or plain Measure precisely to provide the primary structure and gluten network for the dough, allowing the buns to rise and hold shape; choose bread flour for chewier texture or all-purpose for a softer crumb. Sift if lumpy and mix thoroughly with dry ingredients to ensure even hydration and consistent dough development.
- 1 tablespoon instant yeast or rapid rise yeast, quick-rise yeast Activate quickly to leaven the dough, producing carbon dioxide that makes the buns light and airy; instant or rapid-rise varieties mix directly with dry ingredients for convenience. Use the specified amount to balance fermentation speed and flavor without overproofing, and store unused yeast in a cool, dry place.
- 1/2 cup sugar caster or superfine sugar preferred Sweeten and tenderize the dough while feeding the yeast for fermentation, contributing to crust color and overall flavor; superfine or caster sugar dissolves more readily for even sweetness. Adjust slightly only if dietary needs require, since sugar also affects yeast activity and browning during baking.
- 1/2 teaspoons salt Season subtly to enhance overall flavor balance and strengthen gluten slightly, preventing blandness in the final buns. Dissolve into the dry mix so that salt distributes evenly and does not contact yeast directly, which can inhibit fermentation if added in excess.
- 2 teaspoons ground cinnamon Infuse warm aromatic spice throughout the dough to provide the classic hot cross bun flavor; cinnamon pairs well with dried fruit or chocolate additions. Mix thoroughly with the other spices to ensure consistent distribution in every bun.
- 1 teaspoon all spice Add depth and warmth to the spice profile, complementing cinnamon with a slightly peppery, clove-like note that enhances complexity. Use in small amounts to avoid overpowering the dough, and blend into the dry spices for even flavor.
- 1 cup milk warm, temperature at 110°F (45°C) Provide lukewarm liquid to hydrate the dough, activate the yeast, and dissolve sugar; maintain about 110°F (45°C) to ensure yeast viability without killing it. Warm milk also contributes richness and a tender crumb through its fats and proteins, so measure temperature carefully.
- 1/4 cup butter melted Enrich the dough with fat for tenderness, moisture, and richer flavor while helping crust color and softness; melted butter mixes easily into warm liquids. Cool slightly before adding to avoid shocking or killing yeast, and incorporate evenly for consistent texture.
- 1 large egg at room temperature Bind and enrich the dough while contributing to structure, moisture, and a richer crumb; room-temperature eggs incorporate more uniformly than cold eggs. Beat lightly before adding to ensure even distribution and to help with browning and a tender interior.
- 2 cups semi sweet chocolate chips mini or regular Provide sweet, chocolatey pockets throughout the buns for texture and flavor contrast, with mini chips distributing more evenly than regular chips. Fold in gently during shaping to avoid crushing the chips and to keep them evenly dispersed in each bun.
- 2 tablespoons apricot jam Glaze finished buns with a glossy, slightly sweet coating that enhances appearance and adds a hint of fruitiness; apricot jam also helps preserve softness. Warm and strain the jam if necessary to remove lumps, then brush lightly over hot buns for best shine.
- 1 tablespoon hot water Thin the jam to a brushable consistency and loosen any preserves for glazing, using hot water to dissolve and smooth the apricot jam. Mix thoroughly until uniform and apply immediately for an even, shiny finish that sets as it cools.
Instructions
- Sift the flour into a large bowl. Add the yeast, sugar, salt and spices and mix well to combine.: You should notice the dry mix smelling faintly of cinnamon and all spice , which signals the spices are evenly distributed and will flavor the dough consistently. Mixing first prevents clumps of yeast or salt touching wet ingredients directly, which can inhibit yeast action. A common mistake is not sifting, which can lead to uneven pockets of spices or yeast; if you see clumps, break them up with your fingers before adding liquids. The texture should be powdery and uniform, not patchy.
- Make a well in the centre and pour in the milk and butter. Stir the liquid into each other, then add in the egg. Mix with a wooden spoon then bring the dough together with your hands, pressing into it until it forms a sticky ball. (If the dough is too dry add a little water in tablespoon increments (up to 1/2 cup if needed) until the dough is just sticky to touch.): At this stage you will feel the transformation from dry to tacky, the bowl warming slightly as fats and proteins combine. The dough should be cohesive but still a little sticky, which means it will be soft and tender after baking. If it feels dry or crumbly, add water in tiny tablespoon increments, up to 1/2 cup; adding too much liquid at once is a common error and makes the dough overly slack. The aroma will shift as the egg and butter integrate, becoming richer and more fragrant.
- Transfer dough onto a lightly floured surface and knead for 5-10 minutes until it becomes smooth and springy.: While kneading, listen for the soft scrape of dough against your surface and watch it change from shaggy to elastic. Your hands will pick up a faint sheen from the butter. Proper gluten development gives the dough a smooth surface and a bounce when pressed, which ensures a good crumb structure. Over kneading is rare by hand but can make the dough feel tight, while under kneading leaves it sticky and fragile; aim for a satiny texture that springs back when poked.
- Transfer dough back into the bowl and cover with plastic wrap (or a clean, damp tea towel). Leave in a warm place to rise until doubled in size (about 1 hour depending on how warm the room is).: As the dough proofs, you will notice it growing and releasing a yeasty, slightly sweet scent. This rise creates air pockets for a light interior. If the room is cold, the rise can take longer, so patience is key. A common mistake is letting it overproof until it collapses, which causes dense buns, so check visually for about double volume rather than relying solely on time.
- Lightly grease a large baking sheet or line with parchment paper. Set aside.: Preparing the tray ahead of shaping prevents delays that can deflate the dough. You should feel the smoothness of parchment under your palms and appreciate that the buns will transfer with minimal sticking. If you skip lining, buns may stick and tear when removed, so taking a minute now avoids frustration later.
- Punch down dough and transfer onto lightly floured surface. Sprinkle with 3/4 of the chocolate chips and knead the dough for 2-3 minutes.: The act of punching down redistributes gases and evens the crumb; you ll hear a soft sigh as trapped air escapes. As you knead in the chocolate chips , they become embedded and form pockets of melted chocolate in the final bake. Be gentle, because aggressive handling can break up air pockets too much; if chips clump, gently fold rather than forcefully knead.
- Divide dough into 12 or 15 even portions (depending on how many buns you need). Roll each piece into round smooth balls and arrange on baking sheet, leaving space between each bun to allow them to rise. Press remaining chocolate chips on top of each bun.: Rolling creates surface tension that helps buns rise tall and even, which you can observe as a smooth sheen on each ball. Pressing a few chips on top gives a pretty finish and guarantees some chips on the crust. A frequent misstep is making uneven portions, which results in inconsistent baking; use a scale or careful eyeballing to keep sizes uniform.
- Cover with plastic wrap (or damp tea towel) and place in a warm place once again to prove for 20-30 mins, until doubled and just touching. Preheat oven to 400°F (200°C).: During this final proof you will see buns swell and edges begin to soften; they should be puffy and just touching. Preheating the oven ensures a strong initial oven spring, producing a lighter bun. If you skip preheating, the buns may bake unevenly and remain pale. Use visual cues, not just time, to judge readiness.
- When oven is hot, bake buns for 20 minutes until they are golden brown and sound hollow inside when tapped.: As they bake, the kitchen will fill with a toasty aroma and the tops will turn an even golden brown. Tapping the base should produce a hollow sound, signaling they are cooked through. A common error is underbaking; if the center feels soft, give them a few more minutes while watching the color to prevent overbrowning. Proper bake time yields a crisp exterior and soft interior.
- Melt the remaining chocolate in the microwave in 30 second increments until melted. Transfer chocolate to a ziplock bag and snip a small hole in a bottom corner (the larger the hole the wider the crosses will be).: Melted chocolate should be glossy and smooth, without grainy bits, indicating it s been heated gently. Using a bag lets you pipe neat crosses, and adjusting the hole size changes line thickness. Overheating chocolate is a common problem, which causes it to seize; if this happens, stir in a small amount of warm oil or discard and remelt carefully at lower power.
- Allow buns to cool slightly and pipe crosses onto your buns. Allow them to set before glazing.: Cooling a bit prevents the piping from sliding off and keeps the crosses defined rather than melting into the crust. You ll see the chocolate hold shape as it firms, giving a classic cross look. Piping while buns are too hot will smear the design, so wait until they are warm but not piping hot.
- Mix together the jam and warm water to combine, and brush the glaze evenly over each bun using a pastry brush.: Brushing the apricot jam glaze adds shine and a subtle fruit note, and the warmth helps it spread evenly over the surface. The finished buns should glisten and smell slightly fruity, which lifts the spice. If your glaze is too thin it won t hold, if too thick it will be sticky, so adjust with tiny water amounts for the right gloss.
Notes
- Choose your flour wisely, bread flour gives more structure and chew while all purpose yields a softer crumb; pick based on your texture preference and the result will match your expectation.
- Prefer quick rise yeast, if you want a faster turnaround, use instant or rapid rise yeast as recommended, and you ll still get a good lift without extra fuss.
- Keep milk warm, around 110°F, to activate yeast effectively; too hot will kill yeast and too cool will slow the rise significantly.
- Knead to feel, aim for a smooth, springy dough rather than strict timing, as humidity and flour type change how long kneading needs to be.
- Distribute mix ins gently, fold in chocolate chips with care to avoid crushing air pockets and creating uneven density in buns.
- Glaze for shine, warm the apricot jam and strain if needed for a clear, glossy finish that enhances presentation and flavor.
- Adjust proofing by environment, if your kitchen is cool, place the bowl near a warm oven or on top of a warm appliance to encourage consistent rising.