Easy Baked Apples
Easy Baked Apples are one of those recipes I turn to when I want something warm, soothing, and impossibly simple to pull together. The first time I made these I was juggling a busy weeknight and a basket of slightly bruised apples, and this dish rescued both the fruit and the evening. I still remember the moment I opened the oven and a steam of sweet, spiced aroma rolled out, making the kitchen feel like a tiny bakery.
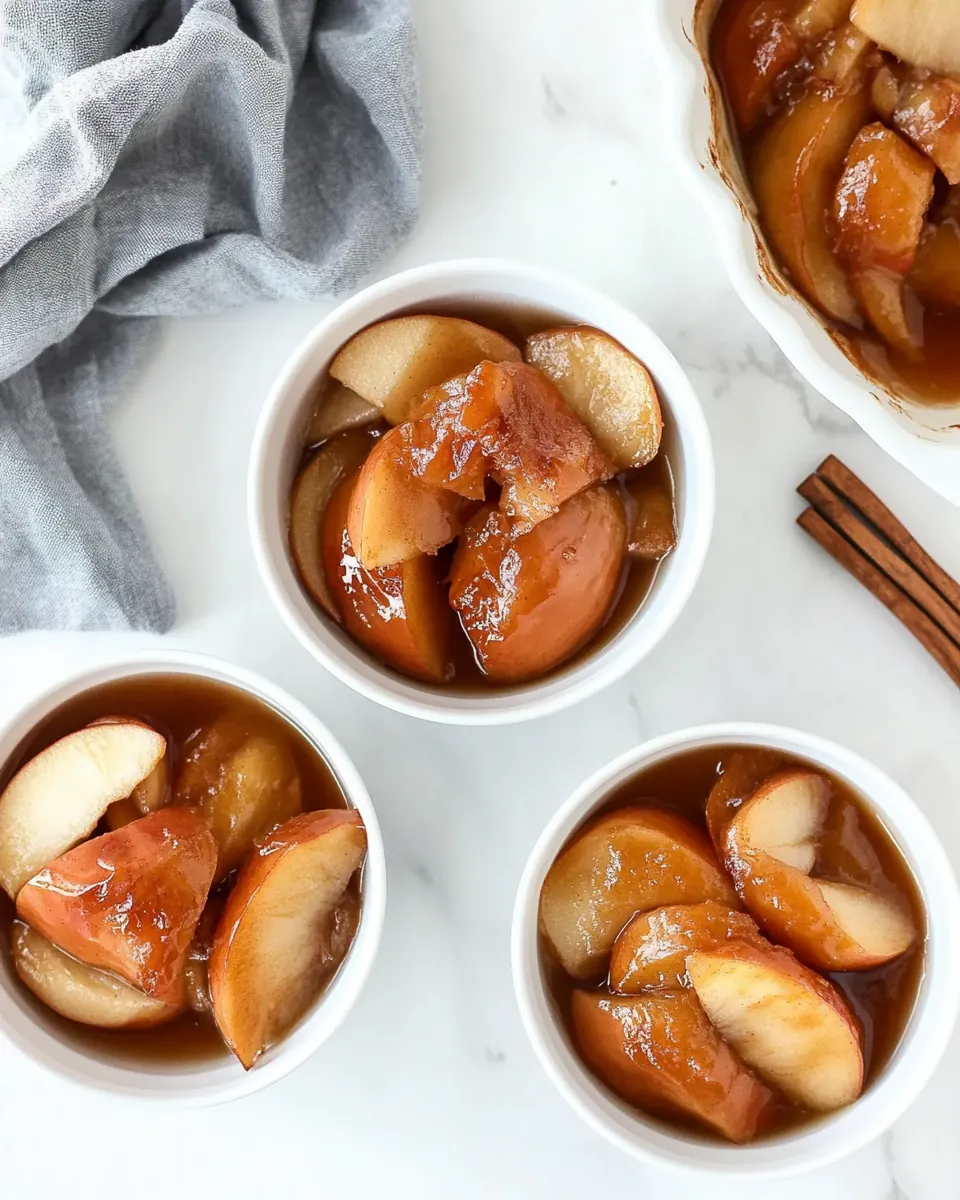
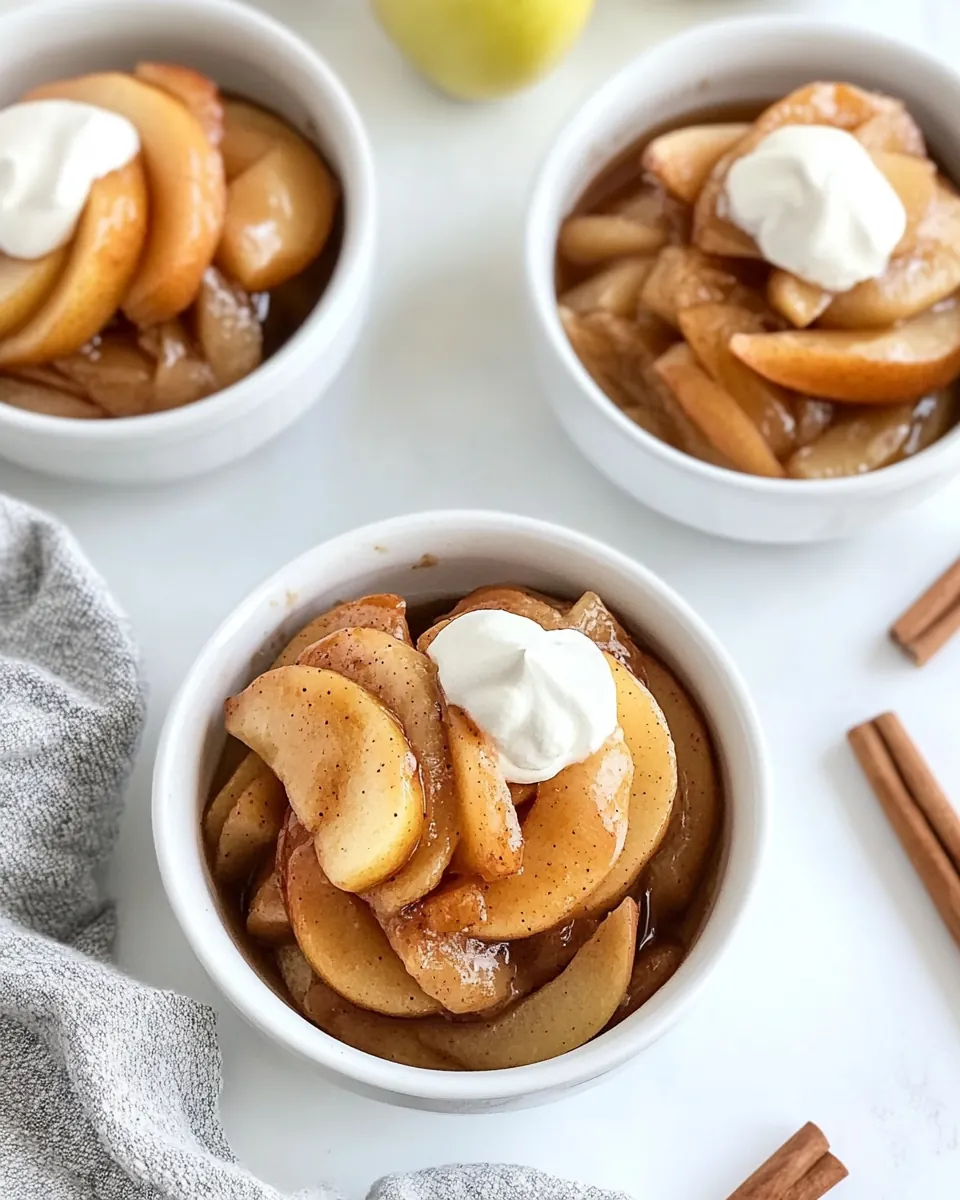
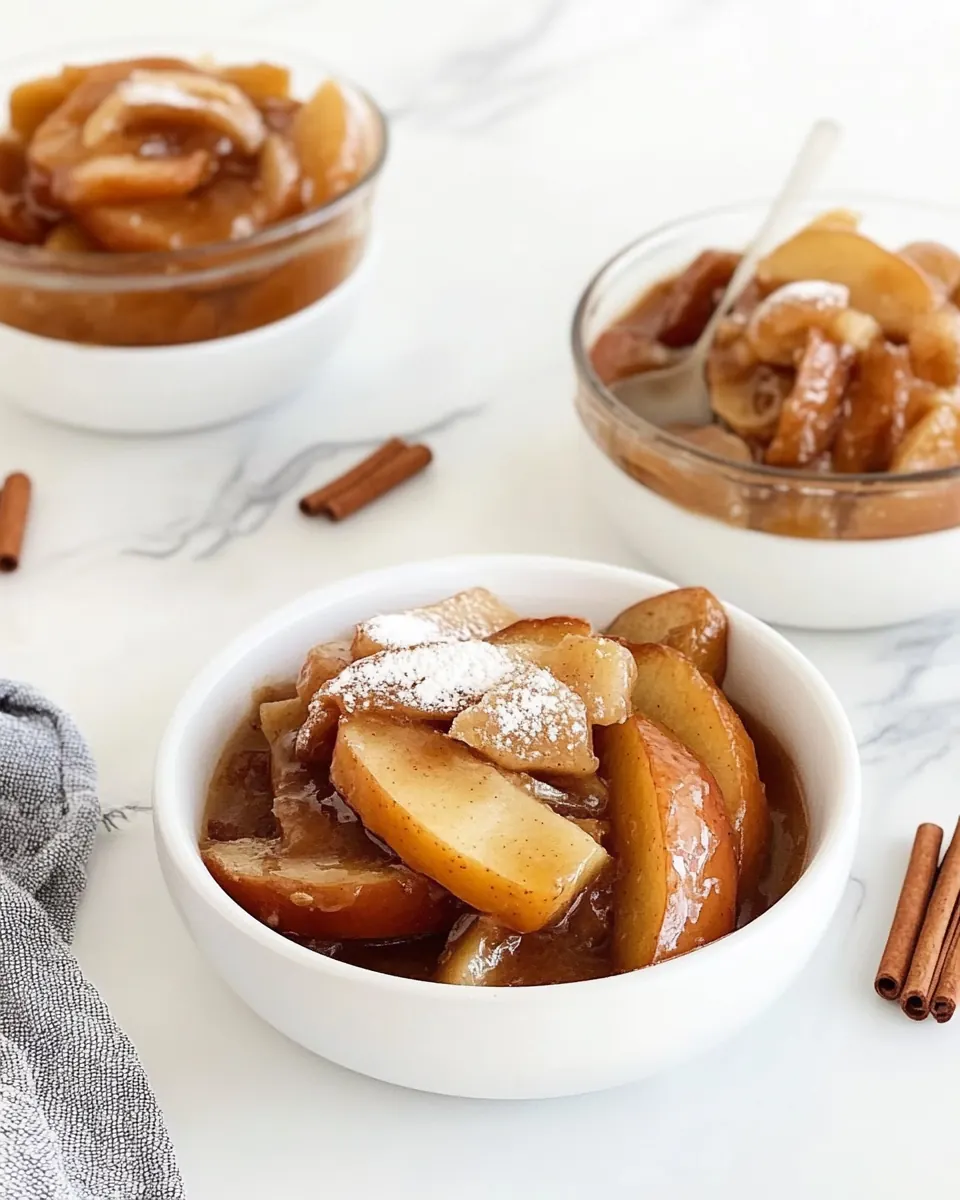
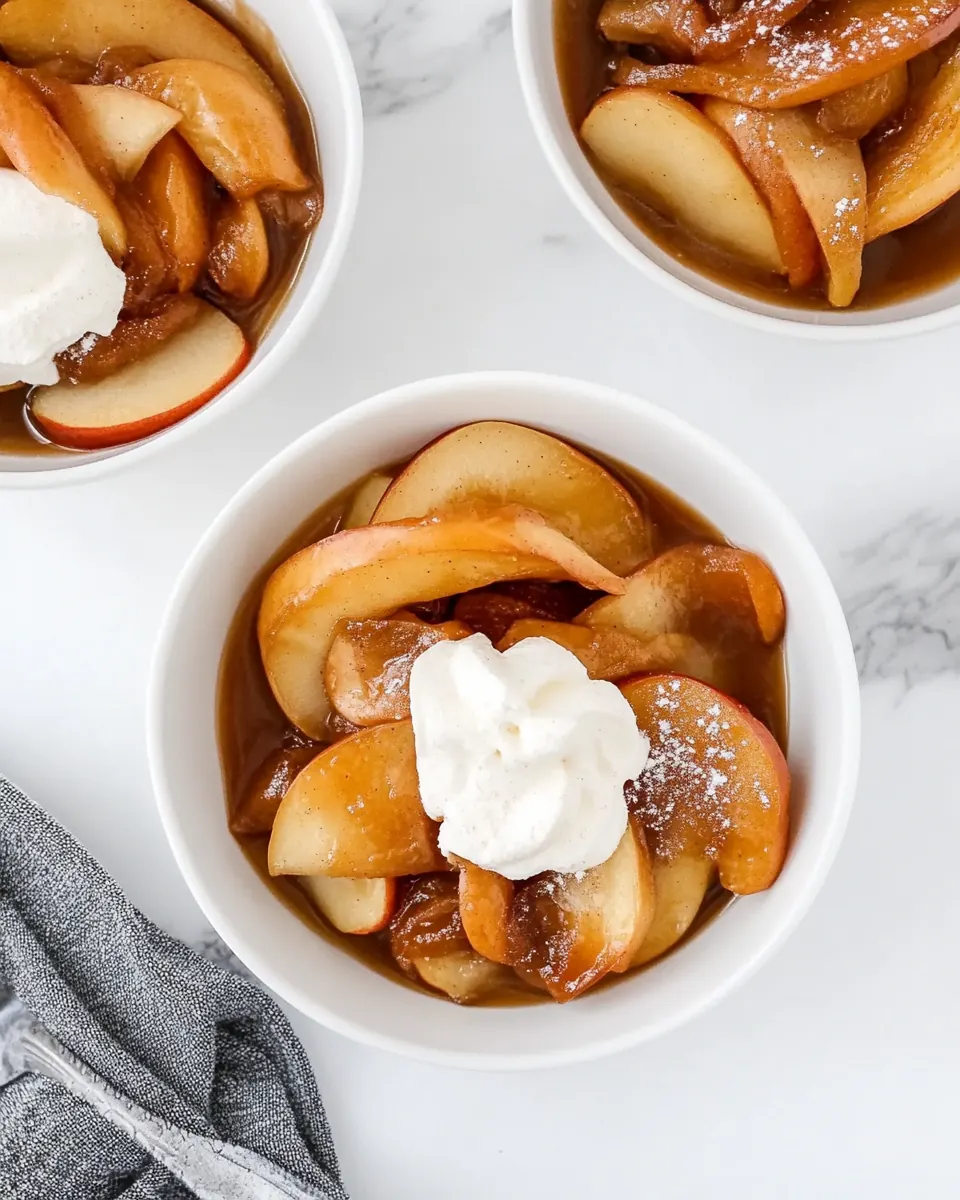
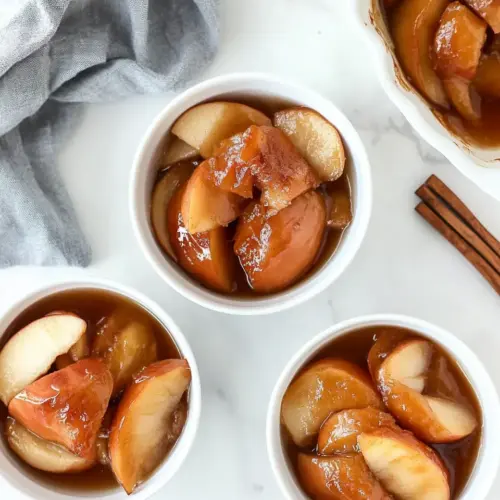
I like to think of this as comfort food that does not demand fuss. You’ll notice how the thin slices of apples collapse into tender ribbons during baking, mingling with a glossy, caramel colored sauce that tastes like fall in a spoon. I often serve these straight from the baking dish while they are still warm and a little bubbly, because the contrast between warm fruit and cool toppings is irresistible.
Recipe Snapshot
1 hr 5 mins
10 mins
55 mins
Medium
180 kcal
American
Gluten-Free, Vegan
Desserts
Oven, 9 x 13 baking dish, Mixing bowl, Knife, Cutting board, Spoon
The Beauty of This Easy Baked Apples
1. Simple ingredients, maximum flavor
I love how a handful of pantry staples transforms into something so comforting. With just apples, a sweetener, and a pinch of spice, the fruit’s natural sugars coax out deep caramel notes in the oven. I find this minimalism makes the recipe approachable, especially when I want a homemade dessert without a grocery run.
2. Versatile and adaptable
I’ve made Easy Baked Apples with different apple varieties and each time the outcome changes slightly, in a good way. You can tailor sweetness and spice to match your mood or the season, and it’s forgiving enough to accommodate swaps if you are low on a particular pantry item. That flexibility is why I turn to it for gatherings and solo treats alike.
3. Texture that comforts
The contrast between soft, tender apples and a slightly syrupy sauce makes every spoonful satisfying. When baked properly, the slices hold enough structure to feel substantial, while still melting in your mouth. I love that balance, especially on chilly evenings.
4. Easy to scale and serve
Because the method is straightforward, you can double or halve the quantities without changing technique. I often make a double batch for company, and I appreciate that it reheats beautifully for later. That reliability makes hosting less stressful, and the dessert always feels like you put in more effort than you did.
5. Cozy aroma and low fuss
One of my favorite parts is the way the kitchen fills with warm, spiced scent while these bake. It signals comfort and slows the pace of the evening. Best of all, the prep is quick, and the oven does the heavy lifting, which means you can sit down and relax while the dessert cooks itself.
Key Ingredients for Easy Baked Apples
These ingredients come together to highlight the natural sweetness and texture of the fruit. I use the spices and starch to build depth and body in the sauce, while the citrus brightens the flavor. The philosophy here is restraint, letting the apples take center stage with a few supporting players that enhance rather than overwhelm.
- 6 large honeycrisp apples (about 2.5 pounds): Provide firm, sweet-tart fruit to bake into a tender, saucy dessert; hollow slightly to hold filling and release natural juices that blend with spices and sweetener during roasting.
- 1/2 cup coconut sugar (84 grams): Add caramel-like sweetness and gentle brown sugar flavor while drawing out apple juices; helps create a syrupy filling that balances tartness and enhances browning in the oven.
- 1 teaspoon ground cinnamon (2 grams): Deliver warm, aromatic spice that complements apples and adds depth to the filling; sprinkle into the sugar mix to infuse the fruit with classic baking warmth as it cooks.
- 1/2 teaspoon ground ginger: Lend bright, slightly peppery warmth that lifts the cinnamon and adds complexity; use sparingly to avoid overpowering the apple’s natural flavor while contributing subtle zing.
- 2 tablespoons tapioca starch (11 grams; or arrowroot/corn starch): Thicken the juices released during baking into a glossy, clingy filling; mix with the sugar and spices so the starch can swell as it heats and prevent a runny texture.
- 1/4 cup orange juice (65 grams): Provide bright acidity and fruity citrus notes that balance sweetness; pour into the cavity or over apples to add moisture, deglaze the baking dish, and enhance overall flavor.
- 1/4 teaspoon salt: Enhance and balance all flavors by amplifying sweetness and reducing bitterness; dissolve into the filling mix to help season the fruit and round out the taste profile.
The Process for Making Easy Baked Apples
These steps are straightforward, but the magic happens as the apples soften and the juices caramelize. Follow the sensory cues and timing, and you will be rewarded with a tender, saucy dessert that smells incredible and tastes like fall.
- Preheat the oven to 400°F. Thinly slice the apples into pieces about 1/8-inch thick. I don't take the time to peel the apples, but you can, if you prefer no peel. (The peels become very soft and tender when they cook!): As the oven warms, you should notice a faint metallic hum from the heating elements, and if you press your hand near the closed door you can feel the gradual rise in temperature. Preheating ensures an immediate burst of heat the moment the apples enter, which helps begin the caramelization process on the exterior of the slices. If you skip preheating you risk uneven cooking and longer bake times. A common mistake is placing the dish in a not fully heated oven, which can lead to paler, less developed sauce and inconsistent texture.
- In a 6-quart dutch oven, or 9 x 13 baking dish, toss the sliced apples with the coconut sugar, cinnamon, ginger, tapioca starch, orange juice, and salt. When the apples look evenly coated, cover with the lid (or use aluminum foil to tightly cover), and bake at 400°F for 45 minutes.: When you slice the apples to this thinness, they will soften quickly and blend into a tender consistency while still offering slight structure. The sound of the knife on the cutting board is crisp, and the slices should glisten with fresh juice. Thin slicing creates more surface area for the sugar and spices to cling to, promoting even caramelization. Avoid slices that are uneven, since thicker pieces will take longer to cook and create textural inconsistency in the finished dish.
- Remove the lid and give the apples a stir. Return to the oven to help any extra liquid evaporate, about 10 to 15 more minutes. The apples should be very soft, in a rich, caramelized sauce.: The peels become very soft and tender when they cook, adding tiny bursts of texture and color. You will notice the peels fold and soften into the slices as they bake, contributing a pleasant rustic mouthfeel. The skin also helps slices hold their shape a bit better during baking. If you remove the skins for a smoother finish, be careful not to overwork the fruit while peeling, because bruised or broken pieces can release too much juice and make the sauce thinner than desired.
- Let the apples cool for 10 minutes, then serve warm with your favorite toppings, like whipped cream or vanilla ice cream.: As you toss, the apples should become evenly coated and slightly glossy from the orange juice and sugar. The spices will dust the fruit and the starch should begin to disperse so it can thicken the juices as they release. You will smell the cinnamon and ginger mingle with the citrus, creating a lovely aromatic hint of what is to come. If the coating looks patchy, take a few extra seconds to massage the ingredients together gently so the starch does not clump. A common error here is dumping the starch on top without mixing, which leaves pockets of uncooked powder in the sauce.
- When the apples look evenly coated, cover with the lid (or use aluminum foil to tightly cover), and bake at 400°F for 45 minutes.: Once covered, steam will build and the apples will begin to soften uniformly, creating a tender, steamy environment that helps them collapse gently. During this time the aroma will grow richer and sweeter, and the sound will be quiet aside from a soft bubbling. This covered stage prevents the top from drying out and encourages the juices to mingle, producing a cohesive sauce. A misstep is baking uncovered from the start, which can dry the slices and prevent proper sauce formation.
- Remove the lid and give the apples a stir.: At this point you will see the juices have darkened and the slices look very tender. Stirring helps redistribute heat and exposes any extra liquid so it can evaporate. The visual cue to watch for is a glossy, caramel colored sauce clinging to the fruit rather than a watery pool. If you notice very thin liquid, return the dish to the oven to concentrate it. Overstirring can break the slices down too much, so be gentle and use a broad spoon to fold rather than mash.
- Return to the oven to help any extra liquid evaporate, about 10 to 15 more minutes.: During this short uncovered bake the sauce will reduce and thicken, taking on a deeper color and slightly sticky texture. You may hear a quiet bubbling as the sugars concentrate and begin to caramelize. This phase is where the finish transforms from simply baked fruit to a saucy dessert with body. Watch closely near the end so it does not overreduce and scorch; if the edges look overly dark, lower the temperature slightly or remove a few minutes early.
- The apples should be very soft, in a rich, caramelized sauce.: The ideal finish is slices that yield easily to the fork and a sauce that clings rather than pools. The aroma will be fragrant and warmly spiced, and the surface may glint with syrupy sheen. If some pieces still seem firm, give them a few extra minutes covered to steam through. Avoid letting the sauce dry completely, because you want that clingy coating to dress the fruit rather than a sticky crust that hardens as it cools.
- Let the apples cool for 10 minutes, then serve warm with your favorite toppings, like whipped cream or vanilla ice cream.: As the dish rests, the sauce will thicken slightly and flavors meld. The cooling window is perfect for setting the texture so spoonfuls hold together on a plate. When you serve warm, contrast with a cool topping for balance and textural interest. A mistake to avoid is serving immediately piping hot, when the sauce is too thin and may slide off the fruit; a short rest improves presentation and mouthfeel.
Recipe Notes about Easy Baked Apples
I like to collect a few practical tips that make the process smoother and the results better. Below are notes I return to, shaped by trials and small adjustments over time.
- Apple choice matters Choose apples that balance sweetness and firmness, such as Honeycrisp or Fuji, to achieve a tender yet structured result.
- Adjust sweetness If you prefer less sweetness, reduce the coconut sugar slightly or increase the citrus for brightness.
- Starch alternatives If you do not have tapioca starch, arrowroot or corn starch works, but note the thickening power differs slightly and may change the final sauce texture.
- Use fresh juice Fresh orange juice brightens the profile, but bottled juice will still produce a pleasant result in a pinch.
- Serve warm These shine when warm, so plan to serve shortly after the brief cooling period for the best contrast with toppings.
What to Serve Alongside Easy Baked Apples
These warm, spiced fruit slices pair beautifully with simple, complementary accompaniments. Below I outline options for different occasions and how to present them. Use the list to mix and match based on the mood of the meal.
- Vanilla ice cream A scoop of cold ice cream balances the warm, syrupy apples, creating a classic contrast in temperature and texture that guests love.
- Whipped cream Lightly sweetened whipped cream adds airiness and a creamy counterpoint to the dense fruit, ideal for an elegant finish.
- Yogurt Plain or lightly sweetened yogurt offers a tangy, lighter option that pairs well if you want to keep the dessert less indulgent.
- Oat or granola sprinkle A sprinkle of crunchy oats or granola adds texture and makes the dish feel more rustic and substantial for brunch service.
- Warm breakfast Serve as a topping for pancakes, waffles, or oatmeal for a cozy autumn breakfast or brunch.
- Dinner dessert Finish a family dinner with a modest portion, served warm and slightly saucy, for a comforting close to the meal.
- Storage tip Refrigerate leftovers in an airtight container for up to 4 days, and gently rewarm in the oven to restore texture before serving.
- Seasonal pairing These are perfect for fall gatherings and holidays when apples are at their best and kitchens crave warming flavors.
- Serving style Present in a communal baking dish for sharing, or spoon individually into bowls for a more refined presentation.
- Occasion flexibility They work equally well for quiet weeknights, brunches, or as a low effort dessert for guests.
FAQ
Conclusion
What makes this recipe special is how a few simple ingredients transform into a cozy, warm dessert that tastes far more complex than the effort involved. Give these Easy Baked Apples a try when you want a comforting finish to a meal or a no fuss treat for guests, the oven does most of the work and the aroma fills the kitchen with seasonal charm. I hope you enjoy the soft texture and spiced, caramel like sauce as much as I do, and that it becomes a go to in your rotation for busy nights or relaxed weekends.
Easy Baked Apples
Equipment
- Oven
- 9 X 13 baking dish
- Mixing Bowl
- Knife
- Cutting Board
- Spoon
Ingredients
- 6 large honeycrisp apples (about 2.5 pounds) Provide firm, sweet-tart fruit to bake into a tender, saucy dessert; hollow slightly to hold filling and release natural juices that blend with spices and sweetener during roasting.
- 1/2 cup coconut sugar (84 grams) Add caramel-like sweetness and gentle brown sugar flavor while drawing out apple juices; helps create a syrupy filling that balances tartness and enhances browning in the oven.
- 1 teaspoon ground cinnamon (2 grams) Deliver warm, aromatic spice that complements apples and adds depth to the filling; sprinkle into the sugar mix to infuse the fruit with classic baking warmth as it cooks.
- 1/2 teaspoon ground ginger Lend bright, slightly peppery warmth that lifts the cinnamon and adds complexity; use sparingly to avoid overpowering the apple’s natural flavor while contributing subtle zing.
- 2 tablespoons tapioca starch (11 grams; or arrowroot/corn starch) Thicken the juices released during baking into a glossy, clingy filling; mix with the sugar and spices so the starch can swell as it heats and prevent a runny texture.
- 1/4 cup orange juice (65 grams) Provide bright acidity and fruity citrus notes that balance sweetness; pour into the cavity or over apples to add moisture, deglaze the baking dish, and enhance overall flavor.
- 1/4 teaspoon salt Enhance and balance all flavors by amplifying sweetness and reducing bitterness; dissolve into the filling mix to help season the fruit and round out the taste profile.
Instructions
- Preheat the oven to 400°F. Thinly slice the apples into pieces about 1/8-inch thick. I don't take the time to peel the apples, but you can, if you prefer no peel. (The peels become very soft and tender when they cook!): As the oven warms, you should notice a faint metallic hum from the heating elements, and if you press your hand near the closed door you can feel the gradual rise in temperature. Preheating ensures an immediate burst of heat the moment the apples enter, which helps begin the caramelization process on the exterior of the slices. If you skip preheating you risk uneven cooking and longer bake times. A common mistake is placing the dish in a not fully heated oven, which can lead to paler, less developed sauce and inconsistent texture.
- In a 6-quart dutch oven, or 9 x 13 baking dish, toss the sliced apples with the coconut sugar, cinnamon, ginger, tapioca starch, orange juice, and salt. When the apples look evenly coated, cover with the lid (or use aluminum foil to tightly cover), and bake at 400°F for 45 minutes.: When you slice the apples to this thinness, they will soften quickly and blend into a tender consistency while still offering slight structure. The sound of the knife on the cutting board is crisp, and the slices should glisten with fresh juice. Thin slicing creates more surface area for the sugar and spices to cling to, promoting even caramelization. Avoid slices that are uneven, since thicker pieces will take longer to cook and create textural inconsistency in the finished dish.
- Remove the lid and give the apples a stir. Return to the oven to help any extra liquid evaporate, about 10 to 15 more minutes. The apples should be very soft, in a rich, caramelized sauce.: The peels become very soft and tender when they cook, adding tiny bursts of texture and color. You will notice the peels fold and soften into the slices as they bake, contributing a pleasant rustic mouthfeel. The skin also helps slices hold their shape a bit better during baking. If you remove the skins for a smoother finish, be careful not to overwork the fruit while peeling, because bruised or broken pieces can release too much juice and make the sauce thinner than desired.
- Let the apples cool for 10 minutes, then serve warm with your favorite toppings, like whipped cream or vanilla ice cream.: As you toss, the apples should become evenly coated and slightly glossy from the orange juice and sugar. The spices will dust the fruit and the starch should begin to disperse so it can thicken the juices as they release. You will smell the cinnamon and ginger mingle with the citrus, creating a lovely aromatic hint of what is to come. If the coating looks patchy, take a few extra seconds to massage the ingredients together gently so the starch does not clump. A common error here is dumping the starch on top without mixing, which leaves pockets of uncooked powder in the sauce.
- When the apples look evenly coated, cover with the lid (or use aluminum foil to tightly cover), and bake at 400°F for 45 minutes.: Once covered, steam will build and the apples will begin to soften uniformly, creating a tender, steamy environment that helps them collapse gently. During this time the aroma will grow richer and sweeter, and the sound will be quiet aside from a soft bubbling. This covered stage prevents the top from drying out and encourages the juices to mingle, producing a cohesive sauce. A misstep is baking uncovered from the start, which can dry the slices and prevent proper sauce formation.
- Remove the lid and give the apples a stir.: At this point you will see the juices have darkened and the slices look very tender. Stirring helps redistribute heat and exposes any extra liquid so it can evaporate. The visual cue to watch for is a glossy, caramel colored sauce clinging to the fruit rather than a watery pool. If you notice very thin liquid, return the dish to the oven to concentrate it. Overstirring can break the slices down too much, so be gentle and use a broad spoon to fold rather than mash.
- Return to the oven to help any extra liquid evaporate, about 10 to 15 more minutes.: During this short uncovered bake the sauce will reduce and thicken, taking on a deeper color and slightly sticky texture. You may hear a quiet bubbling as the sugars concentrate and begin to caramelize. This phase is where the finish transforms from simply baked fruit to a saucy dessert with body. Watch closely near the end so it does not overreduce and scorch; if the edges look overly dark, lower the temperature slightly or remove a few minutes early.
- The apples should be very soft, in a rich, caramelized sauce.: The ideal finish is slices that yield easily to the fork and a sauce that clings rather than pools. The aroma will be fragrant and warmly spiced, and the surface may glint with syrupy sheen. If some pieces still seem firm, give them a few extra minutes covered to steam through. Avoid letting the sauce dry completely, because you want that clingy coating to dress the fruit rather than a sticky crust that hardens as it cools.
- Let the apples cool for 10 minutes, then serve warm with your favorite toppings, like whipped cream or vanilla ice cream.: As the dish rests, the sauce will thicken slightly and flavors meld. The cooling window is perfect for setting the texture so spoonfuls hold together on a plate. When you serve warm, contrast with a cool topping for balance and textural interest. A mistake to avoid is serving immediately piping hot, when the sauce is too thin and may slide off the fruit; a short rest improves presentation and mouthfeel.
Notes
- Apple choice matters Choose apples that balance sweetness and firmness, such as Honeycrisp or Fuji, to achieve a tender yet structured result.
- Adjust sweetness If you prefer less sweetness, reduce the coconut sugar slightly or increase the citrus for brightness.
- Starch alternatives If you do not have tapioca starch, arrowroot or corn starch works, but note the thickening power differs slightly and may change the final sauce texture.
- Use fresh juice Fresh orange juice brightens the profile, but bottled juice will still produce a pleasant result in a pinch.
- Serve warm These shine when warm, so plan to serve shortly after the brief cooling period for the best contrast with toppings.