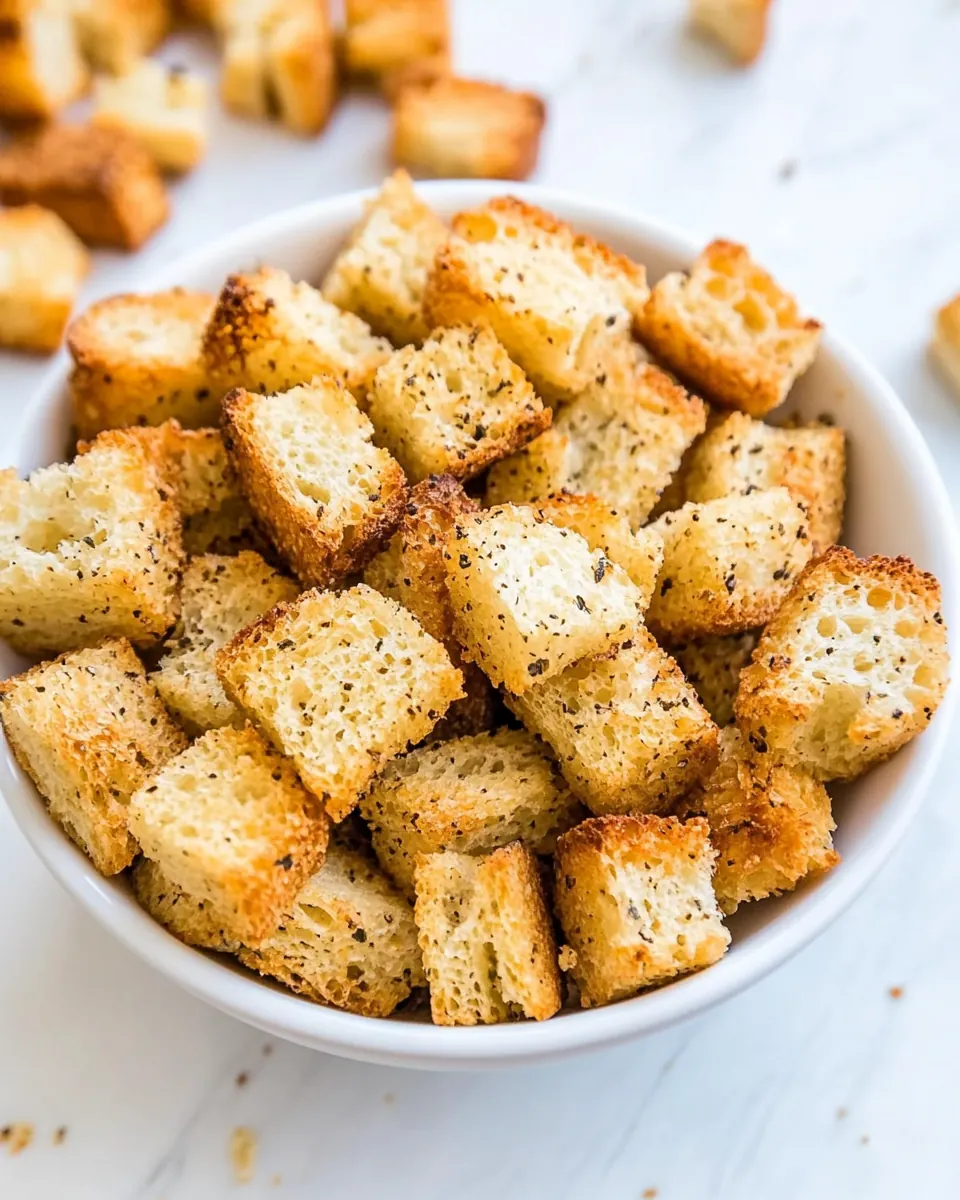
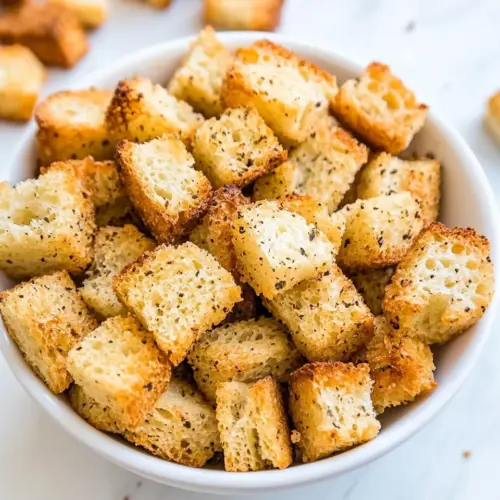
Homemade Croutons
Homemade Croutons are one of those tiny victories in my kitchen that turn simple salads and soups into something memorable. I remember the first time I made them on a rainy afternoon, rescuing an ailing loaf of bread from the counter and transforming it into crunchy, golden morsels that smelled like comfort and warm ovens. That batch vanished faster than I could set the bowl on the table, and since then I always keep a jar of these crunchy bites on hand.
Every time I toss a salad or ladle a bowl of soup, I reach for a handful of these little nuggets. They have that perfect contrast of crisp exterior and just-still-tender center when you bite through them, and they carry flavor so well because the butter and seasonings soak into every nook and cranny. I love how flexible they are, too, working equally well with a peppery green salad or a creamy bisque. Making Homemade Croutons feels like an act of care that elevates an ordinary meal into something I want to linger over.
Over the years I’ve learned small tricks that make a big difference, like ensuring the bread cubes are evenly sized and giving them space on the pan so they roast instead of steam. I also enjoy experimenting with different breads; a tangy sourdough yields a more assertive chew, while a soft French loaf creates a delicate, buttery crunch. No matter which bread you choose, these croutons are a fast, practical way to add texture and personality to your meals, and they make excellent little gifts in a jar when guests come over.
Recipe Snapshot
28 mins
10 mins
18 mins
Easy
150 kcal
American
Gluten-Free, Low FODMAP
Side Dishes
Oven, Baking sheet, Parchment paper, Large bowl, Knife, Spatula
What You’ll Enjoy About This Homemade Croutons
Crunch and Texture That Transform
I make Homemade Croutons because texture changes everything. A bowl of salad or soup suddenly feels complete when you add that satisfying crunch. The contrast between soft greens or silky soup and the toasted bite of these croutons keeps every spoonful interesting, and I find people notice the texture first, even before the seasoning.
Easy Rescue for Stale Bread
One of my favorite reasons to make these is practicality. Bread that is slightly stale is perfect for croutons, and I love turning what might otherwise be wasted into something delicious. It feels thrifty and very rewarding to give a second life to a loaf, and you get superior crunch compared to using fresh, soft bread.
Customizable Flavor Base
With a simple butter and herb mix, Homemade Croutons are a blank canvas. I appreciate how easily you can amplify or soften flavors to suit the meal. The garlic powder and Italian seasoning in this recipe create a classic profile that complements most salads and soups without overpowering them.
Fast and Reliable
These croutons come together quickly, which is why I turn to them when I need an emergency garnish. The process is straightforward, and the results are reliable: golden brown, crisp, and well seasoned. You do not need complicated skills or equipment, so they are perfect for busy weeknights or last minute entertaining.
Great for Make Ahead and Gifting
I often make a big batch in advance, because they store well and retain their crispness when cooled and stored properly. They also make lovely little gifts sprinkled into jars with a ribbon, especially when you share them alongside a jar of homemade soup or salad dressing.
What You’ll Need for Homemade Croutons
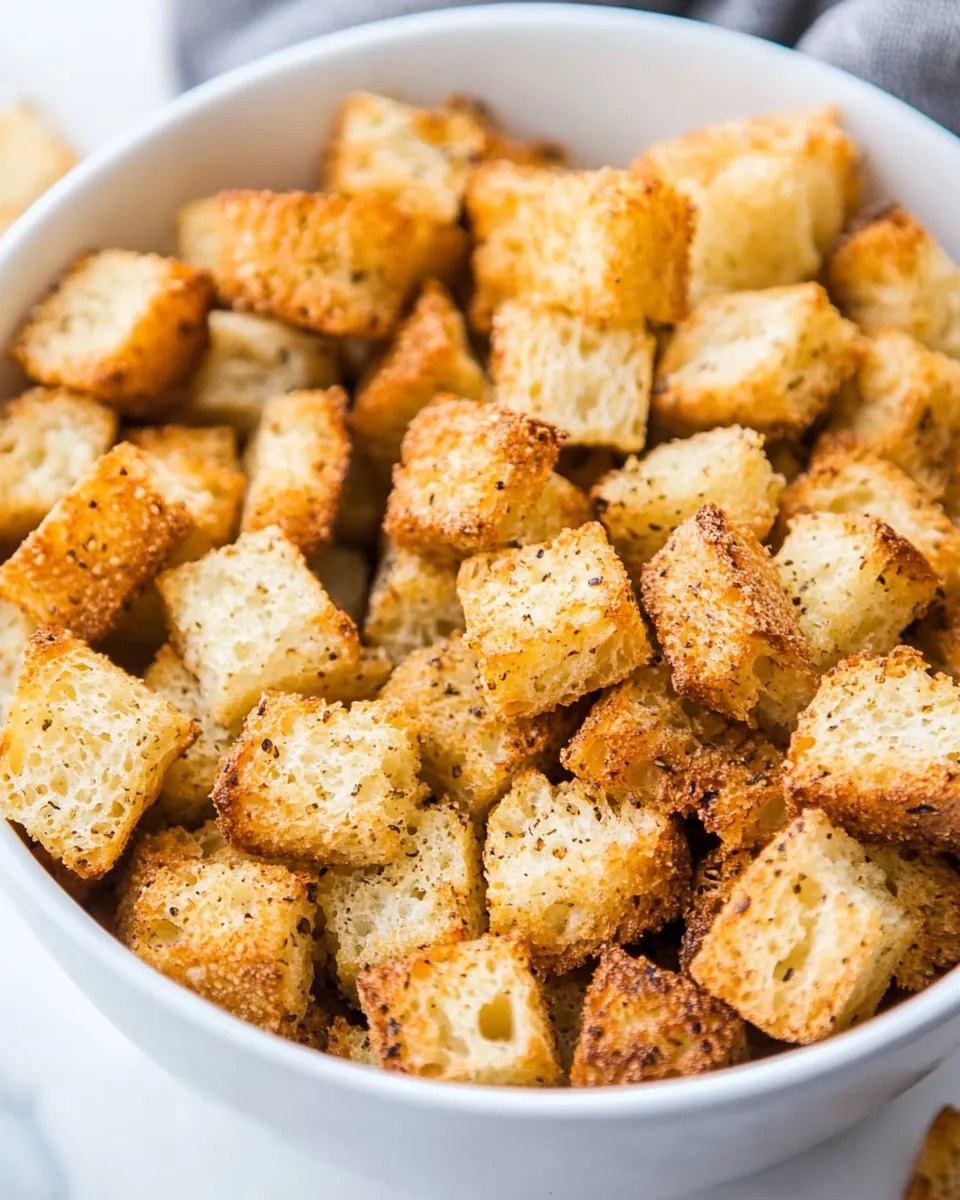
These ingredients are purposeful and simple, working together to create crisp, flavorful croutons. The bread provides the structure and chew, while the butter carries flavor and promotes even browning. The seasonings are concentrated so a little goes a long way, giving each cube a balanced savory finish. Together they form a straightforward, dependable formula that highlights texture and aroma.
- 4 cups bread cut into 3/4 inch pieces French or Sourdough bread: Provide structure and chewiness to the croutons by using cubed bread, ideally French or sourdough, cut into 3/4-inch pieces for even toasting. Encourage air pockets to crisp while retaining some interior tenderness when baked or toasted. Suggest using slightly stale bread for best texture and absorption of seasonings.
- 4 tablespoons melted butter: Add rich flavor and help achieve golden-brown, crisp edges by coating the bread cubes with melted butter. Promote even browning and carry the herbs and spices onto each piece for a flavorful finish. Recommend using fully melted butter to ensure uniform coverage.
- 1 teaspoon garlic powder: Impart a concentrated savory garlic note that complements the butter and herbs and enhances overall flavor. Distribute evenly over the butter-coated bread so each crouton carries a subtle, aromatic kick. Use measured amounts to avoid overpowering other seasonings.
- 1 teaspoon Italian seasoning: Provide a blend of Mediterranean herbs that adds aromatic complexity and savory depth to the croutons. Sprinkle over the buttered bread to infuse each piece with balanced herbal notes during baking. Choose a quality Italian seasoning mix for consistent flavor.
- 1/2 teaspoon kosher salt: Enhance and balance flavors by adding a touch of kosher salt, which brightens other seasonings and aids in achieving a well-seasoned crust. Sprinkle evenly to prevent any overly salty pockets and adjust slightly to taste if using salted butter. Consider the saltiness of other components in your final dish.
- 1/4 teaspoon black pepper: Contribute a subtle, sharp heat and aromatic finish through freshly ground black pepper, rounding out the seasoning profile. Add sparingly and distribute uniformly to avoid concentrated spicy bites. Toast briefly if desired to amplify its aroma.
How to Assemble Homemade Croutons
Getting these croutons right is more about attention to small sensory cues than complicated techniques. Work steadily, listen for the gentle toasting sounds as they roast, and watch for even golden color rather than relying solely on the clock. These steps will guide you through every moment, so your batch comes out uniformly crisp and flavorful.
- Preheat the oven to 375 degrees Fahrenheit. Line a large baking sheet with parchment paper and set aside.: The air in your oven should feel warm and steadily rising when you open the door, and you may notice a faint dry, neutral scent from the heating elements. Preheating matters because it ensures an immediate environment for the bread to begin browning rather than steaming, which creates a crisper exterior. A common mistake is skipping preheating, which can lead to uneven texture and longer bake times. If your oven runs hot or cold, use an oven thermometer to confirm the actual temperature.
- Cut the loaf of bread into 3/4-inch cubes and place in a large bowl. Drizzle the bread cubes with the melted butter. Sprinkle the garlic powder, Italian seasoning, salt, and black pepper over the bread. Toss until all of the bread cubes are well coated.: When you run your fingers over the parchment, it should feel dry and slightly papery, providing a nonstick surface that prevents hot butter from bonding the croutons to the pan. This step helps with even browning and easy cleanup. Don’t overcrowd the pan with too much parchment or multiple overlapping sheets, as that can change how heat circulates and cause uneven crisping. If you do not have parchment, a light brushing of melted butter or a thin layer of oil will work, but watch for sticking.
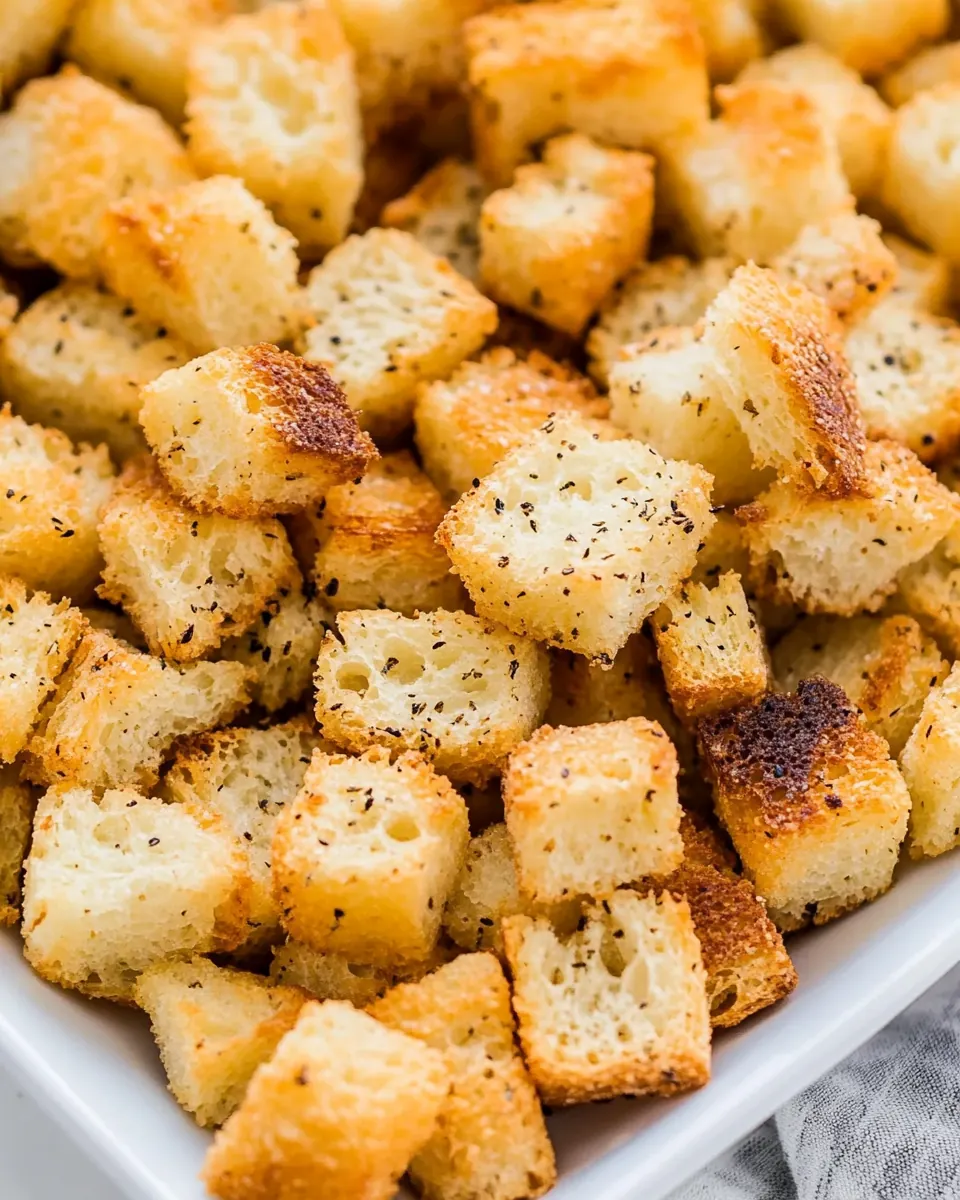
- Spread the bread cubes onto the prepared baking sheet, making sure the bread cubes are in an even layer and not touching.: As you work, you should hear a soft, satisfying thud when the knife meets the crust, and the cubes should be roughly the same size for uniform cooking. The uniformity matters because smaller pieces will toast faster and could burn while larger ones stay soft. A common error is making pieces too irregular, which results in inconsistent texture. Use a steady, confident slicing motion and take a moment to even out any oversized chunks.
- Bake for 16 to 18 minutes, tossing halfway through, or until the croutons are golden brown. Check early to make sure you don’t burn them. Time will depend on the thickness of your bread and your oven. Remove from the oven and let cool completely. Store in an airtight container for up to 1 week.: The melted butter should be warm but not scalding, spreading glossy ribbons over the cubes. As you toss, you'll see the butter cling to surfaces and give the crumb a faint sheen. This coating is crucial because it carries flavor and promotes golden caramelization during roasting. Pouring butter that is too hot can overly soften the cubes, causing them to collapse; if the butter is too cool it will not distribute evenly.
- Sprinkle the garlic powder, Italian seasoning, salt, and black pepper over the bread: When you add these dry seasonings, they will settle into the nooks of the crumb, and the mixture should smell faintly herbal and savory. These concentrated seasonings are designed to stick to the buttered surfaces, infusing each cube. Avoid dumping all the seasonings in one spot, which can create pockets of strong flavor; instead, sprinkle evenly and taste a single piece before baking to confirm balance.
- Toss until all of the bread cubes are well coated: As you toss, listen to the subtle rustle of the cubes and watch as the butter and seasonings distribute, giving each piece a light, even coating. Proper tossing ensures each crouton crisps uniformly and carries balanced flavor. If you skip thorough tossing, some pieces will be dry and underseasoned while others will be overly saturated. Use a gentle folding motion to preserve cube shape while ensuring coverage.
- Spread the bread cubes onto the prepared baking sheet, making sure the bread cubes are in an even layer and not touching: The visual cue here is key, you want a single, breathable layer where each cube has space around it, so heat circulates and moisture can escape. Crowding leads to steaming, which prevents crisping. If your sheet looks crowded, use two pans rather than stacking cubes. One common mistake is piling cubes too closely, which yields soft centers and uneven color.
- Bake for 16 to 18 minutes, tossing halfway through, or until the croutons are golden brown: During baking you will notice the aroma deepen to a toasty, buttery scent and see the cubes shift from pale to a warm golden brown. Tossing at the midpoint encourages even browning, so use a spatula to flip the cubes gently and redistribute heat exposure. Keep a close eye in the last few minutes because ovens vary and the difference between golden and burned can be a minute. If some cubes brown too quickly, remove them early to prevent bitterness.
- Check early to make sure you don’t burn them: Smell and sight are your best indicators here; if you detect any sharp, acrid notes, remove the pan immediately to prevent a batch from going bitter. Burned croutons carry a charred taste that ruins the delicate balance of the finished dish. The safe habit is to start checking a few minutes before the shortest recommended time, especially with thinner bread pieces. If you overbake slightly, you can salvage some uses by repurposing them in soups where the extra toastiness will be less evident.
- Time will depend on the thickness of your bread and your oven: Pay attention to how thickly the cubes were cut and how your oven typically behaves, because both factors change the exact timing. Thicker cubes take longer to heat through and brown, while thinner ones crisp faster. Not accounting for these variables is a frequent reason croutons end up uneven. Make a note of timing for future batches based on the bread and tray arrangement you used.
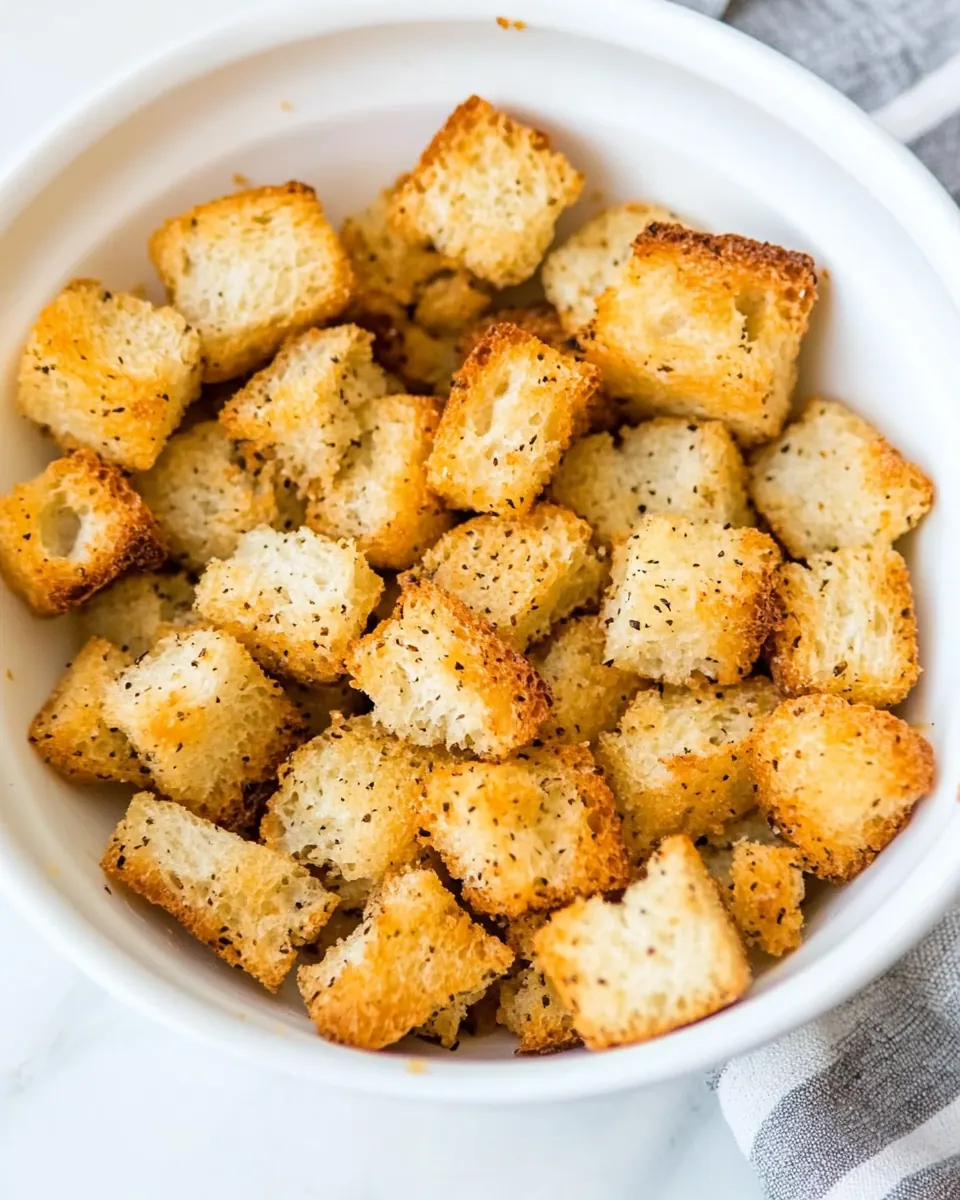
- Remove from the oven and let cool completely: Cooling is more than just waiting, you will notice the texture firming as steam escapes and the surface snaps when pressed. Allowing them to cool fully prevents trapped steam from softening the interior, which is crucial for lasting crunch. Putting them into a container while warm invites condensation, which ruins the texture, so be patient. If you are in a hurry, spread them on a wire rack to speed airflow but still allow full cooling.
- Store in an airtight container for up to 1 week: Once cool, the croutons should feel crisp and dry; pack them into a sealed container or zip top bag with the air squeezed out to preserve crunch. Proper storage keeps them ready to garnish meals without becoming stale. Leaving them exposed or storing while warm is a common mistake that causes sogginess. For longer storage, freeze them in a sealed bag and thaw at room temperature when needed.
Tips and Variations
These tips will help you make the most of Homemade Croutons, whether you are aiming for ultra crisp or a softer bite. Small adjustments in technique and timing lead to reliably excellent results, and there are fun ways to vary the flavor without changing the base method.
- Tip 1: For extra even browning, rotate the baking sheet halfway through baking to account for hot spots in your oven. This helps all croutons reach a similar golden color and prevents one side from overbrowning.
- Tip 2: If you prefer a lighter touch of seasoning, reduce the garlic powder to 1/2 teaspoon and increase to taste after baking. Seasoning can concentrate during roasting, so erring on the lighter side prevents overpowering delicate salads.
- Tip 3: To store long term, freeze cooled croutons in a vacuum seal bag or a well sealed freezer bag for up to six months. Thaw at room temperature and they will regain their crispness quickly.
- Tip 4: When using a particularly dense bread like a country loaf, increase baking time slightly and check more frequently toward the end to avoid burning the exterior before the center crisps.
- Tip 5: For an extra flavor boost, toss the cubes with a teaspoon of finely grated hard cheese after baking, letting residual heat lightly melt it onto the surface, then cool and store.
What to Serve With Homemade Croutons
These crunchy bites pair with many meals and elevate both casual and formal dishes. Use them to add texture, to bulk up a simple salad, or to top a cozy bowl of soup. They work well year round and are especially welcome at gatherings where a little crisp garnish makes dishes feel finished.
- Classic green salads: Add a generous handful of Homemade Croutons to leafy salads for instant texture contrast, especially with crisp romaine or mixed greens.
- Creamy soups: Top bowls of tomato soup, potato leek, or vegetable bisque with croutons for a crunchy counterpoint to silky broths.
- Pasta salads: Use croutons as a crunchy element in chilled pasta salads where you want contrast with creamy dressings.
- Lunch bowls: Sprinkle over grain bowls or composed lunches to introduce a toasty note and satisfying bite.
- Party platters: Serve croutons alongside dips and spreads as an alternative to crackers for added rustic charm.
- Storage tips: Keep in an airtight container at room temperature for up to one week, or freeze for longer storage, labeling the date so you use the oldest batch first.
- Seasonal pairings: These croutons are versatile across seasons, pairing nicely with light spring salads or heartier autumn soups, making them a go to garnish all year.
FAQ
Conclusion
These Homemade Croutons shine because they are simple, flavorful, and transform ordinary meals with bold texture. They rescue stale bread and take just a short time to make, delivering golden crunch that complements salads and soups alike. Give them a try; you might be surprised how often you reach for that jar to finish a meal. Once you master the small techniques, they become a dependable, delightful staple in your kitchen.
Homemade Croutons
Equipment
- Oven
- Baking Sheet
- Parchment Paper
- Large Bowl
- Knife
- Spatula
Ingredients
- 4 cups bread cut into 3/4 inch pieces French or Sourdough bread Provide structure and chewiness to the croutons by using cubed bread, ideally French or sourdough, cut into 3/4-inch pieces for even toasting. Encourage air pockets to crisp while retaining some interior tenderness when baked or toasted. Suggest using slightly stale bread for best texture and absorption of seasonings.
- 4 tablespoons melted butter Add rich flavor and help achieve golden-brown, crisp edges by coating the bread cubes with melted butter. Promote even browning and carry the herbs and spices onto each piece for a flavorful finish. Recommend using fully melted butter to ensure uniform coverage.
- 1 teaspoon garlic powder Impart a concentrated savory garlic note that complements the butter and herbs and enhances overall flavor. Distribute evenly over the butter-coated bread so each crouton carries a subtle, aromatic kick. Use measured amounts to avoid overpowering other seasonings.
- 1 teaspoon Italian seasoning Provide a blend of Mediterranean herbs that adds aromatic complexity and savory depth to the croutons. Sprinkle over the buttered bread to infuse each piece with balanced herbal notes during baking. Choose a quality Italian seasoning mix for consistent flavor.
- 1/2 teaspoon kosher salt Enhance and balance flavors by adding a touch of kosher salt, which brightens other seasonings and aids in achieving a well-seasoned crust. Sprinkle evenly to prevent any overly salty pockets and adjust slightly to taste if using salted butter. Consider the saltiness of other components in your final dish.
- 1/4 teaspoon black pepper Contribute a subtle, sharp heat and aromatic finish through freshly ground black pepper, rounding out the seasoning profile. Add sparingly and distribute uniformly to avoid concentrated spicy bites. Toast briefly if desired to amplify its aroma.
Instructions
- Preheat the oven to 375 degrees Fahrenheit. Line a large baking sheet with parchment paper and set aside.: The air in your oven should feel warm and steadily rising when you open the door, and you may notice a faint dry, neutral scent from the heating elements. Preheating matters because it ensures an immediate environment for the bread to begin browning rather than steaming, which creates a crisper exterior. A common mistake is skipping preheating, which can lead to uneven texture and longer bake times. If your oven runs hot or cold, use an oven thermometer to confirm the actual temperature.
- Cut the loaf of bread into 3/4-inch cubes and place in a large bowl. Drizzle the bread cubes with the melted butter. Sprinkle the garlic powder, Italian seasoning, salt, and black pepper over the bread. Toss until all of the bread cubes are well coated.: When you run your fingers over the parchment, it should feel dry and slightly papery, providing a nonstick surface that prevents hot butter from bonding the croutons to the pan. This step helps with even browning and easy cleanup. Don’t overcrowd the pan with too much parchment or multiple overlapping sheets, as that can change how heat circulates and cause uneven crisping. If you do not have parchment, a light brushing of melted butter or a thin layer of oil will work, but watch for sticking.
- Spread the bread cubes onto the prepared baking sheet, making sure the bread cubes are in an even layer and not touching.: As you work, you should hear a soft, satisfying thud when the knife meets the crust, and the cubes should be roughly the same size for uniform cooking. The uniformity matters because smaller pieces will toast faster and could burn while larger ones stay soft. A common error is making pieces too irregular, which results in inconsistent texture. Use a steady, confident slicing motion and take a moment to even out any oversized chunks.
- Bake for 16 to 18 minutes, tossing halfway through, or until the croutons are golden brown. Check early to make sure you don’t burn them. Time will depend on the thickness of your bread and your oven. Remove from the oven and let cool completely. Store in an airtight container for up to 1 week.: The melted butter should be warm but not scalding, spreading glossy ribbons over the cubes. As you toss, you'll see the butter cling to surfaces and give the crumb a faint sheen. This coating is crucial because it carries flavor and promotes golden caramelization during roasting. Pouring butter that is too hot can overly soften the cubes, causing them to collapse; if the butter is too cool it will not distribute evenly.
- Sprinkle the garlic powder, Italian seasoning, salt, and black pepper over the bread: When you add these dry seasonings, they will settle into the nooks of the crumb, and the mixture should smell faintly herbal and savory. These concentrated seasonings are designed to stick to the buttered surfaces, infusing each cube. Avoid dumping all the seasonings in one spot, which can create pockets of strong flavor; instead, sprinkle evenly and taste a single piece before baking to confirm balance.
- Toss until all of the bread cubes are well coated: As you toss, listen to the subtle rustle of the cubes and watch as the butter and seasonings distribute, giving each piece a light, even coating. Proper tossing ensures each crouton crisps uniformly and carries balanced flavor. If you skip thorough tossing, some pieces will be dry and underseasoned while others will be overly saturated. Use a gentle folding motion to preserve cube shape while ensuring coverage.
- Spread the bread cubes onto the prepared baking sheet, making sure the bread cubes are in an even layer and not touching: The visual cue here is key, you want a single, breathable layer where each cube has space around it, so heat circulates and moisture can escape. Crowding leads to steaming, which prevents crisping. If your sheet looks crowded, use two pans rather than stacking cubes. One common mistake is piling cubes too closely, which yields soft centers and uneven color.
- Bake for 16 to 18 minutes, tossing halfway through, or until the croutons are golden brown: During baking you will notice the aroma deepen to a toasty, buttery scent and see the cubes shift from pale to a warm golden brown. Tossing at the midpoint encourages even browning, so use a spatula to flip the cubes gently and redistribute heat exposure. Keep a close eye in the last few minutes because ovens vary and the difference between golden and burned can be a minute. If some cubes brown too quickly, remove them early to prevent bitterness.
- Check early to make sure you don’t burn them: Smell and sight are your best indicators here; if you detect any sharp, acrid notes, remove the pan immediately to prevent a batch from going bitter. Burned croutons carry a charred taste that ruins the delicate balance of the finished dish. The safe habit is to start checking a few minutes before the shortest recommended time, especially with thinner bread pieces. If you overbake slightly, you can salvage some uses by repurposing them in soups where the extra toastiness will be less evident.
- Time will depend on the thickness of your bread and your oven: Pay attention to how thickly the cubes were cut and how your oven typically behaves, because both factors change the exact timing. Thicker cubes take longer to heat through and brown, while thinner ones crisp faster. Not accounting for these variables is a frequent reason croutons end up uneven. Make a note of timing for future batches based on the bread and tray arrangement you used.
- Remove from the oven and let cool completely: Cooling is more than just waiting, you will notice the texture firming as steam escapes and the surface snaps when pressed. Allowing them to cool fully prevents trapped steam from softening the interior, which is crucial for lasting crunch. Putting them into a container while warm invites condensation, which ruins the texture, so be patient. If you are in a hurry, spread them on a wire rack to speed airflow but still allow full cooling.
- Store in an airtight container for up to 1 week: Once cool, the croutons should feel crisp and dry; pack them into a sealed container or zip top bag with the air squeezed out to preserve crunch. Proper storage keeps them ready to garnish meals without becoming stale. Leaving them exposed or storing while warm is a common mistake that causes sogginess. For longer storage, freeze them in a sealed bag and thaw at room temperature when needed.
Notes
- Tip 1: For extra even browning, rotate the baking sheet halfway through baking to account for hot spots in your oven. This helps all croutons reach a similar golden color and prevents one side from overbrowning.
- Tip 2: If you prefer a lighter touch of seasoning, reduce the garlic powder to 1/2 teaspoon and increase to taste after baking. Seasoning can concentrate during roasting, so erring on the lighter side prevents overpowering delicate salads.
- Tip 3: To store long term, freeze cooled croutons in a vacuum seal bag or a well sealed freezer bag for up to six months. Thaw at room temperature and they will regain their crispness quickly.
- Tip 4: When using a particularly dense bread like a country loaf, increase baking time slightly and check more frequently toward the end to avoid burning the exterior before the center crisps.
- Tip 5: For an extra flavor boost, toss the cubes with a teaspoon of finely grated hard cheese after baking, letting residual heat lightly melt it onto the surface, then cool and store.