Drinking Caramel
Drinking Caramel began as a small experiment that turned my quiet afternoon into something a little magical. The first time I made it I was chasing that deep, toasty aroma that only caramel can create, and I remember leaning close to the stove as the sugar shifted color, thinking how simple ingredients can feel so indulgent. I wanted a warm, drinkable caramel that could lift a chilled evening, and that first batch did exactly that, bringing a slow, buttery sweetness that settled like a cozy blanket.
My friends kept asking for the cup recipe, and I started bringing it to gatherings in tiny espresso cups so everyone could taste a spoonful. Over time I tuned the balance between the 1 cup Wholesome!™ Organic Light Brown Sugar, the splash of 2 tablespoons water, and the richness of 3 cups heavy cream, learning when to stop the caramel so it was deep and smoky but not bitter. That learning curve made each batch feel like a discovery, and I love how approachable the final drink is, whether you serve it for a cozy morning or a sweet after dinner bite.
There is something about serving warm, glossy caramel in small cups that sparks conversation. It is not a complicated recipe, yet it rewards patience and attention. You will notice how the sugar transitions from glossy amber to that moment it smells toasted, and if you watch closely you will be rewarded with a silky, pourable caramel that feels luxurious without fuss. I like to tell people that this is a recipe you can savor slowly, sharing stories while the caramel cools just enough to sip. Try it once, and you will understand why I bring it to every small celebration.
Recipe Snapshot
15 mins
5 mins
10 mins
Easy
200 kcal
American
Gluten-Free, Low FODMAP
Desserts
Large deep sauté pan, Whisk, Ladle, Espresso cups
The Best Thing About This Drinking Caramel
Deep toasted flavor from simple sugar
I love that Drinking Caramel relies on one primary player for flavor, the 1 cup Wholesome!™ Organic Light Brown Sugar. Caramelizing sugar develops complex notes, and when you let it reach that deep brown stage it adds smoky, toffee like layers that make the drink feel sophisticated without adding any extra fuss.
Velvety texture from heavy cream
The addition of 3 cups heavy cream transforms the concentrated caramel into a lush, velvety drink. I always appreciate how the cream softens the intensity, creating a silky mouthfeel that coats the palate, and makes each sip feel indulgent. It also helps the caramel stay stable and spoonable when warm.
Balance with a touch of salt and vanilla
Adding 1 teaspoon ea salt and 1 teaspoon vanilla extract brightens the caramel and rounds the flavor. Salt lifts the sweetness so it does not feel cloying, while vanilla provides a fragrant warmth that ties everything together. I find this small pairing elevates the drink from sweet to memorable.
Quick and rewarding process
The method is straightforward, and I enjoy recipes that pay back attention quickly. In about the time it takes to chat with a friend, you can go from granulated sugar to an aromatic, warm caramel. That immediacy makes this something I turn to when I want a fast, comforting treat without complicated steps.
Versatile serving occasions
I adore how Drinking Caramel works across moments, from a tiny pre dinner sip to a late night cozy cup. It feels special in small servings, and because it stores and reheats well, you can batch it for a small gathering. That flexibility is one reason I keep this recipe in my back pocket.
Recipe Ingredients for Drinking Caramel
These ingredients are intentionally minimal and purposeful. The star is the 1 cup Wholesome!™ Organic Light Brown Sugar, which supplies the toasted, complex caramel notes. The 2 tablespoons water helps the sugar dissolve and caramelize evenly, while the 3 cups heavy cream rounds the intensity into a luxurious texture. Finally, the 1 teaspoon ea salt and 1 teaspoon vanilla extract lift and finish the flavor, creating balance and warmth.
- 1 cup Wholesome!™ Organic Light Brown Sugar: Provides deep molasses flavor and sweetness that forms the caramel base; dissolves and browns when heated to create rich complexity. Helps balance sweetness with a slight toffee note and contributes to the syrupy texture when combined with cream.
- 2 tablespoons water: Adds necessary moisture and helps dissolve sugar evenly to prevent crystallization during caramelization; allows controlled temperature transfer for even browning. Enhances sugar solubility so a smooth, glossy caramel can form.
- 3 cups heavy cream: Contributes rich, creamy body and luscious mouthfeel that transforms browned sugar into a silky drinking caramel; its fat content rounds flavors and stabilizes texture. Supplies the liquid component that tempers heat and yields a velvety sauce when blended with sugar.
- 1 teaspoon ea salt: Provides a subtle savory contrast that balances sweetness and enhances overall flavor depth; distributed sparingly to avoid salinity. Accentuates caramel and cream notes while smoothing perceived sweetness.
- 1 teaspoon vanilla extract: Imparts warm aromatic notes and rounds the flavor profile with sweet floral and vanilla tones; added near the end to preserve delicate fragrance. Enhances overall taste harmony and makes the drinking caramel more aromatic.
How to Prepare Drinking Caramel
This recipe is all about timing and attention. Moving deliberately while watching the sugar change color will give you a glossy, aromatic caramel. Below are the cleaned direction lines expanded into detailed, sensory rich steps so you can feel confident at every stage.
- Place the Wholesome!™ Organic Light Brown Sugar in a large deep sauté pan. Add the water and turn the heat on medium. Bring the sugar to a low boil. Allow the sugar to boil until it darkens to a deep brown and smells toasted, 5-7 minutes.: The pan will soon fill your kitchen with a toasted aroma as the sugar melts, so choose a deep sauté pan to allow for vigorous bubbling when you add other liquids later. You should hear a soft simmer and see the sugar first liquefy into a clear syrup, then turn amber, and finally deepen to a rich, dark brown. This visual transformation indicates Maillard style reactions and caramelization, which create complex toffee notes. One why this matters is that color correlates with flavor depth, so stopping too early yields a milder result, while going too far risks bitterness. A common mistake here is using a shallow pan which causes overflow later, so use plenty of headroom.
- Slowly, carefully, whisk in the heavy cream. The sugar will boil up at first, then firm up, but will eventually loosen and blend into the cream.: Once the sugar is in the pan, adding the measured 2 tablespoons water encourages even melting by lowering the initial temperature hotspot and dissolving sugar crystals. As the mixture warms, you will notice tiny bubbles around the edges, and the syrup will smooth out. Use medium heat to give control over the pace of color change; high heat can jump the process and cause uneven browning. The reason this technique matters is it prevents sudden scorching and gives you time to watch the color shift. Avoid stirring aggressively at this stage because agitation can cause crystallization, a common misstep.
- Add the salt and vanilla extract. Stir and simmer another 2-3 minutes to thicken. Ladle into espresso cups and serve warm.: A steady, low boil signals that the water is evaporating and the sugar molecules are concentrating, which sets the stage for browning. You will hear a steady, gentle bubble and smell the first faint caramel notes as the temperature climbs. Allowing it to boil calmly helps form an even, glossy caramel surface rather than a rough, grainy one. This control yields a smoother final texture when you add the 3 cups heavy cream . A typical error is to rush this phase with high heat, which can create hot spots and lead to burnt pockets.
- Allow the sugar to boil until it darkens to a deep brown and smells toasted, 5 to 7 minutes: During these minutes, watch for a warm, nutty aroma and a rich amber to deep brown color. The scent is your best guide because visual cues can vary by pan color. When you reach that toasted smell and deep shade, you have developed flavor compounds that taste like toffee and toasted nuts. This stage is critical because the final taste depends on hitting that sweet spot; stop a hair before you think it is perfect because residual heat will deepen the color slightly. Overcooking is the biggest pitfall here, introducing bitterness instead of depth.
- Slowly, carefully, whisk in the heavy cream: Expect vigorous bubbling and steam as you incorporate the 3 cups heavy cream , which is a dramatic sensory moment with loud popping and a cloud of aroma. Add the cream gradually while whisking to help the thickening caramel accept the liquid without seizing into hard chunks. You will feel the mixture tighten then gradually loosen into a silky emulsion, and visually it will transform from a glassy syrup to a glossy, creamy sauce. The why is simple, the gradual addition tempers the reaction and creates a smooth texture rather than grainy separation. A mistake to avoid is pouring the cream too fast which can cause splattering and an uneven blend.
- The sugar will boil up at first, then firm up, but will eventually loosen and blend into the cream: When the cream hits the hot sugar, the mixture first foams and climbs the pan, then seems to seize and stiffen before relaxing. This sensory roller coaster is normal; patience and steady whisking coax it back to a smooth state. Listen for the vigorous bubbling, watch the color remain glossy, and smell the richer, cream sweet notes that emerge once it's combined. The technique matters because rushing or stopping whisking can leave an uneven texture. Avoid turning the heat too high to speed things, which risks scorching the dairy.
- Add the salt and vanilla extract: With the caramel now smooth, stirring in 1 teaspoon ea salt and 1 teaspoon vanilla extract will brighten and round the flavor. You will notice the aroma bloom with sweet and floral highlights, and the taste will shift from purely sugary to balanced and warm. This finishing step is important because it layers the final flavor profile and enhances complexity. A typical misstep is adding salt too early which can distort the caramelization process, so add it now for even distribution.
- Stir and simmer another 2 to 3 minutes to thicken: A few more minutes of gentle simmering allows the caramel to reduce slightly and reach a desirable, pourable viscosity. You should see slow, glossy ribbons when you lift the whisk, and the aroma should feel deeply rounded. This time lets the flavors marry and the texture set, which is why it is worth the patience. Over simmering will make it too thick once cooled, so watch for the flowing consistency. Avoid boiling rapidly, as that can create lumps and cause the cream to separate.
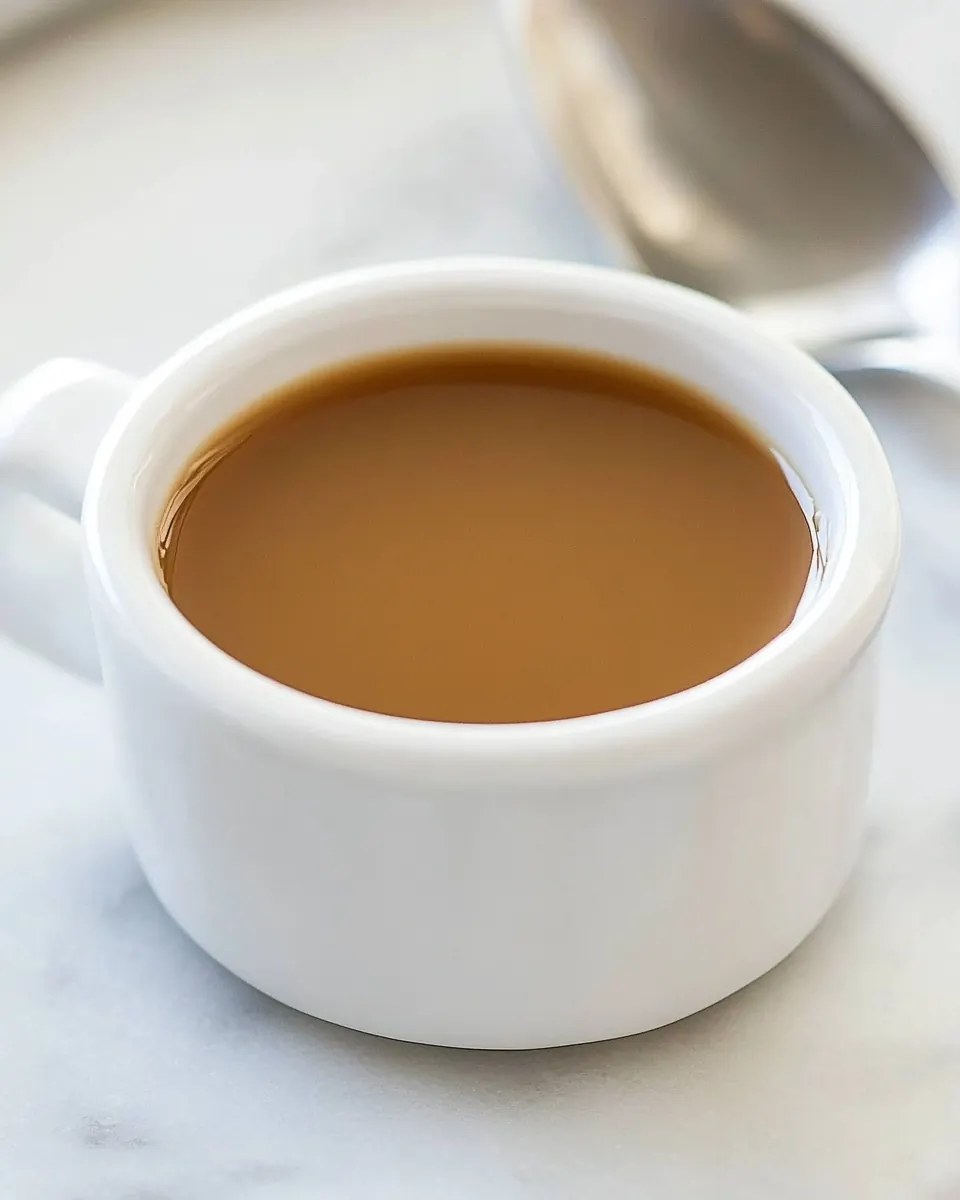
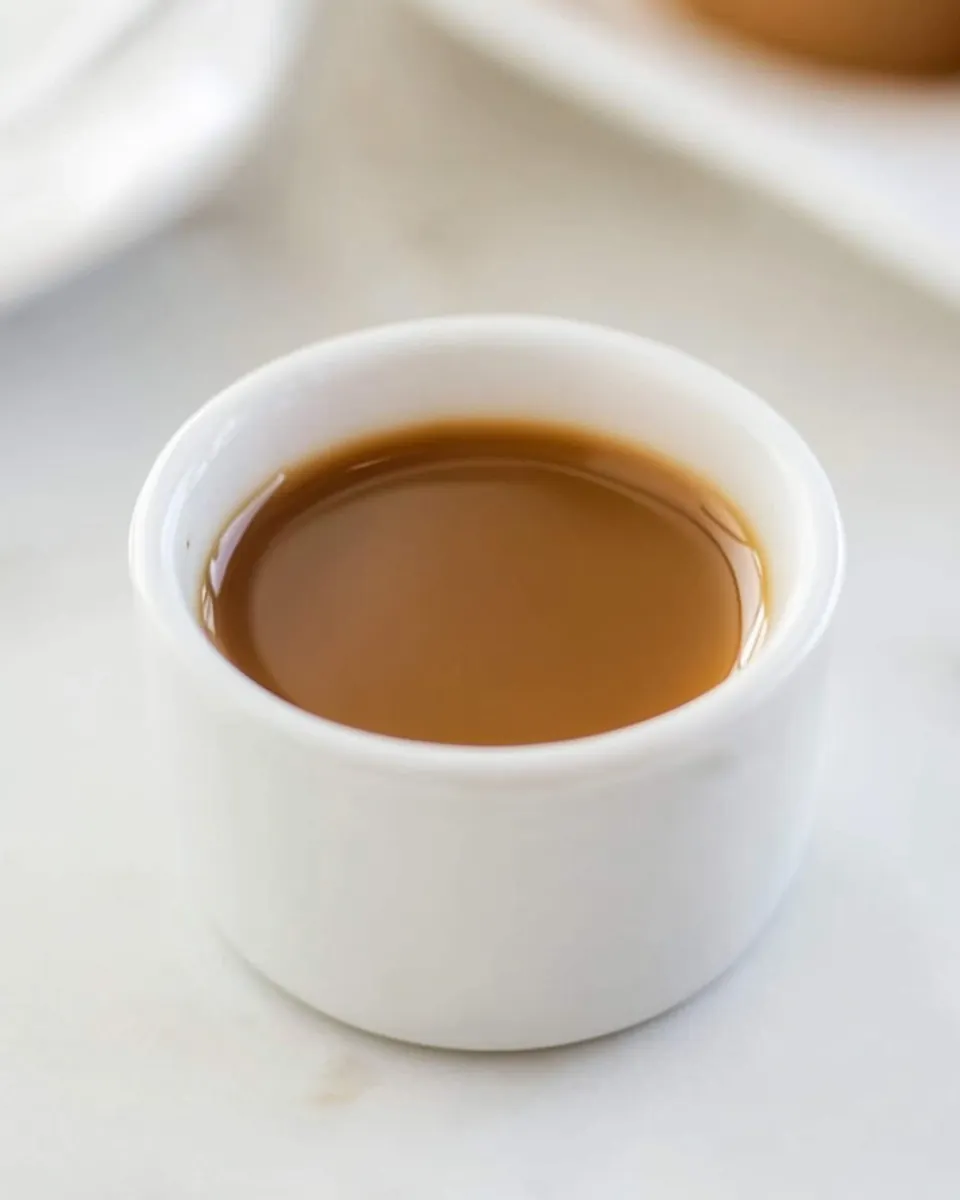
- Ladle into espresso cups and serve warm: Serving warm maximizes aroma and gives the best mouthfeel, a sip that feels like velvet sliding across the palate. Ladling into small espresso cups concentrates the experience and makes it ideal for sharing in tiny tastes. If you must hold it briefly, keep the caramel warm over very low heat and stir occasionally to preserve texture. The key mistake to avoid is serving it piping hot without a moment to settle, which can make it feel excessively thin and mask the nuanced flavors.
How to Switch It Up
Once you have the base Drinking Caramel down, there are tasteful ways to vary the experience while keeping the core technique the same. Below are practical tips to help you explore different textures and serving moments.
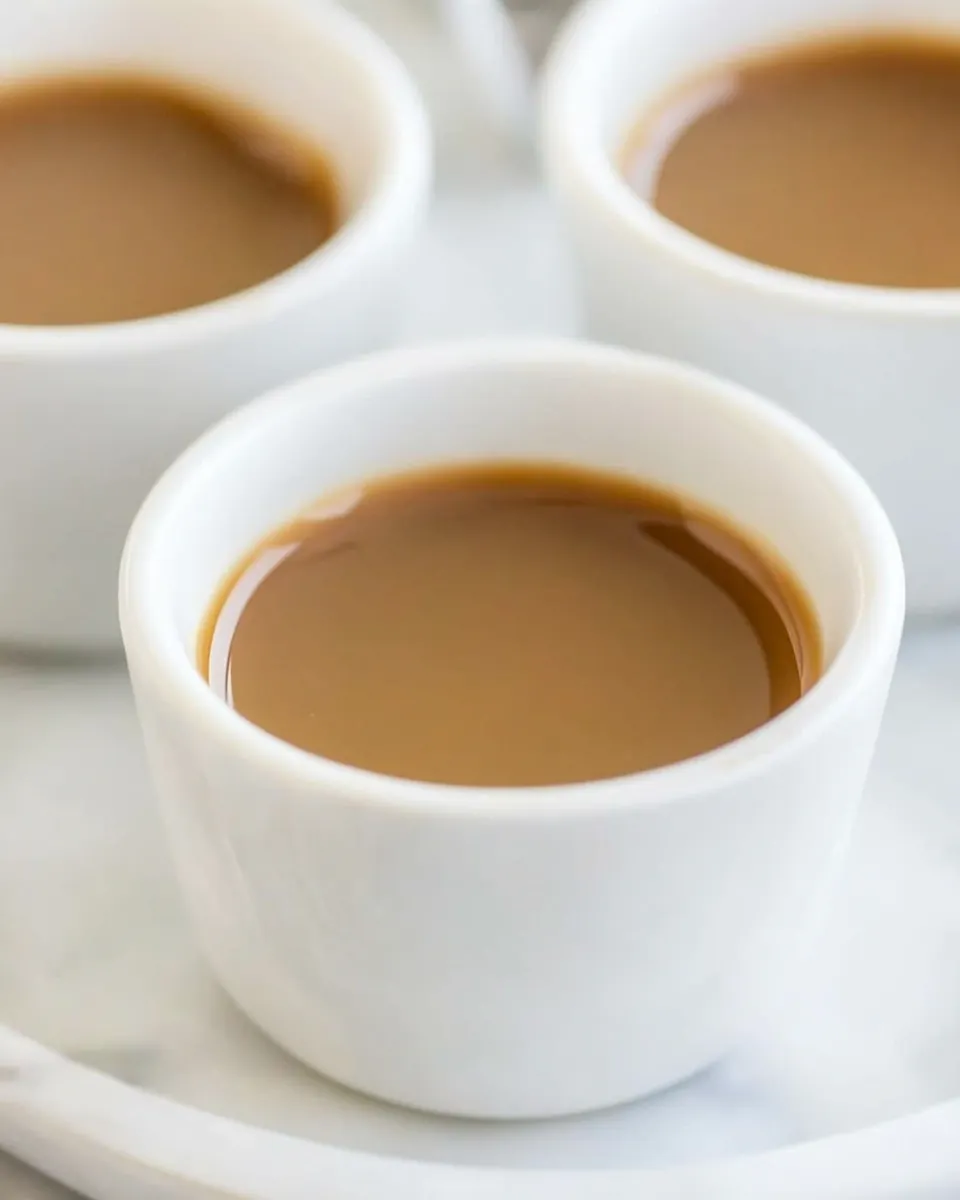
- Serve in mini cups: Presenting small portions emphasizes savoring, and it makes the caramel feel luxurious for parties and intimate gatherings.
- Adjust sweetness lightly: Reduce the initial sugar by a small fraction if you prefer a less sweet sip, but note that the caramel color and flavor will shift as a result.
- Control thickness: Simmer a bit longer for a spoonable sauce, or shorten the final simmer for a pourable drinkable caramel.
- Warm glasses or cups: Pre warming keeps the caramel silky longer and prevents it from congealing too quickly when poured.
- Batch and reheat gently: Store cooled caramel in the fridge and reheat over low heat with a splash of cream to restore texture without breaking the emulsion.
Serve This Drinking Caramel With
Drinking Caramel is a cozy, intimate treat that pairs beautifully with small bites and special moments. Serve it in tiny heated cups for dessert tastings or as a sweet interlude after dinner, and consider the seasonal context to make it feel right for the occasion.
- Serve warm in espresso cups: Small cups concentrate aroma and encourage slow sips, perfect for dessert rounds or coffee free gatherings.
- Pair with small biscuits or shortbread: A crisp, lightly sweet cookie contrasts the caramel texture without overpowering it.
- Occasions: Ideal for cozy evenings, dinner parties, or as a special treat during Ramadan evenings when a small sweet is welcome after breaking fast.
- Storage: Keep leftovers refrigerated in an airtight container, and reheat gently over low heat while stirring to restore pourable texture.
- Seasonal pairings: Works year round, but the warm, toasty notes feel especially comforting in cooler months when warm sips are most welcome.
FAQ
Conclusion
Drinking Caramel stands out because it transforms simple sugar and cream into a luxuriously smooth, aromatic sip that feels indulgent yet effortless. If you enjoy rich textures and deep toasted flavors, this recipe is a quick route to a memorable little treat, perfect for sharing or savoring solo. I encourage you to try it and pay attention to the moment the sugar turns that perfect deep brown, because that is where the magic happens. With minimal equipment and a bit of patience, you can create a warm, comforting cup that brings a sense of occasion to ordinary evenings.

Drinking Caramel
Equipment
- Large deep sauté pan
- Whisk
- Ladle
- Espresso cups
Ingredients
- 1 cup Wholesome!™ Organic Light Brown Sugar Provides deep molasses flavor and sweetness that forms the caramel base; dissolves and browns when heated to create rich complexity. Helps balance sweetness with a slight toffee note and contributes to the syrupy texture when combined with cream.
- 2 tablespoons water Adds necessary moisture and helps dissolve sugar evenly to prevent crystallization during caramelization; allows controlled temperature transfer for even browning. Enhances sugar solubility so a smooth, glossy caramel can form.
- 3 cups heavy cream Contributes rich, creamy body and luscious mouthfeel that transforms browned sugar into a silky drinking caramel; its fat content rounds flavors and stabilizes texture. Supplies the liquid component that tempers heat and yields a velvety sauce when blended with sugar.
- 1 teaspoon ea salt Provides a subtle savory contrast that balances sweetness and enhances overall flavor depth; distributed sparingly to avoid salinity. Accentuates caramel and cream notes while smoothing perceived sweetness.
- 1 teaspoon vanilla extract Imparts warm aromatic notes and rounds the flavor profile with sweet floral and vanilla tones; added near the end to preserve delicate fragrance. Enhances overall taste harmony and makes the drinking caramel more aromatic.
Instructions
- Place the Wholesome!™ Organic Light Brown Sugar in a large deep sauté pan. Add the water and turn the heat on medium. Bring the sugar to a low boil. Allow the sugar to boil until it darkens to a deep brown and smells toasted, 5-7 minutes.: The pan will soon fill your kitchen with a toasted aroma as the sugar melts, so choose a deep sauté pan to allow for vigorous bubbling when you add other liquids later. You should hear a soft simmer and see the sugar first liquefy into a clear syrup, then turn amber, and finally deepen to a rich, dark brown. This visual transformation indicates Maillard style reactions and caramelization, which create complex toffee notes. One why this matters is that color correlates with flavor depth, so stopping too early yields a milder result, while going too far risks bitterness. A common mistake here is using a shallow pan which causes overflow later, so use plenty of headroom.
- Slowly, carefully, whisk in the heavy cream. The sugar will boil up at first, then firm up, but will eventually loosen and blend into the cream.: Once the sugar is in the pan, adding the measured 2 tablespoons water encourages even melting by lowering the initial temperature hotspot and dissolving sugar crystals. As the mixture warms, you will notice tiny bubbles around the edges, and the syrup will smooth out. Use medium heat to give control over the pace of color change; high heat can jump the process and cause uneven browning. The reason this technique matters is it prevents sudden scorching and gives you time to watch the color shift. Avoid stirring aggressively at this stage because agitation can cause crystallization, a common misstep.
- Add the salt and vanilla extract. Stir and simmer another 2-3 minutes to thicken. Ladle into espresso cups and serve warm.: A steady, low boil signals that the water is evaporating and the sugar molecules are concentrating, which sets the stage for browning. You will hear a steady, gentle bubble and smell the first faint caramel notes as the temperature climbs. Allowing it to boil calmly helps form an even, glossy caramel surface rather than a rough, grainy one. This control yields a smoother final texture when you add the 3 cups heavy cream . A typical error is to rush this phase with high heat, which can create hot spots and lead to burnt pockets.
- Allow the sugar to boil until it darkens to a deep brown and smells toasted, 5 to 7 minutes: During these minutes, watch for a warm, nutty aroma and a rich amber to deep brown color. The scent is your best guide because visual cues can vary by pan color. When you reach that toasted smell and deep shade, you have developed flavor compounds that taste like toffee and toasted nuts. This stage is critical because the final taste depends on hitting that sweet spot; stop a hair before you think it is perfect because residual heat will deepen the color slightly. Overcooking is the biggest pitfall here, introducing bitterness instead of depth.
- Slowly, carefully, whisk in the heavy cream: Expect vigorous bubbling and steam as you incorporate the 3 cups heavy cream , which is a dramatic sensory moment with loud popping and a cloud of aroma. Add the cream gradually while whisking to help the thickening caramel accept the liquid without seizing into hard chunks. You will feel the mixture tighten then gradually loosen into a silky emulsion, and visually it will transform from a glassy syrup to a glossy, creamy sauce. The why is simple, the gradual addition tempers the reaction and creates a smooth texture rather than grainy separation. A mistake to avoid is pouring the cream too fast which can cause splattering and an uneven blend.
- The sugar will boil up at first, then firm up, but will eventually loosen and blend into the cream: When the cream hits the hot sugar, the mixture first foams and climbs the pan, then seems to seize and stiffen before relaxing. This sensory roller coaster is normal; patience and steady whisking coax it back to a smooth state. Listen for the vigorous bubbling, watch the color remain glossy, and smell the richer, cream sweet notes that emerge once it's combined. The technique matters because rushing or stopping whisking can leave an uneven texture. Avoid turning the heat too high to speed things, which risks scorching the dairy.
- Add the salt and vanilla extract: With the caramel now smooth, stirring in 1 teaspoon ea salt and 1 teaspoon vanilla extract will brighten and round the flavor. You will notice the aroma bloom with sweet and floral highlights, and the taste will shift from purely sugary to balanced and warm. This finishing step is important because it layers the final flavor profile and enhances complexity. A typical misstep is adding salt too early which can distort the caramelization process, so add it now for even distribution.
- Stir and simmer another 2 to 3 minutes to thicken: A few more minutes of gentle simmering allows the caramel to reduce slightly and reach a desirable, pourable viscosity. You should see slow, glossy ribbons when you lift the whisk, and the aroma should feel deeply rounded. This time lets the flavors marry and the texture set, which is why it is worth the patience. Over simmering will make it too thick once cooled, so watch for the flowing consistency. Avoid boiling rapidly, as that can create lumps and cause the cream to separate.
- Ladle into espresso cups and serve warm: Serving warm maximizes aroma and gives the best mouthfeel, a sip that feels like velvet sliding across the palate. Ladling into small espresso cups concentrates the experience and makes it ideal for sharing in tiny tastes. If you must hold it briefly, keep the caramel warm over very low heat and stir occasionally to preserve texture. The key mistake to avoid is serving it piping hot without a moment to settle, which can make it feel excessively thin and mask the nuanced flavors.
Notes
- Serve in mini cups: Presenting small portions emphasizes savoring, and it makes the caramel feel luxurious for parties and intimate gatherings.
- Adjust sweetness lightly: Reduce the initial sugar by a small fraction if you prefer a less sweet sip, but note that the caramel color and flavor will shift as a result.
- Control thickness: Simmer a bit longer for a spoonable sauce, or shorten the final simmer for a pourable drinkable caramel.
- Warm glasses or cups: Pre warming keeps the caramel silky longer and prevents it from congealing too quickly when poured.
- Batch and reheat gently: Store cooled caramel in the fridge and reheat over low heat with a splash of cream to restore texture without breaking the emulsion.