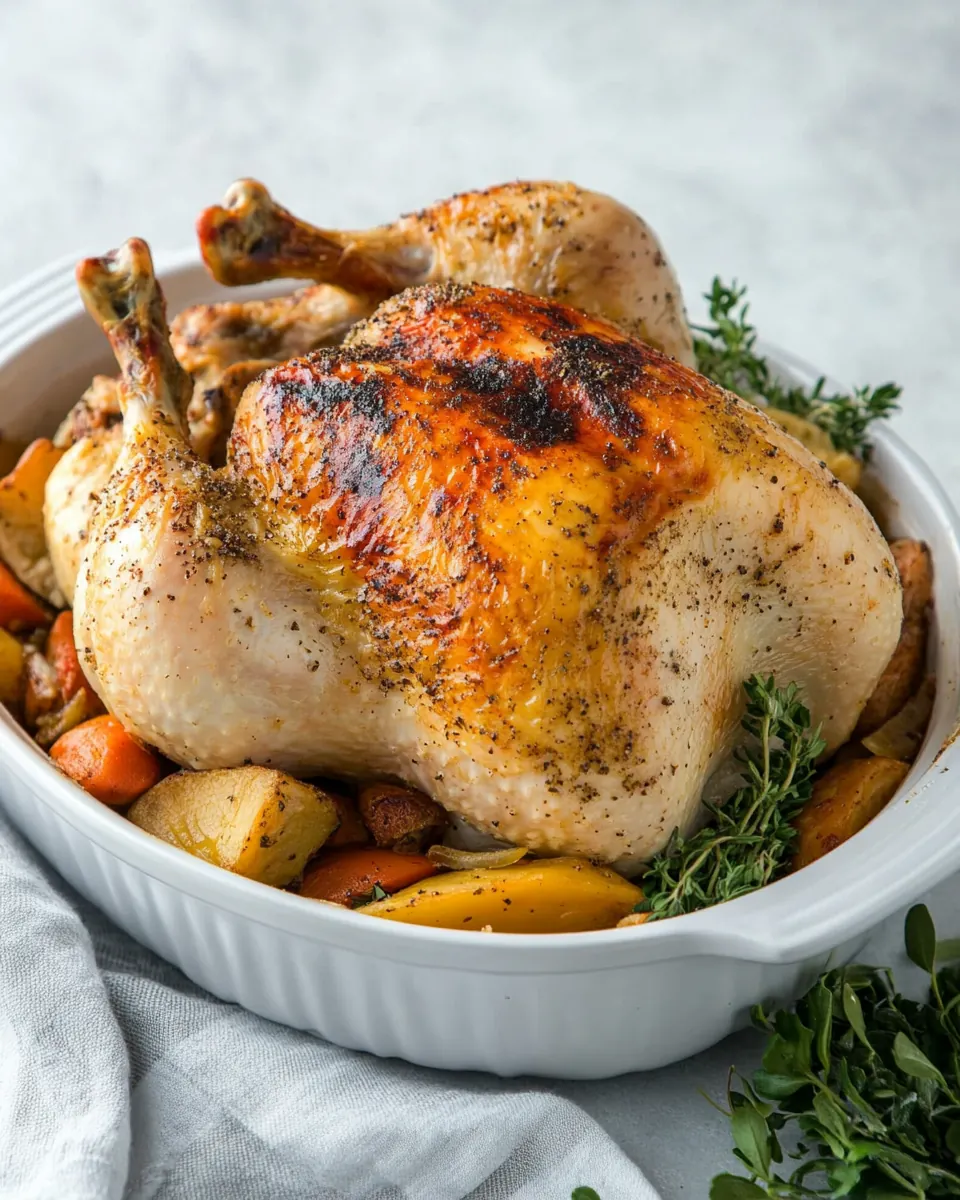
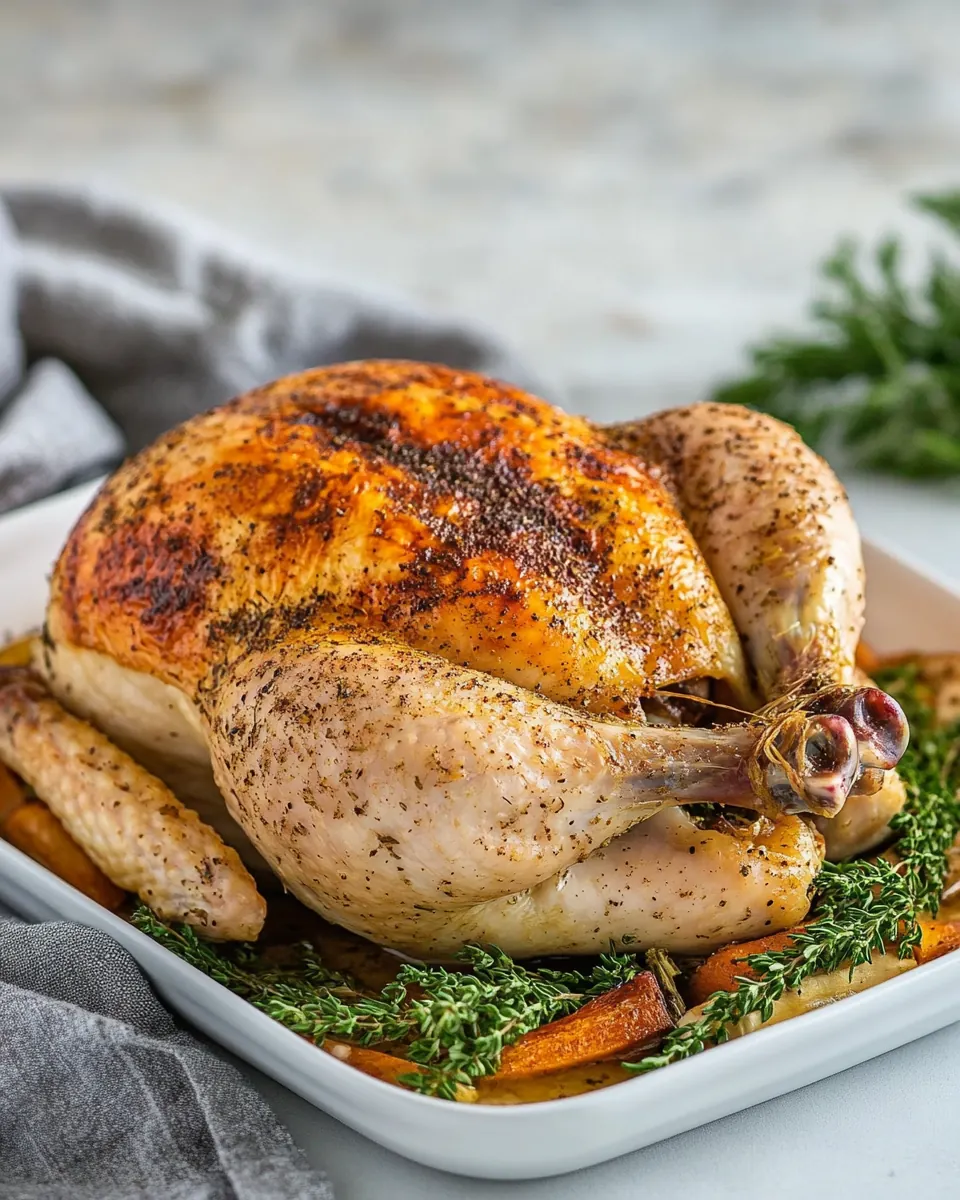
Slow Cooker Whole Chicken
Slow Cooker Whole Chicken is the kind of recipe that feels like coming home, a steady, comforting centerpiece that fills the kitchen with slow roasted warmth. I first learned to rely on it during a long winter when I wanted dinner that required little hands on time but still tasted thoughtful. The aroma of herbs and garlic rising from the slow cooker became my signal to slow down, pour a glass of tea, and set the table without fuss.
Over the years I have tweaked the vegetable nest and the seasoning paste until the results were dependable every time. There have been experiments that failed, lessons learned about drying the skin properly, and evenings when the broil at the end turned the skin into the crisp, bronzed crown the dish deserves. I keep coming back to this method when I need a satisfying meal for family or friends, because the flavor builds quietly, then finishes with a flourish.
I often cook this on chilly nights, when the house needs a slow, savory anchor. The vegetables at the bottom become infused with chicken drippings and herbs, and the final gravy is what I always make extra for guests who ask for seconds. If you love nourishing meals with minimal stress, you will appreciate how reliably delicious Slow Cooker Whole Chicken can be.
Recipe Snapshot
4 hr 20 mins
20 mins
240 mins
Hard
450 kcal
American
Gluten-Free, Paleo
Dinner
6 quart slow cooker, Instant read thermometer, Foil lined baking tray, Rack, Fat separator, Medium sized pan, Whisk
Why This Slow Cooker Whole Chicken Is a Winner
Effortless, hands off cooking
I love how Slow Cooker Whole Chicken lets you walk away while flavor develops. Pop everything in, set the cooker, and go about your day. The slow heat extracts juices and concentrates flavor, so you get deep savory notes with almost zero babysitting. This is the reason I turn to it for busy nights, when I still want a meal that tastes like care without spending the evening in the kitchen.
Vegetable and herb harmony
The bed of celery, carrots, red onion, garlic, rosemary, and thyme acts as both a flavor base and a roasting rack. The vegetables soak up drippings and the herbs lend aromatic depth. I can tell you from experience that skipping the herb sprigs noticeably flattens the final dish, so I always keep them in.
Juicy meat with crisp skin finish
Cooking slowly ensures the interior stays tender and juicy, while a quick broil at the end gives the chicken skin the texture contrast everyone loves. I appreciate this two stage approach, because the slow cooker alone cannot produce the same crispness. The broil transforms the look and mouthfeel, making the meal feel celebratory even on an ordinary weeknight.
Savory pan sauce from drippings
Saving the drippings and turning them into a gravy is a kitchen win every time. I strain and defat the juices before making a pale roux and whisking in the concentrated liquids. The result carries the aromas of roasted herbs and caramelized vegetables, and it ties the whole plate together. Guests always reach for extra gravy, and I always oblige.
Flexible and crowd friendly
This recipe scales and adapts well, which is one reason I reach for it when hosting. Whether I have a small family dinner or extra company, the dish holds well and reheats gracefully. It is forgiving on timing too, so if the day runs long, the chicken still delivers.
Key Ingredients for Slow Cooker Whole Chicken
These ingredients are chosen to build layered flavor with minimal fuss. The aromatic vegetables and herb sprigs create a fragrant cushion that infuses the chicken as it slowly cooks. The simple seasoning paste and a final broil give the skin a golden edge, while a small roux turns collected drippings into a silky gravy. Each player has a clear job, and together they produce a homey, satisfying meal.
- 6 celery ribs cut into 2-inch pieces: Cut into 2-inch pieces to provide a crunchy, aromatic vegetable base that steams and flavors the chicken as it cooks, adding moisture and subtle vegetal sweetness.
- 2 carrots peeled and cut into 1 1/2 inch pieces: Peel and cut into 1 1/2 inch pieces to contribute sweet, tender texture and natural sugars that caramelize slightly, enriching the cooking liquid and overall savory profile.
- 1 red onion peeled and cut into 8 wedges: Peel and cut into 8 wedges to deliver sharp, slightly sweet onion flavor that softens into tender layers, infusing the slow cooker with depth and balancing richer components.
- 8 ounces red potatoes cut into 1-inch pieces: Cut into 1-inch pieces to offer bite-sized, starchy contrast that absorbs savory juices and helps thicken the braising liquid while providing hearty substance to the dish.
- 5 cloves garlic peeled and smashed: Peel and smash to release pungent, aromatic oils that permeate the meat and vegetables, lending warm, savory depth and an underlying garlicky complexity.
- 4 rosemary sprigs: Use whole sprigs to impart a piney, resinous aroma that complements poultry; their woody stems can be removed after cooking while leaving concentrated herbal notes.
- 4 thyme sprigs: Use whole sprigs to add bright, lemony-earthy fragrance that brightens the dish and pairs well with rosemary and garlic for classic poultry seasoning.
- 2 teaspoons kosher salt plus more for seasoning: Measure 2 teaspoons plus extra for seasoning to ensure proper seasoning through the vegetables and cavity; salt enhances flavor and draws moisture to concentrate savory notes.
- 1 1/2 teaspoons paprika: Sprinkle 1 1/2 teaspoons to contribute a warm, smoky-sweet color and mild heat that deepens the chicken’s skin color and rounds out the seasoning blend.
- 1/2 teaspoon black pepper plus more for seasoning: Measure 1/2 teaspoon plus extra for seasoning to introduce subtle heat and sharpness that balances richness, enhancing overall flavor when adjusted to taste.
- 1/2 teaspoon dried thyme or 1 teaspoon chopped fresh: Use 1/2 teaspoon dried or 1 teaspoon fresh to add concentrated herbal flavor; thyme supports the savory profile and complements other aromatics throughout slow cooking.
- 4 teaspoons olive oil plus more for brushing: Measure 4 teaspoons plus extra for brushing to provide fat for browning, sheen, and flavor; olive oil helps herbs and spices adhere and promotes even skin color.
- 4 to 5-pound chicken: Select a 4 to 5-pound bird to ensure even cooking in the slow cooker; this size yields tender, falling-off-the-bone meat while fitting typical slow-cooker capacity.
- 2 tablespoons unsalted butter: Melt before use to brush or rub into the chicken for rich, silky flavor and to help baste the meat, adding a luxurious mouthfeel and aiding in browning if seared.
- 2 tablespoons all-purpose flour: Use to dust and thicken pan drippings into a simple gravy, absorbing fat and creating a smooth roux that gives body and sheen to the finished sauce.
Cooking Method for Slow Cooker Whole Chicken
These directions guide you through a relaxed, confidence building process. Slow cooking builds flavor gently, and the final broil gives the skin its proud, crisp finish. Read each step so you can sense the right cues and avoid common missteps.
- Arrange celery, carrots, onion, garlic cloves, rosemary, and thyme sprigs into a 6 quart slow cooker bowl, creating a nest for the chicken.: You will notice an herbal, root vegetable perfume as you layer the celery , carrots , red onion , and garlic ; this nest cushions the chicken and lifts it off the cooker base so heat circulates evenly. The vegetables will steam and slowly caramelize, releasing sweet and savory juices that mingle with the herbs. When arranging, spread the pieces in a single even layer so the bird sits level; if the bed is lumpy the chicken may tip and cook unevenly. A common mistake is crowding the vegetables or chopping them inconsistently, which leads to some bits overcooking while others stay firm. Listen for a soft hiss as the slow cooker starts and watch for a gentle steam cloud when you remove the lid, signs the nest is doing its job.
- Combine salt, paprika, black pepper, dried thyme, and olive oil in a small bowl to make a seasoning paste.: As you whisk the salt , paprika , black pepper , dried thyme , and olive oil , the mixture should form a glossy paste that clings to your spoon. The oil carries and blooms the spices, so when spread on the skin the paste promotes even browning and concentrated flavor. Make sure the salt dissolves into the oil, because undissolved crystals can create briny pockets on the skin. Avoid making the paste too watery, otherwise it will slip off the surface and not adhere properly during cooking.
- Remove the giblets and neck from the chicken. Dry the outside and inside of the chicken with paper towels.: Drying the cavity and skin thoroughly is essential to encourage Maillard reaction later during the broil, which gives you that coveted crispness. The rubbing of the paper towels creates friction and helps the seasoning paste stick more evenly. If moisture remains, the skin will steam instead of browning when broiled, resulting in limp texture. A common oversight is forgetting to check the cavity for hidden packaging, so double check before seasoning.
- Spread the seasoning paste evenly over the chicken skin. Place the chicken breast side up on the vegetables.: Once the paste is on, you will see the surface take on a warm, rosy hue from the paprika . The even coating ensures each bite of skin and meat carries balanced seasoning. Positioning the chicken breast side up gives the white meat a bit more protection from direct heat so it remains juicy. Make sure the legs are tucked or secured to prevent flapping that could scorch the skin during the broil. A mistake here is piling the bird too deep into vegetables, which can smother the airflow needed for even cooking.
- Cover and cook on the 'High' setting for 4 to 5 hours, or 'Low' setting for 6 to 8 hours, or until the breasts reach an internal temperature of 160 to 165ºF, and thighs reach 170ºF.: As the slow cooker hums, savory steam will rise and the aroma of herbs will deepen. Use an instant read thermometer to verify doneness in the thickest part of the breast and thigh, because visual cues alone are not reliable with slow cooking. The internal temperature targets ensure the white meat stays moist while the dark meat reaches tender doneness. One pitfall is relying on timing alone; every slow cooker runs a bit differently, so temperature checks are your safety net. Expect a gentle bubbling at the edges of the cooker when the dish is nearing completion.
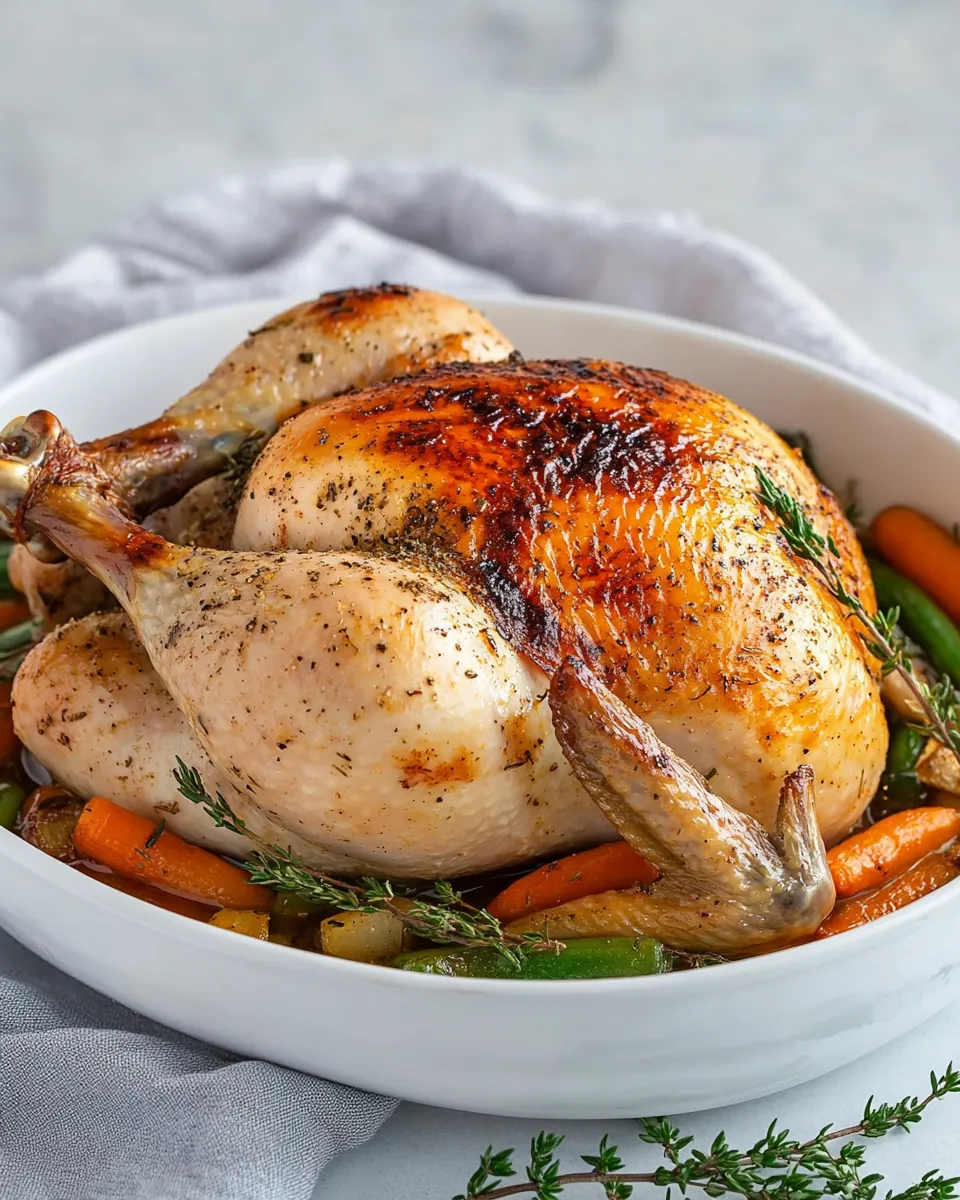
- Carefully transfer chicken to a foil-lined baking tray with a rack on top. Brush the chicken with olive oil and broil 10-inches away from the top of the oven until the skin is browned and crisp, about 5 minutes.: The broil will singe the exterior, producing crisp, bronzed skin and a satisfying contrast to the tender meat. Brushing with a little extra olive oil promotes even color and prevents the skin from drying out too much. Keep a close eye during broiling, because the process is quick and can shift from perfectly browned to burnt in moments. A typical mistake is leaving the bird too close to the heating element, which causes uneven charring; maintain the 10 inch distance for control.
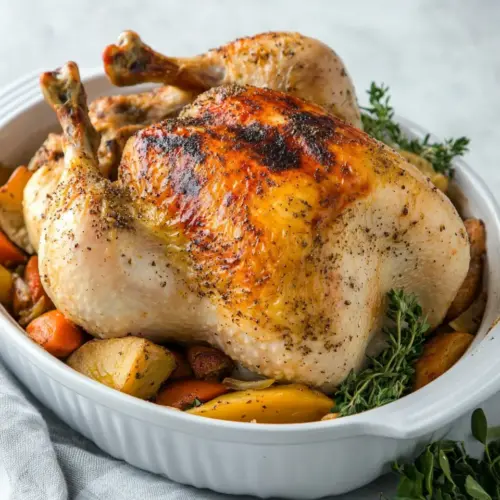
- To further brown the vegetables, transfer to a foil-lined baking tray and broil 10-inches away from the top of the oven for about 8 to 10 minutes.: This step deepens the caramelized sweetness in the celery , carrots , red potatoes , and onion , creating color and concentrated flavor. The aromas will intensify as natural sugars brown, and you should see edges turning golden to mahogany. Watch closely and stir once if needed to avoid burnt patches. A frequent error is skipping this step and ending up with gray, steamed vegetables instead of the rich roasted finish this dish benefits from.
- Transfer chicken to a carving board and rest for 15 minutes before carving.: Resting lets the juices redistribute, so sliced meat stays moist rather than bleeding out onto your platter. During this pause the aroma will mellow into a composed, layered fragrance that signals readiness. Resist the urge to carve immediately, because cutting too soon wastes juices and yields dryer slices. A tip I follow is tenting lightly with foil to keep warm without steaming the skin back to limpness.
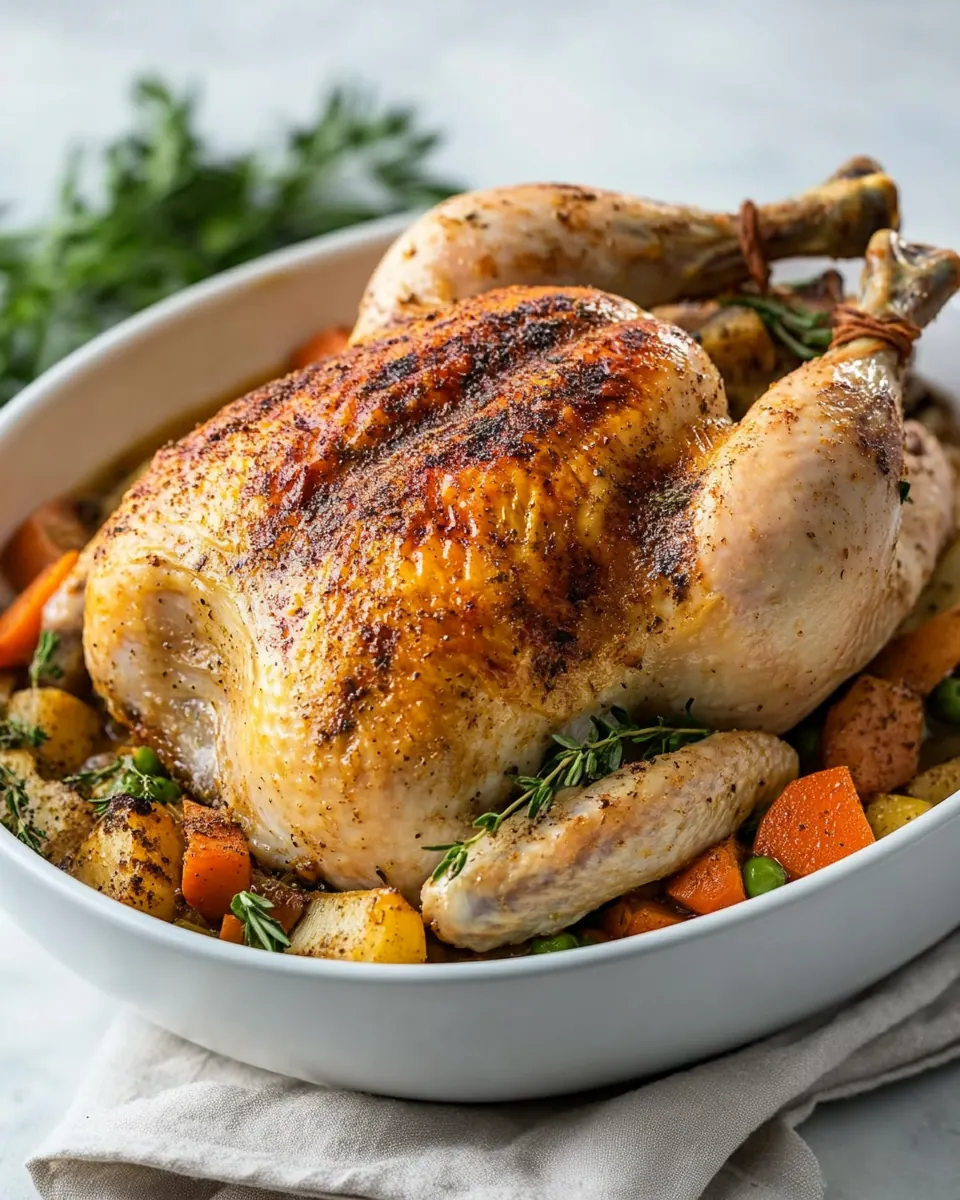
- To serve, add vegetables to a platter and place carved chicken on top.: Arrange the broiled vegetables as a warm, colorful bed and set the carved chicken on top for an inviting presentation. The contrast of crispy skin and tender meat against caramelized roots makes the plate feel abundant. If the juices pooled on the board, spoon some into the vegetables for extra flavor. Avoid drizzling all the drippings at once, as you may want them reserved for the gravy that follows.
- Transfer chicken drippings to a fat separator. Heat a medium sized pan over medium heat.: Using a fat separator clarifies the drippings so your gravy is glossy rather than greasy. The pan should be warm enough that a drop of water sizzles, signaling the right starting temperature for a roux. If you skip separating fat, the sauce can feel heavy. A common oversight is allowing the drippings to cool and congeal, which makes separation harder, so work while they are still warm.
- Melt 2 tablespoons of unsalted butter in the pan and then whisk in 2 tablespoons flour. Once a pale roux is formed, turn the heat up to medium-high.: The butter and flour should marry into a smooth paste that smells slightly nutty when cooked enough, removing raw flour taste. This pale roux provides the thickening backbone for the gravy while keeping flavor delicate. If the roux browns too much you will change the sauce color and taste, so aim for a light, sandy tone. A mistake here is rushing and adding liquid too soon, causing lumps.
- Gradually whisk in 1 cup defatted chicken drippings. Stir continuously until thickened, about 2 minutes. Add more chicken drippings for a thinner sauce. Season gravy with salt and pepper.: As the liquid hits the roux, it should thicken into a glossy, silk like gravy in a matter of minutes, releasing that concentrated savory aroma. Whisking steadily prevents lumps and creates a smooth texture. Taste and adjust seasoning carefully, because the drippings already carry concentrated salt. Over seasoning is common, so add a little at a time, tasting between additions.
Recipe Notes about Slow Cooker Whole Chicken
This set of notes expands practical ways to get reliable results and small refinements I use often. They cover timing, texture, and presentation so you can adapt the recipe with confidence.
- Resting matters: Let the chicken rest for 15 minutes after broiling to keep slices juicy and to let flavors settle before carving.
- Temperature is your friend: I always use an instant read thermometer to confirm breast and thigh temperatures rather than guessing by time, which accounts for variability between slow cookers.
- Control the fat: Use a fat separator on the drippings to remove excess oil before making the gravy, which gives a cleaner, more balanced sauce.
- Uniform chopping: Cut the vegetables into even pieces so they cook at the same rate, avoiding mushy bits and underdone pockets.
- Broil watchfully: The broiler works quickly, so stay nearby and check every minute to achieve golden crispness without burning.
Great Combinations for Slow Cooker Whole Chicken
This bird pairs well with warm, simple sides and can suit many occasions from weeknight dinners to holiday gatherings. Below are practical serving ideas, storage tips, and seasonal suggestions to make the most of the meal.
- Serve with the braised vegetables: The caramelized carrots, red potatoes, celery, and onion that cooked beneath the chicken are perfect on the same platter, creating a no fuss one dish feel for family dinners.
- Family dinners and casual entertaining: For a cozy dinner, carve the chicken at the table so guests can help themselves; it keeps conversation flowing and plating relaxed.
- Holiday and winter gatherings: This recipe is well suited for winter occasions when people appreciate warming, herb scented dishes; the make ahead friendly nature lets you focus on company instead of last minute prep.
- Leftover strategy: Store carved chicken and vegetables separately in airtight containers in the refrigerator for up to three days, and keep the gravy in a separate jar to reheat gently on the stove for serving.
- Seasonal pairing: In colder months, add steamed greens or a simple braised bitter green to cut richness; the warm herb notes of the chicken complement winter produce beautifully.
- Presentation tip: Slice the chicken and fan it over the vegetables, spooning warm gravy over the top for an inviting centerpiece that looks polished with minimal effort.
- Storage of drippings: Chill the drippings and remove the solidified fat for a cleaner sauce later; the defatted juices reheat into a flavorful gravy quickly.
FAQ
Conclusion
Slow Cooker Whole Chicken stands out because it combines fuss free slow cooking with a quick broil that delivers both tenderness and crisp skin. Try it the next time you want a warm, homey meal without constant attention; the method reliably produces juicy meat and flavorful vegetables. Give it a go, and enjoy the way the savory gravy and herb scented vegetables turn a simple bird into a memorable dinner.
Slow Cooker Whole Chicken
Equipment
- 6 quart slow cooker
- Instant read thermometer
- Foil lined baking tray
- Rack
- Fat separator
- Medium sized pan
- Whisk
Ingredients
- 6 celery ribs cut into 2-inch pieces Cut into 2-inch pieces to provide a crunchy, aromatic vegetable base that steams and flavors the chicken as it cooks, adding moisture and subtle vegetal sweetness.
- 2 carrots peeled and cut into 1 1/2 inch pieces Peel and cut into 1 1/2 inch pieces to contribute sweet, tender texture and natural sugars that caramelize slightly, enriching the cooking liquid and overall savory profile.
- 1 red onion peeled and cut into 8 wedges Peel and cut into 8 wedges to deliver sharp, slightly sweet onion flavor that softens into tender layers, infusing the slow cooker with depth and balancing richer components.
- 8 ounces red potatoes cut into 1-inch pieces Cut into 1-inch pieces to offer bite-sized, starchy contrast that absorbs savory juices and helps thicken the braising liquid while providing hearty substance to the dish.
- 5 cloves garlic peeled and smashed Peel and smash to release pungent, aromatic oils that permeate the meat and vegetables, lending warm, savory depth and an underlying garlicky complexity.
- 4 rosemary sprigs Use whole sprigs to impart a piney, resinous aroma that complements poultry; their woody stems can be removed after cooking while leaving concentrated herbal notes.
- 4 thyme sprigs Use whole sprigs to add bright, lemony-earthy fragrance that brightens the dish and pairs well with rosemary and garlic for classic poultry seasoning.
- 2 teaspoons kosher salt plus more for seasoning Measure 2 teaspoons plus extra for seasoning to ensure proper seasoning through the vegetables and cavity; salt enhances flavor and draws moisture to concentrate savory notes.
- 1 1/2 teaspoons paprika Sprinkle 1 1/2 teaspoons to contribute a warm, smoky-sweet color and mild heat that deepens the chicken’s skin color and rounds out the seasoning blend.
- 1/2 teaspoon black pepper plus more for seasoning Measure 1/2 teaspoon plus extra for seasoning to introduce subtle heat and sharpness that balances richness, enhancing overall flavor when adjusted to taste.
- 1/2 teaspoon dried thyme or 1 teaspoon chopped fresh Use 1/2 teaspoon dried or 1 teaspoon fresh to add concentrated herbal flavor; thyme supports the savory profile and complements other aromatics throughout slow cooking.
- 4 teaspoons olive oil plus more for brushing Measure 4 teaspoons plus extra for brushing to provide fat for browning, sheen, and flavor; olive oil helps herbs and spices adhere and promotes even skin color.
- 4 to 5-pound chicken Select a 4 to 5-pound bird to ensure even cooking in the slow cooker; this size yields tender, falling-off-the-bone meat while fitting typical slow-cooker capacity.
- 2 tablespoons unsalted butter Melt before use to brush or rub into the chicken for rich, silky flavor and to help baste the meat, adding a luxurious mouthfeel and aiding in browning if seared.
- 2 tablespoons all-purpose flour Use to dust and thicken pan drippings into a simple gravy, absorbing fat and creating a smooth roux that gives body and sheen to the finished sauce.
Instructions
- Arrange celery, carrots, onion, garlic cloves, rosemary, and thyme sprigs into a 6 quart slow cooker bowl, creating a nest for the chicken.: You will notice an herbal, root vegetable perfume as you layer the celery , carrots , red onion , and garlic ; this nest cushions the chicken and lifts it off the cooker base so heat circulates evenly. The vegetables will steam and slowly caramelize, releasing sweet and savory juices that mingle with the herbs. When arranging, spread the pieces in a single even layer so the bird sits level; if the bed is lumpy the chicken may tip and cook unevenly. A common mistake is crowding the vegetables or chopping them inconsistently, which leads to some bits overcooking while others stay firm. Listen for a soft hiss as the slow cooker starts and watch for a gentle steam cloud when you remove the lid, signs the nest is doing its job.
- Combine salt, paprika, black pepper, dried thyme, and olive oil in a small bowl to make a seasoning paste.: As you whisk the salt , paprika , black pepper , dried thyme , and olive oil , the mixture should form a glossy paste that clings to your spoon. The oil carries and blooms the spices, so when spread on the skin the paste promotes even browning and concentrated flavor. Make sure the salt dissolves into the oil, because undissolved crystals can create briny pockets on the skin. Avoid making the paste too watery, otherwise it will slip off the surface and not adhere properly during cooking.
- Remove the giblets and neck from the chicken. Dry the outside and inside of the chicken with paper towels.: Drying the cavity and skin thoroughly is essential to encourage Maillard reaction later during the broil, which gives you that coveted crispness. The rubbing of the paper towels creates friction and helps the seasoning paste stick more evenly. If moisture remains, the skin will steam instead of browning when broiled, resulting in limp texture. A common oversight is forgetting to check the cavity for hidden packaging, so double check before seasoning.
- Spread the seasoning paste evenly over the chicken skin. Place the chicken breast side up on the vegetables.: Once the paste is on, you will see the surface take on a warm, rosy hue from the paprika . The even coating ensures each bite of skin and meat carries balanced seasoning. Positioning the chicken breast side up gives the white meat a bit more protection from direct heat so it remains juicy. Make sure the legs are tucked or secured to prevent flapping that could scorch the skin during the broil. A mistake here is piling the bird too deep into vegetables, which can smother the airflow needed for even cooking.
- Cover and cook on the 'High' setting for 4 to 5 hours, or 'Low' setting for 6 to 8 hours, or until the breasts reach an internal temperature of 160 to 165ºF, and thighs reach 170ºF.: As the slow cooker hums, savory steam will rise and the aroma of herbs will deepen. Use an instant read thermometer to verify doneness in the thickest part of the breast and thigh, because visual cues alone are not reliable with slow cooking. The internal temperature targets ensure the white meat stays moist while the dark meat reaches tender doneness. One pitfall is relying on timing alone; every slow cooker runs a bit differently, so temperature checks are your safety net. Expect a gentle bubbling at the edges of the cooker when the dish is nearing completion.
- Carefully transfer chicken to a foil-lined baking tray with a rack on top. Brush the chicken with olive oil and broil 10-inches away from the top of the oven until the skin is browned and crisp, about 5 minutes.: The broil will singe the exterior, producing crisp, bronzed skin and a satisfying contrast to the tender meat. Brushing with a little extra olive oil promotes even color and prevents the skin from drying out too much. Keep a close eye during broiling, because the process is quick and can shift from perfectly browned to burnt in moments. A typical mistake is leaving the bird too close to the heating element, which causes uneven charring; maintain the 10 inch distance for control.
- To further brown the vegetables, transfer to a foil-lined baking tray and broil 10-inches away from the top of the oven for about 8 to 10 minutes.: This step deepens the caramelized sweetness in the celery , carrots , red potatoes , and onion , creating color and concentrated flavor. The aromas will intensify as natural sugars brown, and you should see edges turning golden to mahogany. Watch closely and stir once if needed to avoid burnt patches. A frequent error is skipping this step and ending up with gray, steamed vegetables instead of the rich roasted finish this dish benefits from.
- Transfer chicken to a carving board and rest for 15 minutes before carving.: Resting lets the juices redistribute, so sliced meat stays moist rather than bleeding out onto your platter. During this pause the aroma will mellow into a composed, layered fragrance that signals readiness. Resist the urge to carve immediately, because cutting too soon wastes juices and yields dryer slices. A tip I follow is tenting lightly with foil to keep warm without steaming the skin back to limpness.
- To serve, add vegetables to a platter and place carved chicken on top.: Arrange the broiled vegetables as a warm, colorful bed and set the carved chicken on top for an inviting presentation. The contrast of crispy skin and tender meat against caramelized roots makes the plate feel abundant. If the juices pooled on the board, spoon some into the vegetables for extra flavor. Avoid drizzling all the drippings at once, as you may want them reserved for the gravy that follows.
- Transfer chicken drippings to a fat separator. Heat a medium sized pan over medium heat.: Using a fat separator clarifies the drippings so your gravy is glossy rather than greasy. The pan should be warm enough that a drop of water sizzles, signaling the right starting temperature for a roux. If you skip separating fat, the sauce can feel heavy. A common oversight is allowing the drippings to cool and congeal, which makes separation harder, so work while they are still warm.
- Melt 2 tablespoons of unsalted butter in the pan and then whisk in 2 tablespoons flour. Once a pale roux is formed, turn the heat up to medium-high.: The butter and flour should marry into a smooth paste that smells slightly nutty when cooked enough, removing raw flour taste. This pale roux provides the thickening backbone for the gravy while keeping flavor delicate. If the roux browns too much you will change the sauce color and taste, so aim for a light, sandy tone. A mistake here is rushing and adding liquid too soon, causing lumps.
- Gradually whisk in 1 cup defatted chicken drippings. Stir continuously until thickened, about 2 minutes. Add more chicken drippings for a thinner sauce. Season gravy with salt and pepper.: As the liquid hits the roux, it should thicken into a glossy, silk like gravy in a matter of minutes, releasing that concentrated savory aroma. Whisking steadily prevents lumps and creates a smooth texture. Taste and adjust seasoning carefully, because the drippings already carry concentrated salt. Over seasoning is common, so add a little at a time, tasting between additions.
Notes
- Resting matters: Let the chicken rest for 15 minutes after broiling to keep slices juicy and to let flavors settle before carving.
- Temperature is your friend: I always use an instant read thermometer to confirm breast and thigh temperatures rather than guessing by time, which accounts for variability between slow cookers.
- Control the fat: Use a fat separator on the drippings to remove excess oil before making the gravy, which gives a cleaner, more balanced sauce.
- Uniform chopping: Cut the vegetables into even pieces so they cook at the same rate, avoiding mushy bits and underdone pockets.
- Broil watchfully: The broiler works quickly, so stay nearby and check every minute to achieve golden crispness without burning.