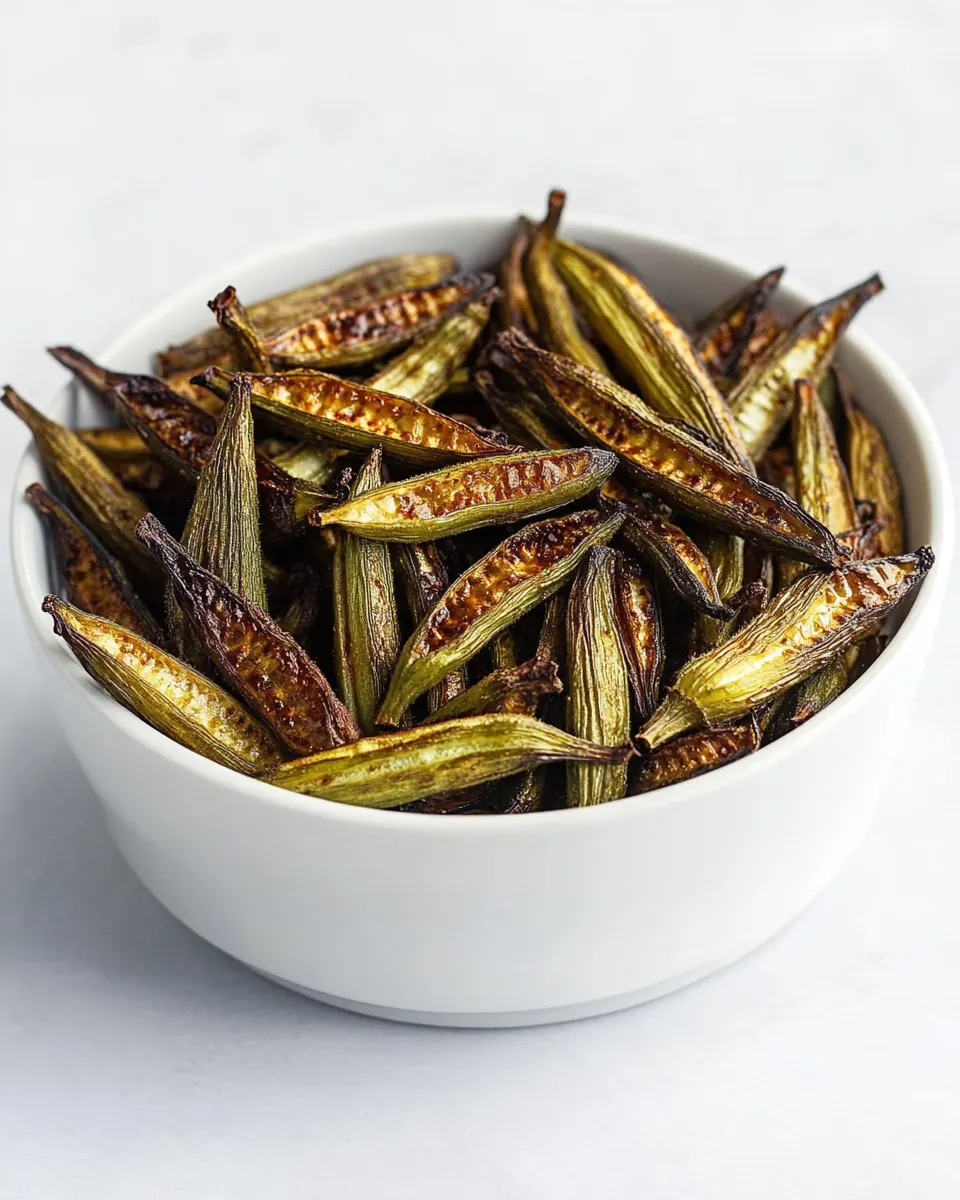
Crispy Oven Roasted Okra
Crispy Oven Roasted Okra was one of those little discoveries that changed how I think about simple vegetables. The first time I roasted a tray of okra until it crackled, I remember standing at the oven door, surprised by the caramelized edges and the toasty aroma that filled the kitchen. That initial batch felt like a small victory, a way to turn a humble green pod into something snackable, bright, and slightly addictive.
I grew up watching relatives steam or stew okra, so this crisped version felt refreshingly modern. Over the summers I experimented with the cut, the seasoning, and the oven temperature, learning that tiny adjustments make a big difference in texture. Friends who usually avoided okra have confessed to stealing two or three pieces off the sheet pan before dinner was even served. I love how this recipe rewards patience and a light hand with oil, producing pods that are tender inside, and satisfyingly crackly outside.
Recipe Snapshot
40 mins
10 mins
30 mins
Easy
150 kcal
American
Vegan, Gluten-Free
Side Dishes
Sheet Pan, Tongs
What We Adore About This Crispy Oven Roasted Okra
1. Pure texture magic
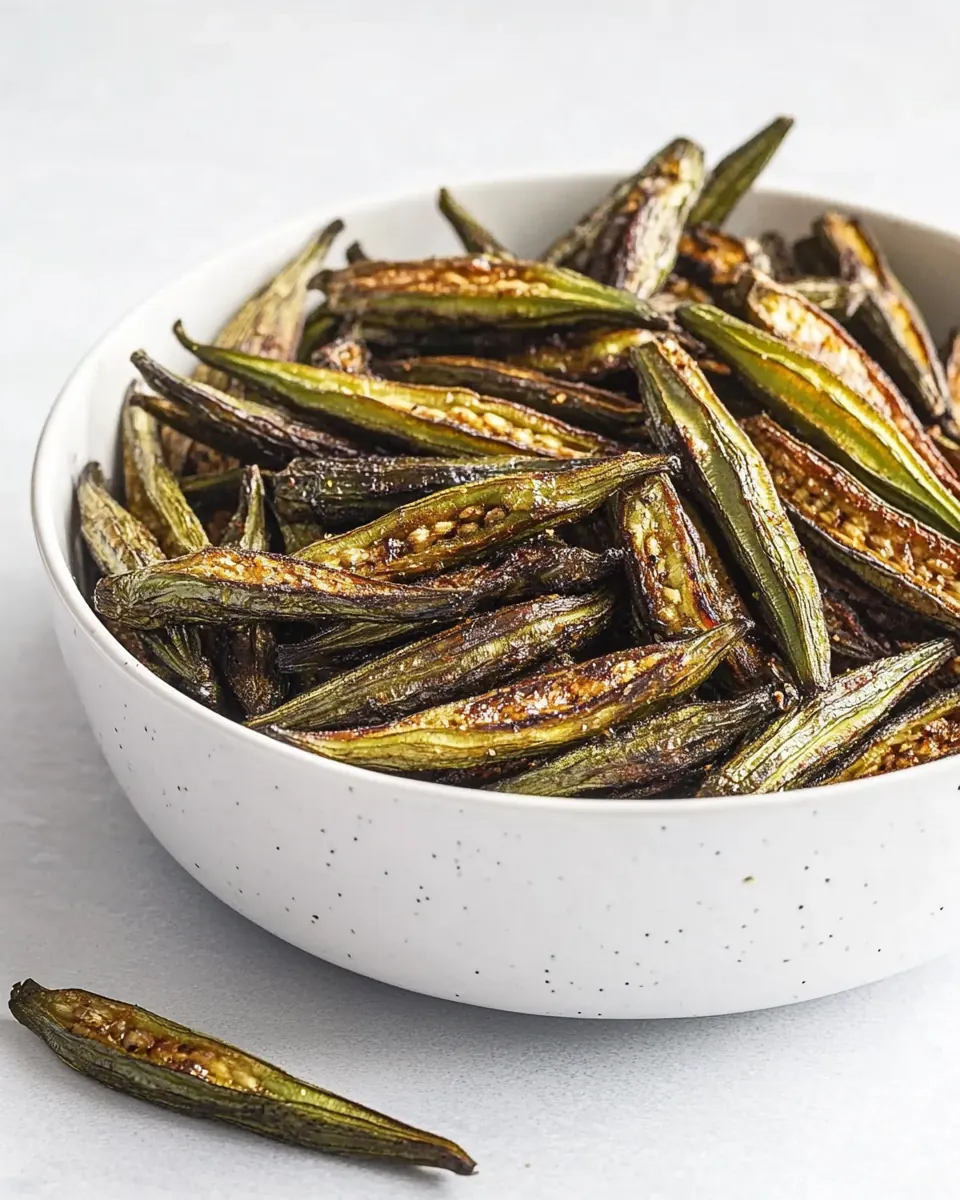
I adore how Crispy Oven Roasted Okra transforms a slippery ingredient into something crunchy and fun to eat. The contrast between the crisp exterior and the softer interior keeps every bite interesting, and that crunch is what will get people reaching back for another piece.
2. Minimal ingredients, maximum flavor
We only need a few pantry staples, yet the result tastes layered and complex. A touch of olive oil helps the seasoning cling while the soy sauce adds an umami lift that plays nicely with the toasted sesame and citrus notes in togarashi.
3. Fast and forgiving
This method is wonderfully forgiving. If you miss one minute here or there, the oven will still coax out deep browning. It adapts well to busy weeknights when you want something satisfying without a lot of fuss.
4. Crowd friendly and versatile
I bring this to potlucks and it disappears fast. It works as a snack, a side, or a small plate for sharing. Because the seasoning is flexible, I’ll change it up depending on the mood or cuisine I’m pairing it with.
5. Keeps its character
Even if you reheat leftovers, the pods maintain their pleasant chew and flavor. They won’t go mushy like some preparations, so you can roast a bit more knowing the texture will hold up.
Shopping List for Crispy Oven Roasted Okra

For this recipe I choose ingredients that do the heavy lifting without drama. The key players are okra for its texture, olive oil to promote browning, and a small amount of soy sauce and spice for umami and heat. Together they create balance, turning each pod into a crunchy, savory bite that feels both light and satisfying.
- 12 ounces 340 g okra: Provides tender, slightly grassy pods that become crisp when roasted; trim stems if desired and halve larger pods for even cooking. Offers a mild earthy flavor and pleasant texture contrast when blistered at high heat.
- 3 tablespoons 42 g olive oil, divided: Adds richness and helps promote browning and crispness; divide between coating and finishing to ensure even roasting and a glossy exterior. Imparts subtle fruitiness and mouthfeel while helping spices adhere to the okra.
- 1 teaspoon soy sauce: Adds a salty, umami depth that balances vegetal notes; toss with okra and oil to create a savory backbone for the seasoning. Contributes a subtle complexity that enhances overall roast flavor without overpowering.
- 1 teaspoon togarashi, or other dry seasoning, as desired: Delivers a bright, spicy, and aromatic kick when sprinkled before or after roasting; adjust amount to personal heat preference. Can include citrus peel, sesame, and chili elements that elevate the dish with layered flavor.
- fine sea salt, for finishing: Provides a clean finishing touch to amplify flavors and enhance crispness; sprinkle sparingly after roasting to taste. Helps highlight the natural sweetness and roasted notes while giving each bite a satisfying seasoning.
Cooking Method for Crispy Oven Roasted Okra
I like to approach the oven as a gentle transformer, coaxing moisture out while turning surfaces golden and crisp. Below are step by step actions rewritten into rich, sensory instructions so you can replicate the exact texture and flavor I describe.
- Preheat oven to 425 degrees F. Prepare a light colored sheet pan by brushing with 1 tablespoon of oil or spray with cooking spray.: Warm air circulation and a hot surface are what create that immediate sear, producing the toasty aroma you want. As the oven heats, you may smell a faint, warm, toasty scent from the pan, especially if it has a bit of oil. Using a light colored sheet pan prevents overbrowning in spots, helping you achieve an even golden color across the pods. One common mistake is using a dark pan which can accelerate browning and make edges bitter. Smooth the oil into a thin, even layer so the okra does not stick, and avoid pooling oil that produces uneven frying rather than roasting.
- Wash and dry okra. Spread on a paper towel and let fully dry (any moisture will prevent it from crisping up fully).: Dryness is everything for crispness, so you should hear a faint rustling as you pat the pods and feel them lose surface moisture. If they remain damp, steaming will occur in the oven and you will miss that crackly finish. A trick I use is to give them a final 5 minute rest on a dry towel to wick away humidity. Mistake to avoid, do not skip drying, even if you are impatient; the texture suffers noticeably.
- Trim off stems (I leave a tiny bit of the caps), then cut each pod in half lengthwise.: The trimmed stem reduces any woody bite while leaving a little cap helps the pods hold their shape. As you cut, you will notice a fresh, green aroma and a slightly sticky sap on some pods, which is normal. Halving them exposes more surface area for browning, creating edges that become golden and slightly crisp. Cutting too thin can make the pods fragile and prone to burning, while leaving them whole may reduce the crisp factor, so aim for even halves for uniform cooking.
- On the baking sheet or in a large bowl, toss okra with 2 tablespoons of olive oil and soy sauce. Sprinkle with togarashi or other seasoning as desired. Spread onto baking sheet in a single layer (overcrowded or overlapping means the okra won't get as crispy). Ideally arrange the pods so the cut sides are facing down for optimal browning.: When you toss, you should hear a gentle sticky clink as the oil coats the pods and notice a glossy sheen. The soy sauce will add a savory perfume and slightly darken the oil, which helps with caramelization. Laying cut sides down creates direct contact with the hot pan so those surfaces blister and brown, signaling Maillard reactions that yield nutty notes. Avoid crowding the pan because steam traps between overlapping pods will yield a soft texture. If your pan seems full, roast in batches to preserve crispness.
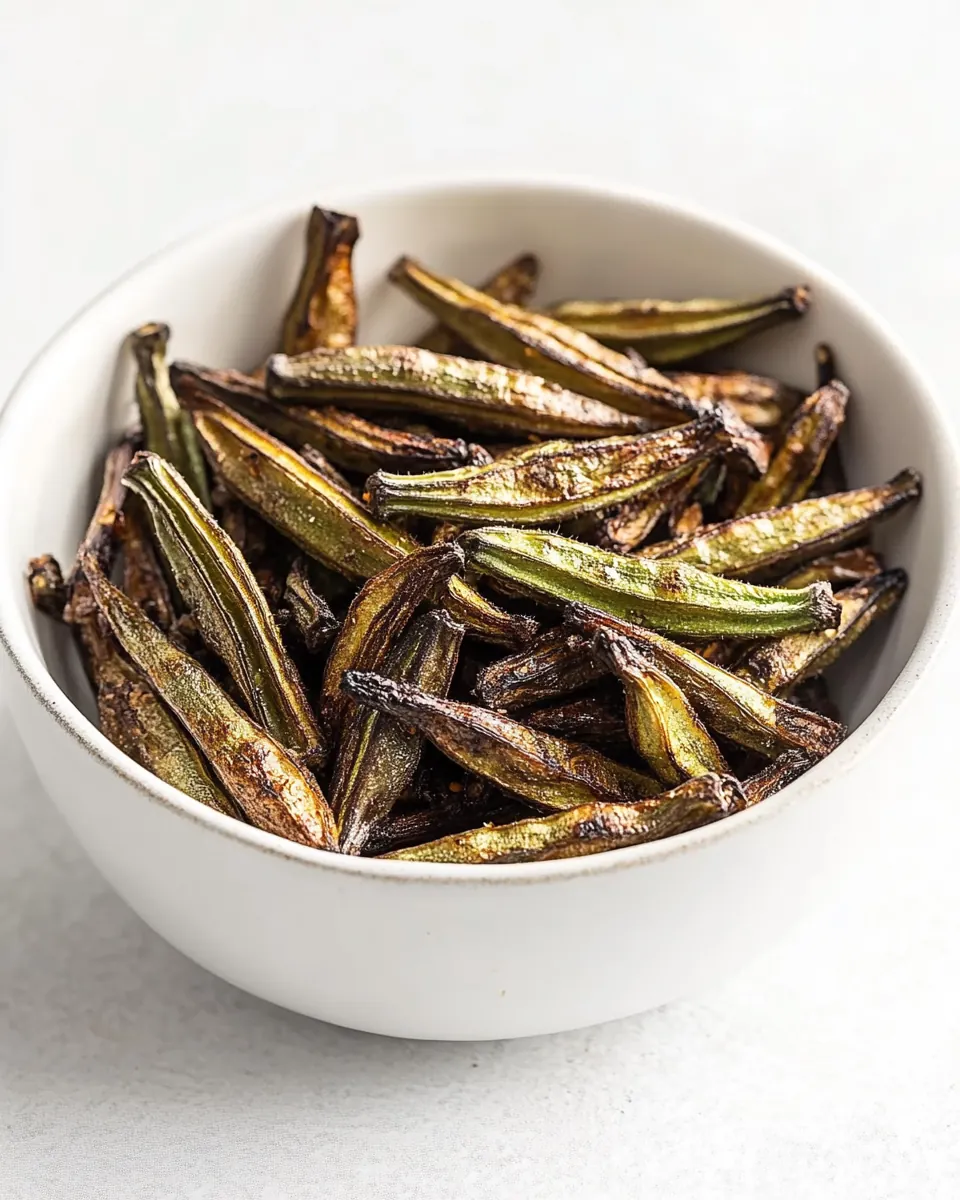
- Bake for about 15 to 20 minutes or until bottoms are nice and brown. Use tongs or a wide spatula to flip the pods cut side up, then return to the oven and bake for an additional 5 to 10 minutes (slightly longer if you want them extra extra crispy).: You will begin to see the edges darken and hear a subtle sizzle as moisture escapes. The initial bake develops a deep, roasted aroma and the bottoms will take on a rich golden to brown color. Flipping exposes the other side to the heat so it too can crisp, and you will notice steam momentarily rise when you flip, which is normal. A frequent error is flipping too often, which interrupts browning, so be decisive and quick when turning the pods. If you prefer ultra crisp pieces, add a few extra minutes, watching closely to prevent charring.
- Remove from oven and serve while still hot and crispy, sprinkled with fine sea salt to taste.: The finishing moment is where texture and seasoning meet. The hot pods will release a warm, roasted aroma and may hiss slightly as residual steam escapes. Sprinkling fine sea salt while the okra is hot ensures the crystals cling and dissolve slightly, creating bursts of salinity. Serve immediately to enjoy the contrast of crisp edges and tender insides. A common misstep is letting them sit on the pan too long where trapped heat can soften them, so transfer to a serving plate quickly for the best bite.
Recipe Tips about Crispy Oven Roasted Okra
This list expands on practical tips I use every time I roast okra. They cover technique, timing, and seasoning so you can consistently get crisp, flavorful pods.
- Choose firm pods — Select okra that snaps when bent. Fresh, smaller pods crisp up better and have less fibrous texture than oversized pieces.
- Dry thoroughly — After washing, lay the pods on a towel and let them air for a few minutes, then pat until no surface moisture remains. Moisture defeats crisping.
- Use a light colored sheet pan — This helps promote even browning without risking overly dark spots that sometimes happen on dark pans.
- Don’t overcrowd the pan — Give each pod breathing room so hot air circulates and surfaces roast rather than steam.
- Adjust seasoning to taste — Togarashi gives bright heat, but you can pick a milder dry spice if serving to children or those sensitive to spice.
- Serve immediately — These are at their best right out of the oven; if you need to hold them, keep briefly in a very low oven to preserve some crispness.
Perfect Pairings for Crispy Oven Roasted Okra
Crispy Oven Roasted Okra pairs beautifully with bold, simple accompaniments that contrast texture and flavor. Think bright salads, rich grains, or light dips that elevate the crunchy pods. The following ideas work for weeknight dinners, casual gatherings, or warm summer afternoons when okra is in season.
- Serve with a grain bowl: Layer warm rice or quinoa with roasted okra for an easy lunch bowl, finishing with a squeeze of citrus for balance.
- Offer as a snack or appetizer: Place the hot pods on a platter with small bowls of dipping sauces, such as a simple yogurt dip or a soy based sauce for extra umami.
- Pair with leafy salads: The crisp texture complements soft greens and adds a toasty note to salads that might otherwise be all soft textures.
- Include in casual dinners: Bring the tray to the table alongside grilled vegetables and a starchy side, where the crunchy okra adds contrast to softer elements.
- Seasonal serving: In summer gatherings, serve hot from the oven alongside chilled sides; the temperature contrast makes the dish feel bright and fresh.
- Storage tips: Keep leftovers in an airtight container for up to one day, but expect some loss of crispness. Reheat briefly in a hot oven to revive texture.
- Occasion ideas: Great for potlucks, casual weeknight meals, or light bites at a backyard party where finger foods are welcome.
FAQ
Conclusion
This recipe turns everyday okra into a crisp, flavorful treat that showcases how small techniques lead to big results. Give it a try the next time you want a light, crunchy side or a shareable snack, and you may see skeptics become instant fans. I hope this method inspires you to experiment with spices and serving styles, making Crispy Oven Roasted Okra a repeat in your kitchen rotation.
Crispy Oven Roasted Okra
Equipment
- Sheet Pan
- Tongs
Ingredients
- 12 ounces 340 g okra Provides tender, slightly grassy pods that become crisp when roasted; trim stems if desired and halve larger pods for even cooking. Offers a mild earthy flavor and pleasant texture contrast when blistered at high heat.
- 3 tablespoons 42 g olive oil, divided Adds richness and helps promote browning and crispness; divide between coating and finishing to ensure even roasting and a glossy exterior. Imparts subtle fruitiness and mouthfeel while helping spices adhere to the okra.
- 1 teaspoon soy sauce Adds a salty, umami depth that balances vegetal notes; toss with okra and oil to create a savory backbone for the seasoning. Contributes a subtle complexity that enhances overall roast flavor without overpowering.
- 1 teaspoon togarashi, or other dry seasoning, as desired Delivers a bright, spicy, and aromatic kick when sprinkled before or after roasting; adjust amount to personal heat preference. Can include citrus peel, sesame, and chili elements that elevate the dish with layered flavor.
- fine sea salt, for finishing Provides a clean finishing touch to amplify flavors and enhance crispness; sprinkle sparingly after roasting to taste. Helps highlight the natural sweetness and roasted notes while giving each bite a satisfying seasoning.
Instructions
- Preheat oven to 425 degrees F. Prepare a light colored sheet pan by brushing with 1 tablespoon of oil or spray with cooking spray.: Warm air circulation and a hot surface are what create that immediate sear, producing the toasty aroma you want. As the oven heats, you may smell a faint, warm, toasty scent from the pan, especially if it has a bit of oil. Using a light colored sheet pan prevents overbrowning in spots, helping you achieve an even golden color across the pods. One common mistake is using a dark pan which can accelerate browning and make edges bitter. Smooth the oil into a thin, even layer so the okra does not stick, and avoid pooling oil that produces uneven frying rather than roasting.
- Wash and dry okra. Spread on a paper towel and let fully dry (any moisture will prevent it from crisping up fully).: Dryness is everything for crispness, so you should hear a faint rustling as you pat the pods and feel them lose surface moisture. If they remain damp, steaming will occur in the oven and you will miss that crackly finish. A trick I use is to give them a final 5 minute rest on a dry towel to wick away humidity. Mistake to avoid, do not skip drying, even if you are impatient; the texture suffers noticeably.
- Trim off stems (I leave a tiny bit of the caps), then cut each pod in half lengthwise.: The trimmed stem reduces any woody bite while leaving a little cap helps the pods hold their shape. As you cut, you will notice a fresh, green aroma and a slightly sticky sap on some pods, which is normal. Halving them exposes more surface area for browning, creating edges that become golden and slightly crisp. Cutting too thin can make the pods fragile and prone to burning, while leaving them whole may reduce the crisp factor, so aim for even halves for uniform cooking.
- On the baking sheet or in a large bowl, toss okra with 2 tablespoons of olive oil and soy sauce. Sprinkle with togarashi or other seasoning as desired. Spread onto baking sheet in a single layer (overcrowded or overlapping means the okra won't get as crispy). Ideally arrange the pods so the cut sides are facing down for optimal browning.: When you toss, you should hear a gentle sticky clink as the oil coats the pods and notice a glossy sheen. The soy sauce will add a savory perfume and slightly darken the oil, which helps with caramelization. Laying cut sides down creates direct contact with the hot pan so those surfaces blister and brown, signaling Maillard reactions that yield nutty notes. Avoid crowding the pan because steam traps between overlapping pods will yield a soft texture. If your pan seems full, roast in batches to preserve crispness.
- Bake for about 15 to 20 minutes or until bottoms are nice and brown. Use tongs or a wide spatula to flip the pods cut side up, then return to the oven and bake for an additional 5 to 10 minutes (slightly longer if you want them extra extra crispy).: You will begin to see the edges darken and hear a subtle sizzle as moisture escapes. The initial bake develops a deep, roasted aroma and the bottoms will take on a rich golden to brown color. Flipping exposes the other side to the heat so it too can crisp, and you will notice steam momentarily rise when you flip, which is normal. A frequent error is flipping too often, which interrupts browning, so be decisive and quick when turning the pods. If you prefer ultra crisp pieces, add a few extra minutes, watching closely to prevent charring.
- Remove from oven and serve while still hot and crispy, sprinkled with fine sea salt to taste.: The finishing moment is where texture and seasoning meet. The hot pods will release a warm, roasted aroma and may hiss slightly as residual steam escapes. Sprinkling fine sea salt while the okra is hot ensures the crystals cling and dissolve slightly, creating bursts of salinity. Serve immediately to enjoy the contrast of crisp edges and tender insides. A common misstep is letting them sit on the pan too long where trapped heat can soften them, so transfer to a serving plate quickly for the best bite.
Notes
- Choose firm pods — Select okra that snaps when bent. Fresh, smaller pods crisp up better and have less fibrous texture than oversized pieces.
- Dry thoroughly — After washing, lay the pods on a towel and let them air for a few minutes, then pat until no surface moisture remains. Moisture defeats crisping.
- Use a light colored sheet pan — This helps promote even browning without risking overly dark spots that sometimes happen on dark pans.
- Don’t overcrowd the pan — Give each pod breathing room so hot air circulates and surfaces roast rather than steam.
- Adjust seasoning to taste — Togarashi gives bright heat, but you can pick a milder dry spice if serving to children or those sensitive to spice.
- Serve immediately — These are at their best right out of the oven; if you need to hold them, keep briefly in a very low oven to preserve some crispness.