
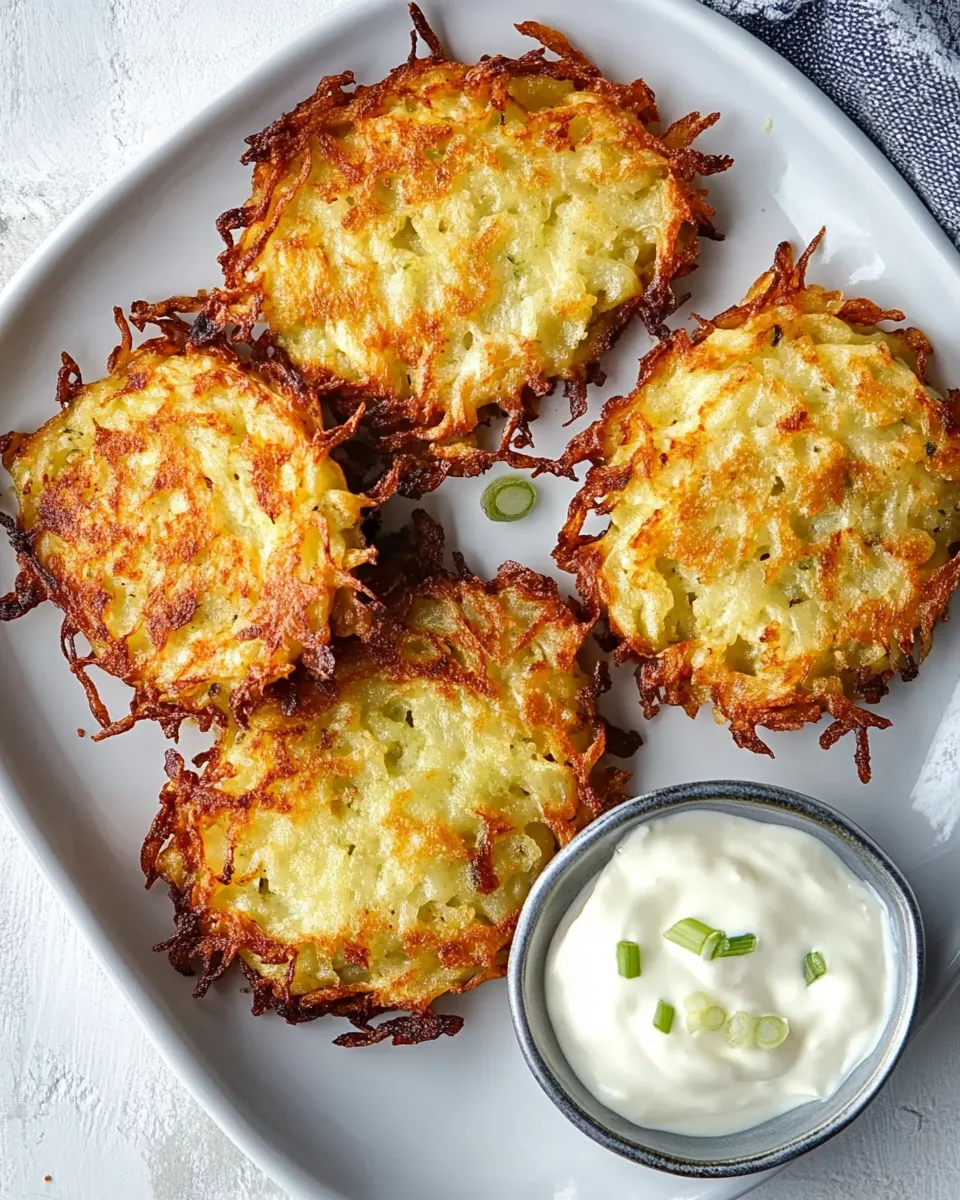
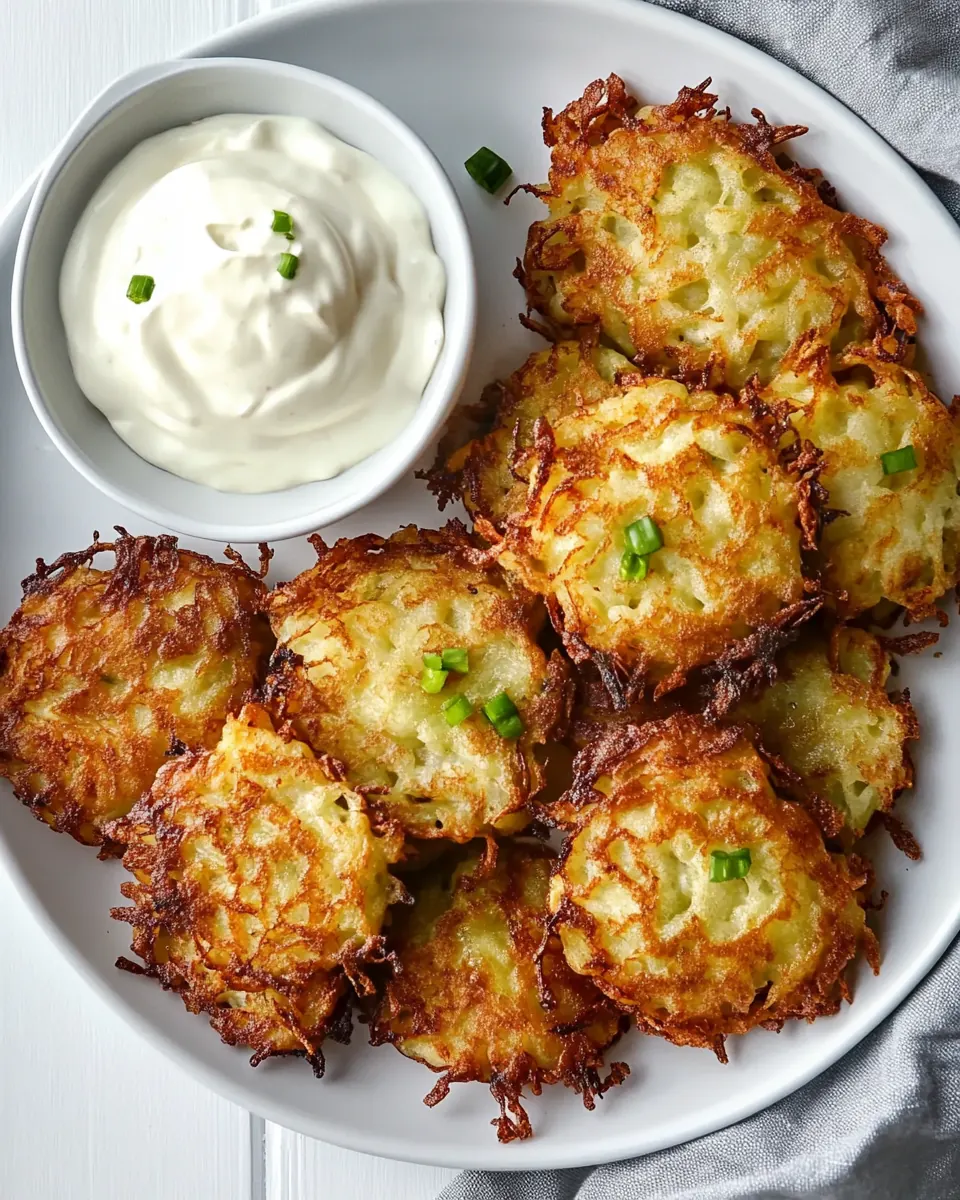
Crispy Latkes
Crispy Latkes have been a kitchen ritual in my house since I was a kid, when my grandmother would crowd the counter with potatoes, a box grater, and a frying pan that smelled like oil and memories. I still remember the way the batter hissed as it hit the hot pan and the tiny flecks of onion that would caramelize at the edges, giving each bite that perfect balance of crunchy and tender. Over the years I learned small habits that make a big difference, and these days I find comfort in the rhythm of grating, draining, and frying, while a bowl of sour cream waits like a reward.
I often make Crispy Latkes for a cozy weekend breakfast or a casual dinner when friends drop by, because they are forgiving and sociable. One time I turned the stove over to a new cook, and by coaching them through the sizzle and color cues, we turned a nervous novice into a confident latke maker in under an hour. That kind of hands on, restaurant style turnaround never gets old to me. The recipe below reflects those lessons, focusing on texture, timing, and the small tricks that keep the latkes crisp long after they come off the heat.
Recipe Snapshot
60 mins
30 mins
30 mins
Medium
250 kcal
American
Gluten-Free, Vegan
Side Dishes
Skillet, Box grater, Baking sheet, Sieve, Spatula
The Charm of This Crispy Latkes
Golden, crisp texture every time
I love that Crispy Latkes deliver an immediate textural payoff. When you get the oil hot enough and remove excess moisture from the shredded potatoes and onion, the edges crisp while the centers stay tender. That contrast is what keeps me coming back, and it’s achievable with simple technique.
Simple ingredients, big flavor
The ingredient list is short and honest, which I appreciate. With just eggs, a little flour, and pantry staples like salt and baking powder, the potato flavor shines. I find that minimalism lets the natural sweetness of the onion and the earthiness of the russet potatoes do the heavy lifting.
Flexible cooking options
I recommend both stovetop and oven methods because they suit different needs. When guests are over, I fry on the stovetop and pass them straight to the table. When I want a more hands off approach, the oven method keeps things tidy and still produces crisp results. Having options makes this recipe versatile in my kitchen routines.
Make ahead and reheat with confidence
These latkes travel well from the pan to the fridge or freezer. I often make extra batches and reheat them in a hot oven so they regain their crispness. That reliability is why this becomes a go to when I want to serve something that feels freshly made without the last minute fuss.
Comforting and communal
Finally, there is the social element. Preparing Crispy Latkes invites collaboration, whether it is someone holding the bowl while you grate, or the ritual of dipping each one into a dollop of sour cream or applesauce. Food that brings people together is always worth making in my book.
Ingredients Overview for Crispy Latkes

These ingredients are built around a single goal, crisp edges with tender interiors. The recipe leans on starchy russet potatoes for structure, aromatic onion for flavor, and binding from eggs and all-purpose flour. A pinch of salt and a little baking powder lift the texture, while frying in vegetable oil creates that irresistible golden crust. The finishing quartet of sour cream and applesauce provides cool and sweet contrasts that highlight the latkes.
- 2 pounds russet potatoes (2 to 3 potatoes): Mashed and grated to provide the starchy base and bulk of the latkes; russet potatoes yield a fluffy interior and crisp exterior when fried. Peel and coarsely grate, then squeeze out excess moisture to concentrate flavor and improve browning. Their starch content binds the batter and contributes to golden, crunchy edges during frying.
- 1 medium yellow onion, peeled (about the size of a baseball): Shredded finely to add moisture, sweetness, and savory depth that balances the potatoes; a yellow onion contributes subtle oniony aroma without overpowering. Grate or mince and mix directly into the potato mixture, or squeeze excess liquid to avoid sogginess. Caramelized sugars from the onion help enhance browning and overall flavor complexity.
- 2 large eggs: Beaten and incorporated to bind the grated potato-onion mixture, providing structure so latkes hold together while frying. Eggs add richness and help create a tender crumb inside the crisp exterior. Use large eggs at room temperature for consistent emulsification and better adherence of flour to the mixture.
- 1 1/2 teaspoons salt: Dissolved and distributed to season the mixture evenly, making sure the latkes have balanced savory taste. Salt also draws out some moisture from the potatoes and onions during resting, concentrating flavors. Adjust to personal taste but maintain enough to enhance both interior and exterior flavor.
- 2 teaspoons baking powder: Combined to help lighten the batter and introduce a little lift so the latkes are not too dense; baking powder creates tiny air pockets during frying. Use the indicated amount to achieve subtle fluffiness without making the pancakes cakey. Whisk in thoroughly to ensure even distribution for consistent texture.
- 1/4 cup all-purpose flour: Added to absorb remaining moisture and bind the mixture into a cohesive batter, flour provides structure for crisping during frying. All-purpose flour ensures the latkes hold their shape while giving a delicate, slightly chewy interior. Measure accurately and mix gently to avoid overworking the starches.
- Vegetable oil, for frying: Heated in a skillet to fry the latkes to a golden, crisp finish; vegetable oil handles high temperatures and yields even browning. Maintain a shallow pool for frying and keep oil at steady medium-high heat to cook through without burning. Drain cooked latkes briefly on paper towels to remove excess oil for optimal texture.
- Sour cream and applesauce, for serving: Served alongside to provide cool, tangy, and sweet contrasts that complement the savory, crispy latkes. Sour cream adds creamy acidity while applesauce brings gentle sweetness and moisture. Offer both for diners to customize each bite and balance the fried richness.
How to Cook Crispy Latkes
These instructions are written to guide you through tactile cues and sensory signs so you gain confidence at the grater and the pan. I like to keep a rhythm: grate, squeeze, mix, and then watch closely as each latke finds its golden moment. Read each step fully before you start, and have your tools and serving dishes ready so the hot latkes move straight from pan to plate.
- If using the oven method, preheat the oven to 425°F (220°C) and set two oven racks in the centermost positions.: The oven needs to be very hot before you place the latkes inside so the oil and pan surface begin crisping immediately; you should feel intense radiant heat when you open the door. The sensation of hot air pouring out is normal and tells you the oven is at temperature. This high heat replicates the surface sear you get from frying, helping the bottoms brown quickly, which preserves interior moisture. A common mistake is underheating, which makes the latkes soggy rather than crisp, so always allow full preheat time.
- Make the Batter: Peel the potatoes, then coarsely grate them with the onion together using a food processor fitted with the grating blade—or by hand, using a box grater. Place the potato and onion mixture in a fine sieve over the sink or a large bowl and press down firmly with a wad of paper towels or a clean dishcloth to wring out excess moisture. Stir and repeat a few times with fresh paper towels until the liquid is mostly drained. Beat the eggs in a large bowl. Add the potato and onion mixture, salt, baking powder, and flour. Mix until evenly combined.: Peel the potatoes, then coarsely grate them with the onion together using a food processor fitted with the grating blade—or by hand, using a box grater : The sound of the grater and the sight of pale shreds indicate progress; when using a food processor the motion is faster and you will notice a wet, starchy slurry forming. This slurry is normal, because potatoes release a lot of moisture and starch when grated, which you will address in the next steps. Rushing this step leads to excess water and limp latkes, so take your time to get consistent shreds for even cooking.
- Fry the Latkes: Stovetop Method: In a large cast iron or nonstick skillet over medium-high heat, heat about 1/4 cup (60 ml) of oil. Once the oil is hot and shimmering, drop mounds of batter (about 3 tablespoons) into the hot pan (the batter should sizzle when you drop it in). Flatten the mounds slightly with a spatula. Reduce the heat to medium and cook until the bottom of the latkes are golden brown and crispy, about 5 minutes. Flip and cook until the second side is golden, another 4 to 5 minutes, adjusting the heat as necessary. Transfer the latkes to a baking sheet lined with paper towels to drain. Repeat with the remaining batter, adding more oil as necessary. Oven Method: Fill two heavy nonstick rimmed baking sheets with 1/2 cup oil each (see note). Place the pans in the oven for 10 minutes to heat the oil. Wearing oven mitts, very carefully remove the pans from the oven. Drop mounds of batter (about 3 tablespoons) onto the baking sheets, spacing the latkes about 1 1/2 inches (4 cm) apart. Using the back of a spoon, press down on the latkes to flatten just slightly. Bake for 15 to 20 minutes, or until the bottoms are crisp and golden. Carefully remove the pans from oven and flip the latkes (tongs are the best tool as a spatula may cause oil to splatter). Place the pans back in the oven and cook until the latkes are crisp and golden brown all over, about 10 minutes more. Remove the pans from the oven and transfer the latkes to a baking sheet lined with paper towels.: When you press and see cloudy, starchy water release, you know you are removing what would otherwise steam the latkes. The tactile feedback is useful, the shreds should feel much drier after a few presses. If water remains, repeat the process with fresh towels; too much retained moisture is the primary reason latkes will not crisp.
- Serve the latkes warm with sour cream and applesauce.: The mixture should end up damp but not dripping, and the shredded pieces should clump slightly when squeezed. This residual dampness is just right because the eggs and flour will bind it, while the oil will create the crust. The mistake to avoid here is over drying which can make the latkes dry and mealy rather than tender.
- Beat the eggs in a large bowl: You will notice the eggs become frothy and pale when beaten, which incorporates air and helps a lighter interior. That gentle foam is an indicator you beat them enough. Under beating gives a dense texture, but over beating is not a real risk here; just aim for uniformity so the binder distributes evenly throughout the shredded mixture.
- Add the potato and onion mixture, salt, baking powder, and flour: When you combine them, the batter will look rustic and slightly shaggy; the flour will absorb moisture and the baking powder will start working as it encounters liquids. Visually, you want no pools of liquid and a cohesive batter that holds together when scooped. If it seems too loose, the remedy is gentle pressing to remove more liquid, not more flour, which can lead to heavy latkes.
- Mix until evenly combined: The sound of the spoon moving through the mixture will change from a watery slosh to a thicker scrape. The why here is simple, even mixing ensures each bite browns consistently and the seasoning is uniform. A common error is overmixing vigorously, which can break down the shreds too much; stir until just combined for the best texture.
- Fry the Latkes: Stovetop Method: In a large cast iron or nonstick skillet over medium-high heat, heat about 1/4 cup (60 ml) of oil : Watch the oil until it shimmers and gives off a faint ripple motion, that sheen tells you it is hot enough. Carefully test with a tiny pinch of batter; it should sizzle immediately. The sizzling sound and the quick formation of a brown edge are your cues. If the oil smokes strongly, reduce heat; smoking oil imparts a bitter flavor. Not using enough oil or starting too cold will result in greasy, underbrowned latkes.
- Once the oil is hot and shimmering, drop mounds of batter (about 3 tablespoons) into the hot pan (the batter should sizzle when you drop it in): The moment the mound hits the oil you want to hear a crisp hiss; that indicates instant surface searing. Use a spoon or measuring scoop to keep sizes consistent so the cooking time is predictable. If the latkes stick, the oil was not hot enough, and if they burn quickly, it was too hot; aim for steady medium to medium-high heat to maintain control.
- Flatten the mounds slightly with a spatula: Pressing them gently encourages contact with the pan so they brown evenly; you will see the edges start to darken and firm up first. The visual cue is a solid, golden rim forming around the pancake. Avoid pressing too hard which can squeeze out moisture and make them dense, and resist flipping before the edge is set or they will tear.
- Reduce the heat to medium and cook until the bottom of the latkes are golden brown and crispy, about 5 minutes: Listen for a steady gentle sizzle rather than an aggressive pop; that steady sound means the interior is cooking through without burning the outside. The first side should be a deep golden color, and you will smell a roasted potato aroma. Flipping too soon causes breakage, while leaving them too long burns the crust and dries the center.
- Flip and cook until the second side is golden, another 4 to 5 minutes, adjusting the heat as necessary: The second side will brown faster because the latke has already set; watch for uniform color and a firm texture when nudged with the spatula. If the centers still feel soft, reduce heat and allow a few more minutes to cook through. A common pitfall is crowding the pan which lowers the oil temperature and leads to soggy results, so fry in batches.
- Transfer the latkes to a baking sheet lined with paper towels to drain: The paper towels absorb excess oil and help maintain crispness without making them greasy. Arrange them in a single layer rather than stacking, which preserves the texture. Leaving them on towels too long can steam them slightly, so transfer to a warm plate to serve once drained.
- Repeat with the remaining batter, adding more oil as necessary: Each batch may need fresh hot oil to keep the temperature consistent; watch the oil sheen and the sizzle test between batches. Rotating oil and giving the pan a minute to return to temperature prevents undercooked middles. A common mistake is adding all batter at once which drops the oil temperature and results in limp latkes.
- Oven Method: Fill two heavy nonstick rimmed baking sheets with 1/2 cup oil each (see note) : Place the pans in the oven for 10 minutes to heat the oil so when the batter hits the surface it begins crisping immediately. The visual cue is shimmering oil pooled in the wells of the sheets, and you will feel heat when you carefully open the oven. Using well seasoned, truly nonstick pans prevents sticking; otherwise the latkes can adhere and tear when flipped.
- Wearing oven mitts, very carefully remove the pans from the oven: Hot oil will cling to the pans and can splash, so stable hands and mitts are essential. Work quickly but safely when dropping batter onto the heated oil. If oil splatters, pause and allow it to calm before continuing to avoid burns; safety matters more than speed.
- Drop mounds of batter (about 3 tablespoons) onto the baking sheets, spacing the latkes about 1 1/2 inches (4 cm) apart: Even spacing promotes hot air circulation and prevents them from fusing together as they crisp. Flatten slightly with the back of a spoon so they cook evenly. Crowding results in uneven doneness and softer edges, so give them room to breathe.
- Using the back of a spoon, press down on the latkes to flatten just slightly: This encourages even contact with the hot oil on the sheet so the bottoms crisp uniformly. The flattened top will brown in the second phase of baking, so resist the urge to over flatten which can dry them. A good visual is a uniform circular shape with edges that begin to pull away from the oil surface.
- Bake for 15 to 20 minutes, or until the bottoms are crisp and golden: You will see the edges firm and the bottoms deepen in color; the sound changes from a faint pop to a steadier crisp as moisture leaves the latkes. If bottoms remain pale, give a few extra minutes. Opening the oven repeatedly slows cooking, so check through the oven window when possible.
- Carefully remove the pans from oven and flip the latkes (tongs are the best tool as a spatula may cause oil to splatter): Use tongs to turn each latke to avoid splatter and to protect the shape. After flipping, the tops will begin to brown and any residual moisture will escape, increasing crunch. If flipping is rushed some latkes can deform, so take your time and work methodically.
- Place the pans back in the oven and cook until the latkes are crisp and golden brown all over, about 10 minutes more: This final stage evens out color and ensures heat penetrates to the center. You should smell a toasty aroma and see a consistent golden tone across each latke. Overbaking will dry them, so remove once they reach that deep golden color.
- Remove the pans from the oven and transfer the latkes to a baking sheet lined with paper towels: Let them rest briefly to shed excess oil, then move to a warm plate for serving. Serving immediately preserves the texture; if you must hold them, keep them in a warm oven on a rack so they stay crisp.
- Serve the latkes warm with sour cream and applesauce: The contrast of hot, crisp latke with cool sour cream or sweet applesauce is classic and satisfying. Present them immediately so each bite keeps its crunch. A final mistake to avoid is stacking them while hot which steams the bottoms and softens the crust.
Variations to Try
I like to experiment with small tweaks that honor the classic while bringing subtle changes to texture or flavor. Below are several thoughtful variations that still keep the heart of Crispy Latkes intact, each explained so you can pick one that suits your mood or occasion.
- Sweet potato twist Swap half of the russet potatoes for sweet potatoes for a naturally sweet, colorful latke that crisps beautifully and pairs well with tangy sour cream.
- Extra onion forward Increase the proportion of grated onion slightly for a sharper, more aromatic profile, but be sure to wring thoroughly to avoid excess moisture.
- Oven batch method Use the oven method for large batches when serving a crowd, heating oil on the sheet pans first so you still achieve a golden crust without standing over the stove.
- Air frying shortcut If you have an air fryer, arrange latkes in a single layer and cook at a high setting for a similar crisp without as much oil, watching closely to avoid over browning.
- Make ahead and freeze Freeze cooked latkes in a single layer on a tray, then transfer to a bag; reheat in a hot oven directly from frozen to preserve texture.
Great Combinations for Crispy Latkes
These serving ideas will help you present Crispy Latkes for different occasions, from casual breakfasts to festive dinners. Below I outline pairings, serving styles, and storage notes so you can plan a menu that complements the latkes without overwhelming them.
- Classic duo Serve with bowls of sour cream and applesauce for a traditional pairing that offers cool creaminess and sweet contrast.
- Brunch spread Plate latkes alongside simple eggs and a green salad for a balanced brunch where the latkes provide the crunchy star.
- Appetizer platter Offer smaller latkes on a shared board with multiple dipping sauces to make them a fun, communal starter at a casual dinner.
- Holiday side For fall gatherings or seasonal meals, present latkes as a crisp side that pairs well with roasted vegetables or a warm grain salad for an autumn table.
- Make ahead storage Refrigerate cooled latkes for up to two days and re-crisp in a 375°F oven for about 10 minutes; for longer storage freeze them and reheat from frozen with a few extra minutes in the oven.
- Serving temperature Serve them hot and straight from the pan when possible, or keep warm on a rack in a low oven to maintain crisp edges while you finish other dishes.
FAQ
Conclusion
Crispy Latkes stand out because they balance crunchy exteriors with tender, flavorful centers using a handful of simple ingredients. Give them a try when you crave a hands on, rewarding dish that brings people together; the process of grating, pressing, and frying becomes part of the enjoyment. Whether you choose the classic stovetop method or the oven approach for larger batches, these latkes are reliably comforting and adaptable, making them a wonderful addition to your cooking repertoire.

Crispy Latkes
Equipment
- Skillet
- Box grater
- Baking Sheet
- Sieve
- Spatula
Ingredients
- 2 pounds russet potatoes (2 to 3 potatoes) Mashed and grated to provide the starchy base and bulk of the latkes; russet potatoes yield a fluffy interior and crisp exterior when fried. Peel and coarsely grate, then squeeze out excess moisture to concentrate flavor and improve browning. Their starch content binds the batter and contributes to golden, crunchy edges during frying.
- 1 medium yellow onion, peeled (about the size of a baseball) Shredded finely to add moisture, sweetness, and savory depth that balances the potatoes; a yellow onion contributes subtle oniony aroma without overpowering. Grate or mince and mix directly into the potato mixture, or squeeze excess liquid to avoid sogginess. Caramelized sugars from the onion help enhance browning and overall flavor complexity.
- 2 large eggs Beaten and incorporated to bind the grated potato-onion mixture, providing structure so latkes hold together while frying. Eggs add richness and help create a tender crumb inside the crisp exterior. Use large eggs at room temperature for consistent emulsification and better adherence of flour to the mixture.
- 1 1/2 teaspoons salt Dissolved and distributed to season the mixture evenly, making sure the latkes have balanced savory taste. Salt also draws out some moisture from the potatoes and onions during resting, concentrating flavors. Adjust to personal taste but maintain enough to enhance both interior and exterior flavor.
- 2 teaspoons baking powder Combined to help lighten the batter and introduce a little lift so the latkes are not too dense; baking powder creates tiny air pockets during frying. Use the indicated amount to achieve subtle fluffiness without making the pancakes cakey. Whisk in thoroughly to ensure even distribution for consistent texture.
- 1/4 cup all-purpose flour Added to absorb remaining moisture and bind the mixture into a cohesive batter, flour provides structure for crisping during frying. All-purpose flour ensures the latkes hold their shape while giving a delicate, slightly chewy interior. Measure accurately and mix gently to avoid overworking the starches.
- Vegetable oil, for frying Heated in a skillet to fry the latkes to a golden, crisp finish; vegetable oil handles high temperatures and yields even browning. Maintain a shallow pool for frying and keep oil at steady medium-high heat to cook through without burning. Drain cooked latkes briefly on paper towels to remove excess oil for optimal texture.
- Sour cream and applesauce, for serving Served alongside to provide cool, tangy, and sweet contrasts that complement the savory, crispy latkes. Sour cream adds creamy acidity while applesauce brings gentle sweetness and moisture. Offer both for diners to customize each bite and balance the fried richness.
Instructions
- If using the oven method, preheat the oven to 425°F (220°C) and set two oven racks in the centermost positions.: The oven needs to be very hot before you place the latkes inside so the oil and pan surface begin crisping immediately; you should feel intense radiant heat when you open the door. The sensation of hot air pouring out is normal and tells you the oven is at temperature. This high heat replicates the surface sear you get from frying, helping the bottoms brown quickly, which preserves interior moisture. A common mistake is underheating, which makes the latkes soggy rather than crisp, so always allow full preheat time.
- Make the Batter: Peel the potatoes, then coarsely grate them with the onion together using a food processor fitted with the grating blade—or by hand, using a box grater. Place the potato and onion mixture in a fine sieve over the sink or a large bowl and press down firmly with a wad of paper towels or a clean dishcloth to wring out excess moisture. Stir and repeat a few times with fresh paper towels until the liquid is mostly drained. Beat the eggs in a large bowl. Add the potato and onion mixture, salt, baking powder, and flour. Mix until evenly combined.: Peel the potatoes, then coarsely grate them with the onion together using a food processor fitted with the grating blade—or by hand, using a box grater : The sound of the grater and the sight of pale shreds indicate progress; when using a food processor the motion is faster and you will notice a wet, starchy slurry forming. This slurry is normal, because potatoes release a lot of moisture and starch when grated, which you will address in the next steps. Rushing this step leads to excess water and limp latkes, so take your time to get consistent shreds for even cooking.
- Fry the Latkes: Stovetop Method: In a large cast iron or nonstick skillet over medium-high heat, heat about 1/4 cup (60 ml) of oil. Once the oil is hot and shimmering, drop mounds of batter (about 3 tablespoons) into the hot pan (the batter should sizzle when you drop it in). Flatten the mounds slightly with a spatula. Reduce the heat to medium and cook until the bottom of the latkes are golden brown and crispy, about 5 minutes. Flip and cook until the second side is golden, another 4 to 5 minutes, adjusting the heat as necessary. Transfer the latkes to a baking sheet lined with paper towels to drain. Repeat with the remaining batter, adding more oil as necessary. Oven Method: Fill two heavy nonstick rimmed baking sheets with 1/2 cup oil each (see note). Place the pans in the oven for 10 minutes to heat the oil. Wearing oven mitts, very carefully remove the pans from the oven. Drop mounds of batter (about 3 tablespoons) onto the baking sheets, spacing the latkes about 1 1/2 inches (4 cm) apart. Using the back of a spoon, press down on the latkes to flatten just slightly. Bake for 15 to 20 minutes, or until the bottoms are crisp and golden. Carefully remove the pans from oven and flip the latkes (tongs are the best tool as a spatula may cause oil to splatter). Place the pans back in the oven and cook until the latkes are crisp and golden brown all over, about 10 minutes more. Remove the pans from the oven and transfer the latkes to a baking sheet lined with paper towels.: When you press and see cloudy, starchy water release, you know you are removing what would otherwise steam the latkes. The tactile feedback is useful, the shreds should feel much drier after a few presses. If water remains, repeat the process with fresh towels; too much retained moisture is the primary reason latkes will not crisp.
- Serve the latkes warm with sour cream and applesauce.: The mixture should end up damp but not dripping, and the shredded pieces should clump slightly when squeezed. This residual dampness is just right because the eggs and flour will bind it, while the oil will create the crust. The mistake to avoid here is over drying which can make the latkes dry and mealy rather than tender.
- Beat the eggs in a large bowl: You will notice the eggs become frothy and pale when beaten, which incorporates air and helps a lighter interior. That gentle foam is an indicator you beat them enough. Under beating gives a dense texture, but over beating is not a real risk here; just aim for uniformity so the binder distributes evenly throughout the shredded mixture.
- Add the potato and onion mixture, salt, baking powder, and flour: When you combine them, the batter will look rustic and slightly shaggy; the flour will absorb moisture and the baking powder will start working as it encounters liquids. Visually, you want no pools of liquid and a cohesive batter that holds together when scooped. If it seems too loose, the remedy is gentle pressing to remove more liquid, not more flour, which can lead to heavy latkes.
- Mix until evenly combined: The sound of the spoon moving through the mixture will change from a watery slosh to a thicker scrape. The why here is simple, even mixing ensures each bite browns consistently and the seasoning is uniform. A common error is overmixing vigorously, which can break down the shreds too much; stir until just combined for the best texture.
- Fry the Latkes: Stovetop Method: In a large cast iron or nonstick skillet over medium-high heat, heat about 1/4 cup (60 ml) of oil : Watch the oil until it shimmers and gives off a faint ripple motion, that sheen tells you it is hot enough. Carefully test with a tiny pinch of batter; it should sizzle immediately. The sizzling sound and the quick formation of a brown edge are your cues. If the oil smokes strongly, reduce heat; smoking oil imparts a bitter flavor. Not using enough oil or starting too cold will result in greasy, underbrowned latkes.
- Once the oil is hot and shimmering, drop mounds of batter (about 3 tablespoons) into the hot pan (the batter should sizzle when you drop it in): The moment the mound hits the oil you want to hear a crisp hiss; that indicates instant surface searing. Use a spoon or measuring scoop to keep sizes consistent so the cooking time is predictable. If the latkes stick, the oil was not hot enough, and if they burn quickly, it was too hot; aim for steady medium to medium-high heat to maintain control.
- Flatten the mounds slightly with a spatula: Pressing them gently encourages contact with the pan so they brown evenly; you will see the edges start to darken and firm up first. The visual cue is a solid, golden rim forming around the pancake. Avoid pressing too hard which can squeeze out moisture and make them dense, and resist flipping before the edge is set or they will tear.
- Reduce the heat to medium and cook until the bottom of the latkes are golden brown and crispy, about 5 minutes: Listen for a steady gentle sizzle rather than an aggressive pop; that steady sound means the interior is cooking through without burning the outside. The first side should be a deep golden color, and you will smell a roasted potato aroma. Flipping too soon causes breakage, while leaving them too long burns the crust and dries the center.
- Flip and cook until the second side is golden, another 4 to 5 minutes, adjusting the heat as necessary: The second side will brown faster because the latke has already set; watch for uniform color and a firm texture when nudged with the spatula. If the centers still feel soft, reduce heat and allow a few more minutes to cook through. A common pitfall is crowding the pan which lowers the oil temperature and leads to soggy results, so fry in batches.
- Transfer the latkes to a baking sheet lined with paper towels to drain: The paper towels absorb excess oil and help maintain crispness without making them greasy. Arrange them in a single layer rather than stacking, which preserves the texture. Leaving them on towels too long can steam them slightly, so transfer to a warm plate to serve once drained.
- Repeat with the remaining batter, adding more oil as necessary: Each batch may need fresh hot oil to keep the temperature consistent; watch the oil sheen and the sizzle test between batches. Rotating oil and giving the pan a minute to return to temperature prevents undercooked middles. A common mistake is adding all batter at once which drops the oil temperature and results in limp latkes.
- Oven Method: Fill two heavy nonstick rimmed baking sheets with 1/2 cup oil each (see note) : Place the pans in the oven for 10 minutes to heat the oil so when the batter hits the surface it begins crisping immediately. The visual cue is shimmering oil pooled in the wells of the sheets, and you will feel heat when you carefully open the oven. Using well seasoned, truly nonstick pans prevents sticking; otherwise the latkes can adhere and tear when flipped.
- Wearing oven mitts, very carefully remove the pans from the oven: Hot oil will cling to the pans and can splash, so stable hands and mitts are essential. Work quickly but safely when dropping batter onto the heated oil. If oil splatters, pause and allow it to calm before continuing to avoid burns; safety matters more than speed.
- Drop mounds of batter (about 3 tablespoons) onto the baking sheets, spacing the latkes about 1 1/2 inches (4 cm) apart: Even spacing promotes hot air circulation and prevents them from fusing together as they crisp. Flatten slightly with the back of a spoon so they cook evenly. Crowding results in uneven doneness and softer edges, so give them room to breathe.
- Using the back of a spoon, press down on the latkes to flatten just slightly: This encourages even contact with the hot oil on the sheet so the bottoms crisp uniformly. The flattened top will brown in the second phase of baking, so resist the urge to over flatten which can dry them. A good visual is a uniform circular shape with edges that begin to pull away from the oil surface.
- Bake for 15 to 20 minutes, or until the bottoms are crisp and golden: You will see the edges firm and the bottoms deepen in color; the sound changes from a faint pop to a steadier crisp as moisture leaves the latkes. If bottoms remain pale, give a few extra minutes. Opening the oven repeatedly slows cooking, so check through the oven window when possible.
- Carefully remove the pans from oven and flip the latkes (tongs are the best tool as a spatula may cause oil to splatter): Use tongs to turn each latke to avoid splatter and to protect the shape. After flipping, the tops will begin to brown and any residual moisture will escape, increasing crunch. If flipping is rushed some latkes can deform, so take your time and work methodically.
- Place the pans back in the oven and cook until the latkes are crisp and golden brown all over, about 10 minutes more: This final stage evens out color and ensures heat penetrates to the center. You should smell a toasty aroma and see a consistent golden tone across each latke. Overbaking will dry them, so remove once they reach that deep golden color.
- Remove the pans from the oven and transfer the latkes to a baking sheet lined with paper towels: Let them rest briefly to shed excess oil, then move to a warm plate for serving. Serving immediately preserves the texture; if you must hold them, keep them in a warm oven on a rack so they stay crisp.
- Serve the latkes warm with sour cream and applesauce: The contrast of hot, crisp latke with cool sour cream or sweet applesauce is classic and satisfying. Present them immediately so each bite keeps its crunch. A final mistake to avoid is stacking them while hot which steams the bottoms and softens the crust.
Notes
- Sweet potato twist Swap half of the russet potatoes for sweet potatoes for a naturally sweet, colorful latke that crisps beautifully and pairs well with tangy sour cream.
- Extra onion forward Increase the proportion of grated onion slightly for a sharper, more aromatic profile, but be sure to wring thoroughly to avoid excess moisture.
- Oven batch method Use the oven method for large batches when serving a crowd, heating oil on the sheet pans first so you still achieve a golden crust without standing over the stove.
- Air frying shortcut If you have an air fryer, arrange latkes in a single layer and cook at a high setting for a similar crisp without as much oil, watching closely to avoid over browning.
- Make ahead and freeze Freeze cooked latkes in a single layer on a tray, then transfer to a bag; reheat in a hot oven directly from frozen to preserve texture.