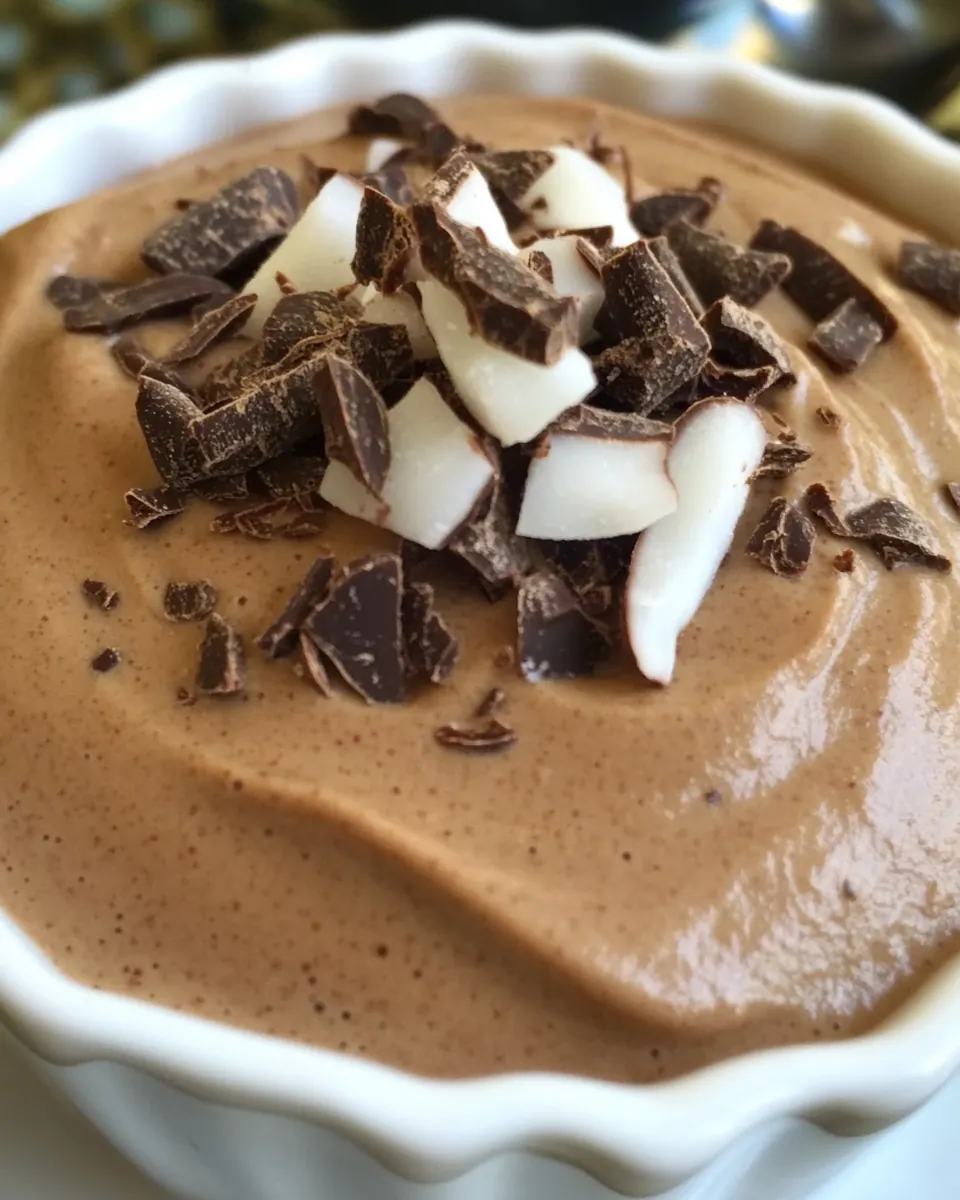
Creamy Chocolate Coconut Pudding
Creamy Chocolate Coconut Pudding has been my go to when I want something that feels indulgent yet refreshingly simple. I first stumbled onto this combo on a sweltering afternoon, carrying a young coconut back from the market and craving chocolate without anything heavy. The first spoonful, all silk and cocoa, reminded me how small, thoughtful combinations can lift an ordinary day.
Over time I refined the balance between the natural sweetness of the coconut and the bitter warmth of cocoa. I like to blend the ingredients until the mixture sings smooth on the tongue, and serve it chilled so the texture snaps cold and creamy at once. Friends have asked for the recipe after one taste, and I usually tell them the story of that coconut, smiling as they spoon it into their bowls.
Recipe Snapshot
5 mins
5 mins
Easy
200 kcal
American
Paleo, Vegan
Desserts
Blender
Why You Need This Creamy Chocolate Coconut Pudding
Rich yet light texture
I love how Creamy Chocolate Coconut Pudding manages to feel decadent without weighing you down. The combination of tender coconut meat and cold ice cubes gives a luscious mouthfeel that still feels feather light, perfect for hot afternoons.
Fast and fuss free
This recipe takes hardly any time, which is a big draw for me after busy days. Because it uses simple steps in the blender, you get a homemade treat in minutes, ideal when you want something special but need it quick.
Natural sweetness, flexible flavor
The sweetness comes from either pure maple syrup or liquid stevia, so you can nudge the dessert toward more cocoa forward or more candy sweet. I appreciate that control, since sometimes I want bold chocolate, and other times a subtler coconut note.
Minimal, real ingredients
There is comfort in recipes that use whole, recognizable foods. Using fresh coconut meat and coconut water means the flavors are bright and honest, and you avoid unnecessary additives. For me, that authenticity matters on many levels.
Versatile serving options
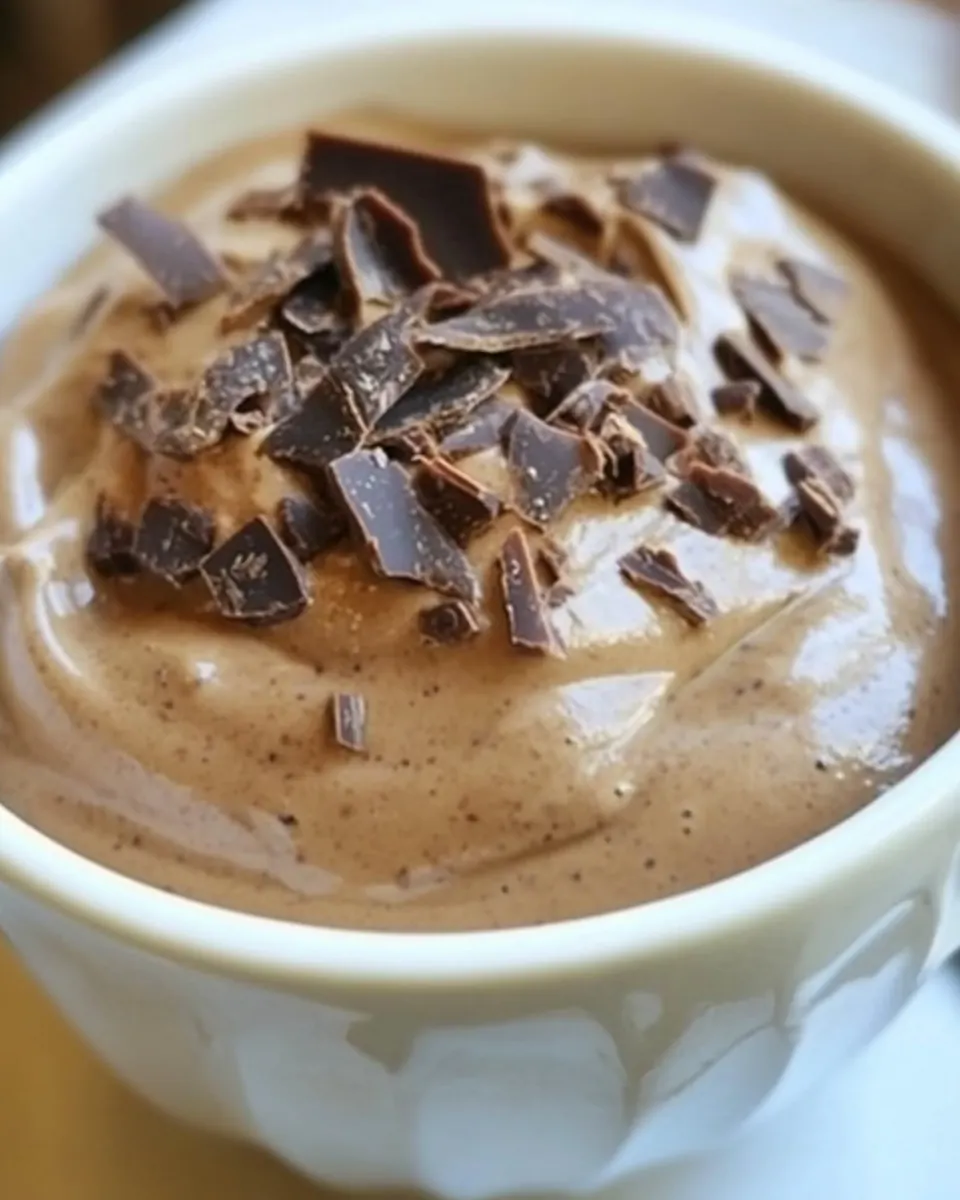
I often serve this straight from the blender as a quick pudding, or spoon it into small glasses for company. It works as a light dessert, a chilled snack, or a creamy palate cleanser between courses, which makes it one of my kitchen staples.
What to Gather for Creamy Chocolate Coconut Pudding

These ingredients are deliberately short and focused, each playing a clear role in texture and flavor. The fresh coconut meat supplies body and natural fat, the coconut water loosens the blend and adds subtle sweetness, while cocoa powder brings chocolate depth. The sweetener and vanilla extract round the edges, and a pinch of fine sea salt makes the chocolate sing. Finally, a few ice cubes chill and aerate the pudding into a silky finish.
- 1 cup fresh coconut meat, from one young Thai coconut: Provide creamy body and natural fat to create a rich, silky pudding texture while contributing delicate, mildly sweet coconut flavor; blend until smooth to form the coconut base for the dessert.
- 1/4 cup fresh coconut water: Add light natural sweetness and subtle tropical flavor while thinning the coconut mixture slightly; use fresh coconut water to help achieve a pourable, smooth consistency.
- 1 tablespoon cocoa powder: Impart deep chocolate flavor and earthy bitterness that defines the pudding’s cocoa profile; whisk or blend thoroughly to dissolve and distribute evenly for balanced chocolate notes.
- 1 tablespoon pure maple syrup, or 12 drops liquid stevia: Sweeten the pudding naturally and balance bitter cocoa while allowing control over sweetness level; choose maple syrup for warmth or liquid stevia for a low-calorie option.
- 1/2 teaspoon vanilla extract: Enhance and round out overall flavor with warm, aromatic notes that lift the chocolate and coconut; add sparingly to avoid overwhelming the dessert.
- pinch of fine sea salt: Heighten and balance flavors by accentuating sweetness and masking any bitterness; a tiny pinch is sufficient to sharpen the overall taste profile.
- 4 5 large ice cubes: Chill and thicken the pudding quickly while helping to set a firmer, cold texture for serving; add ice during blending to achieve an icy-smooth, chilled consistency.
Recipe Steps for Creamy Chocolate Coconut Pudding

These directions are wonderfully simple, but the small details matter. Below I expand each step with sensory cues, reasons behind the technique, and one troubleshooting tip so you can get a flawless texture every time.
- Combine the coconut meat, coconut water, cocoa powder, vanilla extract, salt, sweetener and ice cubes into a blender container, and blend until very smooth and creamy. For best results, use a high-powered blender like the Vitamix or Blendtec.: Right away you will notice the kitchen filling with a warm, roasted chocolate aroma from the cocoa powder , contrasted by the breezy, green scent of fresh coconut water . As the blender spins, the sound will shift from loud thumps to a steady hum, and visually the mixture will transform from chunky white and brown bits into a glossy, uniform chocolate color. This thorough blending is essential because it creates the silk like mouthfeel that defines the pudding, breaking down fibers from the coconut meat and emulsifying the natural fats. Use a high speed blender for the creamiest result; if you stop and taste, you should feel no graininess between your teeth. A common mistake is pulsing too briefly, which leaves fibrous bits and a coarse texture. If that happens, scrape the sides and blend again in short bursts, occasionally tapping the container to release trapped air pockets so the mixture becomes dense and velvety.
- Adjust sweetness to taste, and serve immediately!: When you use a high powered machine the blades shear the coconut meat into an ultra fine emulsion, producing a pudding that feels rich rather than gritty. You'll see the liquid become glossy and slightly thickened from the emulsified fats, and the sound of the blender will smooth into a lower, consistent tone. This step matters because lesser blenders can struggle to fully break down the coconut fibers, leaving a texture that feels under processed. If your blender is not high powered, work in smaller batches and add the coconut water gradually to minimize strain on the motor. One pitfall is overheating the blender motor with prolonged blending, so pause between long blends to let the machine cool.
- Adjust sweetness to taste: As soon as the pudding comes together, take a small spoonful and pay attention to how the flavors balance. The initial hit should be chocolate forward from the cocoa powder , followed by a gentle coconut sweetness and the faint perfume of vanilla extract . If it tastes too bitter, add tiny increments of pure maple syrup or a couple more drops of stevia, blending briefly after each addition to integrate. If it reads too sweet, a pinch more fine sea salt can rebalance and accentuate the chocolate. The goal is harmony, so refine slowly. A common oversight is adding the full sweetener all at once, which can overshoot your preferred sweetness; correct this by diluting with a splash more coconut water and blending again.
- Serve immediately: When you spoon the pudding into bowls or glasses, you should notice it staying glossy and cool, with a slightly chilled sheen from the ice cubes . The immediate serving preserves the airy, mousse like texture that the ice contributes, which can soften if left to sit and release water. Serving right away ensures a contrast between the cold pudding and the warm scent of cocoa in the air, which heightens the experience. If the pudding sits too long, condensation and melting can thin it; to avoid this, keep bowls chilled ahead of time. A frequent slip is letting it sit in the blender, which warms and loosens the texture, so transfer promptly.
- Adjust and enjoy: After tasting the first spoonful, make any final small adjustments to sweetness or salt, and maybe add an extra ice cube for a touch more chill if desired. The sensory cues to watch are the mouth coating richness and the balance between cocoa's bitterness and the natural fruity notes of the coconut water . This final calibration is why tasting as you go is so valuable. One thing to avoid is over seasoning at this point, because once the pudding chills further the flavors tighten and can become slightly more muted; small tweaks are wiser than large ones.
How to Switch It Up
Here are several simple directions for varying the profile of Creamy Chocolate Coconut Pudding, all designed to help you tailor texture and sweetness while keeping the core method intact. Each tip starts with a bolded suggestion to make scanning easy.
- Boost the chocolate: Increase the cocoa powder slightly if you want a darker, more intense chocolate presence, but add extra sweetener carefully so the pudding does not become bitter.
- Lower the sweetness: Use the stevia option and add it drop by drop to maintain control over the sweetness level without altering the texture much.
- Make it frothier: Add an extra ice cube and blend on high for a few seconds longer to introduce more air, creating a lighter, whipped consistency.
- Serve chilled longer: Let the pudding rest briefly in the fridge for a firmer set, which makes it suitable for spooning into dessert cups for guests.
- Adjust thickness: If the pudding is too thin, reduce the coconut water slightly next time or add a bit more coconut meat to thicken naturally.
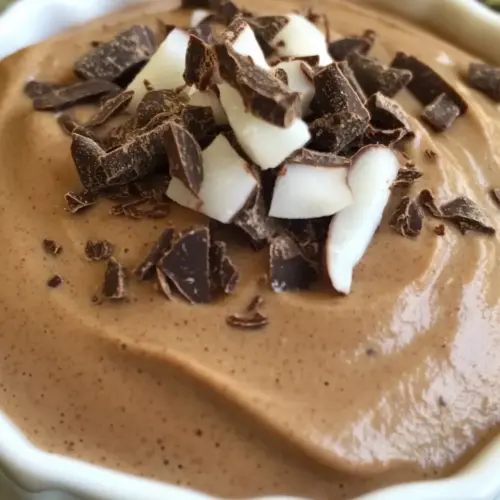
- Presentation tips: Spoon into small glasses and chill the vessels first, then garnish with a light dusting of cocoa powder for contrast and elegance.
Best Served With
This pudding sings when served thoughtfully, whether you are offering it as a small evening treat or a light dessert after a rich meal. Below are ideas for pairing, occasions, and storage, laid out in a way that helps you pick the right context for this chilled dish.
- Light dessert after dinner: Serve small portions of Creamy Chocolate Coconut Pudding at the end of a heavy meal to provide a refreshing, not overwhelming, finish.
- Casual gatherings: Spoon into clear glasses for parties, so guests can see the glossy chocolate texture, making it an easy yet elegant offering for friends.
- Hot weather treat: This pudding is ideal for warm seasons when you want something cooling and satisfying without heat from the oven, perfect for picnics or poolside snacks.
- Special occasion small plates: Offer this in small sample sizes during multi course meals, letting guests enjoy a concentrated chocolate moment between courses.
- Storage advice: If you must store leftovers, keep them in an airtight container in the refrigerator and consume within a day for best texture; expect some thinning as the ice melts, so gently stir before serving.
- Seasonal pairing: Pair with bright fruit in summer to contrast the chocolate, or serve simply on its own for intimate dinners when a single, focused dessert is desired.
FAQ
Conclusion
This pudding stands out because it pairs fresh coconut with rich chocolate in a way that feels both indulgent and clean. Try the recipe to enjoy a quick, chilled dessert that highlights natural flavors and minimal fuss. It is a comforting yet light option that works for casual evenings or small gatherings, and I hope it becomes a simple, satisfying favorite that you reach for when you want a delicious finish without heating up the kitchen.
Creamy Chocolate Coconut Pudding
Equipment
- Blender
Ingredients
- 1 cup fresh coconut meat, from one young Thai coconut Provide creamy body and natural fat to create a rich, silky pudding texture while contributing delicate, mildly sweet coconut flavor; blend until smooth to form the coconut base for the dessert.
- 1/4 cup fresh coconut water Add light natural sweetness and subtle tropical flavor while thinning the coconut mixture slightly; use fresh coconut water to help achieve a pourable, smooth consistency.
- 1 tablespoon cocoa powder Impart deep chocolate flavor and earthy bitterness that defines the pudding’s cocoa profile; whisk or blend thoroughly to dissolve and distribute evenly for balanced chocolate notes.
- 1 tablespoon pure maple syrup, or 12 drops liquid stevia Sweeten the pudding naturally and balance bitter cocoa while allowing control over sweetness level; choose maple syrup for warmth or liquid stevia for a low-calorie option.
- 1/2 teaspoon vanilla extract Enhance and round out overall flavor with warm, aromatic notes that lift the chocolate and coconut; add sparingly to avoid overwhelming the dessert.
- pinch of fine sea salt Heighten and balance flavors by accentuating sweetness and masking any bitterness; a tiny pinch is sufficient to sharpen the overall taste profile.
- 4 -5 large ice cubes Chill and thicken the pudding quickly while helping to set a firmer, cold texture for serving; add ice during blending to achieve an icy-smooth, chilled consistency.
Instructions
- Combine the coconut meat, coconut water, cocoa powder, vanilla extract, salt, sweetener and ice cubes into a blender container, and blend until very smooth and creamy. For best results, use a high-powered blender like the Vitamix or Blendtec.: Right away you will notice the kitchen filling with a warm, roasted chocolate aroma from the cocoa powder , contrasted by the breezy, green scent of fresh coconut water . As the blender spins, the sound will shift from loud thumps to a steady hum, and visually the mixture will transform from chunky white and brown bits into a glossy, uniform chocolate color. This thorough blending is essential because it creates the silk like mouthfeel that defines the pudding, breaking down fibers from the coconut meat and emulsifying the natural fats. Use a high speed blender for the creamiest result; if you stop and taste, you should feel no graininess between your teeth. A common mistake is pulsing too briefly, which leaves fibrous bits and a coarse texture. If that happens, scrape the sides and blend again in short bursts, occasionally tapping the container to release trapped air pockets so the mixture becomes dense and velvety.
- Adjust sweetness to taste, and serve immediately!: When you use a high powered machine the blades shear the coconut meat into an ultra fine emulsion, producing a pudding that feels rich rather than gritty. You'll see the liquid become glossy and slightly thickened from the emulsified fats, and the sound of the blender will smooth into a lower, consistent tone. This step matters because lesser blenders can struggle to fully break down the coconut fibers, leaving a texture that feels under processed. If your blender is not high powered, work in smaller batches and add the coconut water gradually to minimize strain on the motor. One pitfall is overheating the blender motor with prolonged blending, so pause between long blends to let the machine cool.
- Adjust sweetness to taste: As soon as the pudding comes together, take a small spoonful and pay attention to how the flavors balance. The initial hit should be chocolate forward from the cocoa powder , followed by a gentle coconut sweetness and the faint perfume of vanilla extract . If it tastes too bitter, add tiny increments of pure maple syrup or a couple more drops of stevia, blending briefly after each addition to integrate. If it reads too sweet, a pinch more fine sea salt can rebalance and accentuate the chocolate. The goal is harmony, so refine slowly. A common oversight is adding the full sweetener all at once, which can overshoot your preferred sweetness; correct this by diluting with a splash more coconut water and blending again.
- Serve immediately: When you spoon the pudding into bowls or glasses, you should notice it staying glossy and cool, with a slightly chilled sheen from the ice cubes . The immediate serving preserves the airy, mousse like texture that the ice contributes, which can soften if left to sit and release water. Serving right away ensures a contrast between the cold pudding and the warm scent of cocoa in the air, which heightens the experience. If the pudding sits too long, condensation and melting can thin it; to avoid this, keep bowls chilled ahead of time. A frequent slip is letting it sit in the blender, which warms and loosens the texture, so transfer promptly.
- Adjust and enjoy: After tasting the first spoonful, make any final small adjustments to sweetness or salt, and maybe add an extra ice cube for a touch more chill if desired. The sensory cues to watch are the mouth coating richness and the balance between cocoa's bitterness and the natural fruity notes of the coconut water . This final calibration is why tasting as you go is so valuable. One thing to avoid is over seasoning at this point, because once the pudding chills further the flavors tighten and can become slightly more muted; small tweaks are wiser than large ones.
Notes
- Boost the chocolate: Increase the cocoa powder slightly if you want a darker, more intense chocolate presence, but add extra sweetener carefully so the pudding does not become bitter.
- Lower the sweetness: Use the stevia option and add it drop by drop to maintain control over the sweetness level without altering the texture much.
- Make it frothier: Add an extra ice cube and blend on high for a few seconds longer to introduce more air, creating a lighter, whipped consistency.
- Serve chilled longer: Let the pudding rest briefly in the fridge for a firmer set, which makes it suitable for spooning into dessert cups for guests.
- Adjust thickness: If the pudding is too thin, reduce the coconut water slightly next time or add a bit more coconut meat to thicken naturally.
- Presentation tips: Spoon into small glasses and chill the vessels first, then garnish with a light dusting of cocoa powder for contrast and elegance.