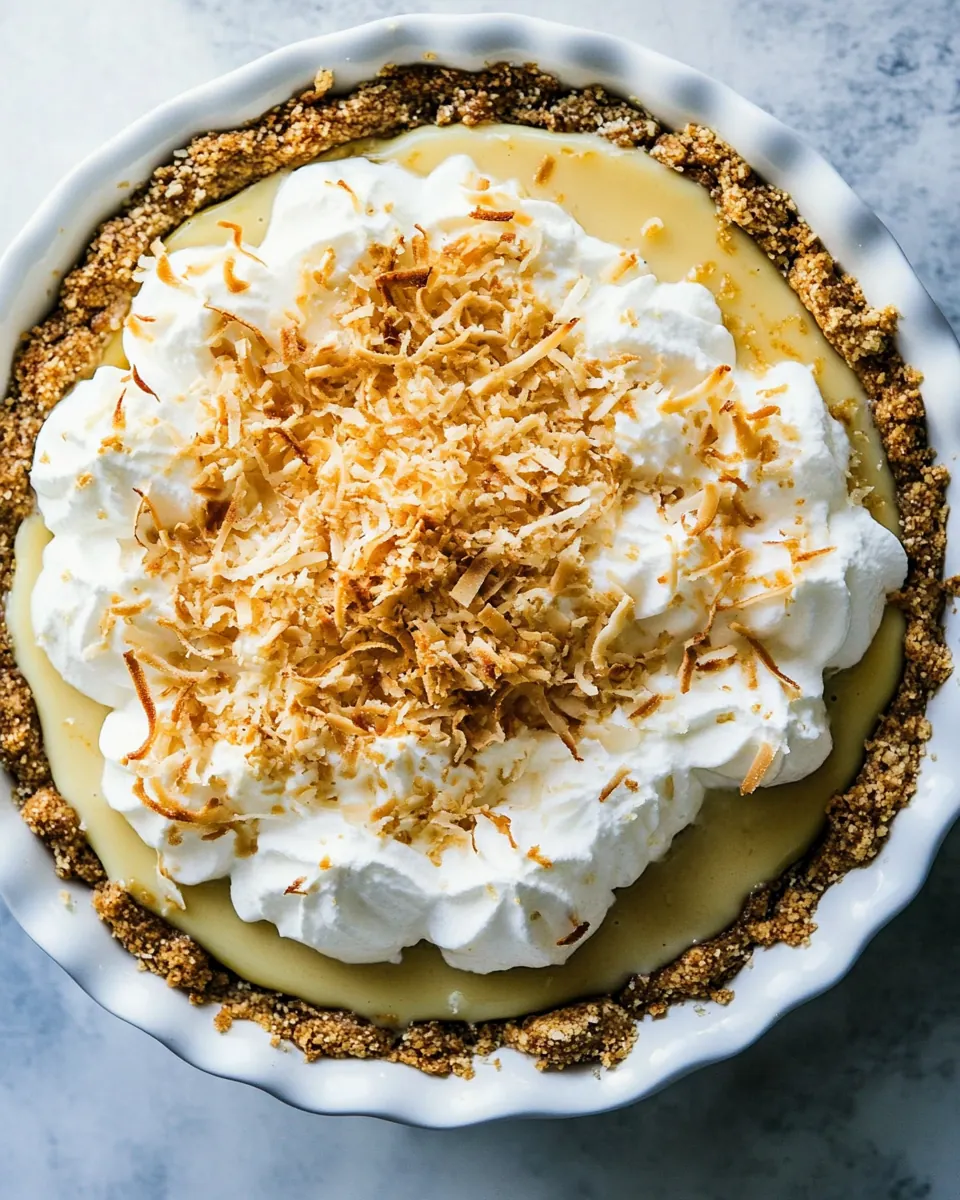
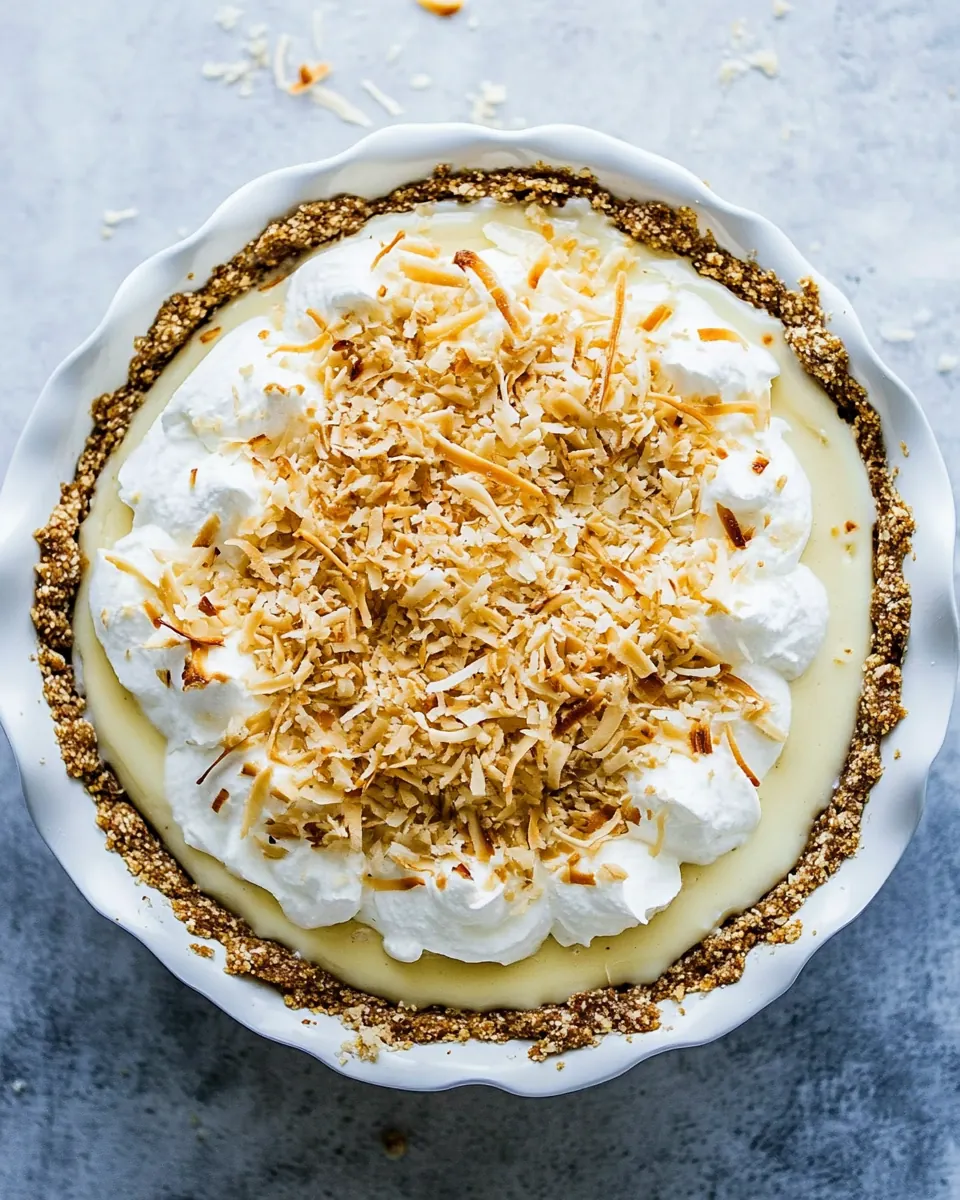
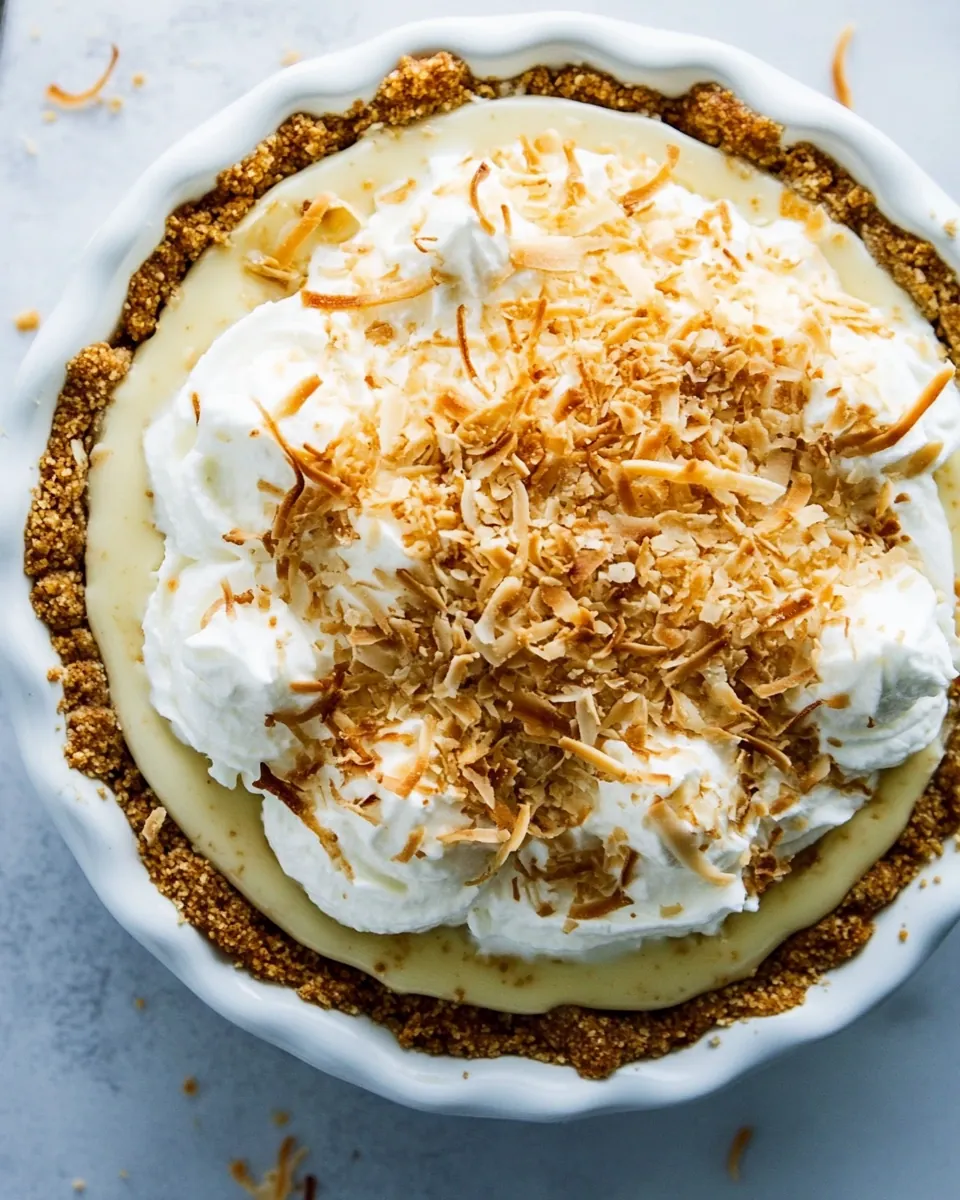
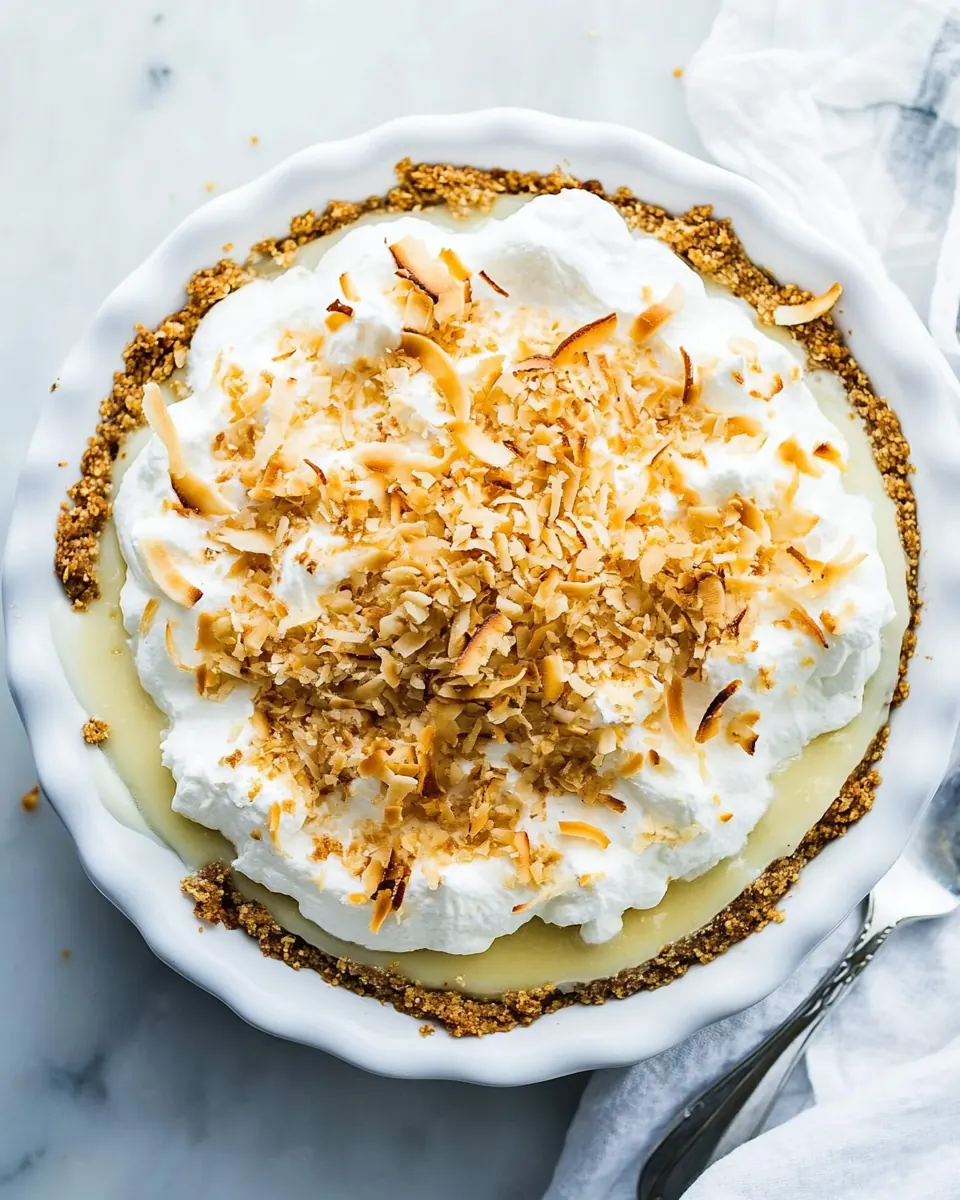
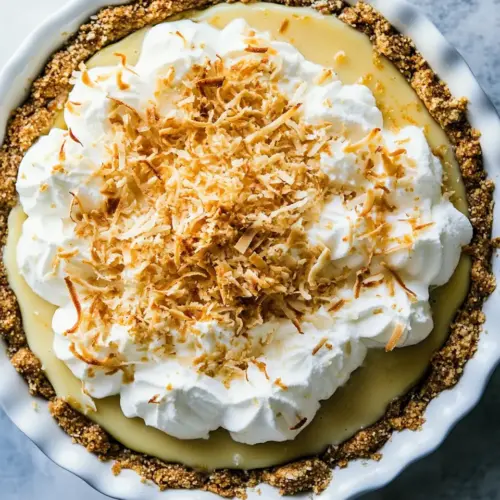
Coconut Cream Pie
Coconut Cream Pie has been one of those recipes that follows me through summers at my grandmother’s beach house, a dessert everyone reached for after sun soaked afternoons and late night card games. I still remember the first time I helped press the crumb crust into the pan, my hands sticky with melted butter and the smell of graham cracker crumbs filling the kitchen as waves rolled in the distance. That pie felt like a celebration of simple ingredients turned soulful, and it taught me how much joy lives in small rituals.
Over the years I’ve played with the custard until it felt just right, keeping the filling silky and not too sweet, balancing the tropical note of coconut milk with a touch of vanilla. There were mishaps too, like a time the filling developed a skin because I skipped the plastic wrap trick, and another when I overwhipped the topping and had to start again. Those mistakes taught me to slow down, to read the texture, and to trust small cues like the way the custard bubbles look when it’s ready.
When friends come by on hot summer evenings, I often bring out a chilled slice of Coconut Cream Pie and watch faces soften with the first forkful. The toasted shredded coconut on top gives a toasty contrast to the creamy interior that always prompts questions about how it’s made. I enjoy telling the story of the crust, pressed and baked until it holds the custard like a cozy little boat. Making this pie is a small act of hospitality that keeps me connected to family rituals and the pleasure of sharing dessert.
Recipe Snapshot
36 mins
35 mins
1 mins
Medium
350 kcal
American
Gluten-Free, Low FODMAP
Desserts
Pie pan 9 inch, Blender or food processor, Medium pot, Stand mixer for whipped topping, Large skillet for toasting coconut
The Charm of This Coconut Cream Pie
Velvety, stable filling
I love how the filling for this Coconut Cream Pie sets into a luscious, spoonable custard that still holds its shape when sliced. Using a combination of cornstarch, careful heat control, and steady whisking produces a smooth texture without graininess. I appreciate that the method makes a filling you can trust for elegant slices when guests arrive.
Crunchy, buttery crust
The graham cracker crust is a simple hero. Pressing the crumbs with a measuring cup until compact and baking briefly gives you a crunchy base that contrasts the creamy center. I find that melting the unsalted butter and letting it cool slightly prevents an oily crust and helps the crumbs bind evenly.
Layered coconut flavor
The recipe layers coconut notes in multiple places, using full fat coconut milk in the custard and optional sweetened shredded coconut toasted on top for a smoky finish. That interplay between creamy and toasty keeps the taste interesting from the first bite to the last. I often tweak the amount of coconut extract to suit my guests, because subtlety can be more memorable than overdoing it.
Make ahead friendly
One of my favorite reasons to make this pie is how well it stores. The crust can be baked a day ahead and the custard benefits from a long chill to fully set. I usually prepare it the night before a gathering, which frees me to greet people instead of fussing in the kitchen. It’s a reliable dessert that plays nicely with busy schedules.
Textural contrast with whipped topping
The stabilized whipped heavy cream crown provides a soft, airy counterpoint to the dense custard and crunchy crust. Whipping to medium to stiff peaks gives structure without being heavy, and the powdered sugar sweetens subtly. I always warn friends not to overbeat, because losing that silky mouthfeel changes the profile of the whole pie.
What Goes Into Coconut Cream Pie
This ingredient lineup is intentionally straightforward and harmonious. The key players are the crunchy graham cracker crumbs and melted butter for the crust, a custard built on full fat coconut milk, and a whipped heavy cream topping. Each ingredient has a structural or flavor role, and together they balance texture and tropical flavor without masking each other.
- 1 3/4 cups graham cracker crumbs 12–13 full sheets: Combine to form the crunchy base and provide structure for the pie crust; graham cracker crumbs bring a sweet, slightly honeyed flavor while offering a sturdy texture when pressed into a pan. Use the specified amount from full sheets to ensure consistent crumb volume and an even bake. Crushing to uniform fineness helps the crust bind evenly with melted butter for a cohesive shell.
- 6 tablespoons unsalted butter melted: Melt to bind the crumbs and add richness; unsalted butter contributes fat that firms the crust as it cools and enhances mouthfeel without adding extra salt. Use the melted form to evenly coat the crumbs and help them compact into a dense, sliceable crust. Butter temperature affects handling—slightly warm is easiest for mixing and pressing.
- 1/4 cup granulated sugar or light brown sugar: Sweeten and balance the crust with added caramel-like depth when using light brown sugar; granulated sugar offers straightforward sweetness and slight crispness. Adjust based on preference for a subtly molasses note versus pure sweetness. Combine with crumbs and butter to help set the crust and complement the custard filling.
- 1/8 teaspoons salt: Enhance flavor balance by providing a faint savory contrast to sweetness; a pinch of salt brightens the crust components and rounds overall taste. Use the small amount precisely to avoid salinity while amplifying other flavors. Salt also helps suppress any overly sweet or flat notes in the crust.
- 3/4 cup granulated sugar: Sweeten and stabilize the custard base by dissolving into the milk mixture to provide consistent sweetness throughout the filling. Granulated sugar contributes to caramelization tendencies during cooking and helps produce a glossy, smooth texture when combined with cornstarch and egg yolks. Adjust slightly for personal sweetness preference but maintain structural integrity.
- 1/2 teaspoons salt: Balance sweetness and enhance flavor perception in the filling; salt intensifies coconut and vanilla notes while moderating cloying sweetness. Include the specified amount to keep the custard bright and well-rounded. Salt also subtly influences protein and starch interactions during thickening.
- 1/4 cup cornstarch: Thicken and stabilize the custard by forming a gel with the liquid when heated; cornstarch creates a smooth, velvety texture that prevents the filling from being runny. Use proper slurry technique to avoid lumps and ensure even thickening as the mixture reaches simmer. Cornstarch also helps the pie set for clean slicing.
- 4 large egg yolks discard the whites or save for a different recipe: Enrich and emulsify the custard while adding silkiness; egg yolks provide proteins and fat that thicken when gently cooked and contribute a rich, custardy flavor. Temper yolks carefully with hot liquid to prevent curdling, then cook to reach safe thickness without scrambling. Reserve whites for other recipes or discard as noted.
- 1 (13.5-ounce) can coconut milk full-fat: Provide primary coconut flavor and creamy body to the filling; full-fat coconut milk delivers both liquid and fat necessary for an authentic coconut profile and a rich mouthfeel. Use the canned product for consistent thickness and pronounced coconut aroma compared with diluted alternatives. Shake well before measuring to incorporate solids and liquids evenly.
- 1 cup heavy cream: Add creaminess and additional fat to enrich the custard; heavy cream contributes to a silky texture and supports a luxurious, velvety filling. Incorporate with coconut milk to create a balanced dairy-coconut base that enhances richness without overpowering coconut notes. Heavy cream also improves freeze-thaw stability if chilling the pie.
- 2 tablespoons unsalted butter: Finish the filling with added richness and a glossy sheen; a small amount of unsalted butter stirred in off heat rounds flavors and smooths texture. Butter melts into the hot custard to provide subtle mouth-coating fat and improved shine. Use unsalted to control overall salt level in the filling.
- 1 teaspoon vanilla bean paste or vanilla extract: Introduce aromatic complexity and rounded vanilla flavor; vanilla bean paste or extract provides sweet, floral notes that complement coconut and enhance perceived sweetness. Use a paste for visible flecks and a deeper flavor, or extract for convenience—both integrate into warm custard evenly. Add according to taste to avoid overpowering delicate coconut.
- 1/4 to 1 full teaspoon coconut extract see note 1: Amplify coconut aroma for a pronounced tropical note; coconut extract intensifies coconut flavor beyond the milk alone and allows fine-tuning from subtle to bold. Use the lower end for a hint and up to the full teaspoon for a pronounced profile, keeping extract potency in mind. Add carefully, as extracts can become artificial if overused.
- 1 cup heavy cream: Whip to create the pie’s light, airy topping and add additional richness; heavy cream forms stable peaks when whipped and provides a classic contrast to the dense custard. Chill equipment and cream for best whipping performance, and whip to medium-stiff peaks to hold shape without becoming grainy. Use as a layer or piped decoration over the filling.
- 2 to 4 tablespoons powdered sugar: Sweeten and stabilize whipped cream topping while adding a smooth mouthfeel; powdered sugar dissolves quickly to provide consistent sweetness and slight body. Adjust the amount within the range to achieve desired sweetness and texture without weighing down the cream. Sift powdered sugar if clumpy to ensure smooth incorporation.
- 1/2 teaspoon vanilla bean paste or vanilla extract: Flavor and slightly stabilize whipped cream with a delicate vanilla note; vanilla bean paste or extract lends depth and complements coconut while rounding the topping’s sweetness. Add during whipping to distribute evenly and infuse aroma throughout the cream. Use the same type as in the filling for cohesive flavor if desired.
- 1 cup sweetened shredded coconut (optional): Add texture and intensify coconut experience with a toasty or chewy element; sweetened shredded coconut can be folded into the topping or toasted for garnish to provide contrast. Use optionally based on preference for additional coconut presence and visual appeal. Toasting briefly enhances nuttiness and reduces perceived sweetness.
Recipe Steps for Coconut Cream Pie
I like to think of the process as a sequence of small focused rituals that together make a memorable dessert. Take your time with the crust and respect the cues the custard gives you, and you will be rewarded with clean slices and layered flavors. Below I expand each step with sensory details and troubleshooting to help you get it right.
- Preheat oven to 350°F (175°C). Lightly grease a 9-inch pie pan with cooking spray. Melt the butter in a microwave-safe bowl. Once melted, set it aside to cool for 5 minutes to prevent a greasy crust.: As the oven warms and the air takes on that dry, warm scent, you can feel the kitchen gearing up. The melted butter should be warm not hot, so when you mix it into the crumbs it moistens evenly without separating, and you will notice the crumbs darken slightly and glisten. Cooling the butter prevents it from making the crust oily, which would ruin the texture. If you skip the cooling step you risk a greasy, loose crust, so be patient. Listen for the quiet hum of the oven as it settles into temperature while you prep the crumbs.
- In a blender or food processor, process graham crackers into fine crumbs, reblending any large chunks. Measure the crumbs and transfer to a large bowl. Add the sugar and salt. Pour in the melted butter and mix until well combined.: The motor whirs and a warm sweet aroma of crushed graham crackers fills the air, signaling progress. Aim for uniformly fine crumbs so the crust binds and bakes evenly; any coarse pieces will create weak spots. Mixing in the granulated sugar and salt ensures every bite is balanced, and the melted butter should coat the crumbs until they clump slightly when pressed. A common mistake is under processing, leaving large flakes that prevent proper compression, so reprocess any stubborn chunks until smooth.
- Pour crumb mixture into prepared pan. Press crumbs firmly along the sides and bottom of the pan using your fingers. To create a solid crust, use the bottom of a flat 1-cup measuring cup to thoroughly compress the crumbs. Bake for 10 minutes, then remove from oven and allow to cool completely. You can prepare and bake the crust up to 24 hours in advance. Cover with plastic wrap and store at room temperature.: When you press the crumbs they should feel compact and hold their shape; the surface will look slightly darker and sheen faintly from the butter. Baking produces a toasty, slightly nutty aroma and the crust firms to a light crunch. Use steady pressure with the measuring cup to avoid cracked edges, and once baked allow it to cool fully so the hot warmth does not destabilize the custard later. If you skip the cooling you may end up with a soggy interface between crust and filling.
- In a medium pot, off heat, combine the sugar, salt, and cornstarch. Whisk together until well mixed. Add egg yolks and whisk until combined. While whisking constantly, pour in coconut milk followed by heavy cream. Continue whisking until all ingredients are fully integrated. Place pot on stove over just below medium heat. Whisk occasionally as the mixture heats up, alternating between whisking and using a rubber spatula to scrape the sides and bottom of the pot to prevent cornstarch from sticking.: Off heat mixing prevents the yolks from scrambling, and you will see the dry ingredients soften into a pale paste before the liquids are added. As the pot warms you can smell the sweet coconut beginning to open up, and the mixture will gradually lose shine and thicken. Scraping the sides keeps the cornstarch from clustering and avoids burnt pockets on the bottom. A common error is heating too quickly which creates lumps, so keep the heat gentle and be attentive to the gradual change in texture.
- As soon as the mixture begins to thicken, start whisking constantly. When you see large bubbles forming in the center, set a timer for 1 minute and continue whisking constantly. If bubbling becomes too intense, reduce heat slightly. The mixture should thicken significantly, reaching a pudding-like consistency. After 1 minute, remove pot from heat.: This is the sensory moment you will remember, when the custard moves from thin to viscous and those large central bubbles signal full gelatinization. The sound changes to a soft rolling simmer and the aroma deepens into a warm, concentrated coconut scent. Whisking continuously during this phase prevents scorching and ensures a smooth body. If you stop whisking you may get a grainy texture or scorched bits, so keep stirring and adjust the flame if it roars too vigorously.
- Whisk off the heat for another full minute. Add the butter and whisk until fully melted. Then, add vanilla and coconut extract to taste. Whisk until the mixture is completely smooth.: Off the heat the custard calms and becomes glossy as the butter is whisked in, lending silk and shine. Adding the extracts now preserves their fresh aromatic qualities, and a quick whisk distributes them evenly so there are no pockets of concentrated flavor. You will sense a thicker, almost velvet texture. A typical mistake here is adding extracts too early to boiling liquid which can dissipate their nuance, so hold them back until the pot is off the heat.
- Use a spatula to transfer mixture from the pot into the cooled crust, smoothing the top with the spatula. Gently place a piece of plastic wrap directly on the surface of the filling, pressing lightly to create a seal. This will prevent a skin from forming on the pudding. Refrigerate for at least 8 hours or until the filling is fully set.: As you spread the warm custard it will settle into the crust with a glossy surface, and the kitchen will smell richly of toasted coconut and vanilla . Pressing plastic wrap directly on the custard stops a membrane from forming and keeps the top perfectly smooth when chilled. Refrigeration firms the filling and deepens the flavors; slicing too early will result in a loose filling that oozes rather than slices cleanly. Patience here yields beautiful presentation.
- Pour the heavy cream, powdered sugar and vanilla into a bowl attached to a stand mixer. Whisk on low speed to combine the ingredients, then gradually increase to high speed. Whisk until medium-to-stiff peaks form, about 2–4 minutes. Be careful not to overbeat. Smooth the whipped cream over the pie.: As you whip the cold heavy cream the texture will change from liquid to billowy peaks, and the sweet aroma of powdered sugar will be faintly present. Watch closely because the transition from soft to stiff peaks happens fast; when the whisk lifts the cream should hold shape without collapsing. Overbeating yields a grainy look and a broken texture, so stop as soon as the peaks are stable yet still glossy. Spreading the whipped topping creates a cloudlike contrast to the dense custard below.
- Toast the unsweetened coconut in a large skillet over low-to-medium heat, stirring frequently, until mostly golden brown, about 3–6 minutes. Remove from heat and transfer to a plate to cool completely. Once cooled, sprinkle evenly over the pie.: Toasting the shredded coconut releases nutty aromas and a warm golden color that adds crunch and visual contrast. Keep stirring so it browns evenly and remove it quickly as residual heat continues to cook it on the pan. Once cooled, the toasted flakes remain crisp on top of the creamy pie. A common mistake is leaving it on the heat unattended, which can turn it from golden to bitter in seconds.
Variations to Try
If you like to experiment, these variations let you nudge the pie toward your personal taste without changing the core method. Each tip focuses on one idea to enhance texture or flavor while keeping the recipe reliable.
- Swap crust texture: Press the graham crumbs finer or coarser depending on whether you want a silkier mouthfeel or more crunch, and consider adding a tablespoon of sugar if you prefer a sweeter base.
- Adjust coconut intensity: Start with 1/4 teaspoon of coconut extract and increase to 1 teaspoon to boost tropical aroma, tasting as you go so it remains natural not artificial.
- Stabilize whipped cream: For longer hold, fold a teaspoon of cornstarch or two teaspoons of powdered milk into the whipped cream, which helps it stay firm for parties without changing flavor much.
- Make it lighter: Use a mix of half heavy cream and half evaporated milk in the custard to reduce richness while keeping a creamy texture, but be aware it will be slightly less luxurious.
- Advance prep: Bake the crust and prepare the custard a day ahead; wrap the cooled crust and custard separately to retain crispness and freshness when assembling before serving.
Perfect Pairings for Coconut Cream Pie
This pie shines on warm afternoons and celebratory dinners alike. Its cool creamy texture is a perfect finish to a bright, citrusy meal or a rich comfort dinner. Below I break down serving ideas and storage notes to help you plan the ideal occasion.
- Serve with fresh fruit: Offer sliced mango or pineapple on the side to echo the tropical coconut, making the dessert feel lighter and fresher for summer gatherings.
- After a seafood dinner: A chilled slice of Coconut Cream Pie pairs nicely after a light seafood meal because it provides a sweet cooled contrast to savory flavors.
- Holiday and special occasions: Present this pie during family gatherings and summer celebrations where a shareable dessert is welcome, because it slices neatly and feels festive.
- Storage tips: Keep the pie refrigerated, covered, for up to 3 days. If you need to store longer, remove the topping and freeze the custard filled crust wrapped tightly for up to 1 month, thawing overnight in the fridge before topping.
- Seasonal pairing: In summer serve with iced coffee or a chilled herbal tea to complement the tropical notes and balance richness with cool refreshment.
FAQ
Conclusion
Coconut Cream Pie stands out because of its harmonious balance of buttery graham crust, silky coconut custard, and airy whipped topping crowned with toasted coconut. Give it the time it needs to chill and you will be rewarded with clean slices and layers of complementary textures. I hope you take a weekend afternoon to make this, enjoy the tactile pleasure of pressing the crust, and savor the quiet satisfaction when the first forkful brings nods around the table.
Coconut Cream Pie
Equipment
- Pie pan 9 inch
- Blender or food processor
- Medium Pot
- Stand mixer for whipped topping
- Large skillet for toasting coconut
Ingredients
- 1 -3/4 cups graham cracker crumbs 12–13 full sheets Combine to form the crunchy base and provide structure for the pie crust; graham cracker crumbs bring a sweet, slightly honeyed flavor while offering a sturdy texture when pressed into a pan. Use the specified amount from full sheets to ensure consistent crumb volume and an even bake. Crushing to uniform fineness helps the crust bind evenly with melted butter for a cohesive shell.
- 6 tablespoons unsalted butter melted Melt to bind the crumbs and add richness; unsalted butter contributes fat that firms the crust as it cools and enhances mouthfeel without adding extra salt. Use the melted form to evenly coat the crumbs and help them compact into a dense, sliceable crust. Butter temperature affects handling—slightly warm is easiest for mixing and pressing.
- 1/4 cup granulated sugar or light brown sugar Sweeten and balance the crust with added caramel-like depth when using light brown sugar; granulated sugar offers straightforward sweetness and slight crispness. Adjust based on preference for a subtly molasses note versus pure sweetness. Combine with crumbs and butter to help set the crust and complement the custard filling.
- 1/8 teaspoons salt Enhance flavor balance by providing a faint savory contrast to sweetness; a pinch of salt brightens the crust components and rounds overall taste. Use the small amount precisely to avoid salinity while amplifying other flavors. Salt also helps suppress any overly sweet or flat notes in the crust.
- 3/4 cup granulated sugar Sweeten and stabilize the custard base by dissolving into the milk mixture to provide consistent sweetness throughout the filling. Granulated sugar contributes to caramelization tendencies during cooking and helps produce a glossy, smooth texture when combined with cornstarch and egg yolks. Adjust slightly for personal sweetness preference but maintain structural integrity.
- 1/2 teaspoons salt Balance sweetness and enhance flavor perception in the filling; salt intensifies coconut and vanilla notes while moderating cloying sweetness. Include the specified amount to keep the custard bright and well-rounded. Salt also subtly influences protein and starch interactions during thickening.
- 1/4 cup cornstarch Thicken and stabilize the custard by forming a gel with the liquid when heated; cornstarch creates a smooth, velvety texture that prevents the filling from being runny. Use proper slurry technique to avoid lumps and ensure even thickening as the mixture reaches simmer. Cornstarch also helps the pie set for clean slicing.
- 4 large egg yolks discard the whites or save for a different recipe Enrich and emulsify the custard while adding silkiness; egg yolks provide proteins and fat that thicken when gently cooked and contribute a rich, custardy flavor. Temper yolks carefully with hot liquid to prevent curdling, then cook to reach safe thickness without scrambling. Reserve whites for other recipes or discard as noted.
- 1 (13.5-ounce) can coconut milk full-fat Provide primary coconut flavor and creamy body to the filling; full-fat coconut milk delivers both liquid and fat necessary for an authentic coconut profile and a rich mouthfeel. Use the canned product for consistent thickness and pronounced coconut aroma compared with diluted alternatives. Shake well before measuring to incorporate solids and liquids evenly.
- 1 cup heavy cream Add creaminess and additional fat to enrich the custard; heavy cream contributes to a silky texture and supports a luxurious, velvety filling. Incorporate with coconut milk to create a balanced dairy-coconut base that enhances richness without overpowering coconut notes. Heavy cream also improves freeze-thaw stability if chilling the pie.
- 2 tablespoons unsalted butter Finish the filling with added richness and a glossy sheen; a small amount of unsalted butter stirred in off heat rounds flavors and smooths texture. Butter melts into the hot custard to provide subtle mouth-coating fat and improved shine. Use unsalted to control overall salt level in the filling.
- 1 teaspoon vanilla bean paste or vanilla extract Introduce aromatic complexity and rounded vanilla flavor; vanilla bean paste or extract provides sweet, floral notes that complement coconut and enhance perceived sweetness. Use a paste for visible flecks and a deeper flavor, or extract for convenience—both integrate into warm custard evenly. Add according to taste to avoid overpowering delicate coconut.
- 1/4 to 1 full teaspoon coconut extract see note 1 Amplify coconut aroma for a pronounced tropical note; coconut extract intensifies coconut flavor beyond the milk alone and allows fine-tuning from subtle to bold. Use the lower end for a hint and up to the full teaspoon for a pronounced profile, keeping extract potency in mind. Add carefully, as extracts can become artificial if overused.
- 1 cup heavy cream Whip to create the pie’s light, airy topping and add additional richness; heavy cream forms stable peaks when whipped and provides a classic contrast to the dense custard. Chill equipment and cream for best whipping performance, and whip to medium-stiff peaks to hold shape without becoming grainy. Use as a layer or piped decoration over the filling.
- 2 to 4 tablespoons powdered sugar Sweeten and stabilize whipped cream topping while adding a smooth mouthfeel; powdered sugar dissolves quickly to provide consistent sweetness and slight body. Adjust the amount within the range to achieve desired sweetness and texture without weighing down the cream. Sift powdered sugar if clumpy to ensure smooth incorporation.
- 1/2 teaspoon vanilla bean paste or vanilla extract Flavor and slightly stabilize whipped cream with a delicate vanilla note; vanilla bean paste or extract lends depth and complements coconut while rounding the topping’s sweetness. Add during whipping to distribute evenly and infuse aroma throughout the cream. Use the same type as in the filling for cohesive flavor if desired.
- 1 cup sweetened shredded coconut optional Add texture and intensify coconut experience with a toasty or chewy element; sweetened shredded coconut can be folded into the topping or toasted for garnish to provide contrast. Use optionally based on preference for additional coconut presence and visual appeal. Toasting briefly enhances nuttiness and reduces perceived sweetness.
Instructions
- Preheat oven to 350°F (175°C). Lightly grease a 9-inch pie pan with cooking spray. Melt the butter in a microwave-safe bowl. Once melted, set it aside to cool for 5 minutes to prevent a greasy crust.: As the oven warms and the air takes on that dry, warm scent, you can feel the kitchen gearing up. The melted butter should be warm not hot, so when you mix it into the crumbs it moistens evenly without separating, and you will notice the crumbs darken slightly and glisten. Cooling the butter prevents it from making the crust oily, which would ruin the texture. If you skip the cooling step you risk a greasy, loose crust, so be patient. Listen for the quiet hum of the oven as it settles into temperature while you prep the crumbs.
- In a blender or food processor, process graham crackers into fine crumbs, reblending any large chunks. Measure the crumbs and transfer to a large bowl. Add the sugar and salt. Pour in the melted butter and mix until well combined.: The motor whirs and a warm sweet aroma of crushed graham crackers fills the air, signaling progress. Aim for uniformly fine crumbs so the crust binds and bakes evenly; any coarse pieces will create weak spots. Mixing in the granulated sugar and salt ensures every bite is balanced, and the melted butter should coat the crumbs until they clump slightly when pressed. A common mistake is under processing, leaving large flakes that prevent proper compression, so reprocess any stubborn chunks until smooth.
- Pour crumb mixture into prepared pan. Press crumbs firmly along the sides and bottom of the pan using your fingers. To create a solid crust, use the bottom of a flat 1-cup measuring cup to thoroughly compress the crumbs. Bake for 10 minutes, then remove from oven and allow to cool completely. You can prepare and bake the crust up to 24 hours in advance. Cover with plastic wrap and store at room temperature.: When you press the crumbs they should feel compact and hold their shape; the surface will look slightly darker and sheen faintly from the butter. Baking produces a toasty, slightly nutty aroma and the crust firms to a light crunch. Use steady pressure with the measuring cup to avoid cracked edges, and once baked allow it to cool fully so the hot warmth does not destabilize the custard later. If you skip the cooling you may end up with a soggy interface between crust and filling.
- In a medium pot, off heat, combine the sugar, salt, and cornstarch. Whisk together until well mixed. Add egg yolks and whisk until combined. While whisking constantly, pour in coconut milk followed by heavy cream. Continue whisking until all ingredients are fully integrated. Place pot on stove over just below medium heat. Whisk occasionally as the mixture heats up, alternating between whisking and using a rubber spatula to scrape the sides and bottom of the pot to prevent cornstarch from sticking.: Off heat mixing prevents the yolks from scrambling, and you will see the dry ingredients soften into a pale paste before the liquids are added. As the pot warms you can smell the sweet coconut beginning to open up, and the mixture will gradually lose shine and thicken. Scraping the sides keeps the cornstarch from clustering and avoids burnt pockets on the bottom. A common error is heating too quickly which creates lumps, so keep the heat gentle and be attentive to the gradual change in texture.
- As soon as the mixture begins to thicken, start whisking constantly. When you see large bubbles forming in the center, set a timer for 1 minute and continue whisking constantly. If bubbling becomes too intense, reduce heat slightly. The mixture should thicken significantly, reaching a pudding-like consistency. After 1 minute, remove pot from heat.: This is the sensory moment you will remember, when the custard moves from thin to viscous and those large central bubbles signal full gelatinization. The sound changes to a soft rolling simmer and the aroma deepens into a warm, concentrated coconut scent. Whisking continuously during this phase prevents scorching and ensures a smooth body. If you stop whisking you may get a grainy texture or scorched bits, so keep stirring and adjust the flame if it roars too vigorously.
- Whisk off the heat for another full minute. Add the butter and whisk until fully melted. Then, add vanilla and coconut extract to taste. Whisk until the mixture is completely smooth.: Off the heat the custard calms and becomes glossy as the butter is whisked in, lending silk and shine. Adding the extracts now preserves their fresh aromatic qualities, and a quick whisk distributes them evenly so there are no pockets of concentrated flavor. You will sense a thicker, almost velvet texture. A typical mistake here is adding extracts too early to boiling liquid which can dissipate their nuance, so hold them back until the pot is off the heat.
- Use a spatula to transfer mixture from the pot into the cooled crust, smoothing the top with the spatula. Gently place a piece of plastic wrap directly on the surface of the filling, pressing lightly to create a seal. This will prevent a skin from forming on the pudding. Refrigerate for at least 8 hours or until the filling is fully set.: As you spread the warm custard it will settle into the crust with a glossy surface, and the kitchen will smell richly of toasted coconut and vanilla . Pressing plastic wrap directly on the custard stops a membrane from forming and keeps the top perfectly smooth when chilled. Refrigeration firms the filling and deepens the flavors; slicing too early will result in a loose filling that oozes rather than slices cleanly. Patience here yields beautiful presentation.
- Pour the heavy cream, powdered sugar and vanilla into a bowl attached to a stand mixer. Whisk on low speed to combine the ingredients, then gradually increase to high speed. Whisk until medium-to-stiff peaks form, about 2–4 minutes. Be careful not to overbeat. Smooth the whipped cream over the pie.: As you whip the cold heavy cream the texture will change from liquid to billowy peaks, and the sweet aroma of powdered sugar will be faintly present. Watch closely because the transition from soft to stiff peaks happens fast; when the whisk lifts the cream should hold shape without collapsing. Overbeating yields a grainy look and a broken texture, so stop as soon as the peaks are stable yet still glossy. Spreading the whipped topping creates a cloudlike contrast to the dense custard below.
- Toast the unsweetened coconut in a large skillet over low-to-medium heat, stirring frequently, until mostly golden brown, about 3–6 minutes. Remove from heat and transfer to a plate to cool completely. Once cooled, sprinkle evenly over the pie.: Toasting the shredded coconut releases nutty aromas and a warm golden color that adds crunch and visual contrast. Keep stirring so it browns evenly and remove it quickly as residual heat continues to cook it on the pan. Once cooled, the toasted flakes remain crisp on top of the creamy pie. A common mistake is leaving it on the heat unattended, which can turn it from golden to bitter in seconds.
Notes
- Swap crust texture: Press the graham crumbs finer or coarser depending on whether you want a silkier mouthfeel or more crunch, and consider adding a tablespoon of sugar if you prefer a sweeter base.
- Adjust coconut intensity: Start with 1/4 teaspoon of coconut extract and increase to 1 teaspoon to boost tropical aroma, tasting as you go so it remains natural not artificial.
- Stabilize whipped cream: For longer hold, fold a teaspoon of cornstarch or two teaspoons of powdered milk into the whipped cream, which helps it stay firm for parties without changing flavor much.
- Make it lighter: Use a mix of half heavy cream and half evaporated milk in the custard to reduce richness while keeping a creamy texture, but be aware it will be slightly less luxurious.
- Advance prep: Bake the crust and prepare the custard a day ahead; wrap the cooled crust and custard separately to retain crispness and freshness when assembling before serving.