Christmas Sugar Cookies Recipe
Christmas Sugar Cookies Recipe has been a holiday constant in my kitchen for years, a recipe I reach for when I want buttery, tender cookies that taste like celebration. The first time I made these, I remember the house filling with the warm, citrusy note of lemon zest while I creamed unsalted butter and granulated sugar together, and I knew I had something special. Over time I have tweaked the feel of the dough with small habits, like handling it very gently and chilling it long enough so the cookies hold their shapes when baked.
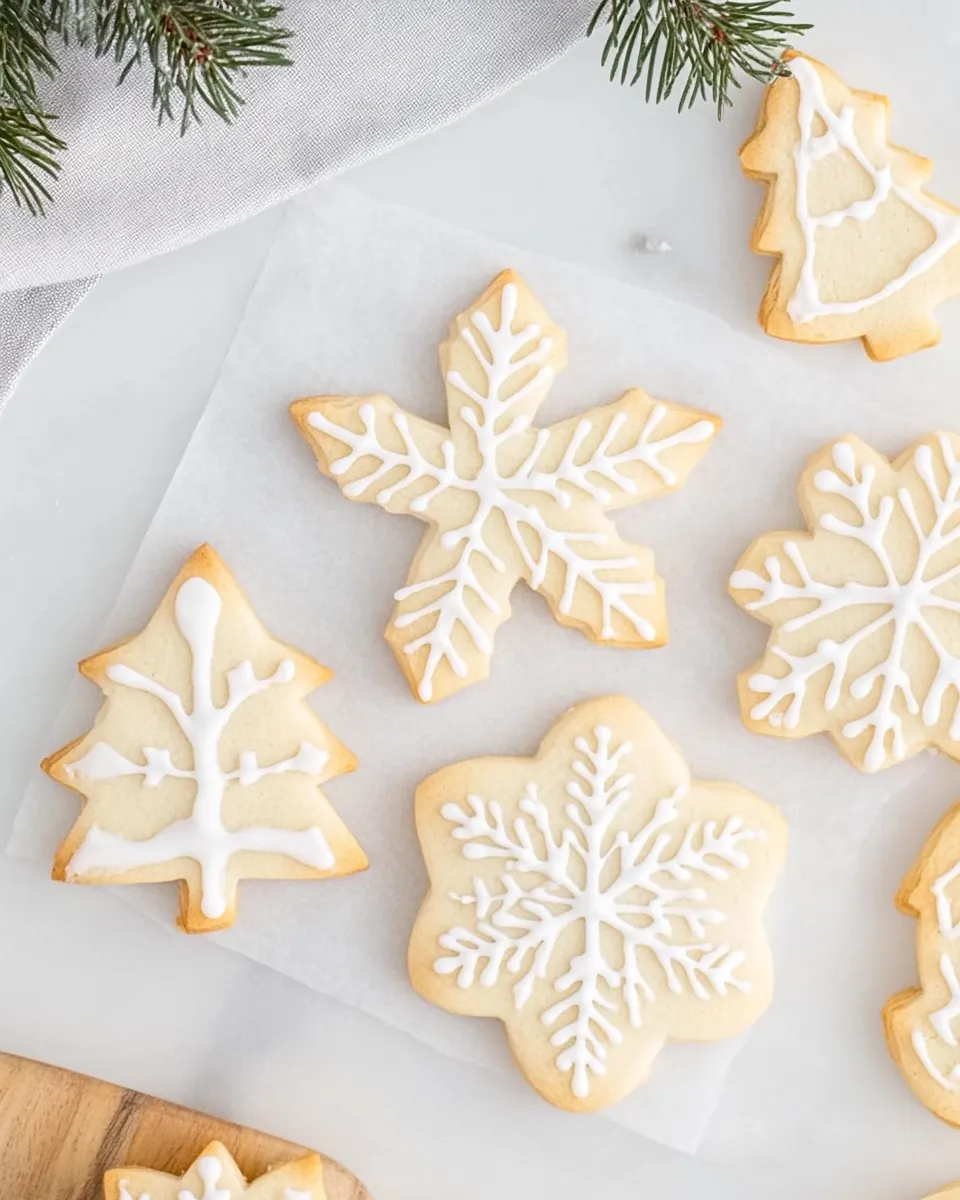
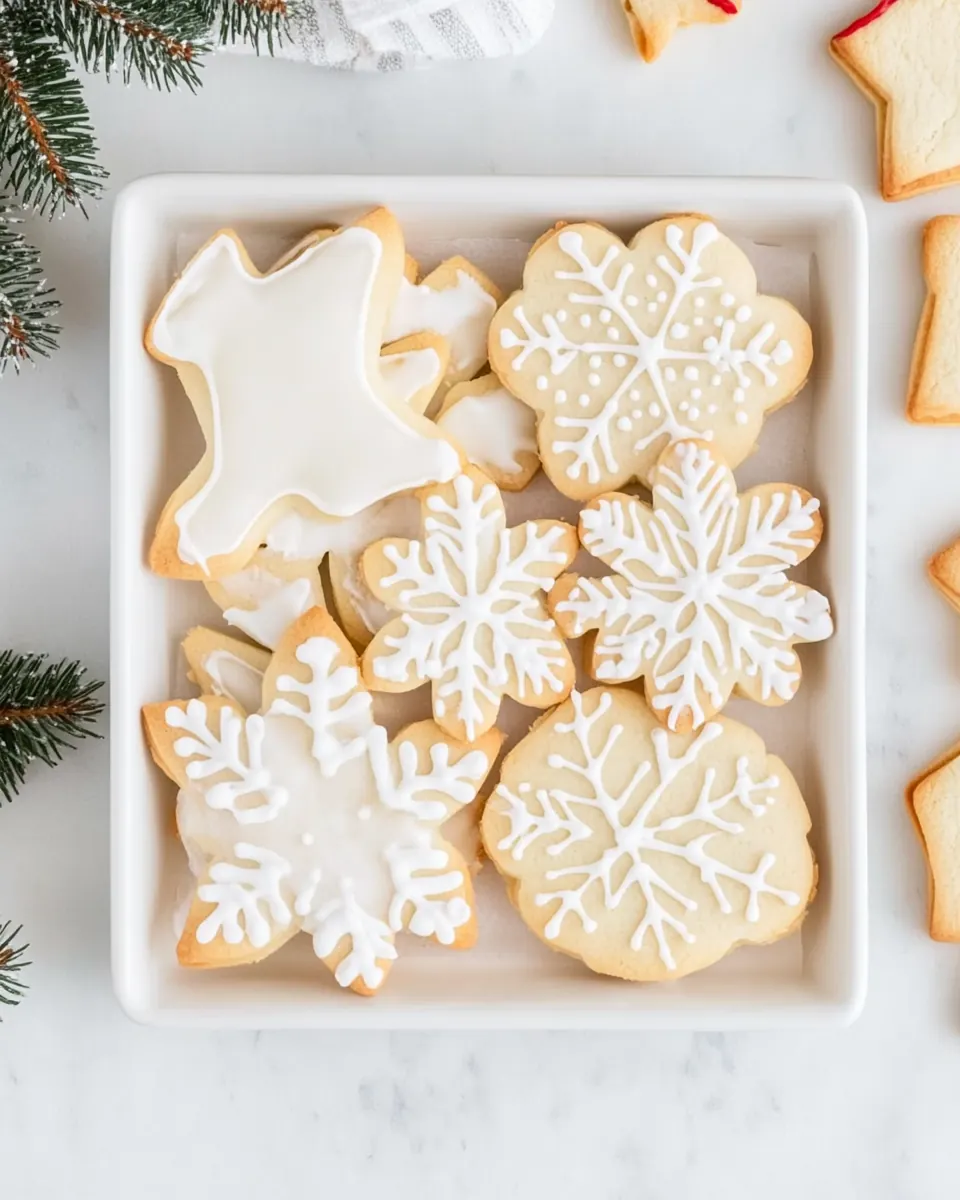
On baking days I clear a big space on the counter, line up cookie cutters, and queue up a playlist. Rolling out the dough is one of my favorite quiet rituals, the way the flour-dusted surface takes on a soft sheen and the cut shapes lift away cleanly. Decorating becomes a joyful group activity; I invite friends or family to pipe icing and add sprinkles, and the kitchen becomes a noisy, happy studio. Those iced edges, glossy from the corn syrup in the glaze, always draw a chorus of approval.
As practical as I am sentimental, I also appreciate that this recipe reliably yields sturdy cookies that store well, which means I can bake ahead for cookie exchanges and parties. There is comfort in a repeatable method, and yet each batch feels new because of small variations in thickness, cutouts, and decoration. I’ve learned to trust visual cues more than exact minutes, and that gentle hands and patience make all the difference in the final texture.
Recipe Snapshot
3 hr 20 mins
190 mins
10 mins
Hard
120 kcal
American
Gluten-Free, Low FODMAP
Desserts
Stand mixer or hand mixer, Mixing bowls, Cookie sheet, Wire rack, Piping bag or Ziploc bag, Sifter
Why Try This Christmas Sugar Cookies Recipe
They hold their shape beautifully
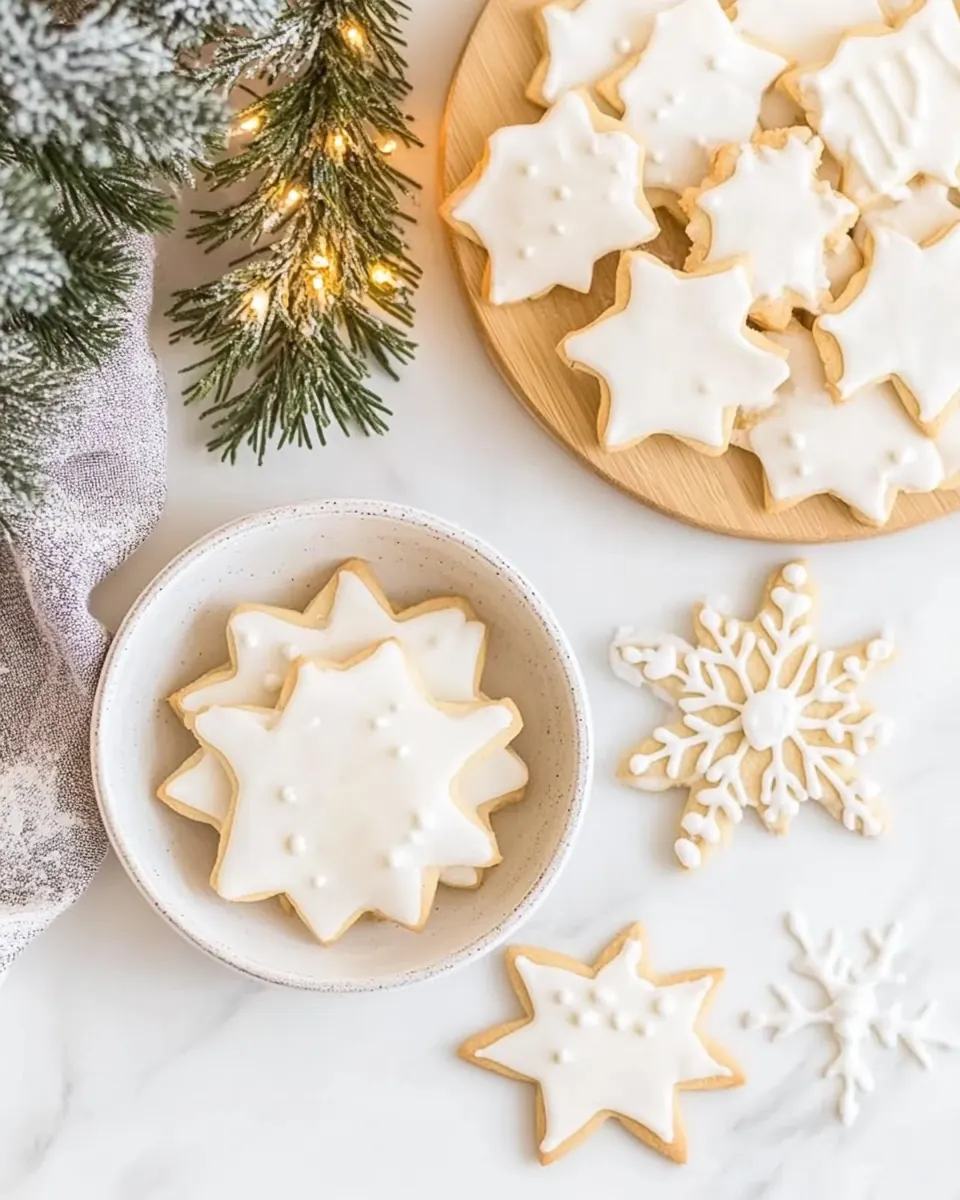
I adore how Christmas Sugar Cookies Recipe comes out of the oven with crisply defined edges, which makes decorating satisfying and precise. Because the dough is chilled thoroughly before rolling, the cookies do not spread, so your star shapes, trees, and hearts look like you cut them that way on purpose. I find this control invaluable when I want a uniform batch for gifting.
Rich, buttery flavor with a bright lift
The combination of unsalted butter and lemon zest gives these cookies a buttery backbone with a subtle citrus brightness. I often taste for that faint lemony note while piping icing, and it balances the sweetness so the cookies never feel cloying. I love how the yolks add a little depth and tenderness.
Perfect icing for decorating
The glaze included here becomes glossy and slightly firm thanks to the small amount of light corn syrup and powdered texture of powdered sugar. I can flood areas and still pipe crisp lines, which makes my designs look polished. When I teach friends to decorate, they always comment on how forgiving this icing is.
Make ahead friendly
Because the recipe asks you to chill the dough, it’s inherently great for planning. I often prepare dough the night before, or freeze portions for later. That flexibility is one reason I reach for this recipe during busy holiday weeks, and I appreciate that the cookies keep up to a week in an airtight container when decorated.
Family friendly and versatile
I’ve made these with kids, with neighbors, and for large cookie swaps. The method is approachable, and the ingredients are pantry staples I usually have on hand. From simple iced rounds to elaborately decorated pieces, this recipe adapts to whatever level of fuss you want to put into it.
Recipe Ingredients for Christmas Sugar Cookies Recipe
These ingredients are deliberately straightforward, each playing a clear role. The unsalted butter supplies richness and structure, while granulated sugar helps with creaming and tenderness. All purpose flour forms the base of the dough, and the egg yolks enrich and bind. The icing ingredients create a glossy, pipeable finish that sets up nicely for decorating.
- 2 cups unsalted butter, softened (4 sticks): Soften and cream to provide a rich, tender base and help incorporate air for lighter cookies; ensures even texture when combined with sugar and eggs.
- 1 cup granulated sugar: Sweeten and aerate the dough for structure and slight crunch; assists with creaming to create a fine crumb and balanced sweetness.
- 2 egg yolks: Enrich and bind the dough while providing tenderness and stability; yolks add fat and help achieve a tender, pliable cookie texture.
- 2 teaspoons lemon zest (from about 1 medium lemon): Zest and brighten the flavor by adding fresh citrus oils, cutting through richness and enhancing overall complexity in the dough.
- 3 cups sifted all-purpose flour: Sift and structure the dough by providing the bulk of dry ingredients; contributes gluten for chew and is key to cookie shape and stability.
- Icing and decorations of your choice (if desired): Decorate and finish once cookies are baked, providing sweetness, color, and texture contrast; allows for creative presentation and additional flavor.
- 3 cups sifted powdered sugar: Sift and thicken icings or fillings by providing a fine, smooth sweetness; dissolves easily to create a glossy, spreadable frosting.
- 2 3 tablespoons milk: Adjust consistency of icing or dough by adding small amounts of liquid to reach desired spreadability or pipeability; helps achieve smooth texture.
- 2 tablespoons light corn syrup: Gloss and stabilize icings while preventing crystallization; adds shine and slight elasticity to frostings for graceful decorations.
- 1/2 teaspoon pure vanilla extract: Flavor and enhance icings or dough with warm, familiar vanilla notes; melds other flavors and deepens overall taste profile.
Directions for Christmas Sugar Cookies Recipe
I like to approach the process with patience and clear stations for mixing, chilling, rolling, baking, and decorating. Below you’ll find each original direction line followed by rich guidance so you can replicate the exact textures and finishes I aim for.
- Cream sugar and butter together in a large bowl of a stand mixer afixed with an S blade or with a hand mixer. Mix until pale yellow, fluffy, and well-incorporated.: The bowl should sound slightly hollow as the mixer runs and the mixture will lighten in color and texture, becoming pale and airy; this trapped air is what gives the cookies lift. You'll feel a silky, smooth texture under the paddle and see tiny ribbons when you lift it up, those ribbons dissolve back in slowly. If the mixture looks gritty, scrape the bowl and continue briefly until smooth. A common mistake is using butter that is too soft, which yields a greasy mixture, so aim for butter that dents with slight pressure but holds shape. The aroma at this stage is light and buttery, with a faint sweetness as the granulated sugar begins to dissolve.
- Add the egg yolks and lemon zest and mix until well-combined.: Right after adding the egg yolks and the fragrant oils from the lemon zest , the mixture gains a richer sheen and a subtle citrus perfume will bloom, signaling aromatic balance. Mixing should be gentle and just long enough to incorporate everything uniformly; overmixing at this point can lead to a tougher final cookie because the yolks increase emulsion. Watch for a homogenous batter where no streaks of yolk remain. A trap to avoid is tossing in the zest with high-speed mixing because that can spread bitter pith if present, so add zest and mix on low until combined.
- Sift the flour over the wet ingredients, and mix just until combined.: As you add the sifted all purpose flour , you'll notice the mixture transitioning from glossy to a more doughlike consistency. The sound changes from slapping to a soft thud as the flour absorbs moisture. Mix briefly, using a folding motion if working by hand, until you no longer see dry streaks of flour. This short mixing period helps preserve tenderness. Overworking here is the usual misstep, and it causes gluten development, which tightens texture, so stop as soon as combined.
- Knead together very gently until it forms enough of a ball to plop onto a piece of plastic wrap. Work the dough just enough to get it to stick together, but be careful not to overdo it. Honestly, I get so paranoid about overworking the dough that I pile the crumbs onto the plastic wrap, fold it up around the mound, and press it together that way.: The tactile cue you want is a cohesive, slightly tacky dough that holds when pressed, not a smooth elastic mass. When pressing in the plastic wrap method, you minimize handling and heat transfer from your hands, which helps keep the butter firm. If you squeeze too hard or knead extensively, the cookies may become dense and lose flakiness. The dough will feel cool and slightly crumbly until it binds, and that's normal; patience at this stage preserves tender crumb.
- Completely wrap the dough with the plastic wrap and chill the dough for at least three hours.: Chilling firms the butter so the shapes stay crisp in the oven, and it lets the flour hydrate for a cohesive texture. During this time the flavors meld and the dough becomes much easier to roll. I mark the time and place the wrapped dough on a flat tray so it chills evenly. If you try to roll warm dough, it will stick and spread; if you skip chilling altogether, the shapes will flatten in the oven, which is the most common error.
- When you're ready to pull the dough out and prepare it, preheat oven to 350°F (175°C).: Preheating the oven ensures that the cookies begin baking immediately, creating a quick edge set that preserves shape and yields that light, tender interior. You'll hear a faint settling sound as the oven reaches temperature, and the heating element glow will stabilize. I always give the oven a few minutes after reaching target to ensure consistent heat. Failing to preheat can lead to uneven texture and longer bake times, so set the oven before rolling.
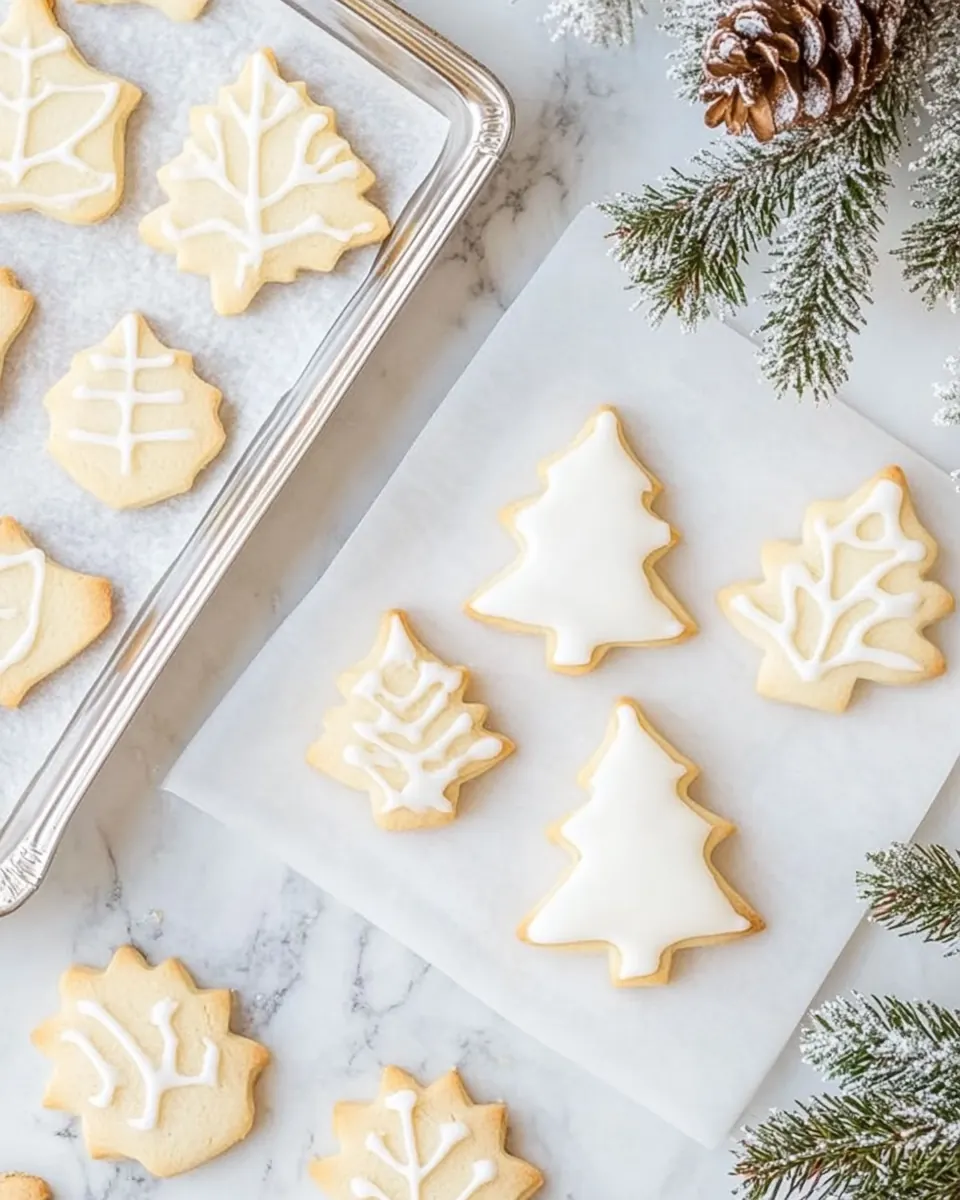
- Roll out dough – I go as thin as 1/8 inch, but I prefer about 1/4 inch thick. Cut into shapes, adding additional flour as necessary to avoid sticking. Place cookie shapes on a cookie sheet (no need to grease).: When rolling, the dough surface should feel cool and slightly floured but not dry. A 1/4 inch thickness gives a tender, slightly substantial bite while 1/8 inch will be crisper; choose based on preference. Press cutters straight down and lift cleanly to avoid dragging the dough. Lightly flour both the surface and the cutters to prevent sticking, and transfer shapes with a thin metal spatula if they feel fragile. Overflouring can toughen edges, so use sparingly.
- Bake just until the cookies start to turn pinky beige around the edges, around 8 minutes. Let cool for a couple of minutes on the baking sheet, then move to wire rack to cool completely.: Visually the cookies will go from pale to a gentle pinky beige at the rims, and the centers will no longer look wet. The aroma shifts to a slightly caramelized butter scent. Letting them rest briefly on the sheet helps them set so they do not split when moved. A common error is overbaking, which yields dry, hard cookies, so watch closely during the last minute.
- To make the icing, add the powdered sugar, 2 tablespoons milk, corn syrup, and the vanilla to a small mixing bowl. Use a wire whisk or a fork to mix it well. If it's too thick, add more milk a teaspoon at a time. You want the icing to be thin enough to be pipeable but thick enough to hold a line. Transfer the icing into a piping bag with tip or a Ziploc bag with the end snipped off, and pipe the icing onto the cookies. Let the icing sit until it hardens before storing or assembling on cookie plates.: The icing should be glossy and smooth, and when you dip a spoon in and lift, it should fall back in thick ribbons that level out. The corn syrup gives that sheen and prevents graininess. Adjust the milk a teaspoon at a time for control. When piping, steady pressure and a light wrist make clean lines. If you rush the piping, the icing can flood into unintended areas, so practice on a spare cookie first.
- Cookies keep up to one week in an airtight container.: When stored at room temperature in a sealed container, the cookies retain texture and the icing remains set. Layer them with parchment to avoid sticking, and keep away from direct sunlight or heat which can soften the icing. A typical mistake is stacking warm cookies, which traps steam and makes them limp, so always cool completely first.
Helpful Notes about Christmas Sugar Cookies Recipe
I keep notes brief and practical so you can get beautiful cookies with minimal fuss. Here are tested suggestions that I use often when making large batches or teaching others how to decorate.
- Handle the dough minimally, because overworking develops gluten which will toughen the cookies; fold crumbs into the center and press gently to form the dough instead of vigorous kneading.
- Weigh ingredients when possible, especially the all purpose flour, to maintain consistent texture across batches and avoid dense cookies caused by packed flour.
- Keep the dough cool while rolling, chilling on the counter briefly if it warms, to ensure shapes cut cleanly and do not stick to cutters.
- Test your icing consistency on a spare cookie before decorating the whole batch, adjusting with milk to achieve a balance between flow and hold for piping details.
- Use light corn syrup sparingly in the icing for shine and stability, but whisk thoroughly so it incorporates evenly and does not create streaks on the finished surface.
Serving Ideas for Christmas Sugar Cookies Recipe
These cookies are as versatile as they are festive. Below are serving ideas, storage suggestions, and occasions where these treats shine. Use the list to plan how to present them for parties, gifts, or snack platters.
- Party Platters, arrange assorted shapes on a large platter for gatherings, using contrast of colors to create a centerpiece that guests can nibble from throughout the evening.
- Cookie Exchange Gifts, package in clear boxes or tins with parchment layers, include a ribbon and a small label with the name Christmas Sugar Cookies Recipe for a thoughtful exchange item.
- Holiday Baking with Kids, set up a decorating station with piping bags and sprinkles so children can personalize their cookies, which makes for a fun and memorable activity.
- Tea or Coffee Pairings, serve these cookies with warm drinks where the citrus notes complement a bright tea, making for a pleasant afternoon snack.
- Make Ahead and Freeze, freeze unbaked cut shapes layered with parchment, then bake from frozen and add icing after cooling, which is perfect for last minute entertaining.
- Storage Tips, keep cooled, decorated cookies in an airtight container up to one week, separating layers with parchment to preserve icing and shape.
FAQ
Conclusion
These cookies stand out because they combine buttery richness, a bright hint of lemon, and a glossy, reliable icing that is both pipeable and floodable. Try the method with chilled dough and take your time decorating; the process is as rewarding as the result. I hope you enjoy sharing them with friends and family this season, and that they become part of your holiday traditions for years to come.

Christmas Sugar Cookies Recipe
Equipment
- Stand mixer or hand mixer
- Mixing Bowls
- Cookie Sheet
- Wire Rack
- Piping bag or Ziploc bag
- Sifter
Ingredients
- 2 cups unsalted butter, softened (4 sticks) Soften and cream to provide a rich, tender base and help incorporate air for lighter cookies; ensures even texture when combined with sugar and eggs.
- 1 cup granulated sugar Sweeten and aerate the dough for structure and slight crunch; assists with creaming to create a fine crumb and balanced sweetness.
- 2 egg yolks Enrich and bind the dough while providing tenderness and stability; yolks add fat and help achieve a tender, pliable cookie texture.
- 2 teaspoons lemon zest (from about 1 medium lemon) Zest and brighten the flavor by adding fresh citrus oils, cutting through richness and enhancing overall complexity in the dough.
- 3 cups sifted all-purpose flour Sift and structure the dough by providing the bulk of dry ingredients; contributes gluten for chew and is key to cookie shape and stability.
- Icing and decorations of your choice (if desired) Decorate and finish once cookies are baked, providing sweetness, color, and texture contrast; allows for creative presentation and additional flavor.
- 3 cups sifted powdered sugar Sift and thicken icings or fillings by providing a fine, smooth sweetness; dissolves easily to create a glossy, spreadable frosting.
- 2 -3 tablespoons milk Adjust consistency of icing or dough by adding small amounts of liquid to reach desired spreadability or pipeability; helps achieve smooth texture.
- 2 tablespoons light corn syrup Gloss and stabilize icings while preventing crystallization; adds shine and slight elasticity to frostings for graceful decorations.
- 1/2 teaspoon pure vanilla extract Flavor and enhance icings or dough with warm, familiar vanilla notes; melds other flavors and deepens overall taste profile.
Instructions
- Cream sugar and butter together in a large bowl of a stand mixer afixed with an S blade or with a hand mixer. Mix until pale yellow, fluffy, and well-incorporated.: The bowl should sound slightly hollow as the mixer runs and the mixture will lighten in color and texture, becoming pale and airy; this trapped air is what gives the cookies lift. You'll feel a silky, smooth texture under the paddle and see tiny ribbons when you lift it up, those ribbons dissolve back in slowly. If the mixture looks gritty, scrape the bowl and continue briefly until smooth. A common mistake is using butter that is too soft, which yields a greasy mixture, so aim for butter that dents with slight pressure but holds shape. The aroma at this stage is light and buttery, with a faint sweetness as the granulated sugar begins to dissolve.
- Add the egg yolks and lemon zest and mix until well-combined.: Right after adding the egg yolks and the fragrant oils from the lemon zest , the mixture gains a richer sheen and a subtle citrus perfume will bloom, signaling aromatic balance. Mixing should be gentle and just long enough to incorporate everything uniformly; overmixing at this point can lead to a tougher final cookie because the yolks increase emulsion. Watch for a homogenous batter where no streaks of yolk remain. A trap to avoid is tossing in the zest with high-speed mixing because that can spread bitter pith if present, so add zest and mix on low until combined.
- Sift the flour over the wet ingredients, and mix just until combined.: As you add the sifted all purpose flour , you'll notice the mixture transitioning from glossy to a more doughlike consistency. The sound changes from slapping to a soft thud as the flour absorbs moisture. Mix briefly, using a folding motion if working by hand, until you no longer see dry streaks of flour. This short mixing period helps preserve tenderness. Overworking here is the usual misstep, and it causes gluten development, which tightens texture, so stop as soon as combined.
- Knead together very gently until it forms enough of a ball to plop onto a piece of plastic wrap. Work the dough just enough to get it to stick together, but be careful not to overdo it. Honestly, I get so paranoid about overworking the dough that I pile the crumbs onto the plastic wrap, fold it up around the mound, and press it together that way.: The tactile cue you want is a cohesive, slightly tacky dough that holds when pressed, not a smooth elastic mass. When pressing in the plastic wrap method, you minimize handling and heat transfer from your hands, which helps keep the butter firm. If you squeeze too hard or knead extensively, the cookies may become dense and lose flakiness. The dough will feel cool and slightly crumbly until it binds, and that's normal; patience at this stage preserves tender crumb.
- Completely wrap the dough with the plastic wrap and chill the dough for at least three hours.: Chilling firms the butter so the shapes stay crisp in the oven, and it lets the flour hydrate for a cohesive texture. During this time the flavors meld and the dough becomes much easier to roll. I mark the time and place the wrapped dough on a flat tray so it chills evenly. If you try to roll warm dough, it will stick and spread; if you skip chilling altogether, the shapes will flatten in the oven, which is the most common error.
- When you're ready to pull the dough out and prepare it, preheat oven to 350°F (175°C).: Preheating the oven ensures that the cookies begin baking immediately, creating a quick edge set that preserves shape and yields that light, tender interior. You'll hear a faint settling sound as the oven reaches temperature, and the heating element glow will stabilize. I always give the oven a few minutes after reaching target to ensure consistent heat. Failing to preheat can lead to uneven texture and longer bake times, so set the oven before rolling.
- Roll out dough – I go as thin as 1/8 inch, but I prefer about 1/4 inch thick. Cut into shapes, adding additional flour as necessary to avoid sticking. Place cookie shapes on a cookie sheet (no need to grease).: When rolling, the dough surface should feel cool and slightly floured but not dry. A 1/4 inch thickness gives a tender, slightly substantial bite while 1/8 inch will be crisper; choose based on preference. Press cutters straight down and lift cleanly to avoid dragging the dough. Lightly flour both the surface and the cutters to prevent sticking, and transfer shapes with a thin metal spatula if they feel fragile. Overflouring can toughen edges, so use sparingly.
- Bake just until the cookies start to turn pinky beige around the edges, around 8 minutes. Let cool for a couple of minutes on the baking sheet, then move to wire rack to cool completely.: Visually the cookies will go from pale to a gentle pinky beige at the rims, and the centers will no longer look wet. The aroma shifts to a slightly caramelized butter scent. Letting them rest briefly on the sheet helps them set so they do not split when moved. A common error is overbaking, which yields dry, hard cookies, so watch closely during the last minute.
- To make the icing, add the powdered sugar, 2 tablespoons milk, corn syrup, and the vanilla to a small mixing bowl. Use a wire whisk or a fork to mix it well. If it's too thick, add more milk a teaspoon at a time. You want the icing to be thin enough to be pipeable but thick enough to hold a line. Transfer the icing into a piping bag with tip or a Ziploc bag with the end snipped off, and pipe the icing onto the cookies. Let the icing sit until it hardens before storing or assembling on cookie plates.: The icing should be glossy and smooth, and when you dip a spoon in and lift, it should fall back in thick ribbons that level out. The corn syrup gives that sheen and prevents graininess. Adjust the milk a teaspoon at a time for control. When piping, steady pressure and a light wrist make clean lines. If you rush the piping, the icing can flood into unintended areas, so practice on a spare cookie first.
- Cookies keep up to one week in an airtight container.: When stored at room temperature in a sealed container, the cookies retain texture and the icing remains set. Layer them with parchment to avoid sticking, and keep away from direct sunlight or heat which can soften the icing. A typical mistake is stacking warm cookies, which traps steam and makes them limp, so always cool completely first.
Notes
- Handle the dough minimally, because overworking develops gluten which will toughen the cookies; fold crumbs into the center and press gently to form the dough instead of vigorous kneading.
- Weigh ingredients when possible, especially the all purpose flour, to maintain consistent texture across batches and avoid dense cookies caused by packed flour.
- Keep the dough cool while rolling, chilling on the counter briefly if it warms, to ensure shapes cut cleanly and do not stick to cutters.
- Test your icing consistency on a spare cookie before decorating the whole batch, adjusting with milk to achieve a balance between flow and hold for piping details.
- Use light corn syrup sparingly in the icing for shine and stability, but whisk thoroughly so it incorporates evenly and does not create streaks on the finished surface.