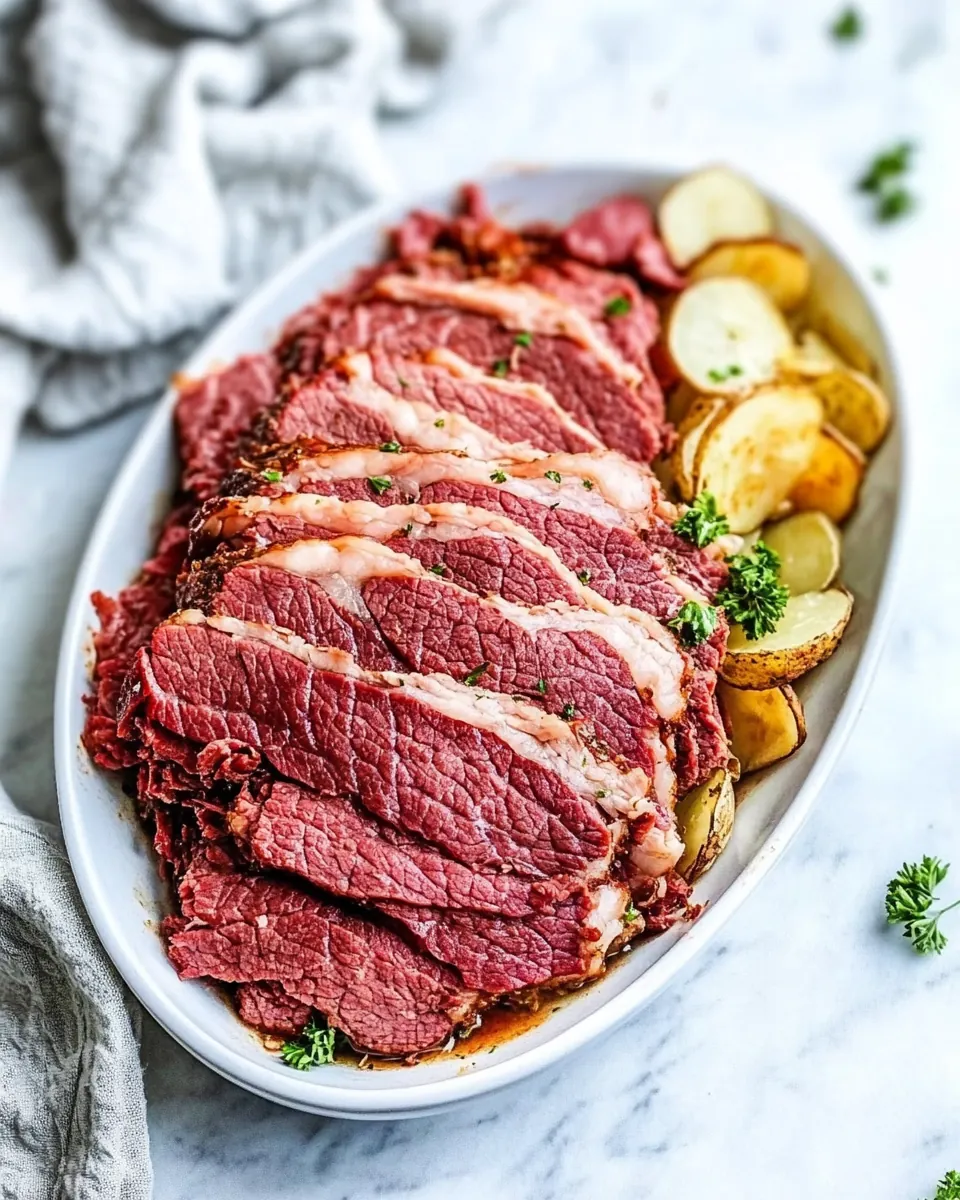
Corned Beef Brisket
Corned Beef Brisket has a way of transporting me back to slow mornings and the patient work of curing and simmering meat until it sings with flavor. The very first time I tackled this recipe I learned to respect time, salt, and the gentle coaxing of heat. I remember standing over a bubbling pot, the kitchen filling with the scent of garlic and pickling spice, thinking how this simple combination transforms a humble beef cut into something soulful and unpretentious.
Years later I still love how making Corned Beef Brisket feels like a ritual more than a chore. There’s comfort in the routine of dissolving salt and sugar, stirring in spices, and tucking a hefty brisket into a cold brine. Every step asks for patience, and that payoff comes when you slice into meat that is tender, pink, and aromatic. I tend to chat with friends while the brine does its work, swapping stories and checking the vessel like a proud gardener checking on seedlings.
Recipe Snapshot
13 hr 20 mins
20 mins
780 mins
Hard
350 kcal
American
Gluten-Free, AIP
Dinner
Stockpot, Brining bag or large bucket, Tongs, Paring knife
Why We Love This Corned Beef Brisket
Deep, Old School Flavor
I love how Corned Beef Brisket pulls from time honored curing techniques, giving the beef a robust, savory profile that you just cannot fake with shortcuts. The brine layers salt, sugar, and pickling spice so each bite is complex, gently sweet, and perfectly seasoned. I always notice that the aroma alone promises the kind of richness you want for a cozy family meal.
Hands Off Miracle
This recipe rewards patience more than babysitting. Once the brisket is submerged, most of the work is waiting, which frees me to prepare sides or relax. I like recipes that let you do other things and still deliver an impressive centerpiece at dinner, and this is one of them.
Versatile and Crowd Friendly
We serve Corned Beef Brisket sliced thin for sandwiches, alongside steamed vegetables, or as the main event for celebratory lunches. It travels well to gatherings and holds up under reheating, so I often make it when I know I will need extra portions for guests. The texture stays forgiving, and the flavors bloom over a day or two in the fridge.
Comfort Food with Technique
I appreciate recipes that teach technique while delivering comfort. Brining teaches temperature control, and the slow simmer demonstrates how low heat and time change tough connective tissue into fork tender silk. Practicing these steps builds confidence for other long cook projects.
Hands On, Yet Adaptable
There are small choices you can make to tailor the final dish, like adjusting the pickling spice to your taste. I like when a recipe provides a reliable backbone yet leaves room for gentle personalization. That balance is why I keep coming back to this process, especially when I want a satisfying, homey result that feels earned.
Ingredients You’ll Need for Corned Beef Brisket
These ingredients form a simple, focused brine and the finishing pot that yields classic Corned Beef Brisket. The key players are the salt and curing salt for preservation and color, the sugars to balance the salt, and the pickling spices to build aromatic complexity. Together they coax flavor deep into the brisket and set up a gentle simmer that turns collagen into tenderness.
- 12 cups water: Provide liquid medium for brining and fully submerge the brisket; allows salts and spices to distribute evenly throughout the meat. Use cool or chilled water to control temperature and prevent premature bacterial growth during the curing process.
- 1 1/2 cups Morton’s Coarse Kosher Salt: Add savory saltiness and preserve the meat by drawing moisture out while seasoning; contributes to texture and flavor balance in the brine. Use coarse kosher salt to dissolve reliably and enhance penetration into the brisket fibers.
- 4 cloves garlic minced: Contribute a pungent, aromatic garlic flavor when minced and incorporated into the brine or rubbed on the meat; helps build complexity in the final corned beef. Minced form releases more oils and disperses flavor more evenly than whole cloves.
- 1/2 cup light brown sugar: Provide sweetness to balance the salty and spiced elements of the brine and promote browning during cooking; melts into the brine to integrate flavor. Use light brown sugar for its mild molasses notes that complement pickling spices.
- 2 tablespoons pink curing salt: Supply nitrite-based curing agents to prevent bacterial growth, retain the meat's pink color, and develop characteristic corned beef flavor. Use measured amounts carefully and follow curing guidelines to ensure food safety.
- 3 tablespoons pickling spice divided: Introduce warm, aromatic notes like coriander, mustard seed, and peppercorns to infuse the brine; divided use allows layering of flavor during curing and cooking. Add part to the brine and reserve part for cooking to maximize depth.
- to 4-pound flat cut beef brisket: Describe the target protein size for which the recipe quantities are scaled; selecting a 4-pound flat cut ensures proper brine-to-meat ratio and even curing. Trim excess fat if desired, but maintain enough fat for flavor and moisture retention during cooking.
- 1 tablespoon pickling spice: Provide an additional burst of pickling spice used specifically for cooking or finishing, concentrating flavor in a specific step. Use as a smaller quantity to adjust final spice intensity without overpowering the brine profile.
- 2 bay leaves: Contribute subtle herbal and aromatic bay leaf notes to the brine or cooking liquid, enhancing savory complexity. Bruising the leaves before adding can release more essential oils for better infusion.
- 4 garlic cloves peeled: Offer fresh garlic aroma and a milder cooked garlic flavor when peeled and added to the cooking liquid; whole cloves impart a softer, sweeter garlic character than minced garlic. Place cloves in the simmering pot to gently flavor the meat during cooking.
- 4 cups ice cubes (1.5 pounds ice): Provide cold thermal mass to rapidly chill the brine and brisket after cooking or to maintain a safe cold temperature during brining; helps prevent bacterial growth. Use measured ice to control final brine temperature when combining with warm ingredients.
Putting Together Corned Beef Brisket
Bringing this dish to life is an exercise in timing and attention, but the technique is straightforward. I like to set up each component ahead so the brining and simmering flow without scrambling. Below I expand each direction into detailed steps, sharing sensory cues, reasons behind choices, and common pitfalls to avoid.
- In an 8-quart or larger stockpot, combine 12 cups water, kosher salt, garlic, brown sugar, pink salt, and 3 tablespoons of pickling spice.: The moment you stir these elements together the kitchen fills with a bright, spiced aroma that signals the start of the cure; you should notice the sugar and salts begin to dissolve and the pickling spice releases a toasted aroma. This mixture is the brine that will penetrate the brisket , so even distribution matters to ensure balanced curing. A common mistake is failing to fully dissolve the salt or sugar which can cause uneven seasoning pockets, so stir until the solution looks uniform and you no longer see granules. Use a large, nonreactive pot so the acid and salts do not react with the metal, and scrape the pot sides occasionally to incorporate any settled spices.
- Bring the liquid to a boil, stirring until the sugar and salt dissolve. Cover the pot with a lid to make the liquid boil faster, checking on it every 5 minutes. Remove from the heat and let cool for 30 minutes.: As the brine reaches a boil you will hear steady bubbling and smell the melding spices intensify; this is when the flavors bloom and the dissolved sugar and salts will be fully incorporated. Covering the pot traps heat and speeds the process, but watch the pot so it does not scorch at the bottom. After you remove it from heat, letting it cool for 30 minutes prevents shock to the brine and preserves texture; adding a brisket to scalding liquid can partially cook the outside which interferes with proper penetration. A frequent oversight is not allowing enough cooling time, so use a thermometer if unsure; you want the brine cool enough that it will not raise the internal temperature of the brisket .
- Line a large bucket, tub, pot, the insert of a crockpot, cooler, or other similar vessel large enough to hold the brisket and brine snugly with a brining bag. Add the ice.: The brining bag protects the meat from direct contact with container surfaces and makes cleanup easy, while the ice ensures the final brine temperature is safe for food handling. You will feel the cold bite of the ice as it softens the lingering heat; this chilling step is critical for food safety. A common error is using a container that is too small which forces the meat to float and partially expose it; choose a vessel that allows the brisket to lie flat and be fully submerged.
- Pour the semi-cooled brining liquid on top (if it is still a little warm, the ice will melt and cool it down the rest of the way). Allow this mixture to sit and come to room temperature, about 1 hour.: Pouring now lets the ice rapidly bring the brine into a safe temperature range while the spices continue to diffuse; you should notice steam diminish and the surface cooling to lukewarm. Letting the assembled brine sit for about an hour equalizes temperatures and avoids hot spots that can partially cook the meat. If you skip this equilibration you risk uneven brining and potential safety issues, so be patient and trust the hour for a steady result.
- Place the brisket into the fully cooled liquid (your patience is worth it for food safety!) and submerge so it’s covered in liquid. If the brisket floats, weigh it down with a heavy pot, bag of ice, or similar (we top ours with a stack of dinner plates that is about the circumference of the bucket; if you are using your crockpot, you can flip the lid upside down and use that).: When you lower the brisket in, you will hear a soft plop and see the surface tension ripple as the meat sinks; submersion ensures the cure reaches all parts of the cut. If you find the brisket floating, weigh it down with a heavy pot, a bag of ice, or plates so the entire surface remains in contact with the brine. A frequent misstep is leaving parts of the meat exposed, which leads to uneven curing and a mottled final texture, so double check that the whole piece is underwater and well weighted.
- Let the brisket brine for at least 5 days (or up to 7 days), ensuring that it stays below 40 degrees but above 32 degrees so that it does not freeze. You can place it in a refrigerator, in your garage, or outside if it's cold enough (just make sure it's not below freezing).: Over the next several days the brine will pull flavors into the meat and slowly alter the texture; you may notice a faint tang on the surface as the cure works. Keeping the temperature steady is essential to prevent bacterial growth while allowing the curing chemistry to proceed. People sometimes underestimate the need for refrigeration or consistent cold, so arrange space in your fridge or a reliably cool area to maintain that 32 to 40 degree band. If the environment dips below freezing you risk damaging the meat structure, and if it gets too warm you risk spoilage.
- When ready to cook, remove the brisket from the brine. Discard the brine. Rinse the brisket all over, then pat very dry. Trim off any excess fat with a paring knife, being careful not to cut away any of the meat itself.: After brining the surface will feel slightly firmer and smell deeply seasoned; rinsing removes excess surface salt and residual spices which prevents an overly salty finish. Use a clean towel to pat the brisket dry so it sears and simmers more evenly later. Trim any fat to your preference but avoid cutting into the meat itself as it will reduce yield and texture. A common mistake is over trimming which removes valuable fat that keeps the meat moist during long cooking.
- Place the brined brisket in a large stockpot (6 quarts or larger). Add water until it is at least 1 inch above the brisket. Add garlic cloves, bay leaf, and 1 tablespoon pickling spice.: Filling the pot so the liquid comes an inch above the meat ensures even heat transfer during simmering and the added whole garlic and bay leaf will perfume the cooking liquid. As the pot heats the surface will start to shimmer and small bubbles will gather at the edges; that is your cue to bring it down to a gentle simmer. People sometimes underestimate the need to fully cover the meat, which can dry out exposed areas, so check the liquid level before you start cooking.
- Bring the liquid to a boil over high heat. Reduce the heat, keeping the liquid at a low simmer. Cover the pot and let simmer for about 3 hours, until the brisket is fork tender and registers 180 degrees F to 190 degrees F on an instant read thermometer.: As it simmers the aroma deepens and the sound turns from a boil to a soft, steady whisper of bubbles; that quiet simmer is what slowly breaks down connective tissue. The brisket will start to give under a fork and develop a tender pull when done. A common error is keeping the heat too high which makes the meat tough as the proteins seize, so maintain a low simmer and test early to avoid overcooking.
- Turn the heat off and allow the meat to cool for 10 minutes. Use tongs to remove the corned beef to a cutting board. Remove 2 cups of the liquid from the pot. Strain the liquid into a bowl and set aside. Discard the remaining liquid from the stockpot. Rinse the pot.: Resting the brisket lets juices redistribute, and the cooled meat is easier and cleaner to handle. Reserving a bit of the cooking liquid concentrated with spice gives you a flavorful base for sauces or to keep slices moist. A typical oversight is discarding all the liquid which wastes a useful cooking concentrate, so strain and save the measured portion for finishing or storage.
- Allow the corned beef to sit at room temperature for 20 minutes.: This short rest lets the meat approach a stable slicing temperature, producing neater, more uniform cuts. You will notice the surface lose its immediate heat and the aroma mellow as the internal juices settle. Slicing too soon causes juices to spill out and produce dry slices, so resist the urge and wait the full twenty minutes.
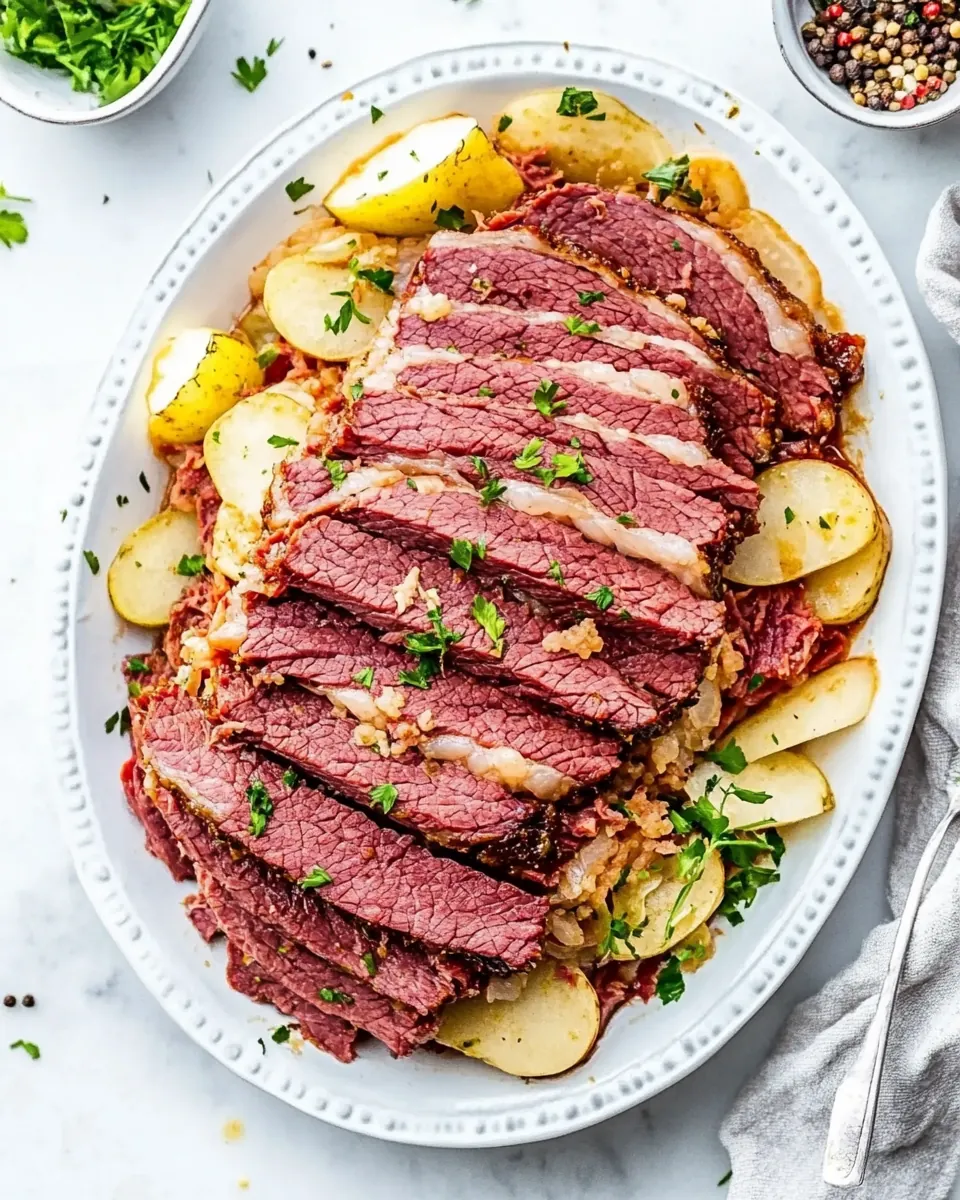
- When you're ready to slice the corned beef, cut against the grain into 1/4 inch strips.: Slicing against the grain shortens muscle fibers and yields tender, shreddable pieces that are pleasant to bite into. You should see the grain direction clearly; a sharp knife will glide and create clean edges. Cutting with the grain results in chewier pieces, which is a common mistake, so always confirm the fiber direction before you slice.
Tips and Variations
I like to keep a few variations and helpful reminders close at hand when making Corned Beef Brisket. These tips cover timing, spice balance, and serving ideas that help you personalize the result while staying safe and consistent.
- Adjust pickling spice intensity If your pickling spice is heavy on any one note like allspice, remove a few whole berries before using to prevent a single spice from dominating the profile, which keeps the overall aroma balanced and nuanced.
- Monitor brine temperature Always ensure the brine is fully chilled before adding the brisket, using ice or a quick chill in the fridge, to avoid partial cooking and to preserve safety while the cure penetrates.
- Trim, but don’t over trim Leave a thin layer of fat on the brisket to protect the meat during long simmering; removing too much fat can lead to drier slices after cooking.
- Reserve cooking liquid Save two cups of the strained cooking liquid to use when reheating slices or to make a light sauce, as it carries concentrated spice and beef notes that elevate leftovers.
- Slice when slightly cooled Let the meat rest and cool for the recommended time before slicing to retain juices and produce clean, even slices that hold together when served.
Accompaniments for Corned Beef Brisket
This Corned Beef Brisket pairs with many classic sides and can be dressed for different occasions. Below are ideas for serving, storage, and seasonal occasions to help you plan the meal and make the most of leftovers.
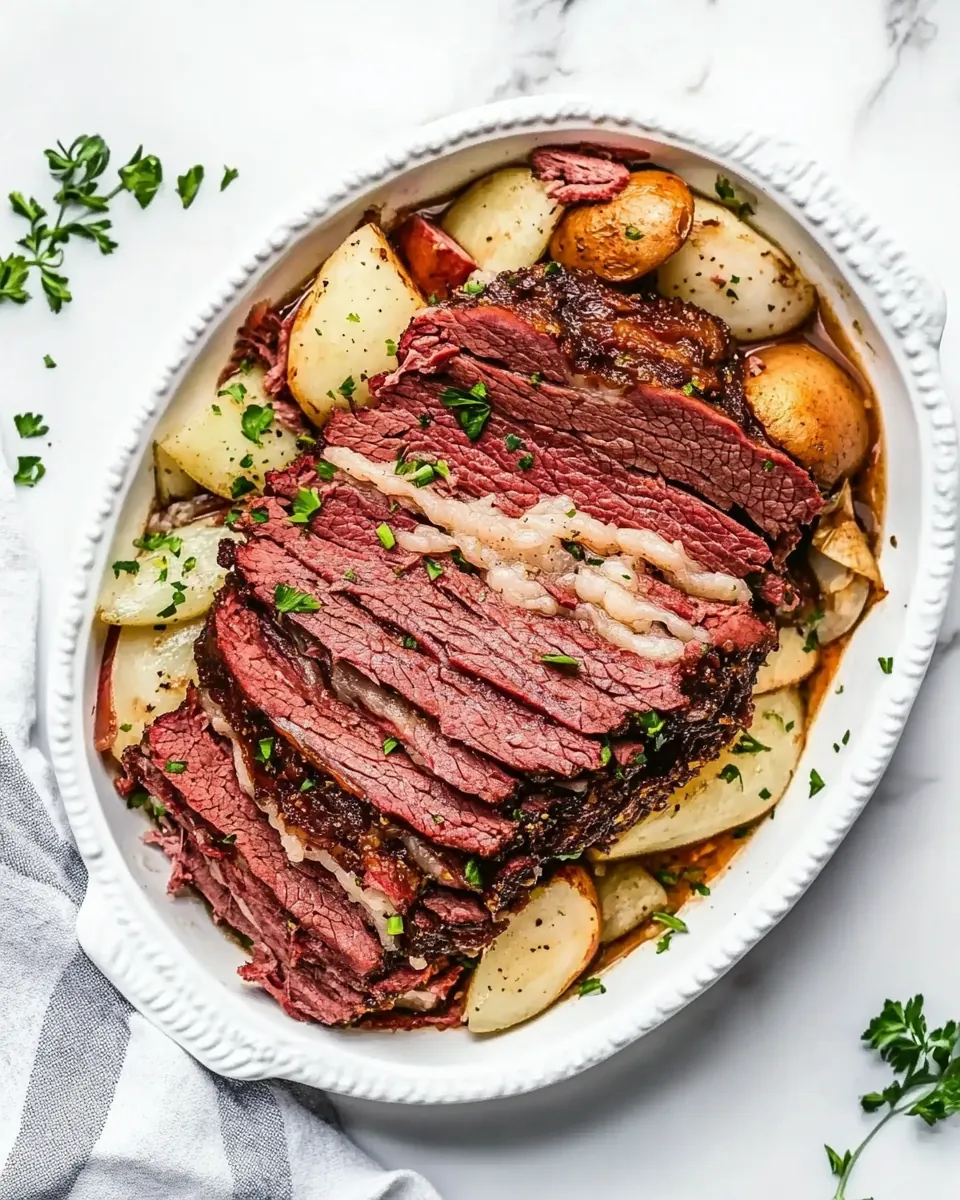
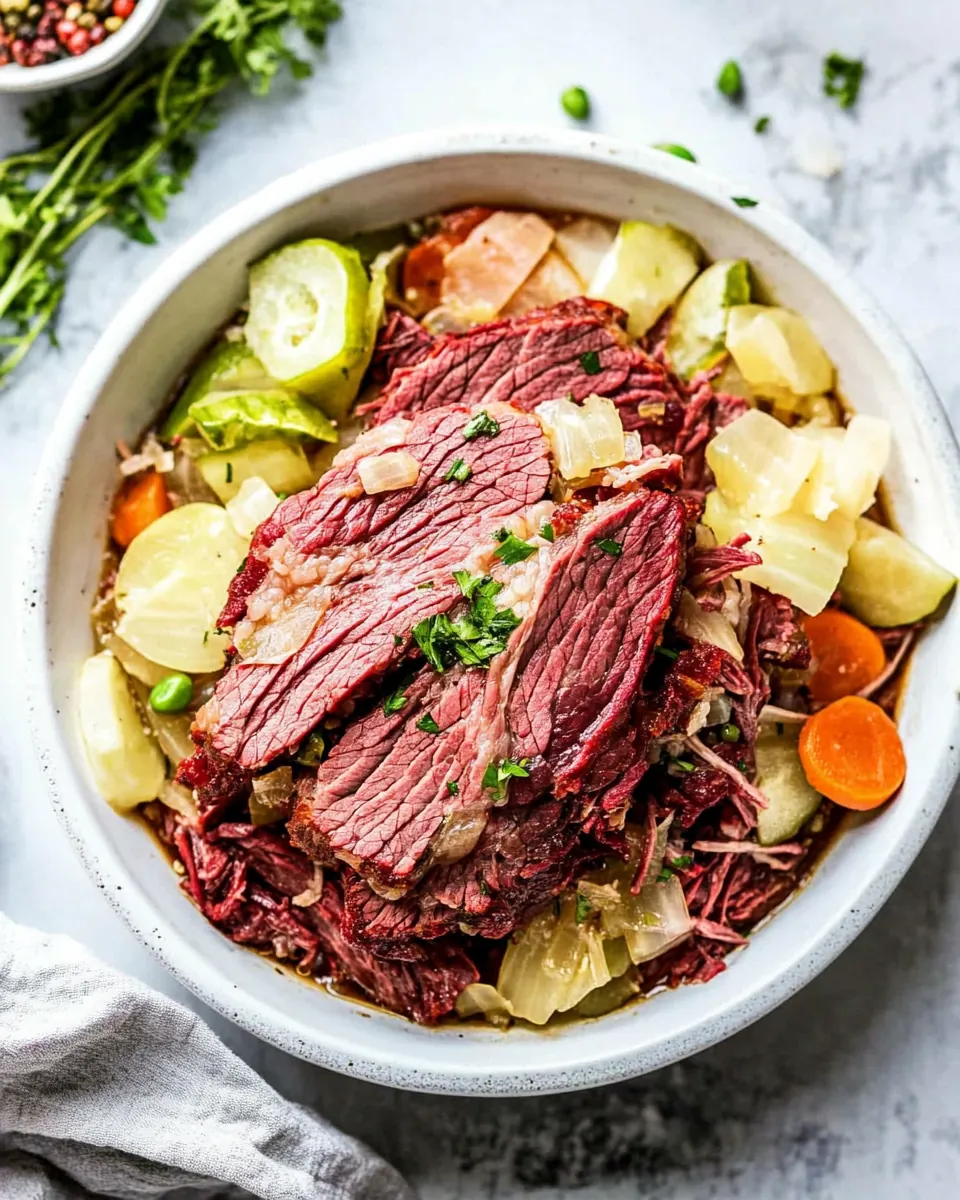
- Classic boiled vegetables Serve with tender boiled potatoes and carrots, the mellow starch and sweet root vegetables absorb the savory juices and make the plate feel traditional and satisfying.
- Cabbage and greens Lightly steamed or braised cabbage complements the rich meat with a crisp vegetal contrast that brightens each bite and works well for family dinners.
- Sandwiches and sliders Thinly sliced brisket makes fantastic sandwiches on sturdy bread; add mustard and pickles if you like a tangy counterpoint for casual lunches or gatherings.
- Special occasion centerpiece For holiday lunches or weekend dinners, place the whole sliced brisket on a platter with reserved cooking liquid for guests to drizzle, creating a warm, communal serving style.
- Storage tips Refrigerate sliced brisket in an airtight container with a splash of the reserved cooking liquid to keep slices moist; it will hold up well for several days and reheats gently in a low oven or on the stovetop.
- Seasonal pairings In winter months, pair with root vegetable mashes and hearty breads; the warming spices and full mouthfeel feel especially comforting when the weather is cold.
FAQ
Conclusion
Corned Beef Brisket stands out for its deep cured flavor, patient technique, and comforting, fork tender results. Try it when you want a hands off, satisfying centerpiece that rewards a little planning. The process teaches respect for time and temperature, and the payoff is slices of richly flavored meat that make simple meals feel special. Share the work with a friend, stash extra for easy lunches, and enjoy the way such humble ingredients transform with care.
Corned Beef Brisket
Equipment
- Stockpot
- Brining bag or large bucket
- Tongs
- Paring knife
Ingredients
- 12 cups water Provide liquid medium for brining and fully submerge the brisket; allows salts and spices to distribute evenly throughout the meat. Use cool or chilled water to control temperature and prevent premature bacterial growth during the curing process.
- 1 1/2 cups Morton’s Coarse Kosher Salt Add savory saltiness and preserve the meat by drawing moisture out while seasoning; contributes to texture and flavor balance in the brine. Use coarse kosher salt to dissolve reliably and enhance penetration into the brisket fibers.
- 4 cloves garlic minced Contribute a pungent, aromatic garlic flavor when minced and incorporated into the brine or rubbed on the meat; helps build complexity in the final corned beef. Minced form releases more oils and disperses flavor more evenly than whole cloves.
- 1/2 cup light brown sugar Provide sweetness to balance the salty and spiced elements of the brine and promote browning during cooking; melts into the brine to integrate flavor. Use light brown sugar for its mild molasses notes that complement pickling spices.
- 2 tablespoons pink curing salt Supply nitrite-based curing agents to prevent bacterial growth, retain the meat's pink color, and develop characteristic corned beef flavor. Use measured amounts carefully and follow curing guidelines to ensure food safety.
- 3 tablespoons pickling spice divided Introduce warm, aromatic notes like coriander, mustard seed, and peppercorns to infuse the brine; divided use allows layering of flavor during curing and cooking. Add part to the brine and reserve part for cooking to maximize depth.
- to 4-pound flat cut beef brisket Describe the target protein size for which the recipe quantities are scaled; selecting a 4-pound flat cut ensures proper brine-to-meat ratio and even curing. Trim excess fat if desired, but maintain enough fat for flavor and moisture retention during cooking.
- 1 tablespoon pickling spice Provide an additional burst of pickling spice used specifically for cooking or finishing, concentrating flavor in a specific step. Use as a smaller quantity to adjust final spice intensity without overpowering the brine profile.
- 2 bay leaves Contribute subtle herbal and aromatic bay leaf notes to the brine or cooking liquid, enhancing savory complexity. Bruising the leaves before adding can release more essential oils for better infusion.
- 4 garlic cloves peeled Offer fresh garlic aroma and a milder cooked garlic flavor when peeled and added to the cooking liquid; whole cloves impart a softer, sweeter garlic character than minced garlic. Place cloves in the simmering pot to gently flavor the meat during cooking.
- 4 cups ice cubes (1.5 pounds ice) Provide cold thermal mass to rapidly chill the brine and brisket after cooking or to maintain a safe cold temperature during brining; helps prevent bacterial growth. Use measured ice to control final brine temperature when combining with warm ingredients.
Instructions
- In an 8-quart or larger stockpot, combine 12 cups water, kosher salt, garlic, brown sugar, pink salt, and 3 tablespoons of pickling spice.: The moment you stir these elements together the kitchen fills with a bright, spiced aroma that signals the start of the cure; you should notice the sugar and salts begin to dissolve and the pickling spice releases a toasted aroma. This mixture is the brine that will penetrate the brisket , so even distribution matters to ensure balanced curing. A common mistake is failing to fully dissolve the salt or sugar which can cause uneven seasoning pockets, so stir until the solution looks uniform and you no longer see granules. Use a large, nonreactive pot so the acid and salts do not react with the metal, and scrape the pot sides occasionally to incorporate any settled spices.
- Bring the liquid to a boil, stirring until the sugar and salt dissolve. Cover the pot with a lid to make the liquid boil faster, checking on it every 5 minutes. Remove from the heat and let cool for 30 minutes.: As the brine reaches a boil you will hear steady bubbling and smell the melding spices intensify; this is when the flavors bloom and the dissolved sugar and salts will be fully incorporated. Covering the pot traps heat and speeds the process, but watch the pot so it does not scorch at the bottom. After you remove it from heat, letting it cool for 30 minutes prevents shock to the brine and preserves texture; adding a brisket to scalding liquid can partially cook the outside which interferes with proper penetration. A frequent oversight is not allowing enough cooling time, so use a thermometer if unsure; you want the brine cool enough that it will not raise the internal temperature of the brisket .
- Line a large bucket, tub, pot, the insert of a crockpot, cooler, or other similar vessel large enough to hold the brisket and brine snugly with a brining bag. Add the ice.: The brining bag protects the meat from direct contact with container surfaces and makes cleanup easy, while the ice ensures the final brine temperature is safe for food handling. You will feel the cold bite of the ice as it softens the lingering heat; this chilling step is critical for food safety. A common error is using a container that is too small which forces the meat to float and partially expose it; choose a vessel that allows the brisket to lie flat and be fully submerged.
- Pour the semi-cooled brining liquid on top (if it is still a little warm, the ice will melt and cool it down the rest of the way). Allow this mixture to sit and come to room temperature, about 1 hour.: Pouring now lets the ice rapidly bring the brine into a safe temperature range while the spices continue to diffuse; you should notice steam diminish and the surface cooling to lukewarm. Letting the assembled brine sit for about an hour equalizes temperatures and avoids hot spots that can partially cook the meat. If you skip this equilibration you risk uneven brining and potential safety issues, so be patient and trust the hour for a steady result.
- Place the brisket into the fully cooled liquid (your patience is worth it for food safety!) and submerge so it’s covered in liquid. If the brisket floats, weigh it down with a heavy pot, bag of ice, or similar (we top ours with a stack of dinner plates that is about the circumference of the bucket; if you are using your crockpot, you can flip the lid upside down and use that).: When you lower the brisket in, you will hear a soft plop and see the surface tension ripple as the meat sinks; submersion ensures the cure reaches all parts of the cut. If you find the brisket floating, weigh it down with a heavy pot, a bag of ice, or plates so the entire surface remains in contact with the brine. A frequent misstep is leaving parts of the meat exposed, which leads to uneven curing and a mottled final texture, so double check that the whole piece is underwater and well weighted.
- Let the brisket brine for at least 5 days (or up to 7 days), ensuring that it stays below 40 degrees but above 32 degrees so that it does not freeze. You can place it in a refrigerator, in your garage, or outside if it's cold enough (just make sure it's not below freezing).: Over the next several days the brine will pull flavors into the meat and slowly alter the texture; you may notice a faint tang on the surface as the cure works. Keeping the temperature steady is essential to prevent bacterial growth while allowing the curing chemistry to proceed. People sometimes underestimate the need for refrigeration or consistent cold, so arrange space in your fridge or a reliably cool area to maintain that 32 to 40 degree band. If the environment dips below freezing you risk damaging the meat structure, and if it gets too warm you risk spoilage.
- When ready to cook, remove the brisket from the brine. Discard the brine. Rinse the brisket all over, then pat very dry. Trim off any excess fat with a paring knife, being careful not to cut away any of the meat itself.: After brining the surface will feel slightly firmer and smell deeply seasoned; rinsing removes excess surface salt and residual spices which prevents an overly salty finish. Use a clean towel to pat the brisket dry so it sears and simmers more evenly later. Trim any fat to your preference but avoid cutting into the meat itself as it will reduce yield and texture. A common mistake is over trimming which removes valuable fat that keeps the meat moist during long cooking.
- Place the brined brisket in a large stockpot (6 quarts or larger). Add water until it is at least 1 inch above the brisket. Add garlic cloves, bay leaf, and 1 tablespoon pickling spice.: Filling the pot so the liquid comes an inch above the meat ensures even heat transfer during simmering and the added whole garlic and bay leaf will perfume the cooking liquid. As the pot heats the surface will start to shimmer and small bubbles will gather at the edges; that is your cue to bring it down to a gentle simmer. People sometimes underestimate the need to fully cover the meat, which can dry out exposed areas, so check the liquid level before you start cooking.
- Bring the liquid to a boil over high heat. Reduce the heat, keeping the liquid at a low simmer. Cover the pot and let simmer for about 3 hours, until the brisket is fork tender and registers 180 degrees F to 190 degrees F on an instant read thermometer.: As it simmers the aroma deepens and the sound turns from a boil to a soft, steady whisper of bubbles; that quiet simmer is what slowly breaks down connective tissue. The brisket will start to give under a fork and develop a tender pull when done. A common error is keeping the heat too high which makes the meat tough as the proteins seize, so maintain a low simmer and test early to avoid overcooking.
- Turn the heat off and allow the meat to cool for 10 minutes. Use tongs to remove the corned beef to a cutting board. Remove 2 cups of the liquid from the pot. Strain the liquid into a bowl and set aside. Discard the remaining liquid from the stockpot. Rinse the pot.: Resting the brisket lets juices redistribute, and the cooled meat is easier and cleaner to handle. Reserving a bit of the cooking liquid concentrated with spice gives you a flavorful base for sauces or to keep slices moist. A typical oversight is discarding all the liquid which wastes a useful cooking concentrate, so strain and save the measured portion for finishing or storage.
- Allow the corned beef to sit at room temperature for 20 minutes.: This short rest lets the meat approach a stable slicing temperature, producing neater, more uniform cuts. You will notice the surface lose its immediate heat and the aroma mellow as the internal juices settle. Slicing too soon causes juices to spill out and produce dry slices, so resist the urge and wait the full twenty minutes.
- When you're ready to slice the corned beef, cut against the grain into 1/4 inch strips.: Slicing against the grain shortens muscle fibers and yields tender, shreddable pieces that are pleasant to bite into. You should see the grain direction clearly; a sharp knife will glide and create clean edges. Cutting with the grain results in chewier pieces, which is a common mistake, so always confirm the fiber direction before you slice.
Notes
- Adjust pickling spice intensity If your pickling spice is heavy on any one note like allspice, remove a few whole berries before using to prevent a single spice from dominating the profile, which keeps the overall aroma balanced and nuanced.
- Monitor brine temperature Always ensure the brine is fully chilled before adding the brisket, using ice or a quick chill in the fridge, to avoid partial cooking and to preserve safety while the cure penetrates.
- Trim, but don’t over trim Leave a thin layer of fat on the brisket to protect the meat during long simmering; removing too much fat can lead to drier slices after cooking.
- Reserve cooking liquid Save two cups of the strained cooking liquid to use when reheating slices or to make a light sauce, as it carries concentrated spice and beef notes that elevate leftovers.
- Slice when slightly cooled Let the meat rest and cool for the recommended time before slicing to retain juices and produce clean, even slices that hold together when served.