Christmas Shortbread Cookies
Christmas Shortbread Cookies have been my go to when I want something buttery, simple, and a little nostalgic at the holidays.
I remember the first time I made these with my neighbor, who taught me how important proper creaming is, and how the smell of warm butter and brown sugar fills a house with memory. We chatted about ornaments, laughed when dough stuck to the rolling pin, and agreed that a dusting of powdered sugar made everything look like snow. Over the years, I have tweaked small things, like using a touch of almond extract or chilling the dough longer so the cookies keep their shape. Those little adjustments changed the texture from good to unforgettable.
When friends ask for a reliable cookie to bring to a party, these Christmas Shortbread Cookies top my list. They are forgiving, travel well, and let you be creative with cutters, glazes, and sprinkles. I often make one batch plain and another decorated, because some guests want simple buttery rounds, while others prefer festive, iced shapes. This recipe is one of those classics that feels fancy without requiring fuss, and I still smile at the crackle of icing setting while a tray cools on the counter.
Recipe Snapshot
29 mins
15 mins
14 mins
Medium
150 kcal
American
Gluten-Free, Low FODMAP
Desserts
Mixing bowl, Standing mixer, Baking sheet, Parchment paper, Wire rack
Why This Christmas Shortbread Cookies Shines
Buttery, Classic Flavor
These Christmas Shortbread Cookies deliver a pure, buttery profile that is the whole point of shortbread, and I love how the combination of unsalted butter and brown sugar creates depth without overpowering the cookie. The texture is tender yet substantial, which makes each bite both melt in your mouth and satisfying.
Flexible Decorating Options
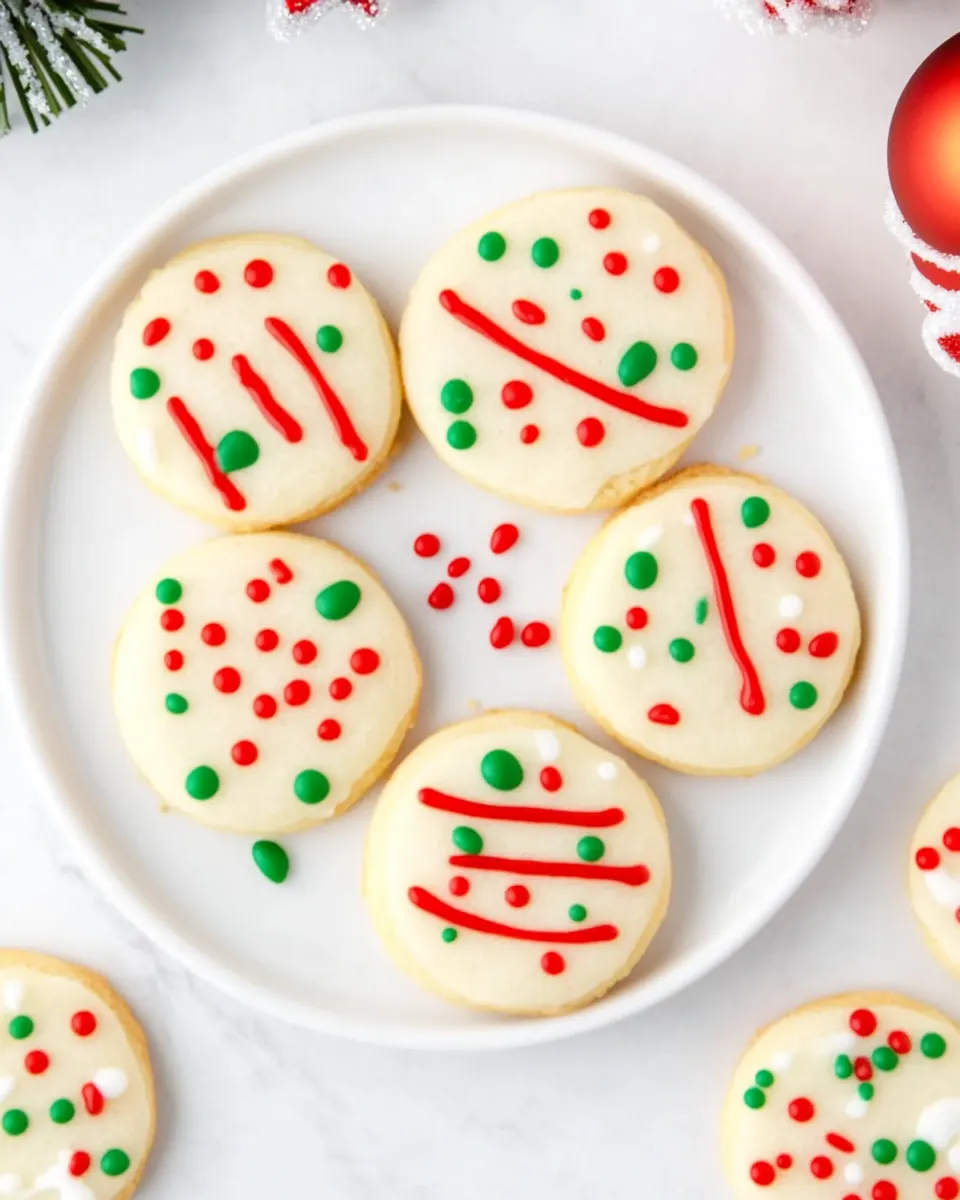
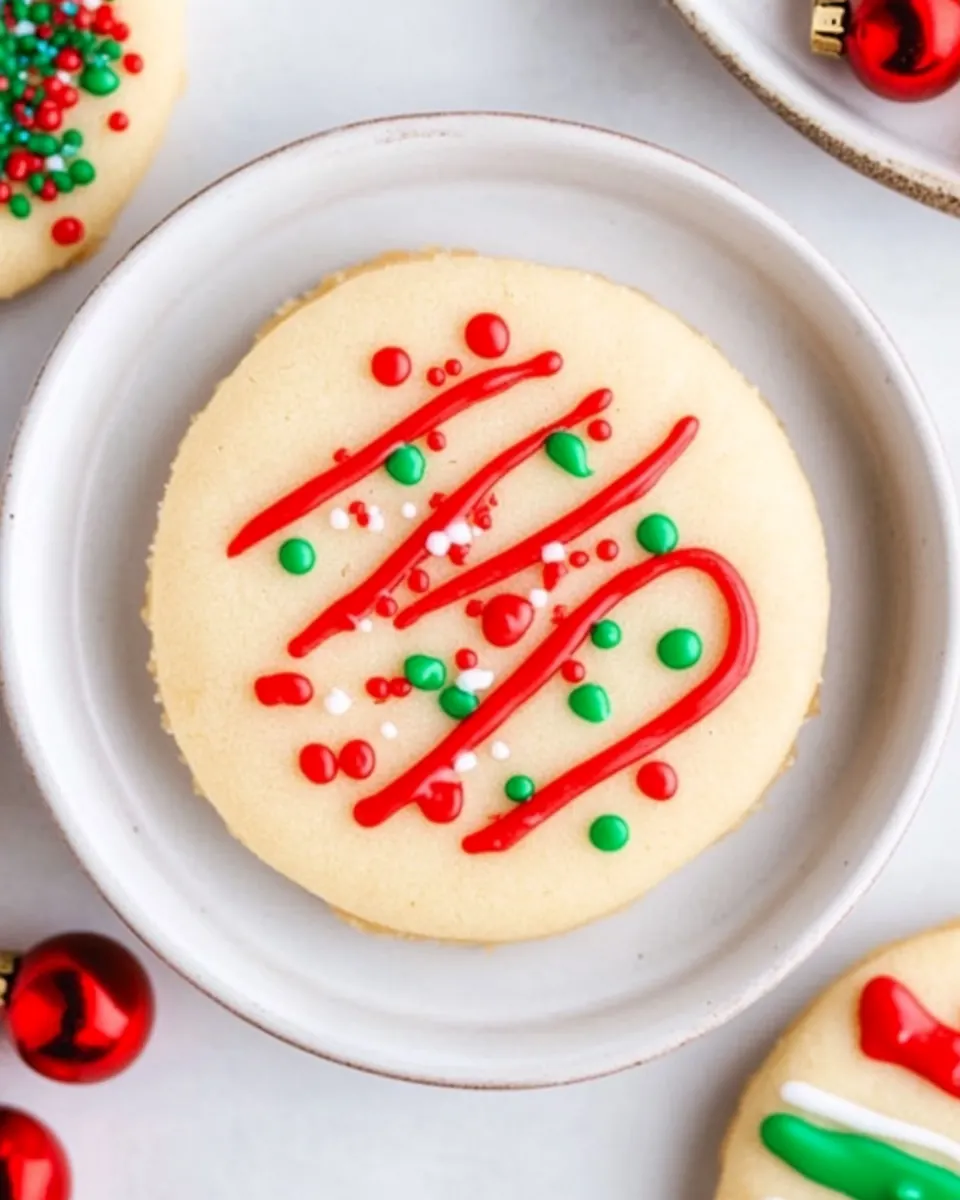
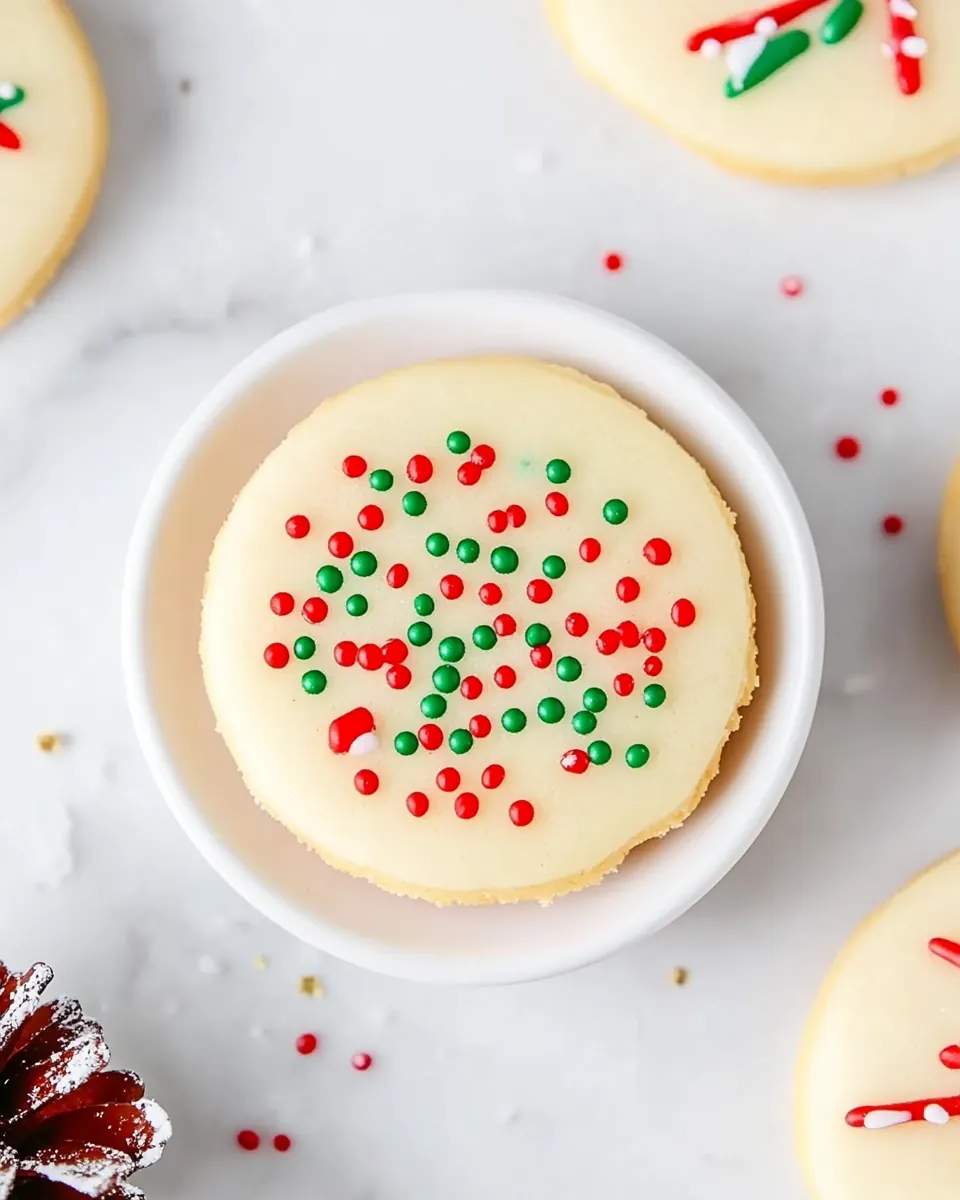
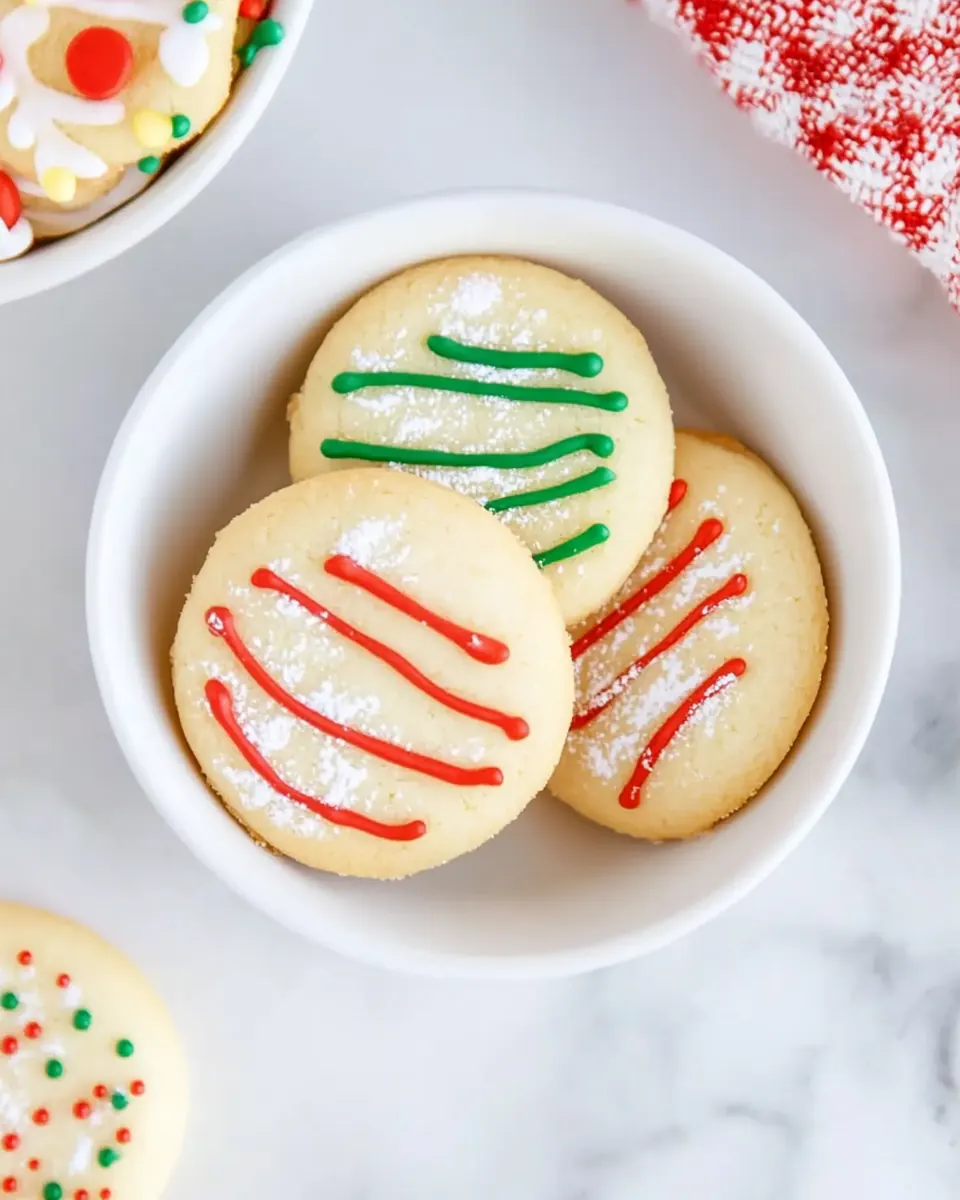
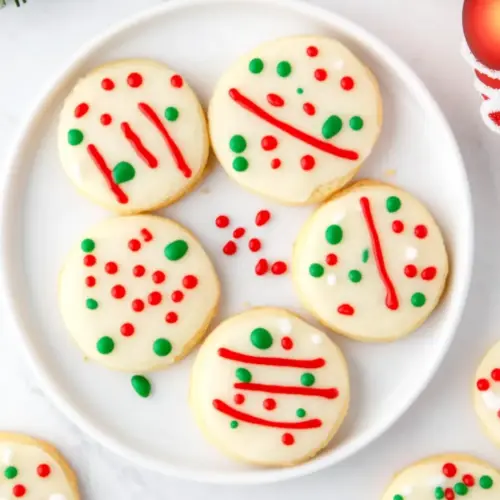
I appreciate recipes that let you personalize without breaking the base. Here, you can slice a log for quick rounds or roll and cut shapes for winter cookies to decorate. The simple icing made from powdered sugar and cream clings perfectly, making these cookies ideal for festive looks or simple finishes.
Make Ahead Friendly
Chilling changes everything, and these cookies are delightfully make ahead. I often prepare dough the day before holiday baking and slice off what I need. It frees up the morning of a gathering, and the flavor actually deepens in the fridge or freezer.
Perfect for Gifting and Sharing
I find these cookies travel well in an airtight tin and look charming arranged in a box. Because they keep for several days and can be frozen, they make excellent edible gifts that show thoughtfulness without too much effort.
Reliable Technique for Home Bakers
From creaming the butter and sugar to watching the edges brown just slightly, the method teaches small techniques that improve overall baking skills. I point out little sensory cues as you go, such as the way the dough looks and feels, so you can repeat success each season.
What You Need for Christmas Shortbread Cookies
These ingredients are intentionally few and harmonious. The recipe relies on high quality butter and properly creamed sugar to create a tender, melt in your mouth shortbread. Flour and salt form the structure, while a small amount of liquid and extracts round out the flavor and texture. Each player is essential, and they work together to yield a simple, festive cookie that holds shape and accepts icing beautifully.
- 1 cup unsalted butter, (2 sticks) softened: Soften to a pliable consistency to provide rich fat and tenderness, creating the classic shortbread crumb; cream with sugar until light and fluffy to incorporate air for a delicate texture.
- 2/3 c brown sugar, packed: Sweeten and add a hint of molasses complexity while contributing to spread and moisture; pack firmly when measuring to ensure correct sweetness balance in the dough.
- 1 1/2 – 2 tsp Vanilla: Flavor gently to impart warm vanilla notes that enhance and round out the buttery cookie profile; add incrementally to adjust intensity between subtle and pronounced.
- 2 c flour: Structure the cookies by supplying gluten and bulk, forming the dough matrix that holds fats and sugars together; sift or whisk before adding to ensure even distribution and a tender bite.
- 1/2 tsp sea salt: Season subtly to balance sweetness and enhance overall flavor, preventing the shortbread from tasting flat; dissolve evenly into the dough to avoid concentrated salty spots.
- 1.5 c powdered sugar: Dust over or incorporate as a coating to provide a sweet, melt-in-your-mouth finish and extra sweetness for serving; whisk to remove lumps for a smooth, snowy appearance on finished cookies.
- 3 – 4 T cream or milk: Moisten to bind the dough if it feels too dry and to achieve the right workable consistency; add tablespoon by tablespoon until the dough just comes together without becoming sticky.
- 1/2 tsp almond extract, or vanilla: Aromatize delicately to introduce a complementary nutty-fruity note or additional vanilla warmth, enhancing depth without overpowering the butter; add sparingly and taste to achieve the desired subtlety.
Instructions for Christmas Shortbread Cookies
These instructions will walk you through each tactile cue and sensory sign so the cookies come out consistently excellent. I like to narrate what you should see and feel, so you can trust your senses more than timers alone.
- Add brown sugar and butter to mixing bowl or standing mixer bowl. Beat on high to cream until light and fluffy. Add the vanilla and beat to incorporate.: The bowl will smell warmly sweet and the texture will shift from grainy to cloud like as the brown sugar dissolves into the butter . You will notice the color lighten and the beaters will leave ribbon like trails, which indicates proper aeration. This step matters because trapped air helps the dough feel tender after baking. A common mistake is under creaming, which leaves a denser cookie, or over creaming, which can introduce too much air and cause spreading.
- In a small bowl, whisk the salt and 1 3/4 cup flour together. Slowly add the dry ingredients into the creamed butter and sugar mixture. Mix until fully incorporated.: At this point a fragrant lift of vanilla spreads through the batter, making the aroma richer. Incorporating at medium speed ensures even distribution without breaking down the texture. This small addition changes the overall balance, enhancing both the caramel notes from the brown sugar and the butteriness. Avoid adding extracts at high speed because they can dissipate volatile aromas and make the dough greasy.
- Take the remaining 1/4 cup flour and add it to a clean surface. Transfer the cookie dough to the surface and knead the dough until nice and smooth and the extra flour is incorporated.: As you add the dry mix, the dough will begin to clump and come together, with a slightly shaggy look before smoothing. The salt, mixed with the flour , ensures even seasoning and avoids pockets of salt. Folding gently until there are no streaks prevents gluten overdevelopment, so handle with care. Overmixing is a typical error here and leads to tough cookies.
- Divide the dough into either three separate balls (if you plan to roll out for cookie cutters) or roll into one big log for slice and bake. Wrap in plastic wrap tightly and chill for at least 30 minutes.: When you press the dough it should feel pliable and not sticky, and the surface will become satiny as the flour is worked in. Kneading briefly aligns the dough for roll out or shaping, but too much pressure or time will develop gluten and toughen the final cookie. If the dough feels overly dry, stop adding flour and let it rest so moisture redistributes.
- When ready to bake, preheat the oven to 350 degrees. Either slice and place on parchment lined cookie sheet or roll out on a flour dusted surface and cut with cookie cutter. I make my cookies a bit over 1/4 inch thickness.: Chilling firms the butter so the cookies keep crisp edges and defined shapes when baked. The surface becomes cooler to the touch and easier to roll or slice. This rest also relaxes any gluten formed during kneading, improving tenderness. Skipping this chill step often results in spreading and misshapen cookies, so be patient.
- Bake for 12-14 minutes or when the edges start to turn golden brown. Allow to sit for 2 minutes on the pan and then transfer to a rack.: The oven preheat should give a steady dry heat, and you'll see the dough warm quickly once on the tray. Slicing a chilled log yields neat, uniform rounds, while rolling and cutting lets you make festive shapes. A good visual cue is that the cookies hold their edge in the raw state. Avoid making cookies too thin, they will brown too quickly and lose tenderness.
- Wait until completely cool and then whisk icing ingredients together. Spread over each cookie and add sprinkles. Allow the icing to set before serving. (But who is really gonna do that?): In the oven you will notice a gentle nutty aroma as edges begin to color. The sound is quiet, but the visual cue is key, watch for a subtle golden rim. Letting them rest on the pan allows residual heat to finish the set without cracking, and then a transfer to a rack prevents sogginess. Opening the oven too often changes temperature and can affect uniform browning, so try to resist peeking repeatedly.
- Store in an airtight container for about 5-7 days. If they last that long!: The cookies should be room temperature before icing so the glaze sets properly. The glaze will shine when freshly spread then mattify as it dries, and adding sprinkles while tacky ensures they stick. If you ice while warm, the glaze will slide off and pooling can occur. Be mindful that humidity can lengthen drying time, so plan accordingly.
- Store in an airtight container for about 5 to 7 days: Proper storage keeps the cookies crisp but prevents staleness. Layer with parchment if stacking decorated pieces to avoid smudging. A common issue is humidity exposure, which softens crisp edges, so use a tight seal and store at room temperature away from heat sources.
Pro Tips and Tweaks
I like to offer practical tweaks that make these cookies more reliable and adaptable. Below are tips that span technique, timing, and presentation so your batch turns out exactly how you want.
- Chill Time: Always chill the dough for at least 30 minutes, and up to an hour for the best shape retention and firmer dough for cutting.
- Room Temperature Butter: Use properly softened butter to cream with the brown sugar; it should dent with a finger but not be oily, ensuring proper aeration.
- Use a Bench Scraper: When transferring and dividing dough, a bench scraper keeps hands cleaner and helps portion evenly without overworking.
- Slice from a Log: For quick cookies, roll a log and freeze it; slice straight from semi frozen for even shapes and quick bake sessions.
- Icing Consistency: Start with less cream when thinning powdered sugar and add drops to reach a spreadable glaze that will set without running.
- Storage: Layer with parchment in an airtight container and store at room temperature up to a week, or freeze dough for two months for future baking.
Side Dish Ideas for Christmas Shortbread Cookies
These cookies are versatile companions for winter gatherings and festive plates. Below are serving ideas, pairing suggestions, and storage guidance so your cookie platter feels thoughtful and complete.
- Serve with warm drinks: Offer alongside hot tea, coffee, or a caffeine free hot chocolate for a cozy pairing that complements the buttery profile.
- Holiday cookie box: Arrange with an assortment of decorated cookies, and add a few plain shortbread rounds as palate cleansers between richer treats.
- After dinner sweet: Present as a light finish to holiday meals; their delicate sweetness is satisfying without being overly heavy.
- Gift packaging: Stack in a tin lined with parchment and tie with ribbon, including a note about best by dates and storage instructions for freshness.
- Make ahead strategy: Bake some the day before and store in an airtight container, or freeze dough logs to slice and bake on demand for fresh tasting cookies.
- Seasonal display: Use cookie cutters shaped for the occasion and coordinate icing colors to match seasonal themes for an attractive platter.
FAQ
Conclusion
These Christmas Shortbread Cookies shine because they combine buttery simplicity with dependable technique to produce a classic holiday favorite. I encourage you to give them a try, experiment with shapes and icing, and enjoy how easily they become part of your seasonal traditions. They reward patience in chilling and careful creaming, and once you master those steps, you will find they consistently produce tender, flavorful cookies that are wonderful for sharing and gifting.
Christmas Shortbread Cookies
Equipment
- Mixing Bowl
- Standing mixer
- Baking Sheet
- Parchment Paper
- Wire Rack
Ingredients
- 1 cup unsalted butter, (2 sticks) softened Soften to a pliable consistency to provide rich fat and tenderness, creating the classic shortbread crumb; cream with sugar until light and fluffy to incorporate air for a delicate texture.
- 2/3 c brown sugar, packed Sweeten and add a hint of molasses complexity while contributing to spread and moisture; pack firmly when measuring to ensure correct sweetness balance in the dough.
- 1 1/2 – 2 tsp Vanilla Flavor gently to impart warm vanilla notes that enhance and round out the buttery cookie profile; add incrementally to adjust intensity between subtle and pronounced.
- 2 c flour Structure the cookies by supplying gluten and bulk, forming the dough matrix that holds fats and sugars together; sift or whisk before adding to ensure even distribution and a tender bite.
- 1/2 tsp sea salt Season subtly to balance sweetness and enhance overall flavor, preventing the shortbread from tasting flat; dissolve evenly into the dough to avoid concentrated salty spots.
- 1.5 c powdered sugar Dust over or incorporate as a coating to provide a sweet, melt-in-your-mouth finish and extra sweetness for serving; whisk to remove lumps for a smooth, snowy appearance on finished cookies.
- 3 – 4 T cream or milk Moisten to bind the dough if it feels too dry and to achieve the right workable consistency; add tablespoon by tablespoon until the dough just comes together without becoming sticky.
- 1/2 tsp almond extract, or vanilla Aromatize delicately to introduce a complementary nutty-fruity note or additional vanilla warmth, enhancing depth without overpowering the butter; add sparingly and taste to achieve the desired subtlety.
Instructions
- Add brown sugar and butter to mixing bowl or standing mixer bowl. Beat on high to cream until light and fluffy. Add the vanilla and beat to incorporate.: The bowl will smell warmly sweet and the texture will shift from grainy to cloud like as the brown sugar dissolves into the butter . You will notice the color lighten and the beaters will leave ribbon like trails, which indicates proper aeration. This step matters because trapped air helps the dough feel tender after baking. A common mistake is under creaming, which leaves a denser cookie, or over creaming, which can introduce too much air and cause spreading.
- In a small bowl, whisk the salt and 1 3/4 cup flour together. Slowly add the dry ingredients into the creamed butter and sugar mixture. Mix until fully incorporated.: At this point a fragrant lift of vanilla spreads through the batter, making the aroma richer. Incorporating at medium speed ensures even distribution without breaking down the texture. This small addition changes the overall balance, enhancing both the caramel notes from the brown sugar and the butteriness. Avoid adding extracts at high speed because they can dissipate volatile aromas and make the dough greasy.
- Take the remaining 1/4 cup flour and add it to a clean surface. Transfer the cookie dough to the surface and knead the dough until nice and smooth and the extra flour is incorporated.: As you add the dry mix, the dough will begin to clump and come together, with a slightly shaggy look before smoothing. The salt, mixed with the flour , ensures even seasoning and avoids pockets of salt. Folding gently until there are no streaks prevents gluten overdevelopment, so handle with care. Overmixing is a typical error here and leads to tough cookies.
- Divide the dough into either three separate balls (if you plan to roll out for cookie cutters) or roll into one big log for slice and bake. Wrap in plastic wrap tightly and chill for at least 30 minutes.: When you press the dough it should feel pliable and not sticky, and the surface will become satiny as the flour is worked in. Kneading briefly aligns the dough for roll out or shaping, but too much pressure or time will develop gluten and toughen the final cookie. If the dough feels overly dry, stop adding flour and let it rest so moisture redistributes.
- When ready to bake, preheat the oven to 350 degrees. Either slice and place on parchment lined cookie sheet or roll out on a flour dusted surface and cut with cookie cutter. I make my cookies a bit over 1/4 inch thickness.: Chilling firms the butter so the cookies keep crisp edges and defined shapes when baked. The surface becomes cooler to the touch and easier to roll or slice. This rest also relaxes any gluten formed during kneading, improving tenderness. Skipping this chill step often results in spreading and misshapen cookies, so be patient.
- Bake for 12-14 minutes or when the edges start to turn golden brown. Allow to sit for 2 minutes on the pan and then transfer to a rack.: The oven preheat should give a steady dry heat, and you'll see the dough warm quickly once on the tray. Slicing a chilled log yields neat, uniform rounds, while rolling and cutting lets you make festive shapes. A good visual cue is that the cookies hold their edge in the raw state. Avoid making cookies too thin, they will brown too quickly and lose tenderness.
- Wait until completely cool and then whisk icing ingredients together. Spread over each cookie and add sprinkles. Allow the icing to set before serving. (But who is really gonna do that?): In the oven you will notice a gentle nutty aroma as edges begin to color. The sound is quiet, but the visual cue is key, watch for a subtle golden rim. Letting them rest on the pan allows residual heat to finish the set without cracking, and then a transfer to a rack prevents sogginess. Opening the oven too often changes temperature and can affect uniform browning, so try to resist peeking repeatedly.
- Store in an airtight container for about 5-7 days. If they last that long!: The cookies should be room temperature before icing so the glaze sets properly. The glaze will shine when freshly spread then mattify as it dries, and adding sprinkles while tacky ensures they stick. If you ice while warm, the glaze will slide off and pooling can occur. Be mindful that humidity can lengthen drying time, so plan accordingly.
- Store in an airtight container for about 5 to 7 days: Proper storage keeps the cookies crisp but prevents staleness. Layer with parchment if stacking decorated pieces to avoid smudging. A common issue is humidity exposure, which softens crisp edges, so use a tight seal and store at room temperature away from heat sources.
Notes
- Chill Time: Always chill the dough for at least 30 minutes, and up to an hour for the best shape retention and firmer dough for cutting.
- Room Temperature Butter: Use properly softened butter to cream with the brown sugar; it should dent with a finger but not be oily, ensuring proper aeration.
- Use a Bench Scraper: When transferring and dividing dough, a bench scraper keeps hands cleaner and helps portion evenly without overworking.
- Slice from a Log: For quick cookies, roll a log and freeze it; slice straight from semi frozen for even shapes and quick bake sessions.
- Icing Consistency: Start with less cream when thinning powdered sugar and add drops to reach a spreadable glaze that will set without running.
- Storage: Layer with parchment in an airtight container and store at room temperature up to a week, or freeze dough for two months for future baking.