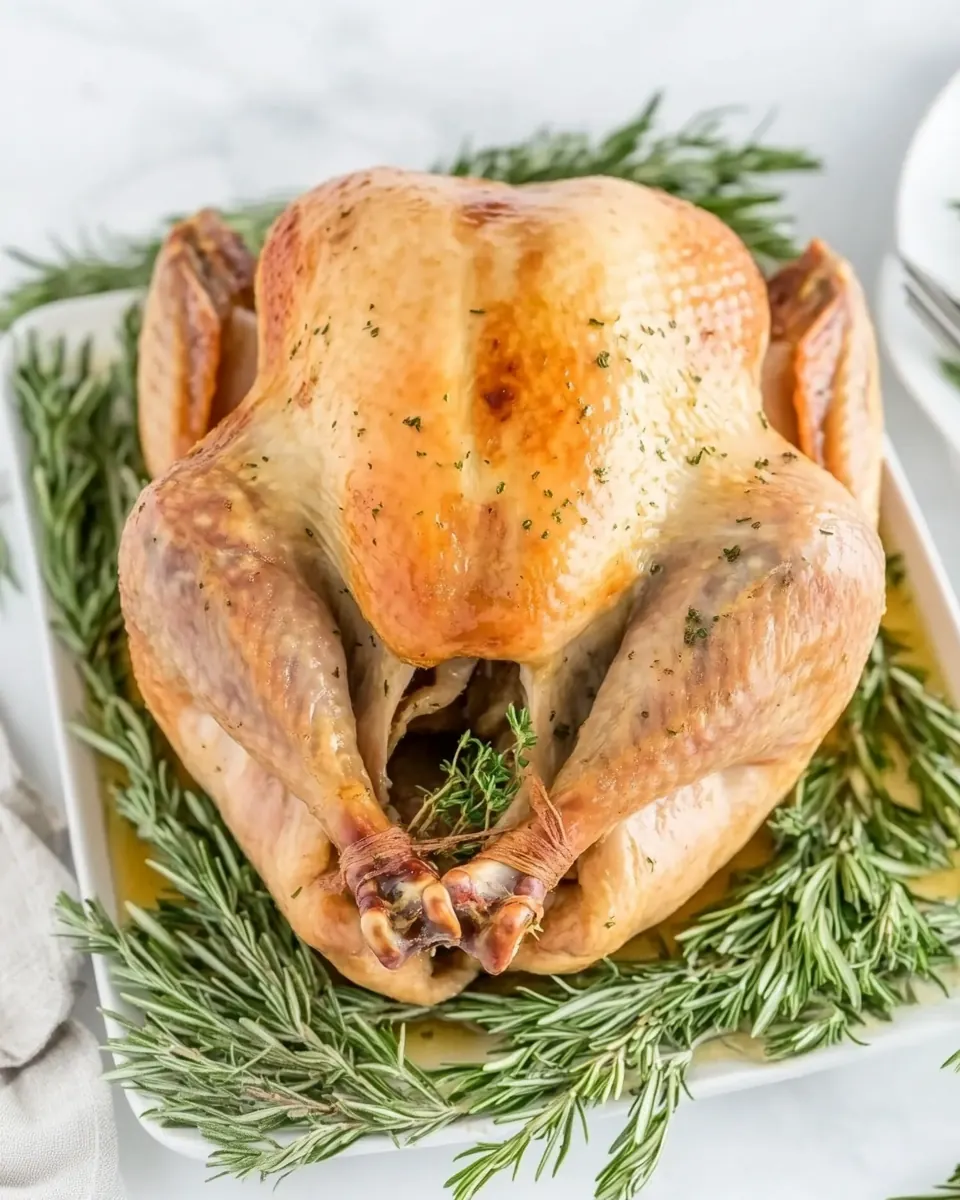
Easy Roast Turkey Recipe
Easy Roast Turkey Recipe has been my fallback for big family gatherings ever since I learned how to coax deep flavor from a simple bird without fuss. The first time I roasted a turkey that actually made everyone pause, I was nervous and excited at the same time, holding a pan that smelled faintly of oil and the bright scent of apple tucked in the cavity. Over the years I developed small rituals that change everything, little moves that bring comfort and confidence when you are serving a whole bird to loved ones.
I remember a chilly afternoon when I brined and roasted a turkey for a close friend who had just moved back to town. We drank warm cider, swapped stories, and the house filled with a slow, savory aroma that promised company and conversation. The skin blistered to a lovely bronze, and when I carved it there was a gentle sigh around the table. That moment taught me how technique and patience pay off in the most delicious ways.
What I love about this Easy Roast Turkey Recipe is the combination of straightforward steps and thoughtful decisions, like whether to brine, how to time the high heat blast, and when to tent the bird so the breast does not overcook. I’ll walk you through those turning points, share what to listen for while the oven works its magic, and how to avoid the slip ups that make turkey dry or underdone. You will get a roast that is juicy, well seasoned, and perfect for carving without stress.
Recipe Snapshot
3 hr 20 mins
20 mins
180 mins
Hard
350 kcal
American
Whole30, Gluten-Free
Dinner
Roasting Pan with Rack, Oven Safe Digital Thermometer, Brining Bags
Why This Easy Roast Turkey Recipe Is a Winner
Reliable Results Every Time
I adore how this Easy Roast Turkey Recipe turns a potentially intimidating centerpiece into something dependable. With a clear sequence and simple tools like a Roasting Pan with Rack and an Oven Safe Digital Thermometer, I know exactly when the bird has reached safe, juicy doneness. That predictability matters, especially when I have company and want the meal to run smoothly.
Flexible Brining Option
One of the smartest choices here is offering a brine as optional. When I have extra time, I brine for added moisture and seasoning that reaches into the meat. When life is busy, skipping the brine and seasoning the exterior with kosher salt and pepper saves time and still delivers a flavorful crust. That flexibility makes this recipe fit a range of schedules.
High Heat for Crisp Skin
Starting at high heat creates a crisp, golden skin that everyone notices first. I love how the initial blast at 500°F caramelizes the surface, then lowering the oven to a steady 350°F finishes the bird gently. This two stage approach gives the best texture contrast, and I always feel proud when the skin is crackly but the meat beneath is tender.
Simple Aromatics That Add Depth
Stashing a quartered yellow onion, apple, and celery in the cavity is a subtle trick I use when I want a gentle aromatic lift without overpowering the turkey. These optional players steam from the inside, lending a background sweetness and savory note. They are unobtrusive, but they make the aroma of the finished roast richer, especially while the bird rests under foil.
Carving Confidence
I always teach people how to carve patiently and with purpose. This recipe outlines carving steps so you can present neat slices and whole pieces for serving. When you know how to remove the thighs and slice the breast meat cleanly, the plate looks thoughtful and inviting. That confidence at the table is part of why this roast works so well for gatherings.
What’s In This Easy Roast Turkey Recipe

The philosophy here is simple, I pick ingredients that build layers of flavor without overwhelming the bird. The turkey is the star, while a light coating of canola oil helps the skin crisp. Kosher salt and pepper are the seasoning backbone, and the optional cavity additions like onion, apple, and celery bring gentle aromatics that steam into the meat. Together these components create a roast that is balanced and approachable.
- 1 whole turkey, full thawed if needed: Use whole and fully thawed to ensure even cooking; a frozen center prevents safe internal temperature. Position breast-side up on a rack to promote airflow and roast evenly, and allow rest before carving to redistribute juices.
- 1 recipe turkey brine (optional): Submerge turkey in a seasoned brine to enhance moisture and flavor; brining times vary by size so follow a tested recipe. Rinse and pat dry after brining to achieve a crisp skin during roasting.
- 1/4 cup canola oil: Coat skin with canola oil to promote even browning and crisping without burning at high oven temperatures. Rub thoroughly under and over the skin to help seasonings adhere and to seal in moisture.
- kosher salt and pepper: Season generously with kosher salt and freshly ground pepper to enhance natural turkey flavors and assist in forming a savory crust. Apply salt both under the skin and on the exterior for deeper seasoning penetration.
- 1 large quartered yellow onion (optional): Quarter and stuff onion into the cavity or scatter around the bird to add aromatic depth and savory sweetness while roasting. Use optional pieces to flavor pan drippings for gravy and to contribute moisture in the roasting environment.
- 1 large quartered apple, any variety (optional): Quarter and place apple in the cavity or roasting pan to add bright, fruity aromatics and subtle sweetness that complements turkey. Choose any variety and consider using slightly firmer apples so they hold shape during roast.
- 2 stalks celery (optional): Chop and tuck celery into the cavity or scatter around the roasting pan to add herbaceous, savory notes and moisture during cooking. Use stalks to flavor drippings for gravy and to help maintain a humid roasting environment.
Step by Step Guide for Easy Roast Turkey Recipe
These steps give you the rhythm for roasting a turkey with confidence. Take your time with each stage, listen for the oven cues, and use the thermometer to make the final call. The following directions follow the source sequence and expand each point so you know what to expect and how to avoid common problems.
- Remove the turkey from the packaging. Remove the giblets (which could be in either the body or neck cavity) and remove and discard the plastic pop-up timer as well.: As you open the package you will notice the immediate scent of raw poultry and sometimes a bit of refrigeration tang. Lay the bird on a clean surface and check both the body and neck cavities for a bag of giblets, which you should remove. Also locate and discard any plastic pop up timers; they are not useful for precise cooking. Pat the skin dry with paper towels so the surface is not damp, because moisture inhibits browning. A typical error here is leaving the bird too wet, which prevents the skin from crisping properly. If you brined earlier, you will want to rinse briefly and pat thoroughly to remove excess salt, then dry again.
- Place the turkey on a roasting pan fitted with a rack, breast-side up. Pat the turkey dry with paper towels.: You will feel the weight of the bird as you set it atop the rack, which promotes even air circulation and prevents the bottom from stewing in juices. Positioning the turkey breast-side up allows the heat to hit the largest surface and develop a golden color. Patting dry again after placement helps remove any residual moisture. A common misstep is using a pan without a rack, which can lead to soggy undersides; the rack keeps the skin crisp and encourages even roasting.
- If desired, add the quartered onion, apple, and celery stick to the cavity of the turkey. Brush the skin liberally with canola oil. If you did NOT brine your turkey, liberally sprinkle your turkey with salt and pepper. Tuck the wings under the turkey.: Sliding the aromatics into the cavity releases a subtle steam as the turkey cooks, giving the meat a quiet depth. You will sense a faint, warming scent as the onion softens and the apple begins to mellow. Brush the skin liberally with canola oil so the heat can create a brown, crispy exterior. If you did not brine, sprinkle the bird liberally with kosher salt and pepper , making sure to reach the thighs and under the wings where possible. Tuck the wings under the turkey to prevent burning and to help the bird hold a compact shape. A mistake to watch for is under seasoning when you skip brining, which leaves the flavor flat; be generous with the salt on the surface.
- Let the turkey rest at room temperature for 30-60 minutes, while you preheat the oven. Position a rack on the lowest section of the oven and preheat to 500°F (260℃). If your oven does not reach 500°F, set it to a minimum of 450°F (232℃).: Allowing the turkey to sit out briefly takes the chill off the core and promotes even cooking, while the oven heats up. During this time the oil will settle and the skin will begin to lose surface moisture, which aids browning. Preheat the oven with a rack positioned on the lowest section, and set the temperature to 500°F (260℃). If your oven cannot reach 500°F, set it to at least 450°F (232℃). Skipping the rest period can result in uneven doneness where the exterior is hot but the center remains too cool, so be patient here.
- Roast the turkey at 500°F (260℃) for 30 minutes. After 30 minutes, reduce the oven to 350°F (175℃) and insert an oven-safe digital probe thermometer into the thickest part of the breast.: This initial high heat blast sears the skin and jump starts color development, creating that appealing bronze finish. You will hear the oven working, and the surface will begin to shimmer with rendered fat, releasing a clean roasted aroma. After 30 minutes, reduce the oven to 350°F (175℃) and insert an oven safe digital thermometer into the thickest part of the breast, avoiding bone, to monitor internal temperature. One trap is leaving the high heat on too long, which can char the skin without allowing the interior to come up to temp, so do not extend the initial blast past the recommended time.
- Cook the turkey until the thermometer reaches 162℉ (72℃). If you notice your turkey breasts are browning too quickly, carefully tent them with foil, leaving the legs and thighs exposed. Plan for approximately 10-13 minutes of cooking time per pound of turkey.: As the oven settles into a steady heat you will notice a deeper, savory scent and the skin taking on a uniform golden tone. Listen for gentle bubbling as the juices render and the fat crisps. If the breasts brown too quickly, tent them with foil, exposing the legs and thighs to finish roasting, which allows those fattier parts to reach temperature without overcooking the white meat. Plan for roughly 10 to 13 minutes of cooking time per pound as a guide, but the thermometer is the true judge. A common error is relying solely on time per pound rather than internal temperature, which can leave the turkey under or overcooked.
- Once the turkey breast reaches 162℉ (72℃), remove the turkey from the oven and check the temperature in the thickest part of the thigh. If not at 165℉ (74℃), place the turkey back in the oven for another 10 minutes, then recheck the temperature.: The thigh holds heat differently, and you want it to reach at least 165°F (74℃) for safety and tenderness. When you probe the thigh you may feel a slight give, and the juices should run clear rather than pink. If the thigh is not yet at 165°F, return the turkey to the oven for another 10 minutes, then recheck. Avoid over relying on surface color as an indicator, because skin can brown ahead of internal doneness, which is a common pitfall that leads to dry breast meat.
- Remove the turkey from the oven and tent it with foil. Allow the turkey to rest for at least 30 minutes or up to 60 minutes if needed.: As you pull the bird out you will be greeted by a warm wave of roasted aromatics. Tenting the turkey with foil helps it rest without cooling too quickly, and it allows carryover cooking to finish bringing the internal temperature up gently. The meat will relax and redistribute juices during the rest period, so slicing too early causes those juices to escape onto the cutting board. A frequent mistake is slicing immediately, which makes even a well cooked turkey seem dry.
- After resting the turkey, carve and serve the turkey. To carve the turkey, remove the wings and then the thighs first by popping out the joints that adhere the wings and thighs to the bird and then cut straight through the joint. Separate the thighs and drumsticks if desired. To carve the turkey breasts, slice the meat off the rib cage, cutting as close to the rib bones as possible. Cut the breast meat into individual slices if desired.: This waiting period is where the magic of juiciness happens, as the hot proteins reabsorb some of the expelled juices. You will notice the exterior cool slightly and the aroma deepen as flavors settle. Resting also makes carving neater, since the flesh firms just enough to slice clean pieces. If you carve too soon the meat will be loose and watery, so plan ahead and use the time to prepare sides or set the table.
- After resting the turkey, carve and serve the turkey: When you begin carving, the first visual cue is a uniform, moist interior with a clear line of cooked white to slightly pinkish dark meat in the thighs. Start by removing the wings and thighs, popping out the joints where they meet the body, then separate thighs from drumsticks if desired. For the breasts, slice meat off the rib cage, cutting close to the bones for the most yield, and then slice into individual portions. Listen for the quiet sound of the knife gliding through tender meat, and offer a platter that shows off both sliced breast and whole pieces. A typical error is using a dull knife which tears rather than slices; keep a sharp carving knife handy for clean presentation.
Ways to Adapt This Recipe
This section explores simple adaptations that keep the core technique intact while tailoring the roast for timing, flavor preference, or equipment. Each tip starts with a bold phrase and then expands on how to implement the change, so you can confidently alter the approach as needed.
- Brine for Extra Moisture, if you have time, immerse the turkey in a chilled brine for 8 to 18 hours to infuse salt and aromatics into the meat, then rinse and dry before roasting to ensure crisp skin.
- Skip the Brine for Speed, when time is tight, skip brining and instead apply a generous rub of kosher salt and pepper to the skin, which still delivers a savory crust and saves a day of planning.
- Use Cavity Aromatics, tuck quartered onion, apple, and celery inside the cavity to gently perfume the bird, they add background sweetness and savory notes without changing the core flavor.
- High Heat Start, begin roasting at 500°F (260℃) for 30 minutes to jump start browning, then lower to 350°F (175℃) to finish cooking gently for moist meat.
- Tent to Prevent Overbrowning, if the breast browns too quickly, tent the top loosely with foil but leave legs exposed, this protects the white meat while allowing darker pieces to finish.
- Rest Well Before Carving, allow 30 to 60 minutes of resting under foil so juices redistribute and carving yields tidy, juicy slices for serving.
What to Pair With Easy Roast Turkey Recipe
When serving this roast, think about balance between rich, savory turkey and bright or creamy sides. Choose accompaniments that add texture contrast, and consider the occasion when planning portion sizes and plating. Below are detailed pairing ideas, storage tips, and serving styles to help you present a thoughtful meal.
- Classic Sides, roasted root vegetables and mashed potatoes are traditional companions because their hearty textures and mellow flavors complement the turkey without competing with it. Roast carrots and parsnips until caramelized to match the turkey‘s savory depth.
- Light Vegetable Options, green beans or a crisp salad bring color and freshness to the plate, cutting through the richness of roasted meat and gravy. Serve vegetables simply dressed so they support the turkey‘s flavor.
- Gravy and Sauce, a pan gravy made from the drippings enhances moisture and flavor, while a simple sauce made from reduced broth and aromatics can add a glossy finish to carved slices. Offer gravy on the side so guests can control how much they use.
- Occasions, this roast shines for Thanksgiving and other large gatherings, but it also works for any Sunday dinner when you want a special main dish. Its flexibility makes it suitable for holiday feasts or relaxed family meals alike.
- Storage Tips, refrigerate leftovers within two hours in shallow containers for rapid cooling, keep for up to four days in the fridge or freeze portions for up to two months to extend the enjoyment without waste.
- Seasonal Pairings, serve with autumnal sides like cranberry chutney or roasted squash in the fall to echo seasonal flavors and create a cohesive, festive plate.
FAQ
Conclusion
What makes this Easy Roast Turkey Recipe special is its blend of straightforward technique and thoughtful choices that consistently yield a juicy, well browned bird. Give it a try because the steps are forgiving and the results are reliably crowd pleasing, whether for a holiday table or a special family dinner. I hope you enjoy the comforting ritual of roasting, the satisfying sound of a crisp skin, and the warmth of sharing a carefully prepared centerpiece with people you love.
Easy Roast Turkey Recipe
Equipment
- Roasting Pan with Rack
- Oven Safe Digital Thermometer
- Brining Bags
Ingredients
- 1 whole turkey, full thawed if needed Use whole and fully thawed to ensure even cooking; a frozen center prevents safe internal temperature. Position breast-side up on a rack to promote airflow and roast evenly, and allow rest before carving to redistribute juices.
- 1 recipe turkey brine, optional Submerge turkey in a seasoned brine to enhance moisture and flavor; brining times vary by size so follow a tested recipe. Rinse and pat dry after brining to achieve a crisp skin during roasting.
- 1/4 cup canola oil Coat skin with canola oil to promote even browning and crisping without burning at high oven temperatures. Rub thoroughly under and over the skin to help seasonings adhere and to seal in moisture.
- kosher salt and pepper Season generously with kosher salt and freshly ground pepper to enhance natural turkey flavors and assist in forming a savory crust. Apply salt both under the skin and on the exterior for deeper seasoning penetration.
- 1 large quartered yellow onion, optional Quarter and stuff onion into the cavity or scatter around the bird to add aromatic depth and savory sweetness while roasting. Use optional pieces to flavor pan drippings for gravy and to contribute moisture in the roasting environment.
- 1 large quartered apple, any variety, optional Quarter and place apple in the cavity or roasting pan to add bright, fruity aromatics and subtle sweetness that complements turkey. Choose any variety and consider using slightly firmer apples so they hold shape during roast.
- 2 stalks celery, optional Chop and tuck celery into the cavity or scatter around the roasting pan to add herbaceous, savory notes and moisture during cooking. Use stalks to flavor drippings for gravy and to help maintain a humid roasting environment.
Instructions
- Remove the turkey from the packaging. Remove the giblets (which could be in either the body or neck cavity) and remove and discard the plastic pop-up timer as well.: As you open the package you will notice the immediate scent of raw poultry and sometimes a bit of refrigeration tang. Lay the bird on a clean surface and check both the body and neck cavities for a bag of giblets, which you should remove. Also locate and discard any plastic pop up timers; they are not useful for precise cooking. Pat the skin dry with paper towels so the surface is not damp, because moisture inhibits browning. A typical error here is leaving the bird too wet, which prevents the skin from crisping properly. If you brined earlier, you will want to rinse briefly and pat thoroughly to remove excess salt, then dry again.
- Place the turkey on a roasting pan fitted with a rack, breast-side up. Pat the turkey dry with paper towels.: You will feel the weight of the bird as you set it atop the rack, which promotes even air circulation and prevents the bottom from stewing in juices. Positioning the turkey breast-side up allows the heat to hit the largest surface and develop a golden color. Patting dry again after placement helps remove any residual moisture. A common misstep is using a pan without a rack, which can lead to soggy undersides; the rack keeps the skin crisp and encourages even roasting.
- If desired, add the quartered onion, apple, and celery stick to the cavity of the turkey. Brush the skin liberally with canola oil. If you did NOT brine your turkey, liberally sprinkle your turkey with salt and pepper. Tuck the wings under the turkey.: Sliding the aromatics into the cavity releases a subtle steam as the turkey cooks, giving the meat a quiet depth. You will sense a faint, warming scent as the onion softens and the apple begins to mellow. Brush the skin liberally with canola oil so the heat can create a brown, crispy exterior. If you did not brine, sprinkle the bird liberally with kosher salt and pepper , making sure to reach the thighs and under the wings where possible. Tuck the wings under the turkey to prevent burning and to help the bird hold a compact shape. A mistake to watch for is under seasoning when you skip brining, which leaves the flavor flat; be generous with the salt on the surface.
- Let the turkey rest at room temperature for 30-60 minutes, while you preheat the oven. Position a rack on the lowest section of the oven and preheat to 500°F (260℃). If your oven does not reach 500°F, set it to a minimum of 450°F (232℃).: Allowing the turkey to sit out briefly takes the chill off the core and promotes even cooking, while the oven heats up. During this time the oil will settle and the skin will begin to lose surface moisture, which aids browning. Preheat the oven with a rack positioned on the lowest section, and set the temperature to 500°F (260℃). If your oven cannot reach 500°F, set it to at least 450°F (232℃). Skipping the rest period can result in uneven doneness where the exterior is hot but the center remains too cool, so be patient here.
- Roast the turkey at 500°F (260℃) for 30 minutes. After 30 minutes, reduce the oven to 350°F (175℃) and insert an oven-safe digital probe thermometer into the thickest part of the breast.: This initial high heat blast sears the skin and jump starts color development, creating that appealing bronze finish. You will hear the oven working, and the surface will begin to shimmer with rendered fat, releasing a clean roasted aroma. After 30 minutes, reduce the oven to 350°F (175℃) and insert an oven safe digital thermometer into the thickest part of the breast, avoiding bone, to monitor internal temperature. One trap is leaving the high heat on too long, which can char the skin without allowing the interior to come up to temp, so do not extend the initial blast past the recommended time.
- Cook the turkey until the thermometer reaches 162℉ (72℃). If you notice your turkey breasts are browning too quickly, carefully tent them with foil, leaving the legs and thighs exposed. Plan for approximately 10-13 minutes of cooking time per pound of turkey.: As the oven settles into a steady heat you will notice a deeper, savory scent and the skin taking on a uniform golden tone. Listen for gentle bubbling as the juices render and the fat crisps. If the breasts brown too quickly, tent them with foil, exposing the legs and thighs to finish roasting, which allows those fattier parts to reach temperature without overcooking the white meat. Plan for roughly 10 to 13 minutes of cooking time per pound as a guide, but the thermometer is the true judge. A common error is relying solely on time per pound rather than internal temperature, which can leave the turkey under or overcooked.
- Once the turkey breast reaches 162℉ (72℃), remove the turkey from the oven and check the temperature in the thickest part of the thigh. If not at 165℉ (74℃), place the turkey back in the oven for another 10 minutes, then recheck the temperature.: The thigh holds heat differently, and you want it to reach at least 165°F (74℃) for safety and tenderness. When you probe the thigh you may feel a slight give, and the juices should run clear rather than pink. If the thigh is not yet at 165°F, return the turkey to the oven for another 10 minutes, then recheck. Avoid over relying on surface color as an indicator, because skin can brown ahead of internal doneness, which is a common pitfall that leads to dry breast meat.
- Remove the turkey from the oven and tent it with foil. Allow the turkey to rest for at least 30 minutes or up to 60 minutes if needed.: As you pull the bird out you will be greeted by a warm wave of roasted aromatics. Tenting the turkey with foil helps it rest without cooling too quickly, and it allows carryover cooking to finish bringing the internal temperature up gently. The meat will relax and redistribute juices during the rest period, so slicing too early causes those juices to escape onto the cutting board. A frequent mistake is slicing immediately, which makes even a well cooked turkey seem dry.
- After resting the turkey, carve and serve the turkey. To carve the turkey, remove the wings and then the thighs first by popping out the joints that adhere the wings and thighs to the bird and then cut straight through the joint. Separate the thighs and drumsticks if desired. To carve the turkey breasts, slice the meat off the rib cage, cutting as close to the rib bones as possible. Cut the breast meat into individual slices if desired.: This waiting period is where the magic of juiciness happens, as the hot proteins reabsorb some of the expelled juices. You will notice the exterior cool slightly and the aroma deepen as flavors settle. Resting also makes carving neater, since the flesh firms just enough to slice clean pieces. If you carve too soon the meat will be loose and watery, so plan ahead and use the time to prepare sides or set the table.
- After resting the turkey, carve and serve the turkey: When you begin carving, the first visual cue is a uniform, moist interior with a clear line of cooked white to slightly pinkish dark meat in the thighs. Start by removing the wings and thighs, popping out the joints where they meet the body, then separate thighs from drumsticks if desired. For the breasts, slice meat off the rib cage, cutting close to the bones for the most yield, and then slice into individual portions. Listen for the quiet sound of the knife gliding through tender meat, and offer a platter that shows off both sliced breast and whole pieces. A typical error is using a dull knife which tears rather than slices; keep a sharp carving knife handy for clean presentation.
Notes
- Brine for Extra Moisture, if you have time, immerse the turkey in a chilled brine for 8 to 18 hours to infuse salt and aromatics into the meat, then rinse and dry before roasting to ensure crisp skin.
- Skip the Brine for Speed, when time is tight, skip brining and instead apply a generous rub of kosher salt and pepper to the skin, which still delivers a savory crust and saves a day of planning.
- Use Cavity Aromatics, tuck quartered onion, apple, and celery inside the cavity to gently perfume the bird, they add background sweetness and savory notes without changing the core flavor.
- High Heat Start, begin roasting at 500°F (260℃) for 30 minutes to jump start browning, then lower to 350°F (175℃) to finish cooking gently for moist meat.
- Tent to Prevent Overbrowning, if the breast browns too quickly, tent the top loosely with foil but leave legs exposed, this protects the white meat while allowing darker pieces to finish.
- Rest Well Before Carving, allow 30 to 60 minutes of resting under foil so juices redistribute and carving yields tidy, juicy slices for serving.