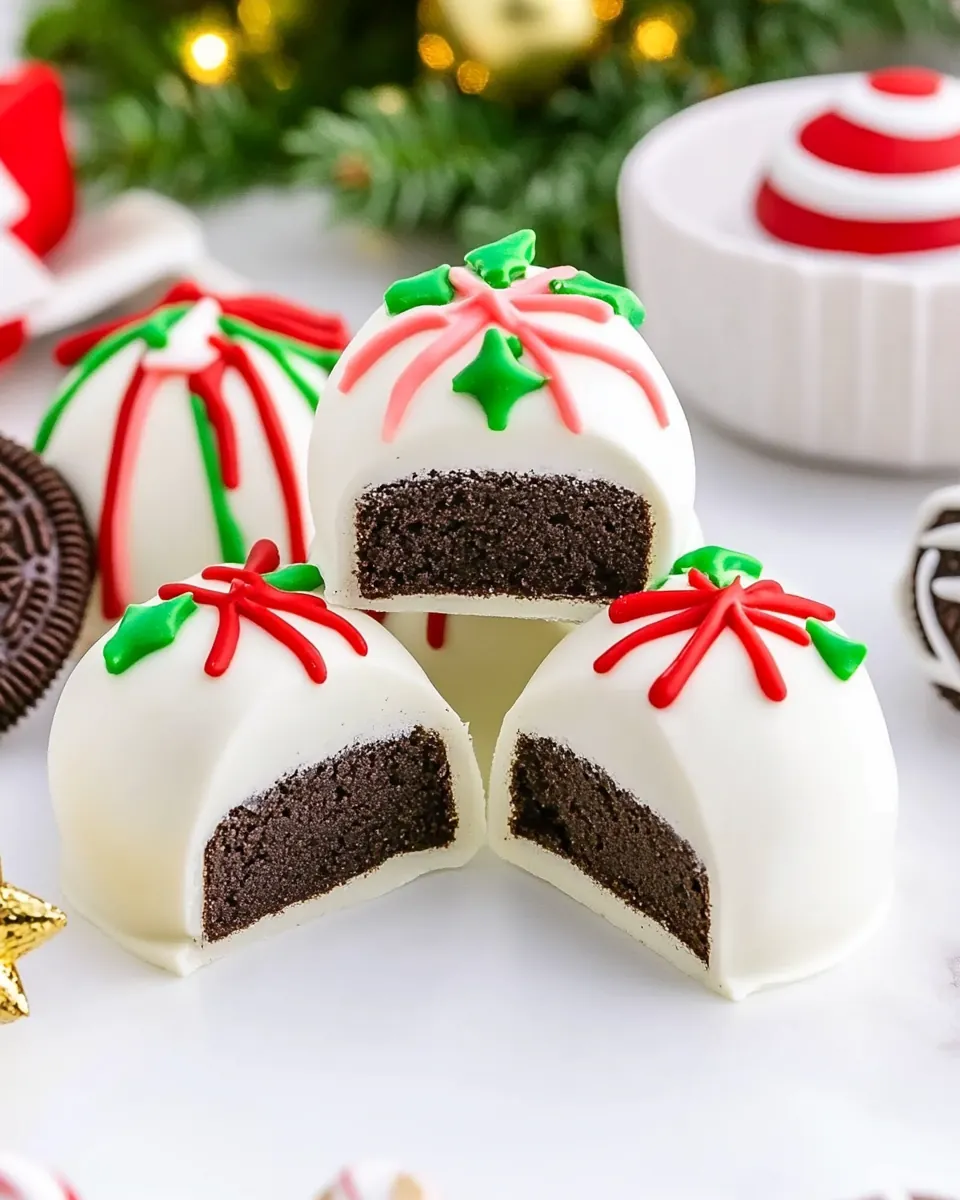
Christmas Present Oreo Truffles
Christmas Present Oreo Truffles quickly became my go to festive treat the first year I made them, a tiny tradition that sneaks sweetness into every holiday gathering. I remember a late afternoon when I was wrapping gifts and realized I needed something simple to bring to my neighbor’s cookie swap, so I crushed cookies, mixed in cream cheese, and suddenly the whole kitchen smelled like chocolate and celebration. The playful look of the little present shaped confections and the way they glimmered under holiday lights made everyone smile, and I loved how easy they were to scale up when guests called last minute.
Over time I tweaked the process, learning that chilling the truffle centers until they are firm enough to handle makes a huge difference, and that working with candy melts in small batches helps avoid grainy or seized coating. I also learned to reserve a bit of each colored melt to create ribbons and bows, which transform a simple bite into a miniature gift. Making these taught me patience and the joy of small details, like tapping excess chocolate off with a fork so the coating stays smooth and glossy.
What I love most is that you can make most of the work ahead, freezing the centers and finishing them the morning of an event. Kids love helping with the drizzling and adding sparkly sanding sugar, and adults always ask for the recipe. These Christmas Present Oreo Truffles are festive, forgiving, and endlessly customizable, and they still make me smile every December when I pull the tray from the freezer and admire the little edible presents lined up like tiny gifts.
Recipe Snapshot
1 hr 1 mins
60 mins
1 mins
Medium
200 kcal
American
Gluten-Free, Low FODMAP
Desserts
3mini bow fondent silicone mold
The Appeal of This Christmas Present Oreo Truffles
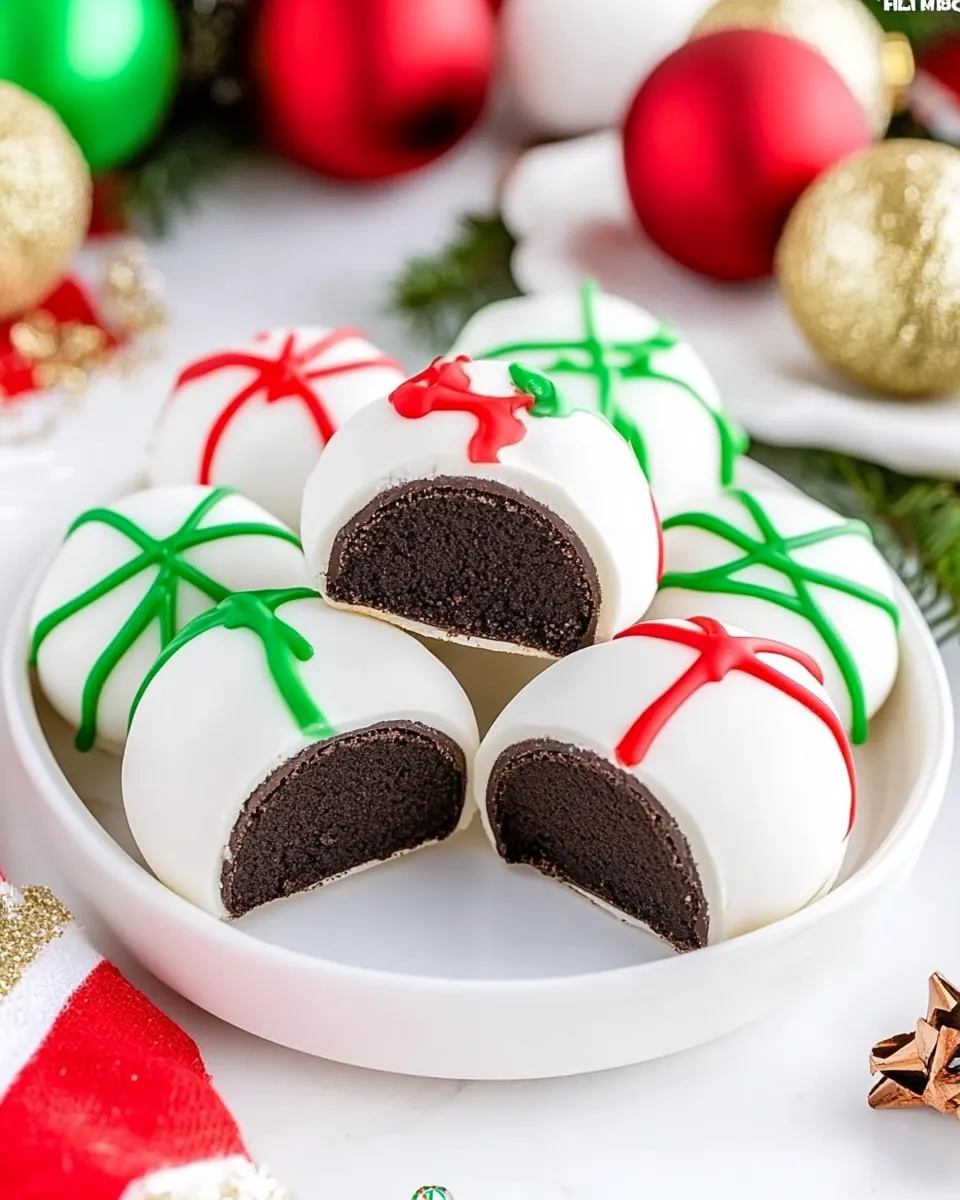
They are instantly festive and fun
I fell for these truffles because they look like tiny gifts, and that visual punch is half the joy. When I bring a tray to a party, people are drawn to the colors, the neat little bows, and the sanding sugar sparkle. It turns an ordinary sweet into a memorable centerpiece, and I love that it does the heavy lifting for you when you want a crowd pleaser.
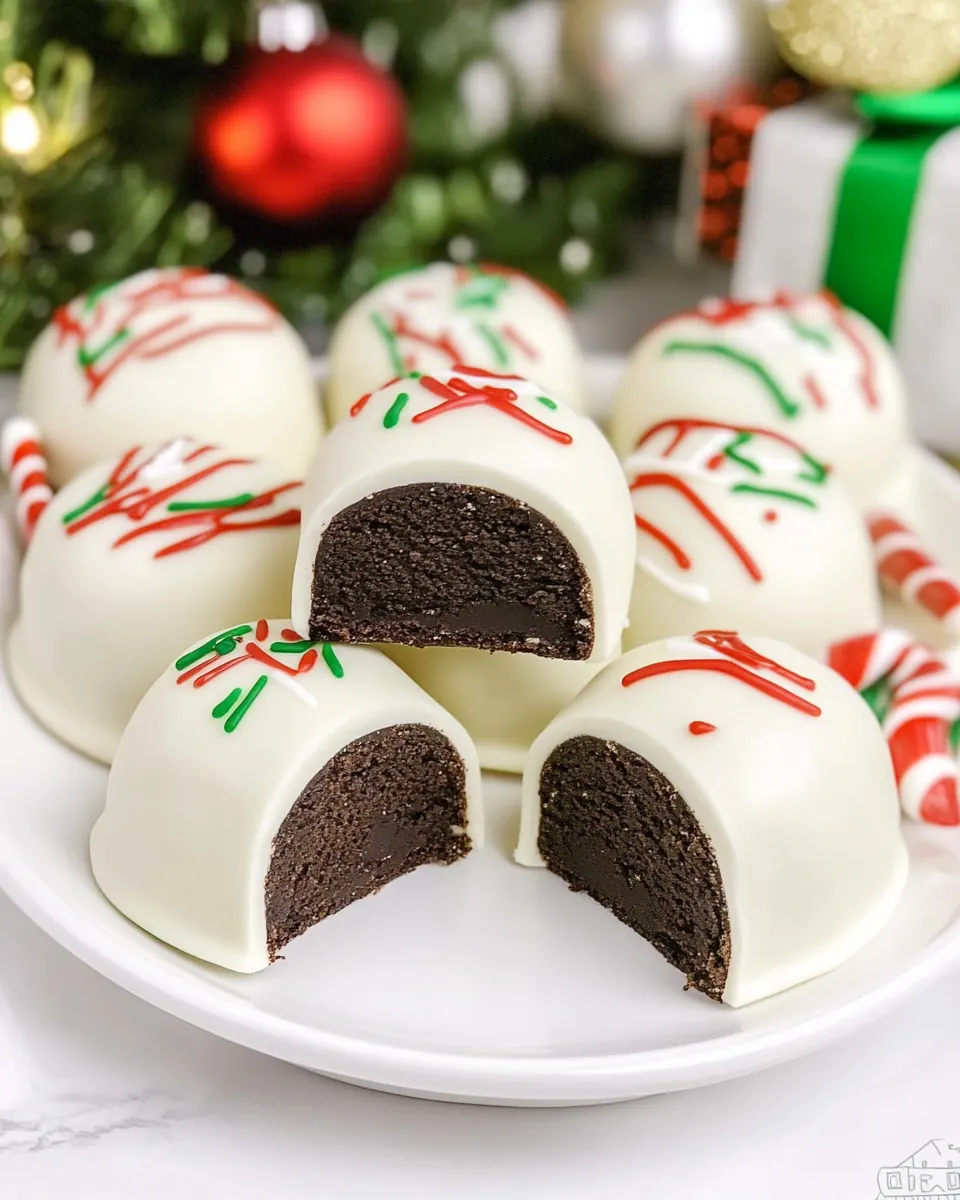
The texture is irresistibly creamy and crunchy
Combining crushed cookies with cream cheese gives a velvety, slightly tangy center that contrasts beautifully with a crisp candy coating. I learned to balance the crumbs and the cream cheese so each bite stays moist without being greasy. That contrast of smooth center and snappy shell is what keeps people coming back for another piece.
They are genuinely simple to make ahead
I often prep the centers and freeze them, which saves precious time the day of a party. Chilling the truffles makes dipping cleaner and faster, and keeping a stash in the freezer means you can assemble trays quickly. I appreciate recipes that let me spread the work across a few sessions, and these truffles are perfect for that.
Kid friendly and great for group projects
Making the bows and drizzling the ribbons is a kid friendly step that everyone loves to join in on. I like to set up a small assembly line with melted candy melts in piping bags and let helpers drizzle while I attach bows. It becomes a shared moment instead of a solo task, and the results always feel celebratory.
Versatile flavor and color options
Whether you stick to the classic chocolate and red velvet combination or play with different candy melt colors, these truffles adapt beautifully. I often change the palette depending on the event and the mood, and the basic technique stays the same. That flexibility makes this recipe a holiday staple in my kitchen.
Recipe Ingredients for Christmas Present Oreo Truffles
These ingredients are purposeful and straightforward, built to produce a creamy, well structured truffle center and a shiny, festive shell. The key players are the cookies for texture, the cream cheese for richness and binding, and the various candy melts for color and crisp coating. Each component plays a role in creating contrast, stability, and visual appeal.
- 22 cookies chocolate Oreo cookies: Crush finely to create the chocolate base and provide texture; these cookies supply both cocoa flavor and structure for the truffle centers. Combine with softened cream cheese to form a moldable mixture that holds shape when chilled. Use the cookie crumbs to balance sweetness from the candy melts and add authentic Oreo taste.
- 22 cookies red velvet Oreo cookies: Crumble gently to add a complementary cocoa-vanilla tang with red velvet flavor; these cookies contribute color contrast and a slightly different crumb texture. Mix into the cream cheese blend to create festive-cookie layers or alternating truffle batches. Provide visual and flavor variety when paired with the chocolate Oreos.
- 8 ounces cream cheese softened to room temperature: Soften completely to room temperature to ensure easy blending; cream cheese binds the crushed cookies into a smooth, cohesive dough. Contribute richness and slight tang that balances the sweetness of the Oreos and candy melts. Chill the mixture slightly if needed to firm up before rolling into balls.
- 10 ounce red candy melts divided: Melt and divide for coating and decorative details; red candy melts provide vibrant color and a smooth shell when tempered or heated correctly. Use a portion to fully enrobe truffles and reserve some for drizzling or creating present motifs. Adjust melting temperature carefully to maintain sheen and prevent burning.
- 10 ounce green candy melts divided: Melt and portion for coating, offering a bright green hue ideal for holiday-themed decorations; green candy melts form a firm, glossy shell when applied. Reserve some melts for dipping and pipework to add bows or accents. Combine with other colored melts to create layered designs without flavor conflicts.
- 10 ounce white candy melts divided: Melt and separate for coating and accents; white candy melts give a clean, neutral base and allow for sharp contrast against colored coatings. Use a portion to enrobe or drizzle, and another for fine piping details like ribbons or snowflake accents. Maintain low heat to keep the white coating smooth and non-grainy.
- White sparkly sanding sugar (optional): Sprinkle lightly for a sparkling finish that adds festive shimmer and texture; sanding sugar enhances visual appeal without altering flavor significantly. Use sparingly on wet candy melt coatings so crystals adhere and catch light. Choose white sparkle to complement the red, green, and white color scheme for a polished look.
Preparation Steps for Christmas Present Oreo Truffles
These steps take you from crumb to decorated present, and I like to work methodically so each stage sets up the next. You will chill, dip, mold bows, and assemble, and moving deliberately helps everything look neat. Below I expand each direction into a richly detailed step with sensory cues and troubleshooting pointers so you can follow along confidently.
- Line two rimmed baking sheet with parchment paper. You can also use a waxed paper-lined pan or cover a pan in aluminum foil sprayed lightly with spray oil.: The smell here is of clean paper and neutral pans, and arranging two sheets gives you space to separate flavors and decorated truffles. This step prevents sticking and protects your countertop from drips, while the parchment allows you to slide trays in and out of the freezer without smashing decorations. A common mistake is skipping the parchment which can make removal frustrating, so always prep your sheets first and leave them flat to avoid wrinkles that transfer to the truffles.
- Place chocolate Oreo cookies in food processor and mix until cookies turn into Oreo crumbs, then set to the side. In the same food processor, blend the red velvet Oreo cookies into fine crumbs and set aside. See notes if you don’t have a food processor.: When you pulse the cookies you will hear a steady, even grinding and see a fine, sandy texture develop, almost like damp sand. The aroma becomes richly chocolatey, especially from the chocolate Oreos, and the color shift tells you they are ready. If you overprocess into a powder, the centers can become too dense, so pulse in short bursts to maintain a slightly granular but fine crumb. If you do not have a food processor, crushing in a sturdy bag with a rolling pin works, though it takes more effort to get uniformly fine crumbs.
- Add half of the cream cheese to the chocolate Oreo crumbs and the other half of the cream cheese to the red velvet Oreo crumbs. Mix each bowl of cookie crumbs with the cream cheese and a clean silicone spatula until smooth.: The texture will shift as you fold in the room temperature cream cheese , the mixture turning glossy and cohesive, almost like a thick dough. The smell will be mildly tangy and sweet, and when you press a bit between your fingers it should hold shape without cracking. If the cream cheese is too cold, lumps remain and the dough is hard to work, so always soften ahead of time. Avoid overmixing which can make the centers too dense; stop once the crumbs are uniformly moistened.
- Using a 2 tablespoon cookie scoop, scoop dough from the bowl and form into cubes. Place on the prepared baking sheet so the truffles aren’t touching each other and place in the freezer to chill for 30 minutes.: As you portion with a scoop you will feel the dough give and then spring back slightly, which is a sign it is the right consistency. Forming into cubes rather than rounds makes them look like tiny presents, and chill time firms them so they hold shape during dipping. You will notice a cold, slightly tangy scent when they come out of the freezer. A frequent error is skipping the chill, which causes centers to deform while dipping, so be patient and allow the full thirty minutes.
- Place the red white and green candy melts each in a heatproof bowl, saving about 1/4 of each color of chocolate for the ribbons. Place the bowls in the microwave and heat for a minute at half power, then stir each with it's own clean and dry spoon. Continue heating the candy melts in thirty-second increments until each forms a smooth chocolate sauce.: The candy melts should become glossy and pourable, with a faint sweet aroma and a smooth sheen. Stirring between intervals helps distribute the heat so the melts do not scorch. Reserving some melts for ribbons ensures you have clean, bright lines for decoration. Overheating is the main pitfall, which can cause the melts to thicken or seize, so use lower power and brief bursts to maintain a smooth consistency.
- Make the bows by spooning some of each colored chocolate into the silicone molds, working in batches as needed. Be sure to wipe the edges so each bow come out clean. Refrigerate until the chocolate is set.: Filling the bow molds feels precise and calming, and when the chocolate sets you will see crisp edges and vibrant color. The surface should look glossy before refrigeration and then dull slightly as it firms. Wiping the edges prevents ragged details and helps each bow pop from the mold cleanly. A misstep is overfilling the molds which can cause messy edges, so use small spoons and tidy the rims promptly.
- Remove half the truffles from the freezer. Working in batches, dip each truffle one at a time into the melted candy melts with a fork. Tap the fork to remove any excess chocolate then place on the prepared baking sheet.: As you dip, you will hear a small splash and see a smooth coat envelope the truffle, then tapping releases excess coating to leave an even shell. The surface should be glossy and set up quickly, with a faint sweet, buttery scent. Dipping in small batches prevents the melted chocolate from cooling and thickening too much. Avoid dunking too many at once, which lowers the melt temperature and makes coating uneven.
- Immediately top with sanding sugar or sprinkles if desired. Repeat until all the truffles both chocolate and red velvet flavored are covered in chocolate.: The sugar adds sparkle and a slight crunch, and placing it while the coating is wet ensures it adheres. You will see the crystals glint and feel a slightly textured surface once set. Work quickly to keep the finish smooth; if the coating begins to set, the sugar will not stick. A common oversight is waiting too long to add decorations, which leads to poor adhesion.
- Place the truffles back in the freezer to chill for 20-30 minutes or until the chocolate is fully set.: The freezing step firms the shell and centers, producing a satisfying snap when bitten. The aroma fades to a gentle sweetness as they firm, and the surface becomes matte where it was once shiny. Rushing this step can cause ribbons or bows to slide, so ensure the coating is completely solid before piping or stacking.
- Once the truffles have set, place each of the remaining colors of candy melts into their own microwave-safe piping bags or freezer zip-top bag. Microwave on half power for 30 seconds, then squeeze the chocolate in each bag to make sure the chocolate melts evenly. Repeat in 30 second increments or until all the candy melts are melted.: The piping bags allow precise control for stripes and ribbons, and you will notice a smooth, flowing stream when you squeeze. The sound is a soft whisper of chocolate moving through the bag, and the visual result is clean lines when done steadily. If the melts are too cool they will sputter and pull, so warm gradually and test the flow before piping onto the truffles.
- Remove all of the bows from the mold and set to the side. Snip a small piece of the tips off of each bag. Drizzle the chocolate over the present to make each ribbon, then immediately top with a chocolate bow. Repeat for each chocolate present truffle.: As you drizzle, you will see fine ribbons of color cross the truffle and hear faint squeaks of the bag as you squeeze, and placing a bow while the drizzle is still soft ensures it adheres. The contrast of ribbon and bow transforms a simple truffle into a miniature gift, with layered textures and bright accents. If you wait too long to place bows they may not stick, so work steadily but gently to keep the decoration neat.
- Serve once the chocolate has set, or chill in the refrigerator until ready to serve. Enjoy!: The final product should look tidy and festive, with crisp bows and glossy ribbons. Taste yields a creamy center, a slight tang from the cream cheese , and a thin crack of candy coating, while the sanding sugar adds a pleasant tooth. If storing, keep them chilled to maintain shape and texture; leaving them at warm room temperature can soften the centers and dull the coating's appearance.
Tips and Tricks about Christmas Present Oreo Truffles
These tips will help you breeze through assembly and keep your truffles looking polished. I include techniques for melting, chilling, and decorating that I use every season to produce consistent, gift worthy results.
- Soften the cream cheese properly, leaving it at room temperature for at least thirty minutes ensures a smooth blend with the cookies and prevents lumps. If it is still cold the mixture will resist combining and you may overwork it trying to smooth lumps out.
- Pulse, do not pulverize the cookies, using short bursts in the food processor creates fine crumbs without turning them into powder which helps keep a nice texture in the centers. Overprocessing can make the centers too dense and dry.
- Use a cookie scoop for uniform pieces, a 2 tablespoon scoop yields consistent cube sizes that chill and dip evenly, which makes decorating simpler and the final platter look professional.
- Temper the candy melts gently, microwave at half power and stir frequently to keep the melts glossy and smooth; overheating can cause them to thicken or seize making dipping difficult.
- Keep a damp cloth handy to wipe spoons, molds, or edges when piping or filling, this small step keeps the bows and ribbons neat and prevents color contamination between bowls.
- Freeze between stages, chilling after forming and again after dipping gives you clean edges and prevents decorations from sliding when you attach bows and ribbons.
Serving This Christmas Present Oreo Truffles
These truffles are designed to be shared, displayed, and savored. Below I describe occasions, presentation ideas, storage tips, and pairing suggestions to make serving effortless and festive.
- Holiday dessert platters, arrange a mix of chocolate and red velvet truffles on a festive platter with alternating colors for visual interest, placing bows facing up to mimic wrapped gifts.
- Party favors, place individual truffles in small clear boxes or cellophane bags tied with ribbon for instant edible gifts that guests can take home.
- Cookie swaps and potlucks, these travel well if chilled; pack them in a single layer and keep them refrigerated until you arrive to avoid melting and bow damage.
- Kids gatherings, set up a decorating station with extra sanding sugar and let little hands drizzle ribbons, this turns serving into a fun activity as well as a treat.
- Storing and freezing, freeze truffles on a tray until solid then transfer to an airtight container; they keep well frozen for several weeks and can be thawed in the fridge before serving.
- Presentation ideas, use small cupcake liners or mini gift boxes for an extra polished display, and add a sprig of fresh greenery or a small ornament on the platter for a seasonal touch.
FAQ
Conclusion
These Christmas Present Oreo Truffles stand out because they combine simplicity with whimsical presentation, delivering festive flavor in every bite. If you enjoy treats that travel well and make a statement without complicated steps, you will love how quickly these come together and how much joy they spark. Try making a batch this season, and enjoy sharing these charming little edible gifts with friends and family; their playful look and creamy centers always invite compliments and requests for the recipe.
Christmas Present Oreo Truffles
Equipment
- 3mini bow fondent silicone mold
Ingredients
- 22 cookies chocolate Oreo cookies Crush finely to create the chocolate base and provide texture; these cookies supply both cocoa flavor and structure for the truffle centers. Combine with softened cream cheese to form a moldable mixture that holds shape when chilled. Use the cookie crumbs to balance sweetness from the candy melts and add authentic Oreo taste.
- 22 cookies red velvet Oreo cookies Crumble gently to add a complementary cocoa-vanilla tang with red velvet flavor; these cookies contribute color contrast and a slightly different crumb texture. Mix into the cream cheese blend to create festive-cookie layers or alternating truffle batches. Provide visual and flavor variety when paired with the chocolate Oreos.
- 8 ounces cream cheese softened to room temperature Soften completely to room temperature to ensure easy blending; cream cheese binds the crushed cookies into a smooth, cohesive dough. Contribute richness and slight tang that balances the sweetness of the Oreos and candy melts. Chill the mixture slightly if needed to firm up before rolling into balls.
- 10 ounce red candy melts divided Melt and divide for coating and decorative details; red candy melts provide vibrant color and a smooth shell when tempered or heated correctly. Use a portion to fully enrobe truffles and reserve some for drizzling or creating present motifs. Adjust melting temperature carefully to maintain sheen and prevent burning.
- 10 ounce green candy melts divided Melt and portion for coating, offering a bright green hue ideal for holiday-themed decorations; green candy melts form a firm, glossy shell when applied. Reserve some melts for dipping and pipework to add bows or accents. Combine with other colored melts to create layered designs without flavor conflicts.
- 10 ounce white candy melts divided Melt and separate for coating and accents; white candy melts give a clean, neutral base and allow for sharp contrast against colored coatings. Use a portion to enrobe or drizzle, and another for fine piping details like ribbons or snowflake accents. Maintain low heat to keep the white coating smooth and non-grainy.
- White sparkly sanding sugar optional Sprinkle lightly for a sparkling finish that adds festive shimmer and texture; sanding sugar enhances visual appeal without altering flavor significantly. Use sparingly on wet candy melt coatings so crystals adhere and catch light. Choose white sparkle to complement the red, green, and white color scheme for a polished look.
Instructions
- Line two rimmed baking sheet with parchment paper. You can also use a waxed paper-lined pan or cover a pan in aluminum foil sprayed lightly with spray oil.: The smell here is of clean paper and neutral pans, and arranging two sheets gives you space to separate flavors and decorated truffles. This step prevents sticking and protects your countertop from drips, while the parchment allows you to slide trays in and out of the freezer without smashing decorations. A common mistake is skipping the parchment which can make removal frustrating, so always prep your sheets first and leave them flat to avoid wrinkles that transfer to the truffles.
- Place chocolate Oreo cookies in food processor and mix until cookies turn into Oreo crumbs, then set to the side. In the same food processor, blend the red velvet Oreo cookies into fine crumbs and set aside. See notes if you don’t have a food processor.: When you pulse the cookies you will hear a steady, even grinding and see a fine, sandy texture develop, almost like damp sand. The aroma becomes richly chocolatey, especially from the chocolate Oreos, and the color shift tells you they are ready. If you overprocess into a powder, the centers can become too dense, so pulse in short bursts to maintain a slightly granular but fine crumb. If you do not have a food processor, crushing in a sturdy bag with a rolling pin works, though it takes more effort to get uniformly fine crumbs.
- Add half of the cream cheese to the chocolate Oreo crumbs and the other half of the cream cheese to the red velvet Oreo crumbs. Mix each bowl of cookie crumbs with the cream cheese and a clean silicone spatula until smooth.: The texture will shift as you fold in the room temperature cream cheese , the mixture turning glossy and cohesive, almost like a thick dough. The smell will be mildly tangy and sweet, and when you press a bit between your fingers it should hold shape without cracking. If the cream cheese is too cold, lumps remain and the dough is hard to work, so always soften ahead of time. Avoid overmixing which can make the centers too dense; stop once the crumbs are uniformly moistened.
- Using a 2 tablespoon cookie scoop, scoop dough from the bowl and form into cubes. Place on the prepared baking sheet so the truffles aren’t touching each other and place in the freezer to chill for 30 minutes.: As you portion with a scoop you will feel the dough give and then spring back slightly, which is a sign it is the right consistency. Forming into cubes rather than rounds makes them look like tiny presents, and chill time firms them so they hold shape during dipping. You will notice a cold, slightly tangy scent when they come out of the freezer. A frequent error is skipping the chill, which causes centers to deform while dipping, so be patient and allow the full thirty minutes.
- Place the red white and green candy melts each in a heatproof bowl, saving about 1/4 of each color of chocolate for the ribbons. Place the bowls in the microwave and heat for a minute at half power, then stir each with it's own clean and dry spoon. Continue heating the candy melts in thirty-second increments until each forms a smooth chocolate sauce.: The candy melts should become glossy and pourable, with a faint sweet aroma and a smooth sheen. Stirring between intervals helps distribute the heat so the melts do not scorch. Reserving some melts for ribbons ensures you have clean, bright lines for decoration. Overheating is the main pitfall, which can cause the melts to thicken or seize, so use lower power and brief bursts to maintain a smooth consistency.
- Make the bows by spooning some of each colored chocolate into the silicone molds, working in batches as needed. Be sure to wipe the edges so each bow come out clean. Refrigerate until the chocolate is set.: Filling the bow molds feels precise and calming, and when the chocolate sets you will see crisp edges and vibrant color. The surface should look glossy before refrigeration and then dull slightly as it firms. Wiping the edges prevents ragged details and helps each bow pop from the mold cleanly. A misstep is overfilling the molds which can cause messy edges, so use small spoons and tidy the rims promptly.
- Remove half the truffles from the freezer. Working in batches, dip each truffle one at a time into the melted candy melts with a fork. Tap the fork to remove any excess chocolate then place on the prepared baking sheet.: As you dip, you will hear a small splash and see a smooth coat envelope the truffle, then tapping releases excess coating to leave an even shell. The surface should be glossy and set up quickly, with a faint sweet, buttery scent. Dipping in small batches prevents the melted chocolate from cooling and thickening too much. Avoid dunking too many at once, which lowers the melt temperature and makes coating uneven.
- Immediately top with sanding sugar or sprinkles if desired. Repeat until all the truffles both chocolate and red velvet flavored are covered in chocolate.: The sugar adds sparkle and a slight crunch, and placing it while the coating is wet ensures it adheres. You will see the crystals glint and feel a slightly textured surface once set. Work quickly to keep the finish smooth; if the coating begins to set, the sugar will not stick. A common oversight is waiting too long to add decorations, which leads to poor adhesion.
- Place the truffles back in the freezer to chill for 20-30 minutes or until the chocolate is fully set.: The freezing step firms the shell and centers, producing a satisfying snap when bitten. The aroma fades to a gentle sweetness as they firm, and the surface becomes matte where it was once shiny. Rushing this step can cause ribbons or bows to slide, so ensure the coating is completely solid before piping or stacking.
- Once the truffles have set, place each of the remaining colors of candy melts into their own microwave-safe piping bags or freezer zip-top bag. Microwave on half power for 30 seconds, then squeeze the chocolate in each bag to make sure the chocolate melts evenly. Repeat in 30 second increments or until all the candy melts are melted.: The piping bags allow precise control for stripes and ribbons, and you will notice a smooth, flowing stream when you squeeze. The sound is a soft whisper of chocolate moving through the bag, and the visual result is clean lines when done steadily. If the melts are too cool they will sputter and pull, so warm gradually and test the flow before piping onto the truffles.
- Remove all of the bows from the mold and set to the side. Snip a small piece of the tips off of each bag. Drizzle the chocolate over the present to make each ribbon, then immediately top with a chocolate bow. Repeat for each chocolate present truffle.: As you drizzle, you will see fine ribbons of color cross the truffle and hear faint squeaks of the bag as you squeeze, and placing a bow while the drizzle is still soft ensures it adheres. The contrast of ribbon and bow transforms a simple truffle into a miniature gift, with layered textures and bright accents. If you wait too long to place bows they may not stick, so work steadily but gently to keep the decoration neat.
- Serve once the chocolate has set, or chill in the refrigerator until ready to serve. Enjoy!: The final product should look tidy and festive, with crisp bows and glossy ribbons. Taste yields a creamy center, a slight tang from the cream cheese , and a thin crack of candy coating, while the sanding sugar adds a pleasant tooth. If storing, keep them chilled to maintain shape and texture; leaving them at warm room temperature can soften the centers and dull the coating's appearance.
Notes
- Soften the cream cheese properly, leaving it at room temperature for at least thirty minutes ensures a smooth blend with the cookies and prevents lumps. If it is still cold the mixture will resist combining and you may overwork it trying to smooth lumps out.
- Pulse, do not pulverize the cookies, using short bursts in the food processor creates fine crumbs without turning them into powder which helps keep a nice texture in the centers. Overprocessing can make the centers too dense and dry.
- Use a cookie scoop for uniform pieces, a 2 tablespoon scoop yields consistent cube sizes that chill and dip evenly, which makes decorating simpler and the final platter look professional.
- Temper the candy melts gently, microwave at half power and stir frequently to keep the melts glossy and smooth; overheating can cause them to thicken or seize making dipping difficult.
- Keep a damp cloth handy to wipe spoons, molds, or edges when piping or filling, this small step keeps the bows and ribbons neat and prevents color contamination between bowls.
- Freeze between stages, chilling after forming and again after dipping gives you clean edges and prevents decorations from sliding when you attach bows and ribbons.