
Five Cheese Mac and Cheese
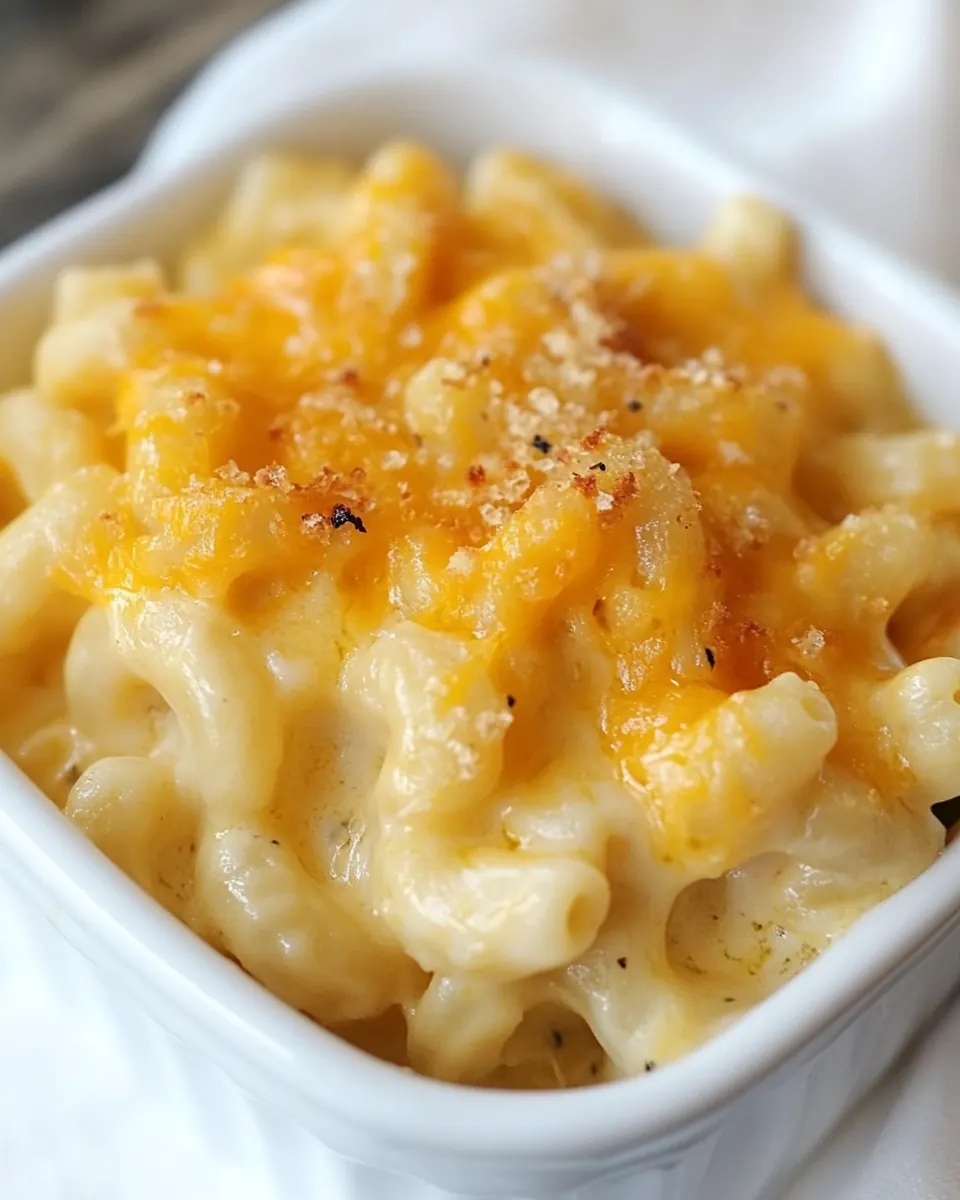
Five Cheese Mac and Cheese is the kind of dish I reach for when I want to make everyone at the table smile without fuss. I remember the first time I layered five different cheeses over hot pasta, the kitchen filled with an irresistible, toasty aroma that made every chair at the table feel like a front row seat to comfort. That first bite was creamy, salty, and somehow celebratory all at once, even though it was just a simple family meal on a Tuesday night.
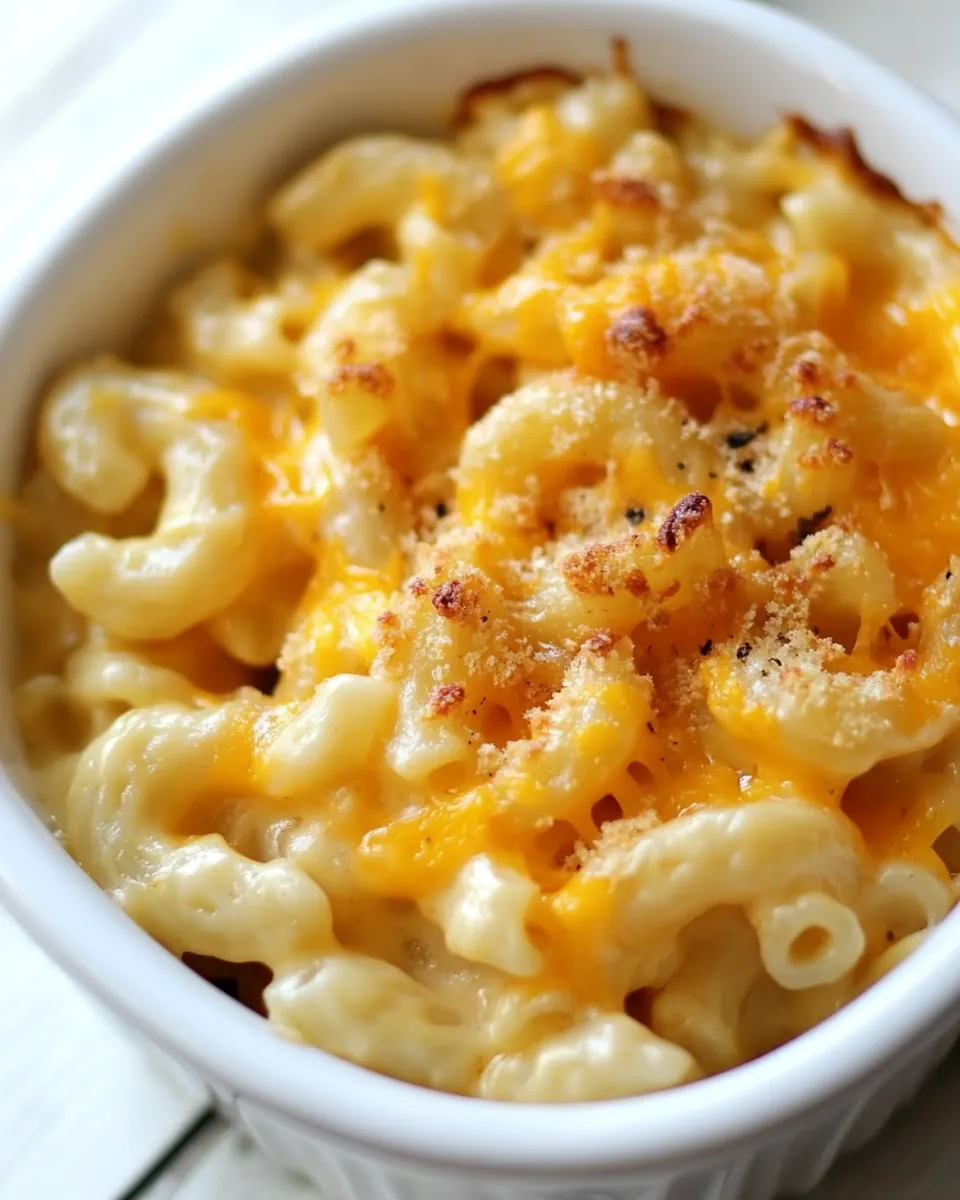
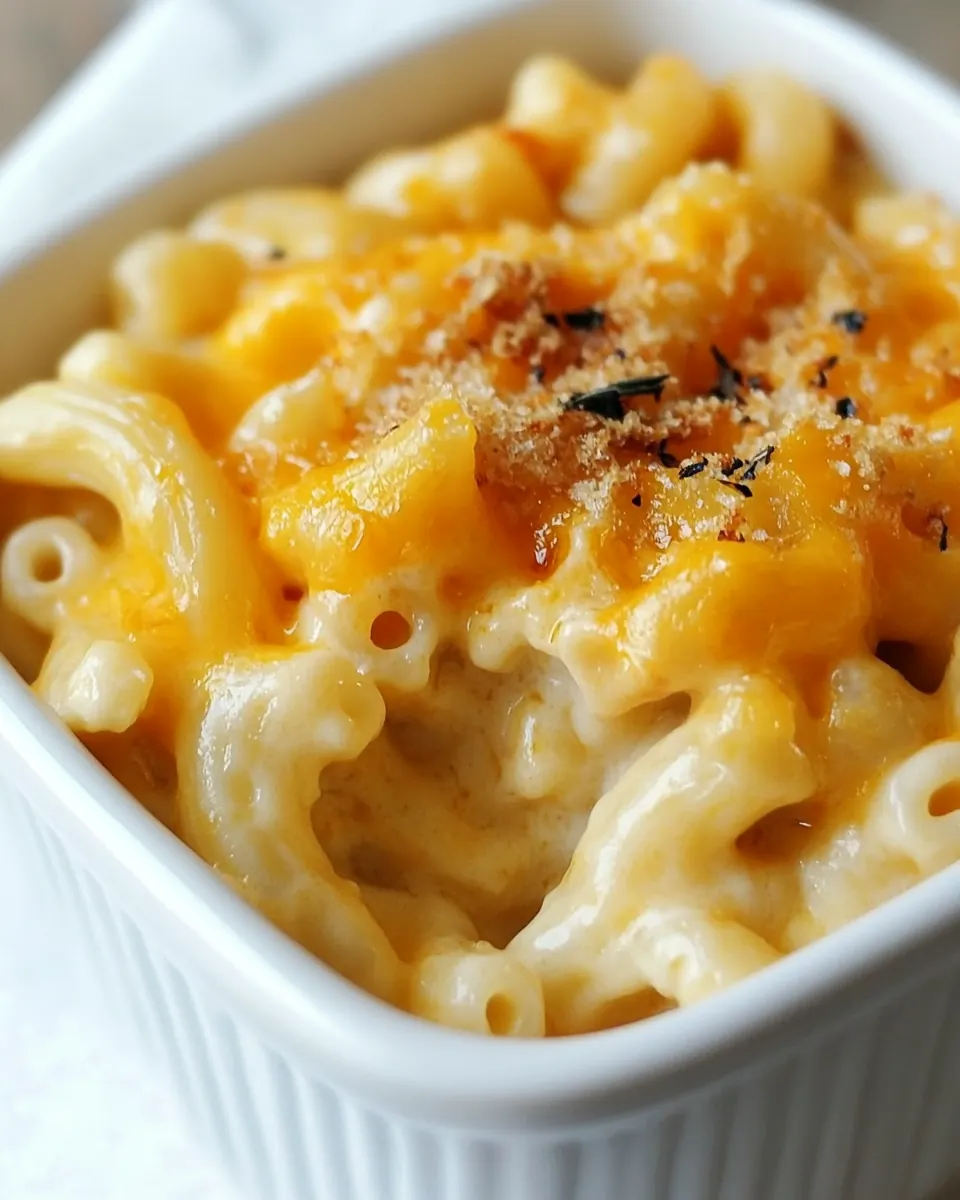
Over the years I’ve learned that great macaroni and cheese is more about texture than technique. With Five Cheese Mac and Cheese I like the contrast between tender elbow macaroni and pockets of molten cheese that pull into long, gooey strands. It is not a heavy sauce that smothers the pasta, instead it lets each individual tube of macaroni shine while the cheeses add layers of flavor and mouthfeel. I often think of this as a celebration of dairy, a recipe that is both nostalgic and reliably crowd pleasing.
When I serve Five Cheese Mac and Cheese I keep things simple, letting the flavors do the talking. A lot of people assume mac and cheese must be lumpy or overly rich to be good, but I aim for balance, so each forkful has a silkiness from the melted cheeses and a slight chew from perfectly cooked elbow macaroni. Whenever I get guests asking for seconds, I know I hit the right note.
Recipe Snapshot
50 mins
10 mins
40 mins
Medium
350 kcal
American
Keto, Gluten-Free
Dinner
Silicone Spatula, Elbow Macaroni, 9×13 Dish
Why This Five Cheese Mac and Cheese Is a Winner
Rich, layered flavor
I love how the combination of five cheeses delivers complexity without overcomplicating the process. Each cheese brings its own personality, so the dish tastes layered and interesting, rather than flat. When you scoop a spoonful you get a mix of sharpness, creaminess, and a little tang, which keeps the palate engaged bite after bite.
Comfort with texture
This recipe stands out because it emphasizes texture as much as taste. The elbow macaroni holds pockets of melted cheese, giving you those satisfying strings and little cheesey wells. I find that textural contrast turns a simple bowl of pasta into something you remember.
Easy assembly, big impact
I appreciate recipes that are approachable for busy nights, and this is one of them. There are no complicated sauces to babysit, just pasta, shredded cheeses, a small amount of butter, and milk. That simplicity means you can get dinner on the table quickly, yet it feels indulgent and special.
Flexible and forgiving
Because the cheeses are layered and melted in the oven, there is some room for improvisation. If you prefer a slightly browner top or a looser melt, you can adjust the oven time. I often remind people that this forgiving nature makes it perfect for feeding a group without stressing about precise technique.
Great for gatherings
When I host, Five Cheese Mac and Cheese is a go to because it appeals to every age. Kids adore the gooeyness, and adults appreciate the depth of flavor. It’s the kind of recipe that makes a weeknight feel like a celebration, and a gathering feel cozy and familiar.
What Goes Into Five Cheese Mac and Cheese
This collection of ingredients is built around a simple philosophy: keep the components honest and let quality shine. The key players are the elbow macaroni for structure, and the five different shredded cheeses for layered flavor. Small amounts of butter and milk help the cheeses melt and bind to the pasta, while salt and pepper balance the richness. Together they create a pleasing interplay of creamy, melty, and lightly browned textures.
- 16 ounces elbow macaroni: Boil until tender to provide the pasta base that carries the creamy cheese sauce and soaks up flavors; cook al dente then drain and toss with sauce to prevent clumping. Serve hot for best texture and to maintain saucy cohesion throughout the dish.
- 1 cup shredded colby cheese: Shred finely to contribute a mild, creamy, and slightly sweet flavor that melts smoothly into the sauce; combine with other cheeses for balanced richness. Add during the melting step to ensure even distribution and a velvety mouthfeel.
- 1 cup shredded sharp cheddar cheese: Shred finely to supply sharp, tangy flavor and depth that cuts through the creaminess; melts well and enhances overall cheesiness. Incorporate gradually to control intensity and maintain a balanced flavor profile.
- 1 cup shredded Monterey Jack cheese: Shred finely to add a buttery, mild melt that creates a silky texture and helps bind the sauce; offers a smooth, creamy mouthfeel. Blend with sharper cheeses to soften strong notes and improve meltability.
- 1 cup shredded Mexican blend cheese: Shred finely to introduce a blend of cheeses (often cheddar, Monterey Jack, queso quesadilla) that contributes a layered, slightly spicy flavor and good melting quality. Use as part of the overall cheese mix to add complexity and a cohesive melt.
- 1 cup shredded Italian blend cheese: Shred finely to impart Italian-style flavors such as Parmesan and Romano blends that bring savory, herbaceous, and umami notes; aids browning if baked. Sprinkle or fold into the mix to enhance depth without overpowering the other cheeses.
- 2 tablespoons butter, cut into small cubes: Cube cold to add a small amount of rich fat that helps create a smooth, glossy sauce when melted; butter also adds flavor and assists in emulsifying the dairy. Melt early with milk to form the roux-like base for a creamier texture.
- 3 tablespoons whole milk: Measure cold to thin and loosen the cheese sauce slightly, improving pourability and consistency; whole milk contributes fat for richness and a silkier finish. Add gradually while stirring to achieve the desired sauce thickness.
- Salt and pepper, to taste: Season lightly to balance and enhance flavors; salt heightens the cheese's savory notes while pepper adds a subtle bite, both adjusted to taste. Add incrementally and taste as you go to avoid over-seasoning the finished dish.
Preparation Steps for Five Cheese Mac and Cheese
Getting this dish from stove to oven is straightforward, and the magic happens as the cheeses melt together. Below I expand on each step so you can sense when things are right, and avoid common pitfalls. Follow each instruction and use the sensory cues to guide you.
- Preheat oven to 400 degrees F.: As the oven warms you should notice a faint hum and then warmth radiating when you open the door to check. A fully preheated oven ensures the cheeses start melting quickly and the top gains light color instead of taking a long time to warm through. If you skip preheating the top may not brown evenly, so always allow the oven to reach temperature before placing the dish inside.
- Bring a large pot of water to a boil over high heat.: You will see vigorous bubbles and hear rolling water as it comes to a boil. Salting the water is important because it seasons the elbow macaroni from the inside out. If the boil is not strong enough the pasta can become gummy, so be patient and wait for a true, rolling boil before adding pasta.
- When the water is boiling add in macaroni and cook until al dente.: You will feel the pasta giving slightly when you bite into it, a slight resistance that tells you it is al dente. This texture matters because the pasta will finish cooking in the oven and you want it to hold shape, not become mushy. Overcooking here is a common mistake, and it leads to a softer mouthfeel once baked.
- Drain and set aside until needed.: After pouring the pasta into a colander you should see steam rising and the pasta glistening with a thin film of water. Let it rest briefly so excess moisture evaporates, otherwise the final casserole can be watery. Avoid rinsing the pasta because rinsing removes surface starch that helps cheeses cling to each piece.
- In a medium-sized mixing bowl add all the cheese and stir to combine.: As you mix the shredded cheeses together you can already see the color variation and smell a nutty, dairy aroma. Combining them evenly ensures each bite contains a balanced mix. A common error is to heap one cheese in one area, causing uneven melt and flavor, so take a moment to toss them thoroughly.
- In a 9×13 dish add butter cubes evenly over the bottom.: When the butter melts it will spread a golden, glossy coating across the dish, which adds flavor and prevents sticking. The butter also helps the bottom layer of pasta develop a hint of toasted richness. If you crowd the butter or place it unevenly you may end up with hot spots, so distribute the cubes deliberately.
- Add in half the pasta and cover with half the shredded cheese.: When you place the first layer of elbow macaroni into the dish you will notice steam settling and the starches ready to bond with the cheese. The first layer of cheese begins to soften from the dish warmth and butter beneath. Layering promotes even melt and prevents clumping, whereas dumping everything together can create an uneven texture.
- Top with remaining pasta and remaining cheese.: The top layer of cheese will sit visibly on the pasta, creating a surface that browns attractively in the oven. Press lightly so the pasta and cheese make contact, which encourages melting into one cohesive casserole. If the top is too sparse on cheese, the bake will lack that signature gooey top, so be sure to distribute it evenly.
- Drizzle milk over the top of the mac and cheese and add to the oven.: The thin stream of milk will settle into crevices, helping the cheeses soften and create pockets of creaminess while baking. You should hear a faint hiss as the milk hits the hot dish, and the oven will quickly take over to meld the ingredients. Adding too much liquid can make the casserole soupy, so stick to the small amount recommended.
- Once the cheese has started to melt, about 10 minutes, open the oven and stir the mac and cheese together.: At this point you will see the cheeses loosening and becoming glossy, and the aroma will be rich and tempting. Stirring now helps redistribute the melted cheese so every piece becomes coated. Be careful when opening the oven, steam will escape and the topping may be soft, so use an oven mitt and a sturdy utensil to stir gently. A common misstep is to stir too early while cheeses are still firm, which can tear the pasta and create a clumpy texture.
- Bake for another 20 minutes until the top of the mac and cheese is lightly browned.: During this final period you will hear a faint bubbling and see the cheese transform from glossy to slightly golden on top. The edges may darken a touch, providing contrast and a hint of toasted flavor that I find irresistible. Remove when the top has a light brown hue, not when it is deeply dark, to preserve a creamy interior. Overbaking results in a dry casserole, so watch the color and pull it out when it looks inviting and tender inside.
Recipe Tips about Five Cheese Mac and Cheese
This casserole rewards small techniques that lift it from good to memorable. The list below expands each practical tip into a usable action that improves texture, flavor, and presentation. Read these and keep them in mind while you assemble and bake.
- Shred from blocks: Whenever possible shred the cheeses yourself, as pre shredded cheeses often include anti caking agents that inhibit smooth melting, leading to a slightly grainy texture.
- Salt the pasta water: Seasoning the water seasons the interior of the elbow macaroni, ensuring that every bite is flavored through and not just on the surface.
- Even layering: Layering the pasta and cheeses promotes uniform melting, so split the pasta and cheese into two layers rather than dumping everything at once into the dish.
- Watch the oven color: Pull the casserole when the top is lightly browned, because deeper browning can dry out the interior while offering marginal flavor gains.
- Rest before serving: Let the dish sit for about five to ten minutes after removing it from the oven, which helps the cheeses settle and makes serving cleaner and easier.
What to Serve With Five Cheese Mac and Cheese
This dish is substantial, so think about balance when planning the rest of the meal. The suggestions below are versatile for casual weeknight dinners, weekend gatherings, and seasonal comfort meals. Each option complements the rich, cheesy profile while offering contrast in texture and flavor.
- Simple green salad: A crisp salad with a light vinaigrette cuts through the richness and adds a refreshing contrast to the creamy cheese and pasta textures.
- Steamed or roasted vegetables: Vegetables like broccoli or green beans provide a bright, slightly crunchy counterpoint and make the meal feel more balanced.
- Light protein options: If you want to round out the meal, choose lean proteins such as grilled chicken or fish, served simply so they do not overpower the cheesy centerpiece.
- Crusty bread: A warm, crusty loaf is great for scooping and catching any leftover melted cheese, adding a toasty element to the table.
- Occasions: This recipe shines for family dinners, casual gatherings, and cold weather nights where comfort food is desirable, especially in the winter months.
- Storage tips: Store leftovers in an airtight container in the refrigerator for up to three days. Reheat gently in a moderate oven so the cheese remelts evenly without becoming greasy.
- Seasonal pairing: In the colder months serve it with roasted root vegetables, while in milder weather a bright salad will keep the meal feeling fresh and lively.
FAQ
Conclusion
What makes Five Cheese Mac and Cheese special is its layered, cheesy character and the pleasing contrast between tender pasta and molten, slightly browned cheese. It’s a straightforward recipe that delivers comfort without complicated steps, making it perfect for weeknights and gatherings alike. Try it soon, and enjoy the simple pleasure of a dish that brings people together with every rich, gooey serving.

Five Cheese Mac and Cheese
Equipment
- Silicone spatula
- Elbow Macaroni
- 9×13 Dish
Ingredients
- 16 ounces elbow macaroni Boil until tender to provide the pasta base that carries the creamy cheese sauce and soaks up flavors; cook al dente then drain and toss with sauce to prevent clumping. Serve hot for best texture and to maintain saucy cohesion throughout the dish.
- 1 cup shredded colby cheese Shred finely to contribute a mild, creamy, and slightly sweet flavor that melts smoothly into the sauce; combine with other cheeses for balanced richness. Add during the melting step to ensure even distribution and a velvety mouthfeel.
- 1 cup shredded sharp cheddar cheese Shred finely to supply sharp, tangy flavor and depth that cuts through the creaminess; melts well and enhances overall cheesiness. Incorporate gradually to control intensity and maintain a balanced flavor profile.
- 1 cup shredded Monterey Jack cheese Shred finely to add a buttery, mild melt that creates a silky texture and helps bind the sauce; offers a smooth, creamy mouthfeel. Blend with sharper cheeses to soften strong notes and improve meltability.
- 1 cup shredded Mexican blend cheese Shred finely to introduce a blend of cheeses (often cheddar, Monterey Jack, queso quesadilla) that contributes a layered, slightly spicy flavor and good melting quality. Use as part of the overall cheese mix to add complexity and a cohesive melt.
- 1 cup shredded Italian blend cheese Shred finely to impart Italian-style flavors such as Parmesan and Romano blends that bring savory, herbaceous, and umami notes; aids browning if baked. Sprinkle or fold into the mix to enhance depth without overpowering the other cheeses.
- 2 tablespoons butter, cut into small cubes Cube cold to add a small amount of rich fat that helps create a smooth, glossy sauce when melted; butter also adds flavor and assists in emulsifying the dairy. Melt early with milk to form the roux-like base for a creamier texture.
- 3 tablespoons whole milk Measure cold to thin and loosen the cheese sauce slightly, improving pourability and consistency; whole milk contributes fat for richness and a silkier finish. Add gradually while stirring to achieve the desired sauce thickness.
- Salt and pepper, to taste Season lightly to balance and enhance flavors; salt heightens the cheese's savory notes while pepper adds a subtle bite, both adjusted to taste. Add incrementally and taste as you go to avoid over-seasoning the finished dish.
Instructions
- Preheat oven to 400 degrees F.: As the oven warms you should notice a faint hum and then warmth radiating when you open the door to check. A fully preheated oven ensures the cheeses start melting quickly and the top gains light color instead of taking a long time to warm through. If you skip preheating the top may not brown evenly, so always allow the oven to reach temperature before placing the dish inside.
- Bring a large pot of water to a boil over high heat.: You will see vigorous bubbles and hear rolling water as it comes to a boil. Salting the water is important because it seasons the elbow macaroni from the inside out. If the boil is not strong enough the pasta can become gummy, so be patient and wait for a true, rolling boil before adding pasta.
- When the water is boiling add in macaroni and cook until al dente.: You will feel the pasta giving slightly when you bite into it, a slight resistance that tells you it is al dente. This texture matters because the pasta will finish cooking in the oven and you want it to hold shape, not become mushy. Overcooking here is a common mistake, and it leads to a softer mouthfeel once baked.
- Drain and set aside until needed.: After pouring the pasta into a colander you should see steam rising and the pasta glistening with a thin film of water. Let it rest briefly so excess moisture evaporates, otherwise the final casserole can be watery. Avoid rinsing the pasta because rinsing removes surface starch that helps cheeses cling to each piece.
- In a medium-sized mixing bowl add all the cheese and stir to combine.: As you mix the shredded cheeses together you can already see the color variation and smell a nutty, dairy aroma. Combining them evenly ensures each bite contains a balanced mix. A common error is to heap one cheese in one area, causing uneven melt and flavor, so take a moment to toss them thoroughly.
- In a 9×13 dish add butter cubes evenly over the bottom.: When the butter melts it will spread a golden, glossy coating across the dish, which adds flavor and prevents sticking. The butter also helps the bottom layer of pasta develop a hint of toasted richness. If you crowd the butter or place it unevenly you may end up with hot spots, so distribute the cubes deliberately.
- Add in half the pasta and cover with half the shredded cheese.: When you place the first layer of elbow macaroni into the dish you will notice steam settling and the starches ready to bond with the cheese. The first layer of cheese begins to soften from the dish warmth and butter beneath. Layering promotes even melt and prevents clumping, whereas dumping everything together can create an uneven texture.
- Top with remaining pasta and remaining cheese.: The top layer of cheese will sit visibly on the pasta, creating a surface that browns attractively in the oven. Press lightly so the pasta and cheese make contact, which encourages melting into one cohesive casserole. If the top is too sparse on cheese, the bake will lack that signature gooey top, so be sure to distribute it evenly.
- Drizzle milk over the top of the mac and cheese and add to the oven.: The thin stream of milk will settle into crevices, helping the cheeses soften and create pockets of creaminess while baking. You should hear a faint hiss as the milk hits the hot dish, and the oven will quickly take over to meld the ingredients. Adding too much liquid can make the casserole soupy, so stick to the small amount recommended.
- Once the cheese has started to melt, about 10 minutes, open the oven and stir the mac and cheese together.: At this point you will see the cheeses loosening and becoming glossy, and the aroma will be rich and tempting. Stirring now helps redistribute the melted cheese so every piece becomes coated. Be careful when opening the oven, steam will escape and the topping may be soft, so use an oven mitt and a sturdy utensil to stir gently. A common misstep is to stir too early while cheeses are still firm, which can tear the pasta and create a clumpy texture.
- Bake for another 20 minutes until the top of the mac and cheese is lightly browned.: During this final period you will hear a faint bubbling and see the cheese transform from glossy to slightly golden on top. The edges may darken a touch, providing contrast and a hint of toasted flavor that I find irresistible. Remove when the top has a light brown hue, not when it is deeply dark, to preserve a creamy interior. Overbaking results in a dry casserole, so watch the color and pull it out when it looks inviting and tender inside.
Notes
- Shred from blocks: Whenever possible shred the cheeses yourself, as pre shredded cheeses often include anti caking agents that inhibit smooth melting, leading to a slightly grainy texture.
- Salt the pasta water: Seasoning the water seasons the interior of the elbow macaroni, ensuring that every bite is flavored through and not just on the surface.
- Even layering: Layering the pasta and cheeses promotes uniform melting, so split the pasta and cheese into two layers rather than dumping everything at once into the dish.
- Watch the oven color: Pull the casserole when the top is lightly browned, because deeper browning can dry out the interior while offering marginal flavor gains.
- Rest before serving: Let the dish sit for about five to ten minutes after removing it from the oven, which helps the cheeses settle and makes serving cleaner and easier.