Dutch Baby
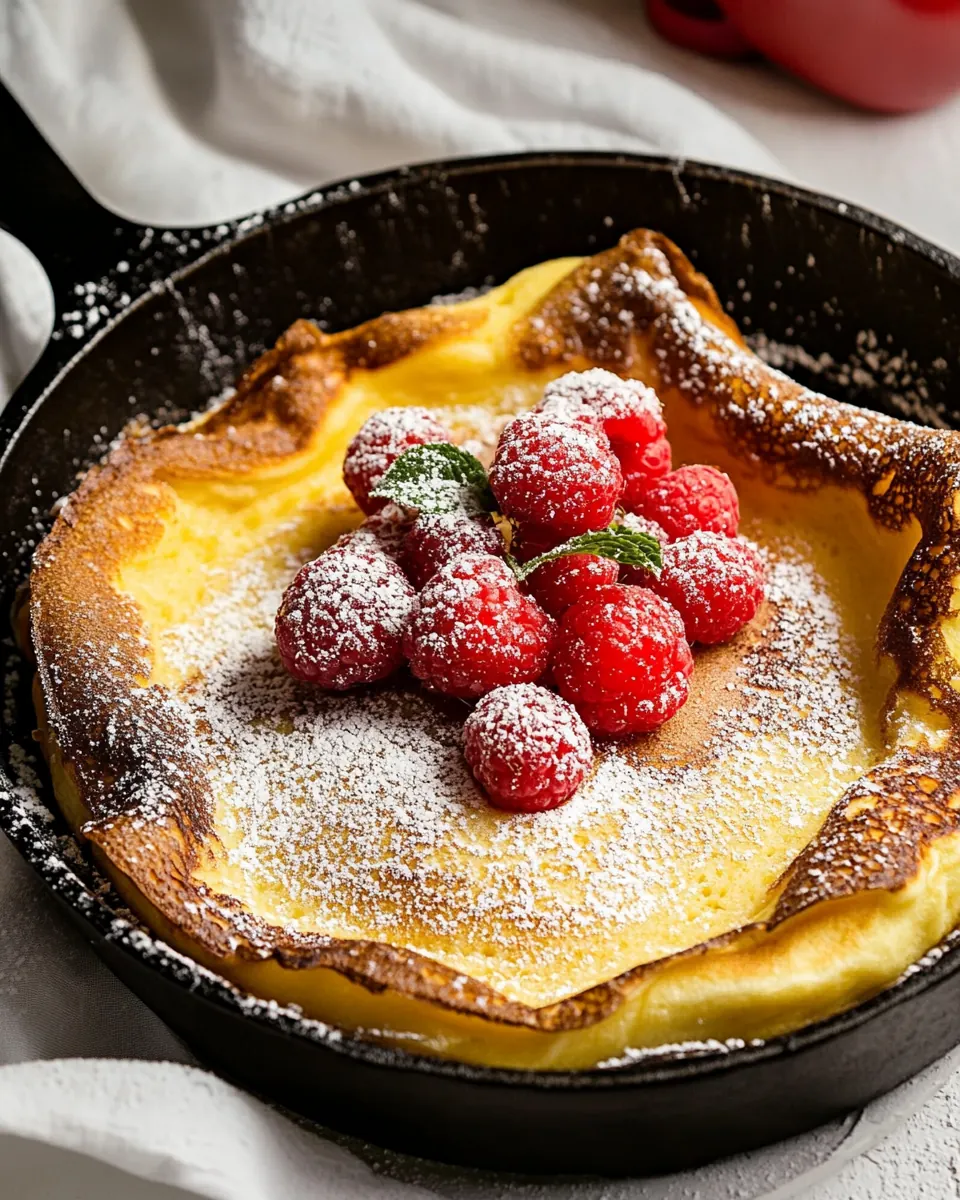
Dutch Baby is the kind of weekend recipe that always draws people into the kitchen, asking what smells so warm and buttery. The very first time I made one I was chasing a memory of a puffed pancake I had once eaten at a tiny café, and the dramatic oven oven rise had me grinning like a kid. That morning I learned how simple ingredients can conspire to create something unexpectedly theatrical, and since then this dish has been my go to when I want something that feels special with minimal fuss.
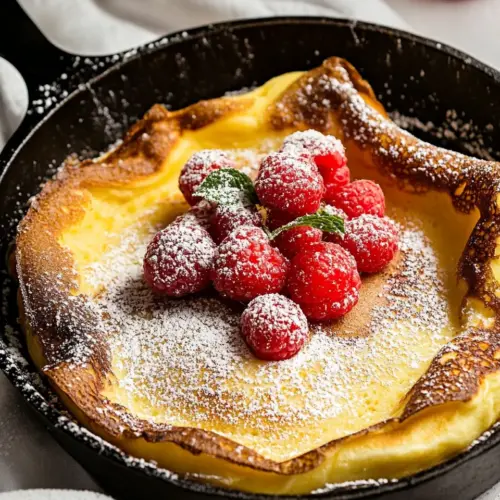
There is an honest comfort to the way a Dutch Baby puffs and browns, the edges turning crisp while the center stays tender and custardy. I often make it when friends drop by unannounced, because it comes together fast once the oven is hot, and everyone loves watching it bloom. The scent of sizzling butter hitting a cast iron skillet is as much part of the memory as the final bite, so I always keep a little extra butter on hand. Over the years I have played with toppings and serving styles, but the core batter always stays the same, and that familiar rhythm is part of the joy for me.
Recipe Snapshot
28 mins
10 mins
18 mins
Easy
200 kcal
American
Gluten-Free, Low FODMAP
Breakfast
Oven, Cast iron skillet, Blender, Hot mitts
Why This Dutch Baby Stands Out
Effortless theater in your oven
I adore how a Dutch Baby arrives at the table looking like a chef trick, while actually being very forgiving. You get that dramatic puff without complicated folding or flipping, which means you can feel fancy with very little stress.
Minimal ingredients, maximum impact
What I love most is how pantry staples like eggs, flour, and milk transform into something airy and rich. The combination yields a texture that is somewhere between a pancake and a popover, and it’s so simple to tweak with sweet or savory toppings.
Fast to make, great for guests
This is a recipe I reach for when company is coming, because you can do the blender work ahead and finish it in the oven while you chat. The timing is predictable, and that predictability makes hosting less stressful and more enjoyable.
Flexible eating occasions
I’ve served a Dutch Baby at weekend brunch, a light lunch, and even a relaxed dinner, depending on the toppings. It pairs well with fruit, a dusting of sugar, or a squeeze of citrus, so it adapts to seasons and cravings.
Kid friendly and crowd pleasing
Everyone from toddlers to grandparents has loved a warm slice, and the presentation sparks curiosity. It’s also a forgiving recipe for cooks who are learning, which makes it a wonderful thing to prepare together with family.
Key Ingredients for Dutch Baby

The beauty of this batter lies in its simplicity. A handful of well chosen ingredients work in harmony to produce a light, custardy interior and crisp, browned edges. Each component plays a role: eggs provide structure and lift, flour gives body, milk adds creaminess, and a touch of sugar and vanilla round out the flavor while butter gives that sizzling, caramelized edge you want.
- 3 large eggs, at room temperature (put in warm water 5 minutes): Beat vigorously to incorporate air and structure; eggs provide richness, lift, and the custardy texture of the Dutch Baby. Ensure they are at room temperature so they blend smoothly into the batter and create a light, puffy rise during baking.
- 1/2 cup all-purpose flour: Sift or whisk finely to avoid lumps and supply the necessary gluten and body for the batter; all-purpose flour gives the pancake enough structure to puff while remaining tender. Measure accurately to keep the batter balance that produces the characteristic edges and custard-like center.
- 1/2 cup whole milk, at room temperature (microwaved 15 seconds): Warm gently and whisk in to loosen the batter and add creaminess; whole milk contributes fat and moisture that yield a silky interior. Using room–temperature milk helps it incorporate evenly so the batter achieves a smooth consistency and consistent rise.
- 1 tbsp sugar: Sweeten mildly to balance the egginess and support browning; granulated sugar enhances flavor and caramelization on the edges. Add sparingly so the Dutch Baby retains its slightly savory profile while developing a pleasant golden crust.
- 1 tsp vanilla extract: Flavor delicately to amplify the overall aroma and provide subtle warmth; vanilla extract rounds out the batter with sweet, floral notes. Use quality vanilla for a noticeable but not overpowering layer of flavor that complements toppings.
- Pinch of salt: Season lightly to enhance other flavors and balance sweetness; a small pinch of salt sharpens the batter and deepens the overall taste. Distribute evenly so the tiny amount improves complexity without being perceptible as saltiness.
- Pinch of nutmeg, () (optional): Optionally grate or sprinkle sparingly for warm, aromatic complexity; nutmeg adds a subtle, slightly sweet-spicy note that pairs well with vanilla and butter. Include only if desired, as it can shift the profile toward spiced breakfast flavors.
- 3 tbsp unsalted butter: Melt thoroughly to grease the skillet and create the signature crisp, brown edges; unsalted butter supplies rich flavor and helps the batter climb the hot pan. Heat until sizzling so the batter begins cooking on contact and the Dutch Baby puffs dramatically.
Directions for Dutch Baby
These directions will guide you through a straightforward process that yields a showy, puffed pancake. Work methodically and keep your oven timing consistent, because the dramatic rise happens while the pan bakes. Below you will find detailed, sensory rich steps to help you feel confident at every turn.
- Preheat oven to 425˚F. Place an oven-safe skillet such as cast iron into the oven and let it preheat for at least 8 minutes.: As the oven heats, you will notice a warm, dry air that signals the environment is ready to transform the batter into a puffed masterpiece. Preheating an oven to 425˚F ensures the skillet becomes searing hot, which is essential for the immediate steam production that lifts the batter. The sound of the oven fan settling and the brief scent of warm metal are cues that the oven is stabilizing. Why this matters, we get that rapid burst of heat so the edges set quickly while the center puffs, creating that contrast between a crisp rim and a tender interior. A common mistake is underpreheating, which yields a flatter result, so always allow at least 15 minutes for the oven to fully reach temperature, and check with an oven thermometer if your oven runs cool.
- Meanwhile, in the jar of a blender, combine eggs, flour, milk, sugar, salt, nutmeg, and vanilla, and blend 30 seconds on high speed until smooth, scraping down the sides of the blender halfway through to make sure all flour is incorporated.: When the skillet is in the oven it gradually absorbs intense, even heat; after about 8 minutes the metal will be uniformly hot and ready to sizzle butter . You can often sense the heat radiating when you open the oven briefly, and the skillet surface will appear to shimmer if you look closely. This step creates the thermal shock needed to immediately crisp the batter edges on contact, which produces a dramatic lift. If the pan is not hot enough the batter will spread and not rise as impressively, so resist the urge to shortcut this step. Use oven mitts to check, and avoid touching the pan as it will be dangerously hot.
- Carefully remove the pan from the oven using hot mitts. Add 3 tbsp butter to the hot pan and swirl to coat bottom and sides of the pan. The butter should sizzle.: As the blades whirl, the batter will change from lumpy to silky, giving off a faint, sweet aroma from the sugar and vanilla . Blending for about 30 seconds ensures the mixture is homogeneous, which helps it set evenly in the oven. Scraping the jar prevents pockets of unblended flour that can create dense spots in the final puff. The texture should be pourable, like heavy cream, indicating the correct hydration. If the batter seems too thick, a splash of milk can adjust it; too thin and it may not hold structure as well. A common error is underblending, which leaves lumps and uneven texture.
- Add batter to the buttered pan then bake for 16-18 minutes or until pancake is puffed and golden brown at the edges.: When you open the oven the blast of hot air and the bright heat will remind you how intense the environment is. Using sturdy hot mitts, slide the skillet onto the range top or an oven rack, and be mindful of the radiant heat nearby. This moment is crucial because the surface temperature of the skillet should be high enough to immediately foam the butter and cause a sizzle, a sound that reassures you the pan is ready. Avoid setting the skillet on a wet surface since thermal shock could warp the pan or cause splatter. A common pitfall here is underestimating the heat and touching the pan with insufficient protection, so always use proper mitts.
- Carefully remove the pan from the oven with hot mitts and serve pancake right away.: As the butter hits the hot metal it will foam and release a nutty, toasted scent; that sizzling noise is exactly what you want. Swirling ensures the entire surface is coated so the batter can slide and the edges crisp evenly. The visual cue is when the butter turns a light golden color and seems to shimmer across the skillet. If the butter browns too quickly, pull the pan out momentarily to avoid burnt flavors. Too little butter results in sticking and uneven browning, so don’t skimp.
- The butter should sizzle: That immediate sizzle indicates the pan is hot enough to create steam and lift the batter, producing the characteristic rise and crisp edge. The sizzling also imparts a faintly caramelized aroma that browns the exterior as the center sets. Pay attention to the intensity of the sizzle; if it is violent and smokey, the pan may be too hot and the butter could burn, so briefly vent the oven or reduce the oven temperature slightly. If you hear only a whisper, the pan might not be hot enough, which can affect the puff, so ensure the skillet has had sufficient preheat time.
- Add batter to the buttered pan then bake for 16 to 18 minutes or until pancake is puffed and golden brown at the edges: As the batter hits the skillet you will hear a gentle hiss and see it begin to set around the edges within a minute. Inside the oven the center will swell dramatically, creating those theatrical peaks and valleys, and the edges will take on a rich golden brown color. The aroma of cooked eggs and toasted butter will fill the kitchen, promising a satisfying contrast of textures. The visual cues for doneness are a deeply puffed center and deeply colored rim. Avoid opening the oven door repeatedly, as that can cause the structure to collapse. If you notice the center wobbling excessively after the time, allow one to two more minutes, but watch carefully to prevent overbrowning.
- Carefully remove the pan from the oven with hot mitts and serve pancake right away: The final moments are sensory rich, with a puffed dome that begins to deflate gently as it cools to a tender custard with a crisp rim. Serve immediately to enjoy the contrast between warm, ethereal center and crunchy edges; a delayed serving will reduce the height and change the texture. Use caution when transporting the skillet since the handle and metal will be extremely hot. A common mistake is letting it sit too long on the counter, which diminishes the visual impact and alters the eating experience, so bring it to the table promptly.
Helpful Notes about Dutch Baby
This next section collects practical pointers I repeatedly use when I make a Dutch Baby. They cover small adjustments and common adjustments that keep the result consistently impressive. Read them before you bake and keep them nearby while you work.
- Room temperature matters: Bringing the eggs and milk to room temperature helps the batter emulsify uniformly and encourages a stronger rise in the oven. If you forgot to set them out, try placing the eggs in warm water for five minutes and microwaving the milk for about fifteen seconds; this prevents the batter from becoming dense.
- Preheat your skillet: A properly heated cast iron or oven safe skillet is non negotiable. Give the pan at least eight minutes in the hot oven so it can radiate heat evenly, which creates immediate steam and the signature puff. Cold pans produce flat results.
- Blend for smoothness: Use a blender for about thirty seconds at high speed to produce a silky batter. Stop and scrape the sides midway to ensure no pockets of flour remain, which can create dense bits in the finished pancake.
- Mind the butter: Add the butter to the hot pan and swirl to coat. When the butter foams and sizzles, you know the surface is ready. If it browns too fast, slightly reduce oven time or temperature to avoid a bitter taste.
- Serve right away: The spectacle and the best texture happen within minutes of coming out of the oven. The pancake deflates as it cools, so plan to plate and enjoy immediately to capture the contrast between the crisp edges and the soft center.
Best Served With
A Dutch Baby is versatile, and the way you serve it can transform the meal. Below are ideas for toppings, pairings, occasions, and storage that help you choose how to present this puffed pancake to guests or family.
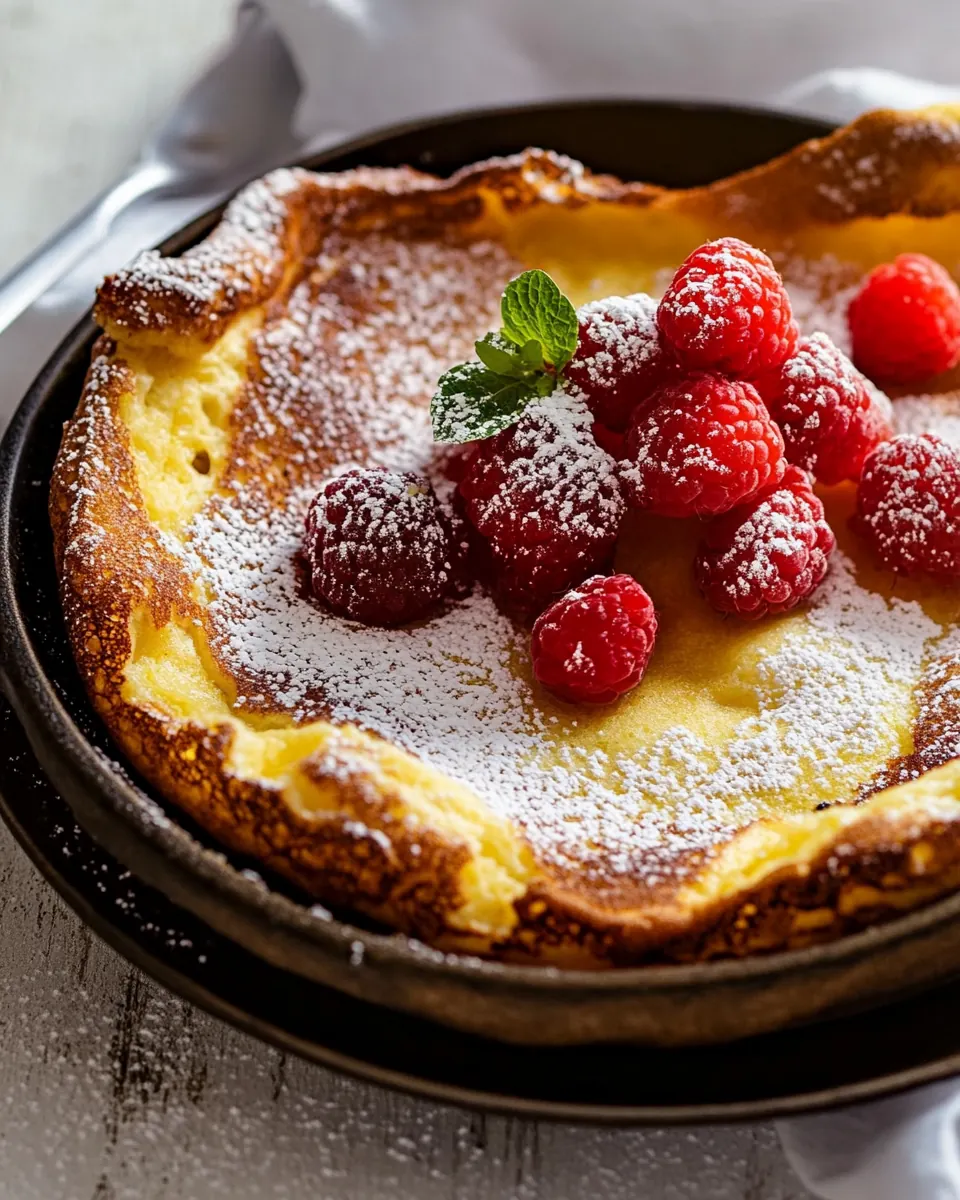
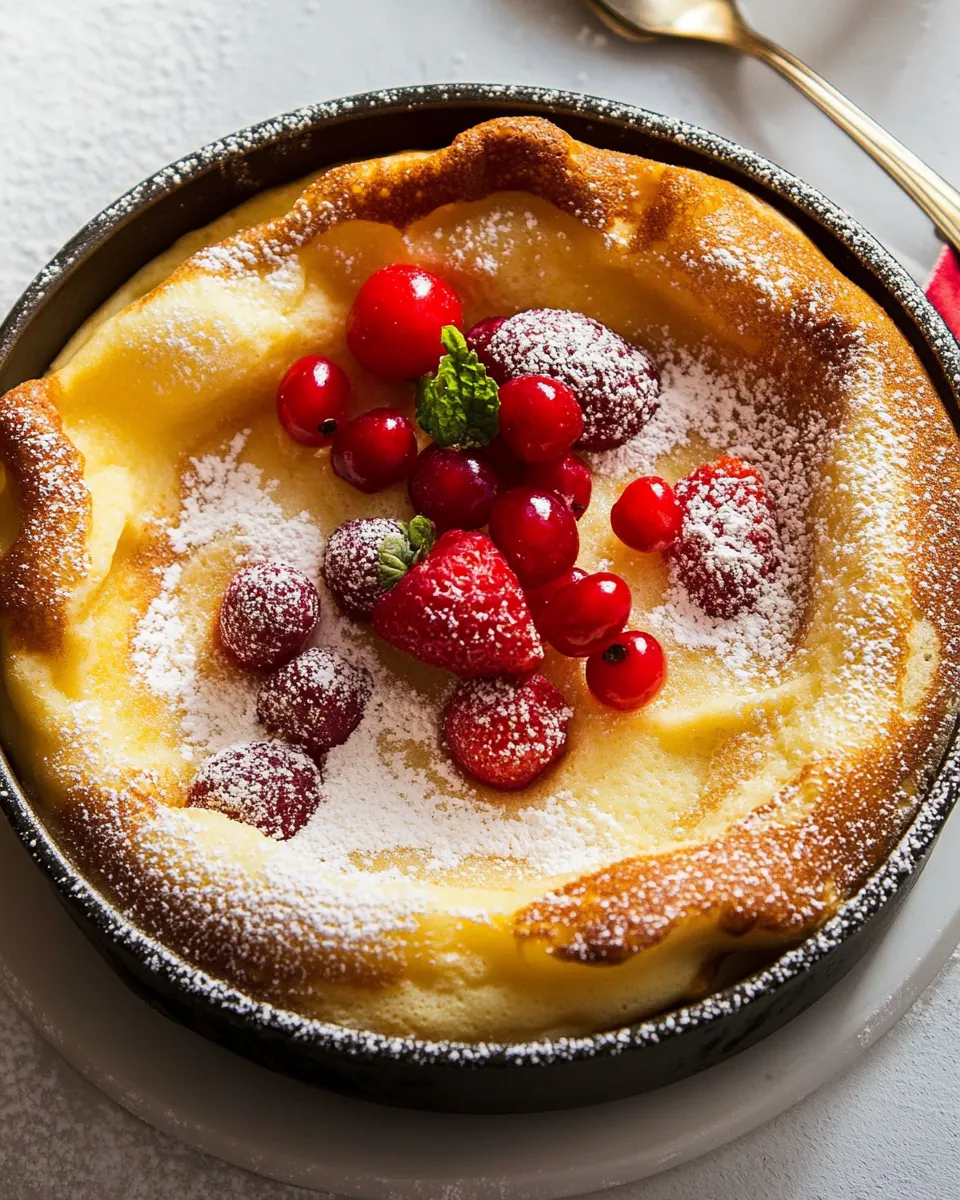
- Fresh fruit and a squeeze of citrus: Bright berries or sliced stone fruit with a little lemon or orange juice bring a lively contrast to the baked egginess and browned edges.
- Powdered sugar dusting: A light dusting of powdered sugar adds a classic visual finish and a subtle sweetness that pairs well with warm butter flavor.
- Maple or simple syrup on the side: Offer a small pitcher of syrup so guests can control sweetness, pouring just enough to complement but not drown the texture.
- Casual brunch or cozy weekend mornings: Serve a Dutch Baby for brunch with coffee and fruit, or as a light dinner with a crisp salad on the side for a relaxed evening meal.
- Storage and reheating: If you have leftovers, keep them in an airtight container in the refrigerator and gently reheat in a low oven to restore some crispness to the edges, although it will not regain the initial dramatic puff.
- Seasonal pairings: In spring and summer I reach for fresh berries and citrus, while in fall a hint of nutmeg and apple slices feel right at home, complementing the toasted butter notes.
FAQ
Conclusion
This Dutch Baby stands out for its spectacular oven puff, crisp browned edges, and tender custardy center, all made from a handful of simple ingredients. Try it when you want a breakfast or brunch that feels special without a lot of effort, because the recipe gives dramatic results with pantry staples and short hands on time. I hope you enjoy the warm, buttered aroma and the playful rise as much as I do, and that this becomes one of your go to treats for mornings with company or lazy weekends at home.
Dutch Baby
Equipment
- Oven
- Cast-Iron Skillet
- Blender
- Hot mitts
Ingredients
- 3 large eggs, at room temperature (put in warm water 5 minutes) Beat vigorously to incorporate air and structure; eggs provide richness, lift, and the custardy texture of the Dutch Baby. Ensure they are at room temperature so they blend smoothly into the batter and create a light, puffy rise during baking.
- 1/2 cup all-purpose flour Sift or whisk finely to avoid lumps and supply the necessary gluten and body for the batter; all-purpose flour gives the pancake enough structure to puff while remaining tender. Measure accurately to keep the batter balance that produces the characteristic edges and custard-like center.
- 1/2 cup whole milk, at room temperature (microwaved 15 seconds) Warm gently and whisk in to loosen the batter and add creaminess; whole milk contributes fat and moisture that yield a silky interior. Using room-temperature milk helps it incorporate evenly so the batter achieves a smooth consistency and consistent rise.
- 1 tbsp sugar Sweeten mildly to balance the egginess and support browning; granulated sugar enhances flavor and caramelization on the edges. Add sparingly so the Dutch Baby retains its slightly savory profile while developing a pleasant golden crust.
- 1 tsp vanilla extract Flavor delicately to amplify the overall aroma and provide subtle warmth; vanilla extract rounds out the batter with sweet, floral notes. Use quality vanilla for a noticeable but not overpowering layer of flavor that complements toppings.
- Pinch of salt Season lightly to enhance other flavors and balance sweetness; a small pinch of salt sharpens the batter and deepens the overall taste. Distribute evenly so the tiny amount improves complexity without being perceptible as saltiness.
- Pinch of nutmeg, (optional) Optionally grate or sprinkle sparingly for warm, aromatic complexity; nutmeg adds a subtle, slightly sweet-spicy note that pairs well with vanilla and butter. Include only if desired, as it can shift the profile toward spiced breakfast flavors.
- 3 tbsp unsalted butter Melt thoroughly to grease the skillet and create the signature crisp, brown edges; unsalted butter supplies rich flavor and helps the batter climb the hot pan. Heat until sizzling so the batter begins cooking on contact and the Dutch Baby puffs dramatically.
Instructions
- Preheat oven to 425˚F. Place an oven-safe skillet such as cast iron into the oven and let it preheat for at least 8 minutes.: As the oven heats, you will notice a warm, dry air that signals the environment is ready to transform the batter into a puffed masterpiece. Preheating an oven to 425˚F ensures the skillet becomes searing hot, which is essential for the immediate steam production that lifts the batter. The sound of the oven fan settling and the brief scent of warm metal are cues that the oven is stabilizing. Why this matters, we get that rapid burst of heat so the edges set quickly while the center puffs, creating that contrast between a crisp rim and a tender interior. A common mistake is underpreheating, which yields a flatter result, so always allow at least 15 minutes for the oven to fully reach temperature, and check with an oven thermometer if your oven runs cool.
- Meanwhile, in the jar of a blender, combine eggs, flour, milk, sugar, salt, nutmeg, and vanilla, and blend 30 seconds on high speed until smooth, scraping down the sides of the blender halfway through to make sure all flour is incorporated.: When the skillet is in the oven it gradually absorbs intense, even heat; after about 8 minutes the metal will be uniformly hot and ready to sizzle butter . You can often sense the heat radiating when you open the oven briefly, and the skillet surface will appear to shimmer if you look closely. This step creates the thermal shock needed to immediately crisp the batter edges on contact, which produces a dramatic lift. If the pan is not hot enough the batter will spread and not rise as impressively, so resist the urge to shortcut this step. Use oven mitts to check, and avoid touching the pan as it will be dangerously hot.
- Carefully remove the pan from the oven using hot mitts. Add 3 tbsp butter to the hot pan and swirl to coat bottom and sides of the pan. The butter should sizzle.: As the blades whirl, the batter will change from lumpy to silky, giving off a faint, sweet aroma from the sugar and vanilla . Blending for about 30 seconds ensures the mixture is homogeneous, which helps it set evenly in the oven. Scraping the jar prevents pockets of unblended flour that can create dense spots in the final puff. The texture should be pourable, like heavy cream, indicating the correct hydration. If the batter seems too thick, a splash of milk can adjust it; too thin and it may not hold structure as well. A common error is underblending, which leaves lumps and uneven texture.
- Add batter to the buttered pan then bake for 16-18 minutes or until pancake is puffed and golden brown at the edges.: When you open the oven the blast of hot air and the bright heat will remind you how intense the environment is. Using sturdy hot mitts, slide the skillet onto the range top or an oven rack, and be mindful of the radiant heat nearby. This moment is crucial because the surface temperature of the skillet should be high enough to immediately foam the butter and cause a sizzle, a sound that reassures you the pan is ready. Avoid setting the skillet on a wet surface since thermal shock could warp the pan or cause splatter. A common pitfall here is underestimating the heat and touching the pan with insufficient protection, so always use proper mitts.
- Carefully remove the pan from the oven with hot mitts and serve pancake right away.: As the butter hits the hot metal it will foam and release a nutty, toasted scent; that sizzling noise is exactly what you want. Swirling ensures the entire surface is coated so the batter can slide and the edges crisp evenly. The visual cue is when the butter turns a light golden color and seems to shimmer across the skillet. If the butter browns too quickly, pull the pan out momentarily to avoid burnt flavors. Too little butter results in sticking and uneven browning, so don’t skimp.
- The butter should sizzle: That immediate sizzle indicates the pan is hot enough to create steam and lift the batter, producing the characteristic rise and crisp edge. The sizzling also imparts a faintly caramelized aroma that browns the exterior as the center sets. Pay attention to the intensity of the sizzle; if it is violent and smokey, the pan may be too hot and the butter could burn, so briefly vent the oven or reduce the oven temperature slightly. If you hear only a whisper, the pan might not be hot enough, which can affect the puff, so ensure the skillet has had sufficient preheat time.
- Add batter to the buttered pan then bake for 16 to 18 minutes or until pancake is puffed and golden brown at the edges: As the batter hits the skillet you will hear a gentle hiss and see it begin to set around the edges within a minute. Inside the oven the center will swell dramatically, creating those theatrical peaks and valleys, and the edges will take on a rich golden brown color. The aroma of cooked eggs and toasted butter will fill the kitchen, promising a satisfying contrast of textures. The visual cues for doneness are a deeply puffed center and deeply colored rim. Avoid opening the oven door repeatedly, as that can cause the structure to collapse. If you notice the center wobbling excessively after the time, allow one to two more minutes, but watch carefully to prevent overbrowning.
- Carefully remove the pan from the oven with hot mitts and serve pancake right away: The final moments are sensory rich, with a puffed dome that begins to deflate gently as it cools to a tender custard with a crisp rim. Serve immediately to enjoy the contrast between warm, ethereal center and crunchy edges; a delayed serving will reduce the height and change the texture. Use caution when transporting the skillet since the handle and metal will be extremely hot. A common mistake is letting it sit too long on the counter, which diminishes the visual impact and alters the eating experience, so bring it to the table promptly.
Notes
- Room temperature matters: Bringing the eggs and milk to room temperature helps the batter emulsify uniformly and encourages a stronger rise in the oven. If you forgot to set them out, try placing the eggs in warm water for five minutes and microwaving the milk for about fifteen seconds; this prevents the batter from becoming dense.
- Preheat your skillet: A properly heated cast iron or oven safe skillet is non negotiable. Give the pan at least eight minutes in the hot oven so it can radiate heat evenly, which creates immediate steam and the signature puff. Cold pans produce flat results.
- Blend for smoothness: Use a blender for about thirty seconds at high speed to produce a silky batter. Stop and scrape the sides midway to ensure no pockets of flour remain, which can create dense bits in the finished pancake.
- Mind the butter: Add the butter to the hot pan and swirl to coat. When the butter foams and sizzles, you know the surface is ready. If it browns too fast, slightly reduce oven time or temperature to avoid a bitter taste.
- Serve right away: The spectacle and the best texture happen within minutes of coming out of the oven. The pancake deflates as it cools, so plan to plate and enjoy immediately to capture the contrast between the crisp edges and the soft center.