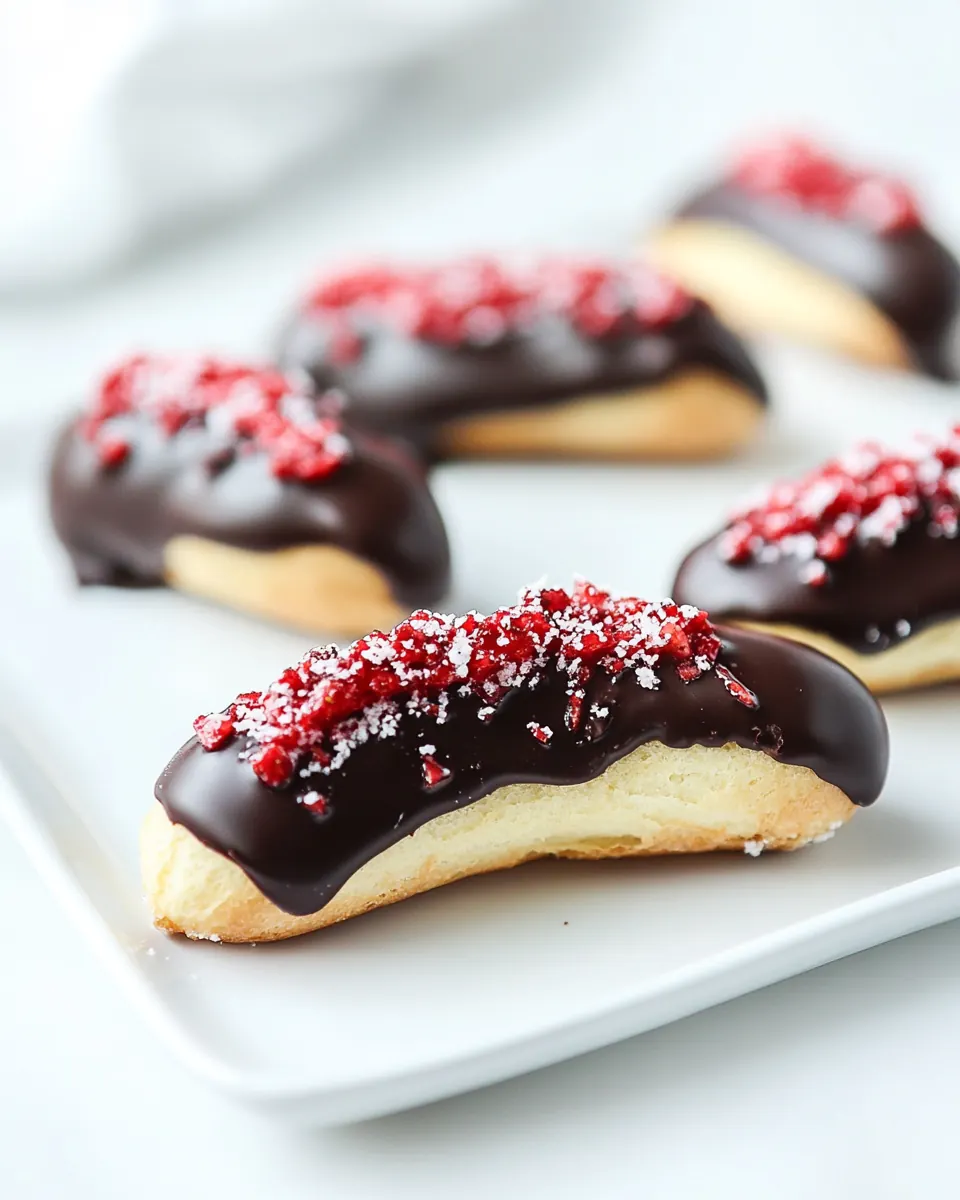
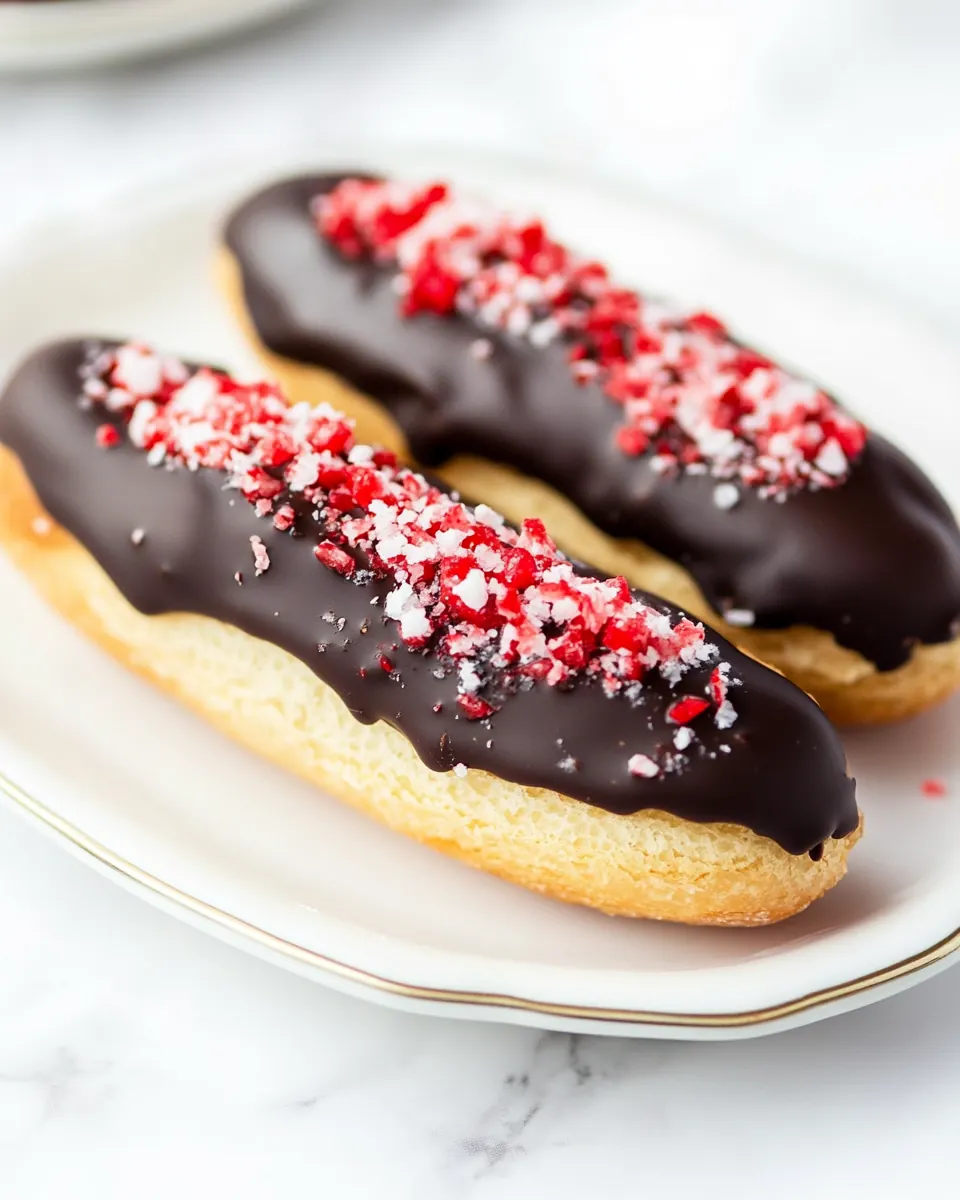
Chocolate Covered Strawberry Eclairs
Chocolate Covered Strawberry Eclairs arrived in my life the first time I tried to impress a very particular dinner guest with something that felt both nostalgic and a little bit daring. I remember standing at the counter with sticky hands from piping cream, the kitchen light soft and the windows fogging a little from the warmth of the oven. I felt equal parts nervous and thrilled, because éclairs ask for patience, but reward you with a contrast of airy shell, silky filling, and glossy glaze that feels celebratory.
That evening taught me how comforting ritual can be. The process of simmering milk, tempering eggs, and piping choux dough became a small, mindful ceremony. I learned to listen for the exact sound the pastry makes as it browns, and to trust that the pastry cream will set if I give it the time it needs. When I finally bit into that first éclair, the sweetness of the strawberry filling with the dark whisper of chocolate felt like a secret victory, and I knew I wanted to make these again and again, for quiet nights and special occasions alike.
Recipe Snapshot
1 hr 10 mins
30 mins
40 mins
Medium
250 kcal
American
Gluten-Free, Low FODMAP
Desserts
Saucepan, Mixing bowl, Wooden spoon, Stand mixer, Pastry bag, Baking sheet, Wire rack, Heat proof bowl
The Charm of This Chocolate Covered Strawberry Eclairs
1. Flavor harmony that sings
I love how Chocolate Covered Strawberry Eclairs balance the bright acidity of strawberry with the deep, slightly bitter notes of bittersweet chocolate. The interplay between the creamy, chilled pastry cream and the warm, glossy glaze creates a layered tasting experience that keeps you coming back for another bite. This contrast is exactly why I reach for this recipe when I want something memorable.
2. Techniques that teach
Working through the steps builds confidence. You get to temper eggs which teaches control, and pipe choux dough which trains your hands. Each technique rewards attention to detail, and when everything comes together you gain a sense of accomplishment that store bought pastries rarely deliver. I always feel more capable after making these.
3. Make ahead flexibility
One of the things I appreciate is timing. The pastry cream needs to chill, and shells can be baked ahead or frozen, which means you can spread the work across days. For gatherings, this is a lifesaver, because final assembly is quick and satisfying. I often prepare elements the day before so I can enjoy the event instead of fretting over last minute tasks.
4. Showstopping presentation
There is something theatrical about dipping each éclair into glossy chocolate glaze and finishing with crushed freeze dried strawberries. Guests immediately notice the shine and color, and the éclairs look like they came from a patisserie. I love that this recipe elevates a simple tray into a centerpiece.
5. Versatility for occasions
Because these are both elegant and playful, I serve them at romantic dinners, spring brunches, and small dinner parties. The recipe feels special enough for holidays like Valentine’s Day, yet approachable for an afternoon treat. I often adjust portion sizes to suit the moment, and it always feels appropriate.
Key Ingredients for Chocolate Covered Strawberry Eclairs

These ingredients are the building blocks of a classic patisserie favorite. Each element plays a precise role, from structure to flavor to texture. The pastry shells rely on a balance of liquid, fat, and flour to puff and become hollow. The pastry cream brings richness and strawberry brightness, while the glaze ties everything together with glossy, indulgent chocolate notes.
- 1 3/4 cups whole milk: Warm gently and infuse the pastry cream base; provides a rich, creamy foundation and helps dissolve sugar for smooth texture when scalded with other ingredients.
- 2 large eggs: Whisk vigorously to incorporate air and structure into the choux and pastry cream; adds lift and richness while contributing to stable emulsification.
- 1 large egg yolk: Enrich custard and contribute to glossy, thickened pastry cream; increases fat content for silkiness and aids in setting when tempered into hot milk.
- 2/3 cup (5 ounces) granulated sugar: Sweeten and stabilize pastry cream while aiding in structure; granulated sugar helps to dissolve into the milk and eggs, creating a balanced sweetness.
- 1/3 cup fresh strawberry purée: Purée fresh strawberries to impart natural fruit flavor and color into the filling; contributes brightness and a light, tangy profile to contrast the pastry.
- 1/4 cup cornstarch: Thicken the custard base by gelatinizing when heated; cornstarch yields a smooth, velvety texture and helps prevent curdling of eggs under heat.
- 1/8 teaspoon salt: Balance sweetness and enhance overall flavor while slightly tightening the custard matrix; salt rounds out flavors and reduces flatness in the filling.
- 1 teaspoon vanilla extract: Perfume delicately and amplify vanilla notes in the cream; vanilla extract elevates aroma and complements chocolate and strawberry components harmoniously.
- 1 2 drops red food coloring () (optional): Tint subtly to intensify strawberry hue if desired; a couple drops of red food coloring boost visual appeal without affecting flavor.
- 1/4 cup milk: Temper when used for thinning or combining components; a small amount of milk can adjust filling consistency and help incorporate ingredients smoothly.
- 1/4 cup water: Combine with other liquids to create the water phase for choux; water contributes steam for puffing and helps dissolve butter when heating the dough.
- 1/8 teaspoon salt: Enhance flavor balance in the choux dough by countering sweetness; a pinch of salt strengthens gluten formation slightly and deepens taste.
- 1 teaspoon granulated sugar: Add a touch of sweetness to the choux dough; a teaspoon of sugar promotes browning and contributes subtle caramelization during baking.
- 1/4 cup (1/2 stick) unsalted butter: Melt with water to create the fat phase for choux; unsalted butter provides richness, tenderness, and steam-producing fat for proper puff.
- 1/2 cup all-purpose flour: Bind and create structure in the choux dough; all-purpose flour develops starch that gelatinizes, forming the hollow interior and stable shell.
- 2 large eggs: Incorporate gradually to emulsify and leaven the choux; eggs add moisture, richness, and help create steam for puff while providing structure once baked.
- 4 ounces bittersweet chocolate, shaved or finely chopped: Melt to form a glossy chocolate coating or drizzle; bittersweet chocolate offers depth, bittersweet contrast, and sets into a firm shell over the pastry.
- 1 tablespoon light corn syrup: Gloss and stabilize the chocolate glaze while improving sheen and pourability; light corn syrup prevents crystallization and keeps the coating smooth.
- 1/2 cup heavy cream: Whip and enrich the ganache or filling with silkiness and body; heavy cream contributes fat for a creamy mouthfeel and helps the chocolate set smoothly.
- crushed freeze-dried strawberries (, for garnish) (optional): Crumble for a crunchy, intense fruit garnish that adds texture and amplified strawberry flavor when sprinkled over the finished eclairs.
Chocolate Covered Strawberry Eclairs Instructions

These instructions walk you through both the pastry cream and the choux steps, then the glaze and assembly. Take your time, pay attention to texture cues, and enjoy the sensory rewards. I’ll guide you through common pitfalls so you end up with glossy, filled éclairs that taste like a bakery treat.
- The day before, prepare the pastry cream filling as it needs sufficient time to set.: The pastry cream should be cool and thick, with a smooth texture that holds its shape when piped; you will notice a fragrant strawberry aroma and a rich mouthfeel as it chills. Cooling overnight lets the flavors meld and the cornstarch finish setting, which prevents runny filling when assembled. A common mistake is trying to rush cooling, which leads to loose cream; always press plastic wrap directly onto the surface to prevent a skin that ruins the texture. If it seems slightly thin after refrigeration, whisk briefly to restore silkiness before filling.
- In a saucepan, bring the milk to a gentle simmer.: Warm the whole milk until small bubbles form around the edge, and steam rises, releasing a comforting dairy aroma; avoid boiling, which can scorch and create off flavors. Heating gradually ensures the milk integrates smoothly with the egg mixture when tempering, preventing curdling. If you overheat, cool slightly before using; overheating is the most common problem here and can produce lumpy custard later.
- In a medium bowl, whisk the eggs and yolk together with sugar, strawberry purée, cornstarch, and salt until combined and no lumps remain.: The mixture should be uniformly pale and slightly thick, the strawberry purée adding a fragrant fruity scent. Thorough whisking prevents lumps of cornstarch that would create gritty spots in the pastry cream. A frequent error is under mixing, so take your time until everything is homogeneous and smooth.
- Slowly whisk a 1/4 cup of hot milk into the eggs; it will be thick at first but will loosen up as the milk incorporates. Continue adding hot milk, 1/4 cup at a time, until about half of the milk has been added and mixture is hot to the touch. Whisk the tempered egg/milk mixture back into the hot milk on the stove. Continue to whisk over medium heat until the mixture thickens and starts to bubble (careful as it will spatter). Continue to cook for exactly one minute to thoroughly cook out the starchy flavor of the cornstarch. Stir in vanilla extract and food coloring, if desired.: When you temper correctly you will feel the bowl warm and the mixture gain body, and once returned to the stove it will shift from glossy to noticeably thicker, clinging to the whisk. That bubbling stage signals the cornstarch is activating, and cooking for one minute eliminates any raw aftertaste. The aroma becomes rich and custardy while the color deepens to a pale pink if you used strawberry purée. Avoid cooking at too high a heat which can scramble the eggs, and if spatters occur cover briefly with a splatter guard or reduce heat immediately.
- Pour the pastry cream into a container or heat-proof bowl, pressing plastic wrap against the surface to prevent a skin from forming, and refrigerate at least 2 hours or overnight.: After pouring out into a shallow bowl you will feel the residual warmth subside quickly and the scent of strawberry will become more pronounced as it cools. Pressing plastic to the surface preserves the smooth texture, and chilling allows the cream to firm up to a pipeable consistency. A common slip is skipping the wrap, which forms a thick skin that ruins the filling; if that happens, pass the cream through a sieve to rescue texture.
- To prepare the eclairs, preheat oven to 425 degrees F. Line two baking sheets with parchment paper or silicone baking mats.: The oven must be fully hot to create immediate steam that helps choux rise, and the lined sheets will prevent sticking while promoting even browning. You should feel confident the oven holds temperature, because uneven heat leads to flat or collapsed shells. If your oven runs hot or cold, use an oven thermometer and adjust accordingly to avoid under or over baking.
- In a heavy saucepan, combine the milk, water, salt, sugar, and butter and bring to a full boil over medium heat. Add the flour all at once, stirring vigorously with a wooden spoon. Keep stirring until the mixture comes together and dries out slightly so that it pulls away from the sides of the pan, about 3 minutes.: As the liquid hits boiling the butter will melt and the mixture will steam, releasing a rich, toasty scent. Adding the flour all at once creates a cohesive paste that loses its raw flour taste as it cooks; you will know it is ready when it forms a ball and a film forms on the bottom of the pan. A frequent error is not drying the dough enough, which results in weak shells that sag when baked. If the dough still feels wet, continue cooking until it cleans the pan.
- Transfer dough to the bowl of a stand mixer fitted with the paddle attachment or a heat-proof mixing bowl. Add the eggs, one at a time, mixing well after each addition and scraping down the sides of the bowl as needed. When all the eggs have been added, the dough will be thick, smooth, and shiny.: The transformation is tactile and visual; each egg will make the paste more elastic and glossy, and the final dough should fall from the spatula in a thick ribbon. This elasticity is what creates steam pockets during baking, so the dough must be homogeneous. A classic mistake is adding eggs too quickly which prevents full incorporation and yields lumpy batter; take your time and only add more when the previous egg is fully mixed in.
- Spoon some of the dough into a pastry bag fitted with a 1/2-inch-round tip. Pipe out tubes about 5 inches long and 1 inch wide, or 3-4 inches long and 1 inch wide for mini eclairs. Leave about 2 inches of space between eclairs as they will puff up quite a bit when baking. If you have any "tails" or imperfections, you can smooth them out with a damp fingertip.: When piping, you should feel the dough giving with a gentle but steady pressure, and visually the tubes should look uniform and slightly glossy. Keeping space between shapes prevents them from fusing in the oven, and smoothing tails leads to attractive, even shells. A common oversight is using inconsistent pressure which makes uneven éclairs; practice piping on spare parchment to build rhythm.
- Bake until puffed and just starting to show some color, about 10 minutes. Reduce oven temperature to 375 degrees F and continue to bake until hollow inside and evenly golden brown outside, about 12 minutes more. Remove from the oven and, using a metal skewer, poke a small hole in the end of each shell to allow the steam to escape. Let cool on wire racks.: The first stage creates steam and lift, and lowering the temperature prevents the exterior from burning while the interior fully dries and hollows. You will hear a faint crisping sound as moisture leaves, and the shells will look dry and evenly colored. Poking a hole is crucial to prevent sogginess from trapped steam. Rushing to remove them before cooling risks collapsing, so let them rest until warm to the touch but not hot.
- To prepare glaze, combine chocolate and corn syrup in a heat-proof bowl. Heat the cream until it just starts to bubble (do not let it come to a full boil), and then pour over the chocolate. Let sit for 1 to 2 minutes, then stir gently until smooth and shiny.: The aroma of melted chocolate and warm cream will be rich and inviting, and resting before stirring ensures the chocolate melts evenly into a glossy ganache. Stirring slowly brings together a silky, pourable glaze that clings to the éclair tops. Overheating the cream or vigorous stirring can seize the chocolate, so work gently and keep temperatures controlled.
- To assemble the eclairs, stir the cold pastry cream until smooth. Spoon into a pastry bag fitted with a small star or special filling tip. Using the holes on each end that you made when the eclairs came out of the oven, fill the shells until they start to feel heavy. Do not overfill or they may start to spew filling out the sides.: The sensation of filling should shift from resistance to a gentle yielding as the cream slides inside, and you will likely see the shell become slightly plump and weighty. This is the point to stop, because overfilling creates messy seams and leaks. If filling seems too stiff, whisk briefly to restore pipeability; if too loose, chill until firmer before piping.
- Dip the top of each filled eclair into glaze, letting excess drip off, then place upright on a wire rack. Sprinkle with crushed freeze-dried strawberries and allow glaze to set. Serve immediately or refrigerate for up to 6 hours. Alternatively, unfilled pastry shells can be frozen for up to 3 weeks. Recrisp in a 450 degree F oven for about 10 minutes; let cool before filling/glazing as instructed.: The final dip should feel smooth as the glaze coats the surface and visually you will see a mirror like shine once it sets. The crushed freeze dried strawberries add texture and a bright contrast to the dark glaze. If you plan to refrigerate, note the shells will soften over time, so assemble close to serving when possible. Reheating frozen shells requires attention to avoid over browning; watch the oven closely during recrisping.
Expert Tips about Chocolate Covered Strawberry Eclairs
These tips collect years of small discoveries into practical guidance. I share what I wish someone had told me the first time I attempted choux, from temperature control to timing the assembly so everything stays crisp and clean.
- Use an oven thermometer: Your oven temperature is the backbone of success when baking choux; uneven heat will ruin rise and color. I always verify true temperature because factory dials can be off by significant degrees, and that little check saves disappointment.
- Weigh ingredients when possible: Baking is precise, and choux dough reacts strongly to moisture ratios. Measuring by weight ensures consistent results across batches and climates, especially for flour and milk.
- Cool pastry cream quickly: Transfer to a shallow container and press wrap to the surface to halt cooking and preserve silkiness. Rapid cooling reduces bacterial growth and improves texture; a slow cool often forms a skin or leaves the cream too loose.
- Pipe with consistent pressure: Even piping creates uniform pastry shells that bake evenly; practice on spare parchment to build a steady rhythm. Uneven tubes can brown at different rates and lead to some shells collapsing or overbrowning.
- Stabilize pastry cream if needed: If you need firmer filling for hot days or longer displays, chill the bowl and beat the cream briefly before piping. This helps maintain structure without changing flavor.
- Use quality chocolate for the glaze: Bittersweet chocolate with good cocoa solids yields a shiny, flavorful ganache; poor chocolate can taste waxy or grainy. Quality ingredients are especially noticeable in simple preparations like glazes.
Serve This Chocolate Covered Strawberry Eclairs With
These serving ideas help you present the éclairs elegantly for different occasions, from intimate dinners to festive gatherings. Think about temperature, timing, and complementary flavors to make the most of each bite.
- Serve with small tea or coffee: Pairing these éclairs with a light brewed coffee or delicate tea highlights their sweetness without overpowering the fruit and chocolate notes, making for a refined after dinner offering.
- Arrange on a dessert platter for gatherings: Place éclairs upright or in neat rows on a tray, garnished with a dusting of powdered sugar and extra crushed freeze dried strawberries for visual appeal and textural contrast at parties.
- Portion for brunch or dessert buffets: Offer mini éclairs alongside fruit salads and light pastries to provide a richer option among lighter fare; the small size invites sampling and pairs well with sparkling non alcoholic beverages.
- Store assembled for short windows: Keep filled éclairs refrigerated and consume within 6 hours for best texture; if you need longer storage, freeze unfilled shells and finish later so you preserve crispness and freshness.
- Occasion pairing: These éclairs are perfect for romantic menus like Valentine’s Day or spring celebrations, as the strawberry element ties into seasonal themes and the glossy glaze feels celebratory.
- Seasonal touches: For spring gatherings, serve alongside fresh berries and light whipped cream to echo the fruit component and brighten the plate presentation.
FAQ
Conclusion
These Chocolate Covered Strawberry Eclairs combine airy choux shells, a silky strawberry pastry cream, and a glossy bittersweet chocolate glaze to create a truly special dessert. Give the elements the time they need and the process becomes rewarding, letting you enjoy both the making and the sharing. I encourage you to try this recipe for a spring gathering or a romantic evening; the results are elegant, made from simple techniques, and well worth the effort.

Chocolate Covered Strawberry Eclairs
Equipment
- Saucepan
- Mixing Bowl
- Wooden Spoon
- Stand mixer
- Pastry bag
- Baking Sheet
- Wire Rack
- heat proof bowl
Ingredients
- 1 3/4 cups whole milk Warm gently and infuse the pastry cream base; provides a rich, creamy foundation and helps dissolve sugar for smooth texture when scalded with other ingredients.
- 2 large eggs Whisk vigorously to incorporate air and structure into the choux and pastry cream; adds lift and richness while contributing to stable emulsification.
- 1 large egg yolk Enrich custard and contribute to glossy, thickened pastry cream; increases fat content for silkiness and aids in setting when tempered into hot milk.
- 2/3 cup (5 ounces) granulated sugar Sweeten and stabilize pastry cream while aiding in structure; granulated sugar helps to dissolve into the milk and eggs, creating a balanced sweetness.
- 1/3 cup fresh strawberry purée Purée fresh strawberries to impart natural fruit flavor and color into the filling; contributes brightness and a light, tangy profile to contrast the pastry.
- 1/4 cup cornstarch Thicken the custard base by gelatinizing when heated; cornstarch yields a smooth, velvety texture and helps prevent curdling of eggs under heat.
- 1/8 teaspoon salt Balance sweetness and enhance overall flavor while slightly tightening the custard matrix; salt rounds out flavors and reduces flatness in the filling.
- 1 teaspoon vanilla extract Perfume delicately and amplify vanilla notes in the cream; vanilla extract elevates aroma and complements chocolate and strawberry components harmoniously.
- 1 -2 drops red food coloring (optional) Tint subtly to intensify strawberry hue if desired; a couple drops of red food coloring boost visual appeal without affecting flavor.
- 1/4 cup milk Temper when used for thinning or combining components; a small amount of milk can adjust filling consistency and help incorporate ingredients smoothly.
- 1/4 cup water Combine with other liquids to create the water phase for choux; water contributes steam for puffing and helps dissolve butter when heating the dough.
- 1/8 teaspoon salt Enhance flavor balance in the choux dough by countering sweetness; a pinch of salt strengthens gluten formation slightly and deepens taste.
- 1 teaspoon granulated sugar Add a touch of sweetness to the choux dough; a teaspoon of sugar promotes browning and contributes subtle caramelization during baking.
- 1/4 cup (1/2 stick) unsalted butter Melt with water to create the fat phase for choux; unsalted butter provides richness, tenderness, and steam-producing fat for proper puff.
- 1/2 cup all-purpose flour Bind and create structure in the choux dough; all-purpose flour develops starch that gelatinizes, forming the hollow interior and stable shell.
- 2 large eggs Incorporate gradually to emulsify and leaven the choux; eggs add moisture, richness, and help create steam for puff while providing structure once baked.
- 4 ounces bittersweet chocolate, shaved or finely chopped Melt to form a glossy chocolate coating or drizzle; bittersweet chocolate offers depth, bittersweet contrast, and sets into a firm shell over the pastry.
- 1 tablespoon light corn syrup Gloss and stabilize the chocolate glaze while improving sheen and pourability; light corn syrup prevents crystallization and keeps the coating smooth.
- 1/2 cup heavy cream Whip and enrich the ganache or filling with silkiness and body; heavy cream contributes fat for a creamy mouthfeel and helps the chocolate set smoothly.
- crushed freeze-dried strawberries (optional, for garnish) Crumble for a crunchy, intense fruit garnish that adds texture and amplified strawberry flavor when sprinkled over the finished eclairs.
Instructions
- The day before, prepare the pastry cream filling as it needs sufficient time to set.: The pastry cream should be cool and thick, with a smooth texture that holds its shape when piped; you will notice a fragrant strawberry aroma and a rich mouthfeel as it chills. Cooling overnight lets the flavors meld and the cornstarch finish setting, which prevents runny filling when assembled. A common mistake is trying to rush cooling, which leads to loose cream; always press plastic wrap directly onto the surface to prevent a skin that ruins the texture. If it seems slightly thin after refrigeration, whisk briefly to restore silkiness before filling.
- In a saucepan, bring the milk to a gentle simmer.: Warm the whole milk until small bubbles form around the edge, and steam rises, releasing a comforting dairy aroma; avoid boiling, which can scorch and create off flavors. Heating gradually ensures the milk integrates smoothly with the egg mixture when tempering, preventing curdling. If you overheat, cool slightly before using; overheating is the most common problem here and can produce lumpy custard later.
- In a medium bowl, whisk the eggs and yolk together with sugar, strawberry purée, cornstarch, and salt until combined and no lumps remain.: The mixture should be uniformly pale and slightly thick, the strawberry purée adding a fragrant fruity scent. Thorough whisking prevents lumps of cornstarch that would create gritty spots in the pastry cream. A frequent error is under mixing, so take your time until everything is homogeneous and smooth.
- Slowly whisk a 1/4 cup of hot milk into the eggs; it will be thick at first but will loosen up as the milk incorporates. Continue adding hot milk, 1/4 cup at a time, until about half of the milk has been added and mixture is hot to the touch. Whisk the tempered egg/milk mixture back into the hot milk on the stove. Continue to whisk over medium heat until the mixture thickens and starts to bubble (careful as it will spatter). Continue to cook for exactly one minute to thoroughly cook out the starchy flavor of the cornstarch. Stir in vanilla extract and food coloring, if desired.: When you temper correctly you will feel the bowl warm and the mixture gain body, and once returned to the stove it will shift from glossy to noticeably thicker, clinging to the whisk. That bubbling stage signals the cornstarch is activating, and cooking for one minute eliminates any raw aftertaste. The aroma becomes rich and custardy while the color deepens to a pale pink if you used strawberry purée. Avoid cooking at too high a heat which can scramble the eggs, and if spatters occur cover briefly with a splatter guard or reduce heat immediately.
- Pour the pastry cream into a container or heat-proof bowl, pressing plastic wrap against the surface to prevent a skin from forming, and refrigerate at least 2 hours or overnight.: After pouring out into a shallow bowl you will feel the residual warmth subside quickly and the scent of strawberry will become more pronounced as it cools. Pressing plastic to the surface preserves the smooth texture, and chilling allows the cream to firm up to a pipeable consistency. A common slip is skipping the wrap, which forms a thick skin that ruins the filling; if that happens, pass the cream through a sieve to rescue texture.
- To prepare the eclairs, preheat oven to 425 degrees F. Line two baking sheets with parchment paper or silicone baking mats.: The oven must be fully hot to create immediate steam that helps choux rise, and the lined sheets will prevent sticking while promoting even browning. You should feel confident the oven holds temperature, because uneven heat leads to flat or collapsed shells. If your oven runs hot or cold, use an oven thermometer and adjust accordingly to avoid under or over baking.
- In a heavy saucepan, combine the milk, water, salt, sugar, and butter and bring to a full boil over medium heat. Add the flour all at once, stirring vigorously with a wooden spoon. Keep stirring until the mixture comes together and dries out slightly so that it pulls away from the sides of the pan, about 3 minutes.: As the liquid hits boiling the butter will melt and the mixture will steam, releasing a rich, toasty scent. Adding the flour all at once creates a cohesive paste that loses its raw flour taste as it cooks; you will know it is ready when it forms a ball and a film forms on the bottom of the pan. A frequent error is not drying the dough enough, which results in weak shells that sag when baked. If the dough still feels wet, continue cooking until it cleans the pan.
- Transfer dough to the bowl of a stand mixer fitted with the paddle attachment or a heat-proof mixing bowl. Add the eggs, one at a time, mixing well after each addition and scraping down the sides of the bowl as needed. When all the eggs have been added, the dough will be thick, smooth, and shiny.: The transformation is tactile and visual; each egg will make the paste more elastic and glossy, and the final dough should fall from the spatula in a thick ribbon. This elasticity is what creates steam pockets during baking, so the dough must be homogeneous. A classic mistake is adding eggs too quickly which prevents full incorporation and yields lumpy batter; take your time and only add more when the previous egg is fully mixed in.
- Spoon some of the dough into a pastry bag fitted with a 1/2-inch-round tip. Pipe out tubes about 5 inches long and 1 inch wide, or 3-4 inches long and 1 inch wide for mini eclairs. Leave about 2 inches of space between eclairs as they will puff up quite a bit when baking. If you have any "tails" or imperfections, you can smooth them out with a damp fingertip.: When piping, you should feel the dough giving with a gentle but steady pressure, and visually the tubes should look uniform and slightly glossy. Keeping space between shapes prevents them from fusing in the oven, and smoothing tails leads to attractive, even shells. A common oversight is using inconsistent pressure which makes uneven éclairs; practice piping on spare parchment to build rhythm.
- Bake until puffed and just starting to show some color, about 10 minutes. Reduce oven temperature to 375 degrees F and continue to bake until hollow inside and evenly golden brown outside, about 12 minutes more. Remove from the oven and, using a metal skewer, poke a small hole in the end of each shell to allow the steam to escape. Let cool on wire racks.: The first stage creates steam and lift, and lowering the temperature prevents the exterior from burning while the interior fully dries and hollows. You will hear a faint crisping sound as moisture leaves, and the shells will look dry and evenly colored. Poking a hole is crucial to prevent sogginess from trapped steam. Rushing to remove them before cooling risks collapsing, so let them rest until warm to the touch but not hot.
- To prepare glaze, combine chocolate and corn syrup in a heat-proof bowl. Heat the cream until it just starts to bubble (do not let it come to a full boil), and then pour over the chocolate. Let sit for 1 to 2 minutes, then stir gently until smooth and shiny.: The aroma of melted chocolate and warm cream will be rich and inviting, and resting before stirring ensures the chocolate melts evenly into a glossy ganache. Stirring slowly brings together a silky, pourable glaze that clings to the éclair tops. Overheating the cream or vigorous stirring can seize the chocolate, so work gently and keep temperatures controlled.
- To assemble the eclairs, stir the cold pastry cream until smooth. Spoon into a pastry bag fitted with a small star or special filling tip. Using the holes on each end that you made when the eclairs came out of the oven, fill the shells until they start to feel heavy. Do not overfill or they may start to spew filling out the sides.: The sensation of filling should shift from resistance to a gentle yielding as the cream slides inside, and you will likely see the shell become slightly plump and weighty. This is the point to stop, because overfilling creates messy seams and leaks. If filling seems too stiff, whisk briefly to restore pipeability; if too loose, chill until firmer before piping.
- Dip the top of each filled eclair into glaze, letting excess drip off, then place upright on a wire rack. Sprinkle with crushed freeze-dried strawberries and allow glaze to set. Serve immediately or refrigerate for up to 6 hours. Alternatively, unfilled pastry shells can be frozen for up to 3 weeks. Recrisp in a 450 degree F oven for about 10 minutes; let cool before filling/glazing as instructed.: The final dip should feel smooth as the glaze coats the surface and visually you will see a mirror like shine once it sets. The crushed freeze dried strawberries add texture and a bright contrast to the dark glaze. If you plan to refrigerate, note the shells will soften over time, so assemble close to serving when possible. Reheating frozen shells requires attention to avoid over browning; watch the oven closely during recrisping.
Notes
- Use an oven thermometer: Your oven temperature is the backbone of success when baking choux; uneven heat will ruin rise and color. I always verify true temperature because factory dials can be off by significant degrees, and that little check saves disappointment.
- Weigh ingredients when possible: Baking is precise, and choux dough reacts strongly to moisture ratios. Measuring by weight ensures consistent results across batches and climates, especially for flour and milk.
- Cool pastry cream quickly: Transfer to a shallow container and press wrap to the surface to halt cooking and preserve silkiness. Rapid cooling reduces bacterial growth and improves texture; a slow cool often forms a skin or leaves the cream too loose.
- Pipe with consistent pressure: Even piping creates uniform pastry shells that bake evenly; practice on spare parchment to build a steady rhythm. Uneven tubes can brown at different rates and lead to some shells collapsing or overbrowning.
- Stabilize pastry cream if needed: If you need firmer filling for hot days or longer displays, chill the bowl and beat the cream briefly before piping. This helps maintain structure without changing flavor.
- Use quality chocolate for the glaze: Bittersweet chocolate with good cocoa solids yields a shiny, flavorful ganache; poor chocolate can taste waxy or grainy. Quality ingredients are especially noticeable in simple preparations like glazes.