Chili
Chili is one of those recipes I reach for when the air turns cold and the house needs warming from the inside out. The very first time I made this version I was hosting a last minute game night, and I wanted something hearty, forgiving, and full of personality. I grabbed a pound of browned hamburger, browned some onions in butter, and layered in spices until the kitchen smelled like a smoky, cozy hug. That evening taught me how simple ingredients and slow time can transform into something deeply comforting.
I remember stirring the pot while my friends argued over a board game, the aroma of beef, onion, and tomato sauce drawing everyone to the kitchen. The texture of tender kidney beans against the rich tomato base became the kind of meal people ask for again. Over the years I tweaked the spice balance to keep heat approachable while preserving complexity, and now this Chili is my go to when I want a crowd pleasing pot with minimal fuss.
Recipe Snapshot
4 hr 15 mins
15 mins
240 mins
Hard
350 kcal
American
Gluten-Free, Keto
Dinner
Skillet, Slow Cooker
What Sets This Chili Apart
Comforting, classic flavor
I love how this Chili tastes like a bowl full of home. The combination of tomato sauce, smoked chipotle and chili powders, and browned beef creates a layered profile that feels familiar but exciting. Each spoonful offers warmth and depth, it is the kind of dish you come back to night after night.
Easy, forgiving process
One of the main reasons I keep this recipe in rotation is how forgiving it is. If you brown the hamburger a touch more or less, or let it simmer a bit longer on high, the pot still comes together beautifully. I appreciate recipes that let me step away and trust the flavors to marry while I handle other things.
Great for gatherings
This recipe scales well, so when friends drop by I can double the ingredients and still get consistent results. The texture stays pleasing, the spices hold up, and people can customize their bowls with toppings while the main pot remains reliably delicious.
Smart pantry ingredients
I adore that this Chili leans on pantry staples like canned tomato sauce, canned tomatoes, and canned kidney beans. Those familiar items create a robust base without requiring special shopping trips, which makes this perfect for weeknights or last minute hosting.
Balanced heat and texture
Between the chipotle powder and chili powder, the spice is present but balanced, letting the savory notes from the browned hamburger and the sweetness from the tomato sauce shine. The beans add a creamy bite that contrasts the tender meat, making each spoonful satisfying.
Ingredients Required for Chili
These ingredients form a straightforward, pantry friendly lineup. I treat the hamburger and the yellow onion as the backbone, while the spices build personality. Canned goods supply body and depth without fuss, and the butter helps mellow the onion and enhance the savory base. Together they deliver a balanced, comforting bowl.
- 1 lb Browned Hamburger (grease drained): Browned and drained to remove excess fat, providing a savory, meaty base and rich texture for the chili. Adds depth of flavor and umami that complements tomatoes and spices. Provides protein and hearty substance to make the chili filling.
- 1 Yellow Onion: Chopped and sautéed to develop sweetness and aromatic complexity that balances the spicy seasonings. Softened onions release natural sugars which enhance overall flavor and mouthfeel. Also contributes subtle texture contrast to the ground beef.
- 1 tbs Butter: Melted to gently cook the onion and carry the dry spices so they bloom and become more fragrant. Adds a touch of richness that helps meld flavors together during the sautéing stage. Prevents sticking and promotes even cooking of aromatics.
- 2 tsp Chili Powder: Added to impart classic chili flavor with warm, mildly spicy notes that define the dish. Helps build a layered spice profile and pairs well with cumin and chipotle. Used in the sauté to release its oils and aroma.
- 2 tsp Chipotle Powder: Sprinkled to contribute smoky, fruity heat that differentiates the chili from standard blends. Enhances complexity with a deep, slightly smoky flavor that complements tomatoes and beans. Used sparingly to control the overall heat and smokiness.
- 2 tsp Cumin: Used to introduce earthy, warm, and slightly citrusy undertones that anchor the chili’s spice mix. Works with chili powder to provide depth and a rounded savory character. Helps balance the heat and enhances the overall seasoning.
- 1/2 tsp Ground Red Pepper: Measured to add concentrated heat and a sharp kick, raising the chili’s spiciness level. Small quantity ensures a noticeable but controlled warming sensation. Complements other spices without overwhelming the dish.
- 1 tsp Salt: Seasoned to elevate and unify flavors, enhancing both savory and sweet elements of the chili. Helps bring out taste in the meat, tomatoes, and beans while balancing saltiness. Added gradually to taste during cooking.
- 1/2 tsp Garlic Powder: Sprinkled to add a mellow garlic maltiness without needing fresh garlic, for convenience and consistent flavor. Helps reinforce savory notes and rounds out the spice blend. Blends smoothly into the sauce for even distribution.
- 1/2 tsp Onion Powder: Added to boost onion flavor and overall savory aroma when fresh onion is insufficient or to intensify background taste. Provides a subtle sweet-onion note that supports other seasonings. Disperses evenly in the chili base.
- 1 15 oz can Tomato Sauce: Poured in to create a saucy, cohesive base that binds spices, meat, and beans together with bright tomato flavor. Adds acidity and body that balance richness from the beef and stock. Forms the foundational tomato element of the chili.
- 2 15 oz cans Chicken Stock: Poured in to thin and enrich the chili while contributing savory, seasoned liquid for simmering. Adds volume and helps meld flavors during a long simmer, producing a well-developed broth. Can be adjusted for desired consistency and depth.
- 1 14.5 oz can Fire Roasted Tomatoes: Added to contribute textured tomato pieces and a smoky roasted flavor that enhances the chili’s complexity. Brings acidity and chunky tomato presence that contrasts with the smooth sauce. Complements the spice blend and beef with bright roasted notes.
- 2 15.5 oz cans Kidney Beans (drained): Rinsed and drained before adding to provide creamy texture, protein, and body while absorbing surrounding flavors. Contributes bite and substantial mouthfeel to make the chili hearty and satisfying. Supplies contrast to the meat and tomatoes while enhancing bulk.
Step by Step Guide for Chili
Below I expand each direction into detailed, sensory rich steps that help you get consistent results. Read each one slowly the first time, then let the pot do the work while you relax or prep toppings.
- Brown your hamburger meat and drain the grease. Add the hamburger to your slow cooker.: The smell of browning hamburger is one of the most rewarding kitchen aromas, a nutty, meaty scent that signals flavor being built. As the meat sizzles, listen for that steady sear and watch the color shift from pink to deep brown with caramelized edges. Browning creates Maillard reaction notes which are essential for a savory chili base, they add complexity that canned stock alone cannot provide. A common mistake is overcrowding the pan, which causes the meat to steam rather than brown; to avoid this, work in a roomy skillet and give the meat space to contact the hot surface. After browning, carefully tilt the pan and drain excess grease into a safe container, but leave the browned bits stuck to the pan to deglaze with a splash of stock if you want extra depth. When you transfer the browned hamburger to the slow cooker, scrape up any fond to capture maximum flavor.
- Add your chopped yellow onion and butter to your skillet and cook until soft, about 5 minutes. Add your onion to the slow cooker.: As the yellow onion hits the warm butter , you will hear a gentle sizzle and smell a sweet, oniony perfume starting to bloom. Cooking until soft releases sugars that temper the acidity of the tomatoes and build a rounded base. Pay attention to the visual cue, the onion should turn translucent and slightly glossy but not brown, which keeps the flavor sweet rather than caramelized. Stir occasionally to prevent sticking, and lower the heat if the onion begins to color too quickly. One pitfall is rushing this step, leaving bits undercooked and sharp; take those five minutes and let the onion mellow, it rewards the final bowl with softer, integrated flavor.
- Add the remaining ingredients to your slow cooker and stir well.: When you transfer the softened onion into the slow cooker you will notice a harmony of scents as the cooked onion meets the browned hamburger . This layering is important because the onions will continue to meld with the meat during the long cook, contributing sweetness and body. Spread the onion evenly so each portion of the pot benefits from those softened pieces. A common oversight is dumping everything on top in clumps; distributing the onion helps flavors develop uniformly. Also, scrape the pan to catch any buttery, oniony bits and add those to the cooker for extra richness.
- Cook on high for 4 hours.: When you pour in the tomato sauce , fire roasted tomatoes , chicken stock , spices like chili powder , chipotle powder , cumin , ground red pepper , salt, garlic powder , onion powder , and the drained kidney beans , you will see the pot come together into a thick, textured mixture. Stirring well is key so the spices distribute evenly and the beans are submerged to absorb flavors. You should smell a warming notes of smoke and cumin with tomato brightness, that is the aroma of a balanced base. The why: even distribution prevents pockets of over seasoned or under seasoned chili, ensuring consistent flavor. A mistake people make is adding spices unevenly or not stirring enough, which leads to hot spots; take a minute to mix thoroughly and scrape the sides so everything blends.
- Serve with sour cream, cheese & green onions and enjoy!: Over the cook time the kitchen will fill with a slow, steady savory aroma as the flavors meld and the liquid reduces to a rich, saucy consistency. You will notice bubbles moving gently across the surface and the sauce darkening slightly as it concentrates. This long cook helps the spices mellow and the beans soften, creating a cohesive texture where the meat and beans taste like they have been simmering together all day. The reason this technique works is time allows collagen and connective tissue in the meat to relax and the flavors to integrate, producing a rounded, balanced chili. A common troubleshooting tip is monitoring liquid levels; if the chili looks too thin after a few hours, pop the lid partially or switch to high heat on the stovetop briefly to reduce. Conversely, if it seems too thick, stir in a splash of additional stock. Avoid lifting the lid too often, as frequent heat loss can extend cook time.
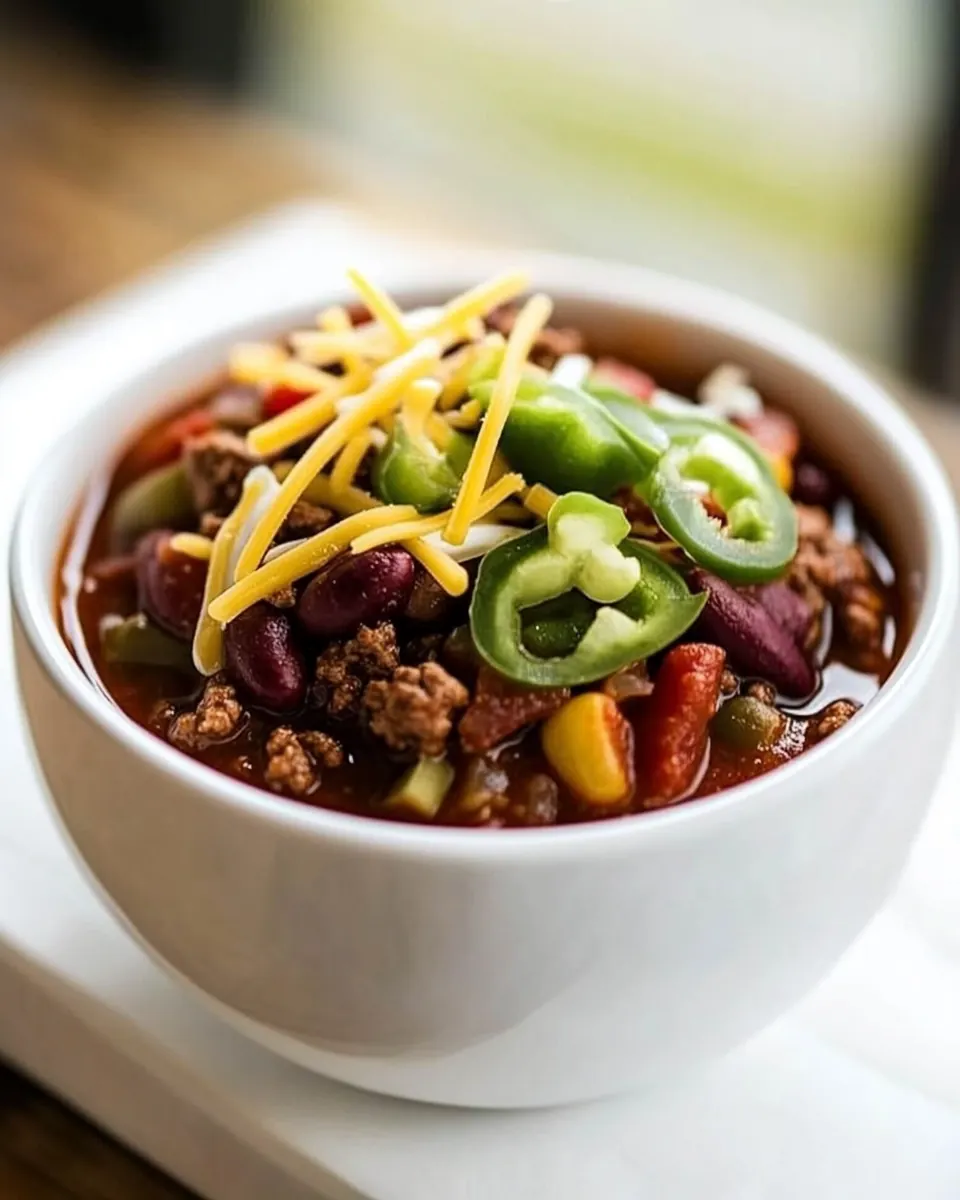
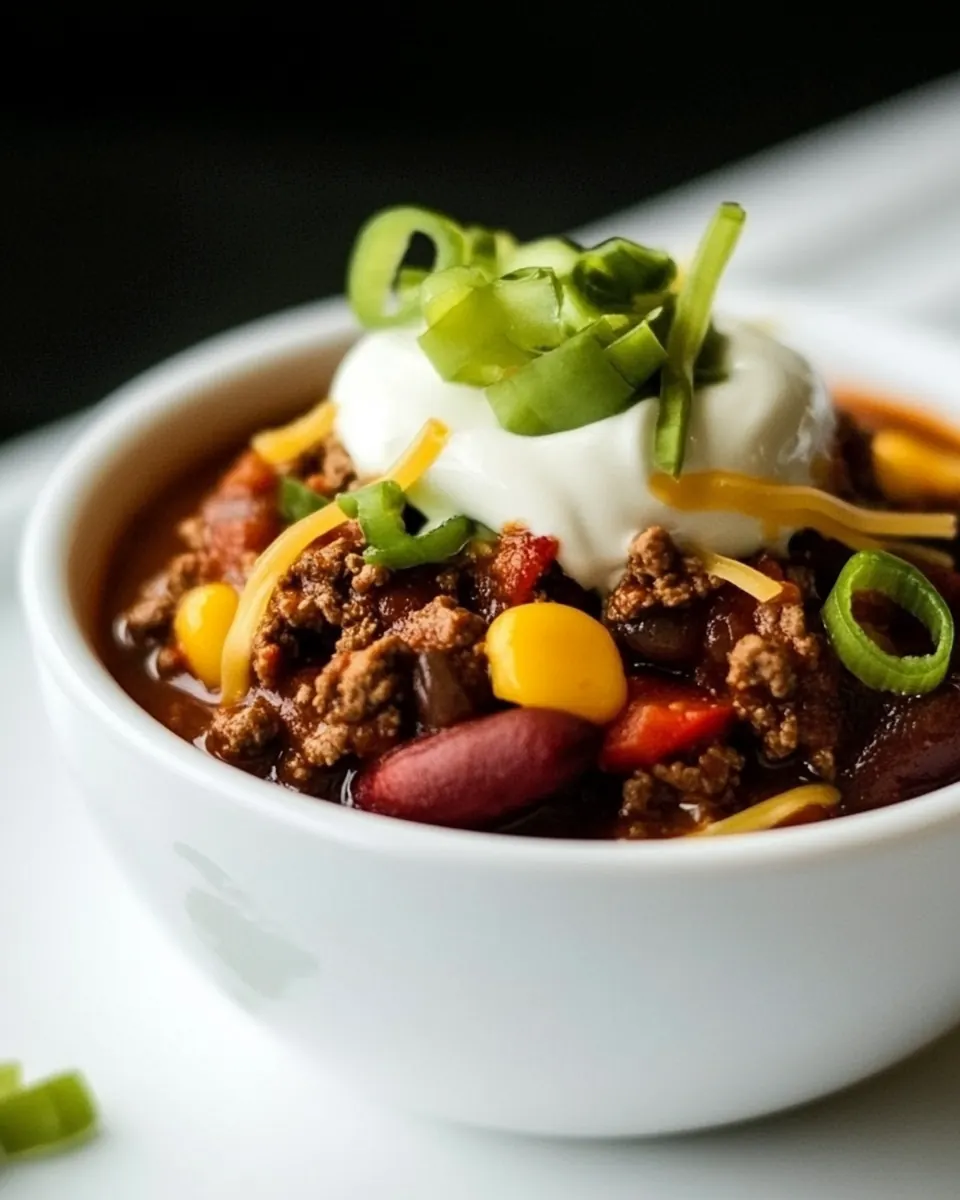
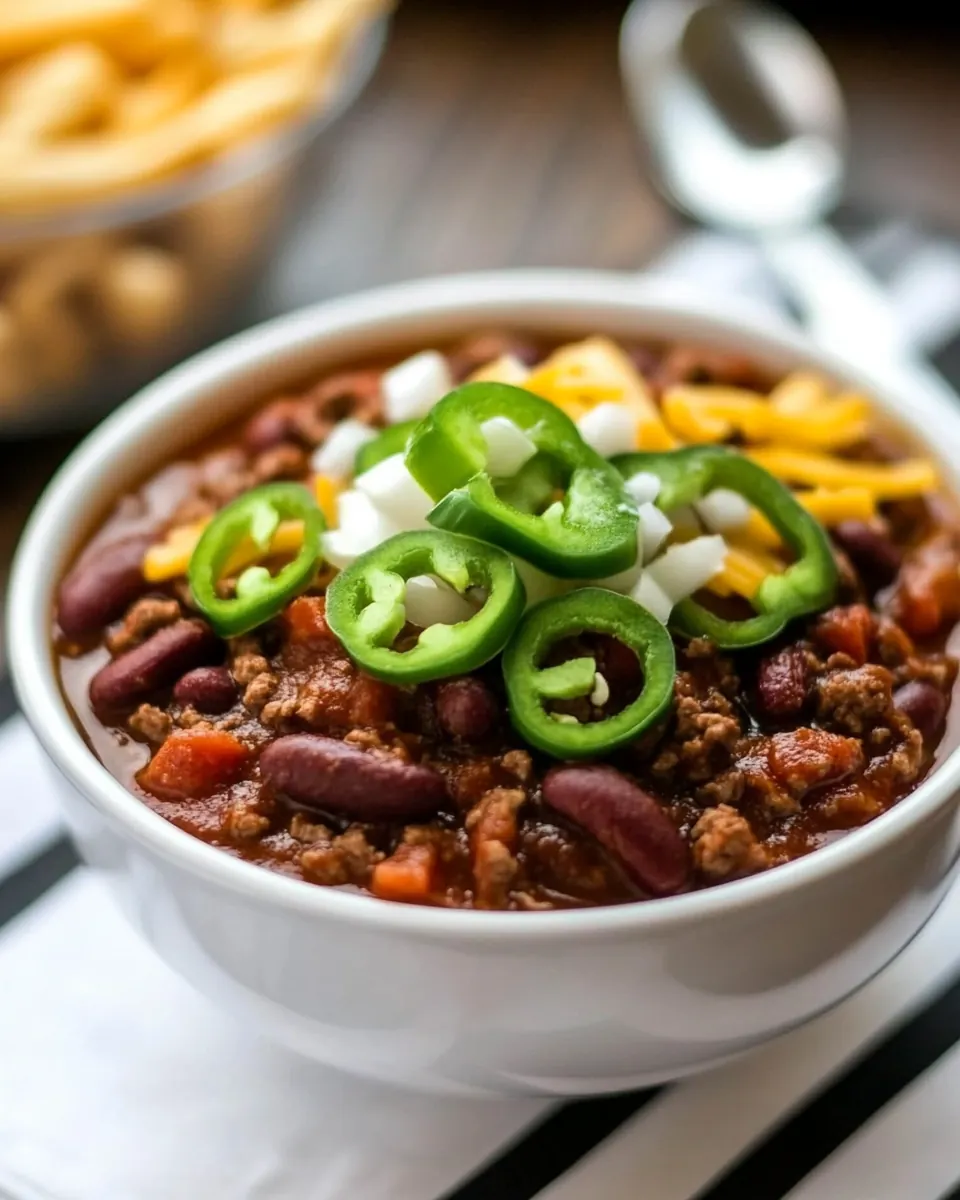
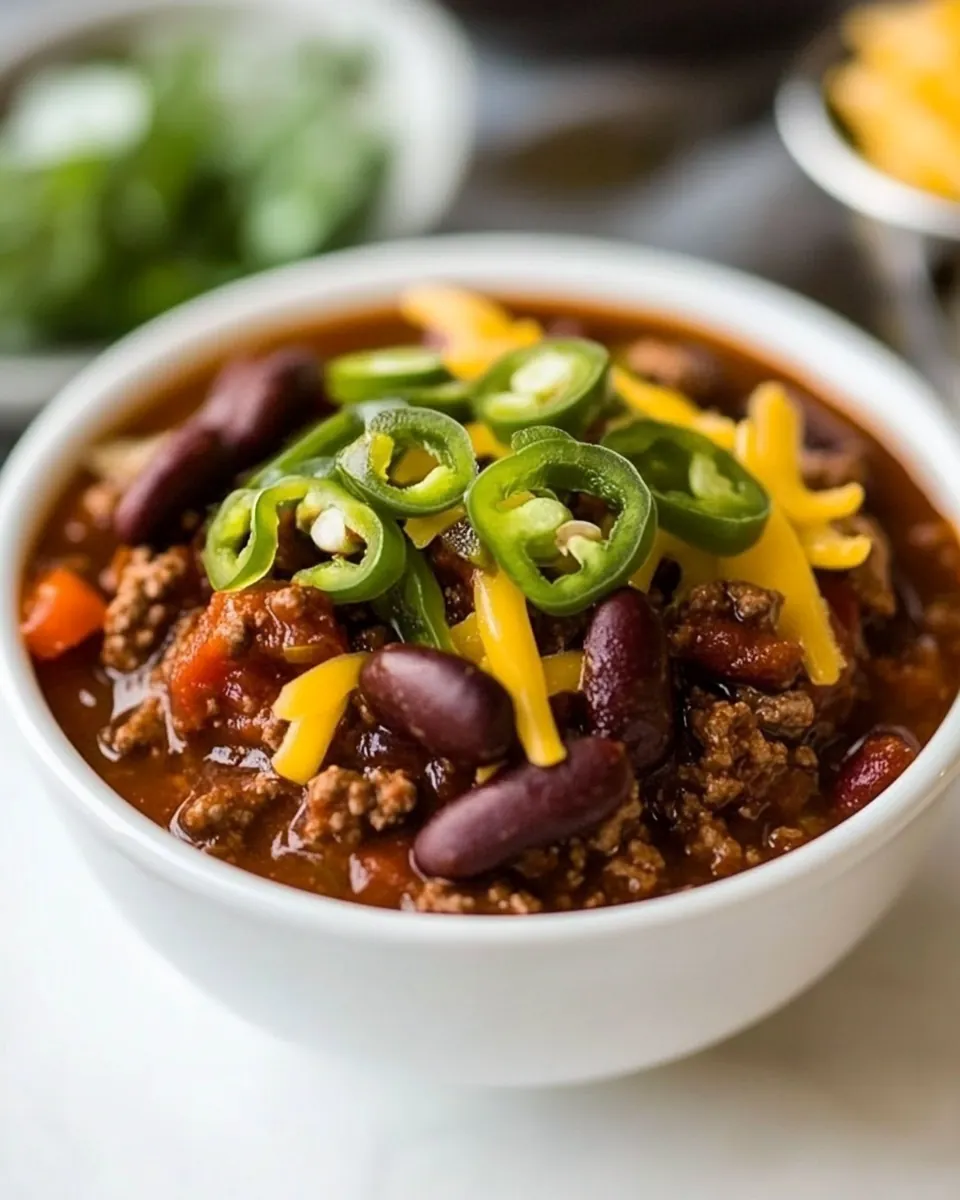
- Serve with sour cream, cheese & green onions and enjoy: The final presentation is where textures and contrasts shine, the cool tang of sour cream or the melty richness of cheese complements the warm, smoky Chili . When you spoon it into bowls, notice the glossy surface and the way the sauce clings to the beans and meat, that cohesion is a good visual cue of doneness. Garnishes like chopped green onions add freshness and a crisp pop against the velvety chili. One thing to avoid is overloading each bowl before tasting; season lightly and then adjust at the table so each guest can personalize. The pleasure here is in the contrast, the creamy, cool toppings against the warm, fragrant chili.
Substitutions and Tips
This section helps you adapt and tailor the Chili to your pantry and taste. I include practical swaps and methods that preserve the core flavor while letting you customize heat, texture, and richness.
- Ground beef swap: If you prefer a leaner protein, choose a leaner ground beef but expect a slightly less fatty mouthfeel, you can add a tablespoon of butter to compensate.
- Stock choice: Use low sodium chicken stock if you want more control over salt, then finish seasoning at the end to taste.
- Bean texture: If you like firmer beans, stir them in halfway through the cook instead of at the start so they retain bite.
- Spice adjustment: Reduce ground red pepper to soften heat or add a pinch more chipotle for smokier intensity, tasting as you go.
- Tomato body: If you want a chunkier chili, swap half the tomato sauce for an extra can of diced tomatoes for texture contrast.
Serving Options for Chili
This section outlines ways I like to serve Chili, from casual bowls to hosting friendly buffets. The ideas below cover sides, occasions, and storage so you can present it perfectly every time.
- Classic bowl: Ladle hot Chili into bowls and top with a dollop of sour cream and shredded cheese for a comforting weeknight meal.
- Topping bar: Offer chopped green onions, shredded cheese, and extra hot sauce on the side so guests can customize their bowls at a casual gathering.
- With cornbread: Serve a slice of warm cornbread for dipping, the sweet crumb contrasts beautifully with the smoky, savory chili.
- For game day: Keep the slow cooker on warm on a buffet table with bowls and spoons, letting guests serve themselves during parties.
- Meal prep: Portion into airtight containers and refrigerate for up to four days, or freeze in single servings for easy lunches and dinners later.
- Seasonal pairing: This is ideal for winter evenings when you want something warming and filling, pair with a simple green salad to lighten the meal.
FAQ
Conclusion
This Chili stands out because it transforms pantry staples into a smoky, hearty bowl that feels like a warm hug on a cold night. Its combination of browned beef, fire roasted tomatoes, and layered spices creates comforting depth while remaining approachable for weeknight cooking. Give it a try when you want a reliable, crowd pleasing meal that scales easily and stores well for leftovers. Serve it with simple toppings and perhaps a piece of cornbread, then settle in and enjoy the cozy satisfaction of a well made bowl.
Chili
Equipment
- Skillet
- Slow Cooker
Ingredients
- 1 lb Browned Hamburger (grease drained) Browned and drained to remove excess fat, providing a savory, meaty base and rich texture for the chili. Adds depth of flavor and umami that complements tomatoes and spices. Provides protein and hearty substance to make the chili filling.
- 1 Yellow Onion Chopped and sautéed to develop sweetness and aromatic complexity that balances the spicy seasonings. Softened onions release natural sugars which enhance overall flavor and mouthfeel. Also contributes subtle texture contrast to the ground beef.
- 1 tbs Butter Melted to gently cook the onion and carry the dry spices so they bloom and become more fragrant. Adds a touch of richness that helps meld flavors together during the sautéing stage. Prevents sticking and promotes even cooking of aromatics.
- 2 tsp Chili Powder Added to impart classic chili flavor with warm, mildly spicy notes that define the dish. Helps build a layered spice profile and pairs well with cumin and chipotle. Used in the sauté to release its oils and aroma.
- 2 tsp Chipotle Powder Sprinkled to contribute smoky, fruity heat that differentiates the chili from standard blends. Enhances complexity with a deep, slightly smoky flavor that complements tomatoes and beans. Used sparingly to control the overall heat and smokiness.
- 2 tsp Cumin Used to introduce earthy, warm, and slightly citrusy undertones that anchor the chili’s spice mix. Works with chili powder to provide depth and a rounded savory character. Helps balance the heat and enhances the overall seasoning.
- 1/2 tsp Ground Red Pepper Measured to add concentrated heat and a sharp kick, raising the chili’s spiciness level. Small quantity ensures a noticeable but controlled warming sensation. Complements other spices without overwhelming the dish.
- 1 tsp Salt Seasoned to elevate and unify flavors, enhancing both savory and sweet elements of the chili. Helps bring out taste in the meat, tomatoes, and beans while balancing saltiness. Added gradually to taste during cooking.
- 1/2 tsp Garlic Powder Sprinkled to add a mellow garlic maltiness without needing fresh garlic, for convenience and consistent flavor. Helps reinforce savory notes and rounds out the spice blend. Blends smoothly into the sauce for even distribution.
- 1/2 tsp Onion Powder Added to boost onion flavor and overall savory aroma when fresh onion is insufficient or to intensify background taste. Provides a subtle sweet-onion note that supports other seasonings. Disperses evenly in the chili base.
- 1 15 oz can Tomato Sauce Poured in to create a saucy, cohesive base that binds spices, meat, and beans together with bright tomato flavor. Adds acidity and body that balance richness from the beef and stock. Forms the foundational tomato element of the chili.
- 2 15 oz cans Chicken Stock Poured in to thin and enrich the chili while contributing savory, seasoned liquid for simmering. Adds volume and helps meld flavors during a long simmer, producing a well-developed broth. Can be adjusted for desired consistency and depth.
- 1 14.5 oz can Fire Roasted Tomatoes Added to contribute textured tomato pieces and a smoky roasted flavor that enhances the chili’s complexity. Brings acidity and chunky tomato presence that contrasts with the smooth sauce. Complements the spice blend and beef with bright roasted notes.
- 2 15.5 oz cans Kidney Beans (drained) Rinsed and drained before adding to provide creamy texture, protein, and body while absorbing surrounding flavors. Contributes bite and substantial mouthfeel to make the chili hearty and satisfying. Supplies contrast to the meat and tomatoes while enhancing bulk.
Instructions
- Brown your hamburger meat and drain the grease. Add the hamburger to your slow cooker.: The smell of browning hamburger is one of the most rewarding kitchen aromas, a nutty, meaty scent that signals flavor being built. As the meat sizzles, listen for that steady sear and watch the color shift from pink to deep brown with caramelized edges. Browning creates Maillard reaction notes which are essential for a savory chili base, they add complexity that canned stock alone cannot provide. A common mistake is overcrowding the pan, which causes the meat to steam rather than brown; to avoid this, work in a roomy skillet and give the meat space to contact the hot surface. After browning, carefully tilt the pan and drain excess grease into a safe container, but leave the browned bits stuck to the pan to deglaze with a splash of stock if you want extra depth. When you transfer the browned hamburger to the slow cooker, scrape up any fond to capture maximum flavor.
- Add your chopped yellow onion and butter to your skillet and cook until soft, about 5 minutes. Add your onion to the slow cooker.: As the yellow onion hits the warm butter , you will hear a gentle sizzle and smell a sweet, oniony perfume starting to bloom. Cooking until soft releases sugars that temper the acidity of the tomatoes and build a rounded base. Pay attention to the visual cue, the onion should turn translucent and slightly glossy but not brown, which keeps the flavor sweet rather than caramelized. Stir occasionally to prevent sticking, and lower the heat if the onion begins to color too quickly. One pitfall is rushing this step, leaving bits undercooked and sharp; take those five minutes and let the onion mellow, it rewards the final bowl with softer, integrated flavor.
- Add the remaining ingredients to your slow cooker and stir well.: When you transfer the softened onion into the slow cooker you will notice a harmony of scents as the cooked onion meets the browned hamburger . This layering is important because the onions will continue to meld with the meat during the long cook, contributing sweetness and body. Spread the onion evenly so each portion of the pot benefits from those softened pieces. A common oversight is dumping everything on top in clumps; distributing the onion helps flavors develop uniformly. Also, scrape the pan to catch any buttery, oniony bits and add those to the cooker for extra richness.
- Cook on high for 4 hours.: When you pour in the tomato sauce , fire roasted tomatoes , chicken stock , spices like chili powder , chipotle powder , cumin , ground red pepper , salt, garlic powder , onion powder , and the drained kidney beans , you will see the pot come together into a thick, textured mixture. Stirring well is key so the spices distribute evenly and the beans are submerged to absorb flavors. You should smell a warming notes of smoke and cumin with tomato brightness, that is the aroma of a balanced base. The why: even distribution prevents pockets of over seasoned or under seasoned chili, ensuring consistent flavor. A mistake people make is adding spices unevenly or not stirring enough, which leads to hot spots; take a minute to mix thoroughly and scrape the sides so everything blends.
- Serve with sour cream, cheese & green onions and enjoy!: Over the cook time the kitchen will fill with a slow, steady savory aroma as the flavors meld and the liquid reduces to a rich, saucy consistency. You will notice bubbles moving gently across the surface and the sauce darkening slightly as it concentrates. This long cook helps the spices mellow and the beans soften, creating a cohesive texture where the meat and beans taste like they have been simmering together all day. The reason this technique works is time allows collagen and connective tissue in the meat to relax and the flavors to integrate, producing a rounded, balanced chili. A common troubleshooting tip is monitoring liquid levels; if the chili looks too thin after a few hours, pop the lid partially or switch to high heat on the stovetop briefly to reduce. Conversely, if it seems too thick, stir in a splash of additional stock. Avoid lifting the lid too often, as frequent heat loss can extend cook time.
- Serve with sour cream, cheese & green onions and enjoy: The final presentation is where textures and contrasts shine, the cool tang of sour cream or the melty richness of cheese complements the warm, smoky Chili . When you spoon it into bowls, notice the glossy surface and the way the sauce clings to the beans and meat, that cohesion is a good visual cue of doneness. Garnishes like chopped green onions add freshness and a crisp pop against the velvety chili. One thing to avoid is overloading each bowl before tasting; season lightly and then adjust at the table so each guest can personalize. The pleasure here is in the contrast, the creamy, cool toppings against the warm, fragrant chili.
Notes
- Ground beef swap: If you prefer a leaner protein, choose a leaner ground beef but expect a slightly less fatty mouthfeel, you can add a tablespoon of butter to compensate.
- Stock choice: Use low sodium chicken stock if you want more control over salt, then finish seasoning at the end to taste.
- Bean texture: If you like firmer beans, stir them in halfway through the cook instead of at the start so they retain bite.
- Spice adjustment: Reduce ground red pepper to soften heat or add a pinch more chipotle for smokier intensity, tasting as you go.
- Tomato body: If you want a chunkier chili, swap half the tomato sauce for an extra can of diced tomatoes for texture contrast.