Deviled Egg Chicks
Deviled Egg Chicks were the tiny guests that always stole the show at my spring gatherings. The first time I made them I was trying to entertain a house full of kids and adults at the same time, and these playful little bites solved the problem of being festive and fuss free at once.
That day I remember laughing as I arranged each face, the olives becoming eyes and the carrot turning into a beak. Friends kept reaching in, delighted by the whimsy, and I loved hearing the soft crunch and the smooth, creamy bite mingle together. I like recipes that make people smile before they even taste them, and these certainly do that.
Over the years I tweaked the filling until it felt perfectly balanced for both kids and grown ups. The blend of creamy mayo, tangy mustard, and the warmth of smoked paprika gives the yolk mixture a familiar but elevated flavor. I always keep a little extra filling on hand for piping, because presentation matters when you are making something so visual. You will find that assembling the chicks becomes meditative, and the simple rituals of slicing, scooping, and decorating turn into a small, joyful ritual.
Recipe Snapshot
45 mins
30 mins
15 mins
Medium
120 kcal
American
Paleo, Whole30
Appetizers
Sharp knife, Mixing bowl, Fork, Pastry bag or resealable plastic bag, Platter
What’s Great About This Deviled Egg Chicks
They are irresistibly playful
I adore how Deviled Egg Chicks transform a classic snack into a conversation piece. When people see the tiny faces they relax and smile, which makes these perfect for family gatherings. The novelty helps even picky eaters try a bite.
Easy to make, easy to scale
I’ve made these for a quick school bake sale and for a brunch of thirty. The technique stays the same whether you are making a dozen or several dozen, so you can scale up without stress. I find that pre prepping the yolk filling and storing it in a piping bag saves time and keeps things tidy.
Textures that sing together
The creamy yolk filling pairs with the firm yet tender egg white for a satisfying contrast. The little crunch from the carrot beaks and the briny pop from the black olives add interest in every bite. I love that each mouthful has a different note.
Kid friendly but grown up approved
These are playful enough for kids, yet the flavors remain nuanced for adults. I sometimes add a touch more smoked paprika for depth when serving to adults, and the result always feels clever rather than childish. The recipe sits comfortably between party food and refined snack.
Super adaptable
I’ve learned to adapt the seasoning to taste, so if you prefer tangier bites add a smidge more dijon mustard, or if you want a smokier edge increase the smoked paprika. Small changes give you big differences, and that’s a habit I encourage in the kitchen.
Everything You Need for Deviled Egg Chicks
These ingredients are intentionally simple, letting each component play its role. The cooked eggs provide a creamy canvas, mayonnaise and dijon mustard bring luxuriously smooth texture and tang, and the aromatics and spices round everything out. The carrot and black olives are small details that add color and personality, turning a familiar snack into an eye catching platter.
- 12 large eggs, hard boiled and peeled: Provide creamy, protein-rich filling when mashed and mixed; offers structure and volume to deviled eggs. Peel and halve carefully to create neat cups for stuffing, and chill prior to assembly for best texture.
- 1/3 cup mayonnaise: Add richness and smoothness to the yolk mixture while balancing acidity; emulsifies dry mustard and spices for a silky filling. Measure for desired creaminess and adjust slightly for firmer or softer consistency.
- 2 teaspoons dijon mustard: Lend bright, tangy flavor that cuts through the richness of mayonnaise and egg yolks; helps develop the classic deviled egg taste. Whisk thoroughly into the yolk mixture to distribute acid evenly without overpowering other seasonings.
- 1/4 teaspoon garlic powder: Provide subtle savory depth and a mild onion-garlic aroma without adding moisture; pairs well with mustard and paprika. Sprinkle in small amounts and taste as you go to avoid overwhelming the delicate filling.
- 1/4 teaspoons smoked paprika: Impart a warm, smoky note and vibrant color to the filling and garnish; enhances visual appeal and flavor complexity. Use sparingly to keep smokiness balanced with other ingredients and sprinkle atop finished chicks.
- 1/4 teaspoons salt, or to taste: Enhance overall flavor by bringing out and balancing the other components; used to season the filling according to taste. Add gradually and taste the yolk mixture to reach a pleasant, balanced salt level.
- 1/8 teaspoon black pepper, or to taste: Introduce subtle heat and aromatic backbone to the filling when freshly cracked; complements salt and paprika. Grind or measure finely and adjust to personal preference to avoid overpowering the eggs.
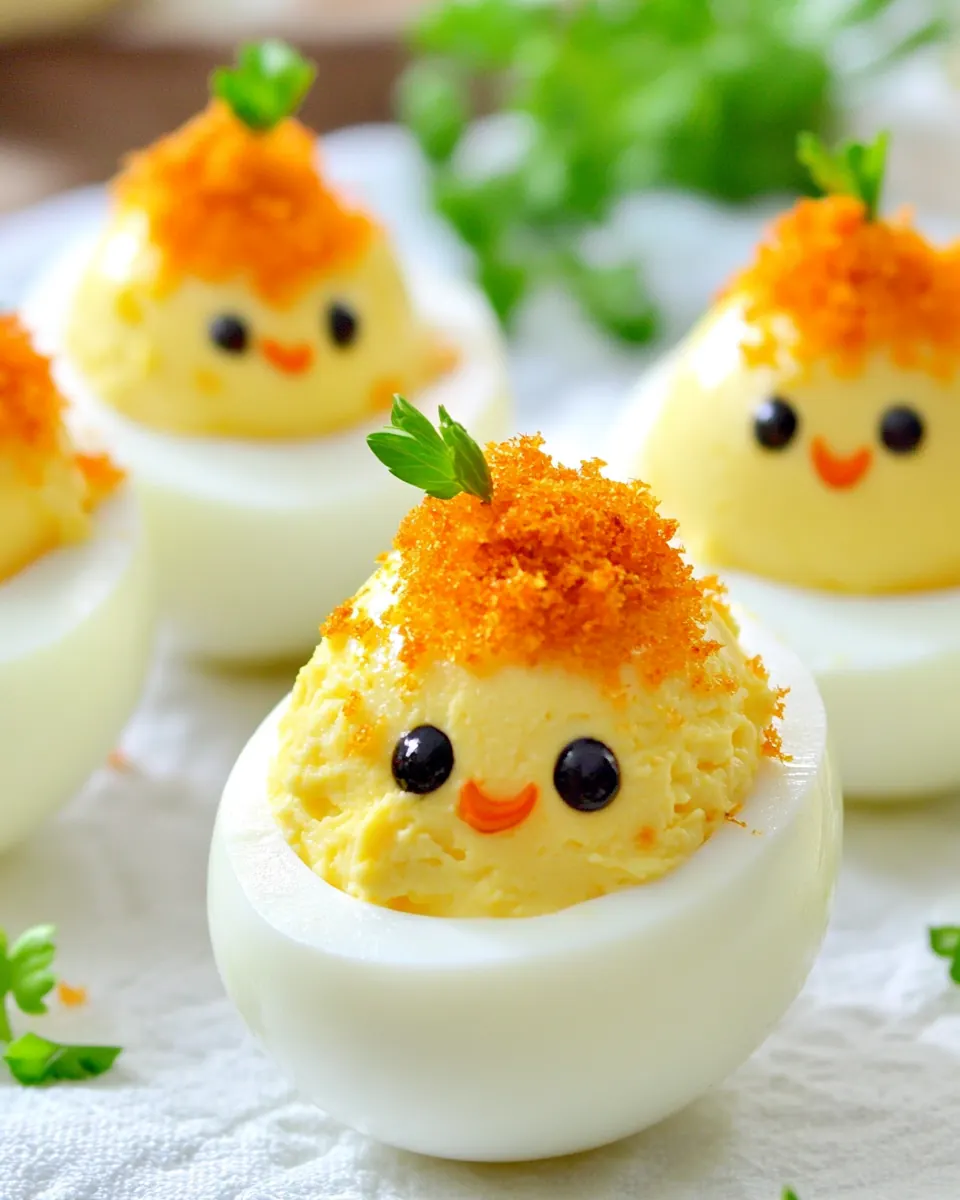
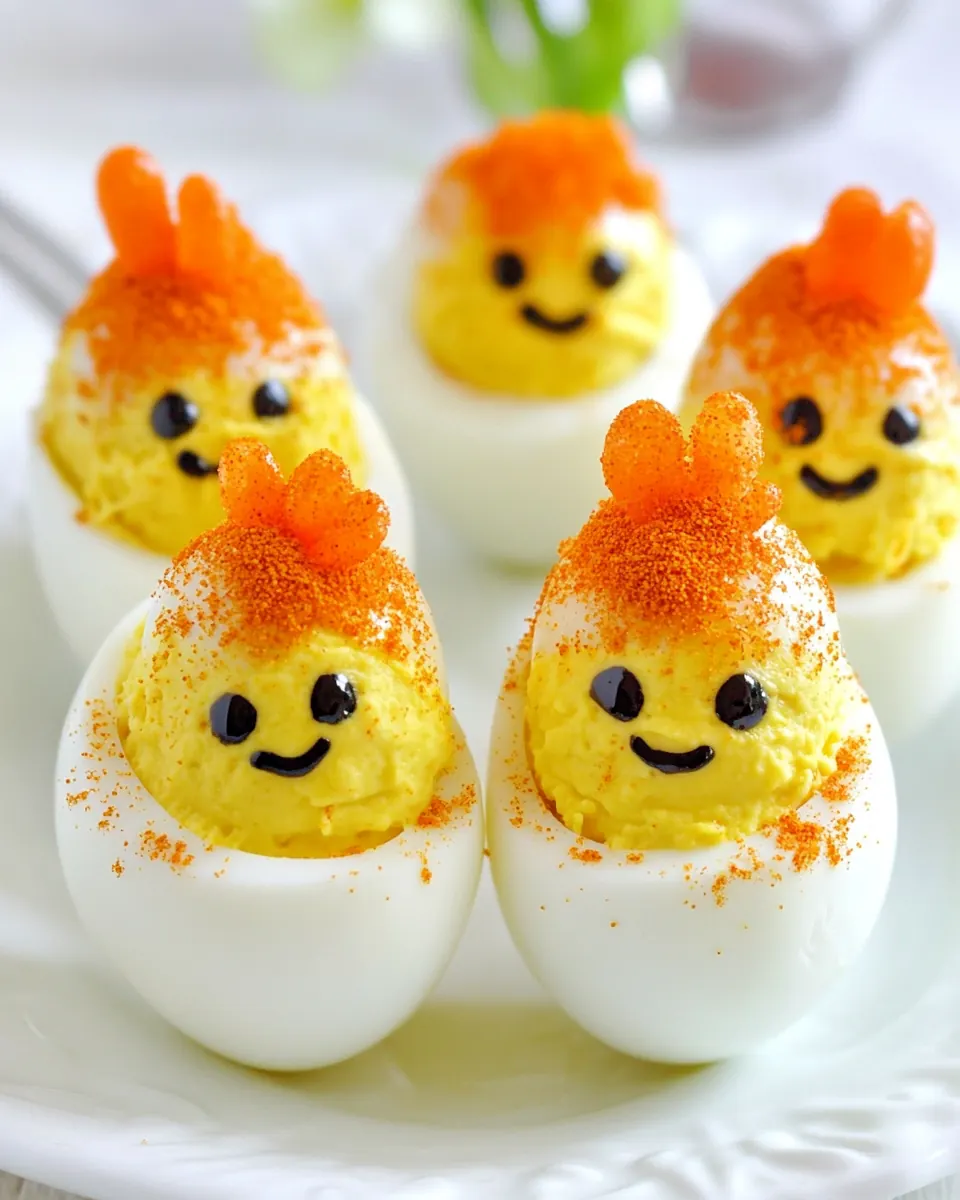
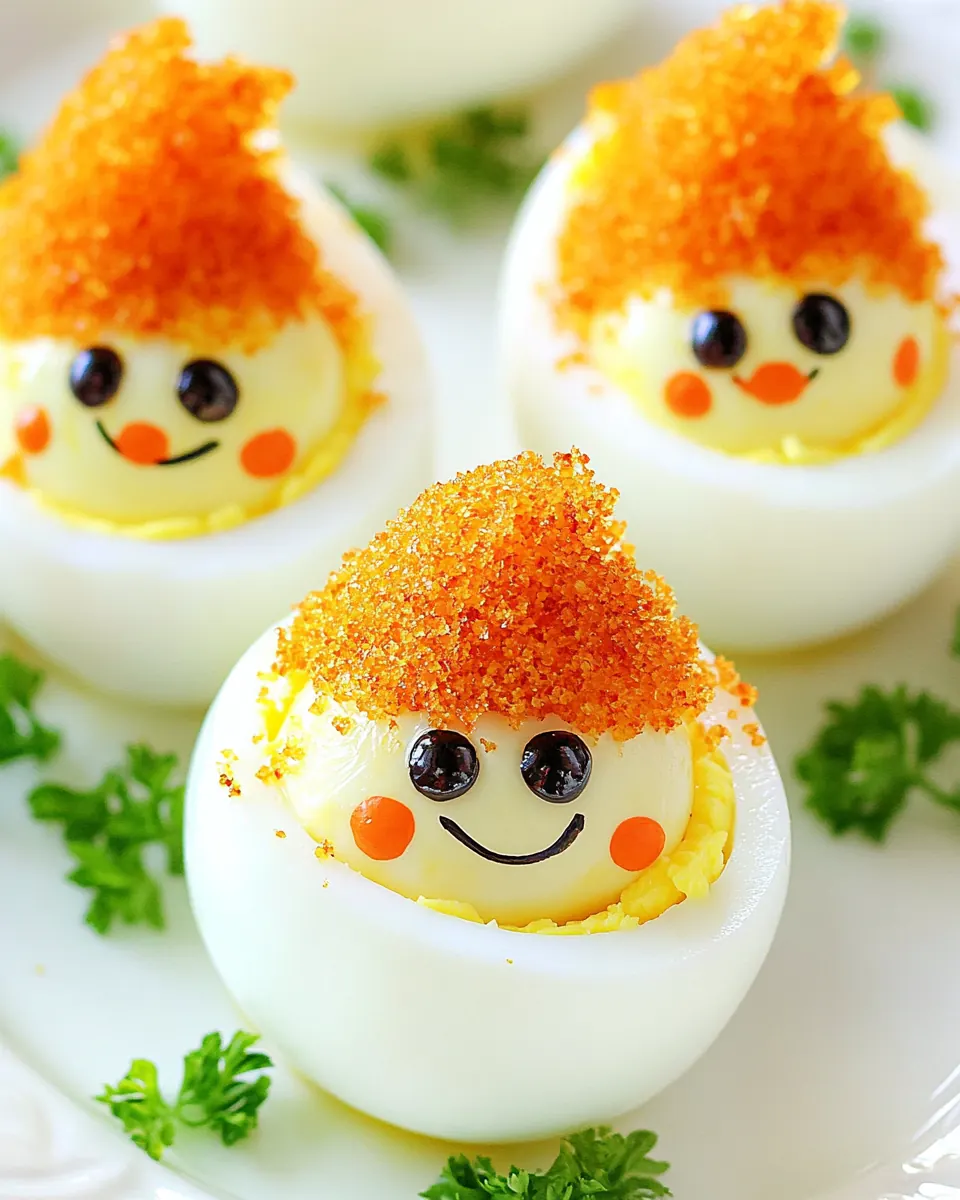
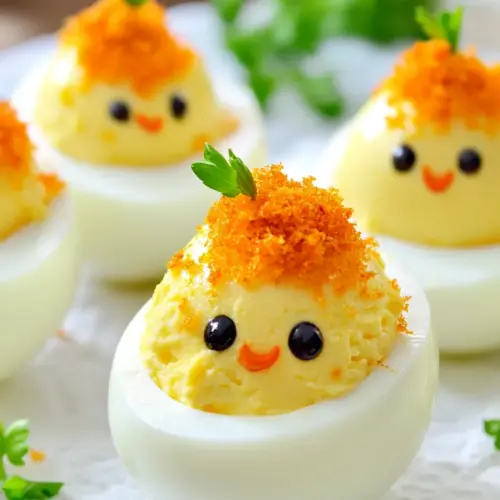
- 1 small carrot, peeled: Serve as decorative and edible beaks for the chick design when thinly sliced; adds mild sweetness, crunch, and color contrast. Peel, shape into small triangles, and insert into each filled egg to form a chick’s beak.
- 6 black olives: Provide small, dark accents used for eyes on each chick; contributes salty, briny flavor and visual definition. Slice into rounds or halves and press gently into the filling to create expressive facial features.
Step by Step Instructions for Deviled Egg Chicks

This method is methodical and satisfying, and it rewards the small acts of assembly. Take your time with each step to ensure clean presentation, and keep your tools handy so you can move through the process without interruption.
- Start by peeling the hard-boiled eggs.: The aroma is faintly sulfuric yet reassuring, and the sound is almost silent as the shell slips away. Use cool water to help ease the shell off, tapping gently to create hairline fractures, then peel under running water if you find stubborn membranes. Proper peeling prevents ragged edges on the white, which is important for the final presentation. A common mistake is peeling warm eggs, which can tear the whites, so always chill them first.
- After that, using a sharp knife, slice a thin layer from the base of the egg to give it a flat surface to stand on.: You will notice a clean, soft white where you cut, and the egg will suddenly sit steadier on the platter. This quiet adjustment makes arranging the chicks simple and prevents wobbling during piping. Use a sharp knife and steady pressure to avoid crushing the egg. Avoid using a dull knife, which can tear and deform the base.
- Next, slice off about a third of the egg from the top and squeeze out gently to loosen the yolk to get it out. Add the yolks to a large bowl. Remember to keep the lids paired with their bases.: As you remove the top third the surface gives way to the bright, crumbly yolk center, which smells rich and eggy in an inviting way. Keep the tops paired with their bases so you can press them back on later without guessing. The gentle squeeze helps dislodge the yolk without cracking the white further. A common error is squeezing too hard, which can shatter the white, so be gentle and deliberate.
- Mash the yolks with a fork and add the mayonnaise, mustard, garlic powder, paprika, salt, and pepper. Mash together until smooth.: You will immediately notice the texture change as the dry crumbly yolk meets the cool, glossy mayonnaise, and the smell of dijon mustard lifts the mixture. Mash until the blend becomes smooth, watching the color turn uniform and creamy. Aim for a texture that holds its shape but still pipes easily. Over mixing can make the filling too loose, while under mixing leaves bumps, so mix until silky.
- Transfer mixture to Ziploc or pastry bag and pipe it generously back into the egg bases.: As you pipe, the filling will extrude with a satisfying swirled ridge, and the tang and cream will be obvious in the aroma. Piping ensures neat, consistent mounds that look like feathers on each chick. If you do not have a bag, spooning works too, but piping gives the most charming result. A mistake to avoid is overfilling, which makes tops hard to replace cleanly, so leave a little room.
- Place the tops back on and slightly press them.: The visual is instantly completed, as each chick gains a little cap that hints at a beak and an eye area. Press just enough so the top sits flush but the filling remains visible. This small action secures the top for serving without crushing the piped filling. Pressing too firmly can cause the filling to ooze out, so be light handed.
- Next, poke through an olive with a plastic straw and then gently squeeze down the straw to get little circles, use them for the eyes.: There is a tactile joy as the olive yields tiny round discs that glisten, and the briny scent of the olive adds depth to the overall aroma. Position the eyes symmetrically for a pleasing expression, and press slightly into the filling so they hold. If the olive discs are too large, trim them down carefully. A common slip is making eyes uneven, which can look less charming, so take a breath and aim for balance.
- For the beaks, cut the carrot into a few thin rounds and thinly slice them into sixths.: The fresh, sweet smell of the carrot is bright and crisp, and the thin wedges create a delightful crunch when bitten. Arrange the tiny wedges point first into the filling to mimic tiny beaks. Cutting evenly produces uniform looks across the platter. Watch your fingers and use a stable board to avoid slips when slicing very small pieces.
- Set chicks on a platter covered with lettuce leaves and garnish with fresh herbs.: The final step is all about presentation, where the cool green of the leaves provides a vivid backdrop and a faint herb aroma lifts the whole tray. Arrange the chicks in small groups to make an appealing display and sprinkle herbs sparingly for color contrast. This finishing touch makes the dish look professional and inviting. Avoid overcrowding the platter, which can make the arrangement look messy rather than intentional.
Substitutions and Tips
These tips are practical and focused on helping you achieve the best texture and presentation for your Deviled Egg Chicks. I wrote them from experience, covering quick swaps and assembly tricks that make the process smoother.
- Use older eggs for peeling: Eggs that are 7 to 10 days old often peel cleaner because the pH of the whites changes with age, reducing sticking to the shell.
- Room for variation in mayonnaise: If you prefer a lighter filling, choose a lighter mayonnaise, but be mindful that the filling will be looser and may not pipe as neatly.
- Alternate piping method: No pastry bag No problem, a resealable plastic bag with a corner snipped works well and gives you good control over the shape.
- Make ahead strategy: Prepare the yolk mixture up to 24 hours in advance and refrigerate in a piping bag, then pipe shortly before serving to keep the whites firm.
- Eye placement trick: Use tweezers or the tip of a spoon to set the olive discs precisely, which helps maintain symmetry across the platter.
Side Dish Ideas for Deviled Egg Chicks
These serving suggestions cover occasions, pairings, and storage so you can present Deviled Egg Chicks beautifully whether you are hosting brunch or a holiday gathering. I include ideas for easy accompaniments and how to keep them tasting fresh.
- Spring brunch pairing: Serve the chicks alongside a fresh green salad for a light meal, their creamy filling balancing crisp leaves and vinaigrette.
- Party platter idea: Arrange with colorful crudites and a few bowls of dips, letting the chicks act as a playful centerpiece on the appetizer table.
- Holiday serving: These are ideal for Easter brunch, where the seasonal theme and cheerful presentation fit right in with holiday decor.
- Storage tips: Keep assembled chicks refrigerated and covered for up to 24 hours, but for best texture pipe the filling shortly before serving if possible.
- Occasion versatility: They work for baby showers, potlucks, and casual gatherings, offering a festive, hand held option that is easy to transport.
FAQ
Conclusion
Deviled Egg Chicks stand out because they turn a timeless classic into a charming, shareable centerpiece that appeals to all ages. The balance of creamy yolk filling, tangy mustard, and tiny crunchy accents makes each bite satisfying and visually delightful. Give them a try at your next spring gathering or holiday brunch, and see how quickly they disappear from the platter. They are an easy, joyful way to add personality to your spread and invite playful conversation among guests.
Deviled Egg Chicks
Equipment
- Sharp Knife
- Mixing Bowl
- Fork
- Pastry bag or resealable plastic bag
- Platter
Ingredients
- 12 large eggs, hard boiled and peeled Provide creamy, protein-rich filling when mashed and mixed; offers structure and volume to deviled eggs. Peel and halve carefully to create neat cups for stuffing, and chill prior to assembly for best texture.
- 1/3 cup mayonnaise Add richness and smoothness to the yolk mixture while balancing acidity; emulsifies dry mustard and spices for a silky filling. Measure for desired creaminess and adjust slightly for firmer or softer consistency.
- 2 teaspoons dijon mustard Lend bright, tangy flavor that cuts through the richness of mayonnaise and egg yolks; helps develop the classic deviled egg taste. Whisk thoroughly into the yolk mixture to distribute acid evenly without overpowering other seasonings.
- 1/4 teaspoon garlic powder Provide subtle savory depth and a mild onion-garlic aroma without adding moisture; pairs well with mustard and paprika. Sprinkle in small amounts and taste as you go to avoid overwhelming the delicate filling.
- 1/4 teaspoons smoked paprika Impart a warm, smoky note and vibrant color to the filling and garnish; enhances visual appeal and flavor complexity. Use sparingly to keep smokiness balanced with other ingredients and sprinkle atop finished chicks.
- 1/4 teaspoons salt, or to taste Enhance overall flavor by bringing out and balancing the other components; used to season the filling according to taste. Add gradually and taste the yolk mixture to reach a pleasant, balanced salt level.
- 1/8 teaspoon black pepper, or to taste Introduce subtle heat and aromatic backbone to the filling when freshly cracked; complements salt and paprika. Grind or measure finely and adjust to personal preference to avoid overpowering the eggs.
- 1 small carrot, peeled Serve as decorative and edible beaks for the chick design when thinly sliced; adds mild sweetness, crunch, and color contrast. Peel, shape into small triangles, and insert into each filled egg to form a chick’s beak.
- 6 black olives Provide small, dark accents used for eyes on each chick; contributes salty, briny flavor and visual definition. Slice into rounds or halves and press gently into the filling to create expressive facial features.
Instructions
- Start by peeling the hard-boiled eggs.: The aroma is faintly sulfuric yet reassuring, and the sound is almost silent as the shell slips away. Use cool water to help ease the shell off, tapping gently to create hairline fractures, then peel under running water if you find stubborn membranes. Proper peeling prevents ragged edges on the white, which is important for the final presentation. A common mistake is peeling warm eggs, which can tear the whites, so always chill them first.
- After that, using a sharp knife, slice a thin layer from the base of the egg to give it a flat surface to stand on.: You will notice a clean, soft white where you cut, and the egg will suddenly sit steadier on the platter. This quiet adjustment makes arranging the chicks simple and prevents wobbling during piping. Use a sharp knife and steady pressure to avoid crushing the egg. Avoid using a dull knife, which can tear and deform the base.
- Next, slice off about a third of the egg from the top and squeeze out gently to loosen the yolk to get it out. Add the yolks to a large bowl. Remember to keep the lids paired with their bases.: As you remove the top third the surface gives way to the bright, crumbly yolk center, which smells rich and eggy in an inviting way. Keep the tops paired with their bases so you can press them back on later without guessing. The gentle squeeze helps dislodge the yolk without cracking the white further. A common error is squeezing too hard, which can shatter the white, so be gentle and deliberate.
- Mash the yolks with a fork and add the mayonnaise, mustard, garlic powder, paprika, salt, and pepper. Mash together until smooth.: You will immediately notice the texture change as the dry crumbly yolk meets the cool, glossy mayonnaise, and the smell of dijon mustard lifts the mixture. Mash until the blend becomes smooth, watching the color turn uniform and creamy. Aim for a texture that holds its shape but still pipes easily. Over mixing can make the filling too loose, while under mixing leaves bumps, so mix until silky.
- Transfer mixture to Ziploc or pastry bag and pipe it generously back into the egg bases.: As you pipe, the filling will extrude with a satisfying swirled ridge, and the tang and cream will be obvious in the aroma. Piping ensures neat, consistent mounds that look like feathers on each chick. If you do not have a bag, spooning works too, but piping gives the most charming result. A mistake to avoid is overfilling, which makes tops hard to replace cleanly, so leave a little room.
- Place the tops back on and slightly press them.: The visual is instantly completed, as each chick gains a little cap that hints at a beak and an eye area. Press just enough so the top sits flush but the filling remains visible. This small action secures the top for serving without crushing the piped filling. Pressing too firmly can cause the filling to ooze out, so be light handed.
- Next, poke through an olive with a plastic straw and then gently squeeze down the straw to get little circles, use them for the eyes.: There is a tactile joy as the olive yields tiny round discs that glisten, and the briny scent of the olive adds depth to the overall aroma. Position the eyes symmetrically for a pleasing expression, and press slightly into the filling so they hold. If the olive discs are too large, trim them down carefully. A common slip is making eyes uneven, which can look less charming, so take a breath and aim for balance.
- For the beaks, cut the carrot into a few thin rounds and thinly slice them into sixths.: The fresh, sweet smell of the carrot is bright and crisp, and the thin wedges create a delightful crunch when bitten. Arrange the tiny wedges point first into the filling to mimic tiny beaks. Cutting evenly produces uniform looks across the platter. Watch your fingers and use a stable board to avoid slips when slicing very small pieces.
- Set chicks on a platter covered with lettuce leaves and garnish with fresh herbs.: The final step is all about presentation, where the cool green of the leaves provides a vivid backdrop and a faint herb aroma lifts the whole tray. Arrange the chicks in small groups to make an appealing display and sprinkle herbs sparingly for color contrast. This finishing touch makes the dish look professional and inviting. Avoid overcrowding the platter, which can make the arrangement look messy rather than intentional.
Notes
- Use older eggs for peeling: Eggs that are 7 to 10 days old often peel cleaner because the pH of the whites changes with age, reducing sticking to the shell.
- Room for variation in mayonnaise: If you prefer a lighter filling, choose a lighter mayonnaise, but be mindful that the filling will be looser and may not pipe as neatly.
- Alternate piping method: No pastry bag No problem, a resealable plastic bag with a corner snipped works well and gives you good control over the shape.
- Make ahead strategy: Prepare the yolk mixture up to 24 hours in advance and refrigerate in a piping bag, then pipe shortly before serving to keep the whites firm.
- Eye placement trick: Use tweezers or the tip of a spoon to set the olive discs precisely, which helps maintain symmetry across the platter.