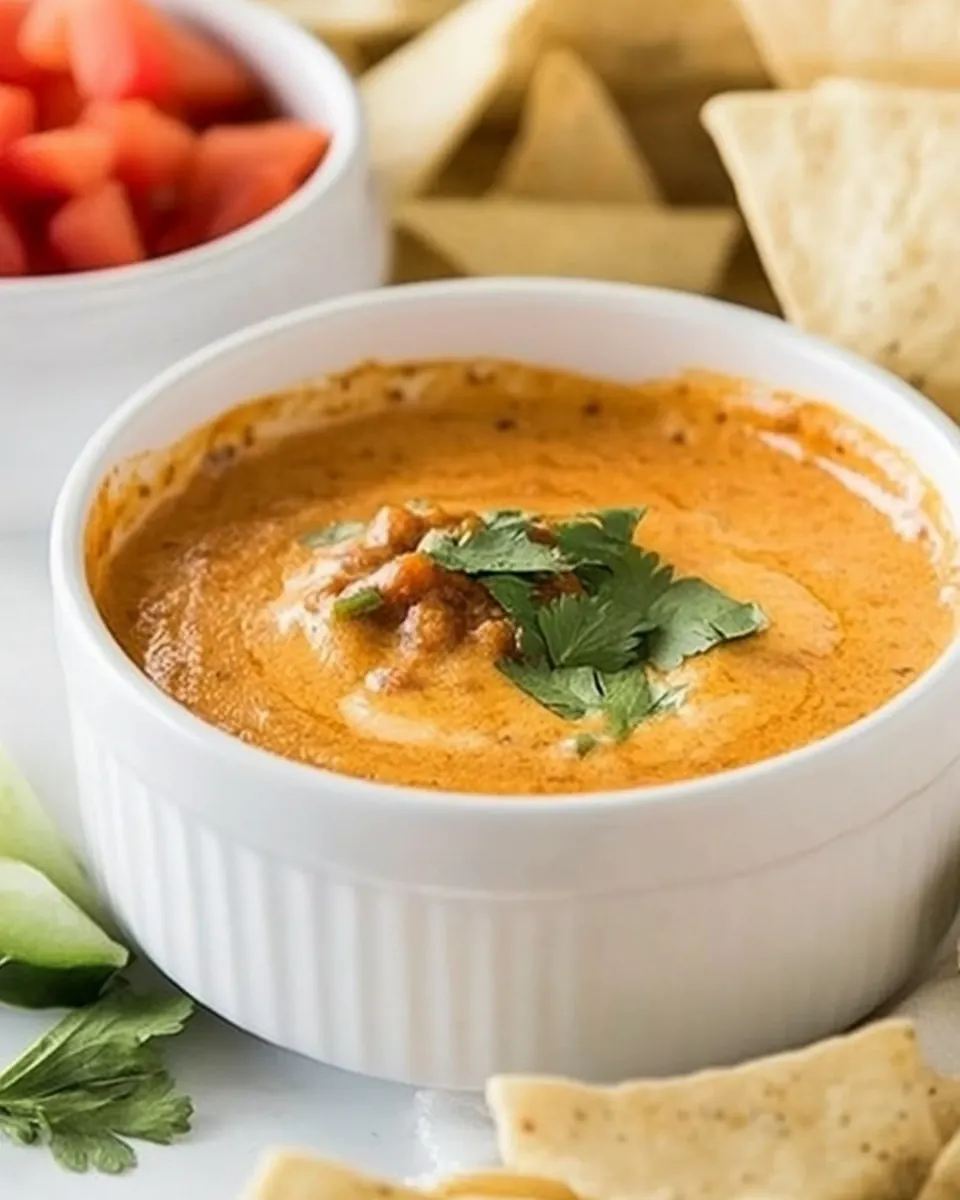
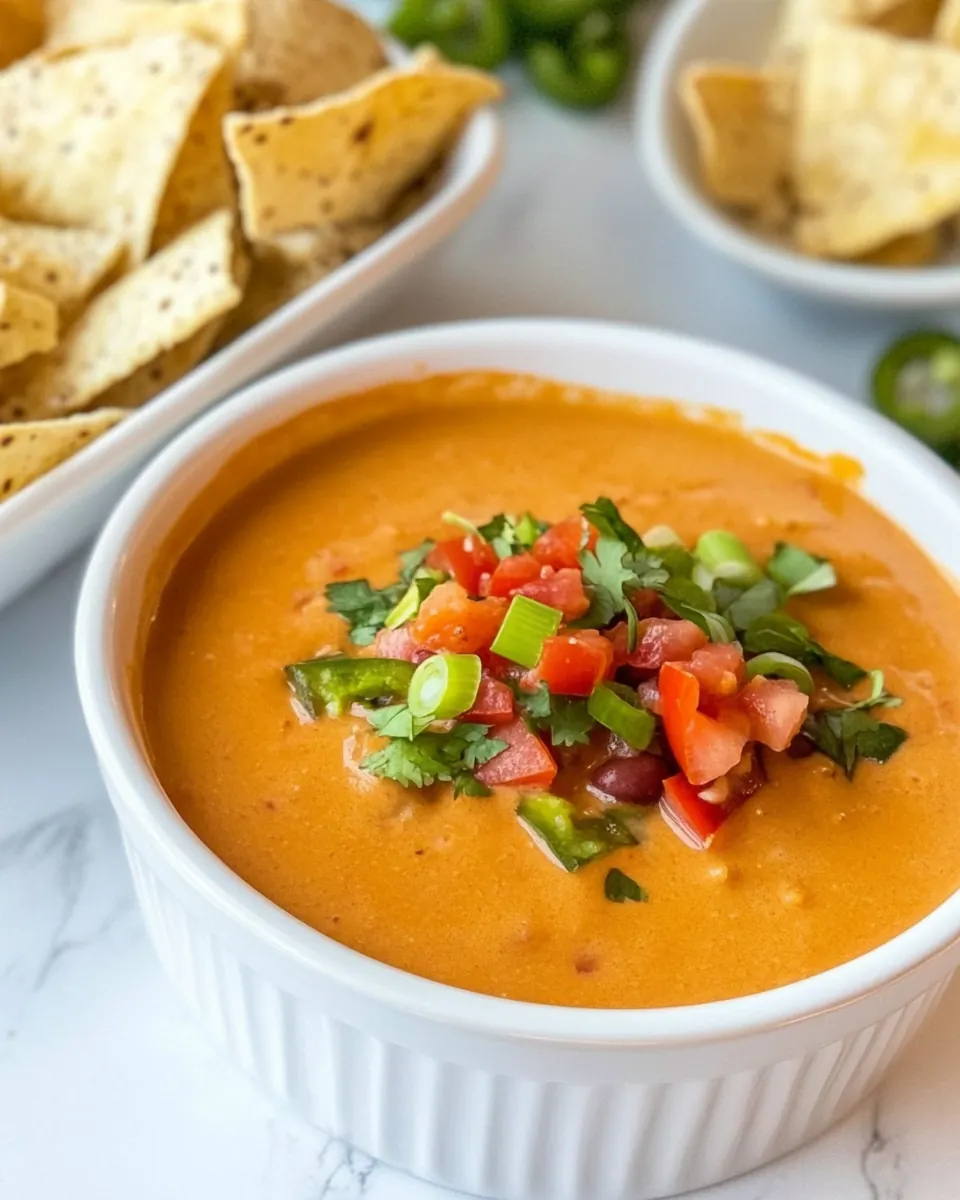
Chili Cheese Dip
Chili Cheese Dip is the kind of party food that feels like a warm hug from the inside out, and I still remember the first time I dipped a chip into a bubbling bowl at a neighborhood potluck. I was skeptical that two simple pantry staples could create something so comforting, but the mix of savory chili and gooey cheese won me over in the first five bites. That night I scribbled the combination on a scrap of paper and kept coming back to it whenever friends gathered.
Over the years I’ve tweaked how I heat and serve this snack, learning which containers keep it at the perfect dipping temperature and which crackers or chips stand up best. My approach is casual, and I love how flexible the recipe is, whether you’re plating it for game day or bringing it to a last minute get together. I often think of this as the ultimate comfort party dip because it fills the room with a savory aroma that draws people in, and the moment someone breaks the crust of cheese on their chip, you can see the small wins of hosting.
Recipe Snapshot
15 mins
5 mins
10 mins
Easy
150 kcal
American
Gluten-Free, Low FODMAP
Appetizers
Small saucepan, Spatula or spoon, Mini crockpot, Microwave safe bowl
Why We Love This Chili Cheese Dip
1. Straightforward comfort
I love that Chili Cheese Dip takes two main pantry jars and turns them into something that tastes indulgent and homemade. There’s no fuss with multiple pots or complicated techniques, just a short warm up and you have a cozy, satisfying dip.
2. Crowd friendly
This dip stretches far and serves many, making it perfect when guests arrive unexpectedly. I rarely have leftovers at parties because everyone gravitates toward the warm, salty combination of chili and cheese.
3. Versatile serving options
Whether you’re spooning it into a mini crockpot to keep it melty or serving straight from a saucepan, the texture holds up. I like that you can also microwave portions for quick reheats, which makes it ideal for busy evenings when you want something impressive with very little effort.
4. Flavor without fuss
The canned chili brings a savory, spiced backbone while the jarred cheese adds creamy stretch and mouthfeel. Together they create a layered taste profile that feels richer than the sum of its parts.
5. Reliable and nostalgic
For me, Chili Cheese Dip is tied to memories and simple celebrations. It’s the recipe I reach for when I want comfort and crowd appeal without being chained to the stove.
What to Buy for Chili Cheese Dip

These ingredients are intentionally minimal. The philosophy here is ingredient integrity, letting each component play a clear role. The canned chili brings seasoned meat and tomato depth, while the jarred cheese melts into a smooth, clingy texture that coats chips and veggies. Together they form a balanced dip that is hearty, creamy, and utterly shareable.
- 1 can 15 ounces Hormel Chili No Beans: Adds hearty, seasoned ground beef flavor and a thick, chili base to the dip that provides savory depth and protein; already cooked and seasoned to streamline preparation. Pour directly from the can and gently heat to meld flavors with the cheese for a rich, spoonable consistency.
- 1 jar 15 ounces Kraft Cheez Whiz Original Cheese Dip: Delivers a smooth, processed cheddar-style cheese texture and creamy, salty flavor that melts easily into the chili to create a velvety, cohesive dip. Use warm to incorporate evenly, providing glossy appearance and long-lasting melt for serving with chips or vegetables.
Recipe Steps for Chili Cheese Dip
This is a fuss free warming and serving routine I trust. The steps below expand on texture cues, aroma clues, and small fixes so you get the ideal melty, spoonable dip every time.
- Combine both ingredients in a small saucepan over medium-low heat. Stir regularly, scraping the bottom of the pan, until hot throughout, for 5-10 minutes. Or heat in the microwave, covered, stirring every minute or so, until hot throughout – about 3-5 minutes total.: What you will notice first is the gentle steam and a soft melding aroma, the tomato and spice from the chili meeting the warm, processed cheese scent. The low heat helps the two bind without breaking the fats, producing a glossy, uniform sauce. Stirring frequently prevents sticking and scraping the bottom keeps flavorful browned bits from accumulating in one place. A frequent slip up is turning the burner too high, which causes the cheese to separate and clump. If it does begin to seize, lower the heat immediately and add a splash of water to help restore a smooth texture.
- Serve straight from the saucepan, super casual. Or transfer to a serving bowl. Or use a mini crockpot to keep it warm. You could also combine the ingredients right in the crockpot and heat until thoroughly melty and hot.: You should hear a soft, steady whisper of bubbling and see small, even movement across the surface rather than violent boiling. The mixture will gradually become homogenous and glossy, and you will smell the spices bloom from the chili . Scraping is important because it prevents any hot spots that could scorch and create bitter notes. If you rush this step or stop stirring, you risk hot pockets and uneven heating, leaving cold bits in the center.
- Or heat in the microwave, covered, stirring every minute or so, until hot throughout about 3 to 5 minutes total: In the microwave the sensory cues shift to short bursts of steam and incremental softening. Stirring after each minute ensures even heat distribution and avoids overheated edges with undercooked centers. When stirring, look for a silky texture and uniform color. A typical mistake is microwaving for long uninterrupted spans, which can create rubbery cheese patches. Keep the intervals short and stir thoroughly to get an even melt.
- Serve straight from the saucepan, super casual: The warmed sauce will cling to a spoon and trail back into the pan in long, glossy ribbons, indicating the right viscosity. Serving from the pan keeps the dip rustic and allows guests to help themselves, and the residual heat continues to soften the dip for a while. Watch for the pan getting too hot on the table surface, and place on a trivet to protect finishes. A common oversight is leaving the dip unattended on a warm burner causing it to thicken or scorch at the base.
- Or transfer to a serving bowl: When you move the dip, you may notice a faint steam plume and a slight settle as air bubbles dissipate. A shallow bowl increases surface area so the dip cools more quickly, while a deeper bowl holds heat longer. Transfer carefully to avoid drips, and stir once more before setting it out to restore a uniform appearance. Avoid using a cold bowl that will accelerate cooling and create a skin on the surface.
- Or use a mini crockpot to keep it warm: When kept in a mini crockpot, the dip will maintain a consistent, gentle warmth and develop a slightly more melded flavor as the ingredients stay in contact. The crockpot setting should be low to avoid drying out the edges, and give the dip an occasional stir to redistribute heat. A common pitfall is leaving the lid closed for too long, which can trap condensation and water down the texture when it drips back in. Stir occasionally to keep texture consistent.
- You could also combine the ingredients right in the crockpot and heat until thoroughly melty and hot: Slow, steady heat in a crockpot intensifies the melded flavors and yields a uniformly smooth texture, with the aroma gradually building over time. It is a hands off approach that shines for parties where you want the dip ready without babysitting a stove. One thing to avoid is turning the crockpot to high for extended periods, which can cause separation; use the low or warm setting for the best consistency.
Ways to Customize
This short intro explains how tiny adjustments change the final texture and serving style. Below are ideas I often use to adapt Chili Cheese Dip for different occasions, all presented as quick, actionable tips.
- Double pot warming Use a small saucepan set over simmering water for gentle, even heat if you are nervous about direct heat causing separation.
- Keep it covered When microwaving, cover the container with a microwave safe lid or plate to trap steam and promote even melting while reducing splatter.
- Serve with sturdy dippers Choose thick tortilla chips or pretzel rods that can hold up to the weight of the dip so guests aren’t frustrated by frequent breaks.
- Maintain temperature Transfer to a mini crockpot for long events to keep the dip melty and attractive without constant reheating.
- Restore creaminess If the dip thickens after cooling, stir in a tablespoon of warm water at a time while reheating gently to bring back the silky texture.
- Portable serving Use a thermal insulated container for transporting to parties so the dip arrives warm and ready with minimal reheating needed.
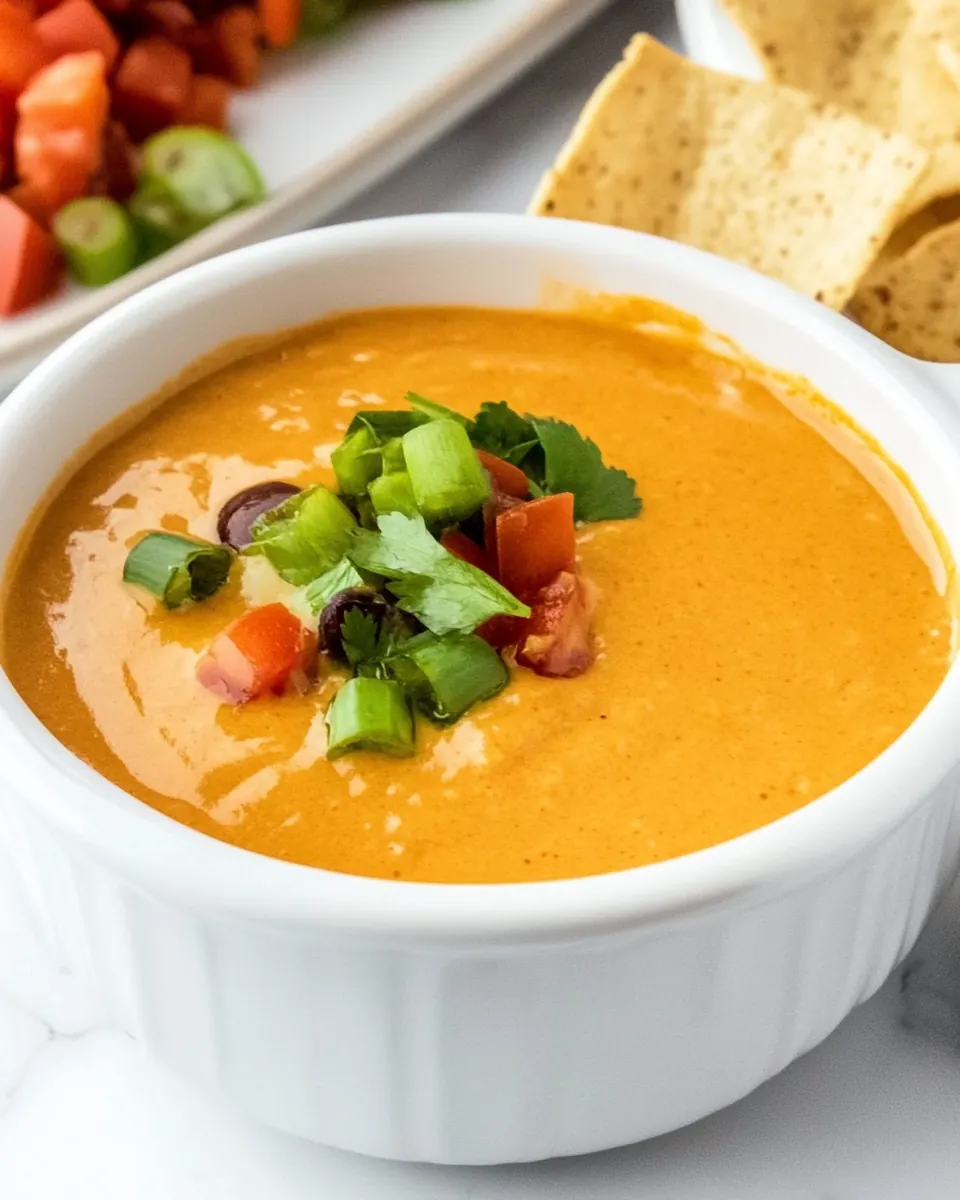
What Goes Well With This Chili Cheese Dip
This introduction outlines pairing logic and serving contexts. I always think about contrasting textures and sturdy carriers when serving Chili Cheese Dip, and these suggestions help you plan a balanced snack spread.
- Chips and crackers Thick corn tortilla chips, sturdy multigrain crackers, or pretzel snaps all provide crisp contrast to the creamy dip, creating satisfying bites that do not collapse under the weight of the sauce.
- Vegetable dippers Carrot sticks and celery offer freshness and crunch, balancing the richness of the dip when guests want a lighter bite alongside chips.
- Party occasions This dip shines during game day, casual potlucks, family movie nights, and informal celebrations like birthdays or holiday gatherings where crowd pleasing comfort food is appreciated.
- Serving sizes Keep a warm crockpot available for continuous grazing, and refill small bowls around the room so guests can help themselves without crowding one station.
- Storage tips Refrigerate leftovers in an airtight container for up to three days; reheat gently in short microwave bursts or warm in a saucepan with a splash of water to restore texture.
- Seasonal pairing In cooler months like fall, serve alongside warm breads or soft pretzels to amplify comfort; for spring and summer gatherings, pair with crisp veggies and cold beverages to balance the richness.
FAQ
Conclusion
This Chili Cheese Dip shines because it combines two pantry staples into a warm, satisfying, and shareable treat that everyone seems to love. Give it a try next time you need a fast, comforting appetizer that feeds a crowd and keeps the conversation flowing. It’s simple, dependable, and one of those recipes that makes hosting feel easy and rewarding.

Chili Cheese Dip
Equipment
- Small Saucepan
- Spatula or spoon
- Mini CrockPot
- Microwave-safe Bowl
Ingredients
- 1 can 15 ounces Hormel Chili No Beans Adds hearty, seasoned ground beef flavor and a thick, chili base to the dip that provides savory depth and protein; already cooked and seasoned to streamline preparation. Pour directly from the can and gently heat to meld flavors with the cheese for a rich, spoonable consistency.
- 1 jar 15 ounces Kraft Cheez Whiz Original Cheese Dip Delivers a smooth, processed cheddar-style cheese texture and creamy, salty flavor that melts easily into the chili to create a velvety, cohesive dip. Use warm to incorporate evenly, providing glossy appearance and long-lasting melt for serving with chips or vegetables.
Instructions
- Combine both ingredients in a small saucepan over medium-low heat. Stir regularly, scraping the bottom of the pan, until hot throughout, for 5-10 minutes. Or heat in the microwave, covered, stirring every minute or so, until hot throughout – about 3-5 minutes total.: What you will notice first is the gentle steam and a soft melding aroma, the tomato and spice from the chili meeting the warm, processed cheese scent. The low heat helps the two bind without breaking the fats, producing a glossy, uniform sauce. Stirring frequently prevents sticking and scraping the bottom keeps flavorful browned bits from accumulating in one place. A frequent slip up is turning the burner too high, which causes the cheese to separate and clump. If it does begin to seize, lower the heat immediately and add a splash of water to help restore a smooth texture.
- Serve straight from the saucepan, super casual. Or transfer to a serving bowl. Or use a mini crockpot to keep it warm. You could also combine the ingredients right in the crockpot and heat until thoroughly melty and hot.: You should hear a soft, steady whisper of bubbling and see small, even movement across the surface rather than violent boiling. The mixture will gradually become homogenous and glossy, and you will smell the spices bloom from the chili . Scraping is important because it prevents any hot spots that could scorch and create bitter notes. If you rush this step or stop stirring, you risk hot pockets and uneven heating, leaving cold bits in the center.
- Or heat in the microwave, covered, stirring every minute or so, until hot throughout about 3 to 5 minutes total: In the microwave the sensory cues shift to short bursts of steam and incremental softening. Stirring after each minute ensures even heat distribution and avoids overheated edges with undercooked centers. When stirring, look for a silky texture and uniform color. A typical mistake is microwaving for long uninterrupted spans, which can create rubbery cheese patches. Keep the intervals short and stir thoroughly to get an even melt.
- Serve straight from the saucepan, super casual: The warmed sauce will cling to a spoon and trail back into the pan in long, glossy ribbons, indicating the right viscosity. Serving from the pan keeps the dip rustic and allows guests to help themselves, and the residual heat continues to soften the dip for a while. Watch for the pan getting too hot on the table surface, and place on a trivet to protect finishes. A common oversight is leaving the dip unattended on a warm burner causing it to thicken or scorch at the base.
- Or transfer to a serving bowl: When you move the dip, you may notice a faint steam plume and a slight settle as air bubbles dissipate. A shallow bowl increases surface area so the dip cools more quickly, while a deeper bowl holds heat longer. Transfer carefully to avoid drips, and stir once more before setting it out to restore a uniform appearance. Avoid using a cold bowl that will accelerate cooling and create a skin on the surface.
- Or use a mini crockpot to keep it warm: When kept in a mini crockpot, the dip will maintain a consistent, gentle warmth and develop a slightly more melded flavor as the ingredients stay in contact. The crockpot setting should be low to avoid drying out the edges, and give the dip an occasional stir to redistribute heat. A common pitfall is leaving the lid closed for too long, which can trap condensation and water down the texture when it drips back in. Stir occasionally to keep texture consistent.
- You could also combine the ingredients right in the crockpot and heat until thoroughly melty and hot: Slow, steady heat in a crockpot intensifies the melded flavors and yields a uniformly smooth texture, with the aroma gradually building over time. It is a hands off approach that shines for parties where you want the dip ready without babysitting a stove. One thing to avoid is turning the crockpot to high for extended periods, which can cause separation; use the low or warm setting for the best consistency.
Notes
- Double pot warming Use a small saucepan set over simmering water for gentle, even heat if you are nervous about direct heat causing separation.
- Keep it covered When microwaving, cover the container with a microwave safe lid or plate to trap steam and promote even melting while reducing splatter.
- Serve with sturdy dippers Choose thick tortilla chips or pretzel rods that can hold up to the weight of the dip so guests aren’t frustrated by frequent breaks.
- Maintain temperature Transfer to a mini crockpot for long events to keep the dip melty and attractive without constant reheating.
- Restore creaminess If the dip thickens after cooling, stir in a tablespoon of warm water at a time while reheating gently to bring back the silky texture.
- Portable serving Use a thermal insulated container for transporting to parties so the dip arrives warm and ready with minimal reheating needed.