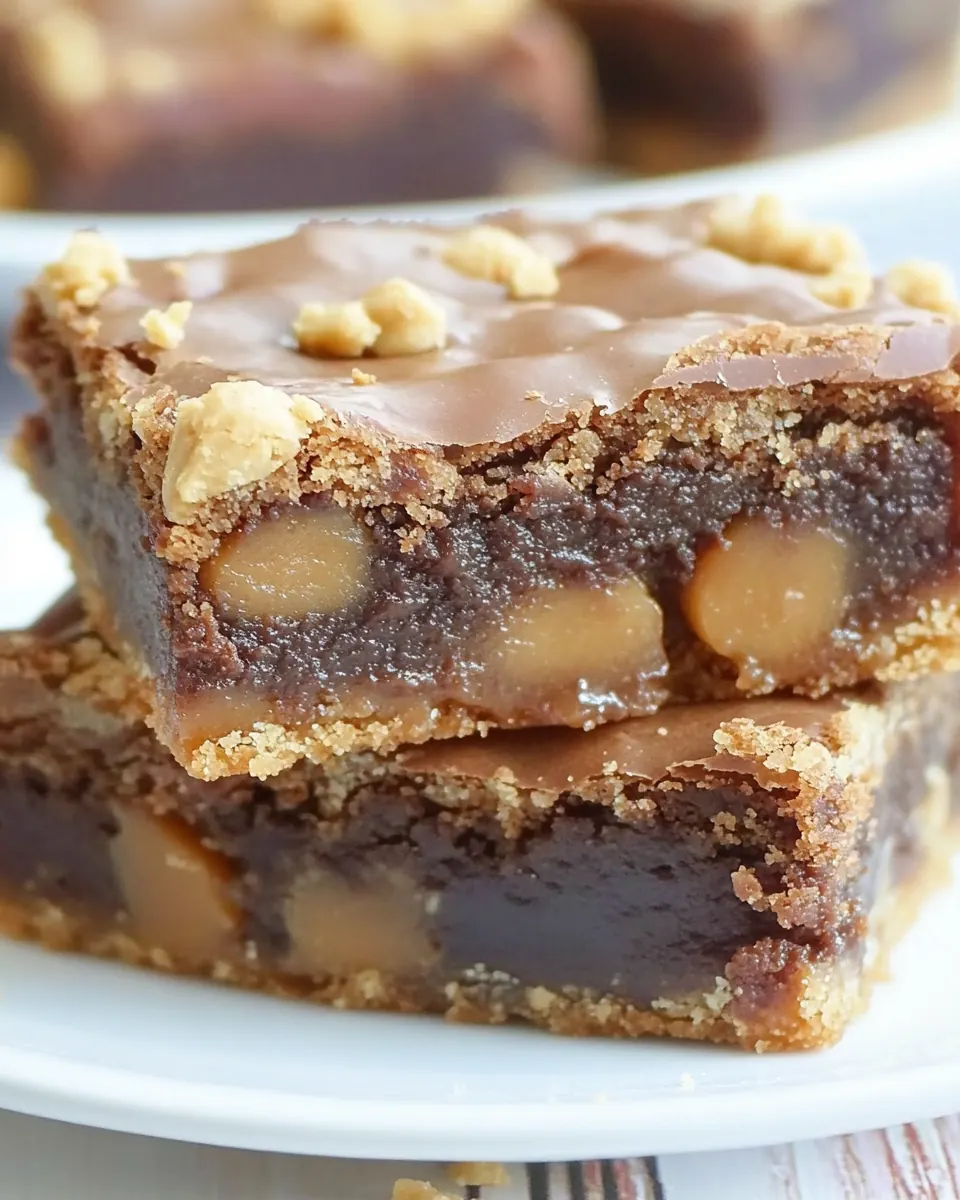
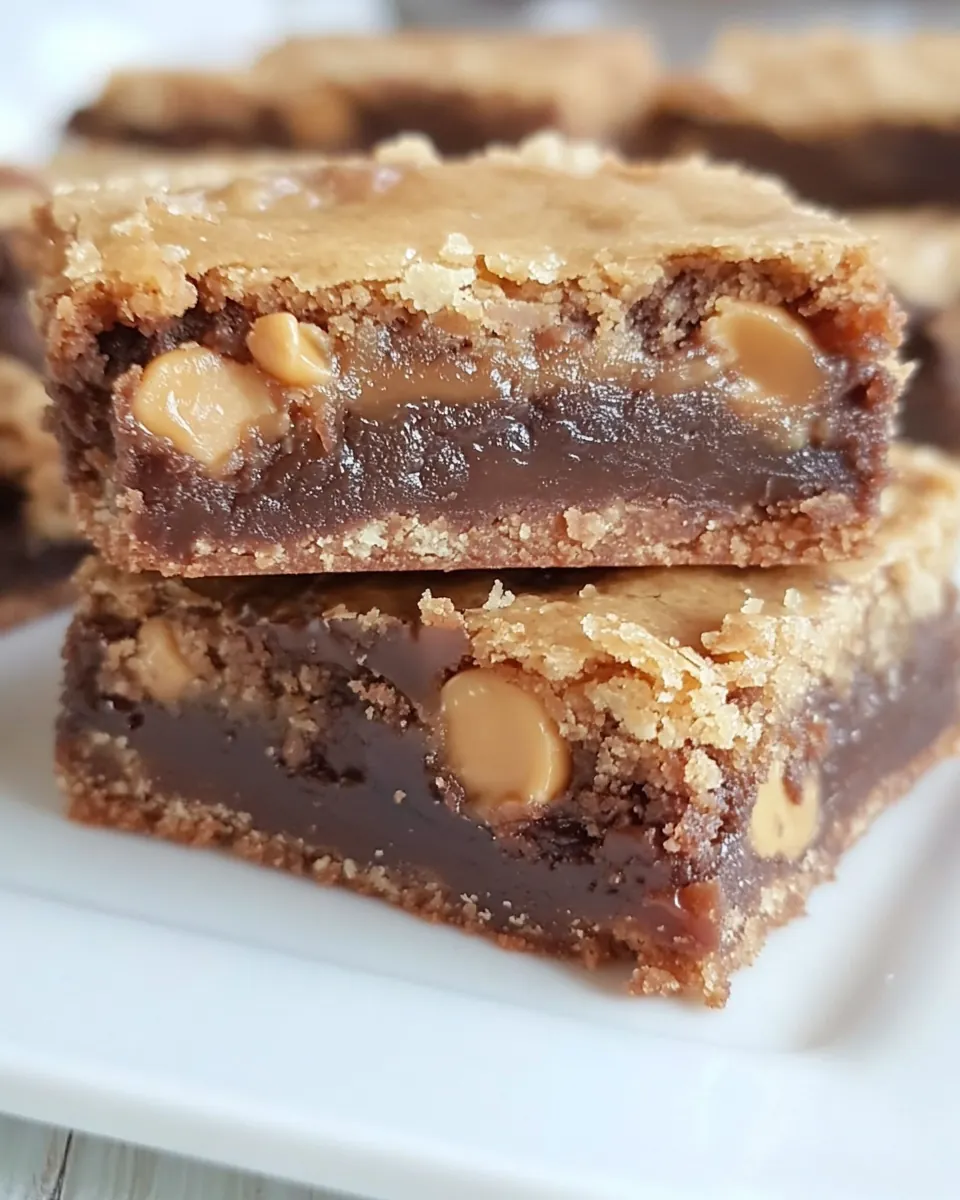
Caramel Brownie Peanut Butter Cookie Bars
Caramel Brownie Peanut Butter Cookie Bars are one of those treats that feel like a celebration in every bite, and I still remember the first time I baked them for a chaotic weekend gathering. I brought the pan out warm, and the room went quiet for a beat before a chorus of compliments started. I loved how the contrast of textures drew people in, and how quickly the bars disappeared. Over time I adapted little habits when I make Caramel Brownie Peanut Butter Cookie Bars, like pressing the cookie dough evenly and letting the bars cool fully so the slices hold together.
On another afternoon, I made these as a surprise for a friend who was having a rough week. The buttery scent of the peanut butter cookie dough mingling with the caramel filled the kitchen and felt instantly comforting. I learned that these bars travel well, which made them my go to for potlucks. The recipe is forgiving, and swapping cookie dough flavors became a playful experiment. When you see people reach for a second piece without thinking, you know you nailed it. I hope these notes help you make your own memorable batch.
Recipe Snapshot
40 mins
10 mins
30 mins
Easy
200 kcal
American
Gluten-Free, Low FODMAP
Desserts
9×13 inch pan, Aluminum foil, Cooking spray, Spatula, Mixing bowl, Wire rack
Why This Caramel Brownie Peanut Butter Cookie Bars Works
Irresistible layered textures
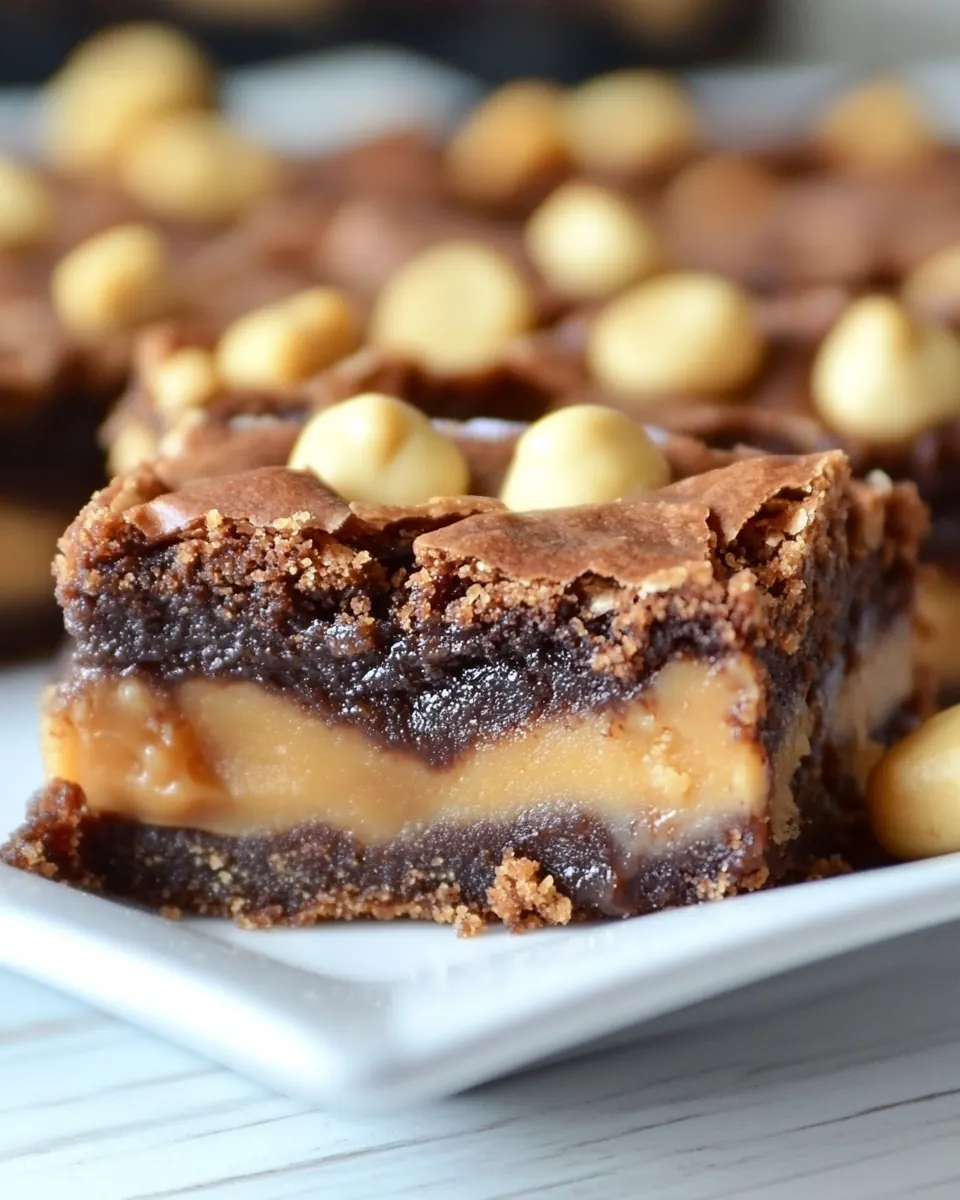
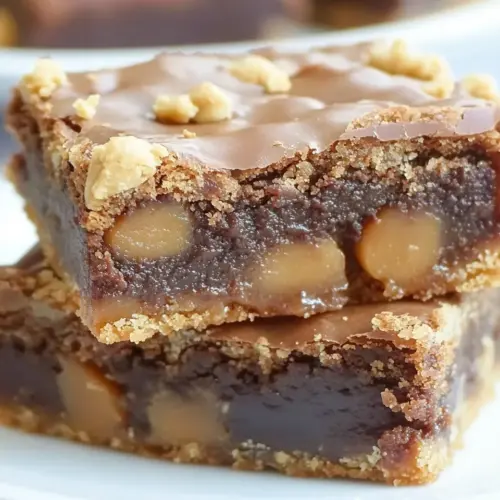
I love how Caramel Brownie Peanut Butter Cookie Bars bring together a crisp cookie base, a gooey caramel middle, and a tender brownie top, creating a multi textural experience. The crunchy edges from the cookie dough contrast perfectly with the soft, slightly chewy brownie. That interplay makes every bite surprising, and I often watch guests pause to savor the layers.
Convenience and speed
These bars are delightfully quick to pull together because the recipe uses boxed brownie mix and refrigerated cookie dough. I appreciate that you can make an impressive dessert without fussing over multiple bowls or complicated techniques. For busy days, they feel like a little victory to bring something homemade to the table.
Customizable and forgiving
One of my favorite things is how adaptable the recipe is. Use any flavor of refrigerated cookie dough or swap the caramel bits for another candy, and the bars stay delightful. I often tweak the candy center based on what I have in the pantry, and the results are consistently crowd pleasing.
Great for sharing
Because the recipe makes a large 9 by 13 pan, it is perfect for gatherings, potlucks, or packing up as gifts. I find the bars easy to portion into neat squares after they fully cool, and they keep well for a couple of days, which makes them practical for planning ahead.
Kid friendly and nostalgic
There is a playful, nostalgic quality to Caramel Brownie Peanut Butter Cookie Bars that draws everyone in. The combination of familiar pantry staples brings back childhood memories for some, and the sweetness is universally appealing. I’ve seen kids and grandparents alike reach for seconds, which always makes me smile.
What Goes Into Caramel Brownie Peanut Butter Cookie Bars
These ingredients combine pantry ease with indulgent flavor. The core players are a ready to use peanut butter cookie dough roll for a crisp, buttery base, a boxed brownie mix for a fudgy top layer, and caramel bits that melt into pockets of sweet chewiness. Together they create balance between texture and sweetness, while keeping the process straightforward.
- 1 roll refrigerated peanut butter cookie dough I used Pillsbury; use whatever brand or flavor you like – it doesn’t have to be peanut butter: Provides a ready-to-roll cookie base that simplifies assembly and contributes buttery, sweet peanut butter flavor and chewy texture; choose any flavor or brand to alter sweetness and texture without changing method.
- 1 box brownie mix made for a 9×13-inch pan plus water, eggs, and oil called for to make the brownies: Creates the chocolate brownie layer when prepared according to package directions, delivering fudgy structure and deep cocoa flavor that contrasts the cookie and caramel layers; follow the box instructions for a 9×13-inch pan to ensure proper bake time and consistency.
- 1 1/2 cups caramel bits you can find them in the baking section or other candy: Adds pockets of rich, chewy caramel throughout the bars, melting slightly during baking to create gooey bites and sweet, buttery notes; use caramel bits from the baking or candy aisle for even distribution and easy layering.
How to Assemble Caramel Brownie Peanut Butter Cookie Bars
These steps are straightforward, but the details matter for texture and presentation. I walk you through what to look, smell, and feel for, and I point out pitfalls I have learned to avoid so your pan comes out picture perfect.
- Preheat oven to 350°F. Line a 9×13” pan with foil and spray with cooking spray.: As the oven heats to 350°F , you will notice a warm, dry aroma that signals readiness; good preheating ensures the layers bake evenly and the cookie base sets properly. Take a moment to line the pan with foil so you can lift the bars out cleanly later, and spraying prevents sticking. A frequent mistake is skipping either the foil or spray, which can make removal messy and damage the edges. Also, confirm the foil sits flat against the pan bottom so the cookie dough presses evenly without gaps that cause uneven thickness.
- Slice cookie dough roll into 1/4” thick slices. Press evenly into the bottom of the prepared pan. Sprinkle with caramel bits.: When you slice the cookie dough , the sound is quiet and soft, and the dough should feel cool and slightly firm; if it is too soft, pop the slices back into the fridge for a few minutes. Pressing the slices into a continuous sheet creates a uniform base that bakes to a golden edge and tender center. As you press, watch for thin areas, which will brown faster, and smooth them with additional dough. Scatter the caramel bits in an even layer so they distribute their sweetness across the pan, and avoid clumping which can lead to spillover during baking.
- Mix brownie mix according to package directions. Pour over caramel bits and spread carefully with a spatula.: When preparing the brownie mix , mix until just combined so the batter remains dense and fudgy; over mixing introduces air and changes the texture. The batter will be glossy and thick, and as you pour it over the caramel bits , use a gentle, steady motion to avoid displacing the base. Spreading should be done with light, even strokes so the batter settles without pushing the caramel aside. A common error is forcing the batter, which can tear the cookie layer; instead, let the batter gently flow and use a light hand to nudge it into corners.
- Bake for about 25-35 minutes, until a toothpick comes out clean along the edge of the brownies. You can eat these after they’ve cooled about 15 minutes in pan, but they won’t cut easily unless they’ve completely cooled.: During baking, the kitchen fills with a rich, toasty aroma from the brownie mix and a sweet caramel scent, and the top will slowly firm while remaining slightly glossy. Check doneness toward the end of the window by inserting a toothpick near the edge; if it comes out clean or with a few moist crumbs, you are good. The center will continue to set as the bars cool. One mistake is underbaking; the top may look done while the interior is still gooey. Conversely, overbaking dries the brownies, so aim for that sweet spot where the top is set but still tender.
- Cool completely before slicing for clean cuts: After removing the pan from the oven, you will notice a settling as the bubbles calm and the caramel firms slightly; this is the time when structure forms. Let the pan cool on a wire rack until it reaches room temperature, then chill if you prefer sharper slices. Cooling prevents the bars from collapsing and makes it far easier to achieve neat squares. A typical mistake is slicing while warm, which results in messy, sticky pieces; patience pays off here.
Tips and Variations

These tips will help you get the best texture and flavor from your batch, and offer simple variations to make the recipe your own. I share practical tweaks I use depending on the occasion.
- Choose sturdy cookie dough: Use a refrigerated cookie dough roll that holds shape well so the base crisps properly while the interior stays tender. If the dough is too soft, chill briefly before slicing to avoid a thin, overbrowned edge.
- Mix brownie batter gently: Stir the brownie mix until ingredients are just combined to keep the top fudgy rather than cakey. Over mixing incorporates extra air, which changes the texture and can make the brownies dry after baking.
- Even caramel distribution: Sprinkle the caramel bits in a single, even layer so every piece has pockets of caramel. If the bits clump, separate them with your fingers to prevent thick spots that may spill during baking.
- Cooling matters: Allow the pan to cool fully on a wire rack before slicing. I often chill the pan for 30 to 60 minutes after it reaches room temperature to get the cleanest cuts, especially if I need tidy squares for gifting.
- Use foil for easy removal: Lining the 9 by 13 pan with foil and spraying it makes lifting the entire slab out effortless, and gives you a stable surface for slicing without damaging edges.
How to Enjoy Caramel Brownie Peanut Butter Cookie Bars
These bars are excellent for sharing, gifting, and serving warm or at room temperature. I describe several serving ideas, storage suggestions, and occasions where they shine.
- Serve warm for gooey filling: Warm bars retain molten ribbons of caramel, so serve within a few minutes of cooling for the softest centers. Use a spatula to lift pieces gently so they keep their shape.
- Room temperature for clean slices: Let the pan cool fully and slice at room temperature for neat squares, ideal for dessert platters or boxed treats. This style is great for potlucks and gatherings where appearance matters.
- Chilled for firmer bars: Refrigerate the pan for 30 to 60 minutes after cooling to make denser, firmer bars that are easier to pack and transport without crumbling.
- Pack for gifting: Place neat squares in a small box with parchment for a thoughtful homemade gift. They travel well for parties and make a comforting gesture when you need a quick, crowd pleasing offering.
- Occasions: These bars suit casual get togethers, bake sales, holiday trays, and weekend potlucks. Their sweet, nostalgic profile resonates across ages and events.
- Storage: Store in an airtight container at room temperature for up to two days, or refrigerate for up to five days. If chilled, bring to room temperature before serving to restore tenderness in the brownie layer.
FAQ
Conclusion
These Caramel Brownie Peanut Butter Cookie Bars stand out because they layer familiar, comforting flavors into a single, shareable pan that delivers on texture and sweetness. I encourage you to give this recipe a try, especially when you need a quick dessert that feels special. Make a batch for a gathering, package a few squares as a thoughtful gift, or keep them on hand for an indulgent weeknight treat. With minimal fuss and maximum rewards, they are a reliable way to bring joy to any table.
Caramel Brownie Peanut Butter Cookie Bars
Equipment
- 9×13-inch pan
- Aluminum Foil
- Cooking spray
- Spatula
- Mixing Bowl
- Wire Rack
Ingredients
- 1 roll refrigerated peanut butter cookie dough I used Pillsbury; use whatever brand or flavor you like - it doesn’t have to be peanut butter Provides a ready-to-roll cookie base that simplifies assembly and contributes buttery, sweet peanut butter flavor and chewy texture; choose any flavor or brand to alter sweetness and texture without changing method.
- 1 box brownie mix made for a 9x13-inch pan plus water, eggs, and oil called for to make the brownies Creates the chocolate brownie layer when prepared according to package directions, delivering fudgy structure and deep cocoa flavor that contrasts the cookie and caramel layers; follow the box instructions for a 9x13-inch pan to ensure proper bake time and consistency.
- 1 1/2 cups caramel bits you can find them in the baking section or other candy Adds pockets of rich, chewy caramel throughout the bars, melting slightly during baking to create gooey bites and sweet, buttery notes; use caramel bits from the baking or candy aisle for even distribution and easy layering.
Instructions
- Preheat oven to 350°F. Line a 9×13” pan with foil and spray with cooking spray.: As the oven heats to 350°F , you will notice a warm, dry aroma that signals readiness; good preheating ensures the layers bake evenly and the cookie base sets properly. Take a moment to line the pan with foil so you can lift the bars out cleanly later, and spraying prevents sticking. A frequent mistake is skipping either the foil or spray, which can make removal messy and damage the edges. Also, confirm the foil sits flat against the pan bottom so the cookie dough presses evenly without gaps that cause uneven thickness.
- Slice cookie dough roll into 1/4” thick slices. Press evenly into the bottom of the prepared pan. Sprinkle with caramel bits.: When you slice the cookie dough , the sound is quiet and soft, and the dough should feel cool and slightly firm; if it is too soft, pop the slices back into the fridge for a few minutes. Pressing the slices into a continuous sheet creates a uniform base that bakes to a golden edge and tender center. As you press, watch for thin areas, which will brown faster, and smooth them with additional dough. Scatter the caramel bits in an even layer so they distribute their sweetness across the pan, and avoid clumping which can lead to spillover during baking.
- Mix brownie mix according to package directions. Pour over caramel bits and spread carefully with a spatula.: When preparing the brownie mix , mix until just combined so the batter remains dense and fudgy; over mixing introduces air and changes the texture. The batter will be glossy and thick, and as you pour it over the caramel bits , use a gentle, steady motion to avoid displacing the base. Spreading should be done with light, even strokes so the batter settles without pushing the caramel aside. A common error is forcing the batter, which can tear the cookie layer; instead, let the batter gently flow and use a light hand to nudge it into corners.
- Bake for about 25-35 minutes, until a toothpick comes out clean along the edge of the brownies. You can eat these after they’ve cooled about 15 minutes in pan, but they won’t cut easily unless they’ve completely cooled.: During baking, the kitchen fills with a rich, toasty aroma from the brownie mix and a sweet caramel scent, and the top will slowly firm while remaining slightly glossy. Check doneness toward the end of the window by inserting a toothpick near the edge; if it comes out clean or with a few moist crumbs, you are good. The center will continue to set as the bars cool. One mistake is underbaking; the top may look done while the interior is still gooey. Conversely, overbaking dries the brownies, so aim for that sweet spot where the top is set but still tender.
- Cool completely before slicing for clean cuts: After removing the pan from the oven, you will notice a settling as the bubbles calm and the caramel firms slightly; this is the time when structure forms. Let the pan cool on a wire rack until it reaches room temperature, then chill if you prefer sharper slices. Cooling prevents the bars from collapsing and makes it far easier to achieve neat squares. A typical mistake is slicing while warm, which results in messy, sticky pieces; patience pays off here.
Notes
- Choose sturdy cookie dough: Use a refrigerated cookie dough roll that holds shape well so the base crisps properly while the interior stays tender. If the dough is too soft, chill briefly before slicing to avoid a thin, overbrowned edge.
- Mix brownie batter gently: Stir the brownie mix until ingredients are just combined to keep the top fudgy rather than cakey. Over mixing incorporates extra air, which changes the texture and can make the brownies dry after baking.
- Even caramel distribution: Sprinkle the caramel bits in a single, even layer so every piece has pockets of caramel. If the bits clump, separate them with your fingers to prevent thick spots that may spill during baking.
- Cooling matters: Allow the pan to cool fully on a wire rack before slicing. I often chill the pan for 30 to 60 minutes after it reaches room temperature to get the cleanest cuts, especially if I need tidy squares for gifting.
- Use foil for easy removal: Lining the 9 by 13 pan with foil and spraying it makes lifting the entire slab out effortless, and gives you a stable surface for slicing without damaging edges.