
Homemade Soft Pretzel Recipe
Homemade Soft Pretzel Recipe began as a weekend experiment for me, a patch of flour on the counter and a stubborn craving for something warm and chewy. I remember the first time I rolled that dough into ropes, the way the kitchen smelled faintly of sweet yeast and melted butter, and how a frantic search for the right twist turned into a quiet ritual that calmed me down. Over the years, this recipe has become my go to when I want a hands on baking session that rewards patience with golden, pillowy results.
There is something oddly satisfying about shaping each piece by hand, the tension in the dough, the little snap as you pinch the ends together, and the final brush of egg before they hit the oven. I’ve learned tiny tricks along the way, like how warmer water and a snug mixing bowl coax the yeast into a happier foam, or how a quick soda bath gives the crust that bronzed sheen and that slightly tangy note. Friends always ask for seconds, and I never tell them how many ended up being practice runs.
Recipe Snapshot
35 mins
15 mins
20 mins
Medium
320 kcal
American
Gluten-Free, Low FODMAP
Appetizers
Standing mixer, Dough hook, Large pot, Baking sheet, Parchment paper, Thermometer
What You’ll Enjoy About This Homemade Soft Pretzel Recipe
Classic Comfort That Feels Homemade
I love Homemade Soft Pretzel Recipe because it delivers a nostalgic, cozy snack without requiring fancy techniques. When I make these, I think about lazy mornings and neighborhood bakeries, and I enjoy the simplicity of turning basic pantry staples into something memorable. The dough’s texture is soft and tender inside, which keeps people coming back for more.
Hands On and Rewarding
We get to play with texture and shape, which makes this recipe perfect for gatherings where everyone pitches in. You can see the dough change as you knead it, feel the warmth as it rises, and hear the slight hiss when the pretzels hit the baking soda bath. That tactile feedback is part of the joy, and it makes the final taste feel earned.
Reliable Flavors with Big Impact
I’ve found that the combination of all purpose flour, a touch of brown sugar, and unsalted butter creates a mild enriched crumb that contrasts beautifully with the crisp, slightly alkaline crust from the baking soda bath. The coarse kosher or sea salt on top adds bursts of savory crunch that highlight the soft interior.
Flexible and Fun
You can change the shape and size to suit your mood. I alternate between big, showy pretzels and bite size versions depending on who I am feeding. The base formula adapts well, so once you know the feel of the dough, you can improvise without fear.
Great for Sharing and Storing
These pretzels travel well and reheat beautifully, so they’re great for taking to potlucks or prepping a day ahead. I often make a batch in the morning, then rewarm them later to preserve that fresh baked aroma. Trust me, they taste just as comforting the next day when warmed properly.
Homemade Soft Pretzel Recipe Ingredients
These ingredients form a straightforward, harmonious lineup that aims for a delicate, enriched crumb and a shiny, slightly chewy crust. The foundation is all purpose flour, which structures the dough, while brown sugar and unsalted butter add tenderness and subtle sweetness. The active yeast brings lift, and the baking soda bath transforms the surface into a deeply colored, chewy exterior. Each component plays a clear role, and they work together to create that classic pretzel contrast between soft interior and crisp outer shell.
- 2 cups of warm water between 110° and 115°: Provide warm liquid to activate yeast and help dissolve sugars; temperature between 110° and 115° promotes fermentation without killing yeast and creates a soft dough texture. Ensure water is not too hot to avoid compromising yeast activity and monitor timing for proper rise. Useful for hydrating flour and forming gluten during mixing and kneading.
- 1 1/2 tablespoons light brown sugar: Add mild sweetness and help feed the yeast to support fermentation; light brown sugar contributes a subtle molasses note that enriches flavor and encourages browning. Measure accurately to balance sweetness and yeast activity, enhancing crust color during baking. Also contributes to tender crumb by interacting with gluten and starch.
- 1 packet active yeast: Leaven the dough by producing carbon dioxide during fermentation; active yeast creates bubbles that make pretzels light and airy when proofed properly. Sprinkle into warm water to proof before mixing or mix directly according to recipe timing for predictable rise. Maintain proper temperature and freshness to ensure effective fermentation.
- 1 1/2 teaspoons sea salt: Enhance overall flavor and strengthen gluten structure; sea salt balances sweetness and controls yeast activity for steady fermentation. Dissolve into dough to distribute evenly so it seasons interior and crust while also improving dough handling. Adjust for preferred saltiness while keeping measurements consistent for proper texture.
- 3 ounces melted unsalted butter: Provide rich fat for tenderness and flavor; melted unsalted butter adds moisture and a soft, pliable crumb while allowing control over salt level. Incorporate into dough during mixing for even distribution and to improve shelf life and mouthfeel. Use unsalted to regulate total sodium content with the added salt later.
- 5 1/4 cups all-purpose flour: Form the bulk of the structure and supply starches and proteins; all-purpose flour develops gluten that gives pretzels chew and shape when kneaded and baked. Measure and add gradually to achieve the correct dough consistency, adjusting slightly for humidity and flour brand. Sift or aerate if needed to avoid dense dough and ensure uniform hydration.
- 1 tablespoon oil: Prevent sticking and assist with shaping or proofing surfaces; a small amount of oil helps keep dough from adhering to bowls or hands and adds minimal tenderness. Rub into the mixing bowl or lightly coat hands when working dough to ease handling without altering flavor significantly. Choose neutral oil to avoid impacting the pretzel taste.
- 3/4 cup baking soda and 1 gallon of water: Create a lye-like alkaline bath substitute to set crust and promote deep color; baking soda dissolved in a large amount of water raises surface pH when boiled or used warm, yielding that classic pretzel flavor and brown exterior. Dip formed pretzels briefly before baking to ensure proper crust formation and slight chewiness. Handle carefully to avoid over-soaking and maintain safety if using boiling water.
- 1 egg yolk whisked with 1 tablespoon cold water: Seal and glaze the surface for shiny, golden crust; whisked egg yolk with cold water creates an egg wash that enhances color and helps toppings adhere during baking. Brush gently on each pretzel just before sprinkling salt and baking to achieve an attractive finish. Use cold water to temper yolk consistency for even application.
- coarse kosher or sea salt for topping: Provide crunchy, savory finishing touch for visual appeal and salty pop; coarse kosher or sea salt sprinkled on top gives classic pretzel flavor and texture contrast. Apply after egg wash so crystals adhere and remain distinct through baking, offering a tactile bite. Choose coarse grains to maintain traditional appearance and salt burst.
How to Make Homemade Soft Pretzel Recipe
These steps will walk you through mixing, shaping, soda bathing, and baking until you have warm, golden pretzels. I like to move deliberately and notice the dough’s changes at each stage, that way you can adjust as needed and end up with consistent results that smell like a bakery.
- Preheat the oven to 450°.: When the oven reaches 450° , you should feel a dry heat and a faint warm rush when you open the door, which helps the outside of the pretzels set quickly, locking in steam and creating a tender interior. I always allow the oven to stabilize for a few minutes after it signals preheated because ovens can fluctuate, and consistent heat ensures even browning. A common mistake is placing the dough in an underheated oven, which causes pale, underbaked crusts.
- In a standing mixer bowl, add in the water, brown sugar, and sprinkle on the yeast, whisk together and let it sit for 5 to 7 minutes or until it forms a foamy raft on top.: You'll notice a sweet, yeasty aroma and bubbles forming across the surface when the active yeast is lively, which is a reliable visual cue that fermentation is underway. I find that waiting for a foamy raft prevents failure later on, because it confirms the yeast is alive. Stirring too aggressively during this stage can deflate early foam, so be gentle. If no foam appears, the yeast may be expired and should be replaced.
- Add the hook attachment and turn the speed to low and pour in the salt and butter.: At this point, you will smell the butter and salt combining with the yeast mixture, creating a rich, savory base note. Using the dough hook at low speed allows the ingredients to begin binding without overworking gluten prematurely. If you add the salt directly onto the yeast before it is diluted, it can shock the yeast, so pouring and mixing helps distribute it evenly.
- Add in the flour 1 cup at a time until combined and knead the dough on low to medium speed for 5 minutes.: The dough will shift from shaggy to smooth as you slowly incorporate the all purpose flour . Expect the texture to become elastic, and as you knead you should hear a subtle, soft stretching sound and notice the dough pulling away from the bowl. Proper kneading develops gluten for a chewy interior. Avoid adding all the flour at once, which can lead to a dry, stiff dough rather than the tender, slightly springy feel you want.
- Add oil into a large bowl or container and place in the dough. Cover with a towel or lid and rest until it doubles in size, about an hour.: After placing the dough in the oiled bowl, its surface should feel slightly tacky and smooth. Over the next hour, watch for the dough to swell and hold an indentation when gently poked, which signals it has doubled and is ready. Rising in a warm, draft free spot accelerates this process. If the room is too cool, the rise will be slow, so find a warm corner or turn the oven on briefly and then off as a cozy proofing environment.
- Before it is time to form the dough, bring the baking soda and 1 gallon of water to a boil in a large pot.: The bubbling, alkaline bath should smell faintly mineral and create steam, which prepares the surface to brown dramatically when baked. Boiling activates the baking soda so it interacts with the dough surface effectively. Be cautious of the hot, steaming pot and avoid splashing when you lower the dough pieces into the water.
- To form the dough, take a small piece and roll it out until it is a 24” long rope. Form the dough into a U shape and holding each end cross over each other and pull down to make a pretzel with the ends slightly over the other part of the dough.: As you roll, you will feel the dough lighten and stretch; a properly shaped rope should spring back slightly when pressed. The twisting motion traps small pockets of air, which expand in the oven to create the classic pretzel shape. A common pitfall is rolling the ropes unevenly, which leads to inconsistent baking, so aim for uniform thickness throughout.
- Turn down the boiling water to a simmer and cook each pretzel dough 1 to 2 at a time for 30 seconds each and then place back on a cookie sheet tray lined with parchment paper or with a Silpat.: When the pretzels hit the water, you may hear a soft hiss and see tiny bubbles cling to the surface, a sign that the soda bath is doing its job. The dough will feel slightly tauter after the quick dunk, and transferring them carefully keeps their shape intact. Avoid overcrowding the pot, which lowers the water temperature and reduces the desired reaction on the crust.
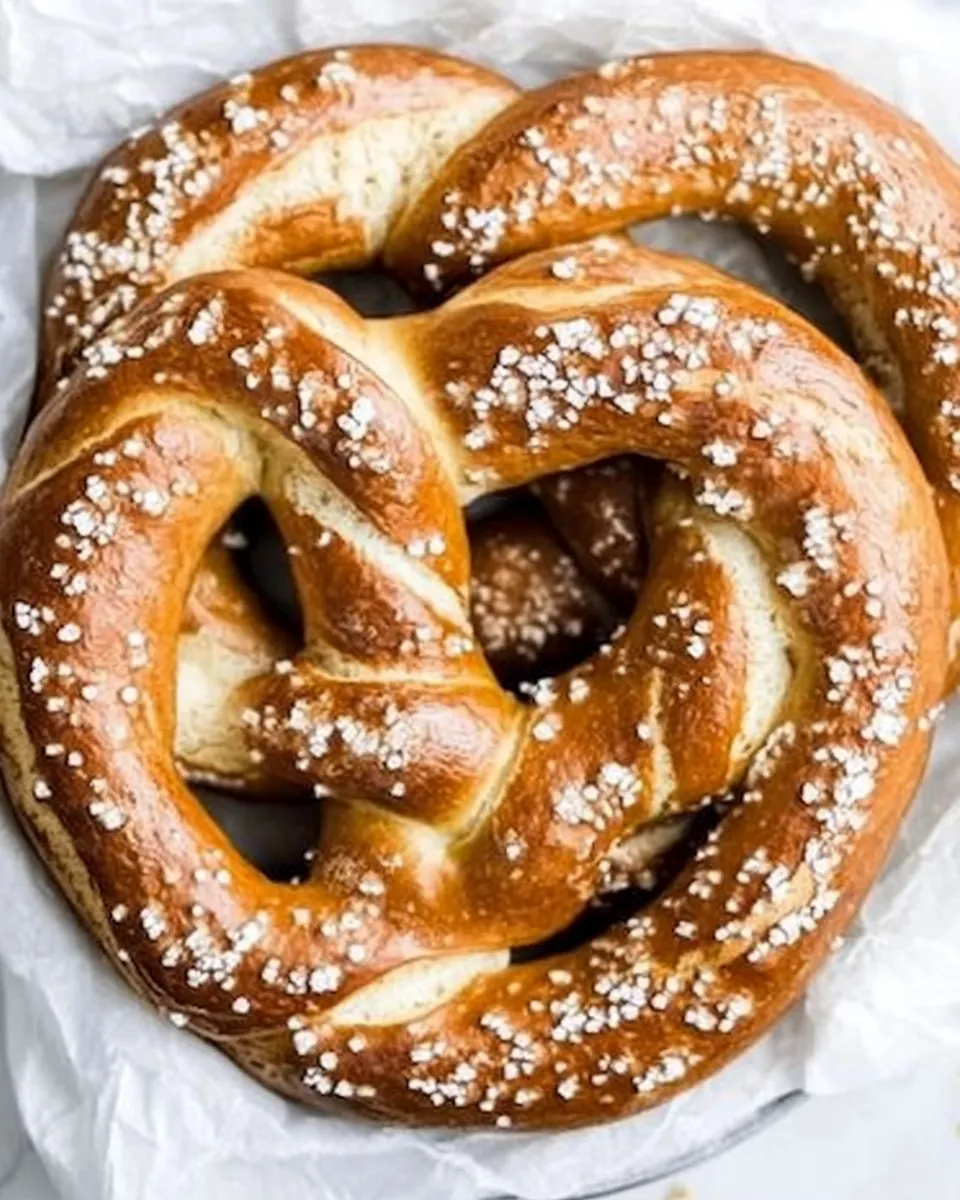
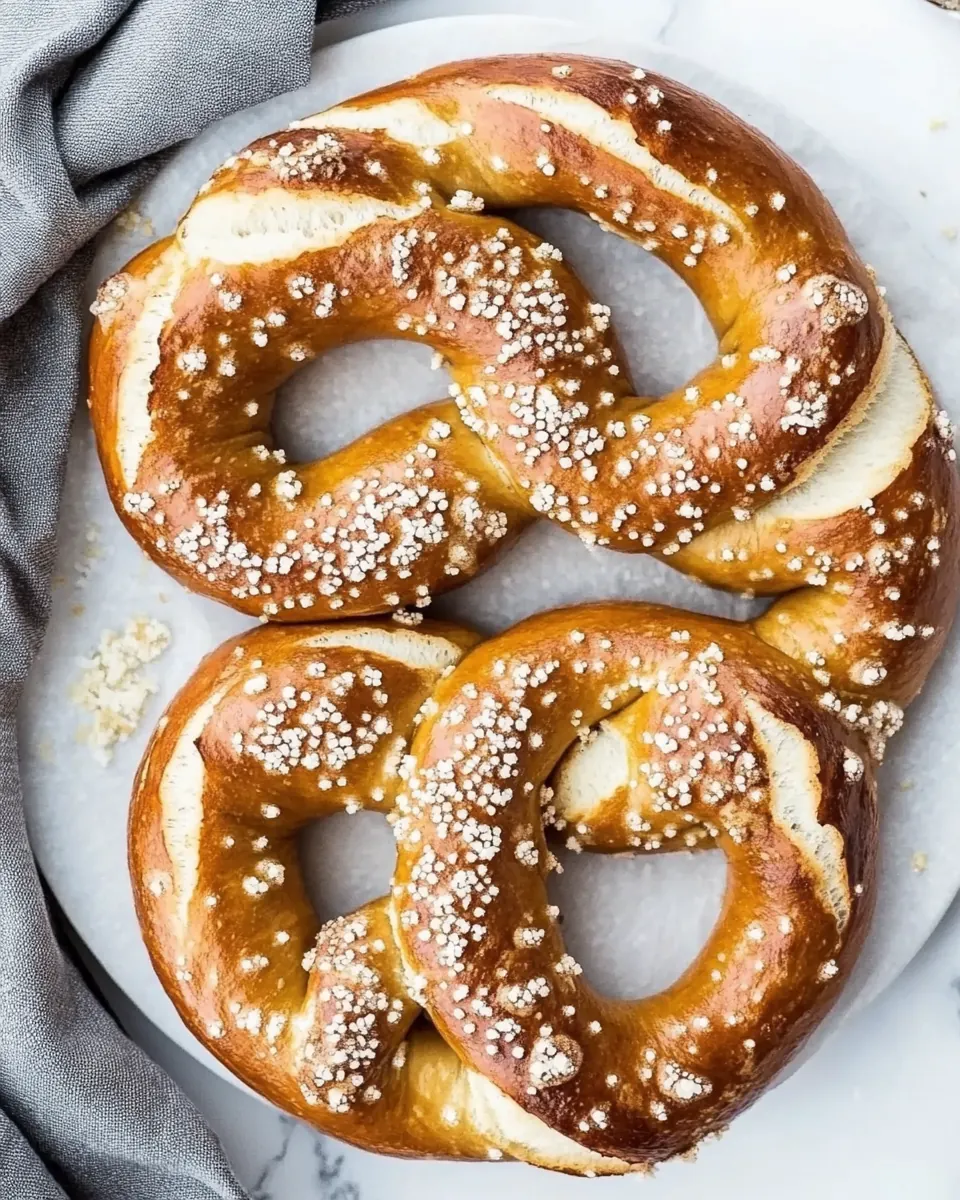
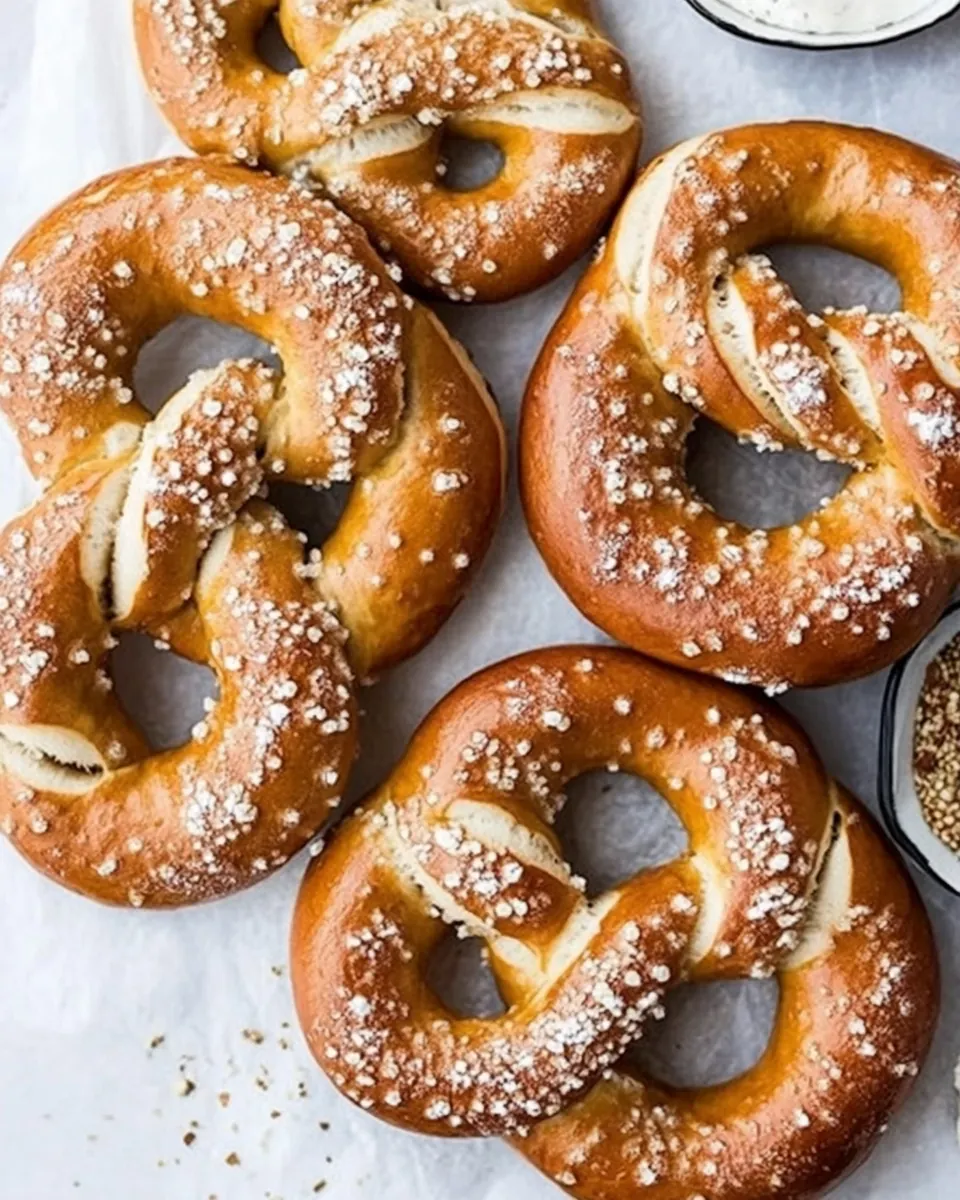
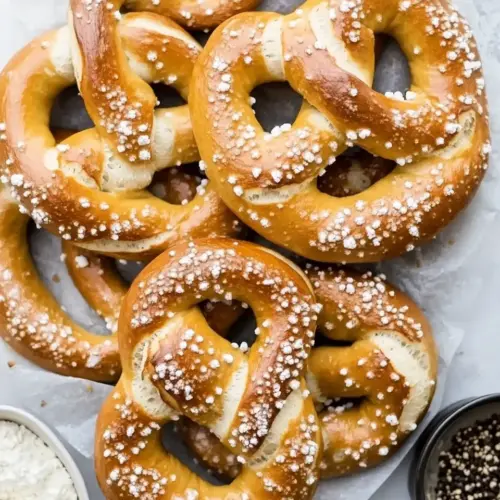
- Once all of the pretzels have been cooked in the baking soda solution, brush the tops with the egg wash and season heavily with coarse kosher or sea salt.: The egg wash gives a glossy sheen and helps the coarse salt stick, while the salt itself provides sharp bursts of flavor. Brush lightly and uniformly so the wash does not pool, and press the salt gently so it adheres without saturating the surface. Overapplying egg wash can darken the crust too quickly, so keep it moderate.
- Bake in the oven for 12 to 15 minutes or until golden brown.: As they bake, you will notice the oven filling with a toasty, buttery aroma and the pretzels taking on a deep, even brown. The contrast between the crisp exterior and pillowy interior is what makes them irresistible. Use visual cues like a rich golden hue to determine doneness, because ovens vary; pulling them too early results in a pale, underdone center, while overbaking will dry them out.
Helpful Hints
These hints reflect tried and true adjustments I use every time I make Homemade Soft Pretzel Recipe. They help you control temperature, texture, and timing so the results are consistently excellent. Read through and pick a couple that fit your kitchen rhythm, then try them on your next batch.
- Warm Water Adjustment: When adding the water to the mixer, I sometimes aim a touch hotter, around 118°, because the bowl will pull the temperature down slightly, which helps ensure the active yeast activates reliably and produces a strong foamy rise.
- Shape Variations: Experiment with thick pretzels, thin twists, bites, or rods to suit your crowd. Each shape changes bake time and mouthfeel, so note timing adjustments if you change sizes.
- Flour Cue: If the dough seems sticky during kneading, add flour gradually until it feels soft but not tacky; too much flour makes the crumb dense, while too little leaves it unmanageable.
- Proofing Spot: Let the dough rise in a warm, cozy corner away from drafts, this encourages a steady rise and more even fermentation which impacts texture and flavor.
- Sweet Twist Option: For a dessert style, brush baked pretzels with melted unsalted butter and dredge in cinnamon sugar for an instant nostalgic treat.
- Reheating Method: To reheat, wrap pretzels in foil and bake at 350° for 5 to 6 minutes or heat briefly in the microwave until warm; this restores softness without over drying.
- Make Ahead: You can make the dough a day ahead and refrigerate after the first rise, then shape and finish the next day for fresher timing on serving.
Great Combinations for Homemade Soft Pretzel Recipe
These serving ideas and pairings help you showcase the best qualities of Homemade Soft Pretzel Recipe. Think about contrast in texture and temperature, and select accompaniments that highlight the pretzel’s chewy interior and savory crust. These suggestions work for casual snacks, gatherings, or simple family meals.
- Classic Dips: Serve with mustard based dips or a cheese sauce warmed until silky, which complements the salty crust and soft center, and works well for game nights and casual get togethers.
- Meal Pairing: Pair pretzels with soups or stews for lunch or dinner, their sturdy shape makes them great for dunking into brothy dishes and adds a satisfying chew alongside a warm bowl.
- Occasion Serving: For brunch or a party, present a platter of different sized pretzels with small bowls of dips, allowing guests to sample a variety; they travel well to potlucks and communal gatherings.
- Storage Tips: Keep cooled pretzels wrapped in plastic in the refrigerator for up to four days, then reheat in a warm oven to restore texture and aroma before serving.
- Seasonal Pairings: In cooler months, serve alongside hearty, spiced dishes to add a homey touch; in warmer months, offer lighter dips and salads to keep the meal balanced and refreshing.
- Presentation: Place pretzels on a wooden board with small bowls of mustard and sauce, garnish with sprigs of herbs for visual contrast and a fresh aroma that enhances the tasting experience.
- Serving Styles: Offer them as an appetizer, snack, or part of a casual dinner spread; their versatility means they fit many meal contexts and always invite sharing.
FAQ
Conclusion
These soft pretzels stand out because they marry a tender, buttery interior with a glossy, slightly tangy crust that invites sharing and second helpings. Give this recipe a try the next time you want a hands on baking activity that rewards patience with bakery worthy results. I hope you enjoy the ritual of shaping and the warm aromas that fill your kitchen, and that this becomes one of your favorite comfort baking projects to revisit often.
Homemade Soft Pretzel Recipe
Equipment
- Standing mixer
- Dough Hook
- Large Pot
- Baking Sheet
- Parchment Paper
- Thermometer
Ingredients
- 2 cups of warm water between 110° and 115° Provide warm liquid to activate yeast and help dissolve sugars; temperature between 110° and 115° promotes fermentation without killing yeast and creates a soft dough texture. Ensure water is not too hot to avoid compromising yeast activity and monitor timing for proper rise. Useful for hydrating flour and forming gluten during mixing and kneading.
- 1 1/2 tablespoons light brown sugar Add mild sweetness and help feed the yeast to support fermentation; light brown sugar contributes a subtle molasses note that enriches flavor and encourages browning. Measure accurately to balance sweetness and yeast activity, enhancing crust color during baking. Also contributes to tender crumb by interacting with gluten and starch.
- 1 packet active yeast Leaven the dough by producing carbon dioxide during fermentation; active yeast creates bubbles that make pretzels light and airy when proofed properly. Sprinkle into warm water to proof before mixing or mix directly according to recipe timing for predictable rise. Maintain proper temperature and freshness to ensure effective fermentation.
- 1 1/2 teaspoons sea salt Enhance overall flavor and strengthen gluten structure; sea salt balances sweetness and controls yeast activity for steady fermentation. Dissolve into dough to distribute evenly so it seasons interior and crust while also improving dough handling. Adjust for preferred saltiness while keeping measurements consistent for proper texture.
- 3 ounces melted unsalted butter Provide rich fat for tenderness and flavor; melted unsalted butter adds moisture and a soft, pliable crumb while allowing control over salt level. Incorporate into dough during mixing for even distribution and to improve shelf life and mouthfeel. Use unsalted to regulate total sodium content with the added salt later.
- 5 1/4 cups all-purpose flour Form the bulk of the structure and supply starches and proteins; all-purpose flour develops gluten that gives pretzels chew and shape when kneaded and baked. Measure and add gradually to achieve the correct dough consistency, adjusting slightly for humidity and flour brand. Sift or aerate if needed to avoid dense dough and ensure uniform hydration.
- 1 tablespoon oil Prevent sticking and assist with shaping or proofing surfaces; a small amount of oil helps keep dough from adhering to bowls or hands and adds minimal tenderness. Rub into the mixing bowl or lightly coat hands when working dough to ease handling without altering flavor significantly. Choose neutral oil to avoid impacting the pretzel taste.
- 3/4 cup baking soda and 1 gallon of water Create a lye-like alkaline bath substitute to set crust and promote deep color; baking soda dissolved in a large amount of water raises surface pH when boiled or used warm, yielding that classic pretzel flavor and brown exterior. Dip formed pretzels briefly before baking to ensure proper crust formation and slight chewiness. Handle carefully to avoid over-soaking and maintain safety if using boiling water.
- 1 egg yolk whisked with 1 tablespoon cold water Seal and glaze the surface for shiny, golden crust; whisked egg yolk with cold water creates an egg wash that enhances color and helps toppings adhere during baking. Brush gently on each pretzel just before sprinkling salt and baking to achieve an attractive finish. Use cold water to temper yolk consistency for even application.
- coarse kosher or sea salt for topping Provide crunchy, savory finishing touch for visual appeal and salty pop; coarse kosher or sea salt sprinkled on top gives classic pretzel flavor and texture contrast. Apply after egg wash so crystals adhere and remain distinct through baking, offering a tactile bite. Choose coarse grains to maintain traditional appearance and salt burst.
Instructions
- Preheat the oven to 450°.: When the oven reaches 450° , you should feel a dry heat and a faint warm rush when you open the door, which helps the outside of the pretzels set quickly, locking in steam and creating a tender interior. I always allow the oven to stabilize for a few minutes after it signals preheated because ovens can fluctuate, and consistent heat ensures even browning. A common mistake is placing the dough in an underheated oven, which causes pale, underbaked crusts.
- In a standing mixer bowl, add in the water, brown sugar, and sprinkle on the yeast, whisk together and let it sit for 5 to 7 minutes or until it forms a foamy raft on top.: You'll notice a sweet, yeasty aroma and bubbles forming across the surface when the active yeast is lively, which is a reliable visual cue that fermentation is underway. I find that waiting for a foamy raft prevents failure later on, because it confirms the yeast is alive. Stirring too aggressively during this stage can deflate early foam, so be gentle. If no foam appears, the yeast may be expired and should be replaced.
- Add the hook attachment and turn the speed to low and pour in the salt and butter.: At this point, you will smell the butter and salt combining with the yeast mixture, creating a rich, savory base note. Using the dough hook at low speed allows the ingredients to begin binding without overworking gluten prematurely. If you add the salt directly onto the yeast before it is diluted, it can shock the yeast, so pouring and mixing helps distribute it evenly.
- Add in the flour 1 cup at a time until combined and knead the dough on low to medium speed for 5 minutes.: The dough will shift from shaggy to smooth as you slowly incorporate the all purpose flour . Expect the texture to become elastic, and as you knead you should hear a subtle, soft stretching sound and notice the dough pulling away from the bowl. Proper kneading develops gluten for a chewy interior. Avoid adding all the flour at once, which can lead to a dry, stiff dough rather than the tender, slightly springy feel you want.
- Add oil into a large bowl or container and place in the dough. Cover with a towel or lid and rest until it doubles in size, about an hour.: After placing the dough in the oiled bowl, its surface should feel slightly tacky and smooth. Over the next hour, watch for the dough to swell and hold an indentation when gently poked, which signals it has doubled and is ready. Rising in a warm, draft free spot accelerates this process. If the room is too cool, the rise will be slow, so find a warm corner or turn the oven on briefly and then off as a cozy proofing environment.
- Before it is time to form the dough, bring the baking soda and 1 gallon of water to a boil in a large pot.: The bubbling, alkaline bath should smell faintly mineral and create steam, which prepares the surface to brown dramatically when baked. Boiling activates the baking soda so it interacts with the dough surface effectively. Be cautious of the hot, steaming pot and avoid splashing when you lower the dough pieces into the water.
- To form the dough, take a small piece and roll it out until it is a 24” long rope. Form the dough into a U shape and holding each end cross over each other and pull down to make a pretzel with the ends slightly over the other part of the dough.: As you roll, you will feel the dough lighten and stretch; a properly shaped rope should spring back slightly when pressed. The twisting motion traps small pockets of air, which expand in the oven to create the classic pretzel shape. A common pitfall is rolling the ropes unevenly, which leads to inconsistent baking, so aim for uniform thickness throughout.
- Turn down the boiling water to a simmer and cook each pretzel dough 1 to 2 at a time for 30 seconds each and then place back on a cookie sheet tray lined with parchment paper or with a Silpat.: When the pretzels hit the water, you may hear a soft hiss and see tiny bubbles cling to the surface, a sign that the soda bath is doing its job. The dough will feel slightly tauter after the quick dunk, and transferring them carefully keeps their shape intact. Avoid overcrowding the pot, which lowers the water temperature and reduces the desired reaction on the crust.
- Once all of the pretzels have been cooked in the baking soda solution, brush the tops with the egg wash and season heavily with coarse kosher or sea salt.: The egg wash gives a glossy sheen and helps the coarse salt stick, while the salt itself provides sharp bursts of flavor. Brush lightly and uniformly so the wash does not pool, and press the salt gently so it adheres without saturating the surface. Overapplying egg wash can darken the crust too quickly, so keep it moderate.
- Bake in the oven for 12 to 15 minutes or until golden brown.: As they bake, you will notice the oven filling with a toasty, buttery aroma and the pretzels taking on a deep, even brown. The contrast between the crisp exterior and pillowy interior is what makes them irresistible. Use visual cues like a rich golden hue to determine doneness, because ovens vary; pulling them too early results in a pale, underdone center, while overbaking will dry them out.
Notes
- Warm Water Adjustment: When adding the water to the mixer, I sometimes aim a touch hotter, around 118°, because the bowl will pull the temperature down slightly, which helps ensure the active yeast activates reliably and produces a strong foamy rise.
- Shape Variations: Experiment with thick pretzels, thin twists, bites, or rods to suit your crowd. Each shape changes bake time and mouthfeel, so note timing adjustments if you change sizes.
- Flour Cue: If the dough seems sticky during kneading, add flour gradually until it feels soft but not tacky; too much flour makes the crumb dense, while too little leaves it unmanageable.
- Proofing Spot: Let the dough rise in a warm, cozy corner away from drafts, this encourages a steady rise and more even fermentation which impacts texture and flavor.
- Sweet Twist Option: For a dessert style, brush baked pretzels with melted unsalted butter and dredge in cinnamon sugar for an instant nostalgic treat.
- Reheating Method: To reheat, wrap pretzels in foil and bake at 350° for 5 to 6 minutes or heat briefly in the microwave until warm; this restores softness without over drying.
- Make Ahead: You can make the dough a day ahead and refrigerate after the first rise, then shape and finish the next day for fresher timing on serving.