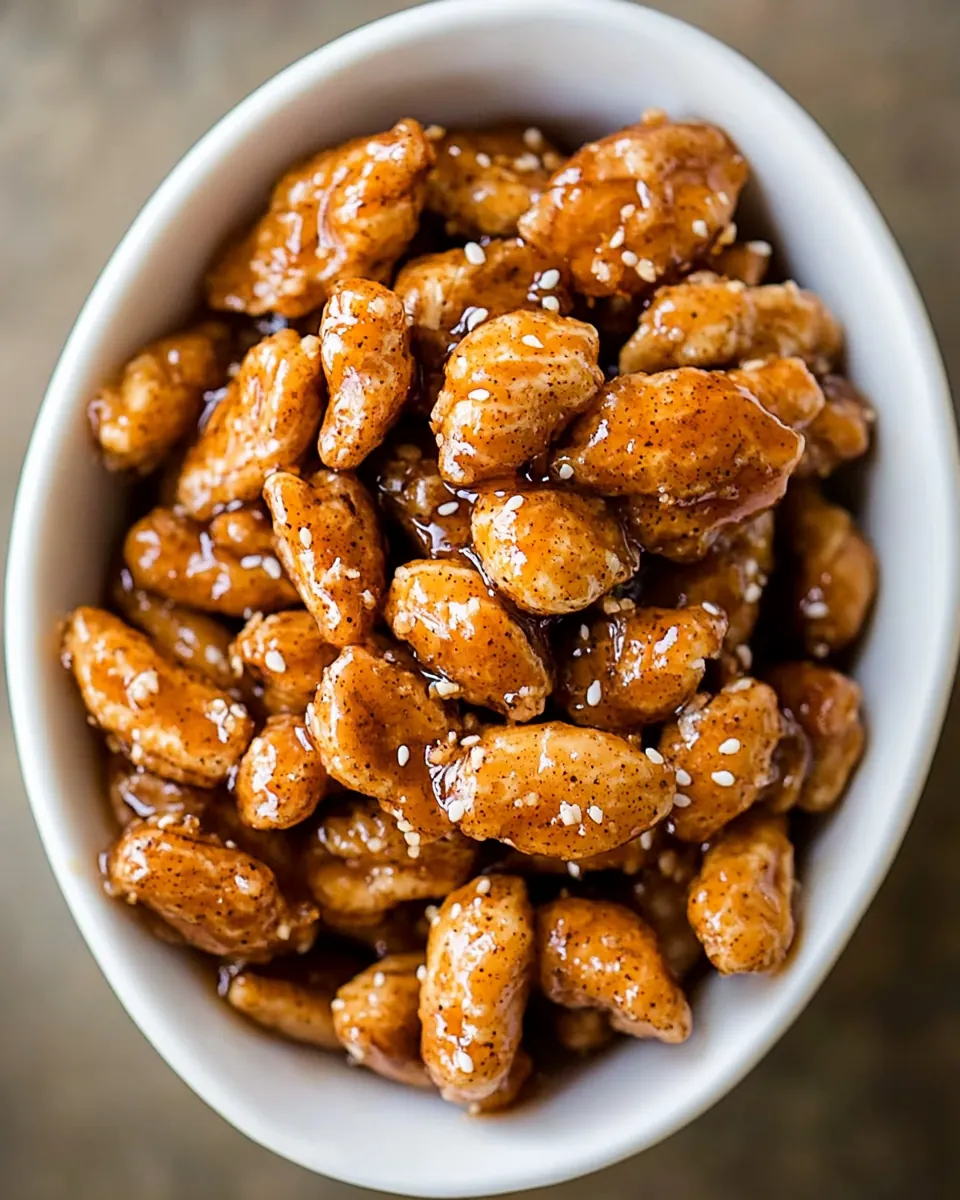
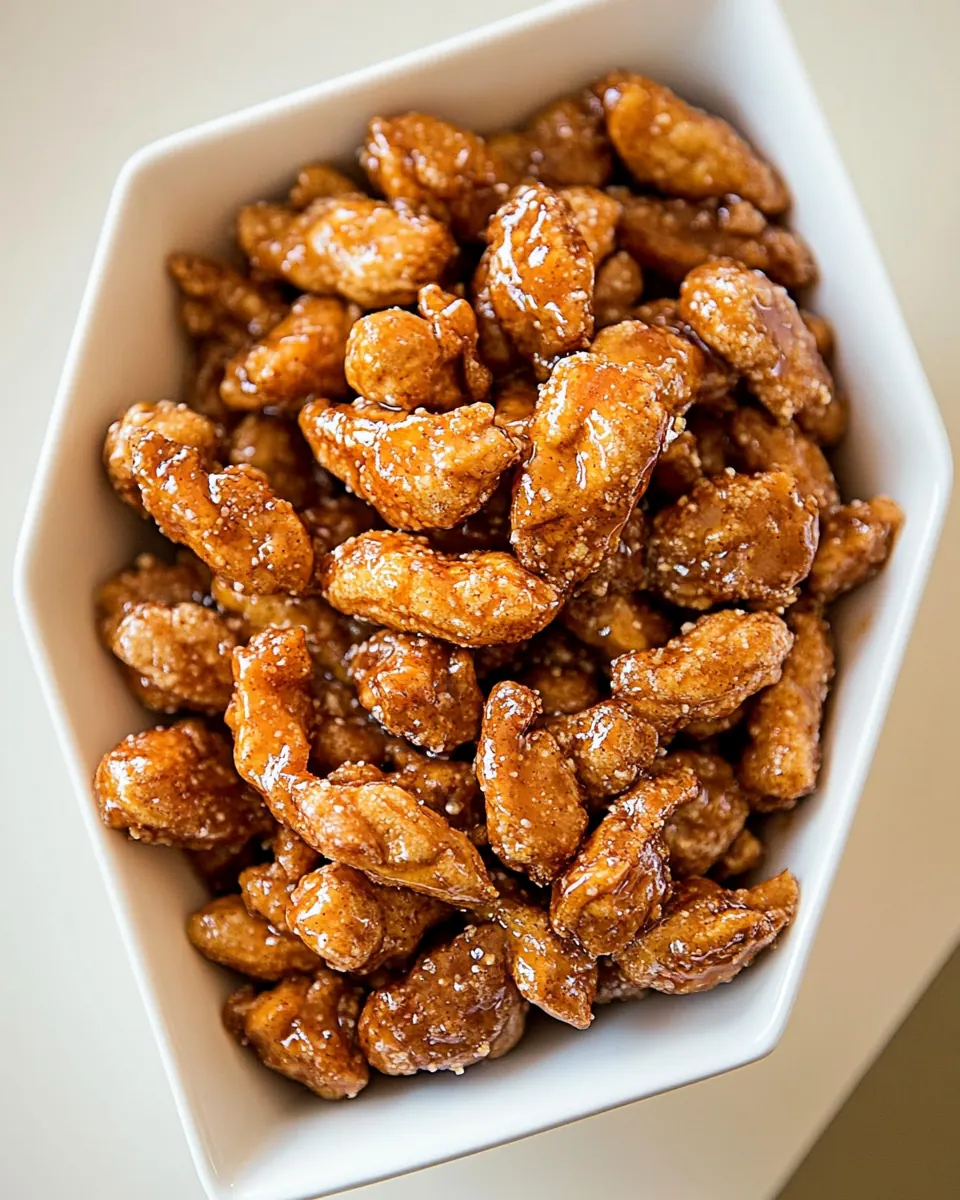
Candied Peanut Recipe
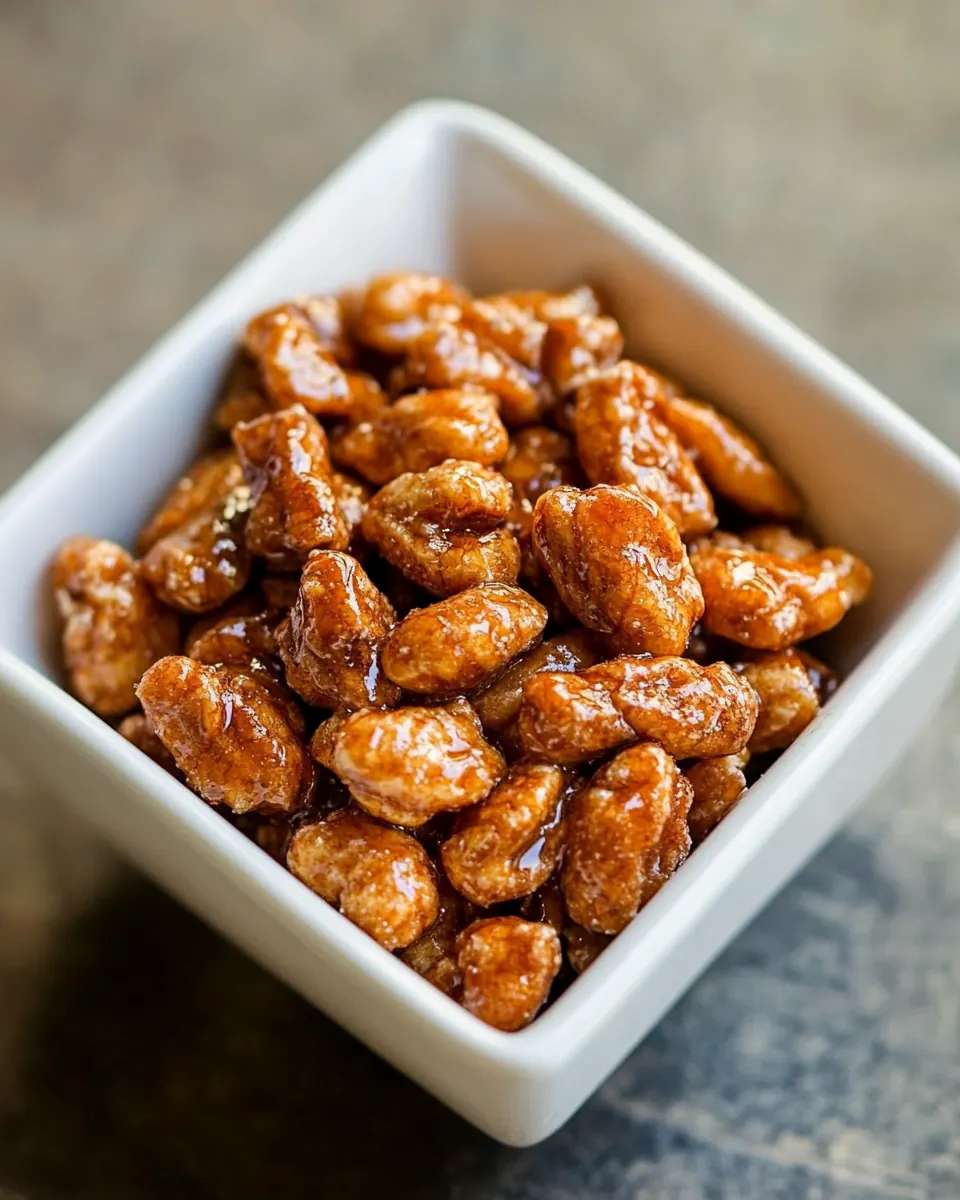
Candied Peanut Recipe has been my go to crunchy snack for late afternoons and small gatherings, a treat that fills the kitchen with warm, caramelized sugar and the friendly scent of toasted nuts.
Years ago I learned to make Candied Peanut Recipe on a tiny stovetop while visiting a friend who kept a jar on the counter for anyone who stopped by. I still remember the first time I stirred that sandy sugar coating and tasted the first bite, when the peanuts were glossy, sweet, and had that tiny counterpoint of sea salt that made them irresistible. That memory is what keeps me coming back to this simple method.
Now I make Candied Peanut Recipe when I need something that feels homemade but travels well. I like preparing a small batch, letting the peanuts cool on a sheet, and then breaking up the clumps while I sip coffee. It’s a ritual, and each step adds a little texture to the final result. I rarely change the core ingredients, because the magic is in the sugar transformation and the timing at the pan.
Recipe Snapshot
30 mins
10 mins
20 mins
Easy
250 kcal
American
Vegan, Gluten-Free
Desserts
Wide heavy duty skillet, Baking sheet or marble slab, Spatula or wooden spoon
Why This Candied Peanut Recipe Hits Different
Quick satisfaction in every handful
I love how Candied Peanut Recipe gives you instant gratification. With just a few pantry staples, you get a snack that is crunchy, sweet, and carry able. The transformation from granular sugar to a crunchy shell happens in minutes, and that speed makes it a go to when I want something homemade without fuss.
Versatile flavor notes
The basic recipe is a canvas. I often reach for flaky sea salt to lift the sweetness, or a pinch of ground cinnamon when I want warmth. Even a whisper of chili powder can add a surprising kick, and because the base is simple, these variations sing rather than compete.
Outstanding texture contrast
There is something undeniably pleasing about the contrast between the toasted peanuts and the crisped sugar shell. The nuts stay pleasantly firm while the coating fractures with a light snap. That texture contrast is why people keep reaching into the jar.
Great for gifts and gatherings
I often make a double batch for neighbors or to pack into small jars for last minute gifts. Candied Peanut Recipe stores well in an airtight container, so you can prepare ahead for game days, movie nights, or casual get togethers. It’s easy to transport and universally enjoyed by kids and adults alike.
Low barrier to entry
You do not need fancy equipment or advanced skills to pull this off. With attention and a sturdy skillet, even novice cooks can produce a bright, caramelized coating. I appreciate recipes that reward focus, and this one delivers consistent results when you pay attention to the color and smell as the sugar darkens.
Candied Peanut Recipe Ingredients
These ingredients are intentionally minimal, chosen to create a harmony of sweet, salty, and toasty notes. The key players are the peanuts for body and crunch, the sugar for that caramel shell, and the water which helps the sugar dissolve and transform evenly. A final sprinkle of coarse sea salt or an aromatic hint of ground cinnamon or chili powder takes the snack from ordinary to memorable.
- 2 cups (275 g) raw or roasted (unsalted) peanuts: Provide crunchy body and rich nutty flavor as the primary component; can be used raw or pre-roasted (unsalted) to control texture. Offer protein and natural oils that caramelize with sugar for classic candied peanuts.
- 1 cup (200 g) sugar: Create sweetness and the caramel backbone by dissolving and heating until syrupy; crystallizes around peanuts to form a glossy, crunchy coating. Balance moisture and flavor while determining final sweetness level.
- 1/3 cup (75 ml) water: Supply necessary moisture to dissolve sugar and facilitate even heating; helps create a smooth syrup that cooks to the correct stage for coating. Evaporates during cooking to concentrate sugars and achieve proper texture.
- a sprinkle of coarse sea salt, or smoked salt: Add a finishing contrast of saltiness and complexity to enhance sweetness and deepen overall flavor; coarse sea salt gives bursts of crunch while smoked salt imparts an aromatic, savory note. Sprinkle sparingly to avoid overpowering the candy.
- ground cinnamon or chili powder (optional): Introduce optional aromatic or spicy accents to customize the flavor profile; ground cinnamon offers warm, sweet spice while chili powder provides heat and depth for a savory-sweet contrast. Adjust quantity to taste for subtle or pronounced variations.
Recipe Steps for Candied Peanut Recipe
These steps are about rhythm and attention. The process is short, but it demands constant stirring and careful heat control. As you follow along, tune into the aromas and the visual cues, because those tell you exactly when to move on to the next stage.
- In a wide, heavy-duty skillet, mix the peanuts with the sugar and water. Cook the ingredients over moderate heat, stirring almost non-stop, until the sugary liquid begins to crystallize. It will take a few minutes.: The moment you combine the peanuts , sugar , and water , you begin a visible transformation. At first there is a wet, glossy mixture that smells faintly of sugar and raw nut oil. You will notice small syrupy bubbles forming around the edges as the liquid warms. This stage is all about even contact, so using a wide pan spreads the heat and prevents clumping. One common mistake is using too small a pan, which traps moisture and creates uneven caramelization; choose your widest, heaviest skillet to ensure even heat distribution and steady evaporation.
- Keep stirring until the sugar gets sandy and dry around the peanuts.: As the mixture heats, the sound shifts from quiet simmering to a gentle sputter as water evaporates. You will see the syrup thicken and then go from glossy to slightly grainy, that sandy look signaling crystallization. The smell will shift to a lightly toasted sugar note. Stirring almost constantly prevents the sugar from seizing or forming big burned spots. A frequent error is turning the heat too high to speed things up, which causes scorching; maintain a moderate flame so the sugar can crystallize uniformly.
- Lower the heat and keep going, scraping up any syrup collecting in the bottom of the pan and stir the peanuts in it, coating them as much as possible. As you go, tilt the pan, removing it from the heat from time to time to regulate and control the heat and the syrup, so you can coat the nuts with the liquid as it darkens without burning the peanuts or the syrup. This is the only tricky part—I like to get the peanuts as deeply bronzed as possible. If the mixture starts to smoke, simply remove it from the heat and stir further, coating the nuts.: At this point, the pan will look almost dusty, the sugar reducing to a dry coating. The peanuts will clump slightly as the sugar crystallizes, and you may hear a faint, dry scrape as particles move across the pan. The texture change is your cue to reduce heat, because the next stage concentrates sugars and can darken quickly. Avoid walking away here, because even brief neglect can shift the sugar from golden to bitter. If you notice a burnt smell, remove the pan from the heat and stir until it cools slightly, then return to gentle warmth.
- Right before the peanuts are done, sprinkle them with a flurry of flaky salt (and pinch of cinnamon or chili powder, if you want), stir them a couple of times, then tilt the peanuts out onto a baking sheet or a marble countertop.: Lowering the temperature lets you work the coating toward a deep bronze without burning it. As you scrape, the syrup will melt and recoat the peanuts, bringing a glossy sheen and richer color. Visually, you are aiming for an even, darker amber, not a blackened patch. The aroma will deepen into caramel tones. A frequent pitfall is continuing at high heat, which yields an unevenly burnt finish; patience here gives you that desirable deep bronze and complex flavor without acridity.
- Let the peanuts cool completely, breaking up any clumps as they cool. Store in an airtight container. The peanuts will keep for up to a week.: Tilting and intermittent removal from heat helps you control temperature spikes and gives you a chance to judge color away from direct flame. You will feel the pan temperature drop slightly when you lift it, and the syrup will momentarily slow its cooking, allowing you to coat stubborn spots. The sensory cue is the fragrance: when it leans toward toasted caramel but not bitter, you are in the sweet spot. Avoid continuous high heat or constant pan contact with flame which often leads to burning; instead, use short rests to manage cooking momentum.
- This is the only tricky part I like to get the peanuts as deeply bronzed as possible: When you intentionally push the color deeper, watch closely for shifts in smell to avoid bitterness. The peanuts should develop a layered aroma of toasted nut and complex caramel. The texture will move from sandy to glossy as the syrup re melts and coats the nuts. A typical mistake is overcooking to chase color; once you hit a rich amber, act quickly to finish so the sugars do not scorch.
- If the mixture starts to smoke, simply remove it from the heat and stir further, coating the nuts: Smoke is the universal signal that sugars are approaching the edge of burning. Immediately lifting the pan and stirring cools the mixture and distributes remaining syrup. The sound will become quieter as the sugars stabilize, and the smell will shift back from acrid to toasty if you react quickly. A trap many fall into is increasing heat to counter perceived cooling, which accelerates burning; resist that urge and use stirring to manage temperature.
- Right before the peanuts are done, sprinkle them with a flurry of flaky salt or a pinch of cinnamon or chili powder, if you want: Adding a finishing salt or spice at the end ensures those flavors remain bright and do not dissolve into the syrup. The salt crystals will glint on the glossy surface, and the aroma of cinnamon or chili will lift immediately. The tactile cue is the slight crackle when you press a coated nut between fingers. A common mistake is seasoning too early, which leads to muted notes as they cook away; always finish with these accents for maximum impact.
- Stir them a couple of times, then tilt the peanuts out onto a baking sheet or a marble countertop: Moving the nuts to a cool surface stops the cooking quickly and gives you room to separate clusters. You will hear the shells cool and crisp; the sound changes from sticky dragging to a dry rustle. Visually, you should see evenly coated nuts with a warm amber sheen. Avoid piling them while hot, which traps steam and softens the coating; spread them thin immediately to set the crunch.
- Let the peanuts cool completely, breaking up any clumps as they cool: Cooling lets the sugar fully harden into a crisp shell. The texture becomes firm under the teeth and the aroma settles into a balanced caramel and roasted nut fragrance. Breaking clumps while still slightly warm prevents large chunks but waiting until fully cool preserves brittle shards. A typical mistake is storing before they are fully cool, which leads to sticky, softened coatings; always ensure they are room temperature and dry before packing.
- Store in an airtight container: Proper storage maintains crispness and keeps the peanuts fresh for up to a week. You will notice the crunch persists when sealed from humidity. One common issue is trapping residual warmth in the container; always ensure the batch is completely cooled to room temperature before sealing to avoid condensation and loss of texture.
Helpful Notes about Candied Peanut Recipe
I like to include practical reminders that make the process foolproof. Below are expanded tips that address common pitfalls, flavor variations, and storage strategies so your batch comes out perfectly every time.
- Use a wide, heavy pan: A broad surface spreads heat and allows moisture to evaporate evenly, which prevents clumping and scorching. A thin pan concentrates heat and tends to create hot spots, making consistent caramelization much harder to achieve.
- Control the heat, do not rush: Moderate, steady heat is essential. Rushing by turning the burner up usually results in burnt sugar and bitter notes. Work patiently and adjust the flame as the mixture changes color.
- Stir almost nonstop during crystallization: Frequent stirring ensures the sugar crystallizes uniformly around each peanut, giving an even texture. Leaving long gaps between stirs often yields uneven coating and burnt patches.
- Finish with salt or spice at the end: Add flaky sea salt or a sprinkle of ground cinnamon or chili powder right before the nuts are done to keep those flavors bright and perceptible on the surface.
- Cool on a flat, nonabsorbent surface: A baking sheet or marble slab helps the nuts set quickly and prevents sticking. Cooling on parchment is fine too, but avoid cloth which can absorb syrup and dull the finish.
- Store in an airtight container once cool: Seal only after full cooling to avoid condensation. Keep at room temperature away from humidity for up to a week of crisp texture.
What to Serve Alongside Candied Peanut Recipe
These serving ideas help you present Candied Peanut Recipe across occasions, from casual snacking to thoughtful gifting. I’ll cover pairings, storage, and occasions so you can make the most of each batch.
- Casual snack bowls for gatherings: Serve the peanuts in small bowls around a living room for game nights or movie evenings. Their crunchy sweetness pairs well with lightly salted crackers or fresh fruit to balance the palate.
- Gift jars for neighbors or hosts: Pack cooled peanuts into small glass jars with a ribbon. They make approachable, homemade gifts for holidays, thank yous, or housewarming presents and travel well.
- Party mix component: Mix Candied Peanut Recipe with plain nuts and dried fruit for a homemade snack mix. The candied pieces add sweetness and shine while the plain nuts keep the mix balanced.
- Seasonal pairings: For colder months, pair the peanuts with spiced teas or hot chocolate to complement warming spices like ground cinnamon. In warmer seasons, they make a crunchy contrast to fresh fruit platters.
- Storage and make ahead: Prepare batches in advance and store in an airtight container at room temperature. Properly cooled and sealed, they stay crisp for up to a week, making them ideal as a make ahead snack for events.
- Occasion ideas: These work for casual lunches, picnic add ons, potluck contributions, or Ramadan snacks to nibble on between gatherings. Their portability and shelf stability make them versatile for many scenarios.
FAQ
Conclusion
What makes this recipe special is its simplicity and the beautiful contrast between crunchy peanuts and a brittle, caramelized shell. The process teaches attention to heat and timing, and rewards you with a snack that feels homemade and thoughtful. Give it a try when you want an easy, transportable treat to share or to tuck into gifts, and enjoy how a few pantry staples become something unexpectedly addictive and memorable.
Candied Peanut Recipe
Equipment
- Wide heavy duty skillet
- Baking sheet or marble slab
- Spatula or wooden spoon
Ingredients
- 2 cups (275 g) raw or roasted (unsalted) peanuts Provide crunchy body and rich nutty flavor as the primary component; can be used raw or pre-roasted (unsalted) to control texture. Offer protein and natural oils that caramelize with sugar for classic candied peanuts.
- 1 cup (200 g) sugar Create sweetness and the caramel backbone by dissolving and heating until syrupy; crystallizes around peanuts to form a glossy, crunchy coating. Balance moisture and flavor while determining final sweetness level.
- 1/3 cup (75 ml) water Supply necessary moisture to dissolve sugar and facilitate even heating; helps create a smooth syrup that cooks to the correct stage for coating. Evaporates during cooking to concentrate sugars and achieve proper texture.
- a sprinkle of coarse sea salt, or smoked salt Add a finishing contrast of saltiness and complexity to enhance sweetness and deepen overall flavor; coarse sea salt gives bursts of crunch while smoked salt imparts an aromatic, savory note. Sprinkle sparingly to avoid overpowering the candy.
- optional: ground cinnamon or chili powder Introduce optional aromatic or spicy accents to customize the flavor profile; ground cinnamon offers warm, sweet spice while chili powder provides heat and depth for a savory-sweet contrast. Adjust quantity to taste for subtle or pronounced variations.
Instructions
- In a wide, heavy-duty skillet, mix the peanuts with the sugar and water. Cook the ingredients over moderate heat, stirring almost non-stop, until the sugary liquid begins to crystallize. It will take a few minutes.: The moment you combine the peanuts , sugar , and water , you begin a visible transformation. At first there is a wet, glossy mixture that smells faintly of sugar and raw nut oil. You will notice small syrupy bubbles forming around the edges as the liquid warms. This stage is all about even contact, so using a wide pan spreads the heat and prevents clumping. One common mistake is using too small a pan, which traps moisture and creates uneven caramelization; choose your widest, heaviest skillet to ensure even heat distribution and steady evaporation.
- Keep stirring until the sugar gets sandy and dry around the peanuts.: As the mixture heats, the sound shifts from quiet simmering to a gentle sputter as water evaporates. You will see the syrup thicken and then go from glossy to slightly grainy, that sandy look signaling crystallization. The smell will shift to a lightly toasted sugar note. Stirring almost constantly prevents the sugar from seizing or forming big burned spots. A frequent error is turning the heat too high to speed things up, which causes scorching; maintain a moderate flame so the sugar can crystallize uniformly.
- Lower the heat and keep going, scraping up any syrup collecting in the bottom of the pan and stir the peanuts in it, coating them as much as possible. As you go, tilt the pan, removing it from the heat from time to time to regulate and control the heat and the syrup, so you can coat the nuts with the liquid as it darkens without burning the peanuts or the syrup. This is the only tricky part—I like to get the peanuts as deeply bronzed as possible. If the mixture starts to smoke, simply remove it from the heat and stir further, coating the nuts.: At this point, the pan will look almost dusty, the sugar reducing to a dry coating. The peanuts will clump slightly as the sugar crystallizes, and you may hear a faint, dry scrape as particles move across the pan. The texture change is your cue to reduce heat, because the next stage concentrates sugars and can darken quickly. Avoid walking away here, because even brief neglect can shift the sugar from golden to bitter. If you notice a burnt smell, remove the pan from the heat and stir until it cools slightly, then return to gentle warmth.
- Right before the peanuts are done, sprinkle them with a flurry of flaky salt (and pinch of cinnamon or chili powder, if you want), stir them a couple of times, then tilt the peanuts out onto a baking sheet or a marble countertop.: Lowering the temperature lets you work the coating toward a deep bronze without burning it. As you scrape, the syrup will melt and recoat the peanuts, bringing a glossy sheen and richer color. Visually, you are aiming for an even, darker amber, not a blackened patch. The aroma will deepen into caramel tones. A frequent pitfall is continuing at high heat, which yields an unevenly burnt finish; patience here gives you that desirable deep bronze and complex flavor without acridity.
- Let the peanuts cool completely, breaking up any clumps as they cool. Store in an airtight container. The peanuts will keep for up to a week.: Tilting and intermittent removal from heat helps you control temperature spikes and gives you a chance to judge color away from direct flame. You will feel the pan temperature drop slightly when you lift it, and the syrup will momentarily slow its cooking, allowing you to coat stubborn spots. The sensory cue is the fragrance: when it leans toward toasted caramel but not bitter, you are in the sweet spot. Avoid continuous high heat or constant pan contact with flame which often leads to burning; instead, use short rests to manage cooking momentum.
- This is the only tricky part I like to get the peanuts as deeply bronzed as possible: When you intentionally push the color deeper, watch closely for shifts in smell to avoid bitterness. The peanuts should develop a layered aroma of toasted nut and complex caramel. The texture will move from sandy to glossy as the syrup re melts and coats the nuts. A typical mistake is overcooking to chase color; once you hit a rich amber, act quickly to finish so the sugars do not scorch.
- If the mixture starts to smoke, simply remove it from the heat and stir further, coating the nuts: Smoke is the universal signal that sugars are approaching the edge of burning. Immediately lifting the pan and stirring cools the mixture and distributes remaining syrup. The sound will become quieter as the sugars stabilize, and the smell will shift back from acrid to toasty if you react quickly. A trap many fall into is increasing heat to counter perceived cooling, which accelerates burning; resist that urge and use stirring to manage temperature.
- Right before the peanuts are done, sprinkle them with a flurry of flaky salt or a pinch of cinnamon or chili powder, if you want: Adding a finishing salt or spice at the end ensures those flavors remain bright and do not dissolve into the syrup. The salt crystals will glint on the glossy surface, and the aroma of cinnamon or chili will lift immediately. The tactile cue is the slight crackle when you press a coated nut between fingers. A common mistake is seasoning too early, which leads to muted notes as they cook away; always finish with these accents for maximum impact.
- Stir them a couple of times, then tilt the peanuts out onto a baking sheet or a marble countertop: Moving the nuts to a cool surface stops the cooking quickly and gives you room to separate clusters. You will hear the shells cool and crisp; the sound changes from sticky dragging to a dry rustle. Visually, you should see evenly coated nuts with a warm amber sheen. Avoid piling them while hot, which traps steam and softens the coating; spread them thin immediately to set the crunch.
- Let the peanuts cool completely, breaking up any clumps as they cool: Cooling lets the sugar fully harden into a crisp shell. The texture becomes firm under the teeth and the aroma settles into a balanced caramel and roasted nut fragrance. Breaking clumps while still slightly warm prevents large chunks but waiting until fully cool preserves brittle shards. A typical mistake is storing before they are fully cool, which leads to sticky, softened coatings; always ensure they are room temperature and dry before packing.
- Store in an airtight container: Proper storage maintains crispness and keeps the peanuts fresh for up to a week. You will notice the crunch persists when sealed from humidity. One common issue is trapping residual warmth in the container; always ensure the batch is completely cooled to room temperature before sealing to avoid condensation and loss of texture.
Notes
- Use a wide, heavy pan: A broad surface spreads heat and allows moisture to evaporate evenly, which prevents clumping and scorching. A thin pan concentrates heat and tends to create hot spots, making consistent caramelization much harder to achieve.
- Control the heat, do not rush: Moderate, steady heat is essential. Rushing by turning the burner up usually results in burnt sugar and bitter notes. Work patiently and adjust the flame as the mixture changes color.
- Stir almost nonstop during crystallization: Frequent stirring ensures the sugar crystallizes uniformly around each peanut, giving an even texture. Leaving long gaps between stirs often yields uneven coating and burnt patches.
- Finish with salt or spice at the end: Add flaky sea salt or a sprinkle of ground cinnamon or chili powder right before the nuts are done to keep those flavors bright and perceptible on the surface.
- Cool on a flat, nonabsorbent surface: A baking sheet or marble slab helps the nuts set quickly and prevents sticking. Cooling on parchment is fine too, but avoid cloth which can absorb syrup and dull the finish.
- Store in an airtight container once cool: Seal only after full cooling to avoid condensation. Keep at room temperature away from humidity for up to a week of crisp texture.