
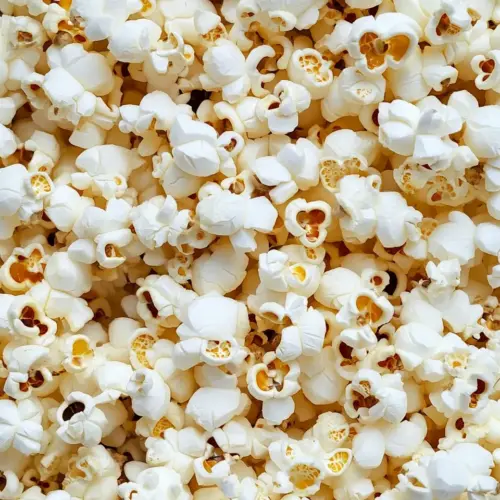
Stovetop Popcorn
Stovetop Popcorn is the snack I turn to when I want something fast, comforting, and a little nostalgic. The first time I learned to make it at home I was more interested in the ritual than the result, but the sound of kernels bursting into fluffy clouds hooked me right away. Over the years I tweaked small details, and now this simple method reliably gives me light, crisp popcorn that beats microwave bags for flavor and texture.
There is something small but satisfying about tending to a pot on the stove, the way the oil warms, then the first tentative pops, then the full orchestra of cracking and popping. I often make a batch when friends drop by unexpectedly, because it comes together in minutes and feels generous. When I want a neutral base, I stick with just oil and salt, but sometimes I brush on a little melted butter and sprinkle a touch more salt right at the end, which makes each bite sing.
Recipe Snapshot
15 mins
5 mins
10 mins
Medium
200 kcal
American
Gluten-Free, Low FODMAP
Snack
Heavy-bottomed pot, Lid, Large bowl
Why This Stovetop Popcorn Stands Out
Pure, old school technique
I love how Stovetop Popcorn uses a handful of pantry items and a focused technique. You are not relying on a machine, you are guiding heat and time with your hands. That control yields kernels that pop wide open while avoiding burnt bits, and I find that very satisfying.
Speed without shortcuts
This method is fast, but it does not skip steps that matter. Heating the oil with two test kernels, then briefly removing the pot, gives you predictable results. I appreciate that small ritual because it prevents overheating and keeps the popcorn light and crisp.
Versatility for flavor play
With a neutral base of popcorn kernels and coconut oil, you can go sweet, savory, or classic butter and salt. I often use melted butter and salt for a classic finish, but you can experiment and still keep the core technique intact. That flexibility makes it a go to for movie nights and casual gatherings.
Engaging sensory feedback
The recipe gives you real-time cues; the sizzle when the oil heats, the rapid cadence of popping, and the visual cue when the kernels slow down. I trust these sensory signals more than timers, and I like teaching them to friends because they become confident quickly.
Minimal cleanup and cost
There is almost no equipment to wash and kernels are an economical snack. I like that I can make a big bowl without much fuss, which feels practical and a little indulgent at once.
Ingredients for Stovetop Popcorn

These ingredients are intentionally simple and work together to produce light, crisp popcorn. The oil heats evenly and carries the heat to each popcorn kernel, while a finishing touch of melted butter and salt enhances mouthfeel and flavor. The key players are about heat control and contrasting textures, so each element is chosen to do a specific job.
- 3 tablespoons coconut oil: Provides a high smoke point fat that facilitates even heat distribution and prevents kernels from burning; contributes a subtle tropical aroma and crisp mouthfeel to the popcorn. Melts smoothly to coat the bottom of the pot, ensuring kernels heat uniformly and pop efficiently. Can be adjusted to control richness and flavor intensity.
- 1/3 cup popcorn kernels: Creates the main popping component by releasing steam when heated, transforming into light, airy popcorn; offers a neutral corn flavor that crisps when heated. Supplies the bulk of the snack and determines yield per batch, so accurate measurement affects cooking time and pot crowding. Pairs well with various seasonings and fats for different flavor profiles.
- melted butter and salt for serving () (optional): Adds finishing richness and enhances mouthfeel when drizzled over freshly popped corn; contributes a savory, slightly creamy layer that helps seasonings adhere. Introduces saltiness to balance the natural sweetness of corn and amplify overall flavor; both elements are optional to suit dietary preferences and can be adjusted to taste.
Step by Step Instructions for Stovetop Popcorn

These directions walk you through making a classic batch of Stovetop Popcorn. I like to stay attentive during the popping because the auditory and visual cues tell you when to shake, when to vent, and when to finish. Follow the rhythm of the pot and you will be rewarded with fluffy, even popcorn.
- Heat a heavy-bottomed pot over medium heat. Add the oil and two popcorn kernels and cover the pot.: The air will fill with a faint warming scent as the coconut oil softens, and the pot will feel evenly warm at the base. You want a steady, moderate heat so the two test kernels warm slowly, preventing the oil from smoking. The purpose of the test kernels is to check that the oil is hot enough to pop without overheating, which would scorch the oil or burn the kernels. If you turn the heat too high you risk a smoky smell and burnt popcorn, so keep the flame moderate and be patient while the oil comes up to temperature.
- Once the popcorn has popped the oil is ready. Add the remaining popcorn kernels and return the cover. Remove the pot from the heat for 30 seconds. This ensures the oil doesn't overheat.: You will hear a sharp crack when the test kernels pop, that click signals readiness. After adding the rest of the popcorn kernels , the brief off-heat rest equalizes temperature so the kernels absorb just enough heat to pop evenly when returned to the stove. The pot will be warm to the touch but not smoking. If you skip the 30 seconds you may overheat the kernels, causing some to burn before others pop, so allow this calm pause for best results.
- Return the pan to heat. Give the pan a shake every few seconds as you wait for the popcorn to start popping. Once it starts to pop rapidly give the pan a good shake to make sure the kernels pop evenly.: As soon as the pot returns to the burner you will sense a building tension, then a soft patter as the first group of kernels opens. The shakes redistribute kernels so the ones at the bottom do not scorch, and you will hear the popping accelerate into a lively rhythm. The sound is the best guide to timing and evenness. Avoid leaving the pot still because uneven contact with the heat will create burnt spots and many unpopped kernels.
- Once the popping has slowed down, and let the steam vent by moving the cover on the pan slightly.: When the popping cadence drops to isolated pops, you will notice steam collecting under the lid. Slightly ajar the cover to let moisture escape, which keeps the popcorn crisp rather than chewy. You may see a few final shy pops, but this is the time to let steam go so the crisp texture stays. A typical error is leaving the lid fully closed which traps steam and softens the popcorn.
- Once all the popping has stopped, pour into a large bowl.: The pot will release a warm, nutty aroma as you lift the lid, and emptying the contents quickly prevents residual heat from steaming the finished popcorn. Pouring into a roomy bowl gives space to toss and cool, maintaining crispness. If you leave the popcorn in the hot pot it will steam and lose its crunch, so transfer promptly.
- Add toppings while hot and toss until it coats the popcorn evenly.: The hot surface helps melted butter and salt adhere to the popped kernels, giving even coverage and a glossy finish. Start with a light drizzle and toss vigorously, tasting as you go so you do not overdo it. Over-buttering is a common pitfall that makes the popcorn heavy and greasy, so aim for balance and loud, even tossing.
- Serve immediately.: The bowl will steam slightly and the aroma will be strongest right away, which is when the textural contrast is at its peak. Serve to friends or family while the popcorn is warm and crisp. If you wait too long the popcorn will cool and settle, losing some of its allure, so plan to serve right after tossing with toppings.
Recipe Variations about Stovetop Popcorn

This base method invites small variations that change flavor and texture without changing technique. Below are several ways I like to tweak the classic approach, each starting with a short bold phrase and followed by practical details you can apply right away.
- Classic Butter and Salt: Drizzle warm melted butter over hot popcorn and toss with salt for the timeless theater taste, keeping the butter light to avoid sogginess.
- Oil Swap: Use avocado oil instead of coconut oil if you prefer a neutral, high smoke point option; it behaves similarly while changing the aroma profile slightly.
- Even Coating Trick: Pour butter in a thin stream while tossing to ensure every kernel receives a touch, rather than pooling at the bottom of the bowl.
- Low Smoke Tip: If you ever smell smoke, immediately turn off the heat and start again with fresh oil and kernels to avoid smoky, bitter popcorn.
- Batch Size: Make several smaller batches rather than one giant one to maintain even popping and reduce unpopped kernels.
- Serving Warm: Serve right away for the crispest texture, and avoid covered storage which traps moisture and softens the popcorn.
What Goes Well With This Stovetop Popcorn
Stovetop Popcorn works in many settings, from casual movie nights to snack tables at gatherings. Below are ideas for pairings, occasions, and storage, each in list form to help you plan how to serve and enjoy your batch.
- Movie Night: Serve warm in individual bowls or a large communal bowl for a cozy movie evening, adding optional melted butter and salt for a classic experience.
- Game Day: Place several bowls around a casual room so guests can graze while watching sports, keeping napkins nearby to handle buttery fingers.
- Kid Friendly Snack: Keep portions moderate and let kids sprinkle a little salt, making it a quick, crunchy treat for after school or playdates.
- Party Snack Table: Offer plain popcorn alongside small bowls of toppings so guests can customize their portions, which keeps the base technique the same while offering variety.
- Storage Tips: Store leftover popcorn in an airtight container at room temperature for up to two days; re-crisp in a 300 degree Fahrenheit oven for a few minutes if it softens.
- Seasonal Pairings: For cozy autumn evenings, pair with warm beverages, while in summer keep it light and serve with chilled drinks for balance.
FAQ
Conclusion
Stovetop Popcorn stands out because it delivers fresh, crunchy popcorn with minimal ingredients and maximum control. The method is fast, reliable, and satisfying, letting you tune heat and timing to get the best texture. Try it the next time you want a quick snack or something special for movie night, and you will likely prefer it to prepackaged options. Making popcorn this way turns a simple ingredient into something warm, fragrant, and shareable, and it becomes a small ritual that’s easy to repeat.
Stovetop Popcorn
Equipment
- Heavy-bottomed pot
- Lid
- Large Bowl
Ingredients
- 3 tablespoons coconut oil Provides a high smoke point fat that facilitates even heat distribution and prevents kernels from burning; contributes a subtle tropical aroma and crisp mouthfeel to the popcorn. Melts smoothly to coat the bottom of the pot, ensuring kernels heat uniformly and pop efficiently. Can be adjusted to control richness and flavor intensity.
- 1/3 cup popcorn kernels Creates the main popping component by releasing steam when heated, transforming into light, airy popcorn; offers a neutral corn flavor that crisps when heated. Supplies the bulk of the snack and determines yield per batch, so accurate measurement affects cooking time and pot crowding. Pairs well with various seasonings and fats for different flavor profiles.
- melted butter and salt for serving (optional) Adds finishing richness and enhances mouthfeel when drizzled over freshly popped corn; contributes a savory, slightly creamy layer that helps seasonings adhere. Introduces saltiness to balance the natural sweetness of corn and amplify overall flavor; both elements are optional to suit dietary preferences and can be adjusted to taste.
Instructions
- Heat a heavy-bottomed pot over medium heat. Add the oil and two popcorn kernels and cover the pot.: The air will fill with a faint warming scent as the coconut oil softens, and the pot will feel evenly warm at the base. You want a steady, moderate heat so the two test kernels warm slowly, preventing the oil from smoking. The purpose of the test kernels is to check that the oil is hot enough to pop without overheating, which would scorch the oil or burn the kernels. If you turn the heat too high you risk a smoky smell and burnt popcorn, so keep the flame moderate and be patient while the oil comes up to temperature.
- Once the popcorn has popped the oil is ready. Add the remaining popcorn kernels and return the cover. Remove the pot from the heat for 30 seconds. This ensures the oil doesn't overheat.: You will hear a sharp crack when the test kernels pop, that click signals readiness. After adding the rest of the popcorn kernels , the brief off-heat rest equalizes temperature so the kernels absorb just enough heat to pop evenly when returned to the stove. The pot will be warm to the touch but not smoking. If you skip the 30 seconds you may overheat the kernels, causing some to burn before others pop, so allow this calm pause for best results.
- Return the pan to heat. Give the pan a shake every few seconds as you wait for the popcorn to start popping. Once it starts to pop rapidly give the pan a good shake to make sure the kernels pop evenly.: As soon as the pot returns to the burner you will sense a building tension, then a soft patter as the first group of kernels opens. The shakes redistribute kernels so the ones at the bottom do not scorch, and you will hear the popping accelerate into a lively rhythm. The sound is the best guide to timing and evenness. Avoid leaving the pot still because uneven contact with the heat will create burnt spots and many unpopped kernels.
- Once the popping has slowed down, and let the steam vent by moving the cover on the pan slightly.: When the popping cadence drops to isolated pops, you will notice steam collecting under the lid. Slightly ajar the cover to let moisture escape, which keeps the popcorn crisp rather than chewy. You may see a few final shy pops, but this is the time to let steam go so the crisp texture stays. A typical error is leaving the lid fully closed which traps steam and softens the popcorn.
- Once all the popping has stopped, pour into a large bowl.: The pot will release a warm, nutty aroma as you lift the lid, and emptying the contents quickly prevents residual heat from steaming the finished popcorn. Pouring into a roomy bowl gives space to toss and cool, maintaining crispness. If you leave the popcorn in the hot pot it will steam and lose its crunch, so transfer promptly.
- Add toppings while hot and toss until it coats the popcorn evenly.: The hot surface helps melted butter and salt adhere to the popped kernels, giving even coverage and a glossy finish. Start with a light drizzle and toss vigorously, tasting as you go so you do not overdo it. Over-buttering is a common pitfall that makes the popcorn heavy and greasy, so aim for balance and loud, even tossing.
- Serve immediately.: The bowl will steam slightly and the aroma will be strongest right away, which is when the textural contrast is at its peak. Serve to friends or family while the popcorn is warm and crisp. If you wait too long the popcorn will cool and settle, losing some of its allure, so plan to serve right after tossing with toppings.
Notes
- Classic Butter and Salt: Drizzle warm melted butter over hot popcorn and toss with salt for the timeless theater taste, keeping the butter light to avoid sogginess.
- Oil Swap: Use avocado oil instead of coconut oil if you prefer a neutral, high smoke point option; it behaves similarly while changing the aroma profile slightly.
- Even Coating Trick: Pour butter in a thin stream while tossing to ensure every kernel receives a touch, rather than pooling at the bottom of the bowl.
- Low Smoke Tip: If you ever smell smoke, immediately turn off the heat and start again with fresh oil and kernels to avoid smoky, bitter popcorn.
- Batch Size: Make several smaller batches rather than one giant one to maintain even popping and reduce unpopped kernels.
- Serving Warm: Serve right away for the crispest texture, and avoid covered storage which traps moisture and softens the popcorn.