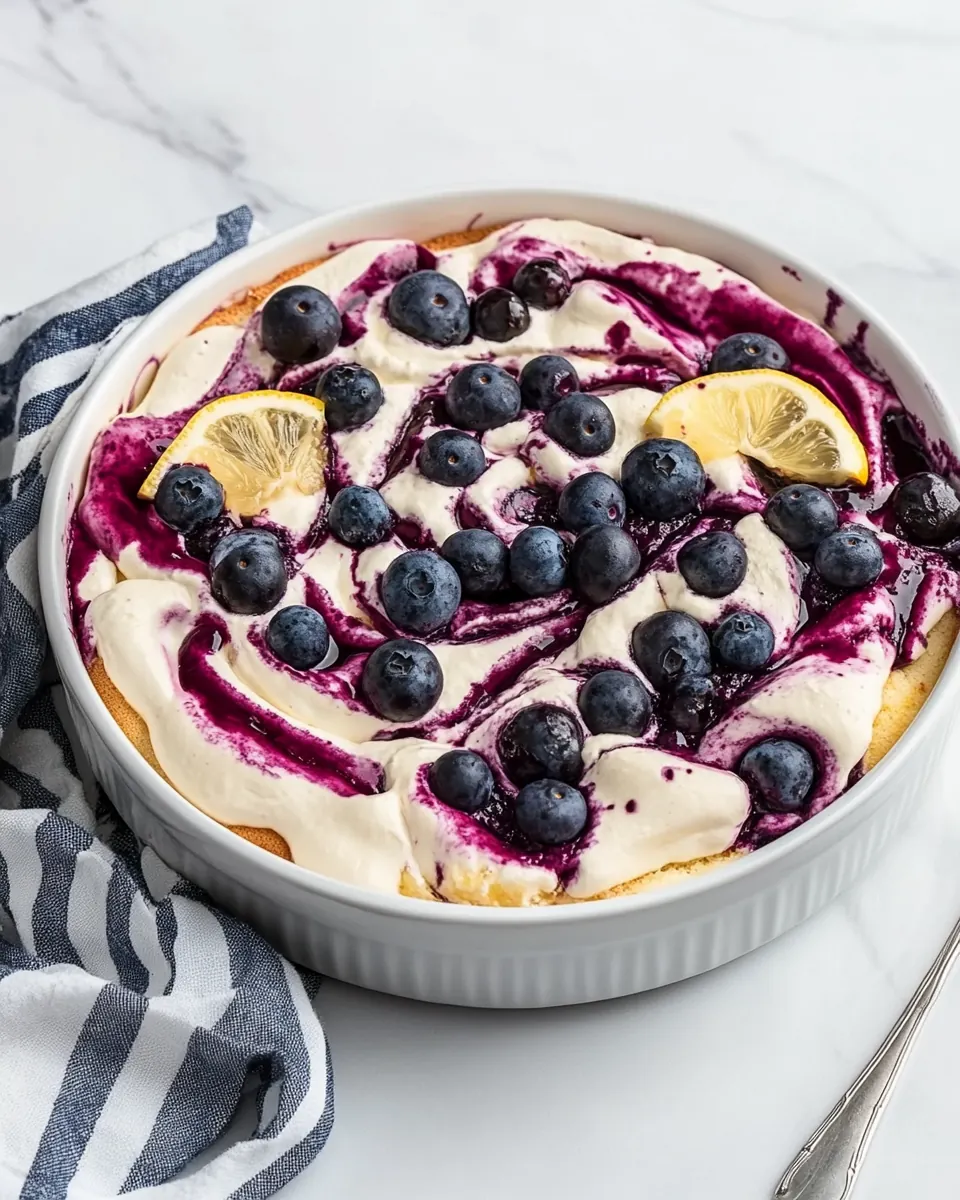
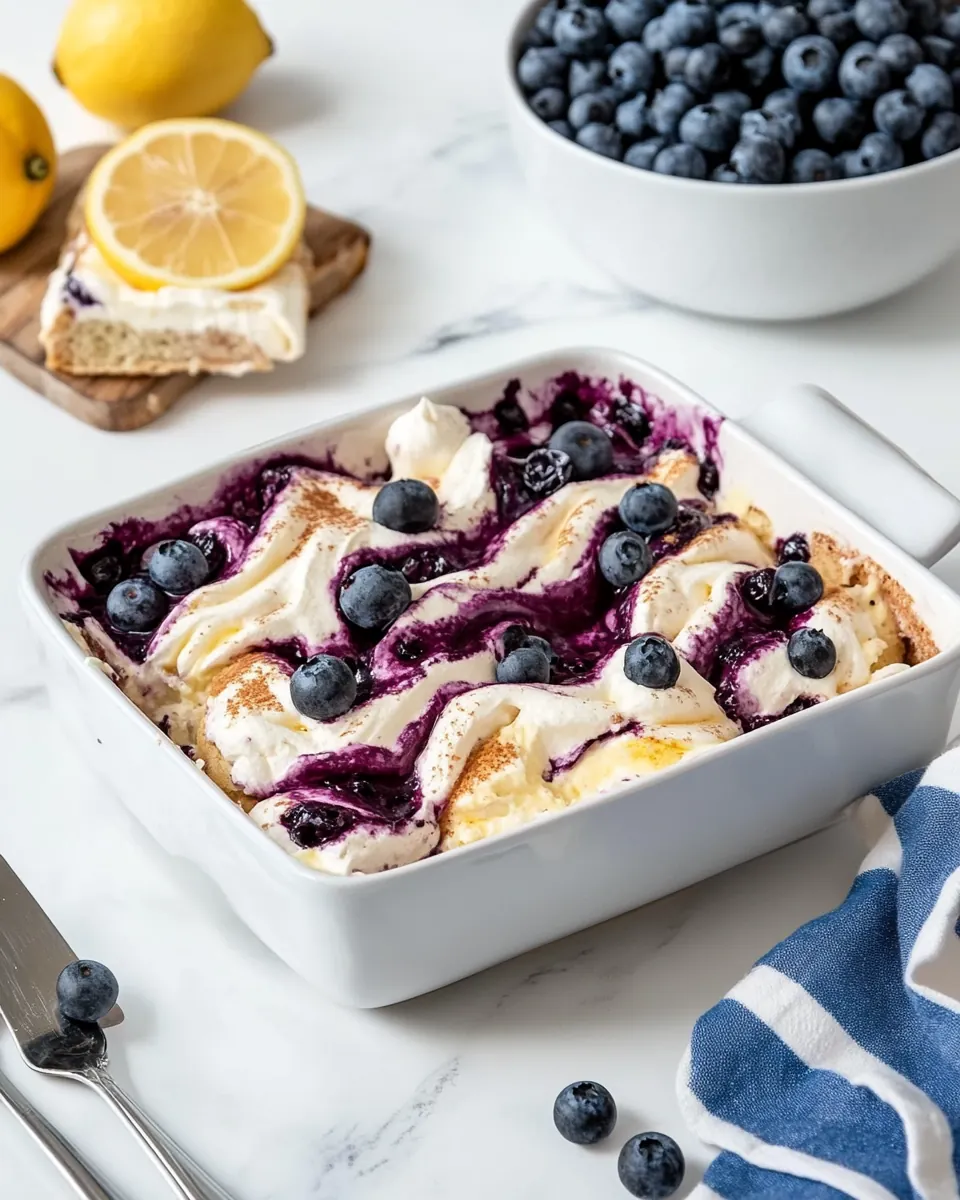
Blueberry Lemon Tiramisu
Blueberry Lemon Tiramisu started as a spontaneous experiment the first summer I found ripe blueberries at the farmers market and could not stop thinking about bright citrus flavors paired with creamy textures.
I remember carrying a handful of those berries back to my tiny kitchen, humming an old song, and feeling oddly certain that the classic, boozy tiramisù I loved could be reimagined into something lighter and more playful. Over several afternoons I tested layers of sponge and mascarpone, adjusting how much lemon syrup to use so the ladyfingers were kissed with citrus without turning soggy. Friends who stopped by for coffee the next day insisted I write it down, and that nudge became the recipe you have here.
There is comfort in the ritual of assembling the layers, the same calm I get when I fold whipped cream into mascarpone and coax the blueberry compote into glossy ribbons. This version keeps the spirit of tiramisù alive while highlighting blueberry brightness and a clean, zesty finish. I often make it for summer gatherings when stone fruit and berries are at their best, and I love how the colors look in a pale ceramic dish. If you enjoy desserts that are creamy, citrusy, and a little theatrical to assemble, you will find this version rewarding.
Recipe Snapshot
45 mins
30 mins
15 mins
Hard
380 kcal
Italian
Gluten-Free, Low FODMAP
Desserts
Stand mixer, Whisk attachment, Pastry bag, 7/16-inch round piping tip, Food processor, Saucepan, Baking sheets, Parchment paper, Mixing bowls
Why This Blueberry Lemon Tiramisu Works
Fresh seasonal flavor
I love how Blueberry Lemon Tiramisu showcases fresh blueberry brightness alongside clean lemon notes. The compote concentrates fruit flavor without overwhelming the delicate mascarpone filling, so every forkful tastes like summer in a bowl.
Light but luxurious texture
One of the reasons I return to this recipe is the contrast between airy ladyfingers and silky mascarpone cream. The whipped heavy whipping cream gives lift while the egg yolk custard adds richness, so the dessert feels indulgent without being heavy.
Make-ahead friendliness
We often prepare this the day before a gathering, because the flavors deepen overnight. The structure holds well in the refrigerator, and assembling in advance saves time on the day of the event while improving harmony between layers.
Visual and textural play
I love the way the swirls of blueberry compote ripple through the pale mascarpone. The visual contrast is as satisfying as the mouthfeel, and the gentle tartness of lemon lifts each bite so it never feels cloying.
Comfort with a twist
This recipe gives you the comfort of a familiar format, while modern swaps like a citrus syrup for dipping and a fresh compote make it feel new. It’s a great way to introduce people to tiramisù who might be wary of more classic, boozy versions.
Main Ingredients for Blueberry Lemon Tiramisu
The philosophy behind these ingredients is simple: bright, juicy blueberry flavor balanced by clean lemon acidity, supported by a creamy, luxurious mascarpone base and airy ladyfingers. Each component plays a role, from the structure of the baked cookies to the silky custard that holds the layers together.
- Makes about 1 1/4 cups: Yields about 1 1/4 cups and indicates the total makes, helping portion and serving planning for the recipe; use this amount to gauge yield from assembled layers and toppings. Include when prepping containers and timing to ensure the finished tiramisu matches expectations.
- 9 ounces (256 grams) fresh blueberries (about 2 cups): Provides fresh blueberries, offering bright, juicy fruit flavor and natural sweetness that complements lemon and mascarpone; count on about 2 cups for folding into layers or making a compote. Choose ripe berries for optimal color and texture, and rinse gently before use to avoid bruising.
- cup (133 grams) granulated sugar: Supplies granulated sugar to sweeten the blueberry mixture or components, balancing tart lemon and mascarpone richness; dissolve fully for even sweetness. Adjust slightly for taste if using particularly sweet berries, but retain measured weight for consistent results.
- 1 tablespoon (15 grams) fresh lemon juice: Adds fresh lemon juice to introduce bright acidity that cuts through richness and elevates blueberry flavor; one tablespoon contributes a noticeable citrus lift. Use freshly squeezed juice for best aroma and avoid bottled lemon juice to preserve delicate flavor nuances.
- 1 tablespoon (15 grams) water: Provides water to help dissolve sugar and create a syrupy consistency or to thin mixtures as needed; small amounts aid in extracting berry juices. Use measured water to maintain proper texture without diluting flavors excessively.
- 1/2 teaspoon (2 grams) vanilla extract: Imparts vanilla extract for subtle aromatic depth, rounding out fruity and dairy notes; a half teaspoon brings warm, sweet undertones. Use pure vanilla extract for the best flavor impact in delicate desserts.
- 1/4 teaspoon kosher salt: Contributes kosher salt to enhance and balance sweetness while brightening other flavors; a quarter teaspoon helps prevent flatness. Use measured salt and adjust minimally, as it accentuates the dessert's overall profile.
- Makes about 60 cookies: Yields about 60 cookies and specifies how many ladyfinger-style components or small cookies to prepare for layering; use this to determine assembly and portions. Bake or acquire the indicated quantity to ensure uniform layers throughout the tiramisu.
- cup (83 grams) unbleached cake flour: Provides unbleached cake flour to create a tender, delicate crumb for cookies, ensuring light texture that soaks up flavored syrups without collapsing. Prefer unbleached cake flour for fine structure and consistent baking results.
- 2 1/2 tablespoons (20 grams) cornstarch: Adds cornstarch to tenderize and stabilize the cookie batter, absorbing moisture and helping achieve a soft yet structured crumb; it also contributes to lightness. Measure carefully to avoid a gummy texture and sift with flour for even distribution.
- 4 large eggs (200 grams), separated and room temperature: Supplies large eggs separated and at room temperature to provide both structure from yolks and volume from whipped whites; egg whites beaten create airy lift for cookies. Bring eggs to room temperature for optimal whipping and fold gently to retain air.
- 1/2 cup (100 grams) plus 2 tablespoons (24 grams) granulated sugar, divided: Offers additional granulated sugar split between steps to sweeten both batter and fillings, contributing to proper texture and balance; portioning controls sweetness and whipping results. Use the divided sugar amounts as specified for predictable outcomes in meringue and fillings.
- 1/2 teaspoon (2 grams) vanilla extract: Provides vanilla extract to flavor the cookie or other components, adding sweet, aromatic notes that complement lemon and blueberry; half teaspoon enhances overall complexity. Use pure vanilla for the most natural, rounded flavor.
- 2 tablespoons (14 grams) confectioners’ sugar: Adds confectioners’ sugar to the cookie dough or for dusting, contributing fine sweetness and a smooth mouthfeel; it can also aid tenderization. Sift before use to prevent lumps and ensure even incorporation.
- 2 cups (480 grams) cold heavy whipping cream: Supplies cold heavy whipping cream to be whipped into soft peaks, creating a light, airy component that stabilizes mascarpone and forms the creamy tiramisu layers. Keep cream cold for best whipping performance and to achieve a stable, fluffy texture.
- 1 tablespoon (3 grams) lemon zest: Contributes lemon zest to provide concentrated citrus aroma and bright flavor, intensifying the lemon presence without adding extra liquid. Zest just the yellow portion to avoid bitter pith, and distribute evenly for consistent flavor.
- 2 teaspoons (8 grams) vanilla extract: Adds vanilla extract to the mascarpone–cream mixture for layered aromatic sweetness that complements lemon and blueberry; two teaspoons impart clear vanilla character. Use high-quality vanilla and mix thoroughly to integrate evenly.
- 1/2 teaspoon (1.5 grams) kosher salt: Provides kosher salt to enhance the dessert's flavors, balancing sweetness and strengthening other flavor components; half teaspoon is used across creamy or custard components. Measure precisely to avoid over-salting delicate mixtures.
- 2 cups (400 grams) granulated sugar, divided: Supplies granulated sugar in a larger divided amount to sweeten lemon curd, custards, or syrup components, contributing both flavor and structure; division allows control over sweetness at different stages. Follow the divided usage to ensure proper texture and stability in cooked elements.
- 3/4 cup (180 grams) fresh lemon juice: Adds fresh lemon juice to deliver strong citrus flavor and acidity for curd or syrups, balancing sweetness and brightening the overall dessert profile; three-quarters cup yields a pronounced lemon presence. Use freshly squeezed lemon juice for the cleanest, most vibrant flavor.
- 6 large pasteurized egg yolks (120 grams): Provides large pasteurized egg yolks to create a rich, silky lemon curd or custard base, supplying emulsification, body, and color; six yolks produce a thick, luscious texture. Use pasteurized yolks if serving lightly cooked or no-cook preparations to reduce food-safety concerns.
- 2 (8-ounce) containers (452 grams) cold BelGioioso Mascarpone Cheese: Supplies cold mascarpone cheese to form the luxurious, creamy base of tiramisu layers, offering rich, slightly tangy dairy flavor and a smooth mouthfeel; two 8-ounce containers ensure ample filling. Keep mascarpone cold to maintain structure when folding with whipped cream and other components.
How to Assemble Blueberry Lemon Tiramisu
Assembling Blueberry Lemon Tiramisu is a rewarding, layered process that combines baked ladyfingers, vibrantly flavored compote, and whipped mascarpone custard. I walk you through each element so the final dessert has clean layers, balanced sweetness, and the right texture contrast.
- In a medium saucepan, combine blueberries, sugar, lemon juice, 1 tablespoon (15 grams) water, vanilla, and salt. Heat over medium-high heat, stirring occasionally, until blueberries begin to break down and mixture begins to boil. Cook, stirring occasionally, until thickened, about 10 minutes. Remove from heat, and let cool completely. Refrigerate in an airtight container for up to 1 week.: The moment the mixture heats, fragrant steam rises and the blueberry aroma intensifies, announcing a jamlike transformation. You will hear the gentle simmer begin as the berries start to pop, and the sound changes to a low bubbling when the juices release. This step concentrates flavor and dissolves the sugar, which is why gentle heat matters, it prevents burning and preserves bright fruit notes. Common mistake to avoid, stirring too vigorously can break down the fruit too fast and create a gritty texture from over reduced solids, so stir occasionally with a wooden spoon and watch for a glossy, slightly thickened consistency.
- Preheat oven to 375°F (190°C). Line 2 baking sheets with parchment paper.: As bubbles form, the mixture shifts from opaque to translucent, and a sweet, slightly tart perfume fills the kitchen. The visual cue to watch for is when whole berries start to collapse and the liquid thickens, this indicates pectin and natural sugars are concentrating. The purpose of bringing to a boil briefly is to fully dissolve sugar and soften fruit, producing a spreadable compote that will swirl smoothly into the mascarpone. A troubleshooting tip, if it seems too watery after cooling, return to the heat for another minute or two to reduce further, but avoid overcooking which will darken the flavor.
- In a small bowl, sift together flour and cornstarch.: You will notice a shift in texture from runny to syrupy, and spooning a bit onto a plate should reveal a coat that clings rather than runs instantly. That tacky finish is important because it helps the compote hold pockets of fruit when layered. The 'why' is simple, reduction intensifies natural sugars and stabilizes the mixture so it does not bleed excessively into the mascarpone. Common oversight, leaving it unattended can lead to scorching, so keep an eye and stir more often toward the end.
- In the bowl of a stand mixer fitted with the whisk attachment, beat egg whites at medium speed until foamy, about 30 seconds. With mixer on medium speed, add 1/4 cup (50 grams) granulated sugar in a slow, steady stream. Increase mixer speed to medium-high, and beat until stiff peaks form, 4 to 5 minutes. Transfer to a medium bowl.: Cooling allows the compote to set and the flavors to meld, reducing the risk of melting the whipped cream later. You should feel a cooler, denser texture compared to the hot runny state, and the aroma will mellow slightly. This pause is vital, because warm compote can loosen the mascarpone and create a soupy filling. A tip, transfer to a shallow dish to speed cooling and cover to prevent skin forming if you will refrigerate for longer storage.
- Clean bowl of stand mixer and whisk attachment. Using the whisk attachment, beat egg yolks and 1/4 cup (50 grams) granulated sugar at medium-high speed until pale yellow and thick, 2 to 3 minutes. Using a balloon whisk, fold half of egg white mixture and vanilla into egg yolk mixture just until combined; fold in remaining egg white mixture. Fold in sifted flour mixture in two additions just until combined.: Chilled compote develops deeper flavor and is convenient for make ahead planning. Keep it sealed to preserve freshness and prevent the fruit from absorbing other refrigerator odors. The compote will thicken a touch more when cold, making it easier to spread or swirl. Common pitfall, storing uncovered will dry the surface or allow off flavors, so always seal tightly.
- Working in batches if necessary, transfer batter to a large pastry bag fitted with a 7/16-inch round piping tip (Ateco #805). Pipe 3-inch-long lines at least 1 inch apart on prepared pans. (Final dimensions of Ladyfingers should be 3 x 1 inches.): The oven should be fully reached before baking to ensure the ladyfingers set correctly, producing a crisp exterior and tender interior. You may notice the heat hum as the elements cycle, and that consistent environment helps the piped batter dry evenly. This temperature creates a quick burst of steam that puffs the batter then dries it to the desired texture. Avoid opening the oven door during the early minutes which can cause uneven baking and collapse.
- In a small bowl, whisk together confectioners’ sugar and remaining 2 tablespoons (24 grams) granulated sugar. Using a fine-mesh sieve, lightly dust piped batter with sugars.: Lining the pans prevents sticking and encourages even browning, and the parchment also makes it easier to transfer cookies after baking. Smooth sheets help the piping maintain shape, producing consistent ladyfinger dimensions. Prepare the sheets ahead because the batter is best piped immediately to retain air and structure. A common error is overcrowding the pans, which causes cookies to bake into each other, so keep spacing as directed.
- Bake for 4 minutes. Rotate pans between racks, and bake until light golden brown and dry, 3 to 4 minutes more. Let cool completely. Best used within 24 hours.: Sifting aerates the dry ingredients, eliminating lumps and ensuring an even, delicate crumb in the cookies. The texture after sifting will be light and fine, which makes it easier to fold into the egg mixture without deflating it. Proper incorporation prevents dense spots and preserves the light profile expected of ladyfingers . If you skip sifting, you risk pockets of dry flour that create uneven texture, so take the extra minute.
- In the work bowl of a food processor, pulse Blueberry Compote until smooth.: As the whites aerate, they turn from glossy to frothy, and you will hear a change in sound as air is incorporated. The foam forms the backbone of the cookie lift and prevents them from becoming heavy. It is crucial to use room temperature whites for optimal volume, and ensure no yolk contaminates them which can prevent whipping. If whites seem slow to form peaks, check the bowl and whisk are impeccably clean and dry.
- In the bowl of a stand mixer fitted with the whisk attachment, beat cold cream, lemon zest, vanilla, and salt at medium-high speed until stiff peaks form, about 2 minutes. Transfer to a large bowl; cover and refrigerate. Clean bowl of stand mixer and whisk attachment.: Adding sugar gradually stabilizes the meringue and creates a glossy, firm texture that holds peaks. You will see the mixture become glossy and stiffer as the sugar dissolves, which is essential for structure in the piped cookies. This step matters because undissolved sugar can create a gritty mouthfeel and weaken the foam. A common mistake is dumping sugar too quickly, which can deflate the whites.
- In a small saucepan, bring 3/4 cup (150 grams) granulated sugar and lemon juice to a boil over medium-high heat, stirring until sugar dissolves, about 1 minute. Pour into a medium heatproof bowl, and let cool completely.: Stiff peaks should stand upright when you lift the whisk, signaling a stable meringue ready for folding. The noise of the mixer will change as the mixture thickens, and the visual cue is a smooth, glossy surface. This level of stability ensures the cookies will rise and maintain shape during baking. Avoid overbeating which can dry out the meringue and cause it to break down.
- In the heatproof bowl of a stand mixer, whisk together egg yolks and remaining 1 1/4 cups (250 grams) sugar. Place bowl over a saucepan of simmering water. Cook, whisking frequently, until an instant-read thermometer registers 110°F (43°C).: Moving the meringue gently preserves its volume and makes it easier to combine with yolk mixture later. The foam should look airy and resilient in the new bowl, ready for delicate folding. Transferring also allows you to clean the mixer bowl for the next step without losing any structure. Common oversight, rough handling here can deflate the meringue and reduce the lightness of the final cookies.
- Wipe bottom of stand mixer bowl dry; carefully return bowl to stand mixer. Using the whisk attachment, beat at medium-high speed until thick and ribbon-consistency, 2 to 3 minutes. (Mixture will still have texture from the sugar.) Let cool for 5 to 10 minutes.: A spotless bowl and whisk are necessary for the next stage, ensuring no residual oils or crumbs interfere with whipping other components. You should feel confident the surface is free of grease which would inhibit foaming in future steps. This reset keeps each element working at its best. Skipping this can compromise the egg yolk whipping stage, so always wipe thoroughly.
- In a medium bowl, stir cold mascarpone with a spatula until softened, smooth, and creamy; fold into egg yolk mixture in two additions just until combined. Fold whipped cream into mascarpone mixture in two additions just until combined.: The yolks will transform into a ribbon like batter that falls slowly when the whisk is lifted, indicating they have incorporated enough air for tenderness and richness. This texture adds silkiness to the cookie batter and later to the mascarpone custard. The reason this matters is aerated yolks lighten the crumb, offsetting the denser flour. A common mistake is under beating which results in a dull, heavy texture.
- Quickly dip half of Ladyfingers in lemon syrup. (Do not let it soak.) Place in bottom of a 13 x 9-inch baking dish in a single layer, with long sides of Ladyfingers going along long sides of pan. (Trim or cut Ladyfingers as needed to fully cover bottom of pan.) Spread half of mascarpone mixture (about 4 cups or 630 grams) onto dipped Ladyfingers. Spread 3/4 cup (150 grams) Blueberry Compote onto mascarpone mixture.: Gentle folding preserves the airy structure created in the whites while incorporating flavor from the yolks and vanilla extract . You will see ribbons of white swirl through pale yolk, and the mixture should appear uniform but still light. This technique prevents deflation which would yield dense cookies, so fold with care and patience. Avoid aggressive stirring that knocks out air.
- Dip remaining Ladyfingers in lemon syrup, and layer on compote in pan. Spread remaining mascarpone mixture onto Ladyfingers to fully cover. Dollop remaining compote onto mascarpone mixture; using a wooden pick, swirl compote as desired. Cover and refrigerate for 24 hours before serving. Just before serving, garnish with blueberries, if desired. Cover and refrigerate for up to 3 days.: Folding in dry ingredients in portions prevents overworking the batter and keeps the texture delicate. The batter should look smooth and slightly ribbon like, not flat or heavy. This step is essential for maintaining the tender crumb that characterizes classic ladyfingers . Overmixing is the typical pitfall here, producing a tough result, so stop as soon as streaks disappear.
- Working in batches if necessary, transfer batter to a large pastry bag fitted with a 7/16-inch round piping tip (Ateco #805): Piping ensures uniform cookie shape and size, which helps with even baking and layered presentation. The batter should pipe smoothly without air pockets, and the technique gives control over final dimensions. Consistent sizing makes dipping and layering easier later. A note, if the batter is too thick to pipe, fold in gently to reintroduce looseness rather than overbeating.
- Pipe 3-inch-long lines at least 1 inch apart on prepared pans (Final dimensions of Ladyfingers should be 3 x 1 inches): Proper spacing allows air to circulate and avoids merging during baking, resulting in crisp edges and a tender interior. You will hear a soft hiss when the batter hits parchment, and the shaped cookies should hold their form. The precise dimension ensures they fit neatly into the pan during assembly. Packing them too close will yield uneven baking, so keep the spacing consistent.
- In a small bowl, whisk together confectioners’ sugar and remaining 2 tablespoons (24 grams) granulated sugar: This blend creates a fine dust that forms a delicate crust on the cookies, providing a subtle sweetness and visual appeal. Sifting or whisking prevents clumps so the dusting is even. That thin layer helps the cookies dry to the right texture in the short bake period. A common error is uneven dusting which leads to irregular browning.
- Using a fine-mesh sieve, lightly dust piped batter with sugars: Dusting before baking creates a slightly crackled top and a hint of sweetness on each ladyfinger . The visual cue is a pale dusted surface that turns gently golden in the oven, adding texture contrast to the finished tiramisù. This small step elevates both appearance and mouthfeel. Avoid heavy application which can cause excessive browning.
- Bake for 4 minutes: The initial short bake sets structure quickly, creating steam that puffs the cookies just enough before the second stage finishes drying them. You will notice the edges firm slightly and the surface becoming matte. This two part bake is why the cookies are crisp yet tender. A pitfall is opening the oven too soon which interrupts the initial set and can lead to collapse.
- Rotate pans between racks, and bake until light golden brown and dry, 3 to 4 minutes more: Rotating ensures even color and texture across both trays, and the final color should be a light golden tone with dry, not soft, centers. The sound changes from soft to crisp as moisture leaves the cookies, and you will smell a toasty sweetness. This drying phase is crucial so the cookies withstand dipping without falling apart. Overbaking will make them brittle and too hard.
- Let cool completely: Cooling stabilizes the structure and prevents condensation when stored, ensuring the ladyfingers keep their crispness. The room temperature rest also makes them easier to handle when trimming or dipping. If you assemble while cookies are warm, the filling may melt or the cookies may break, so patience is important. A common oversight is stacking warm cookies which traps steam and softens them.
- Best used within 24 hours: Freshly baked ladyfingers are at their prime in the first day, offering the ideal balance between tender crumb and crisp exterior for dipping and layering. If you must store longer, keep them airtight but expect a slight loss in crispness. Using older cookies can lead to faster soaking into the syrup during assembly, so plan baking time accordingly.
- In the work bowl of a food processor, pulse Blueberry Compote until smooth: A quick pulse creates a silky compote with few seeds and a spreadable consistency that will swirl easily into the mascarpone. You should note a smooth, glossy texture that spreads without running. Processing refines mouthfeel while preserving color and flavor. Overprocessing can thin the mixture too much, so pulse just until smooth.
- In the bowl of a stand mixer fitted with the whisk attachment, beat cold cream, lemon zest, vanilla, and salt at medium-high speed until stiff peaks form, about 2 minutes: The whipped heavy whipping cream should become billowy and hold shape, with fragrant lemon oils brightening the aroma. This whipped cream lightens the mascarpone filling and contributes a melt in the mouth sensation. Chilled equipment helps speed whipping and achieve stable peaks; a common mistake is using warm cream which will take longer and may not reach proper stiffness.
- Transfer to a large bowl; cover and refrigerate. Clean bowl of stand mixer and whisk attachment: Chilling the whipped cream maintains its stability while you prepare the custard, and a clean bowl keeps subsequent mixing uncontaminated. The chilled cream should look glossy and dense in the bowl. If left uncovered it can develop a skin, so cover tightly. A problem to avoid is letting the cream warm which can cause it to deflate.
- In a small saucepan, bring 3/4 cup (150 grams) granulated sugar and lemon juice to a boil over medium-high heat, stirring until sugar dissolves, about 1 minute: The syrup becomes intensely aromatic, fragrant with citrus and hot sugar, which will be used to quickly flavor the ladyfingers without soaking them. The goal is a simple syrup that is not too viscous, so it lightly coats when dipped. Watch closely, because sugar can caramelize quickly if left unattended.
- Pour into a medium heatproof bowl, and let cool completely: Cooling ensures the syrup will not melt the cookies or warm the custard layers when you dip, keeping assembly precise. A cooled syrup remains fluid enough to coat but not so hot that it weakens the mascarpone. If it is still warm, chill briefly before using to avoid soggy layers.
- In the heatproof bowl of a stand mixer, whisk together egg yolks and remaining 1 1/4 cups (250 grams) sugar: The mixture will become pale and ribbon like when properly aerated, which contributes to a rich, silky custard. This sugar warmed yolk base is the backbone of the mascarpone filling, providing sweetness and body. Ensure the bowl is heatproof for the next stage of gentle cooking to temper and stabilize the yolks. A common issue is insufficient whisking, leaving the custard flat.
- Place bowl over a saucepan of simmering water. Cook, whisking frequently, until an instant-read thermometer registers 110°F (43°C): Gentle heat cooks the yolks to a safe temperature while dissolving sugar, producing a velvety texture. You will feel the mixture thicken slightly and become warmer to the touch, and the thermometer is the best guide to avoid overcooking. This step is important for safety and for building structure, but overheating can scramble the yolks, so monitor closely and whisk constantly.
- Wipe bottom of stand mixer bowl dry; carefully return bowl to stand mixer. Using the whisk attachment, beat at medium-high speed until thick and ribbon-consistency, 2 to 3 minutes: The whipped, warm yolk mixture should fall in ribbons when the whisk is lifted, indicating it has incorporated air and cooled slightly, creating an airy, stable base for the mascarpone. The texture will be lighter and the color paler, with a satiny sheen. This aeration is essential for a creamy yet airy filling. Overbeating is rare here but watch for graininess which indicates overheating earlier.
- Let cool for 5 to 10 minutes: Allowing a brief cool down prevents heat from melting the mascarpone when combined, preserving the creaminess and preventing separation. The mixture should feel warm but not hot, ready to receive the cold cheese without losing emulsion. If too hot, the mascarpone can become runny, so patience pays off.
- In a medium bowl, stir cold mascarpone with a spatula until softened, smooth, and creamy; fold into egg yolk mixture in two additions just until combined: Working gently keeps the texture silky and avoids lumps, creating a light yet rich base for the tiramisù. The mascarpone will meld into the custard and lend tangy richness that balances the sweet components. Overworking can make the mixture loose, so fold until just combined.
- Fold whipped cream into mascarpone mixture in two additions just until combined: Folding in the chilled whipped heavy whipping cream lightens the filling and gives it billowy texture, producing that melt in your mouth sensation that defines good tiramisù. Watch for uniform color and texture without streaks, and stop folding once blended to retain volume. A troubleshooting tip, if the mixture deflates, chill briefly and fold gently to revive some structure.
- Quickly dip half of Ladyfingers in lemon syrup: The dip should be a quick touch, not a soak, so the cookies absorb flavor without collapsing; aim for a surface dampness that darkens the cookie slightly. You will feel the cookies give just a bit when dipped, and that is the right amount of moisture for layering. This technique infuses citrus brightness without making layers syrupy, and a common mistake is over dipping which yields a soggy base.
- Place in bottom of a 13 x 9-inch baking dish in a single layer, with long sides of Ladyfingers going along long sides of pan (Trim or cut Ladyfingers as needed to fully cover bottom of pan): Arranging cookies snugly creates an even bed for the filling and ensures a neat presentation when sliced. The visual should be a uniform layer with no large gaps, facilitating even distribution of cream above. Cutting to fit preserves structure and appearance; rushing here often leaves exposed gaps that can make serving messy.
- Spread half of mascarpone mixture (about 4 cups or 630 grams) onto dipped Ladyfingers: Use an offset spatula for a smooth, even layer that reaches the edges, creating a stable surface for the compote. The feeling should be thick and luscious under the spatula, and the filling should hold shape without sliding. Even spreading ensures consistent bites and prevents uneven settling. If the layer is applied too thinly, the dessert will taste unbalanced.
- Spread 3/4 cup (150 grams) Blueberry Compote onto mascarpone mixture: Dollop the compote and use a small spoon or spatula to distribute it into patches that will be swirled later, preserving fruity pockets and visual streaks. The contrast of glossy blueberry against pale cream is important for both taste and presentation. If you spread too thinly, the fruit will be lost among the cream, so aim for discernible pockets.
- Dip remaining Ladyfingers in lemon syrup, and layer on compote in pan: Repeat the quick dip and layer process so the second layer mirrors the first, building height and balancing texture throughout the dish. Ensuring consistent dipping prevents uneven moisture between layers which can cause instability. A common issue is uneven pressure when placing cookies which can break them, so handle gently.
- Spread remaining mascarpone mixture onto Ladyfingers to fully cover: The final spread should be smooth and fill any gaps, creating a uniform top that will set and accept the blueberry swirls. The cream should sit confidently, not runny, indicating the right texture for refrigeration. Overworking the surface can deflate the filling, so finish with broad, gentle strokes.
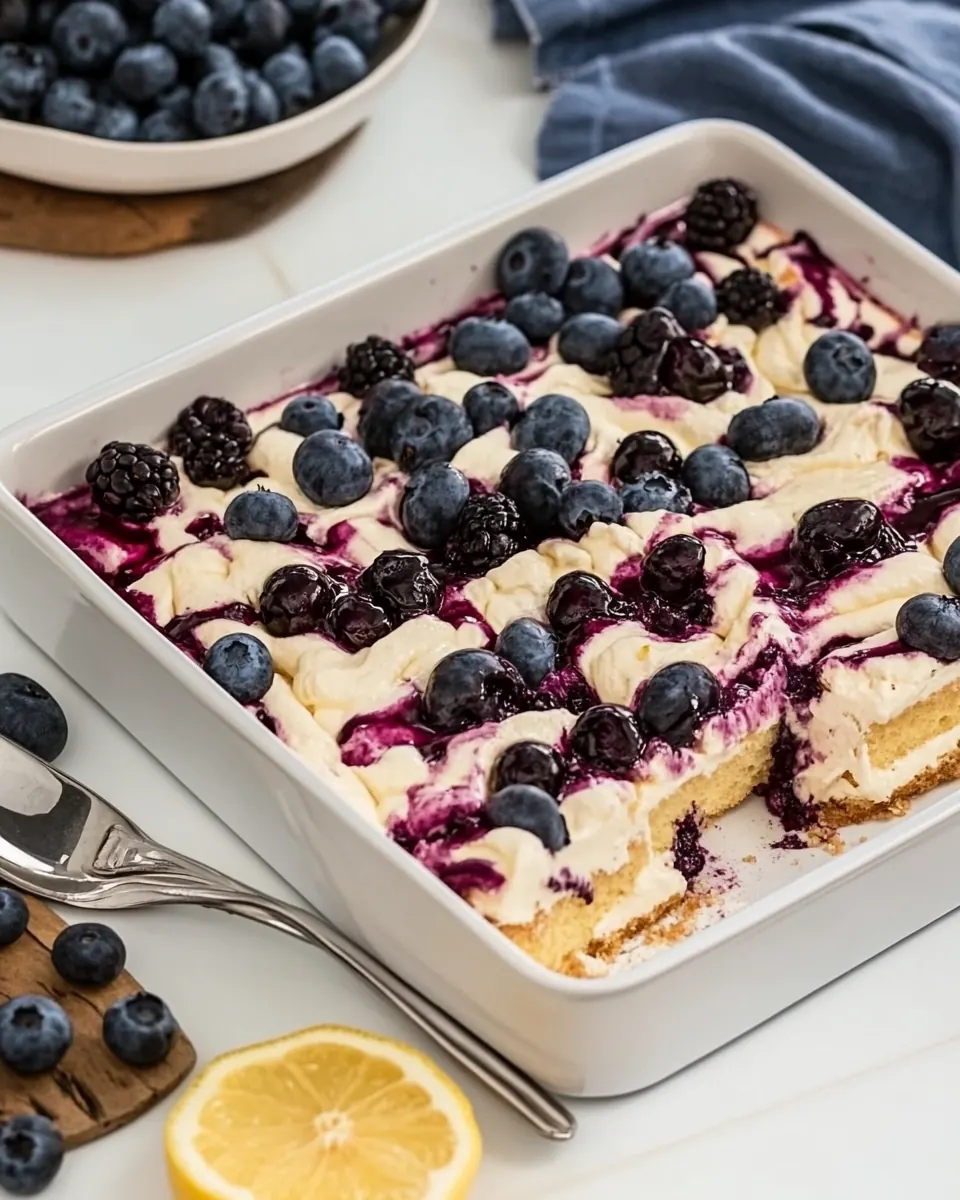
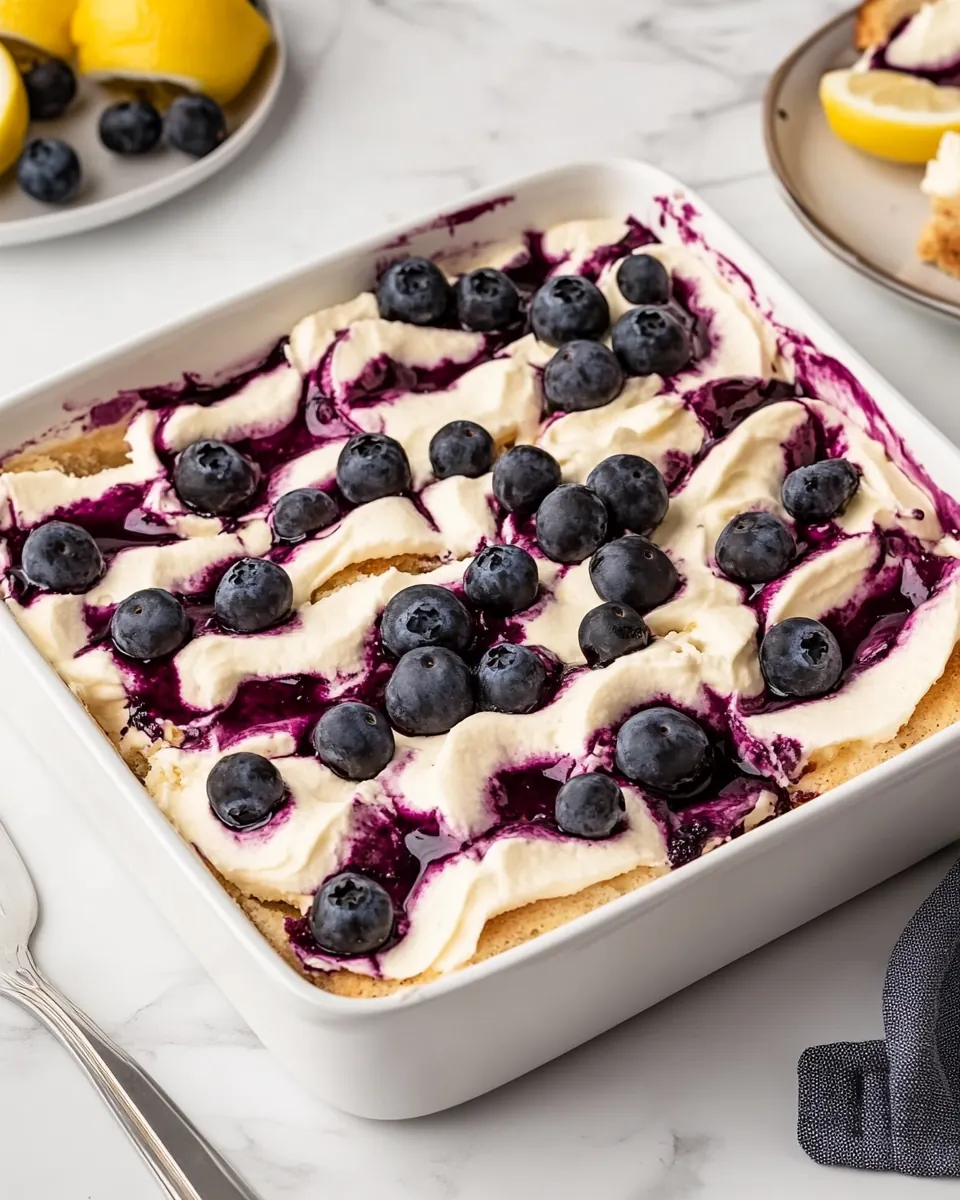
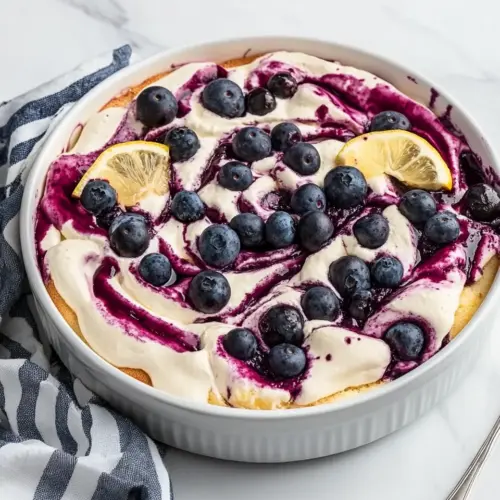
- Dollop remaining compote onto mascarpone mixture; using a wooden pick, swirl compote as desired: Swirling creates pretty marbling and distributes fruit flavor without flattening the cream, producing an inviting top layer. The visual cue is elegant ribbons of deep blue threading through pale cream, which also gives varied flavor in each slice. Avoid over mixing which will blend colors into a muddy tone.
- Cover and refrigerate for 24 hours before serving: Resting overnight allows flavors to marry and the textures to set, resulting in a cohesive, sliceable tiramisù with integrated layers. The patience rewarded, as the compote will infuse gentle fruit notes throughout the cream. A common mistake is serving too soon when the layers have not settled.
- Just before serving, garnish with blueberries, if desired: Fresh blueberry on top adds brightness and a fresh textural contrast to the creamy surface, making the presentation pop. Garnish lightly to avoid weighing down the cream, and consider a few whole berries for each slice. Overcrowding the top can look cluttered and make slicing messy.
- Cover and refrigerate for up to 3 days: Properly chilled and covered, the tiramisù keeps well, though flavors are best within the first two days. Keep it sealed to prevent drying and flavor transfer, and note that texture will soften slightly over time, so plan serving accordingly. A pitfall is leaving it uncovered which leads to a dry surface and compromised texture.
How to Switch It Up
If you want to put a different spin on Blueberry Lemon Tiramisu, small adjustments go a long way. Below are ideas to vary texture, sweetness, and presentation while keeping the core character intact.
- Turn the compote into a coulis, by processing the blueberry compote until completely smooth and straining out seeds for an ultra silky sauce that can be drizzled over individual slices at serving.
- Use different citrus, try swapping some or all of the lemon juice for a milder citrus like Meyer lemon to reduce tartness while keeping the floral aroma.
- Make individual portions, assemble in small glasses for elegant single serve presentations that are perfect for dinner parties and easier to portion control.
- Adjust sweetness, taste your blueberries first and reduce sugar in the compote if the berries are very sweet, maintaining balance with the mascarpone.
- Decorate with texture, sprinkle a few crushed toasted almonds or cookie crumbs on top right before serving for a pleasing crunch against the creamy layers.
- Swap ladyfingers for sponge, if you prefer a lighter base, use thin slices of sponge cake trimmed to fit the pan for a softer, more cake like bite.
- Layer more fruit, add thin layers of whole blueberries between mascarpone layers for bursts of fresh fruit in each forkful without over hydrating the dessert.
How to Enjoy Blueberry Lemon Tiramisu
This dessert shines when served chilled, with bright flavors and a pleasing contrast of textures. Whether you slice it for a casual family meal or present it at a summer gathering, thoughtful serving elevates the experience.
- Serve chilled, cut neat slices with a warm knife to get clean edges and show the pretty marbled top.
- Pair with simple sides, a small bowl of fresh blueberry or a light fruit salad complements the flavors without competing.
- Occasions, ideal for summer dinners, brunch gatherings, or celebratory meals when you want a make ahead dessert that feels special.
- Storage tips, keep covered in the refrigerator for up to three days, and avoid freezing which will change texture and release water when thawed.
- Portioning, use a sharp knife and wipe between cuts for tidy slices, and consider serving in individual glasses for easy plating.
- Seasonal pairings, enjoy during summer when berries are peak; the bright citrus makes it a refreshing choice after a heavier meal.
FAQ
Conclusion
What makes this recipe special is the way bright blueberry and clean lemon notes transform a classic creamy dessert into a summery, elegant treat. The layered textures from crisp ladyfingers to silky mascarpone create a harmonious bite that feels both comforting and refreshed. I encourage you to give it a try, especially when berries are at their peak, because the make ahead convenience and show stopping presentation make it ideal for gatherings. Enjoy the process of assembling and the pleasure of sharing slices with friends and family.
Blueberry Lemon Tiramisu
Equipment
- Stand mixer
- Whisk attachment
- Pastry bag
- 7/16-inch round piping tip
- Food Processor
- Saucepan
- Baking Sheets
- Parchment Paper
- Mixing Bowls
Ingredients
- Makes about 1 1/4 cups Yields about 1 1/4 cups and indicates the total makes, helping portion and serving planning for the recipe; use this amount to gauge yield from assembled layers and toppings. Include when prepping containers and timing to ensure the finished tiramisu matches expectations.
- 9 ounces (256 grams) fresh blueberries (about 2 cups) Provides fresh blueberries, offering bright, juicy fruit flavor and natural sweetness that complements lemon and mascarpone; count on about 2 cups for folding into layers or making a compote. Choose ripe berries for optimal color and texture, and rinse gently before use to avoid bruising.
- cup (133 grams) granulated sugar Supplies granulated sugar to sweeten the blueberry mixture or components, balancing tart lemon and mascarpone richness; dissolve fully for even sweetness. Adjust slightly for taste if using particularly sweet berries, but retain measured weight for consistent results.
- 1 tablespoon (15 grams) fresh lemon juice Adds fresh lemon juice to introduce bright acidity that cuts through richness and elevates blueberry flavor; one tablespoon contributes a noticeable citrus lift. Use freshly squeezed juice for best aroma and avoid bottled lemon juice to preserve delicate flavor nuances.
- 1 tablespoon (15 grams) water Provides water to help dissolve sugar and create a syrupy consistency or to thin mixtures as needed; small amounts aid in extracting berry juices. Use measured water to maintain proper texture without diluting flavors excessively.
- 1/2 teaspoon (2 grams) vanilla extract Imparts vanilla extract for subtle aromatic depth, rounding out fruity and dairy notes; a half teaspoon brings warm, sweet undertones. Use pure vanilla extract for the best flavor impact in delicate desserts.
- 1/4 teaspoon kosher salt Contributes kosher salt to enhance and balance sweetness while brightening other flavors; a quarter teaspoon helps prevent flatness. Use measured salt and adjust minimally, as it accentuates the dessert's overall profile.
- Makes about 60 cookies Yields about 60 cookies and specifies how many ladyfinger-style components or small cookies to prepare for layering; use this to determine assembly and portions. Bake or acquire the indicated quantity to ensure uniform layers throughout the tiramisu.
- cup (83 grams) unbleached cake flour Provides unbleached cake flour to create a tender, delicate crumb for cookies, ensuring light texture that soaks up flavored syrups without collapsing. Prefer unbleached cake flour for fine structure and consistent baking results.
- 2 1/2 tablespoons (20 grams) cornstarch Adds cornstarch to tenderize and stabilize the cookie batter, absorbing moisture and helping achieve a soft yet structured crumb; it also contributes to lightness. Measure carefully to avoid a gummy texture and sift with flour for even distribution.
- 4 large eggs (200 grams), separated and room temperature Supplies large eggs separated and at room temperature to provide both structure from yolks and volume from whipped whites; egg whites beaten create airy lift for cookies. Bring eggs to room temperature for optimal whipping and fold gently to retain air.
- 1/2 cup (100 grams) plus 2 tablespoons (24 grams) granulated sugar, divided Offers additional granulated sugar split between steps to sweeten both batter and fillings, contributing to proper texture and balance; portioning controls sweetness and whipping results. Use the divided sugar amounts as specified for predictable outcomes in meringue and fillings.
- 1/2 teaspoon (2 grams) vanilla extract Provides vanilla extract to flavor the cookie or other components, adding sweet, aromatic notes that complement lemon and blueberry; half teaspoon enhances overall complexity. Use pure vanilla for the most natural, rounded flavor.
- 2 tablespoons (14 grams) confectioners’ sugar Adds confectioners’ sugar to the cookie dough or for dusting, contributing fine sweetness and a smooth mouthfeel; it can also aid tenderization. Sift before use to prevent lumps and ensure even incorporation.
- 2 cups (480 grams) cold heavy whipping cream Supplies cold heavy whipping cream to be whipped into soft peaks, creating a light, airy component that stabilizes mascarpone and forms the creamy tiramisu layers. Keep cream cold for best whipping performance and to achieve a stable, fluffy texture.
- 1 tablespoon (3 grams) lemon zest Contributes lemon zest to provide concentrated citrus aroma and bright flavor, intensifying the lemon presence without adding extra liquid. Zest just the yellow portion to avoid bitter pith, and distribute evenly for consistent flavor.
- 2 teaspoons (8 grams) vanilla extract Adds vanilla extract to the mascarpone-cream mixture for layered aromatic sweetness that complements lemon and blueberry; two teaspoons impart clear vanilla character. Use high-quality vanilla and mix thoroughly to integrate evenly.
- 1/2 teaspoon (1.5 grams) kosher salt Provides kosher salt to enhance the dessert's flavors, balancing sweetness and strengthening other flavor components; half teaspoon is used across creamy or custard components. Measure precisely to avoid over-salting delicate mixtures.
- 2 cups (400 grams) granulated sugar, divided Supplies granulated sugar in a larger divided amount to sweeten lemon curd, custards, or syrup components, contributing both flavor and structure; division allows control over sweetness at different stages. Follow the divided usage to ensure proper texture and stability in cooked elements.
- 3/4 cup (180 grams) fresh lemon juice Adds fresh lemon juice to deliver strong citrus flavor and acidity for curd or syrups, balancing sweetness and brightening the overall dessert profile; three-quarters cup yields a pronounced lemon presence. Use freshly squeezed lemon juice for the cleanest, most vibrant flavor.
- 6 large pasteurized egg yolks (120 grams) Provides large pasteurized egg yolks to create a rich, silky lemon curd or custard base, supplying emulsification, body, and color; six yolks produce a thick, luscious texture. Use pasteurized yolks if serving lightly cooked or no-cook preparations to reduce food-safety concerns.
- 2 (8-ounce) containers (452 grams) cold BelGioioso Mascarpone Cheese Supplies cold mascarpone cheese to form the luxurious, creamy base of tiramisu layers, offering rich, slightly tangy dairy flavor and a smooth mouthfeel; two 8-ounce containers ensure ample filling. Keep mascarpone cold to maintain structure when folding with whipped cream and other components.
Instructions
- In a medium saucepan, combine blueberries, sugar, lemon juice, 1 tablespoon (15 grams) water, vanilla, and salt. Heat over medium-high heat, stirring occasionally, until blueberries begin to break down and mixture begins to boil. Cook, stirring occasionally, until thickened, about 10 minutes. Remove from heat, and let cool completely. Refrigerate in an airtight container for up to 1 week.: The moment the mixture heats, fragrant steam rises and the blueberry aroma intensifies, announcing a jamlike transformation. You will hear the gentle simmer begin as the berries start to pop, and the sound changes to a low bubbling when the juices release. This step concentrates flavor and dissolves the sugar, which is why gentle heat matters, it prevents burning and preserves bright fruit notes. Common mistake to avoid, stirring too vigorously can break down the fruit too fast and create a gritty texture from over reduced solids, so stir occasionally with a wooden spoon and watch for a glossy, slightly thickened consistency.
- Preheat oven to 375°F (190°C). Line 2 baking sheets with parchment paper.: As bubbles form, the mixture shifts from opaque to translucent, and a sweet, slightly tart perfume fills the kitchen. The visual cue to watch for is when whole berries start to collapse and the liquid thickens, this indicates pectin and natural sugars are concentrating. The purpose of bringing to a boil briefly is to fully dissolve sugar and soften fruit, producing a spreadable compote that will swirl smoothly into the mascarpone. A troubleshooting tip, if it seems too watery after cooling, return to the heat for another minute or two to reduce further, but avoid overcooking which will darken the flavor.
- In a small bowl, sift together flour and cornstarch.: You will notice a shift in texture from runny to syrupy, and spooning a bit onto a plate should reveal a coat that clings rather than runs instantly. That tacky finish is important because it helps the compote hold pockets of fruit when layered. The 'why' is simple, reduction intensifies natural sugars and stabilizes the mixture so it does not bleed excessively into the mascarpone. Common oversight, leaving it unattended can lead to scorching, so keep an eye and stir more often toward the end.
- In the bowl of a stand mixer fitted with the whisk attachment, beat egg whites at medium speed until foamy, about 30 seconds. With mixer on medium speed, add 1/4 cup (50 grams) granulated sugar in a slow, steady stream. Increase mixer speed to medium-high, and beat until stiff peaks form, 4 to 5 minutes. Transfer to a medium bowl.: Cooling allows the compote to set and the flavors to meld, reducing the risk of melting the whipped cream later. You should feel a cooler, denser texture compared to the hot runny state, and the aroma will mellow slightly. This pause is vital, because warm compote can loosen the mascarpone and create a soupy filling. A tip, transfer to a shallow dish to speed cooling and cover to prevent skin forming if you will refrigerate for longer storage.
- Clean bowl of stand mixer and whisk attachment. Using the whisk attachment, beat egg yolks and 1/4 cup (50 grams) granulated sugar at medium-high speed until pale yellow and thick, 2 to 3 minutes. Using a balloon whisk, fold half of egg white mixture and vanilla into egg yolk mixture just until combined; fold in remaining egg white mixture. Fold in sifted flour mixture in two additions just until combined.: Chilled compote develops deeper flavor and is convenient for make ahead planning. Keep it sealed to preserve freshness and prevent the fruit from absorbing other refrigerator odors. The compote will thicken a touch more when cold, making it easier to spread or swirl. Common pitfall, storing uncovered will dry the surface or allow off flavors, so always seal tightly.
- Working in batches if necessary, transfer batter to a large pastry bag fitted with a 7/16-inch round piping tip (Ateco #805). Pipe 3-inch-long lines at least 1 inch apart on prepared pans. (Final dimensions of Ladyfingers should be 3 x 1 inches.): The oven should be fully reached before baking to ensure the ladyfingers set correctly, producing a crisp exterior and tender interior. You may notice the heat hum as the elements cycle, and that consistent environment helps the piped batter dry evenly. This temperature creates a quick burst of steam that puffs the batter then dries it to the desired texture. Avoid opening the oven door during the early minutes which can cause uneven baking and collapse.
- In a small bowl, whisk together confectioners’ sugar and remaining 2 tablespoons (24 grams) granulated sugar. Using a fine-mesh sieve, lightly dust piped batter with sugars.: Lining the pans prevents sticking and encourages even browning, and the parchment also makes it easier to transfer cookies after baking. Smooth sheets help the piping maintain shape, producing consistent ladyfinger dimensions. Prepare the sheets ahead because the batter is best piped immediately to retain air and structure. A common error is overcrowding the pans, which causes cookies to bake into each other, so keep spacing as directed.
- Bake for 4 minutes. Rotate pans between racks, and bake until light golden brown and dry, 3 to 4 minutes more. Let cool completely. Best used within 24 hours.: Sifting aerates the dry ingredients, eliminating lumps and ensuring an even, delicate crumb in the cookies. The texture after sifting will be light and fine, which makes it easier to fold into the egg mixture without deflating it. Proper incorporation prevents dense spots and preserves the light profile expected of ladyfingers . If you skip sifting, you risk pockets of dry flour that create uneven texture, so take the extra minute.
- In the work bowl of a food processor, pulse Blueberry Compote until smooth.: As the whites aerate, they turn from glossy to frothy, and you will hear a change in sound as air is incorporated. The foam forms the backbone of the cookie lift and prevents them from becoming heavy. It is crucial to use room temperature whites for optimal volume, and ensure no yolk contaminates them which can prevent whipping. If whites seem slow to form peaks, check the bowl and whisk are impeccably clean and dry.
- In the bowl of a stand mixer fitted with the whisk attachment, beat cold cream, lemon zest, vanilla, and salt at medium-high speed until stiff peaks form, about 2 minutes. Transfer to a large bowl; cover and refrigerate. Clean bowl of stand mixer and whisk attachment.: Adding sugar gradually stabilizes the meringue and creates a glossy, firm texture that holds peaks. You will see the mixture become glossy and stiffer as the sugar dissolves, which is essential for structure in the piped cookies. This step matters because undissolved sugar can create a gritty mouthfeel and weaken the foam. A common mistake is dumping sugar too quickly, which can deflate the whites.
- In a small saucepan, bring 3/4 cup (150 grams) granulated sugar and lemon juice to a boil over medium-high heat, stirring until sugar dissolves, about 1 minute. Pour into a medium heatproof bowl, and let cool completely.: Stiff peaks should stand upright when you lift the whisk, signaling a stable meringue ready for folding. The noise of the mixer will change as the mixture thickens, and the visual cue is a smooth, glossy surface. This level of stability ensures the cookies will rise and maintain shape during baking. Avoid overbeating which can dry out the meringue and cause it to break down.
- In the heatproof bowl of a stand mixer, whisk together egg yolks and remaining 1 1/4 cups (250 grams) sugar. Place bowl over a saucepan of simmering water. Cook, whisking frequently, until an instant-read thermometer registers 110°F (43°C).: Moving the meringue gently preserves its volume and makes it easier to combine with yolk mixture later. The foam should look airy and resilient in the new bowl, ready for delicate folding. Transferring also allows you to clean the mixer bowl for the next step without losing any structure. Common oversight, rough handling here can deflate the meringue and reduce the lightness of the final cookies.
- Wipe bottom of stand mixer bowl dry; carefully return bowl to stand mixer. Using the whisk attachment, beat at medium-high speed until thick and ribbon-consistency, 2 to 3 minutes. (Mixture will still have texture from the sugar.) Let cool for 5 to 10 minutes.: A spotless bowl and whisk are necessary for the next stage, ensuring no residual oils or crumbs interfere with whipping other components. You should feel confident the surface is free of grease which would inhibit foaming in future steps. This reset keeps each element working at its best. Skipping this can compromise the egg yolk whipping stage, so always wipe thoroughly.
- In a medium bowl, stir cold mascarpone with a spatula until softened, smooth, and creamy; fold into egg yolk mixture in two additions just until combined. Fold whipped cream into mascarpone mixture in two additions just until combined.: The yolks will transform into a ribbon like batter that falls slowly when the whisk is lifted, indicating they have incorporated enough air for tenderness and richness. This texture adds silkiness to the cookie batter and later to the mascarpone custard. The reason this matters is aerated yolks lighten the crumb, offsetting the denser flour. A common mistake is under beating which results in a dull, heavy texture.
- Quickly dip half of Ladyfingers in lemon syrup. (Do not let it soak.) Place in bottom of a 13 x 9-inch baking dish in a single layer, with long sides of Ladyfingers going along long sides of pan. (Trim or cut Ladyfingers as needed to fully cover bottom of pan.) Spread half of mascarpone mixture (about 4 cups or 630 grams) onto dipped Ladyfingers. Spread 3/4 cup (150 grams) Blueberry Compote onto mascarpone mixture.: Gentle folding preserves the airy structure created in the whites while incorporating flavor from the yolks and vanilla extract . You will see ribbons of white swirl through pale yolk, and the mixture should appear uniform but still light. This technique prevents deflation which would yield dense cookies, so fold with care and patience. Avoid aggressive stirring that knocks out air.
- Dip remaining Ladyfingers in lemon syrup, and layer on compote in pan. Spread remaining mascarpone mixture onto Ladyfingers to fully cover. Dollop remaining compote onto mascarpone mixture; using a wooden pick, swirl compote as desired. Cover and refrigerate for 24 hours before serving. Just before serving, garnish with blueberries, if desired. Cover and refrigerate for up to 3 days.: Folding in dry ingredients in portions prevents overworking the batter and keeps the texture delicate. The batter should look smooth and slightly ribbon like, not flat or heavy. This step is essential for maintaining the tender crumb that characterizes classic ladyfingers . Overmixing is the typical pitfall here, producing a tough result, so stop as soon as streaks disappear.
- Working in batches if necessary, transfer batter to a large pastry bag fitted with a 7/16-inch round piping tip (Ateco #805): Piping ensures uniform cookie shape and size, which helps with even baking and layered presentation. The batter should pipe smoothly without air pockets, and the technique gives control over final dimensions. Consistent sizing makes dipping and layering easier later. A note, if the batter is too thick to pipe, fold in gently to reintroduce looseness rather than overbeating.
- Pipe 3-inch-long lines at least 1 inch apart on prepared pans (Final dimensions of Ladyfingers should be 3 x 1 inches): Proper spacing allows air to circulate and avoids merging during baking, resulting in crisp edges and a tender interior. You will hear a soft hiss when the batter hits parchment, and the shaped cookies should hold their form. The precise dimension ensures they fit neatly into the pan during assembly. Packing them too close will yield uneven baking, so keep the spacing consistent.
- In a small bowl, whisk together confectioners’ sugar and remaining 2 tablespoons (24 grams) granulated sugar: This blend creates a fine dust that forms a delicate crust on the cookies, providing a subtle sweetness and visual appeal. Sifting or whisking prevents clumps so the dusting is even. That thin layer helps the cookies dry to the right texture in the short bake period. A common error is uneven dusting which leads to irregular browning.
- Using a fine-mesh sieve, lightly dust piped batter with sugars: Dusting before baking creates a slightly crackled top and a hint of sweetness on each ladyfinger . The visual cue is a pale dusted surface that turns gently golden in the oven, adding texture contrast to the finished tiramisù. This small step elevates both appearance and mouthfeel. Avoid heavy application which can cause excessive browning.
- Bake for 4 minutes: The initial short bake sets structure quickly, creating steam that puffs the cookies just enough before the second stage finishes drying them. You will notice the edges firm slightly and the surface becoming matte. This two part bake is why the cookies are crisp yet tender. A pitfall is opening the oven too soon which interrupts the initial set and can lead to collapse.
- Rotate pans between racks, and bake until light golden brown and dry, 3 to 4 minutes more: Rotating ensures even color and texture across both trays, and the final color should be a light golden tone with dry, not soft, centers. The sound changes from soft to crisp as moisture leaves the cookies, and you will smell a toasty sweetness. This drying phase is crucial so the cookies withstand dipping without falling apart. Overbaking will make them brittle and too hard.
- Let cool completely: Cooling stabilizes the structure and prevents condensation when stored, ensuring the ladyfingers keep their crispness. The room temperature rest also makes them easier to handle when trimming or dipping. If you assemble while cookies are warm, the filling may melt or the cookies may break, so patience is important. A common oversight is stacking warm cookies which traps steam and softens them.
- Best used within 24 hours: Freshly baked ladyfingers are at their prime in the first day, offering the ideal balance between tender crumb and crisp exterior for dipping and layering. If you must store longer, keep them airtight but expect a slight loss in crispness. Using older cookies can lead to faster soaking into the syrup during assembly, so plan baking time accordingly.
- In the work bowl of a food processor, pulse Blueberry Compote until smooth: A quick pulse creates a silky compote with few seeds and a spreadable consistency that will swirl easily into the mascarpone. You should note a smooth, glossy texture that spreads without running. Processing refines mouthfeel while preserving color and flavor. Overprocessing can thin the mixture too much, so pulse just until smooth.
- In the bowl of a stand mixer fitted with the whisk attachment, beat cold cream, lemon zest, vanilla, and salt at medium-high speed until stiff peaks form, about 2 minutes: The whipped heavy whipping cream should become billowy and hold shape, with fragrant lemon oils brightening the aroma. This whipped cream lightens the mascarpone filling and contributes a melt in the mouth sensation. Chilled equipment helps speed whipping and achieve stable peaks; a common mistake is using warm cream which will take longer and may not reach proper stiffness.
- Transfer to a large bowl; cover and refrigerate. Clean bowl of stand mixer and whisk attachment: Chilling the whipped cream maintains its stability while you prepare the custard, and a clean bowl keeps subsequent mixing uncontaminated. The chilled cream should look glossy and dense in the bowl. If left uncovered it can develop a skin, so cover tightly. A problem to avoid is letting the cream warm which can cause it to deflate.
- In a small saucepan, bring 3/4 cup (150 grams) granulated sugar and lemon juice to a boil over medium-high heat, stirring until sugar dissolves, about 1 minute: The syrup becomes intensely aromatic, fragrant with citrus and hot sugar, which will be used to quickly flavor the ladyfingers without soaking them. The goal is a simple syrup that is not too viscous, so it lightly coats when dipped. Watch closely, because sugar can caramelize quickly if left unattended.
- Pour into a medium heatproof bowl, and let cool completely: Cooling ensures the syrup will not melt the cookies or warm the custard layers when you dip, keeping assembly precise. A cooled syrup remains fluid enough to coat but not so hot that it weakens the mascarpone. If it is still warm, chill briefly before using to avoid soggy layers.
- In the heatproof bowl of a stand mixer, whisk together egg yolks and remaining 1 1/4 cups (250 grams) sugar: The mixture will become pale and ribbon like when properly aerated, which contributes to a rich, silky custard. This sugar warmed yolk base is the backbone of the mascarpone filling, providing sweetness and body. Ensure the bowl is heatproof for the next stage of gentle cooking to temper and stabilize the yolks. A common issue is insufficient whisking, leaving the custard flat.
- Place bowl over a saucepan of simmering water. Cook, whisking frequently, until an instant-read thermometer registers 110°F (43°C): Gentle heat cooks the yolks to a safe temperature while dissolving sugar, producing a velvety texture. You will feel the mixture thicken slightly and become warmer to the touch, and the thermometer is the best guide to avoid overcooking. This step is important for safety and for building structure, but overheating can scramble the yolks, so monitor closely and whisk constantly.
- Wipe bottom of stand mixer bowl dry; carefully return bowl to stand mixer. Using the whisk attachment, beat at medium-high speed until thick and ribbon-consistency, 2 to 3 minutes: The whipped, warm yolk mixture should fall in ribbons when the whisk is lifted, indicating it has incorporated air and cooled slightly, creating an airy, stable base for the mascarpone. The texture will be lighter and the color paler, with a satiny sheen. This aeration is essential for a creamy yet airy filling. Overbeating is rare here but watch for graininess which indicates overheating earlier.
- Let cool for 5 to 10 minutes: Allowing a brief cool down prevents heat from melting the mascarpone when combined, preserving the creaminess and preventing separation. The mixture should feel warm but not hot, ready to receive the cold cheese without losing emulsion. If too hot, the mascarpone can become runny, so patience pays off.
- In a medium bowl, stir cold mascarpone with a spatula until softened, smooth, and creamy; fold into egg yolk mixture in two additions just until combined: Working gently keeps the texture silky and avoids lumps, creating a light yet rich base for the tiramisù. The mascarpone will meld into the custard and lend tangy richness that balances the sweet components. Overworking can make the mixture loose, so fold until just combined.
- Fold whipped cream into mascarpone mixture in two additions just until combined: Folding in the chilled whipped heavy whipping cream lightens the filling and gives it billowy texture, producing that melt in your mouth sensation that defines good tiramisù. Watch for uniform color and texture without streaks, and stop folding once blended to retain volume. A troubleshooting tip, if the mixture deflates, chill briefly and fold gently to revive some structure.
- Quickly dip half of Ladyfingers in lemon syrup: The dip should be a quick touch, not a soak, so the cookies absorb flavor without collapsing; aim for a surface dampness that darkens the cookie slightly. You will feel the cookies give just a bit when dipped, and that is the right amount of moisture for layering. This technique infuses citrus brightness without making layers syrupy, and a common mistake is over dipping which yields a soggy base.
- Place in bottom of a 13 x 9-inch baking dish in a single layer, with long sides of Ladyfingers going along long sides of pan (Trim or cut Ladyfingers as needed to fully cover bottom of pan): Arranging cookies snugly creates an even bed for the filling and ensures a neat presentation when sliced. The visual should be a uniform layer with no large gaps, facilitating even distribution of cream above. Cutting to fit preserves structure and appearance; rushing here often leaves exposed gaps that can make serving messy.
- Spread half of mascarpone mixture (about 4 cups or 630 grams) onto dipped Ladyfingers: Use an offset spatula for a smooth, even layer that reaches the edges, creating a stable surface for the compote. The feeling should be thick and luscious under the spatula, and the filling should hold shape without sliding. Even spreading ensures consistent bites and prevents uneven settling. If the layer is applied too thinly, the dessert will taste unbalanced.
- Spread 3/4 cup (150 grams) Blueberry Compote onto mascarpone mixture: Dollop the compote and use a small spoon or spatula to distribute it into patches that will be swirled later, preserving fruity pockets and visual streaks. The contrast of glossy blueberry against pale cream is important for both taste and presentation. If you spread too thinly, the fruit will be lost among the cream, so aim for discernible pockets.
- Dip remaining Ladyfingers in lemon syrup, and layer on compote in pan: Repeat the quick dip and layer process so the second layer mirrors the first, building height and balancing texture throughout the dish. Ensuring consistent dipping prevents uneven moisture between layers which can cause instability. A common issue is uneven pressure when placing cookies which can break them, so handle gently.
- Spread remaining mascarpone mixture onto Ladyfingers to fully cover: The final spread should be smooth and fill any gaps, creating a uniform top that will set and accept the blueberry swirls. The cream should sit confidently, not runny, indicating the right texture for refrigeration. Overworking the surface can deflate the filling, so finish with broad, gentle strokes.
- Dollop remaining compote onto mascarpone mixture; using a wooden pick, swirl compote as desired: Swirling creates pretty marbling and distributes fruit flavor without flattening the cream, producing an inviting top layer. The visual cue is elegant ribbons of deep blue threading through pale cream, which also gives varied flavor in each slice. Avoid over mixing which will blend colors into a muddy tone.
- Cover and refrigerate for 24 hours before serving: Resting overnight allows flavors to marry and the textures to set, resulting in a cohesive, sliceable tiramisù with integrated layers. The patience rewarded, as the compote will infuse gentle fruit notes throughout the cream. A common mistake is serving too soon when the layers have not settled.
- Just before serving, garnish with blueberries, if desired: Fresh blueberry on top adds brightness and a fresh textural contrast to the creamy surface, making the presentation pop. Garnish lightly to avoid weighing down the cream, and consider a few whole berries for each slice. Overcrowding the top can look cluttered and make slicing messy.
- Cover and refrigerate for up to 3 days: Properly chilled and covered, the tiramisù keeps well, though flavors are best within the first two days. Keep it sealed to prevent drying and flavor transfer, and note that texture will soften slightly over time, so plan serving accordingly. A pitfall is leaving it uncovered which leads to a dry surface and compromised texture.
Notes
- Turn the compote into a coulis, by processing the blueberry compote until completely smooth and straining out seeds for an ultra silky sauce that can be drizzled over individual slices at serving.
- Use different citrus, try swapping some or all of the lemon juice for a milder citrus like Meyer lemon to reduce tartness while keeping the floral aroma.
- Make individual portions, assemble in small glasses for elegant single serve presentations that are perfect for dinner parties and easier to portion control.
- Adjust sweetness, taste your blueberries first and reduce sugar in the compote if the berries are very sweet, maintaining balance with the mascarpone.
- Decorate with texture, sprinkle a few crushed toasted almonds or cookie crumbs on top right before serving for a pleasing crunch against the creamy layers.
- Swap ladyfingers for sponge, if you prefer a lighter base, use thin slices of sponge cake trimmed to fit the pan for a softer, more cake like bite.
- Layer more fruit, add thin layers of whole blueberries between mascarpone layers for bursts of fresh fruit in each forkful without over hydrating the dessert.